

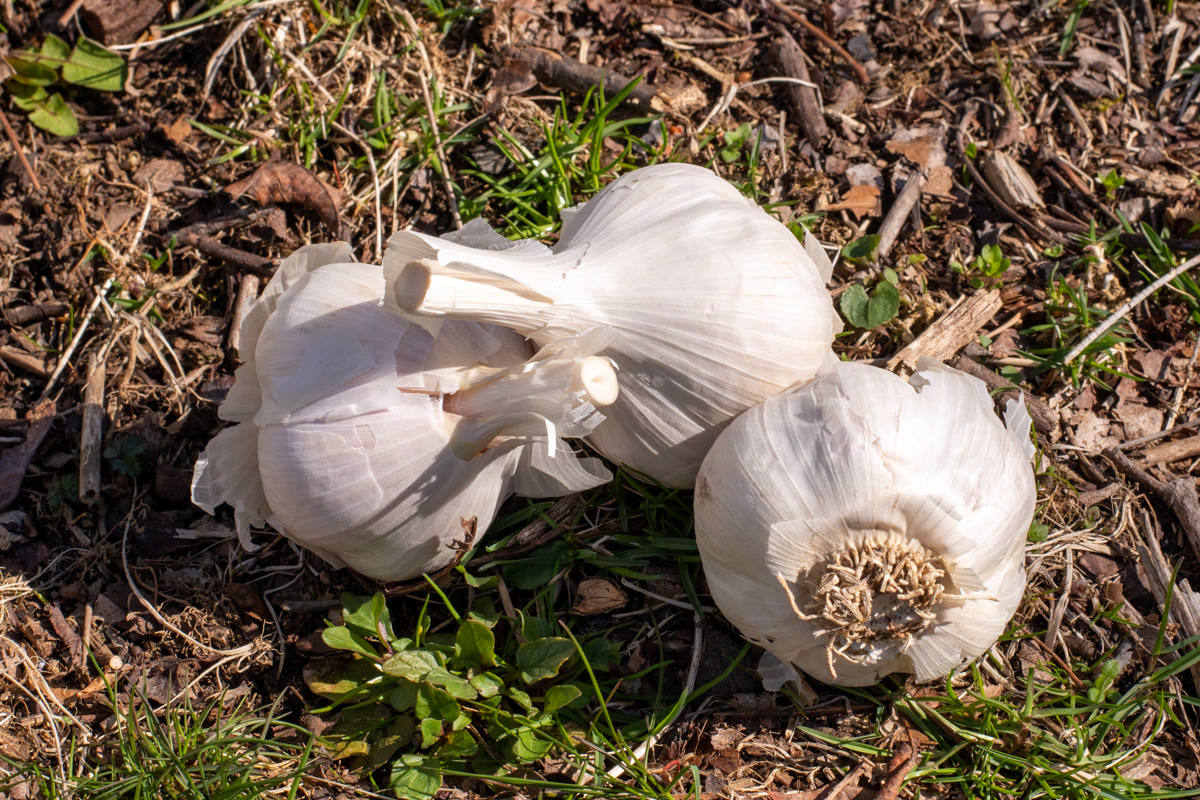
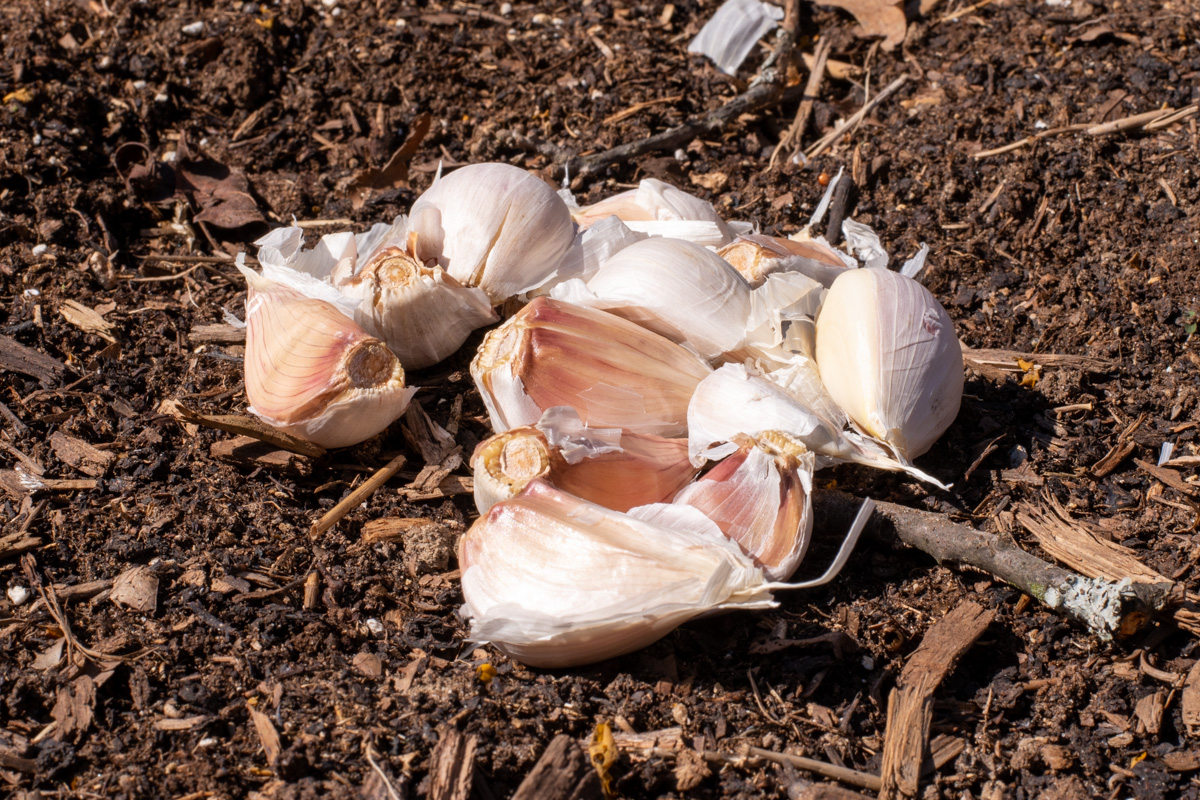
This piece was updated on 8/28/2023 to include photos of the harvested garlic from the cloves planted in the spring.
In the book of Germinations, it doth say, “Woe to the springtime gardener who Googleth ‘When to plant garlic,” for there will be much gnashing of teeth and rending of robes. And lo, their hopes of roasted garlic hummus and pickled dilly-garlic beans shall be dashed upon the rocks.
Many a gardener has learned at the wrong end of the growing season when you’re supposed to plant garlic. But don’t go tearing your robes just yet; you can plant garlic in the spring.
Why Garlic Is Usually Planted in the Fall
Garlic is a geophyte, meaning the aboveground plant grows from an underground storage organ, or for us non-sciencey people – bulbs. You’re probably familiar with other popular geophytes – carrots, ginger and daffodils.
Most geophytes grow and spread via new bulbs that grow apart from the main bulb. If you’ve ever dug up bulbs to divide, then you’re quite familiar with this method of plant reproduction.
Some geophytes need to experience prolonged cold temperatures, which triggers a process called vernalization.
While the exact mechanisms are still unknown, we’ve learned that something about that long stretch of cold weather sets off a signal within the bulb that “tells” the bulb to start flower development, new bulb division, or both.
Garlic happens to be a geophyte that needs to undergo vernalization. This is why we plant garlic in the fall.
In September or October, gardeners plant garlic to allow the new roots to develop before the cold weather sets in. Then the plant enters a period of dormancy, and super-secret enzymes or proteins or whatever are released, which signal to the bulb to split from one clove into many – come spring, your garlic is primed to grow into the tell-tale bulbs full of delicious cloves we know and love.
How to Trick Mother Nature
If, for whatever reason, you missed the boat last fall, you can trick mother nature and still grow some tasty garlic if you get started in the spring. The earlier you start this process, the better, as garlic is a long-growing crop.
Vernalizing Garlic in Your Fridge
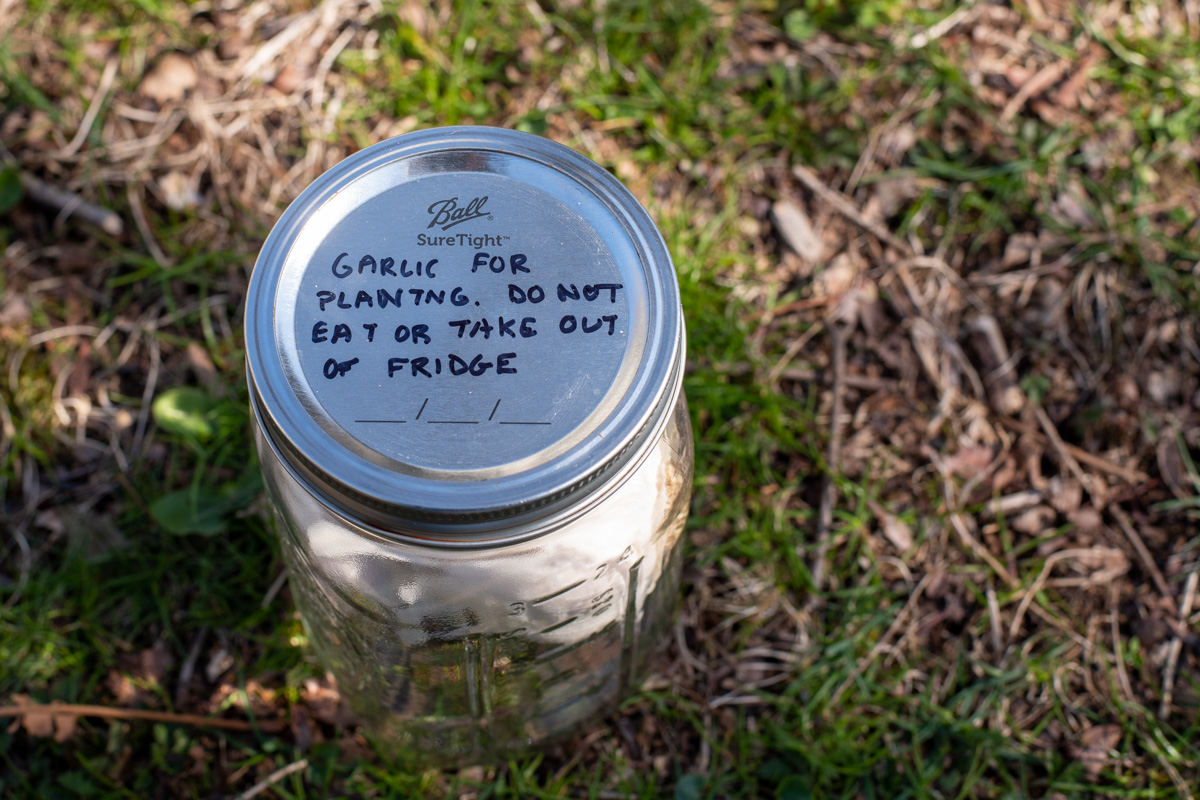
To simulate winter, you can trick your garlic by giving it a stint in the fridge for a few weeks. Store it in a mason jar with the lid on or in doubled-up paper bags. You can also pack the garlic in a plastic ziptop bag filled with potting soil.
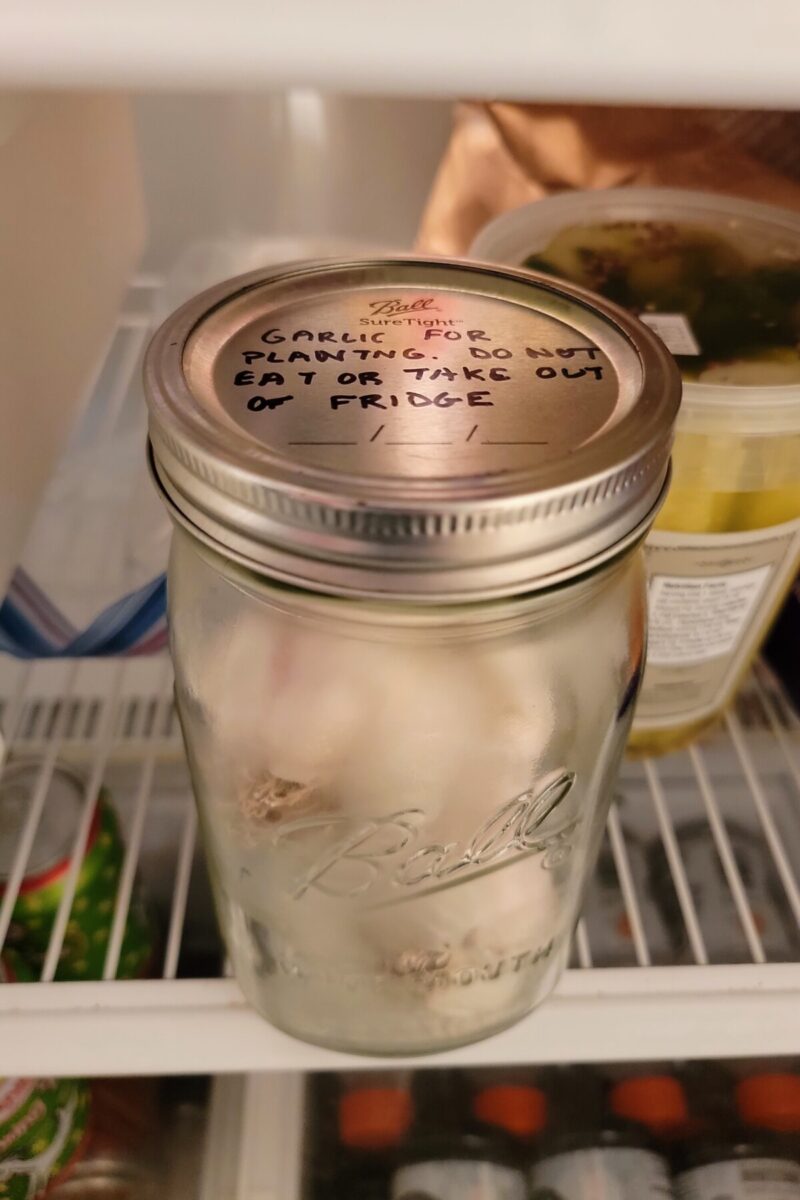
Choose a spot in your fridge where the garlic won’t dry out but won’t develop mold. I’ve found the bottom shelf of the fridge is best, not in the crisper drawer (too wet) or the top shelf (too cold).
You’ll want to give your garlic as much “wintertime” as possible.
I’ve heard from other gardeners that as little as two weeks in the fridge does the trick. (As the old saying goes, your mileage may vary.)
Then, you’ll want to get the garlic in the ground as soon as it’s workable. You want to give garlic as much time in the ground as possible to grow large bulbs. Even before your last frost date, if the ground thaws and you’ve got a few sunny days ahead while it’s still cold out, get that garlic in the ground.
What to Do If You Don’t Have Enough Time to Trick Mother Nature
If the calendar is getting away from you, you can still plant cloves that haven’t been vernalized in the spring. However, the resulting garlic will be much smaller, and the bulbs won’t separate into individual cloves. But it will still be tasty. Think of these bulbs as garlic scallions. They will be milder in flavor, and the tops will be quite tasty as well.
This is why it’s important to get garlic in the ground as soon as possible in the spring. You want to give it as much time as possible to grow and develop. The longer it’s in the ground, the more like traditional garlic bulbs it will be. So, even if you can only toss your garlic in the fridge for a week before you put it in the ground, go for it.
How to Plant Spring Garlic
Hardneck or Softneck
Garlic comes in two different types – hard and softneck. Both require vernalization but grow a little differently and yield different bulbs. The difference is right there in their names.
Hardneck garlic grows a stiff stalk, known as a scape which can be harvested and eaten in early summer. (They make incredible pickles.) The papery skin is harder, too, making it easier to peel. Hardneck is great for areas with brutal winters, as it’s very cold-hardy. Unfortunately, the harvested bulbs don’t store as long as softneck varieties.
Because softneck garlic grows in areas with milder winters, it’s the ideal garlic to plant in the spring as it doesn’t need as long a cold period to develop cloves.
Softneck varieties are generally what you see in the grocery store due to their excellent shelf-life and storage capacity. The stalk that grows from them is, you guessed it, softer and more leaf-like. If you live where winters are mild, softneck varieties will do best for you. Generally, hardiness zones 8 to 12 should grow softneck varieties. Softneck skins tend to be quite thin and sticky, making them harder to peel than hardneck varieties. But don’t worry; I’ve got you covered with the best way to peel garlic.
Bulb Inspection
Okay, so you’ve played your trickery on Mother Nature, and you’ve got garlic bulbs that think they’ve gone through winter. Let’s get them in the ground.
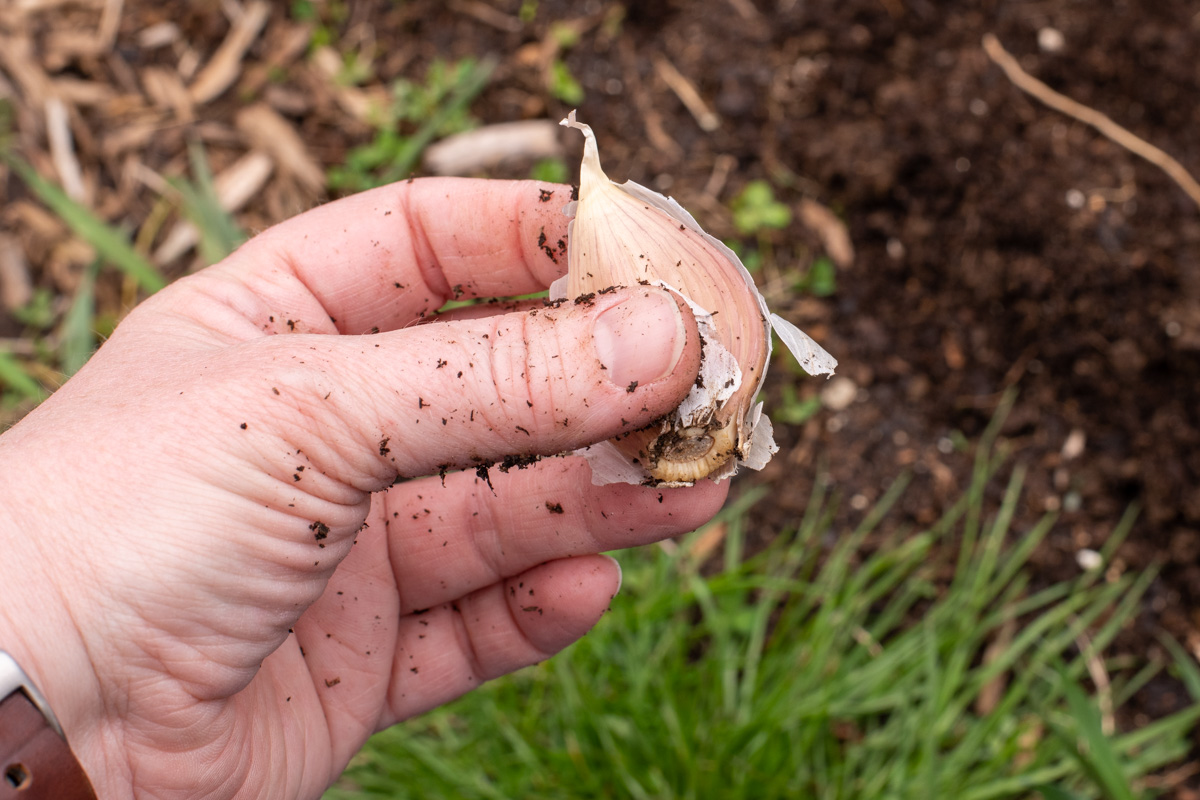
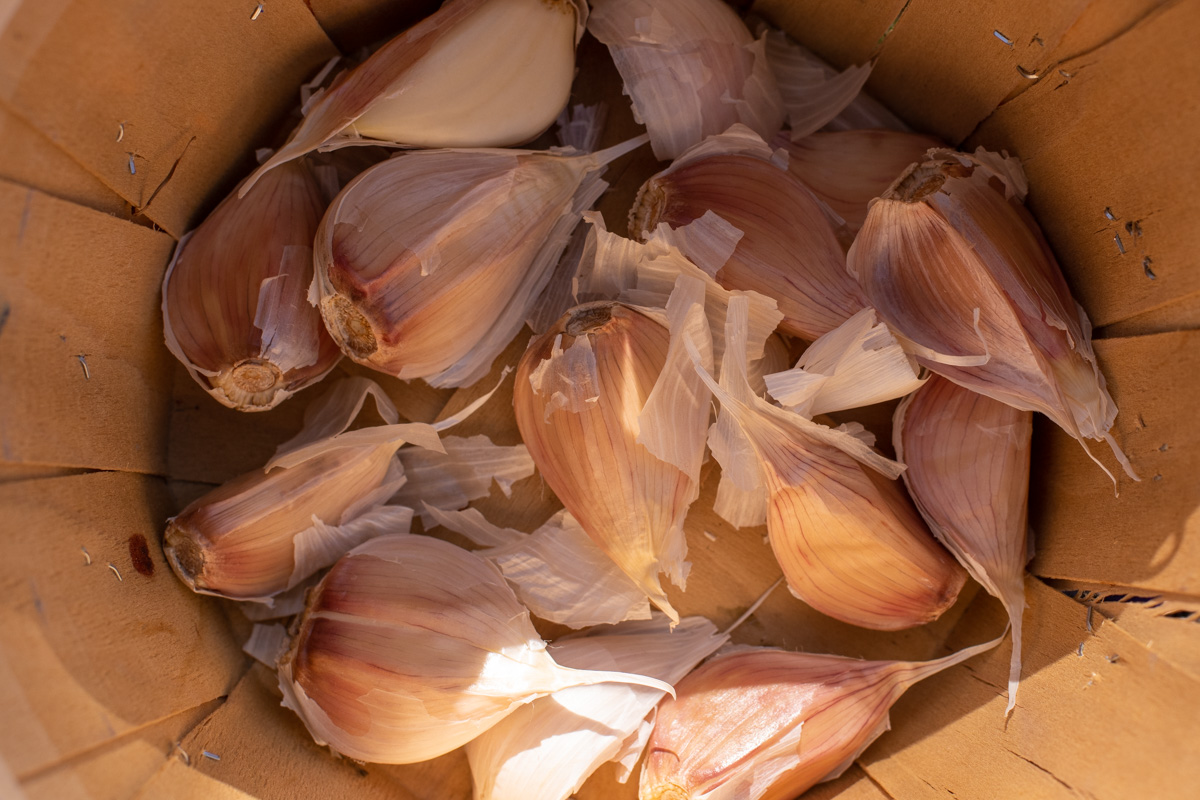
The first thing to do is inspect your bulbs. Get rid of any cloves that are moldy or soft and mushy. The bulbs and individual cloves should be firm.
Split Your Bulbs
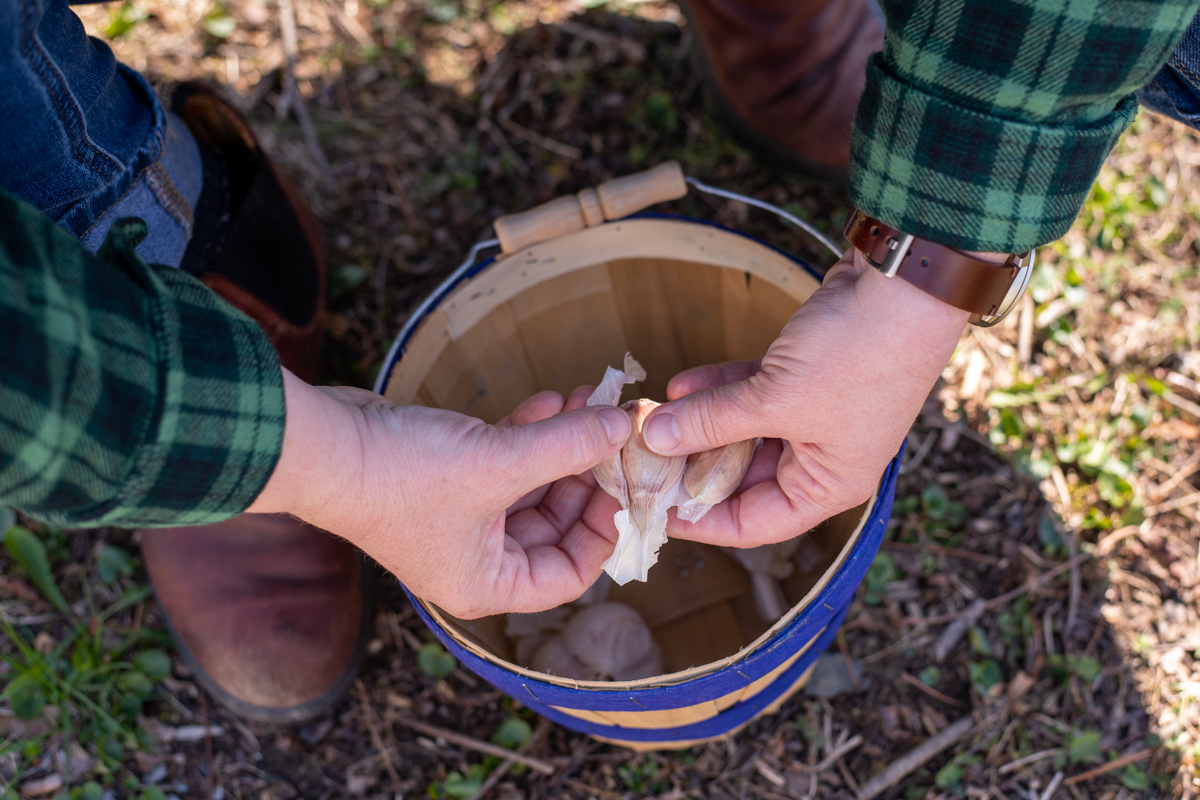
Gently break your full bulb down into individual cloves. Try to leave the paper skin on each clove, as this protects the clove in the ground. Granted, this is less important for spring garlic that won’t be wintering over, but it still helps.
Planting Garlic Cloves
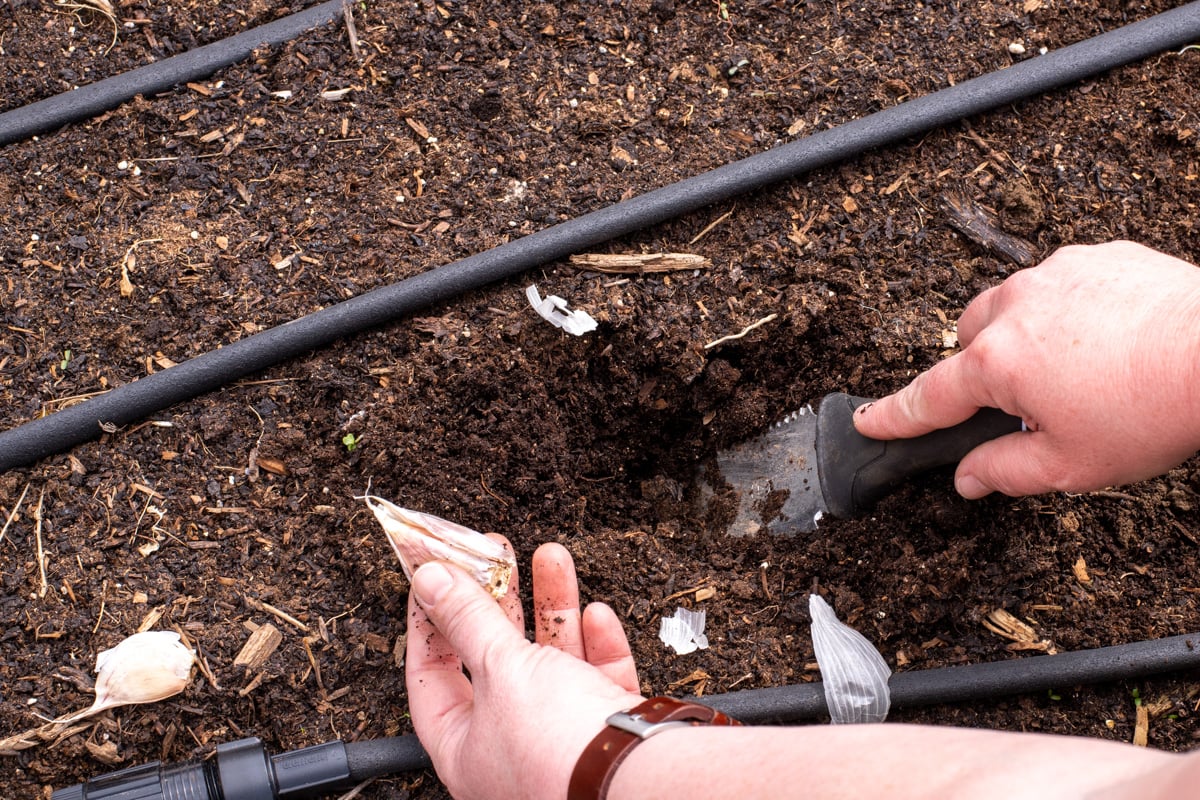
- Like any other bulb, be sure to plant each clove with the root side down and the pointy tip up.
- Loosen your soil. If you have it, sprinkle wood ash over the soil and dig it into the top few inches, as garlic needs a lot of potassium to grow large bulbs.
- Plant the cloves 3-5” deep. Too often, new gardeners make the mistake of planting garlic too shallow, so err on the deeper side.
- Space cloves no more than six inches apart. Since we’re getting our cloves in the ground late, we want to do everything we can to ensure they grow nice and big, and garlic hates being crowded. Give each clove plenty of room to develop into a fat, round bulb.
- Gently press the soil back on top of the cloves. Don’t forget to mark your spring garlic with the variety you planted.
- Water in the cloves well. You want to give them a thorough soaking, so they have the appropriate moisture in the soil to put down roots quickly.

Now make a sacrifice to the Garlic Gods as described in chapter three, verses 9-15 in the book of Allium sativum and wait patiently.
Spring Garlic Care
Because we’re planting garlic in the spring rather than the fall, caring for your garlic will be a little different than normal.
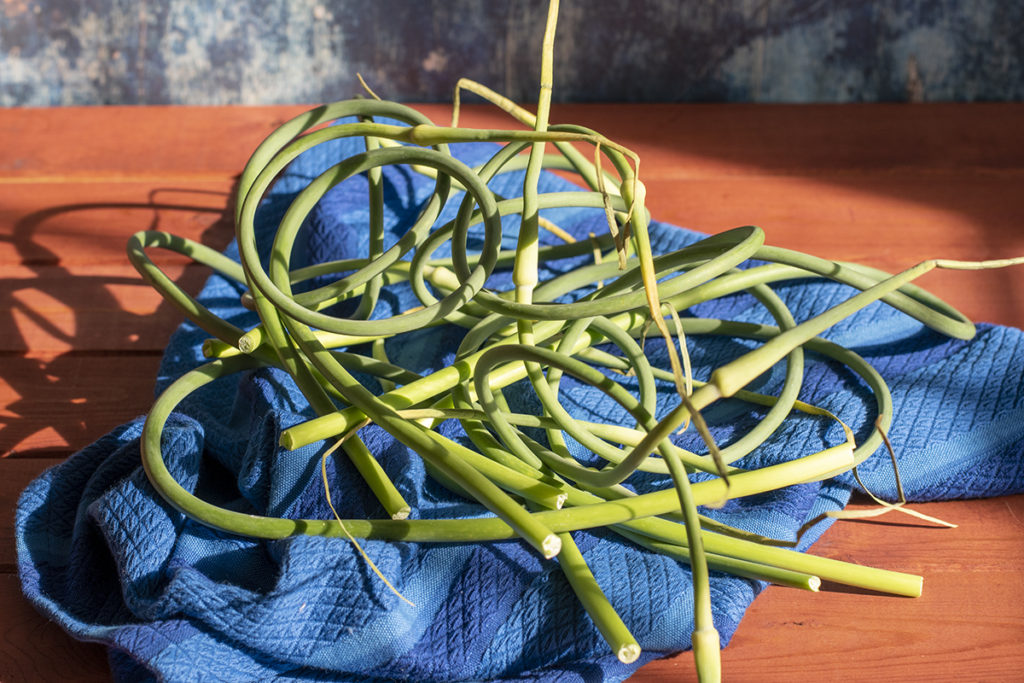
Cut garlic scapes off hardneck varieties using sterilized scissors in the early summer. You want to harvest them while they’re still tender if you plan to eat them. A good rule of thumb is to cut them once they’ve formed a complete loop.
Make sure you water your spring garlic regularly if you don’t get enough rain. Mulching your garlic will help to hold in moisture and keep weeds out, which compete for nutrients.
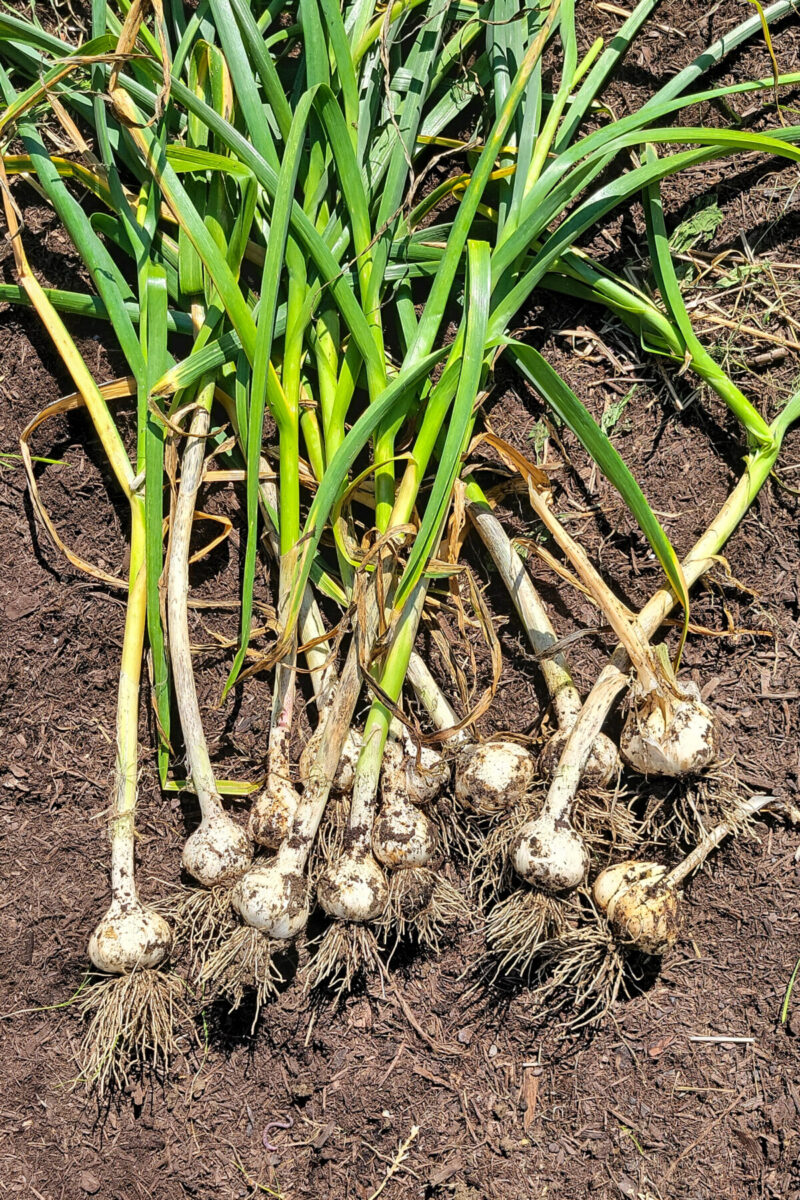
Harvesting Spring Garlic
Again, depending on how late you get your cloves in the ground, you may not end up with fully developed bulbs. That’s okay; enjoy a season of the smaller, milder garlic bulbs. You may find yourself planting a few rows of this “green garlic” to enjoy every year.
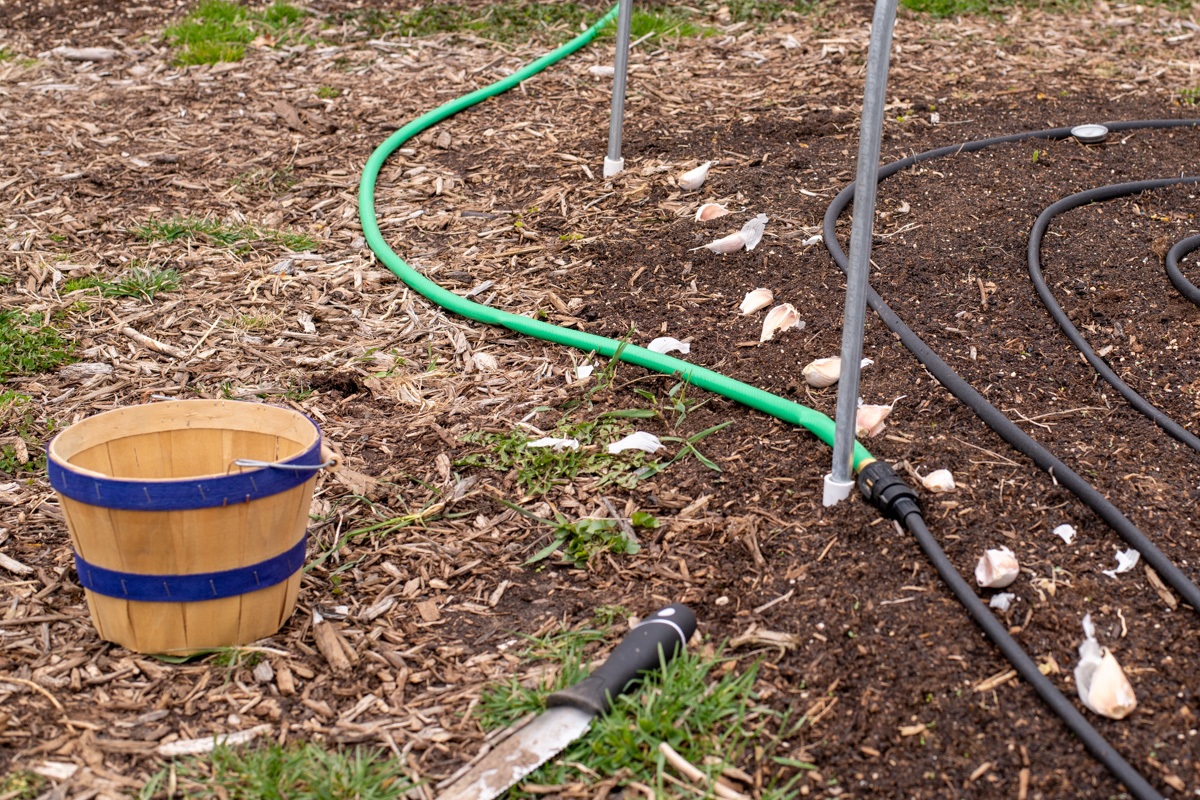
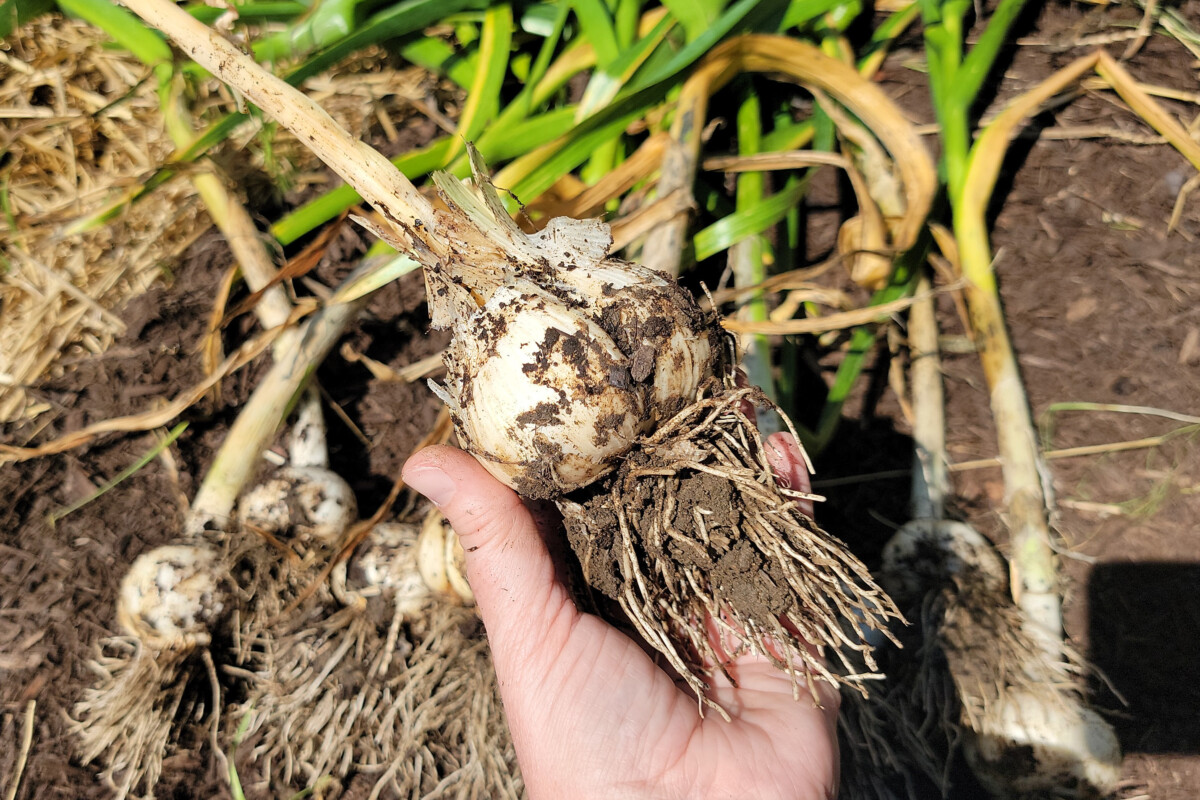
For bulbed garlic, leave the plants in the ground for as long as possible. You can harvest the garlic once the bottom half of the leaves on the stalk turn brown. Carefully lift the bulbs from the soil using a hori hori knife or a garden fork.
To cure and store your garlic, you’ll want to read Cheryl’s article detailing the process of curing garlic.
By the time you’re harvesting your spring garlic, you’ll soon be ready to get a fall crop in the ground. You may want to save some of your spring bulbs to plant next year’s crop. You might even end up with a yield of biblical proportions, no gnashing of teeth or rending of robes necessary.

Get the famous Rural Sprout newsletter delivered to your inbox.
Join the 50,000+ gardeners who get timely gardening tutorials, tips and tasks delivered direct to their inbox.