

Leaf miners, aphids and bolting the second there’s a bit of heat, for such a simple green, spinach can be tough to grow. Sadly, too many gardeners give up because they’re tired of putting in the time and effort only to have a piddly harvest that’s riddled with bugs. But once you know how to grow spinach the right way, you’ll see just how easy it is to harvest tons of deep green, crunchy leaves every single spring.
Spinach – You’ve Come a Long Way, Baby
If you’re like me, you grew up eating piles of mushy, steamed spinach. And let me tell you, it was not great. If it weren’t for the Popeye cartoons, I don’t think I would have even bothered. (Oddly enough, the muscles never showed up.) But much like the Brussels sprout, spinach had a rebranding and emerged as a superfood. We all learned some better ways to cook and eat this nutrient-packed green, and Popeye’s cans of green slop are now a thing of the past.
It’s a good thing, too, because spinach is one of those unassuming vegetables that does some serious heavy lifting.
Spinach is packed full of vitamins K, A and C. It’s also an excellent natural source of folate. Spinach is a mineral powerhouse, boasting plenty of iron, magnesium and potassium.
But the most important reason I choose to grow spinach rather than buy it is that I got tired of all the recalls at the grocery store. That and my homegrown spinach tastes way better than anything that’s been sitting in a bag for days.
It’s incredibly easy to grow bunches and bunches of spinach for fresh eating and freezing.
Why are you looking at me like that?
Okay, I know. I almost gave up on growing spinach, too. I got tired of the bugs eating more than I did, or having it bolt before it was ready. But luckily, I didn’t give up, which means I can pass on my secrets to growing masses of this savory superfood every single spring.
If you’ve been a regular reader of Rural Sprout, you’ll know by now that I’m all about lazy gardening.
If I can automate it or make growing something easier to do, I’m on it. So, when it comes to spinach, which can be a pain to grow, I’m not going to do it unless I can make it worth my time. And by worth my time, I mean reliably grow tons of large tender leaves that I can sauté, mix into my salads, or chop up and chuck in my freezer. Here’s how I do it.
1. Prepping Your Soil & Planting Your Seeds
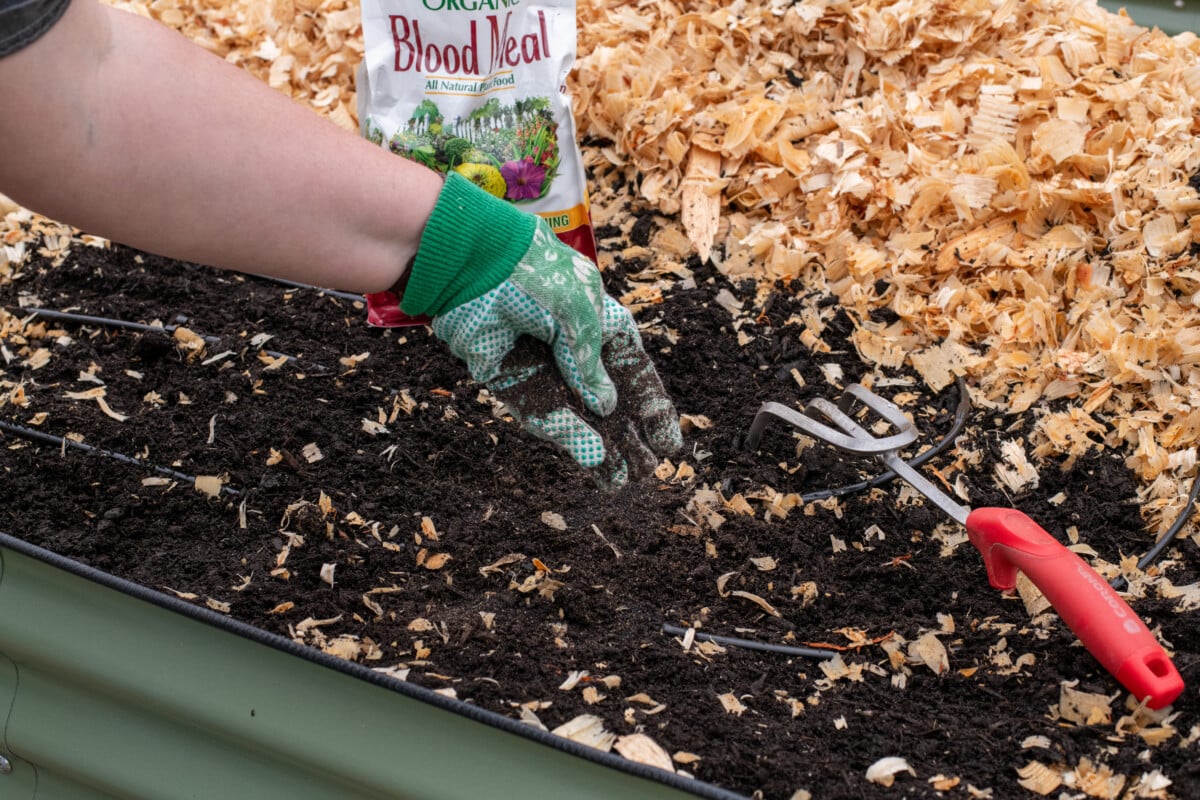
Spinach is all foliage. There’s no fruit, and no flowers. (If you do it right.) That means it needs lots of nitrogen to grow well. So, we’ll start there. In the spring, as soon as the soil can be worked, I scratch into the soil plenty of blood meal.
Spinach prefers consistently moist, well-draining soil.
Next, I take care of watering. I use driplines to water my raised beds. It’s by far the easiest way to water your entire garden, not just spinach. I can control what beds get watered when, so I’m not watering indiscriminately. (This is the kit I use for my beds. I love Rain Bird!) Do you have to have some sort of irrigation system installed to grow spinach well? No. But you will need to stay on top of watering, which isn’t a huge inconvenience in the spring when it tends to be rainy.
If you want great spinach, keep your soil moist. Don’t let it dry out. It is key to its rapid growth and to preventing spinach from bolting. (But we’ll get to that later.)
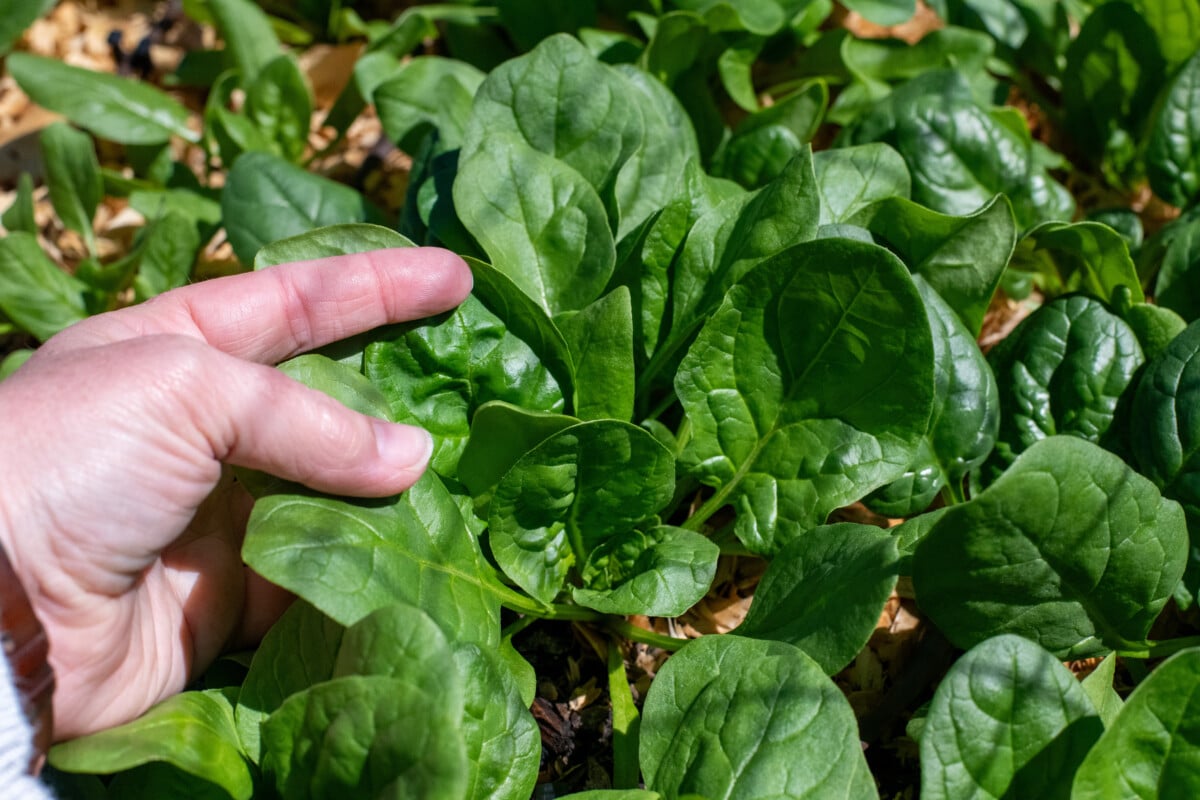
Finally, I completely and utterly disregard spacing and rows when I grow spinach. Lazy, remember? Conventional wisdom tells you to plant spinach in neat little rows with so much space between each plant—this same font of knowledge also advises you to thin out plants.
Nope. I ignore all of this and grow glorious patches of incredible spinach anyway. (Read to the end to find out why this works.)
When sowing spinach seed, I sprinkle it randomly in the area I’ve designated for spinach. I always sprinkle more than I think I’ll need. Then I use my little hand cultivator, to gently scratch the seed into the surface. You don’t want to go crazy. Remember, spinach only needs to be buried ¼” – ½” to germinate. Then I gently pat the soil with my hand.
2. Mulching
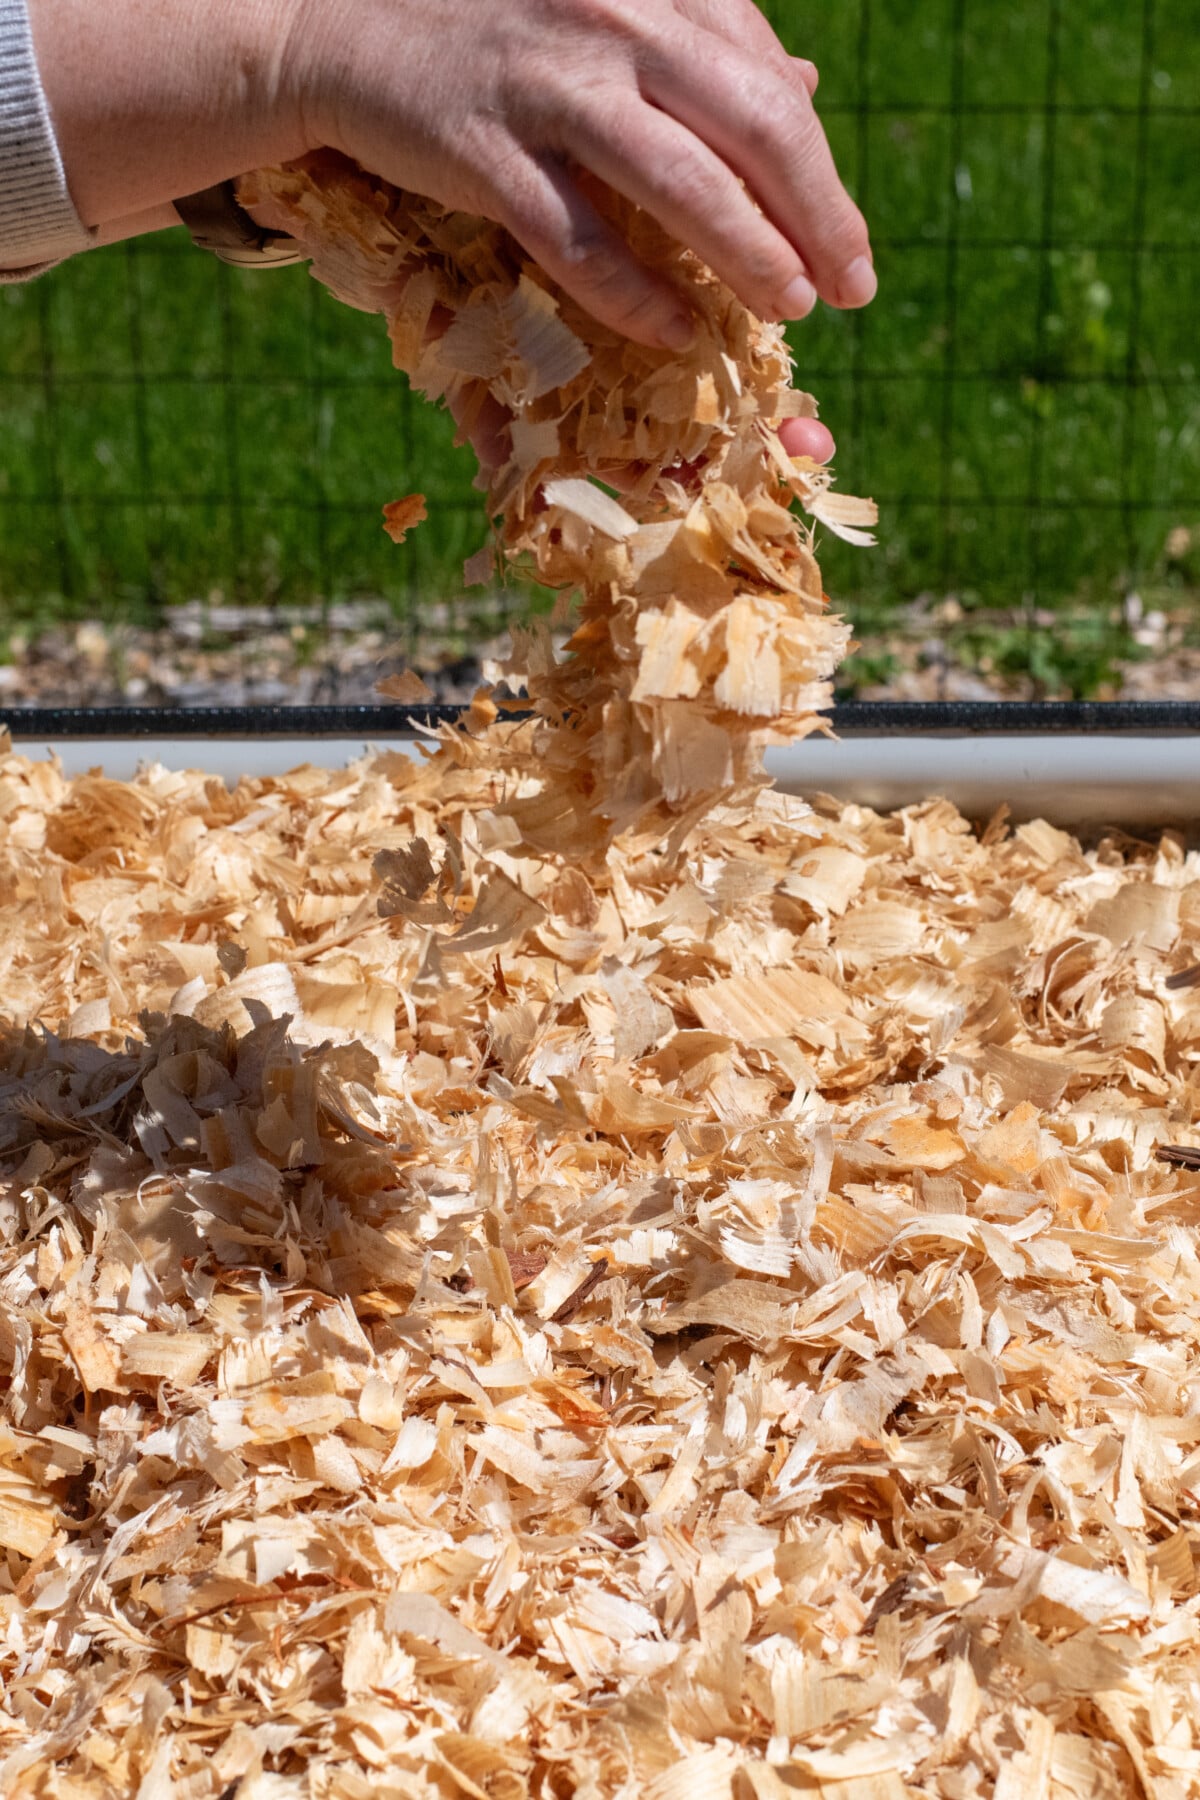
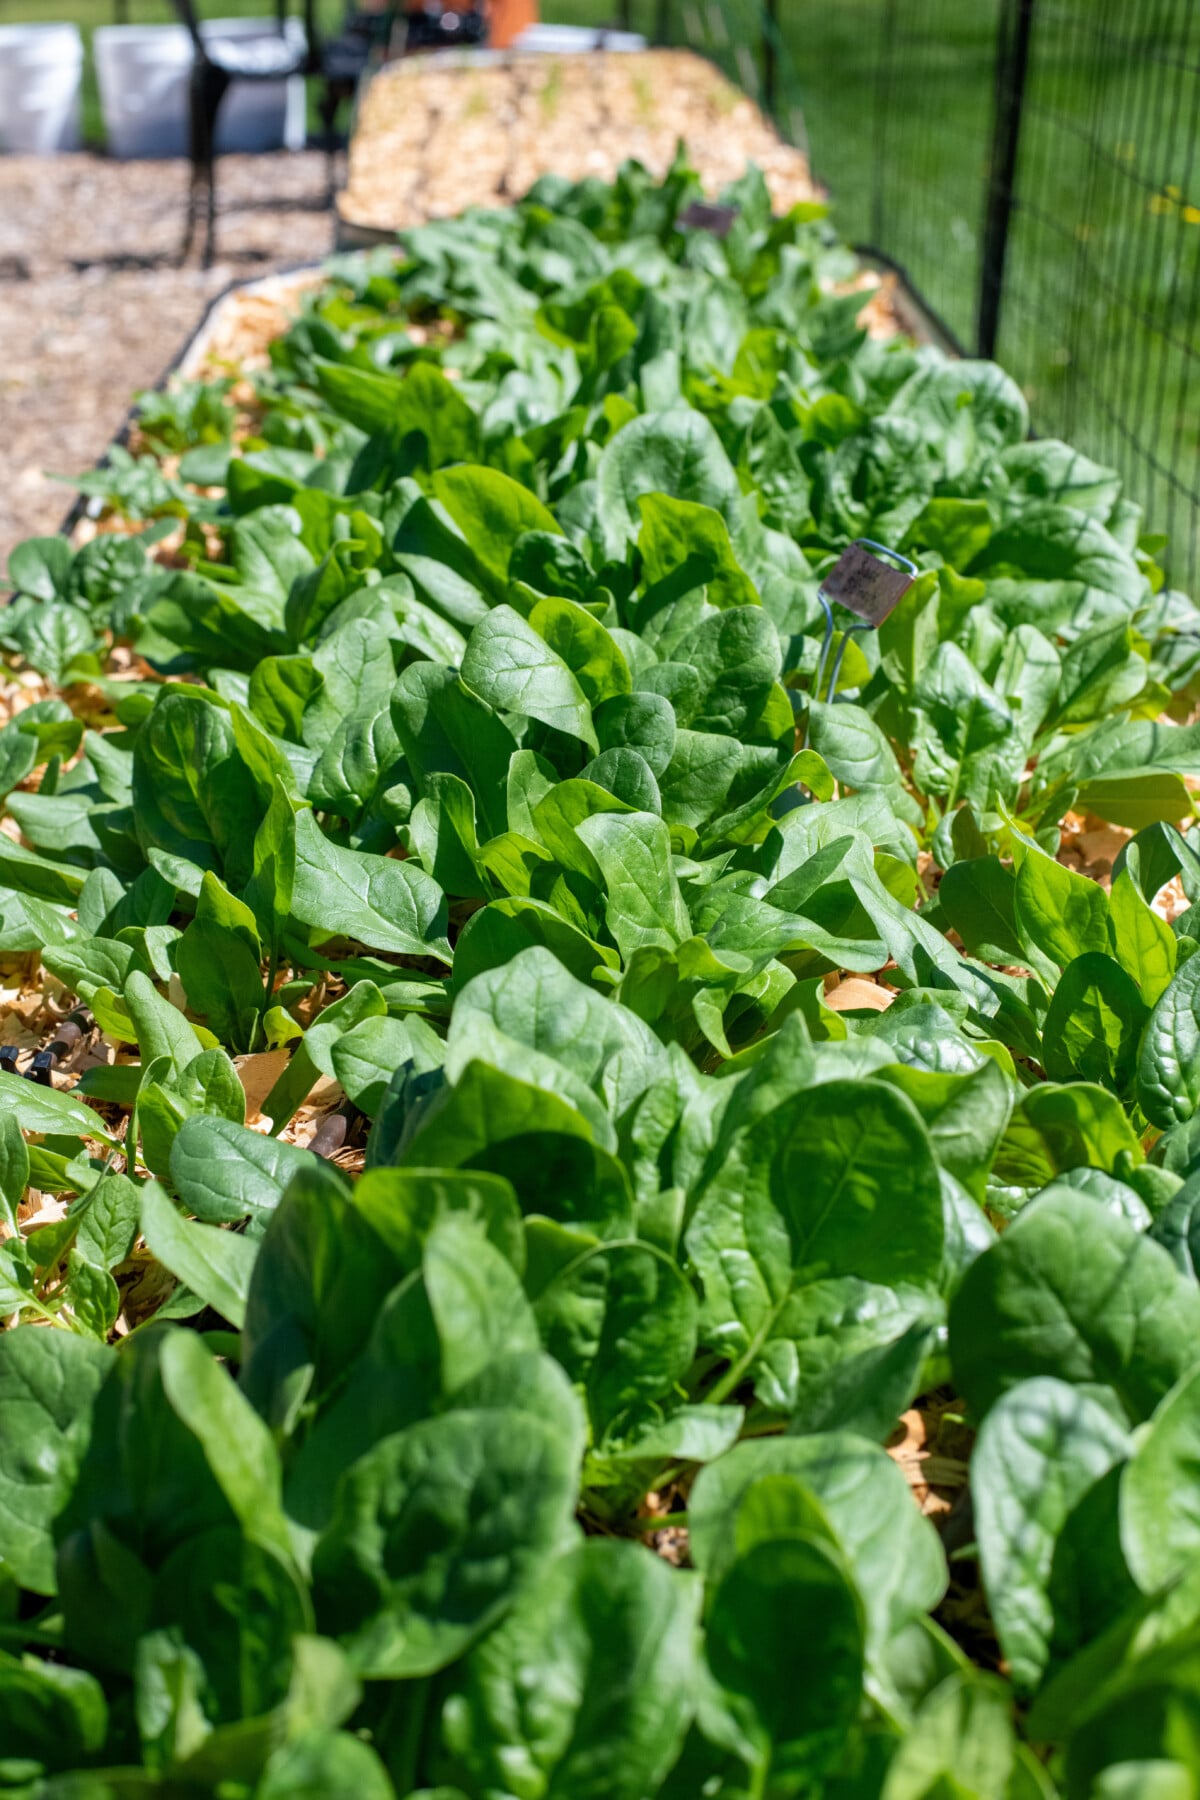
Now, this step is important, so don’t skip it. I mulch with pine flakes. I can see some of you wincing, but keep reading and look at my spinach. It speaks for itself.
Using chipped wood in the garden gets a bad rep for stealing nitrogen from your plants. Let’s set this nonsense to rest right now: wood chips will only bind to nitrogen if they are buried in the soil. They aren’t capable of pulling nitrogen from within the soil when they’re sitting on top of it.
So, unless you are burying your mulch in your garden each year, which I do not recommend, wood chips are perfectly safe to use in your garden. Yes, even pine. As for the pine acidifying your soil, again, you would need to bury it, and lots of it, for it to significantly change the pH.
Pine flakes are the only mulch I use in my garden.
I got tired of weeding all the grass that grew from my straw mulch and all the slugs that loved to hide in it. I use bags of pine flakes because they are lightweight, ridiculously inexpensive, and I can pick up a bag at any Tractor Supply or Rural King.
The important thing to remember about mulching at this time is to keep it light. I put down about a three-inch thick layer, and because the pine flake is so airy, it doesn’t impede my seedlings.
Unlike sturdier vegetables, spinach seedlings are incredibly delicate, so they can’t push up through layers of heavy mulch material.
Do you need to use pine flakes? No, but whatever you decide to mulch with, make sure it isn’t heavy or doesn’t become heavy when it’s wet.
Mulching serves several purposes in the long run, but when you’re first planting your spinach, it prevents evaporation and keeps the rain from pounding your bare soil into a compacted crust.
All that’s left to do at this point is to keep your soil consistently moist and wait for your spinach to germinate.
3. Hide Your Spinach from Sun and Pests
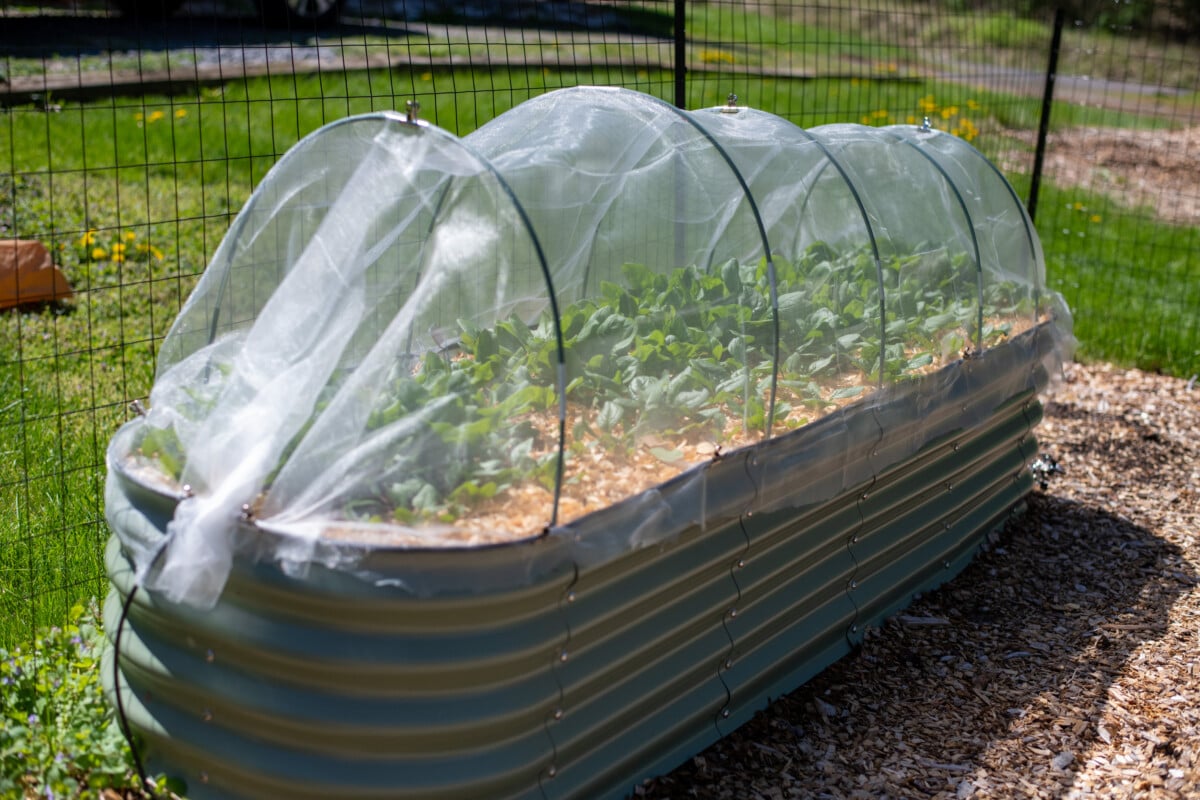
Once your spinach seedlings emerge, it is nature’s job to try to murder them. The sun will try to make it bolt, and the bugs will try to eat it. But we’re going to take our spinach off the menu.
As soon as my spinach seedlings pop up, I put either a lightweight row cover or fine insect-mesh over them. The easiest way to deal with pests is to take away their access. Aphids, leaf miners, leaf hoppers, cutworms, flea beetles – they all want a bite. But now they have to find something else to snack on.
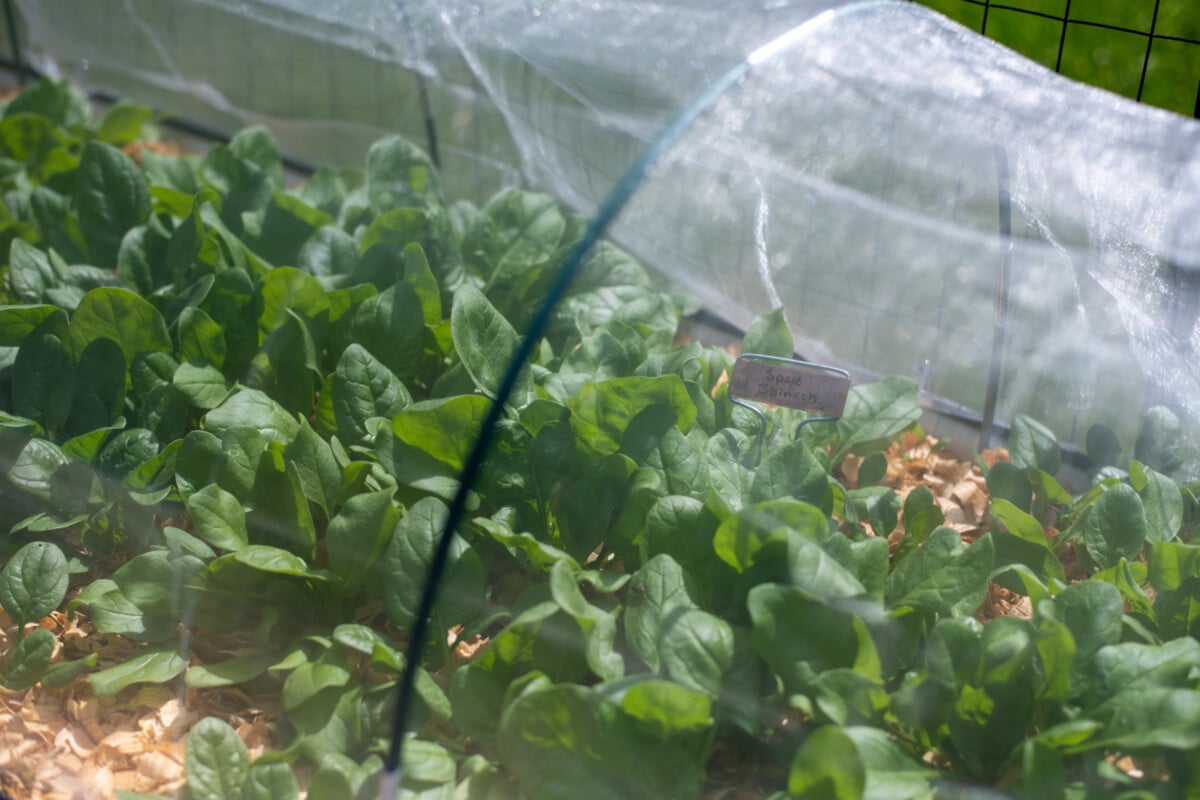
Covering your spinach also prevents it from bolting.
I don’t know what spring looks like in your neck of the woods, but here in Pennsylvania, (zone 6b) spring usually looks something like this: cold, cold, rain, cold, snow, cold, hey we can wear shorts, cold, rain, why did I put my winter jacket away so soon, I can wear shorts again, cold, rain, cold, rain, and now it’s going to be 85°F until October.
And that’s all before the end of April.
So, it was always a miracle if I could get one full round of spinach harvested before the temperatures soared and it bolted. That is, until I started cheating.
To keep your spinach from bolting, and, dare I say it, even sneak in a second planting, you need two things: this little soil thermometer and 30-50% shade cloth, depending on how quickly your spring heats up.
What most gardeners don’t realize is that it’s the temperature of the soil rather than the air temperature that causes spinach to bolt.
Once the soil stays consistently around 75°F, the roots send a signal to start closing up shop and put out a seedhead, then a week later, it bolts and flowers.
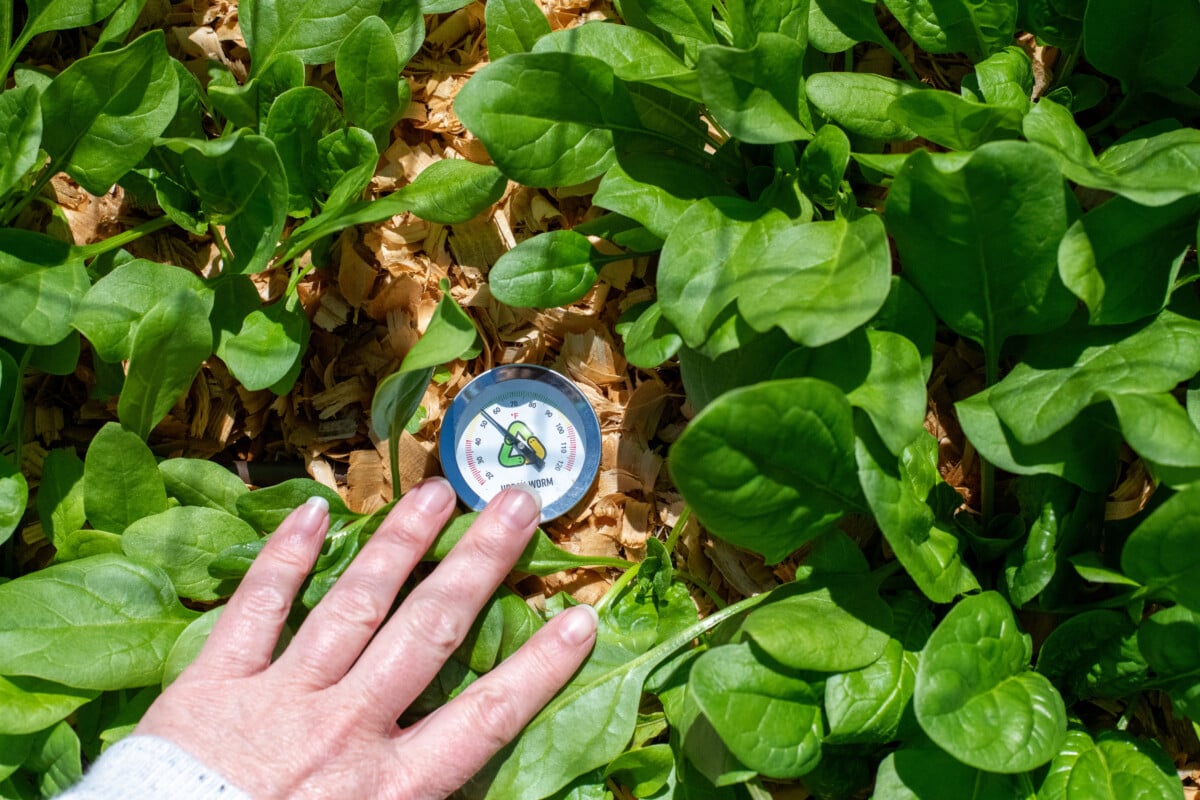
To prevent this, we have to know how warm the soil is, hence the soil thermometer. From there, we have two ways to cool the soil: we water it, and we shade it. Remember that part about spinach preferring moist soil? This is part of the reason why. Moist soil = cool roots. Watering your spinach regularly, or even a little extra when you know it’s going to be hot out, will help keep those roots cool.
Once you begin to get consistently nice weather, put the shade cloth over the top of your mesh or row cover, and that too will help to keep the soil temperature below 75°F. In this way, you can get a lovely, hole-free crop of spinach, or several if you succession plant.
A note on frosts: Yes! Spinach is frost-hardy, but really, all that means is that it will grow back if it gets hit by a frost. I always cover my spinach when we get a freeze warning.
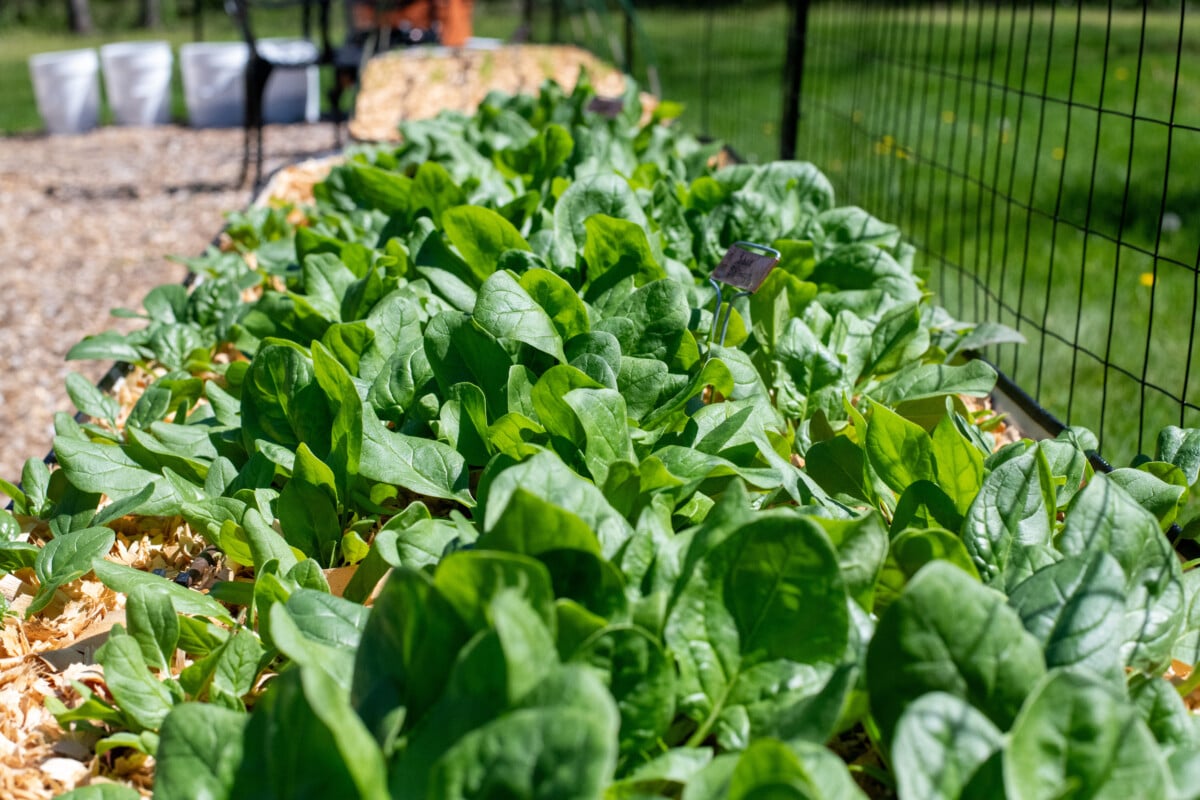
Here’s why I don’t bother thinning plants and how I get away with sowing my spinach seeds all willy-nilly.
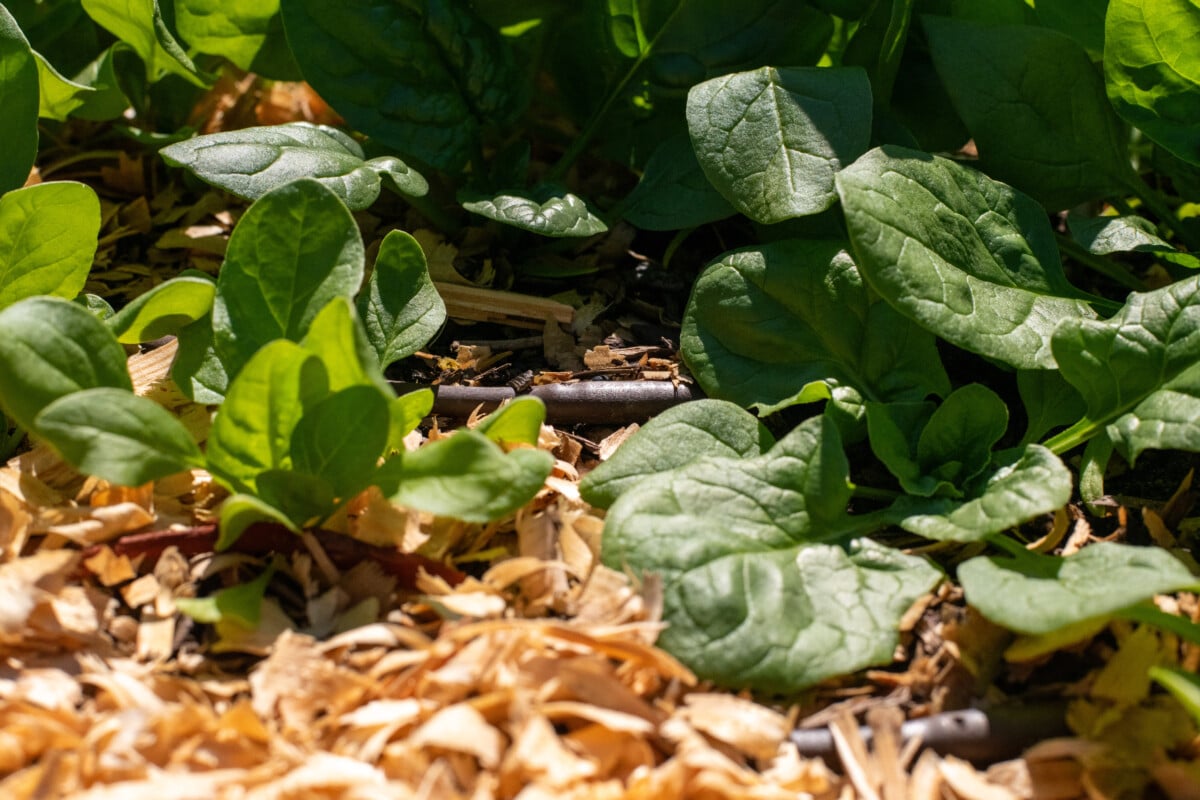
As my spinach seeds germinate and start growing, I leave them alone. I don’t thin them. Yes, some of the plants are smaller. No, there are no tidy rows. But a funny thing happens.
Since I provided the plants with plenty of fertilizer before I planted my seeds, and I keep them well-watered, the plants don’t lack for either. The mulch keeps weeds from stealing water and nutrients. The only thing the spinach plants are competing for is sunlight.
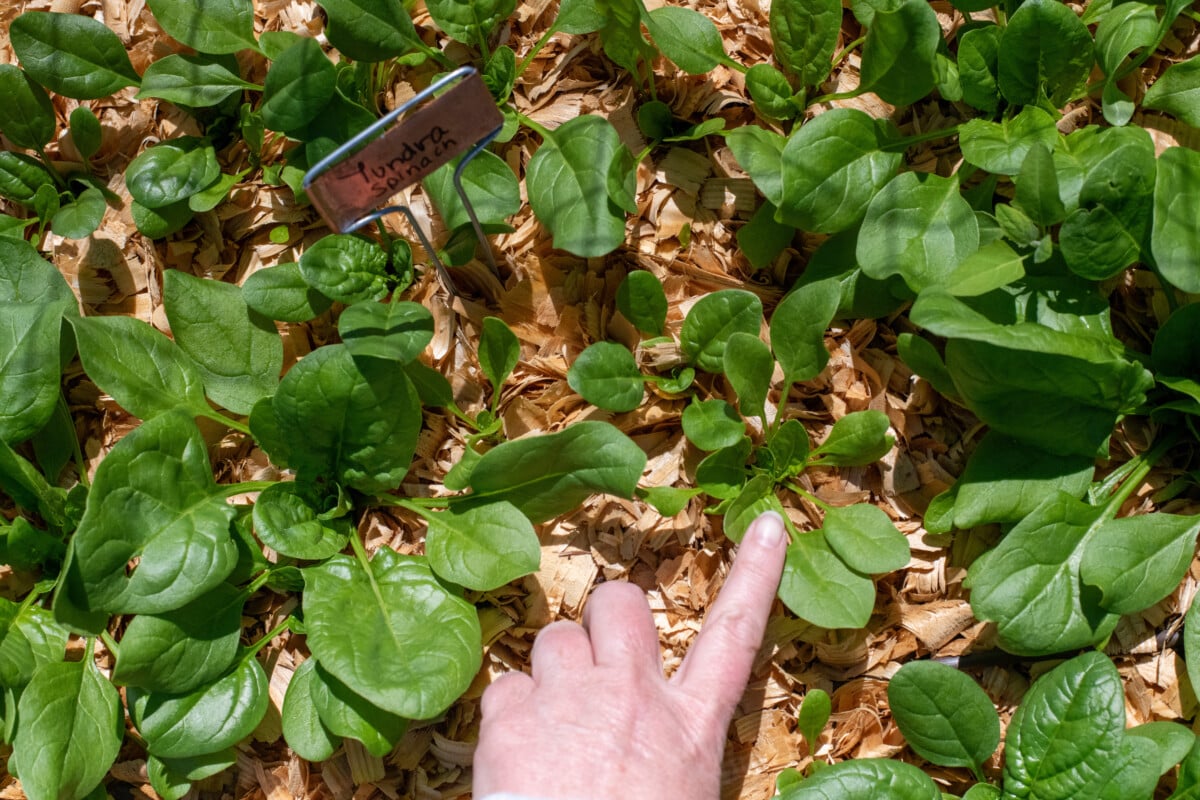
So, some plants mature faster than others. As they are ready to be harvested, I pick them. That opens up room for the smaller plants to grow and fill in their place. As more pockets open up, I drop a few more seeds into the soil below the mulch, and we keep going until even shade cloth can’t keep the soil cool. Beat that, Popeye!

Get the famous Rural Sprout newsletter delivered to your inbox.
Join the 50,000+ gardeners who get timely gardening tutorials, tips and tasks delivered direct to their inbox.