

I love those first few spicy radishes each spring, and the sweet, tender crunch of a new sugar snap pea, but there is one gardening bite I dream of all winter long – the first bite of a sun-ripened tomato.
Despite being the Drama Queens of the garden, you’d be hard-pressed to find a home garden without tomatoes in it.
I’ve often wondered why we’re so drawn to growing these fruits, and I’ve concluded that out of all the produce you can easily get in the grocery store, home-grown tomatoes just taste different from their supermarket counterparts.
Carrots, celery, eggplant, even peppers; most of us wouldn’t notice the difference in taste if someone swapped our garden basket with a grocery bag. But tomatoes? Oh-ho, my friend, there is a huge difference in taste.
Which is why when it comes to growing tomatoes in my own garden, I don’t mess around.
I’ve spent decades dialing in my tomato-growing methods. I’m incredibly particular, from the way I start seeds down to how I harvest and store tomatoes once picked.
I have tried so many different products over the years in my quest for a tomato-growing season with as little drama and as many tomatoes as possible.
Fertilizers have come and gone, support systems have been bought, made and replaced. And through it all, there have been a few products that really stood out.
These are the products that have made growing tomatoes easier, produced bigger, more flavorful yields, and kept pests to a minimum year after year.
1. Tree Seedling Pots
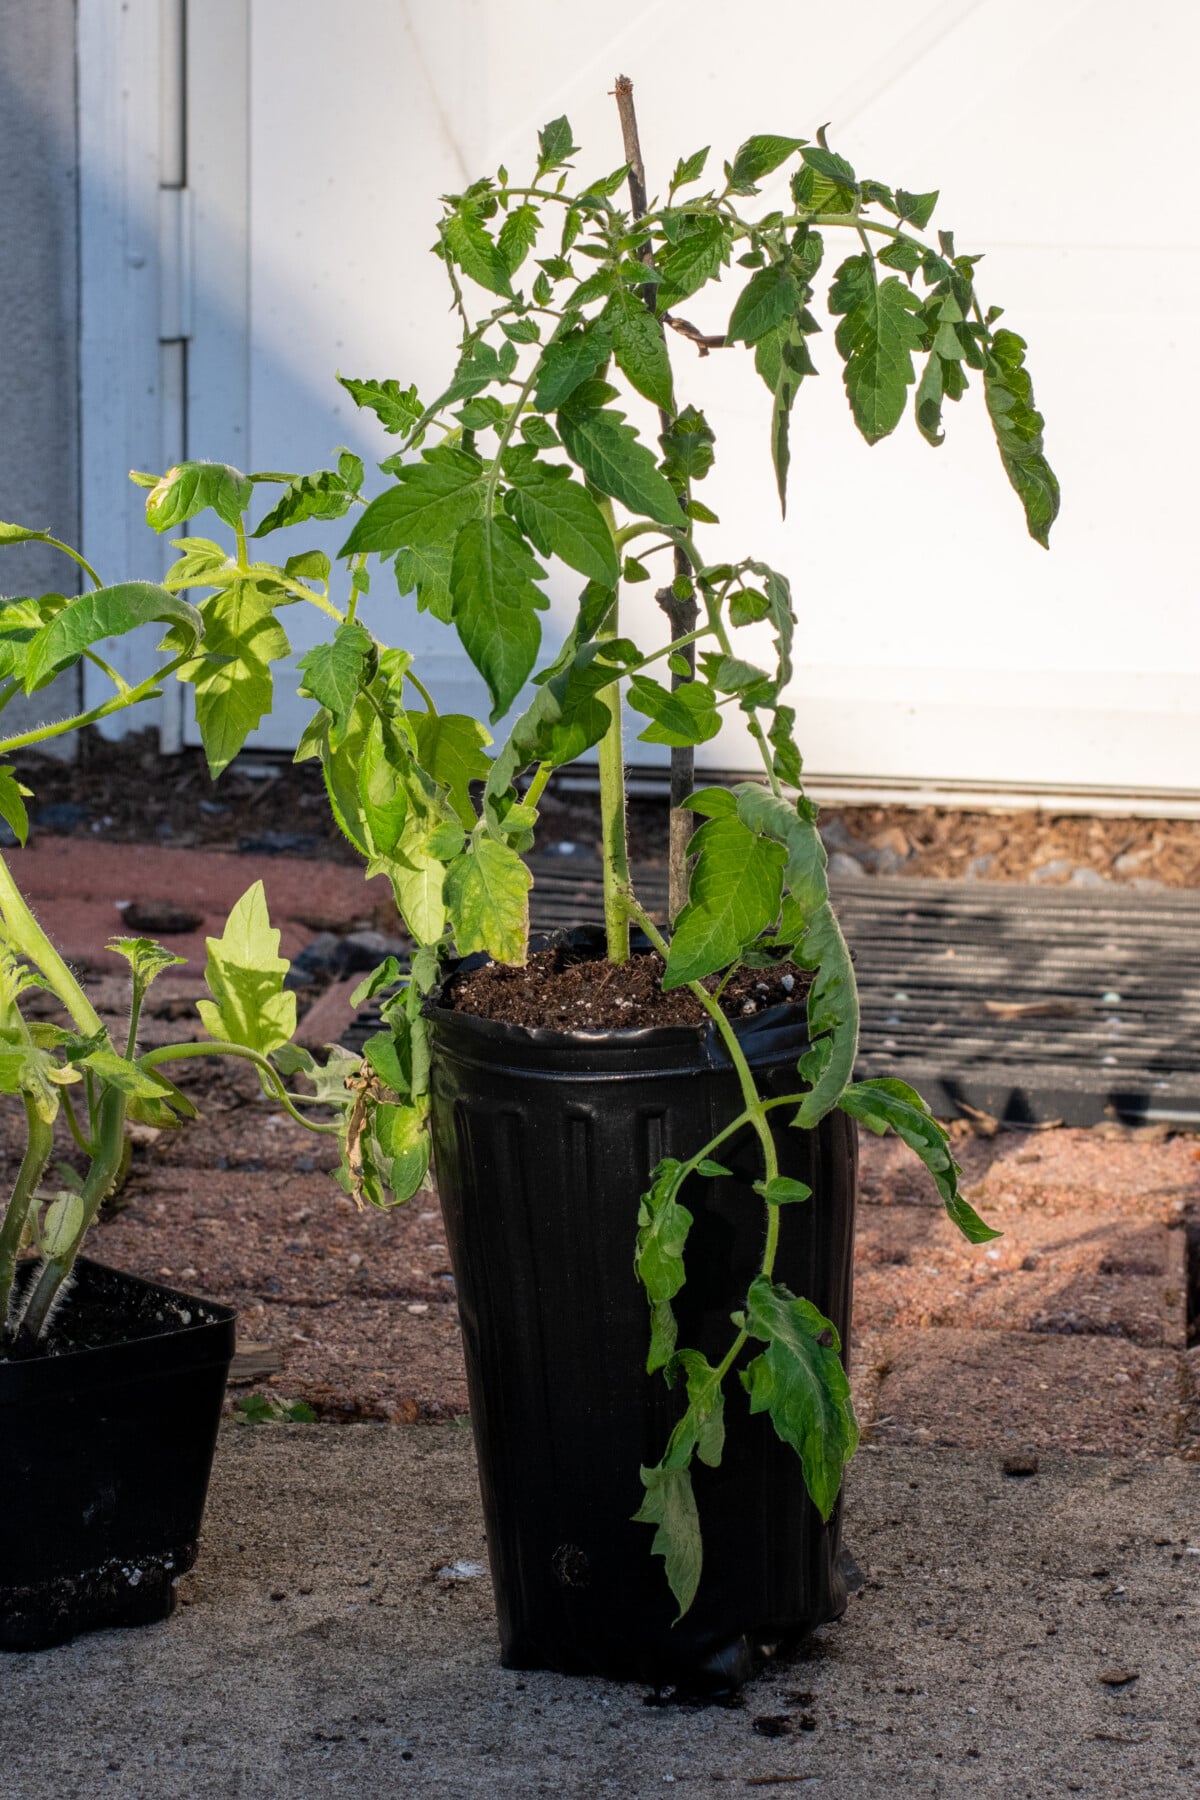
We’ll start with the item I use first each year. Like many of you, I start my tomatoes from seed. I always pot up my tomatoes once before they go outside, but I do it strategically.
Tomatoes are pretty incredible as far as plants go. They produce adventitious roots. This means if you bury any part of a tomato stem, it will grow roots.
You could bury an entire tomato plant underground, leaving only the topmost leaves above ground, and everything below ground would put out roots. What’s left above ground would grow larger, stronger, faster.
In fact, this is the basis of the whole idea of burying a tomato sideways. You’re putting a significant portion of the plant in the soil to encourage it to grow a massive root system. The benefits of having such a large root system are a plant that’s extremely drought-tolerant and capable of accessing more nutrients in the soil. You know what that means – lots more tomatoes. So, I always bury my tomatoes deeply.
A few years back, I was using these tall, skinny tree seedling pots to root beautyberry cuttings. Around the same time, I was potting up my tomato seedlings. Looking at the pots got me thinking – why not bury my seedlings when I pot them up in the same way I do when I plant them in the garden, that way I’m giving the seedling a headstart at growing a huge root system.
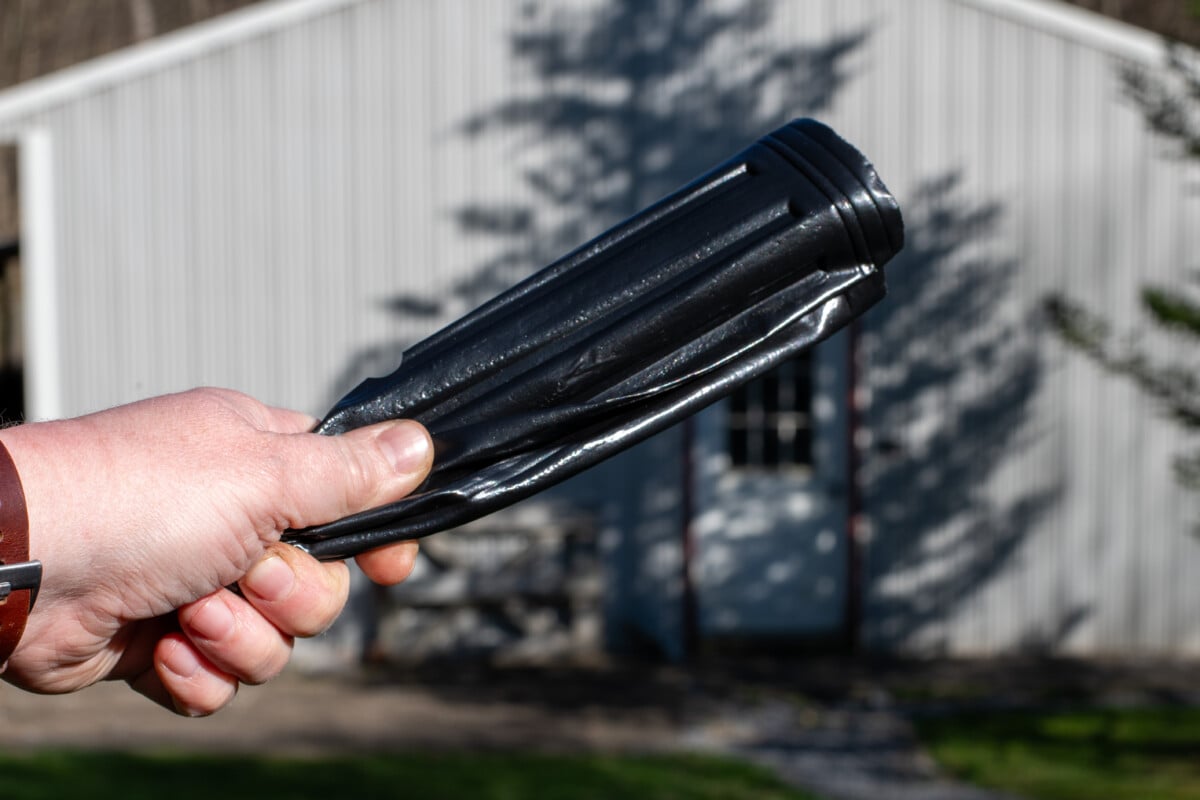
Now, I always use these tree seedling pots to pot up my tomato seedlings and bury the seedlings halfway up the stem. By the time I move that seedling into the garden, the pot is filled with healthy roots, and my tomatoes shoot up fast. Did I also mention they’re less susceptible to transplant shock? I’ve got a detailed tutorial here.
2. Tomato Booster
Everyone obsesses about fertilizer when it comes to tomatoes. Which do you use? When do you use it? Do you switch it up throughout the season?
I used to have this whole complicated tomato fertilizing method that involved three different brands of fertilizer being used at different times throughout the season. It was very fussy, and I hated it.
Tomatoes are heavy feeders, so if you want lots of tomatoes, then fertilizing is a must. The problem is that far too often, gardeners will reach for that garbage in the green and yellow box and then wonder why they have to prune back their tomato every few minutes, but aren’t getting a lot of fruit. The answer? Too much nitrogen.
We tend to go heavy-handed on the nitrogen while skimping on the nutrients that are important for flower and fruit development.
My customized fertilizing schedule included a high nitrogen fertilizer when the plants were small, then switching to a formula with more phosphorus and potassium. Over the years, I realized something pretty magnificent about plants: as long as you’re providing all the nutrients they require, all the time, they will use what they need without becoming deficient in some or having too much of another.
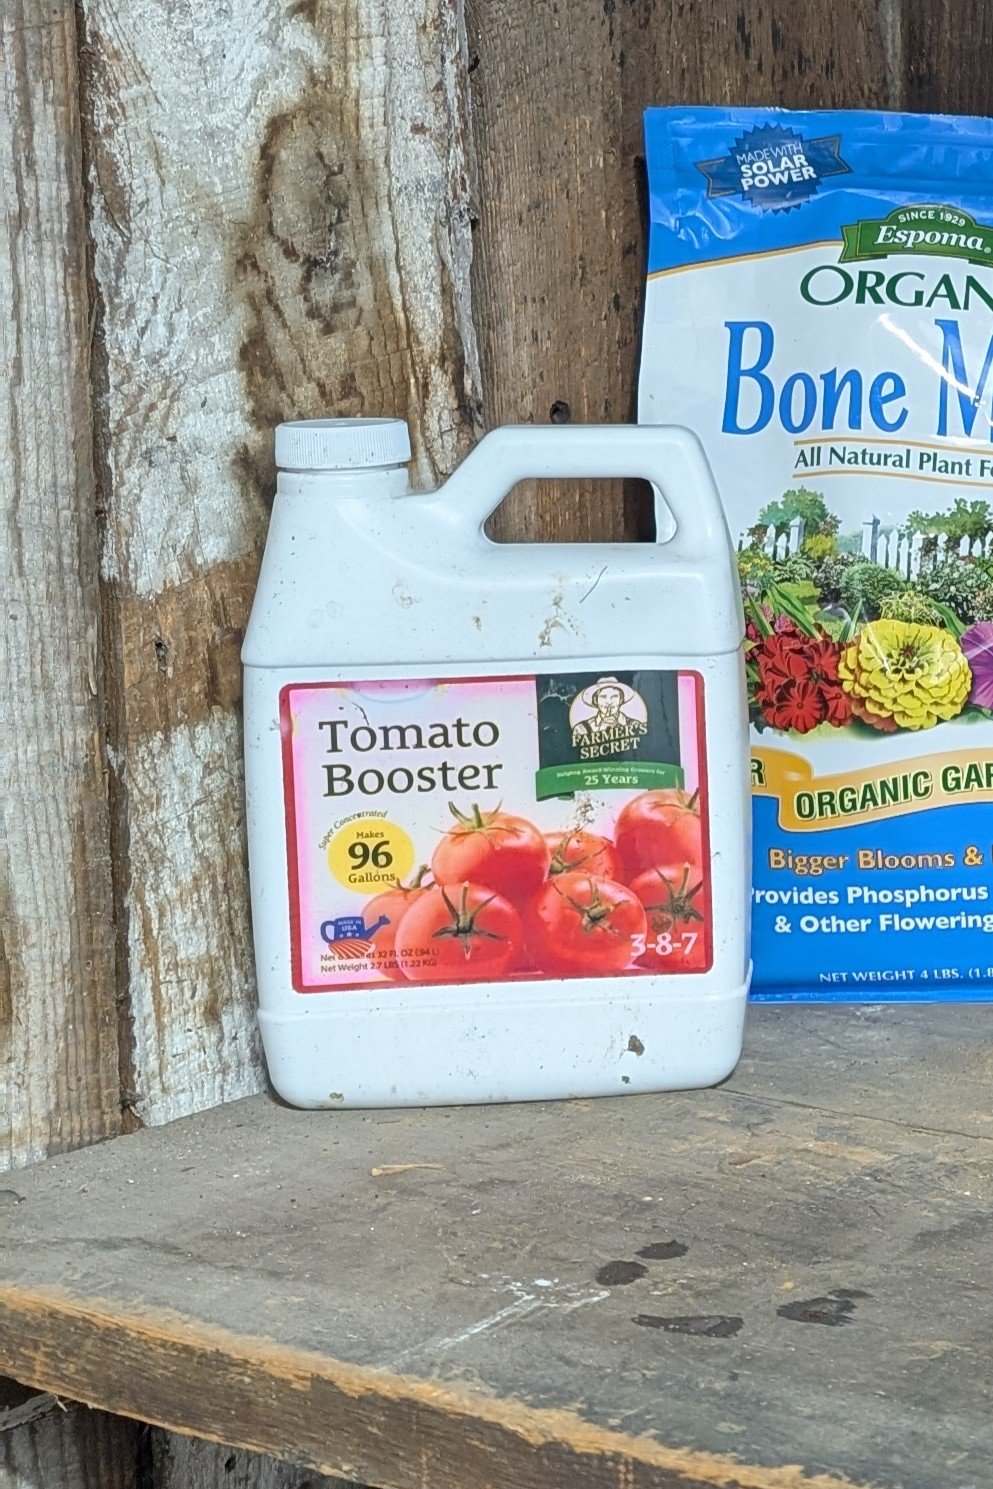
This is why I love Farmer’s Secret Tomato Booster, it’s a (mostly) balanced fertilizer, with an NPK ratio of 3-8-7. It also has calcium, so I don’t have to worry about blossom end rot. It only takes 2 teaspoons per gallon, so a little goes a long way. I use it throughout the entire growing season, starting when my tomato seedlings have three sets of true leaves.
It works better than any other fertilizer (tomato-specific or otherwise) that I have ever tried, and I like the fact that I only need one bottle, no matter what stage of growth my tomatoes are in. Get some and give it a try this year. You’re going to love it.
3. Mycorrhizae
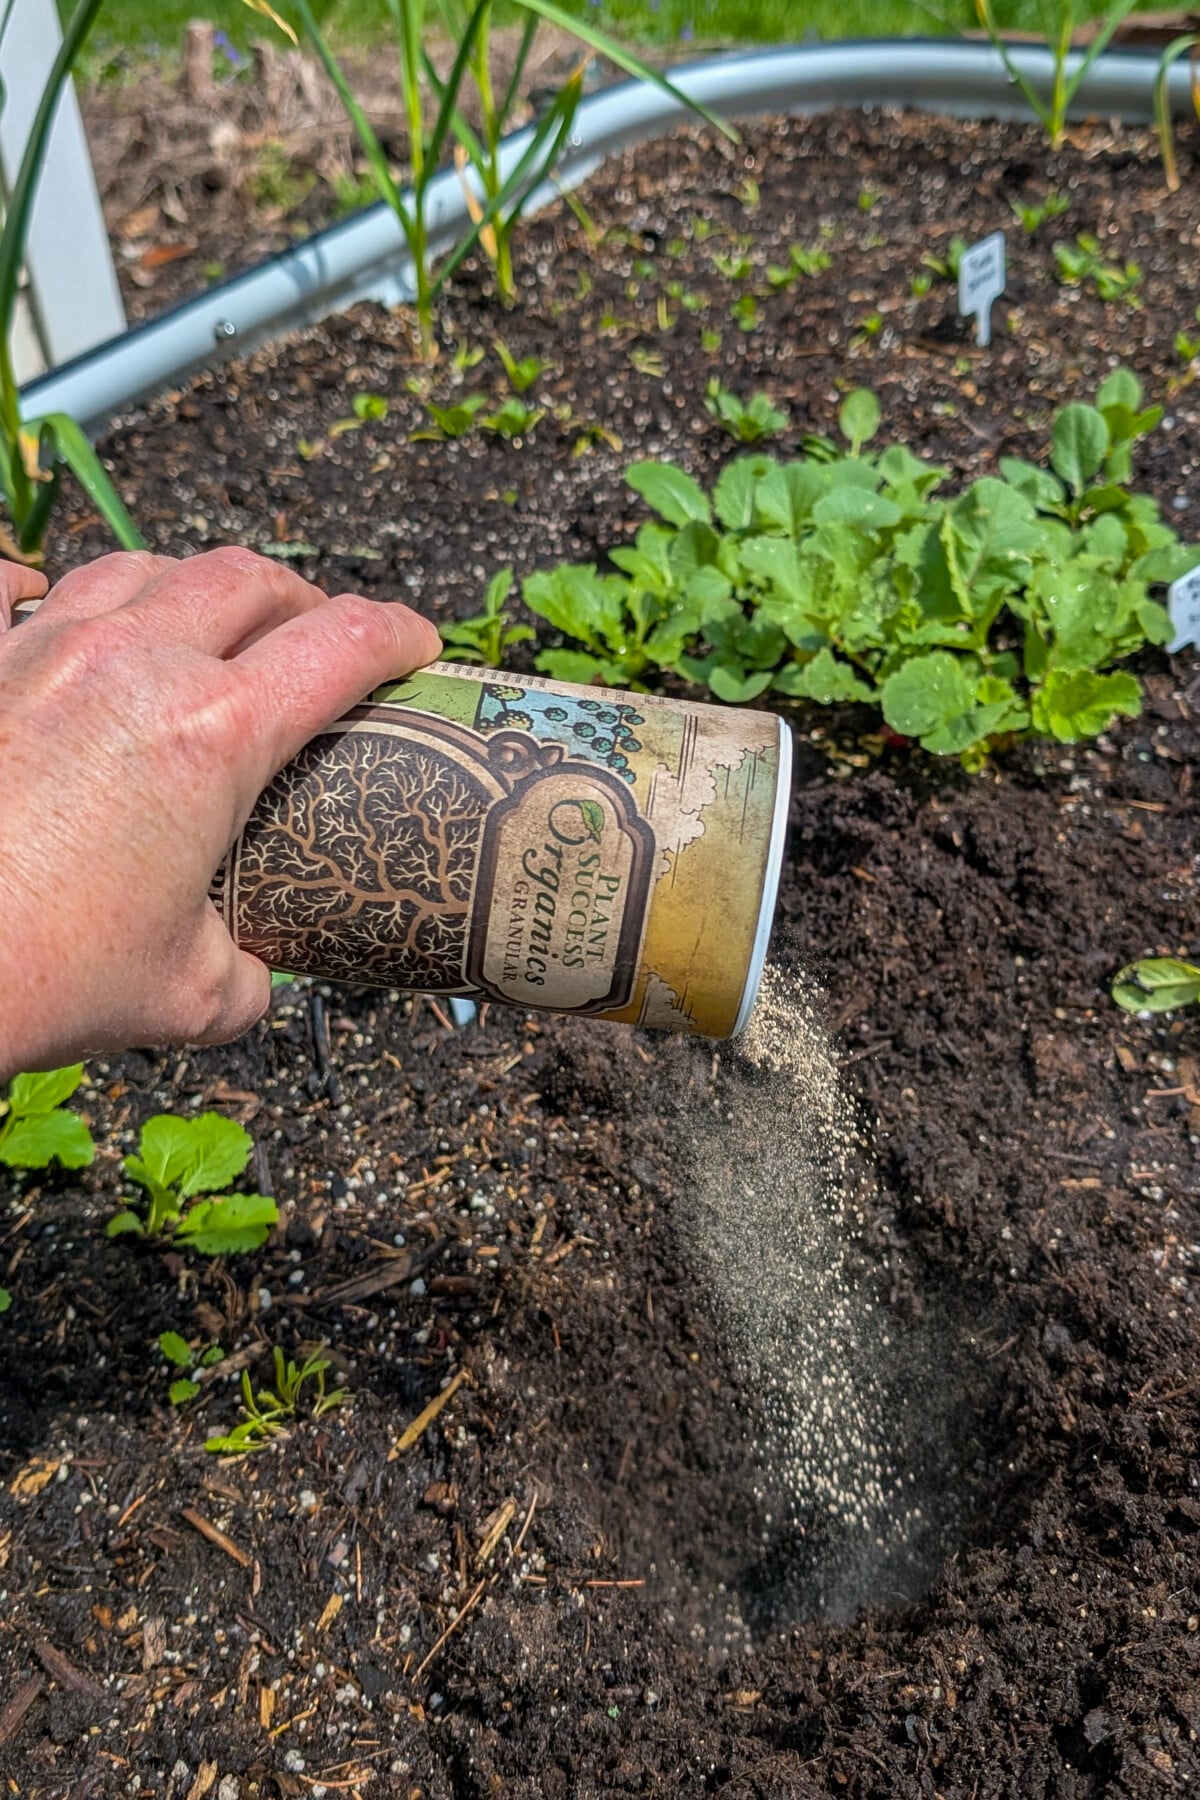
I started using mycorrhizae in my garden in the spring of 2021. I’ve used it every growing season since. I have noticed a big difference in my overall plant health and yields. The funny thing is, sometimes I forget what a difference it makes until I start pulling up plants at the end of the season and actually see how big the root systems are.
If you’re unfamiliar with mycorrhizae, they’re microscopic fungi that attach themselves to the roots of vascular plants, such as trees and tomatoes. The mycorrhizae access nutrients in the soil that the plants wouldn’t otherwise have access to. They sort of predigest it, making it more accessible to the root system.
Mycorrhizae also increase the overall size of the root system, which is huge when you’re dealing with drought conditions. If there is water in that soil, they will find it!
So, each spring when I plant my tomatoes in the garden, before I put them in the hole, I add a teaspoon or two of mycorrhizae. Once my seedling is buried deeply, I water everything in. You can read more about the benefits of mycorrhizae here and pick some up for yourself. (This is the one I use.)
4. Garden Snips

When you slice one of your perfectly delicious home-grown tomatoes, you want to use a very sharp knife for a nice, clean cut. The same applies when growing tomatoes.
Out of all the plants in my garden, my tomatoes see these little snips the most. I string-train my tomatoes, I snip some, but not all suckers, I prune periodically, and in the fall, I top my tomatoes.
All of this requires sturdy, sharp pruners.
Traditional hand pruners or secateurs are overkill when dealing with tomatoes and can crush delicate stems rather than cutting them. Scissors are okay, but are unwieldy when trying to maneuver them among the jungle-like foliage of tomato plants. Initially, I bought this pair of Fiskars garden snips to use on my houseplants. I took them out to the garden to prune my tomatoes once, and that was that. Their permanent home is in the garden shed.
They make precise cuts easily, and their small size makes them easy to use and get into the heart of my tomato plants without snapping stems. Plus, for any absent-minded gardeners out there, not me, I’m just saying, if there are any, the bright orange color makes them easy to spot when you set them down and forget where.
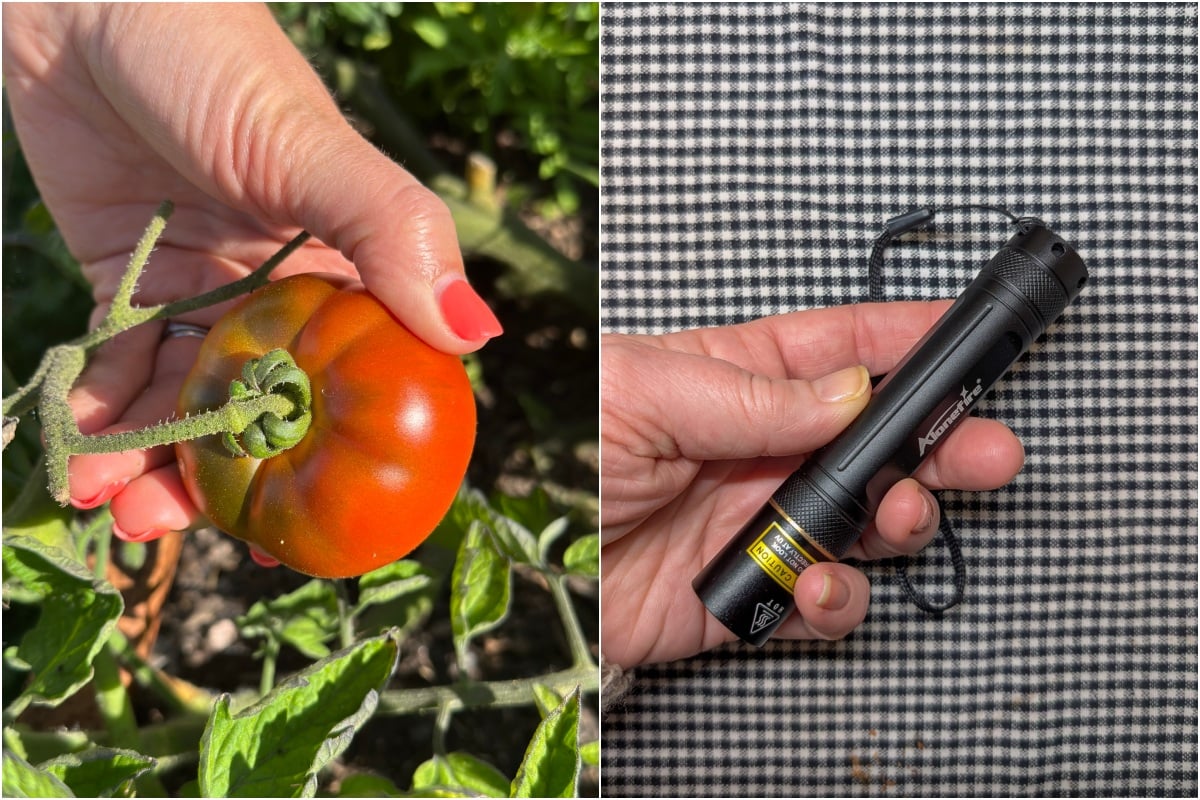
5. UV Flashlight
Yes, you read that right, a UV flashlight. Okay, hear me out. If there is one pest that makes me break out in a cold sweat, it’s the tomato hornworm. Finding a hornworm (or its poop) on a plant always means there’s the one you can see and six others you can’t. These pudgy little caterpillars are masters of disguise.
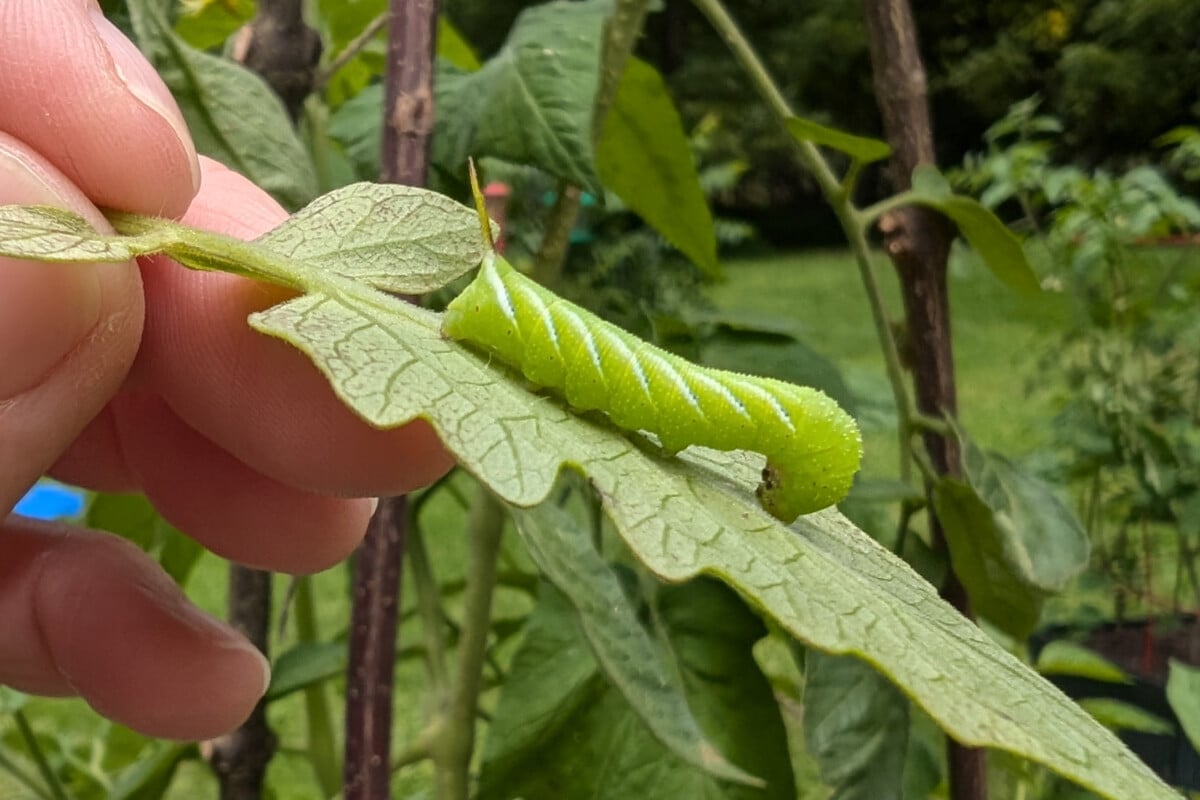
If they weren’t utterly destroying my beloved tomato plants, I would be in awe of how fast they can defoliate a tomato. And while they might not kill my plants, those ruined tomatoes rarely have the time to catch up and produce again in my hardiness zone. So, I take hornworms seriously.
I never had much luck spraying with Bt. And yes, while Braconid wasps are amazing and abundant in my area, they take too long to stop the problem. My plants are basically green twigs by the time they’ve parasitized the hornworms. What’s an organic gardener to do?

Take a stroll in your garden at night with a UV flashlight.
A UV flashlight has been a game-changer in dealing with tomato hornworms. There’s just no way they can hide. The UV light makes the caterpillars glow like beacons in the night, making it easy to pick them off. At the first sign of hornworms, I go out with a jar and my flashlight for a few nights in a row. (If you’re squeamish about handling bugs, wear gloves.)
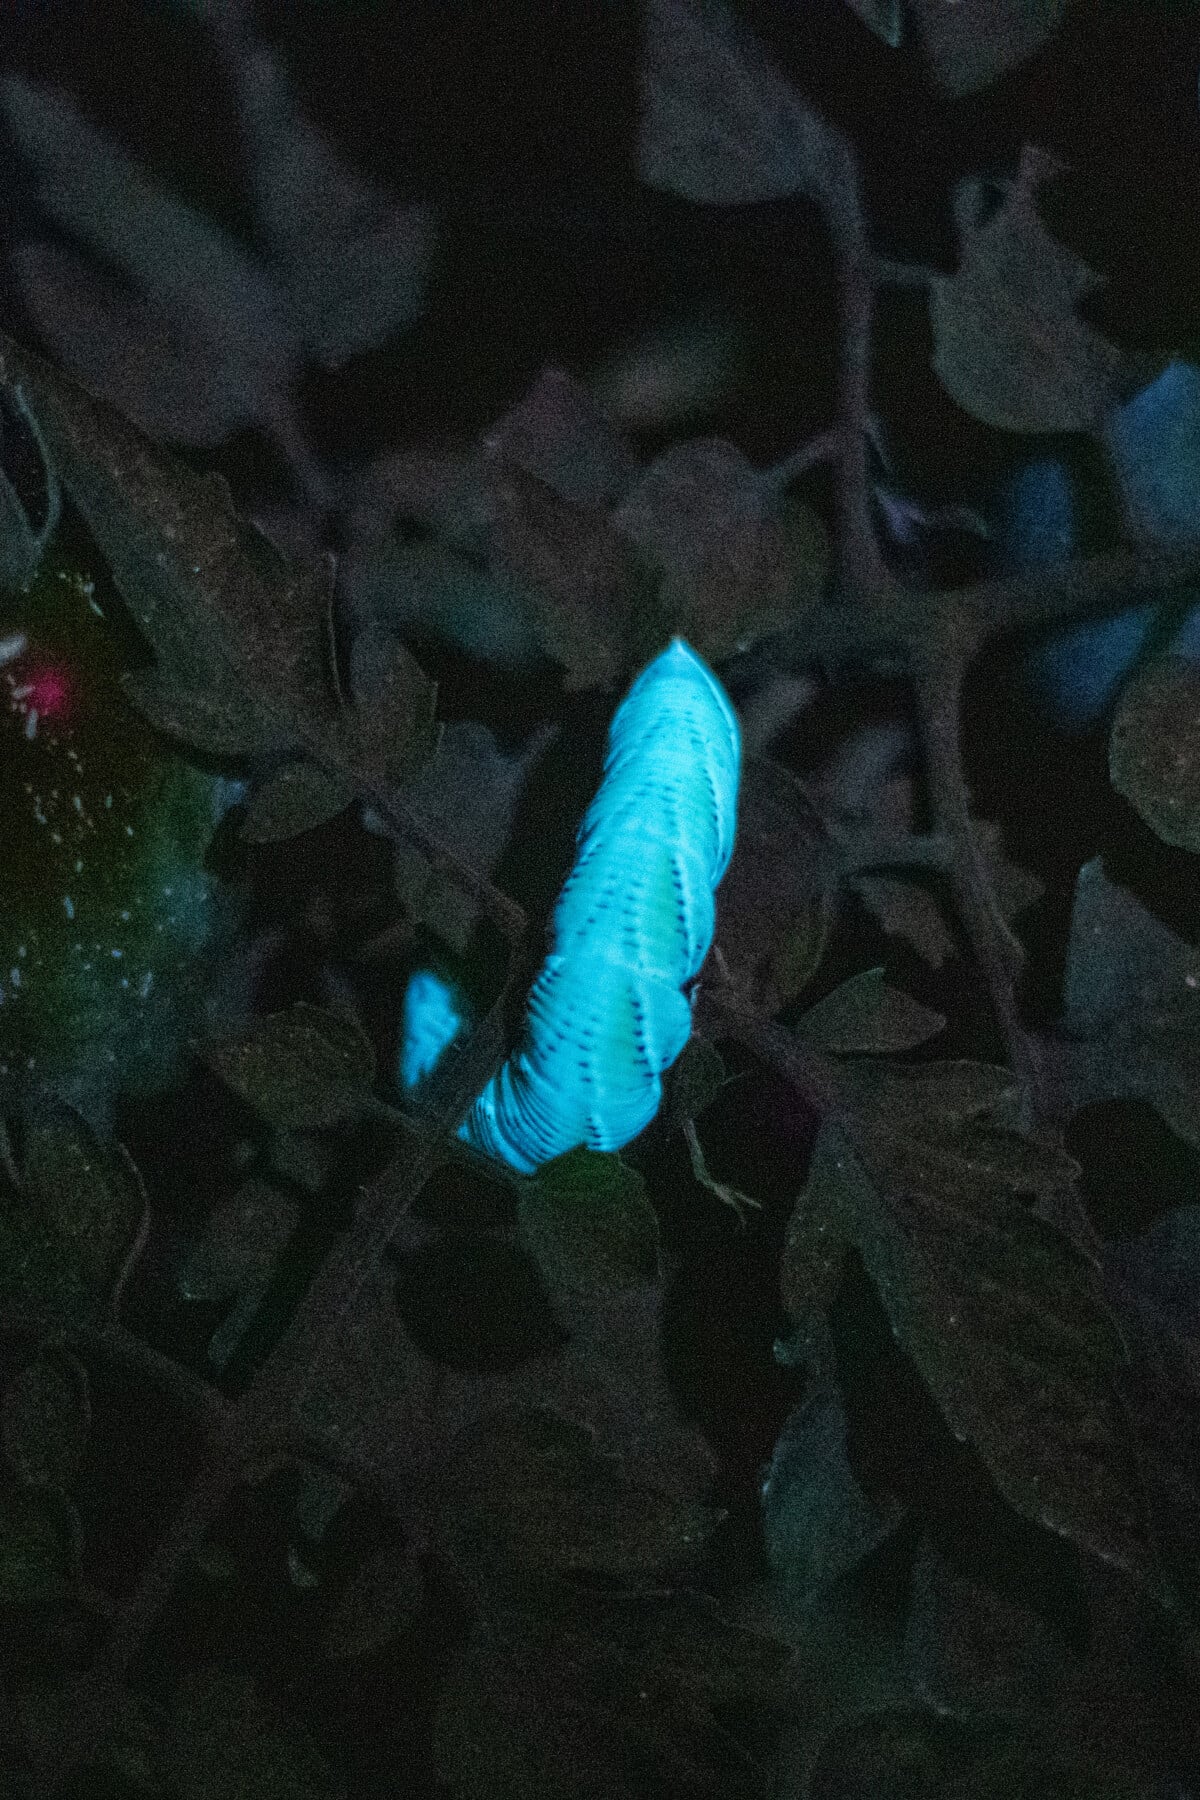
This simple trick has put an end to hornworm issues in my garden. (It also makes a really impressive gift for the tomato gardener in your life.) Here is the light I use. You can read more info on using a UV light to find pests, other pests that glow, as well as UV light safety here.
6. & 7. Rain Bird Drip Irrigation System and Smart Hose Timer
I’m lumping these final two in together because they go hand in hand. The smartest thing I ever did for my tomatoes was to automate watering. For tomatoes to produce lots of fruit, they need plenty of water on a consistent schedule.
The weather is crazy these days. In the spring, I never know if my plants are going to rot in the garden from all of the rain or be blasted by a surprise snowstorm. Yet by mid-July, I’m usually thinking nostalgically of those spring downpours.
Installing a drip irrigation system with a smart hose timer means my plants are watered precisely, even when Mother Nature refuses to turn on the tap.
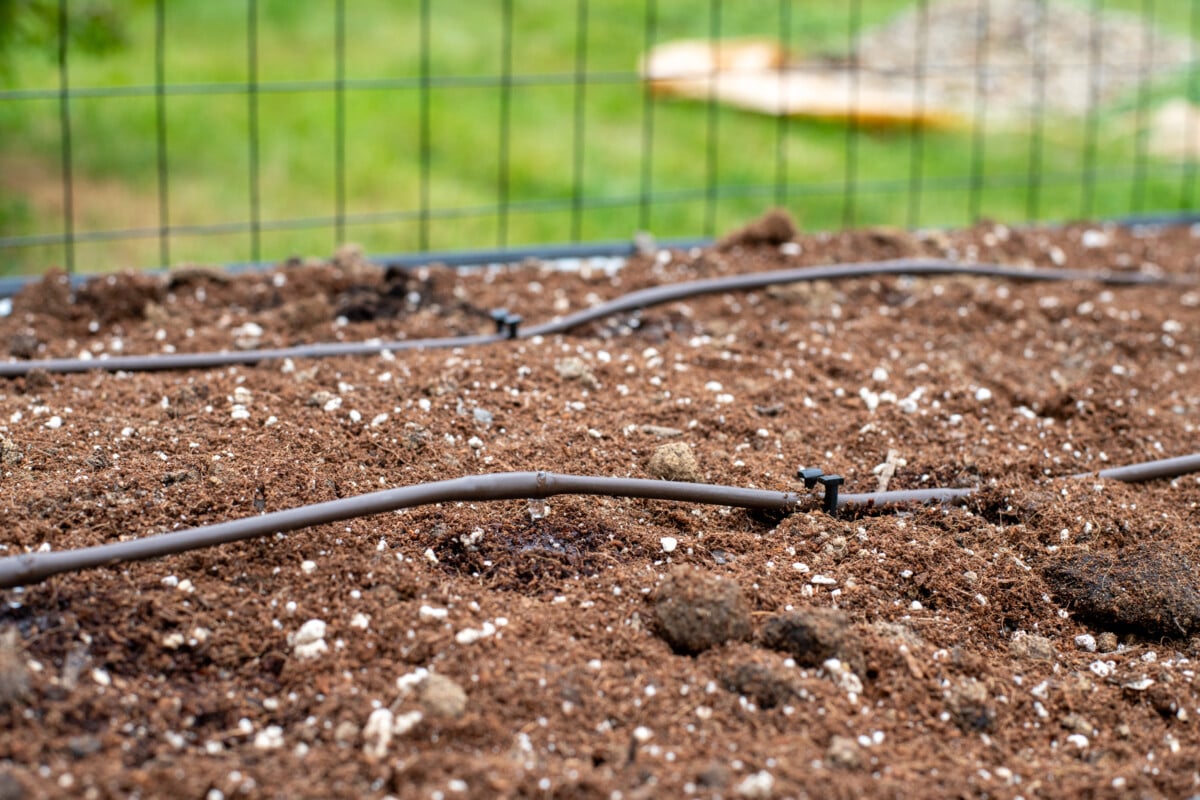
I lay out the drip hose in the spring and then cover everything with mulch. This locks in moisture (and really cuts down on the weeds). Because I’m only watering as needed and where it’s needed, my water waste is negligible these days.
I’ve been using Rain Bird drip irrigation for four years now, and I love all that they have to offer. I have their raised bed drip system in all of my beds. While it’s great on its own, pairing the drip irrigation with Orbit’s B-Hyve smart hose timer makes all the difference. Download the B-Hyve app, and it uses your local weather to determine when your plants need to be watered.
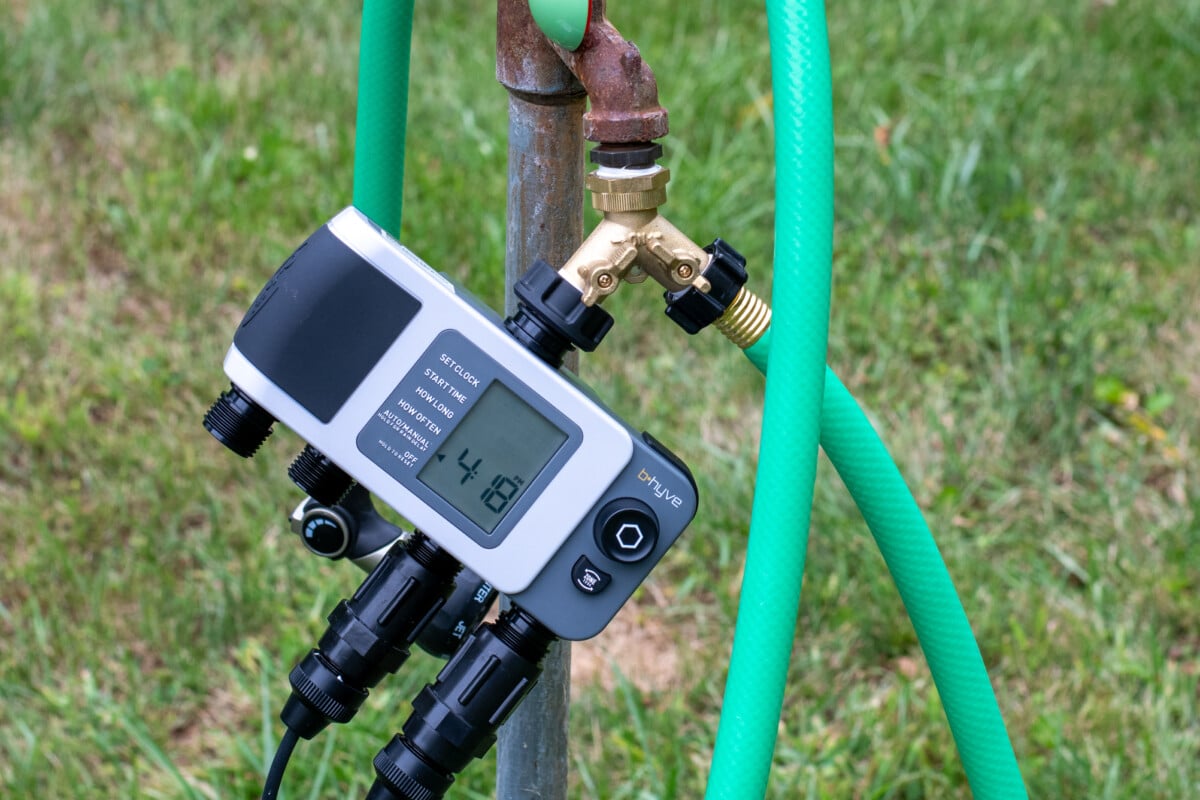
For instance, I set my smart hose timers to water every Tuesday and Friday for half an hour. (Remember it’s drip; slow and steady, not like a lawn sprinkler.) The app will automatically delay my normal watering schedule if rain is forecast within 24 hours of a normally scheduled watering. If it doesn’t actually rain, I open my app and do a manual watering.
Watering isn’t something I worry about anymore, even when I’m on vacation. I know how much my tomato plants are getting every single week.
These are my ride-or-die tomato growing tools. I use them every year because I get great results, and they’ve made growing tomatoes easier. I hope you find them useful, too.
Read Next:


Get the famous Rural Sprout newsletter delivered to your inbox.
Join the 50,000+ gardeners who get timely gardening tutorials, tips and tasks delivered direct to their inbox.