


If you want to add a bit of height, texture, and a punch of vivid color to your landscape, there’s one bush I would recommend above all others: the beautyberry (Callicarpa).
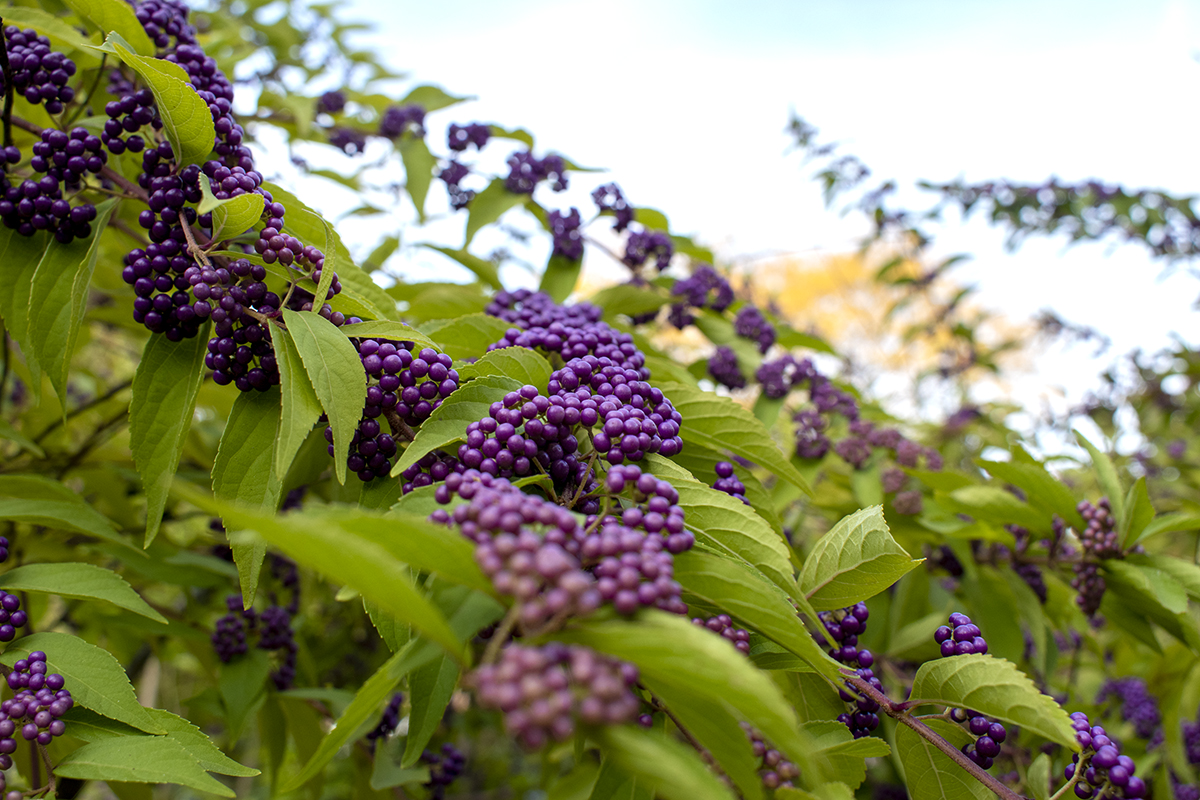
With its dramatic arching limbs and bright green leaves, the shrub resembles a growing waterfall. Most striking of all are the clusters of berries (drupes), which are a startling violet or magenta hue. If you’ve got access to a mature beautyberry, you can grow your own from a cutting.
Propagating beautyberry this way isn’t hard, but it takes a little patience and care. Read on to learn everything you need to propagate beautyberry from cuttings successfully.
The Shrub That Stops People in Their Tracks
Where I live, there’s a great outdoor workspace set up in the park near the creek. It has everything I need: tables and chairs, free wifi, and access to electric outlets if you check in with the Chamber of Commerce. It’s great for getting out of the office in the afternoon. I’ve spent many a summer day working at one of those tables, with a view of the park and its many beautyberry bushes along the path.
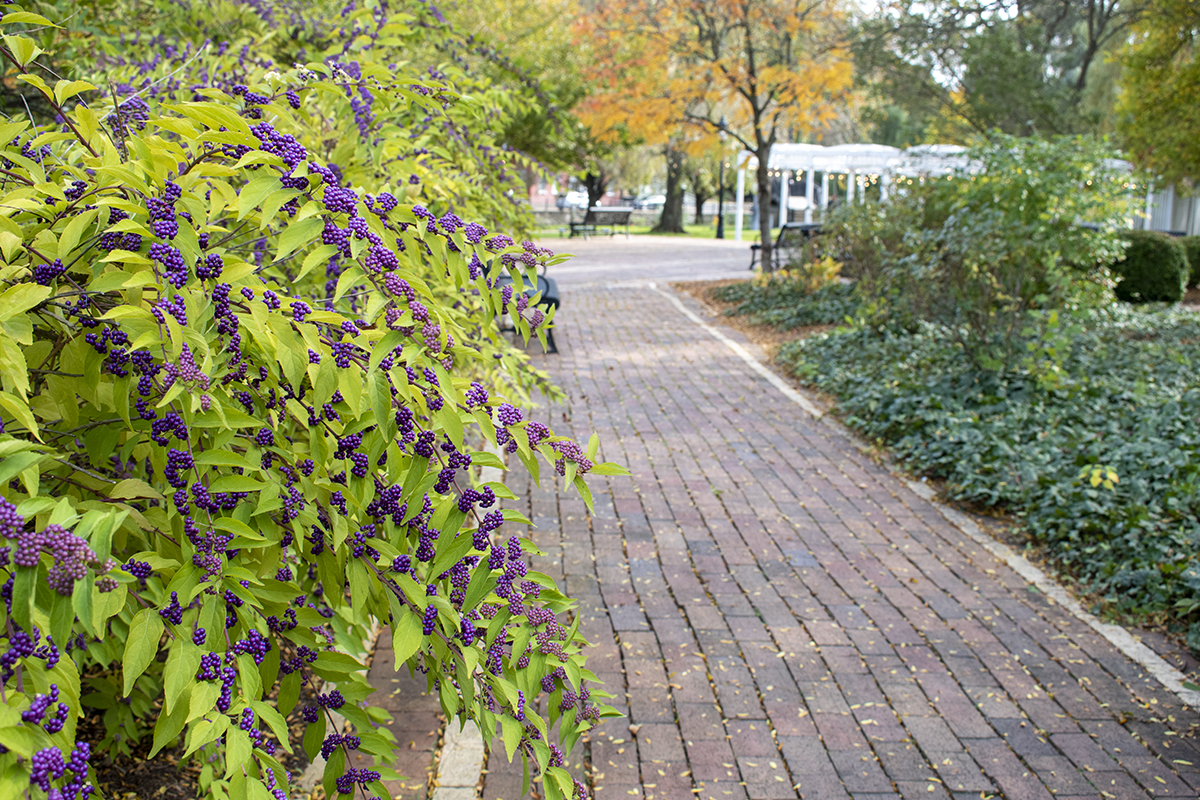
I’ve lost count of the times people have stopped dead in their tracks when encountering the colorful drupes of beautyberry.
“What is that?” they exclaim as they whip out their phones to snap a picture. Being a gardener and forager, it’s impossible for me not to pipe up from behind my laptop.
“Those are beautyberry bushes. They’re quite easy to grow,” and heading off the usual follow-up question, “They’re not poisonous. The purple berries are edible and make an exceptionally tasty jam.”
(Okay, maybe my days working in the park aren’t my most productive.)
Needless to say, I’m a huge fan of beautyberry, not only because they’re beautiful and edible, but because it’s such a hardy, easy to grow plant. If you need more reasons to add one to your landscape, I can give you several.
When Is the Best Time of Year to Take Beautyberry Cuttings?

Beautyberry is a softwood, so the best time to take cuttings is the spring to early summer. There is plenty of new, supple growth on the shrub, which will take well to cutting and rooting this time of year.
Choose Your Parent Plant Wisely
Good stock makes for healthy seedlings, so look for a mature, healthy beautyberry plant with strong branches and vibrant foliage. Avoid shrubs that have visible disease or pest issues.
Skip Ahead With Volunteer Plants When Available

Beautyberry is a pioneer species meaning they are among the first plants to colonize new areas. They spread easily, and the volunteer plants that pop up beneath mature plants from seed are quite tough. You can easily dig them up and transplant them in a new location.
If you find a couple of volunteers growing amidst the established beautyberry, grab them. They are by far the easiest way to propagate beautyberry. When your volunteer beautyberry is established, you can give away or sell new volunteers that pop up.
Equipment Needed
You’ll need to gather a few tools before taking your beautyberry cuttings.
Sharp, Sterilized Cutting Implement
First, you need something to take the cutting: pruning shears, heavy kitchen scissors or a sharp knife.
I know I’m always reminding you to clean and sterilize your tools before pruning, but it’s especially important when you’re taking cuttings for propagation. Introducing disease or bacteria via dirty tools will quickly put a stop to your propagating efforts. So, grab a bottle of isopropyl alcohol and wipe down your blades.
Equally important is ensuring your tools are sharp.
When taking cuttings, you want a nice clean cut. This equates to less damage to the cutting, which makes it more likely to root. A dull blade will cause more damage at the cut site.
Think of it this way: if you’re heading into surgery, you want the surgeon to use the sharpest tools possible to minimize scarring and hasten healing. The same concept applies to cuttings. Take the time to sharpen your pruning shears; it’s well worth the effort.
Jar of fresh water

You’ll use this to place your cuttings in as you cut them to keep them fresh until you can prepare them in the pot for rooting.
Rooting hormone of your choice
While this is optional, using a rooting hormone increases the odds that your cutting will root. There are numerous commercial rooting hormones on the market, but there are plenty of natural alternatives available, too. You likely have at least one in your home already.
A small container or pot to root your cutting
You’ll need something fairly tall but not necessarily wide. The pot should be a minimum of 6” tall, but taller is better. It should also have a drainage hole at the bottom.
Lightweight growing media

You want to root your cuttings in a sterile, lightweight growing mix. Soilless seed starting mix works really well, as does coconut coir. You want something that drains easily but still holds moisture. Generally, soilless mixes tend to be a bit hydrophobic initially, so I suggest wetting it in a separate container before adding it to your pot.
Something to Keep in Moisture
Moisture is key in propagating from cuttings, so you’ll need to cover your setup with a clear plastic bag, a soda bottle with the bottom cut off, or a tall glass jar.
Plant Mister
It’s optional, but a mister or spray bottle filled with water makes it easy to mist leaves and soil.
Taking a Beautyberry Cutting
Look for new stems, suckers or first-year growth. The stem should be bendy, and the bark thin and pale gray, not woody. You don’t want older stems or ones with flowers or drupes. For the best results, you want to take a cutting between 8”- 10” long. You can always take longer cuttings and retrim and clean them up at home.
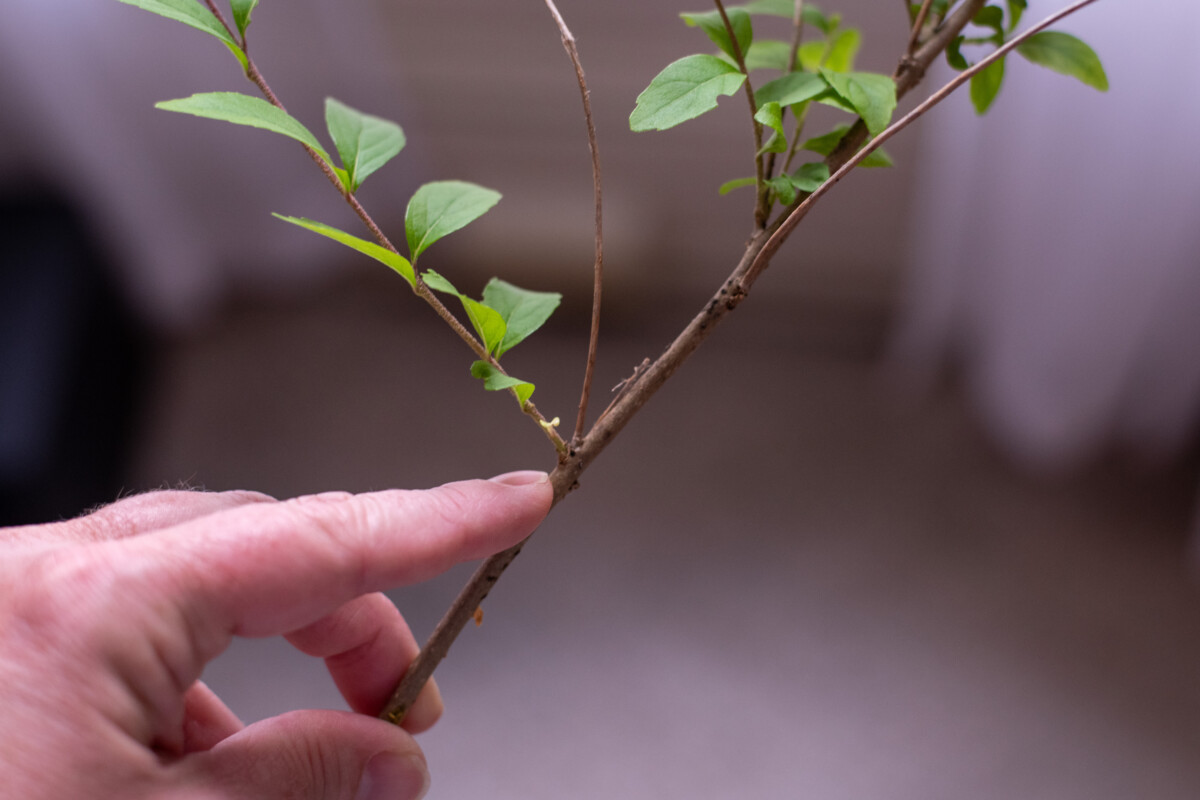
Using clean pruning shears, make a clean, diagonal cut just below a node (the point where a leaf or stem emerges from the stem). Strip off the lower set of leaves, leaving only a few leaves at the tip of the cutting. This helps reduce moisture loss (through the leaves) and encourages root development.
Place the cuttings in a jar of fresh water as you cut them. Softwood cuttings are the easiest to root, but it’s always a good idea to take a few more cuttings than you need, as it’s unlikely that all of them will root.
Rooting Your Cuttings

Fill your chosen container with a sterile potting mix. Moisten the soil slightly, ensuring it’s evenly damp but not soaking wet. Use your finger, a chopstick or a pencil to create a hole in the soil for the cutting.
If you’re using one, apply a rooting hormone to the diagonally cut edge, increasing the chances of successful rooting. Follow the instructions on the rooting hormone package for proper application, or use one of these natural rooting hormones.
Place the cutting in the hole you made and gently press the soil around the cutting to hold it in place. You may need to add a bit more potting mix as it compresses. You can put more than one cutting in a pot.
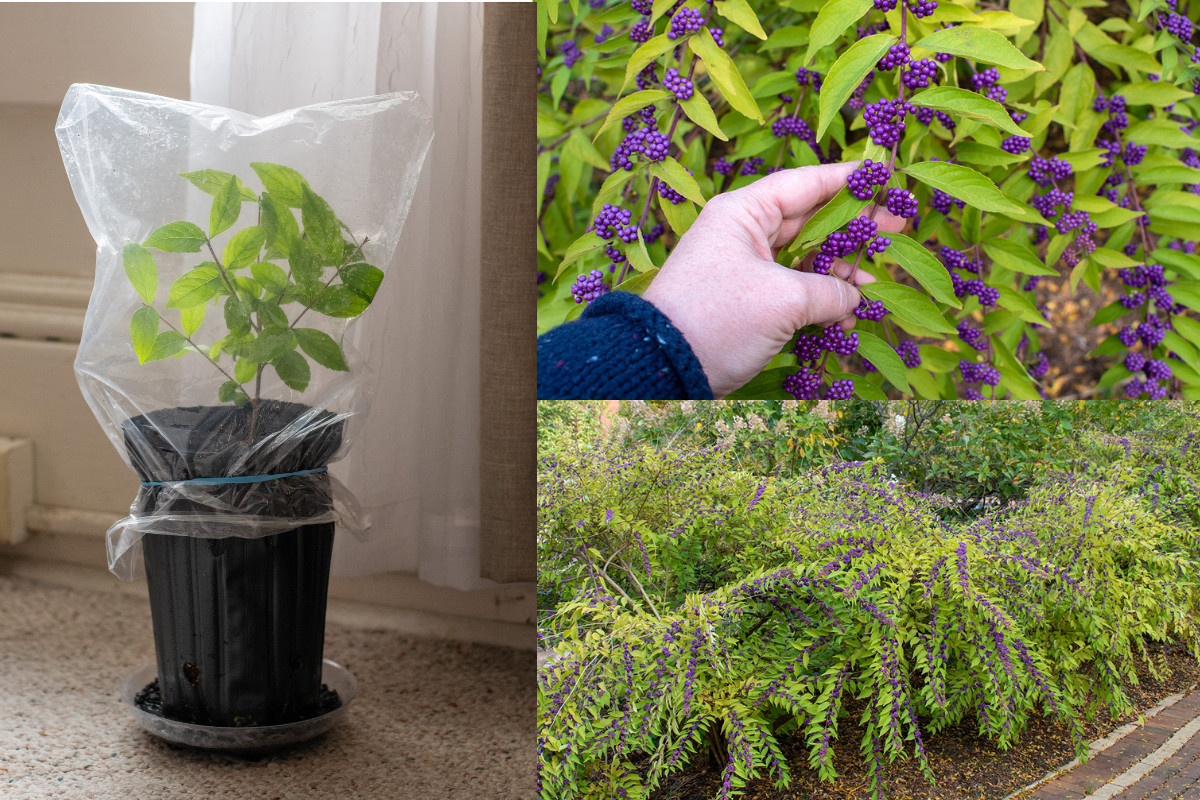
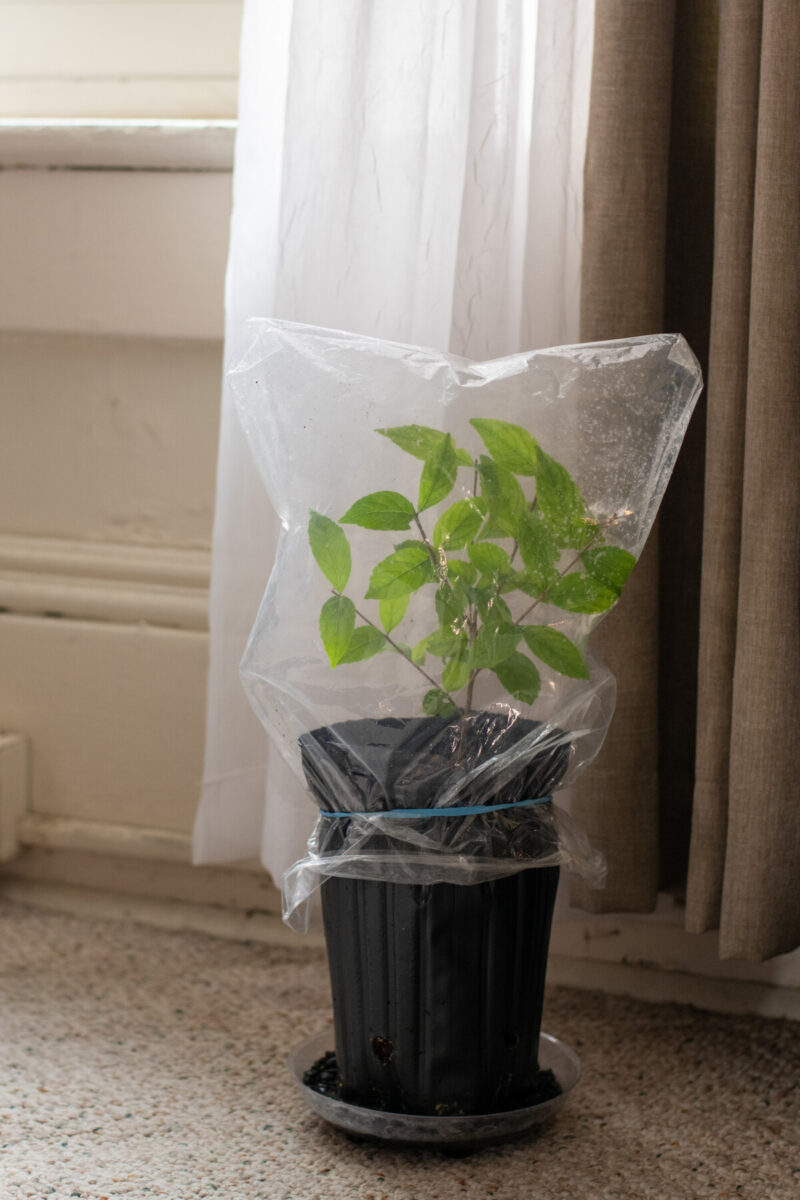
Now place the plastic bag over the pot and use a rubber band to secure it, creating a humid greenhouse environment. This will keep the leaves and soil moist as well as encourage rooting.
Light, Heat, and Moisture While Rooting
When rooting cuttings, achieving the proper mix of light, heat and moisture is important. The soil should be between 65-75 degrees F and be kept moist but not soggy at all times.
Your cutting needs bright, indirect sunlight. Too much light dries out the leaves, which can cause the cutting to die before it can root. Alternatively, not enough light and the plant won’t produce enough energy to root.
And Now We Wait
Check the cutting daily to ensure you maintain the proper growing environment. Mist the leaves and soil regularly to ensure they don’t dry out. If you notice that things are drying out quickly, you may need to move the cutting to a location that gets less light. If you notice mold, the soil may be too cold, or the cutting may not receive enough light.
In three to four weeks, gently tug the cutting to check for resistance. (Which would indicate the development of roots.)
Be patient; as long as you can see that the cutting isn’t dead, it should root eventually.
If the leaves die or the bark of the cutting becomes wrinkled and dried out, you’ll need to start the process again with a fresh cutting.
Harden Off Rooted Cuttings
It’s important to acclimate your cuttings to the air, as they’ve been babied in their tiny little greenhouse. Begin by removing the plastic covering for a few hours daily, gradually increasing the exposure over several days. Do this indoors; you’re just getting the cutting used to a less humid environment.
Once the cutting has spent a week or two uncovered, you can begin hardening it off outdoors. Bring it outside for a few hours at a time, placing it somewhere sheltered from direct sun and the elements. Gradually lengthen the time you leave it outdoors.
Planting Your Beautyberry Cutting
Once your cutting has a healthy root system and has been hardened off properly outdoors, it’s time to transplant it into a larger pot or your chosen garden location.
Pick a spot with well-draining soil that receives full to partial sun.
Remember, naturally; they grow on the edge of wooded areas. If you’re hoping to enjoy some beautyberry jam, you’ll want to plant your cuttings in full sun, which will encourage plenty of drupes.
Dig a hole large enough to accommodate the cutting while ensuring the crown of the plant is at soil level.
Add compost to the hole, mounding it in the bottom. Place your rooted beautyberry cutting in the hole on top of the compost mound and gently backfill, pressing the soil around the plant. Water in the plant.
You’ll need to give your newly planted beautyberry shrub a little extra attention until it’s established.
It will need to be watered frequently at first, and you may need to cover it to protect it from extreme weather conditions for the first year.
Beautyberry, despite appearing fragile and delicate, is a tough little plant. With a little patience and proper care, you can grow beautyberry shrubs from cuttings, and once established, they will grow quickly. Before you know it, you’ll be taking cuttings from your new shrub to grow more.

Get the famous Rural Sprout newsletter delivered to your inbox.
Join the 50,000+ gardeners who get timely gardening tutorials, tips and tasks delivered direct to their inbox.