


I put my very first tomato seed in a Jiffy peat pot when I was seven years old. My dad helped me pat the soil down, and then carefully pour water over it. Later that spring, I planted my first tomato seedling in our garden.
That was 40 years and many, many tomato seeds ago. My dad was an off-grid, organic gardener and had a compost pile that rivaled the famed Madame Trash Heap of Fraggle Rock. Working by his side in the garden each summer, he taught me the basics of organic gardening, from seed starting to when to pick each vegetable and how to close the garden down for the winter.
I learned a lot from my dad, but I’ve learned much more from my own failures and successes over the years in my own garden.
Trust me, when it came to getting tomatoes started, there were a lot of failures. But that’s usually where I learned the most. Now, each spring, I head out to the garden with a flat of hearty and hale tomato seedlings that are ready to hit the ground running.
Here’s everything you need to know about starting tomatoes from seed.
A quick note: I don’t use Jiffy peat pots anymore. Those were my dad’s jam. I found that they rarely broke down well in the soil, and in later years learned about the devastation that peat harvesting causes, so I no longer use peat.
Grow What You Actually Eat
I know this seems kind of obvious, but it’s easy to fall into the trap of growing the wrong tomatoes for what you use them for. Just because your neighbor, who is helping you get started with gardening, grows eight beefsteak tomato plants every year, doesn’t mean that’s the best option for you.
Tomatoes fall into the following eating categories:
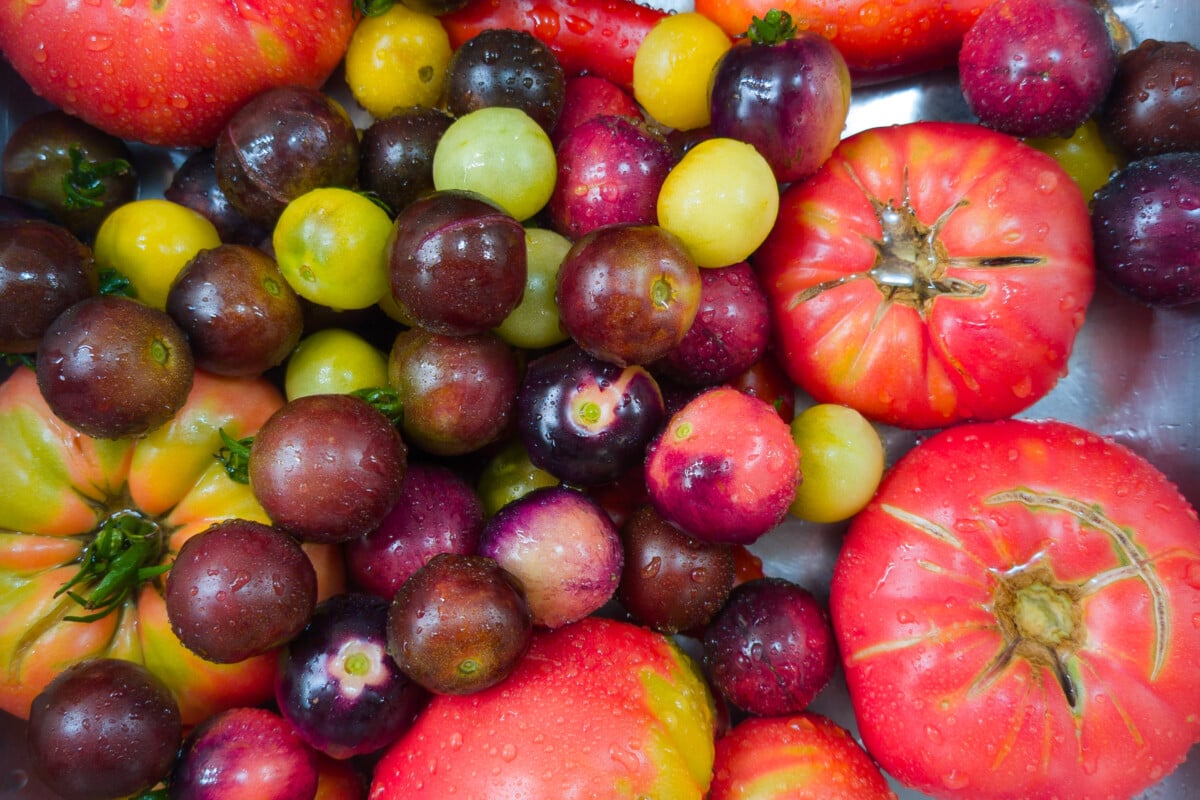
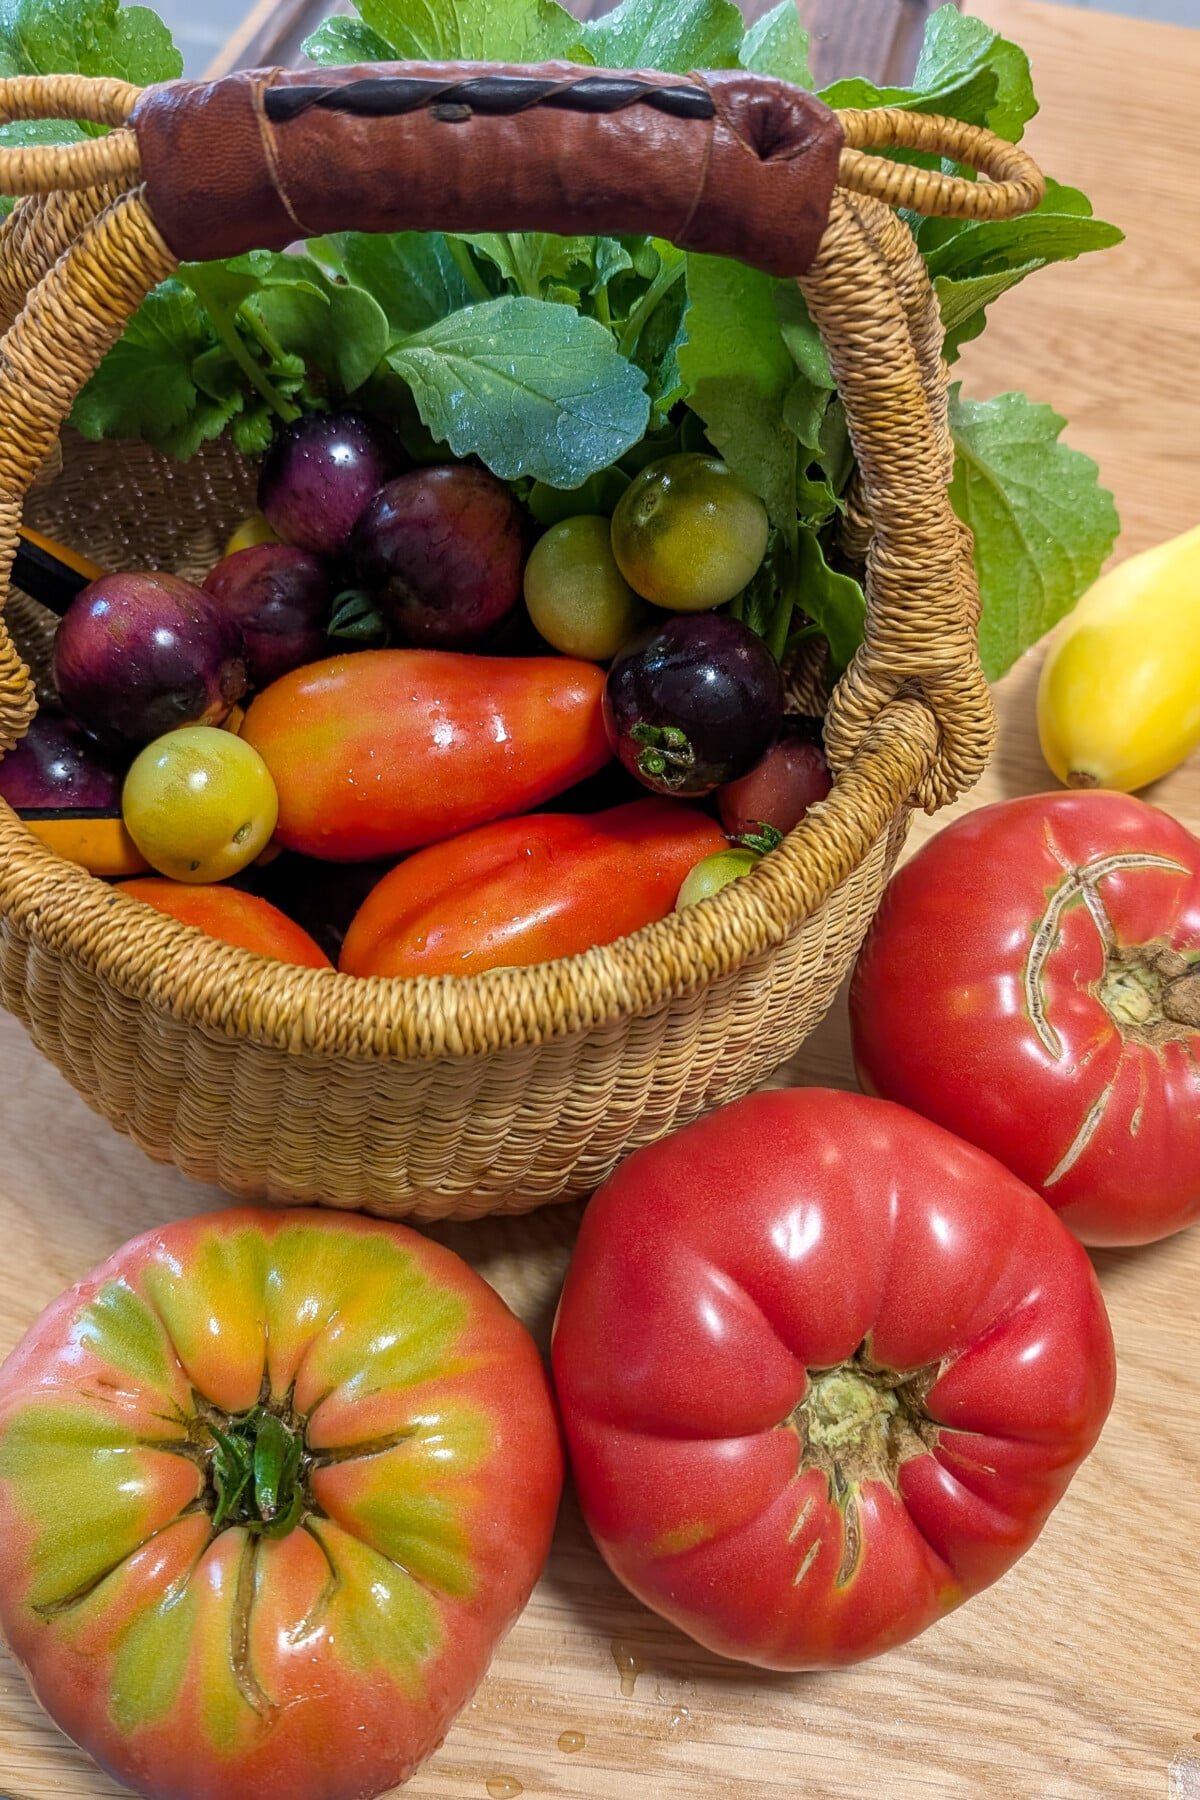
Snacking
My personal favorite. These include both your cherry and grape tomatoes, with cherry tomatoes being rounder and juicier and grape tomatoes having a bit more paste and thicker skins (which means they hold up better for things like roasting). And finally, we can’t forget pears, which, as their name implies, look like little pears.
Sauce/Paste
These are the tomatoes you grow for canning and making Grandma’s famous Sunday gravy. Your Plum and Roma tomatoes. They are very thick-walled and have fewer seeds.
Slicers/Globes
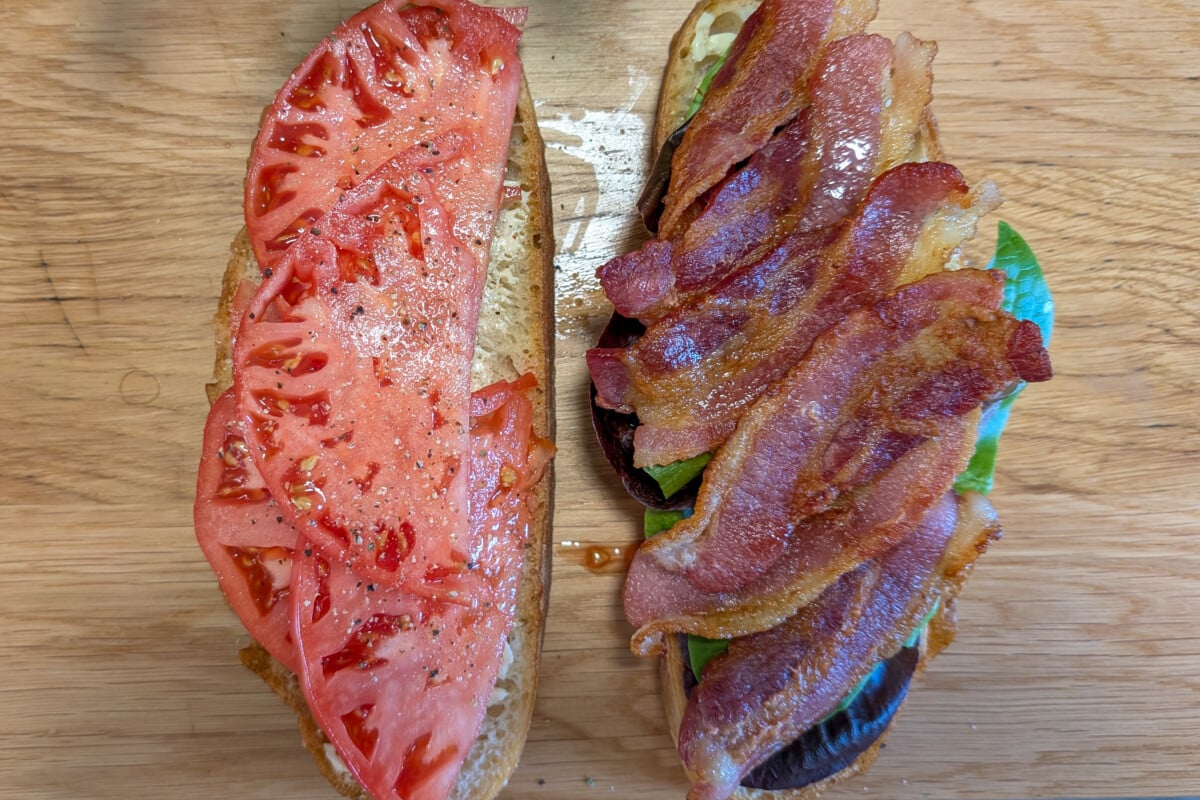
These are the classics. Slicers are your all-purpose tomato, just as good sliced up on a sandwich as they are in the sauce pot.
Beefsteak
These are the big honkers. They’re usually well over a pound each. Some varieties produce tomatoes large enough for a single slice to cover your entire sandwich!
Rarer Types
There are a few other types that are starting to grow more popular: cocktail tomatoes, which are reminiscent of cherry tomatoes, only bigger. They’re sort of midway between a slicer and a cherry tomato. The perfect salad tomato. Oxheart tomatoes are named for their large heart shape (anatomically correct) and almost no seeds. I’m going to grow these for the first time this year, and I can’t wait. They’re such beautiful tomatoes!
I went through a whole streak where I was growing tons of Amish Paste tomatoes for tomato sauce, when in fact we didn’t eat a lot of pasta. I gave so much away. It took me several seasons of having leftover tomato sauce from the previous year to realize what I wanted most were lots of tomatoes for fresh eating during the summer. I wanted cherry tomatoes for things like salads and quick snacking, but I also wanted a couple of nice slicing varieties for sandwiches and eating with a healthy dose of black pepper, salt and chopped dill.
So, I finally got smart.
Now, in the early winter when the seed catalogs roll in, I look at what I want to grow and ask a few questions:
- Is this a determinate or indeterminate variety?
- What’s the flavor like?
- How long before this variety starts producing fruit?
- How long does it produce?
- Roughly how many tomatoes can I expect per plant?
- What are other gardeners saying about it?
I do a quick Google search using this formula – name of tomato variety + reddit. I can find out what other gardeners are saying about that variety, and more often than not, find some good photos of the tomatoes, too. (Seed catalog photos are always too pretty.) I’ve found this incredibly helpful in deciding what tomatoes I want to grow.
Thoughtfully paying attention to how I use the tomatoes I grow was probably the smartest thing I’ve done for my garden and kitchen. It has helped me utilize my garden space much more efficiently and avoid waste.
Getting Seeds Started
Tomato seeds seem to last forever. Most of the time, I run out of seeds before they go bad. Generally, tomato seeds are viable for around 4-6 years, but they will last longer if you store them properly. (This tip will benefit all of your seeds, my friend.)
I was at Rural King one day to buy sunflower seeds for my bird feeders when I noticed several pallets of bright orange seed storage containers for sale. Okay, they were ammo cans, but all I saw were plastic boxes that are near water-tight, air-tight, keep out the light and roughly the same size as my seed packets. Eureka! (You can also order them here.)
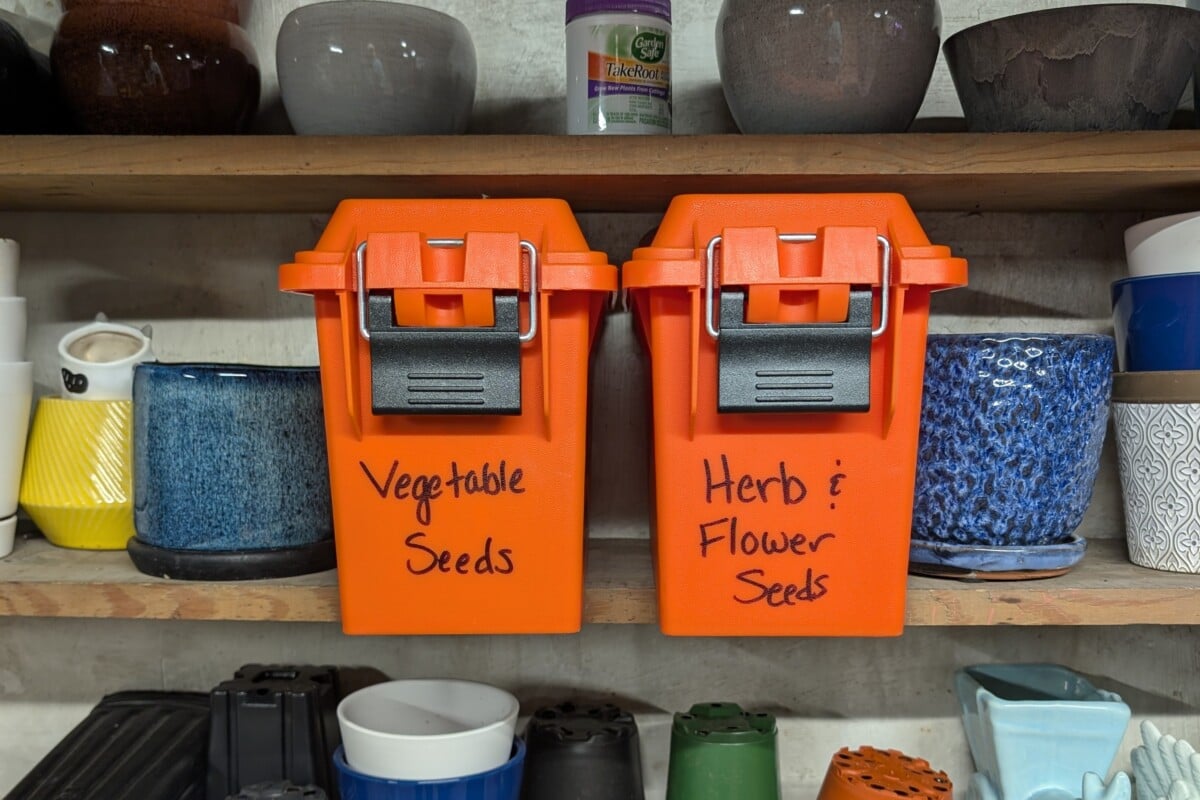
My seeds stay fresh year after year.
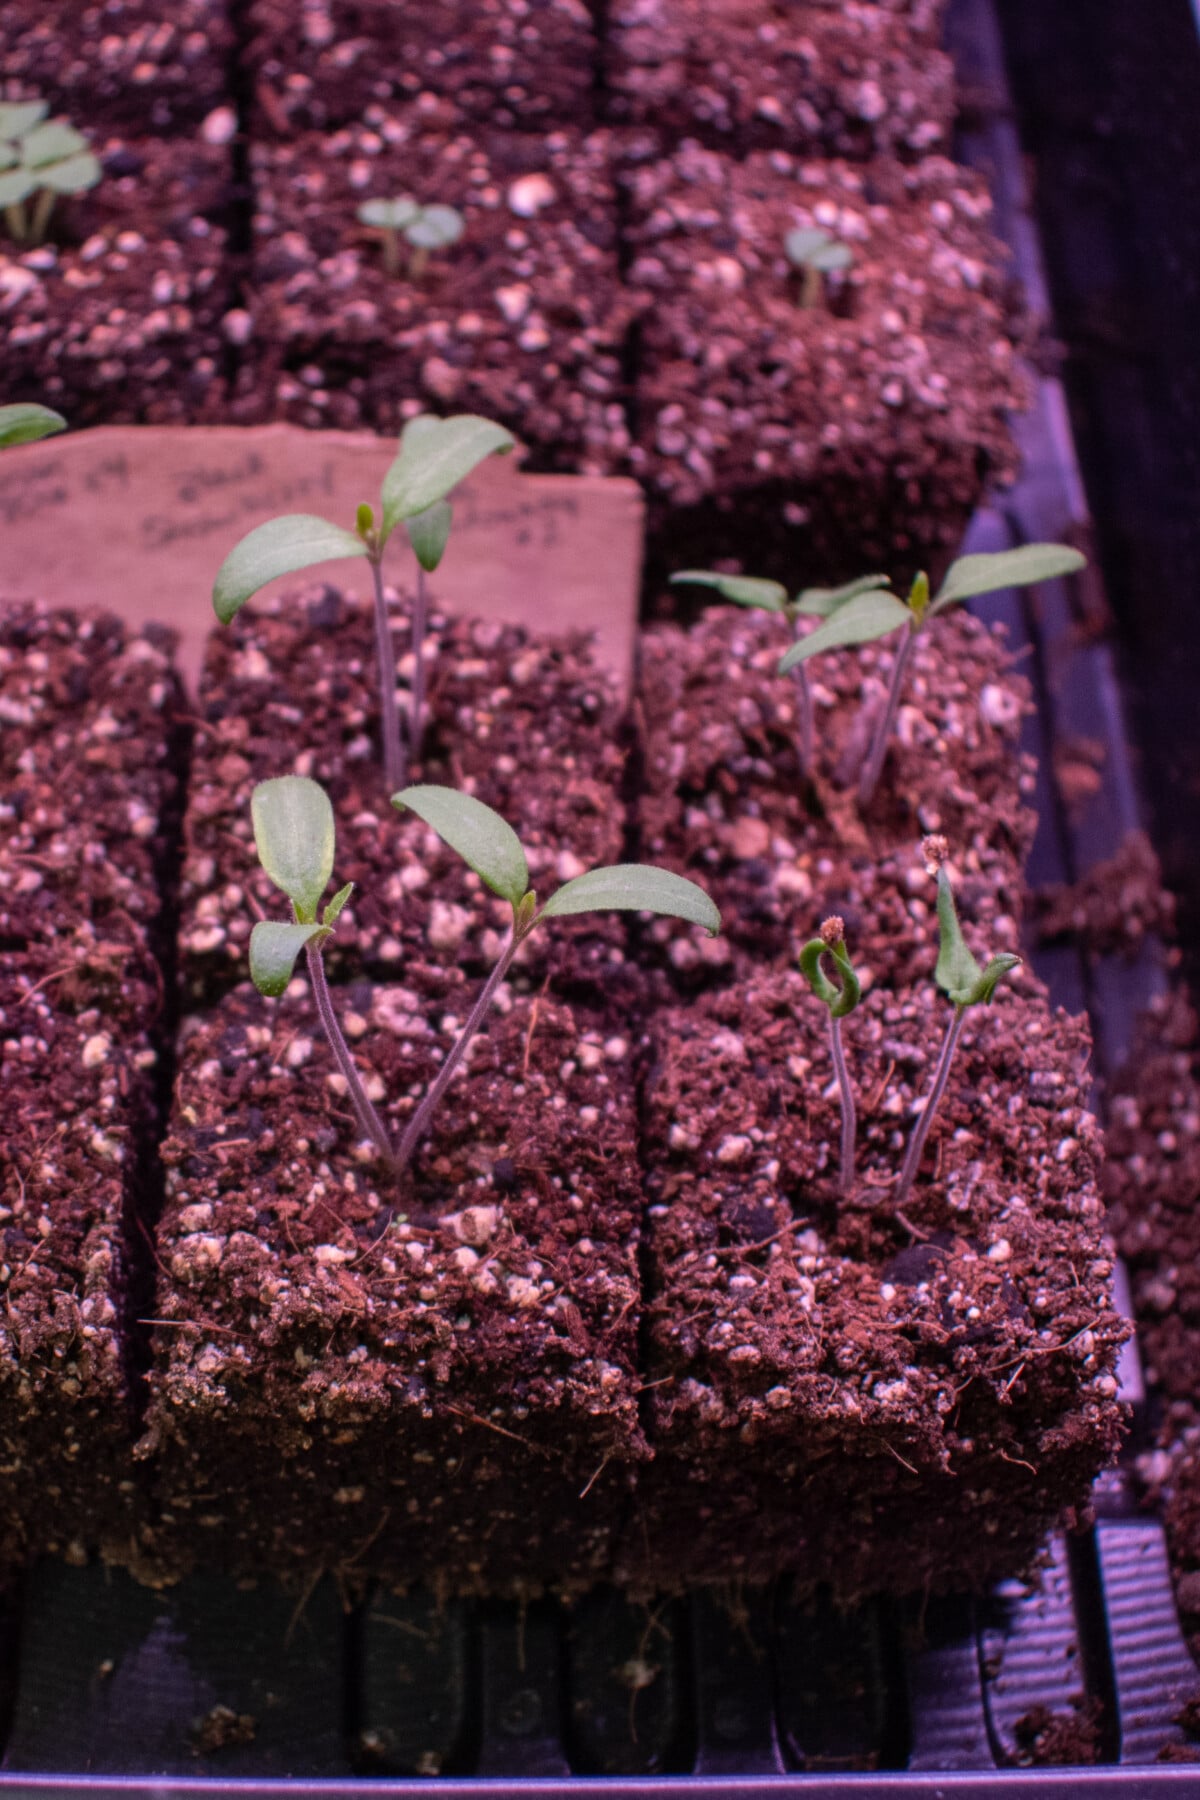
The Tomato Seedling Struggle is Real
So many people struggle to grow sturdy tomato seedlings. They end up with leggy plants that snap under the slightest breeze or take forever to catch up once they’ve been planted. This was me for the longest time. It’s taken me a decade of tweaking my process, but these days I easily grow robust tomato seedlings each year. Here’s what I do:
Grow Lights and Heated Seedling Mats
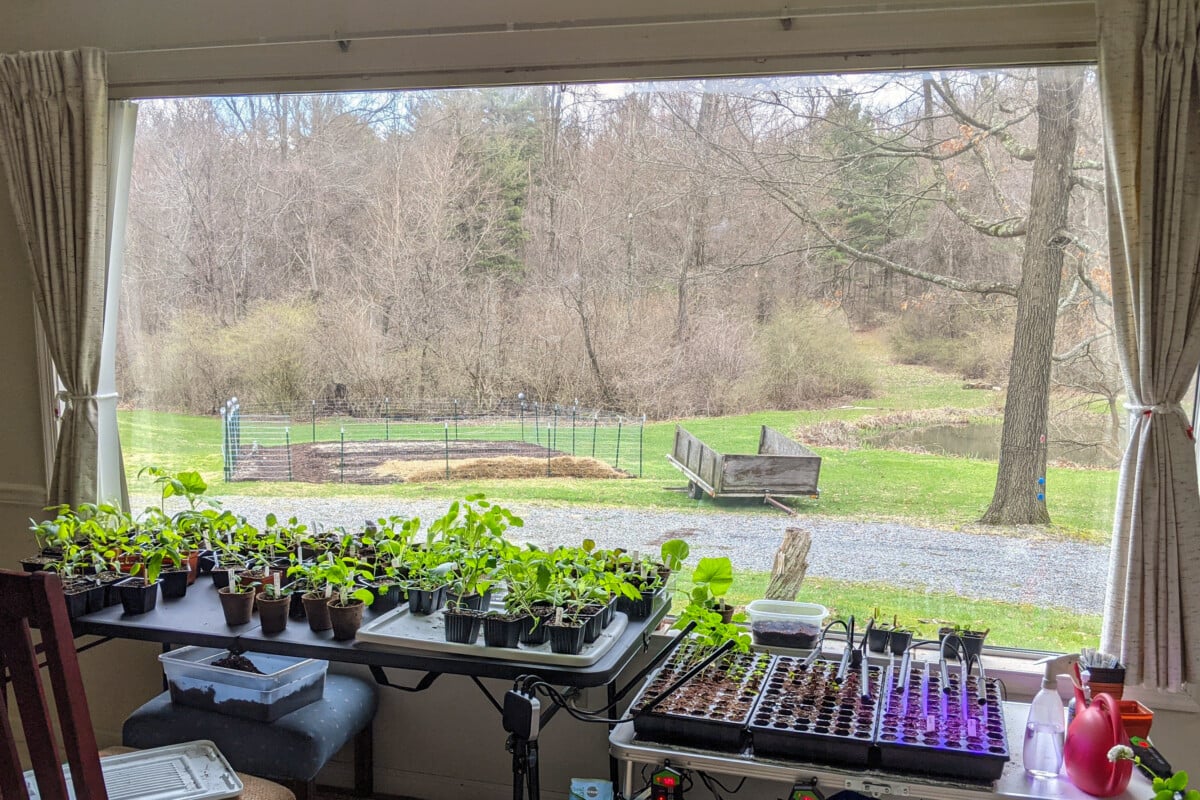
One of the most important things I’ve learned about starting tomatoes from seed is that to get great results, you really do need good equipment. Can you start tomatoes on your windowsill? Yes, I did it for many years. My dad did, too. It’s how millions of gardeners start their seeds, tomato or otherwise.
But you know what?
Nearly all of my tomato seedling issues disappeared the moment I bought a good set of grow lights and a heated seedling mat.
Granted, in my 20s, there was no way I could afford either of those things. But LED technology has been a game-changer for all of us. Now, most anyone can afford grow lights. And the seedling mats are not only cheaper these days but also energy efficient.
Seed Starting Mix
I use a coconut coir seed-starting mix that I blend myself. You don’t need to do this, any seed-starting mix will work fine. I choose to make my own because I use a lot of it, and it’s cheaper to make it in bulk than to buy it by the bag. Just make sure whatever you use is lightweight. You don’t want anything heavy, like all-purpose potting mix.
To Soak or Not to Soak
I don’t soak my tomato seeds. Unlike some seeds that have a waxy coating that needs to be softened before sowing, tomato seeds are quite thin and respond to moisture in the soil almost immediately.
Germination
After planting my tomato seeds in either small pots or soil blocks, I wet the soil thoroughly. I really give it a good soaking and then let everything drain for about fifteen minutes before covering the pots or trays with cling wrap or a clear lid. This combination of thoroughly wetted soil and then covering my pots allows the water to penetrate the seed faster for quicker germination.
As soon as the seeds have germinated, I uncover them. From that point on, I check on them daily to make sure that the soil never dries out. Dry soil is death to new seedlings. I use a spray bottle to water them when they are still tiny.
Tomato Seeds and Soil Temperature
Tomato seeds need a minimum soil temperature of around 60F to germinate. They do best in soil temperatures between 70F and 85F. If you’re germinating tomato seeds without a heated seedling mat, it takes much longer, and seeds are more apt to rot in cool soil.
Most of us starting tomato seeds indoors are in an area of the country that has cold winters.
Maintaining the right soil temperatures for tomato seeds to germinate indoors this time of year can be a real headache. Enter the heated seedling mat. This magical little pad with a digital thermostat costs less than two fast food meals and has made my seed starting each winter stress-free.
Since I started using heated seedling mats, I have not had a single instance of damping off, something that used to be a real problem in a drafty old house. Likewise, my tomato seeds germinate faster (usually around the five-day mark) and grow faster because they’re happy in their toasty, warm soil.
If a heated seedling mat just isn’t in the cards, you can use my old standby for germinating seeds that need warmer soil – putting them on top of the refrigerator. Warm air rises, and your fridge puts out a surprising amount of heat to keep its contents cool. The top of the fridge is always nice and warm. Just be sure to move them into the light as soon as they have germinated.
Tomato Seedlings and Light
To avoid leggy seedlings, your tomatoes need consistent, bright light for around 8-12 hours a day. I hate to say it, but for a lot of us, that’s really hard to do on a windowsill. I messed around with cheap clip-on grow lights from Amazon, but eventually I decided it was time to get serious and buy some good grow lights. Luckily, they also happen to be affordable.
I use the Barrina brand of grow lights. I have these larger T8 lights in my grow tent, and they’re incredible. If you don’t need anything that big, check out these little guys. You can stick them just about anywhere. (I put a bunch underneath my kitchen cabinets to light my counters and grow plants. Check it out!)
Having this bright light source has made an incredible difference in the size and health of all of my seedlings, not just my tomatoes.
Fertilizing Seedlings
Tomatoes do not need to be fertilized until they have developed their first set of true leaves. They have all the nutrients they need to get to that state stored right in that tiny little seed.
I’ve drastically changed how I fertilize tomatoes (and all of my plants) in the past two years. I used to be very specific, feeding a high-nitrogen fertilizer to my seedlings and young tomato plants, and then switching over to something lower in nitrogen but higher in phosphorus and potassium once they started producing flowers.
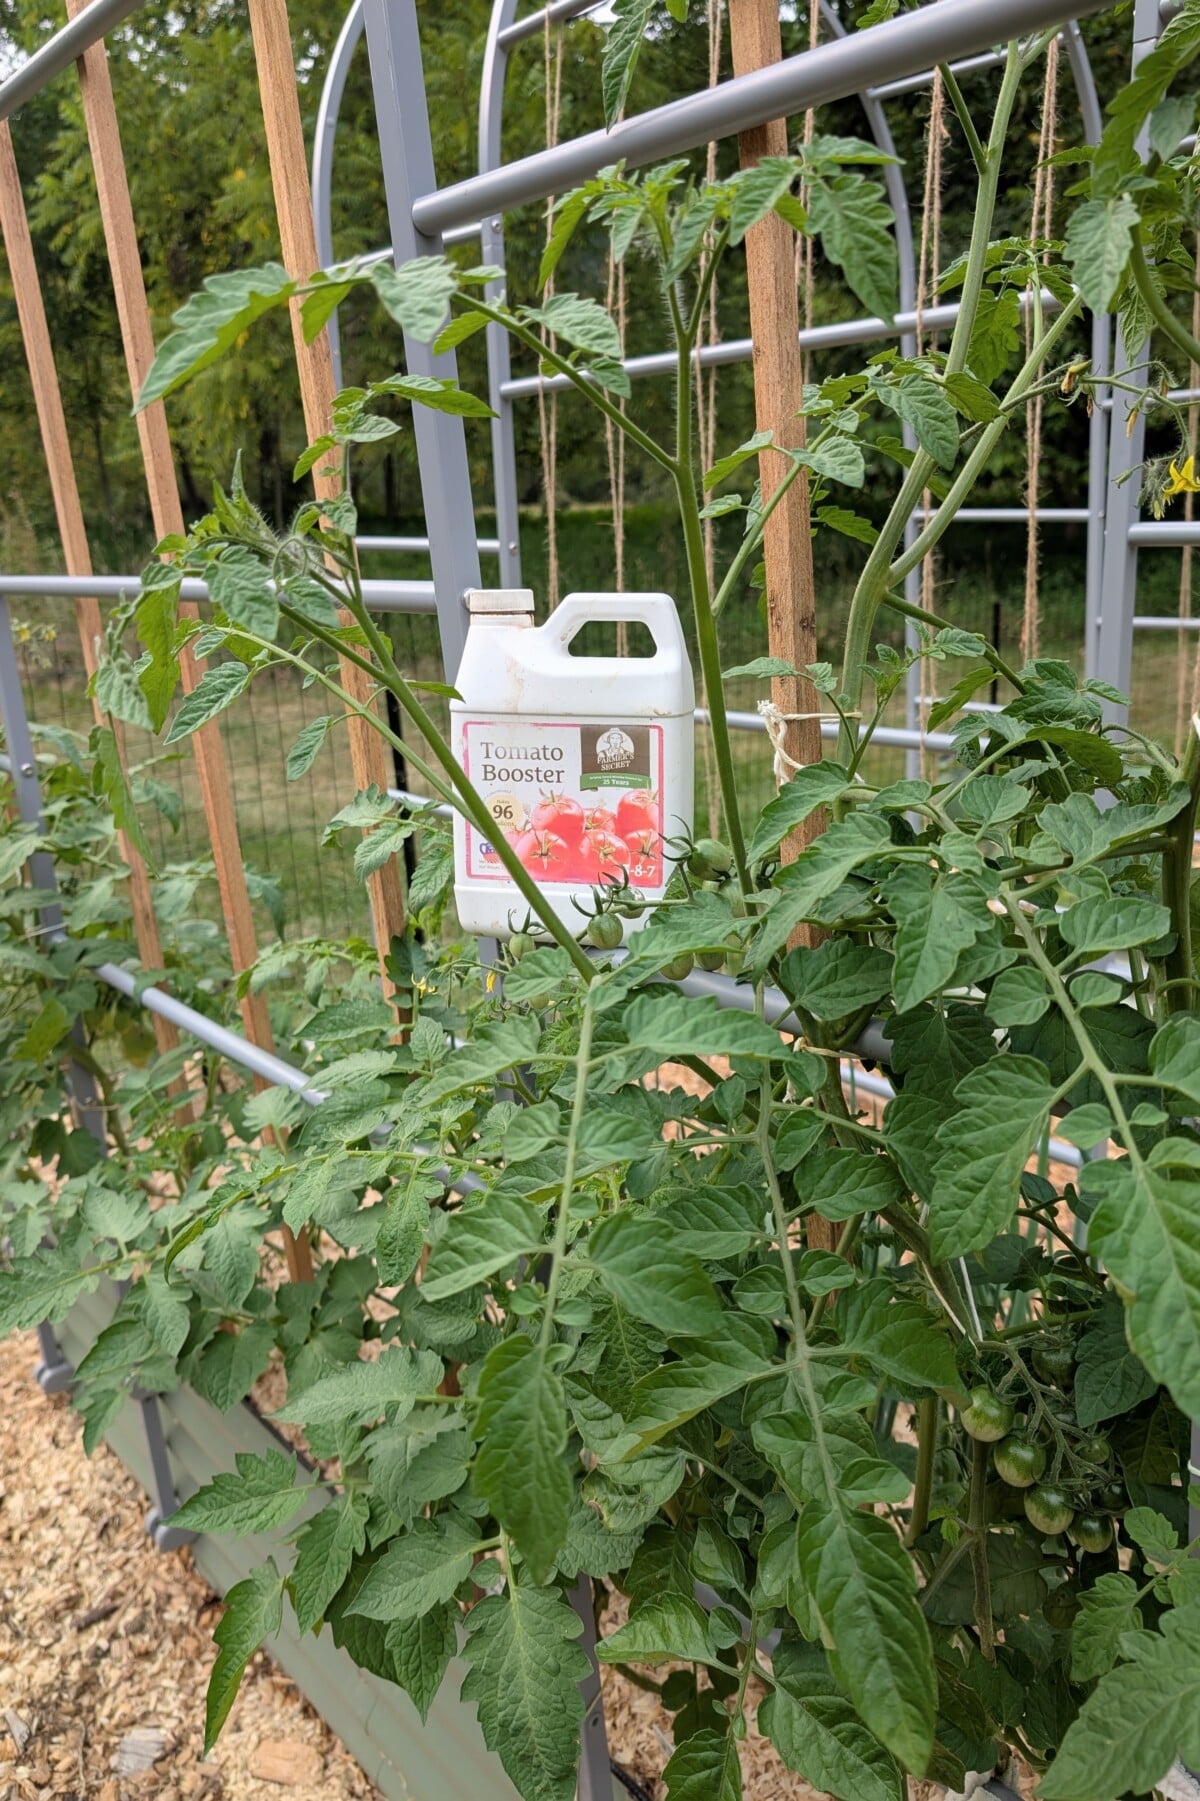
I’ve realized I was making things harder on myself and likely causing more problems for my plants. These days, I opt for a balanced fertilizer, or a fertilizer where all the numbers are pretty close, for the entire season. You’re less likely to have nutrient imbalances. (I have had amazing results using Farmer’s Secret Tomato Booster.)
I like to think of it this way. Instead of offering my plants an entrée of one nutrient, I make sure they have a buffet all season long and trust them to know what they need, when they need it.
Potting Up
I am 100% convinced that this step is the key to why my tomato seedlings are so sturdy and less prone to transplant shock.
Once my tomato seedlings have at least three sets of true leaves, I pot them up into tall nursery pots. These are traditionally used for rooting tree cuttings, so they are tall and slim.
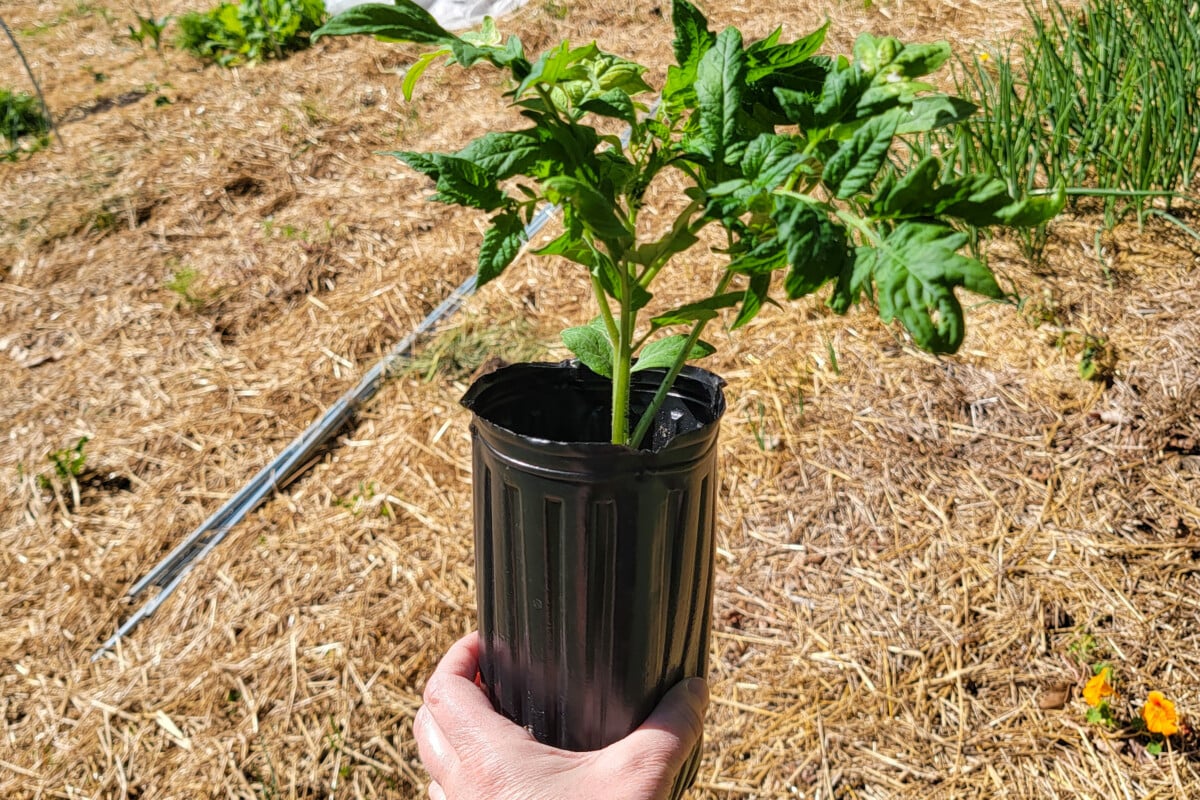
When I pot up into these pots, I bury about an inch or two of the stem that was growing above the soil level.
Everything buried will begin to put out roots.
Because the pot is tall, it gives my seedling room to focus on growing the most important part of the plant for a smooth transition to the garden – the root system. When it’s time to move these seedlings out into the garden, they will have the kind of root system needed to support fast growth above ground.
This is the main reason why, when you transplant your seedlings to the garden, they seem to pause growing for a couple of weeks. They are busy building the root system below ground to support the growth that will happen above ground.
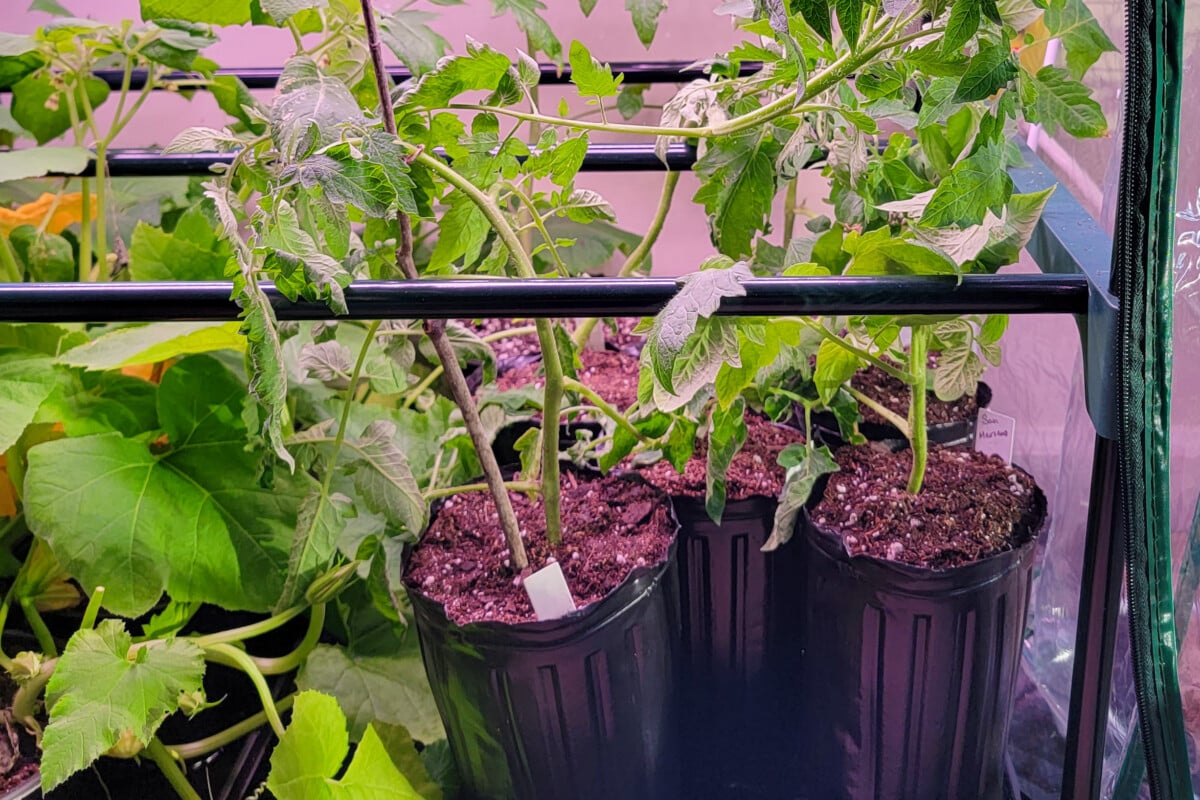
Since I set up my seedlings for root growth over height, they outpace other seedlings once I put them in the garden. I like to think of this as my tomato cheat code.
This One is For the Fans
Finally, I began setting up a small desk fan to blow across my seedlings. It’s on the lowest setting. It causes just enough of a breeze to trigger the tomatoes to grow thicker stems. I will move the fan to the other side of the seedlings each week so they don’t grow sideways.
Important Tips for Transplanting Tomato Seedlings
There’s something wonderful about getting your hands in the soil at the beginning of the growing season. Here’s what I do.
I try to make transplanting as stress-free as possible. (Kind of like me with the dentist.) By limiting the stress factors when my little tomato babies go in the soil, I can limit the severity of the transplant shock, which means the plant adapts faster to being outdoors. And that means tomatoes in my hot little hands sooner.
Hardening Off
First off, I always harden off my tomatoes before they make their permanent transition to the garden. This is one of those gardening steps you don’t skip. Most of us already know how to do this, so I won’t go into detail here. (You can read about hardening off seedlings here if you’re new to gardening.)
I never leave my seedlings outside if I’m leaving the house. If I need to go somewhere, they get put back inside. This might sound trivial, but I learned this lesson the hard way, and it’s a lesson I only needed to be taught once.
I had two full flats of seedlings hardening off on my back patio one spring. I decided to go to the grocery store, and while shopping, we had a quick storm show up. It brought marble-sized hail with it. By the time I got home, my seedlings were obliterated. So yes, always bring your seedlings into the house if you go anywhere.
Plump Roots
Another thing I do is to water my tomato plants the day before I’m going to plant them outdoors. This ensures that the roots are nice and plump on the day of planting. I also minimize the amount of time the roots are in contact with the air, so having nice, hydrated roots helps.
Digging the Hole
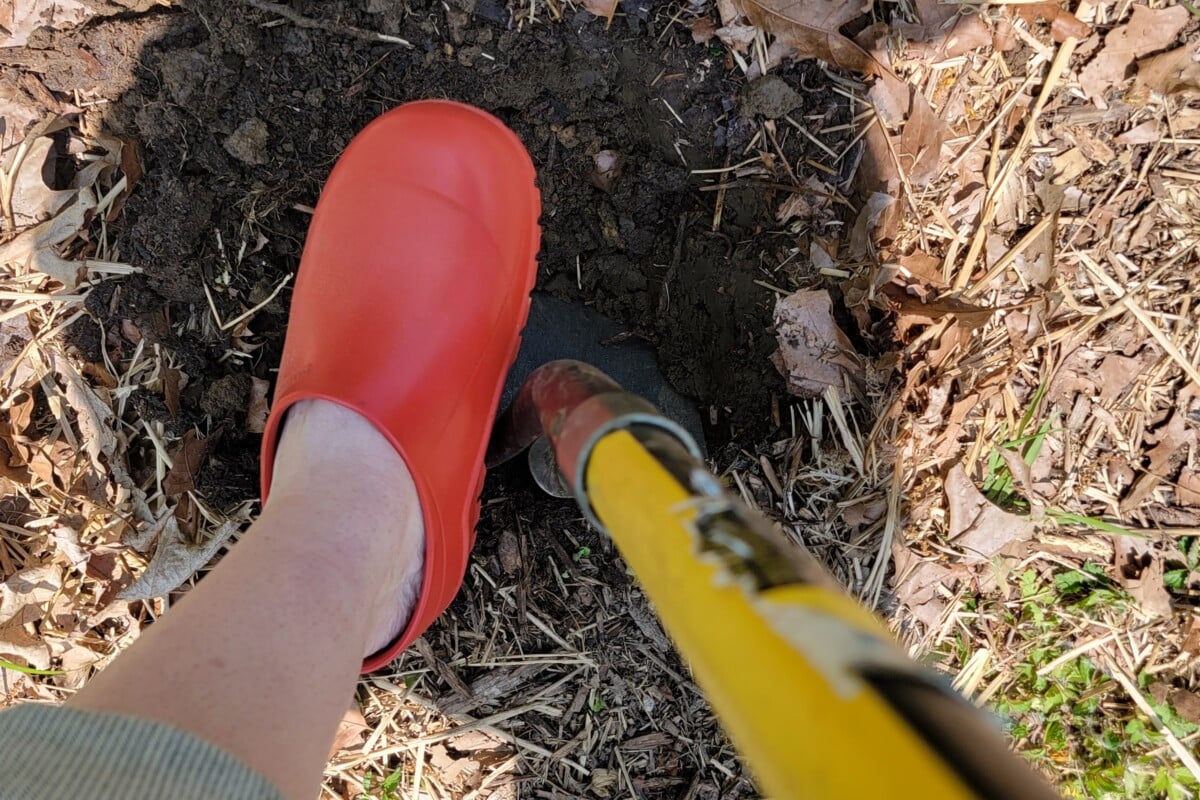
I’ve written extensively on the benefits of burying tomatoes. Tomatoes will produce new roots anywhere the stems are touching soil, and a large, healthy root system is key to growing tomatoes by the bucketload. So, we’re going to dig a hole deep enough to bury not just the roots, but also half of the plant growing above ground.
Having an extensive root system means your tomatoes have better access to nutrients and water, and that means much more rapid growth and a lot more tomatoes.
Before I put the tomato in the hole, I always add a scoop of compost and some mycorrhizae (this is the brand I use) to the bottom of the hole. The compost is a great way to slowly and continuously improve my soil each year, and it provides an immediate boost of important microorganisms to the soil. The mycorrhizae assist in making the most out of the root system, among other things.
Planting the Tomato Seedling
Now we get to the moment of truth, actually planting the tomato seedling.
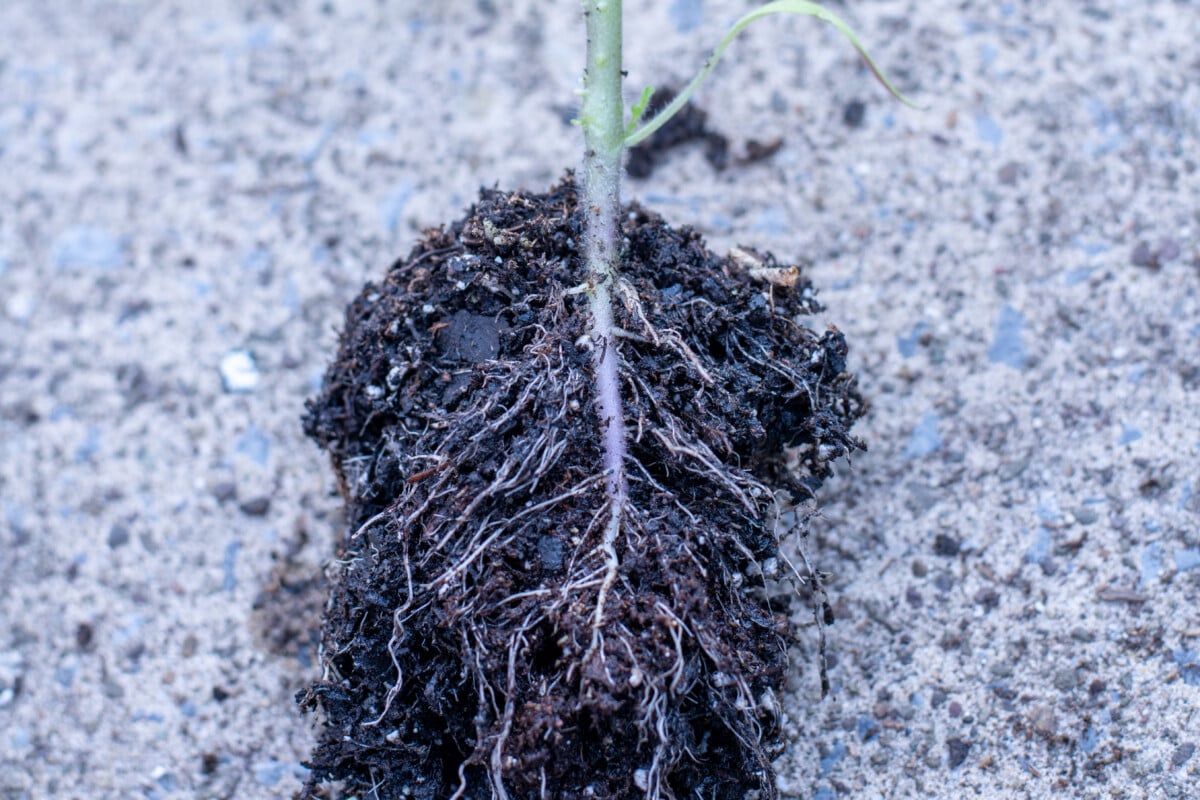
Roots are pretty tough, but only if they’re underground where they’re meant to be. I used to pull my seedlings out of their little pot, ready to go, and then dig my hole, and oh, I forgot my trowel at the end of the row, and then, wait, where is the watering can?
By the time I got my little seedling into the soil where it belonged, the roots had been zapped by the air and sun. It took several days for them to perk up and look okay again. Luckily, I’ve gotten smarter over the years. (At least where gardening is concerned.)
I don’t take my seedling out of the nursery pot until the exact moment I am ready to plant it.
The idea is to get it into the ground as fast as possible to limit the roots’ exposure to air. I gently squeeze the base of the pot until I feel the seedling loosen, and carefully pull it out and get it positioned in the hole. Then I backfill the hole, gently packing the dirt around the seedling, which is now buried halfway up the stem. I water it in immediately. This also helps settle the soil back around the rootball.
If you’ve been doing this for a few years, you probably noticed that I skipped a step.
How often have you seen the advice to gently loosen the root ball of a seedling before you plant it? You see it everywhere. I even used to suggest you do it before poking seedlings in the ground. But I stopped doing it.
Loosening the rootball only makes sense when you are planting tomato seedlings that you bought at the store. These are almost always quite rootbound by the time they’re ready to be planted. Teasing out that mess a little bit helps the plant.
However, with the way I grow my seedlings, I end up with lots of root growth but not a rootbound plant. If you’re reading this, it’s safe to say you aren’t buying nursery-grown tomato seedlings either.
Teasing apart the root ball is only going to stress the plant further during a process that is stressful enough, so skip it unless it’s absolutely necessary. They’re roots, they know how to spread out and find their way in the dirt.
I’ll leave you with this final tip.
Grow One New Tomato Variety Every Year
Okay, I’m throwing this one in last because it’s something I started doing about eight or nine years ago, and I have discovered some great tomato varieties this way. There are thousands of tomato varieties available to us as home gardeners. Heck, this is the main reason that most of us start tomatoes from seed rather than buying seedlings. New tomato varieties show up in seed catalogs every single year.
I love heirloom varieties. I’m biased. I can admit it.
But I started forcing myself to try some hybrids here and there or opt for a shape or color that I normally wouldn’t. My point is, I started making this my “I normally wouldn’t grow this, but I’ll give it a try” tomato, and it’s been great fun. I’ve discovered some cool varieties.
The only downside to this is that you’ll inevitably find new “favorites” that you want to grow every single year.
I could plant tomatoes in my garden and still not have enough room to grow all the varieties I would like to.
In my 40 years of growing tomatoes, I’ve learned a lot. My final thoughts on growing everyone’s favorite garden fruit are this: When it comes to tomatoes, there will always be a problem. Be it pest, disease, weather or all three. But these scrappy survivors are harder to kill off than you think, so you’ll always end up with tomatoes in your kitchen.

Get the famous Rural Sprout newsletter delivered to your inbox.
Join the 50,000+ gardeners who get timely gardening tutorials, tips and tasks delivered direct to their inbox.