

I’m constantly amazed at the number of foods that can be made easily at home that taste infinitely better than their store-bought counterparts.
The best example is homemade yogurt.
There is nothing at the store that even comes close to the creamy, sweet-tart taste of homemade yogurt.
I’m sure if you’ve tasted store-bought plain yogurt before, you’re giving me a dubious frown.
Let’s be very honest with each other for a moment – store-bought plain yogurt is awful and I’m sorry you had to go through that terrible experience.
Homemade plain yogurt is pleasantly sweet with a mild, tart finish.
I’m going to walk you through making yogurt at home from start to finish, no fancy equipment is necessary. For the most part, the time involved in making yogurt is inactive, so it’s an easy project to fit into your day.
Here’s what you’ll need to get started:
- Ideally, a slow cooker with a removable crock, this is hands down your easiest and best option. However, you can also make yogurt by heating your milk on the stove in a pan. I’ll include the minor adjustments needed to do so in the directions.
- A thermometer – A simple food thermometer will do the trick. You need to be able to read between 110 – 180 degrees accurately. I received a ThermPro wireless remote thermometer as a gift a few years back and it makes monitoring my yogurt temp incredibly easy.
- Milk – ½ to 1 gallon is the perfect amount. The fresher, the better.
- Yogurt starter – for your first batch, use a single-serve container of store-bought plain yogurt. Be sure it has live cultures.
- A ladle
- A cup or measuring cup
- A bath towel
- Cheesecloth and a colander if you want Greek-style yogurt
- Small jars if you’re going to portion out your yogurt into individual servings once it’s finished.
The basic process of making yogurt is simple.
You’ll heat your milk slowly to 180 degrees; this kills off any existing bacteria in the milk. This isn’t as important when using pasteurized milk, but it is imperative when using raw or unpasteurized milk. You don’t want any competing microbes in there with the lactobacilli, which are the bacteria responsible for making yogurt.
Once you reach this temp, you quickly lower the milk to 115 degrees – the ideal temperature for your lactobacilli buddies to grow. Then we’ll inoculate our milk and incubate it.
It sounds technical, but I promise it’s super easy.
Let’s make some yogurt!
Set your slow cooker to the low heat-setting and pour in the milk. Place the lid on it, and ignore it for a while. Begin checking the temperature after about two hours. If you’re forgetful, like me, you can set a two-hour timer.
If you aren’t using a slow cooker, heat your milk over med-low heat in a pan.
You want to bring the milk temperature up to 180 degrees.
Now pay close attention – the next step is the key to fantastic yogurt.
Once your milk is starting to get close to 180 degrees, pre-heat your oven to 180 degrees as well. When the milk reaches the desired temperature, put the lidded slow cooker crock in the oven for half an hour.
If you’re using a pan on the stove, transfer your milk to a thick oven-safe mixing bowl, cover it with foil, and put it in the oven for half an hour.
Technically, when your milk reaches 180 degrees, you can cool it immediately, but by holding the milk steady at this temperature for an extended period, you are allowing the natural sugars in it to begin to caramelize.
This gives your finished yogurt a natural sweetness without adding sugar and makes it extra creamy– the secret to yogurt that’s beyond ordinary.
Amazing!
After half an hour has passed, take the milk out of the oven but leave the oven on.
You’ll need to quickly bring the temperature of your milk down to 115 degrees. Some people put the crock in an ice-water bath, but you know me, I like to do things the easy way. I put the whole thing in the fridge on a hot pad. This method works just as well, without all the fuss.
Start checking the temperature after about a half-hour in the fridge. When your milk reaches 115 degrees, pull it from the refrigerator. Using a clean ladle, remove about one cup of milk to a measuring cup.
Add a few tablespoons of your store-bought yogurt or yogurt starter to it and stir until dissolved.
Great! You’ve inoculated the milk with lactobacilli.
Now slowly pour the inoculated milk back into the crock. Be sure you pour it evenly throughout the milk, then give it a gentle stir. You want to evenly distribute the bacteria throughout the milk.
Place your lidded crock, or tin foil-covered bowl of inoculated milk back in your oven and turn the oven off.
The residual heat will be enough to rewarm the crock but not heat up the milk again. We’re going to tuck the milk in by wrapping a clean bath towel around the crock to help insulate it.
Turn your oven light on too, between the heat from the incandescent lightbulb and the towel; your milk will hold at the necessary temperature range for the bacteria to do their thing.
Close the oven door and let the milk incubate for 8-12 hours. This is one of those things that’s great to do in the evening so you can wake up to fresh yogurt the next day.

The little lactobacilli will have worked their magic, leaving you with creamy, delicious yogurt.
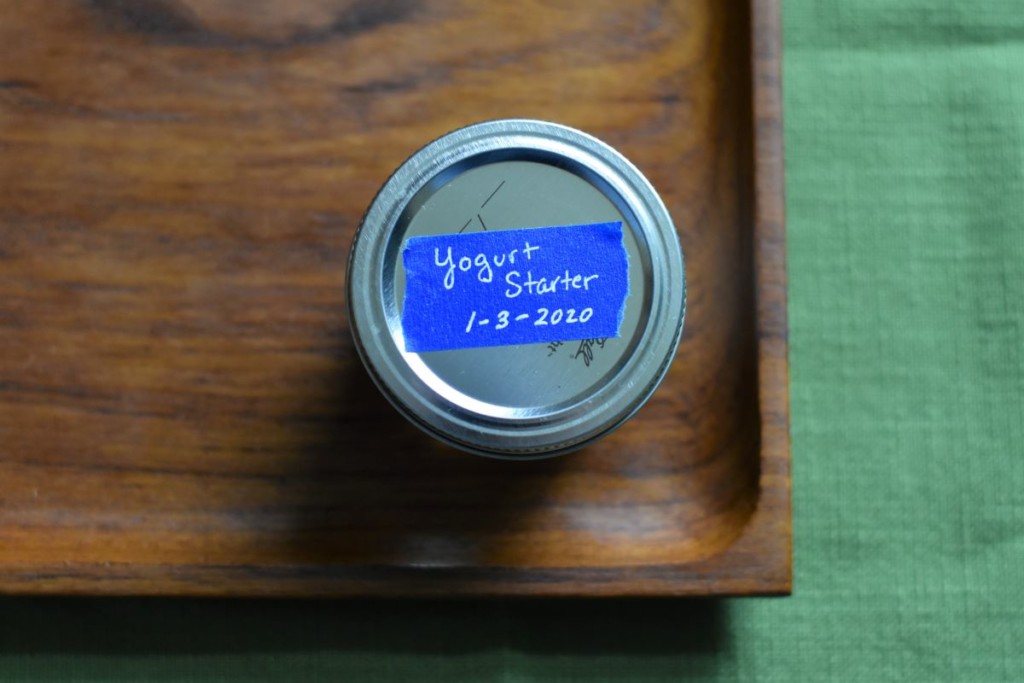
The first thing you’ll want to do with your yogurt is set aside a few tablespoons to use as the starter for the next batch.
(Who am I kidding, the first thing you’ll want to do is eat some.)
Clearly label your starter, so no one accidentally eats it. No, I haven’t done this before, why are you looking at me like that?
Once you have your starter set aside, you have a few choices with what to do with your yogurt.
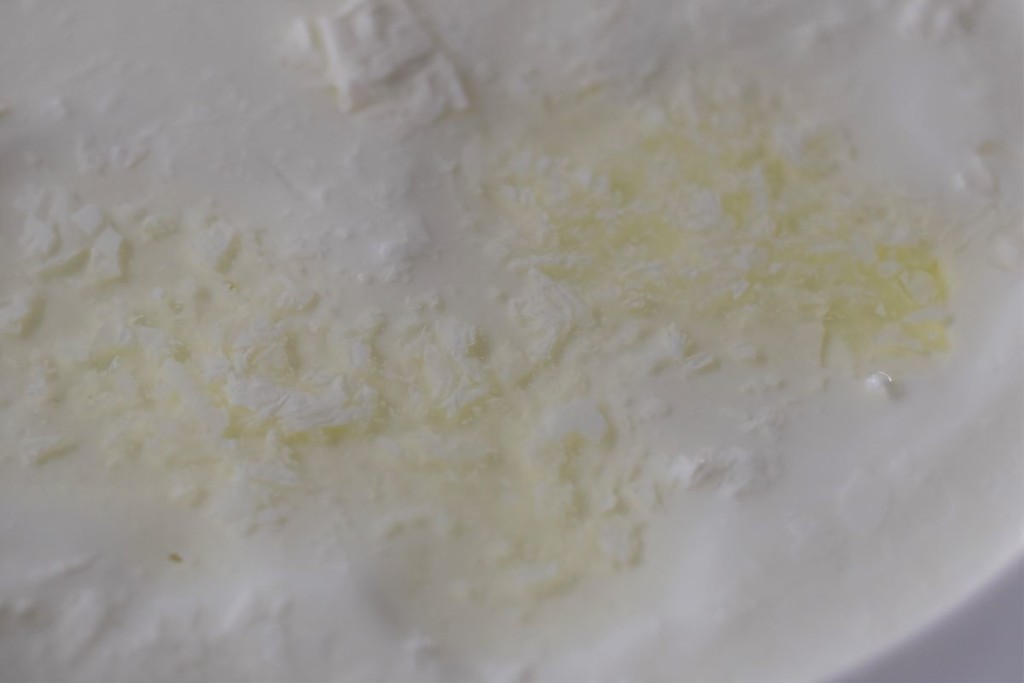
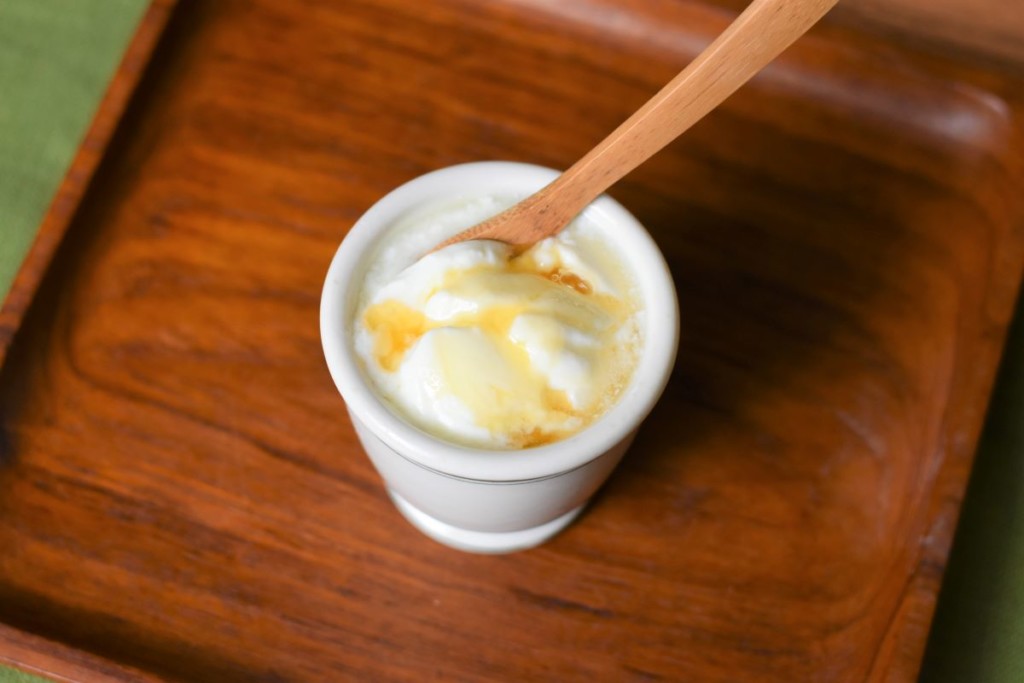
Eat it as is and enjoy – your yogurt is ready to eat as is. There will be yellowish whey floating on top and around the sides, just stir it back in when you eat your yogurt.
Or you can strain your yogurt for a thicker Greek-style yogurt. If you used a gallon of milk, this would yield about 2-quarts of whey once you have strained the yogurt.
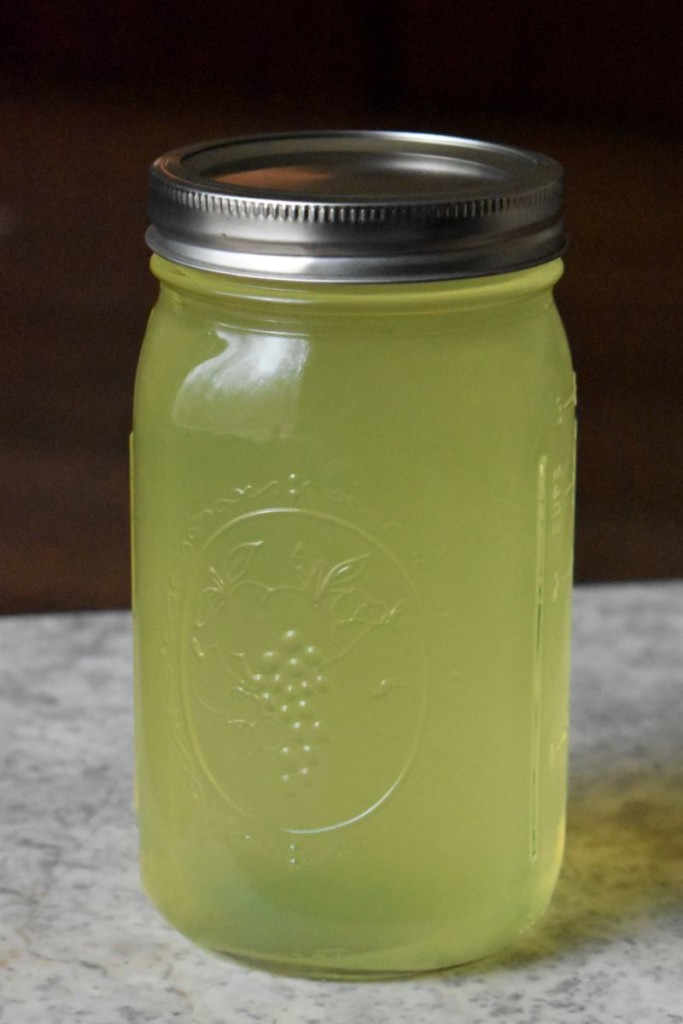
Don’t just dump it! Whey is highly nutritious.
To strain your yogurt, place a colander lined with doubled-up cheesecloth over a bowl. Scoop your yogurt into the colander. Place a piece of wax paper over the top of your yogurt and put it in the fridge.
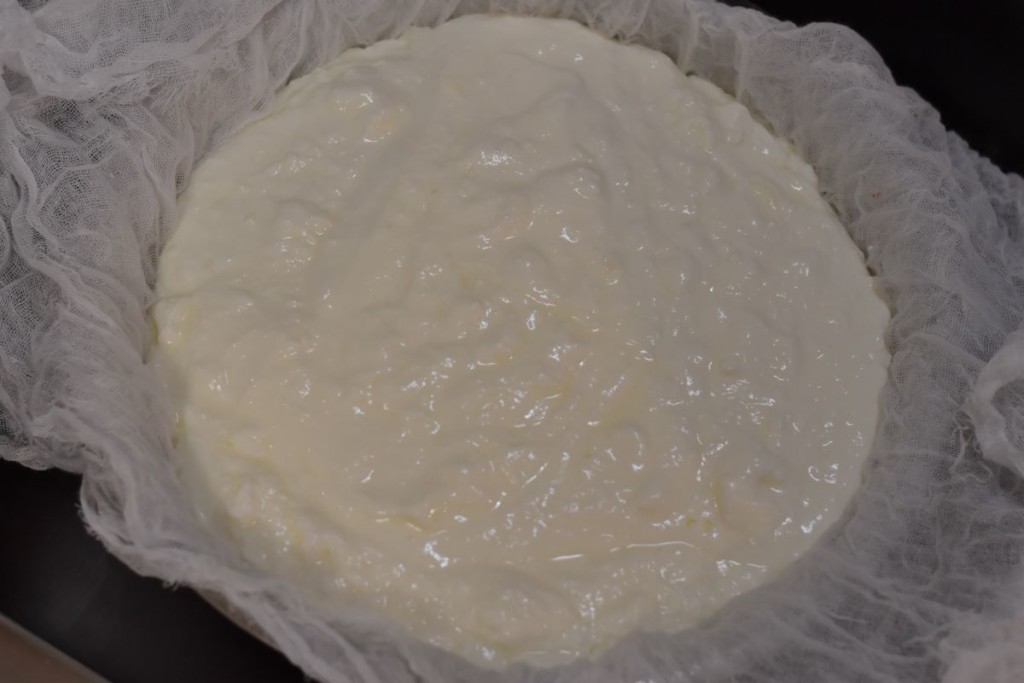
Let the yogurt strain for 2-4 hours. Usually, the yogurt becomes solid enough that I can kind of peel it away from the cheesecloth and flop the whole mass back into a bowl without too much mess.
You can leave the yogurt in a bowl or transfer it to individual jars. I like putting it in individual jars as it’s much easier to pack for breakfast or lunches.
In the past, I have used the pint-sized jam jars as well as the little bitty 4 oz jelly jars. The wee ones are more snack-sized. I recently purchased dedicated yogurt jars and the 7 oz portion size is perfect, plus I don’t have all of my jelly jars in use at once.
A few things to consider going forward:
The fresher and better quality the milk you use, the better your yogurt will be. If you have access to a local dairy, try making yogurt with their fresh milk. Organic raw milk from grass-fed cows makes the most fantastic yogurt on the planet.
If you use creamline milk, milk that hasn’t had the cream removed, your finished yogurt will have a thin layer of cream on top. It’s like a layer of dessert on top of your breakfast. In our house, there are fights over the cream layer. “You got more than me!”
Whole milk will produce the creamiest yogurt, but you can use skim, 1%, and 2% as well. Just remember with a lower fat percentage, the finished yogurt will have a more liquid texture.
You can use store-bought yogurt for starter, but there are many different strains of yogurt cultures out there. They are easy to find online. I highly recommend trying different types of yogurt cultures to find your favorite. It’s pretty cool how the different bacterial strains lend themselves to different flavors and consistencies.
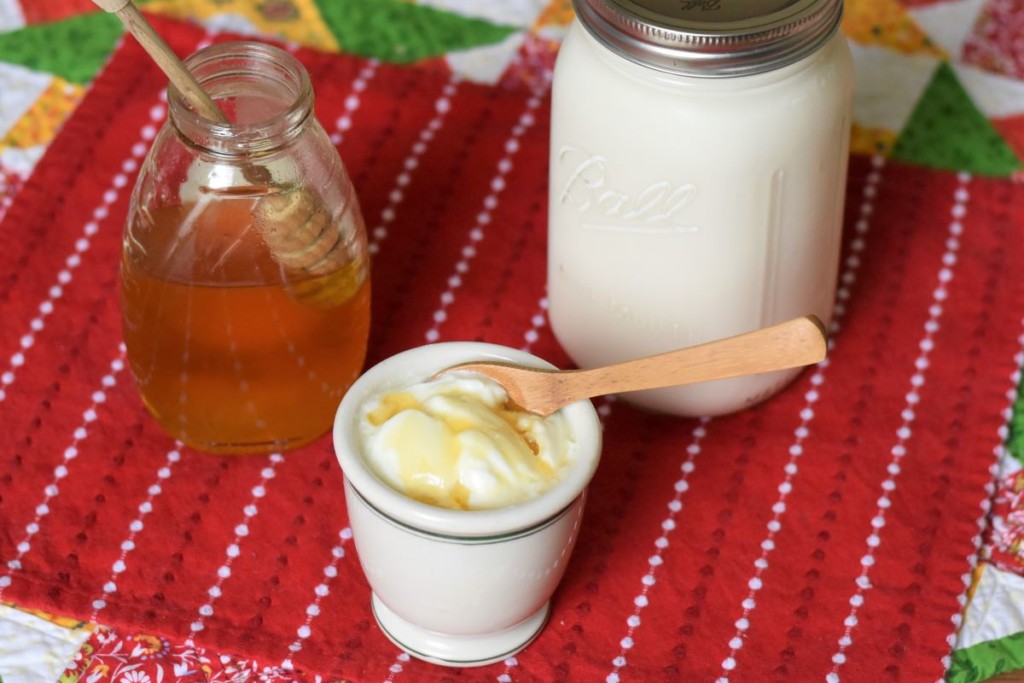
Want some ideas on what to eat with your yogurt? Here are some delicious stir-ins:
- Fresh or frozen berries
- Granola
- Honey
- Maple Syrup
- Chocolate chips
- Toasted and salted pepitas
- A couple of tablespoons of salsa make for a savory snack
- Banana slices
- Dried cranberries or any other dried fruit
- Chopped nuts
While you can fancy up your homemade yogurt with any number of tasty additions, I urge you to try it au natural just once. I promise it will change your mind about plain yogurt forever. I rarely put anything in my yogurt because it’s just so good on its own.
After a couple of batches, you’ll soon get the hang of making yogurt at home. The process is easy enough that you may never go back to buying yogurt from the store again.
Of course, once you realize how easy it is to make yogurt and how much better it tastes, you’ll start looking at other things in your fridge and wondering how easy it is to make them; like mozzarella, butter, and cultured buttermilk.
Enjoy!

Get the famous Rural Sprout newsletter delivered to your inbox.
Join the 50,000+ gardeners who get timely gardening tutorials, tips and tasks delivered direct to their inbox.