


Dried apples, bananas, apricots, plums and fragrant strawberries all make for happy, healthy snacks that can be added to your breakfast muesli or eaten on the go.
Kids just happen to love them too!
The downside?
They are a luxury item, costing a small fortune when bought from the store, and they often contain sulfur dioxide as a preservative.
Sulfite sensitivity can be a problem for those with asthma, so it is best to steer clear of the big brands and always watch the ingredients.
To avoid sulfites in dried fruit, learn to dehydrate your favorites in the sun, the oven or dehydrator.
They may not last as long as conventionally produced snacks, but when you have a bag of cinnamon apple chips, how long are they really going to last anyway?
Once you know how to make your own, you can dehydrate a batch as often as you wish!
Dehydrating fruit is one of the most ancient ways to preserve food, having been discovered thousands of years ago. It is one of the best ways to prepare your favorite summer foods for long-term storage, outside of preserving jams, that is.
How To Make Sun-Dried Fruit
Using the power of the sun is the most low-tech, and low-cost, solution you can find for dehydrating fruits and vegetables. However, this only works in climates where the temperatures rise to 85 degrees Fahrenheit (30 Celsius) or more, so it is a location dependent way of dehydrating fruit.
It does produce the most flavorful results of any drying method, so if sun is what you have, use it!
The humidity level is also something to consider (the lower the better), there must be adequate air flow around the slices of fruit and it is beneficial if the sun shines much of the day.
Also note, that you will have to bring in the racks of fruit at night, and take them back out into the sun each morning, once the temperatures have risen. It takes anywhere from 2 to 6 days to sufficiently dry out a rack of fruit under the summer sun.
Equipment needed for sun drying fruit
Tempting as it may be to lay sliced fruit directly on a baking sheet and set it outside in the sun, this simply won’t do.
It may take a small investment to purchase or make your own drying racks, which are also suitable for vegetables and herbs – the ability to dehydrate your food is catching!
These multi-functional drying racks can be made from wooden slats, woven twigs, bamboo or a stainless steel mesh with a frame. Make sure that the metal is food-grade, not to leave toxic residues on the precious dried fruit.
This stainless steel drying rack is ideal for dehydrating your own fruits at home.
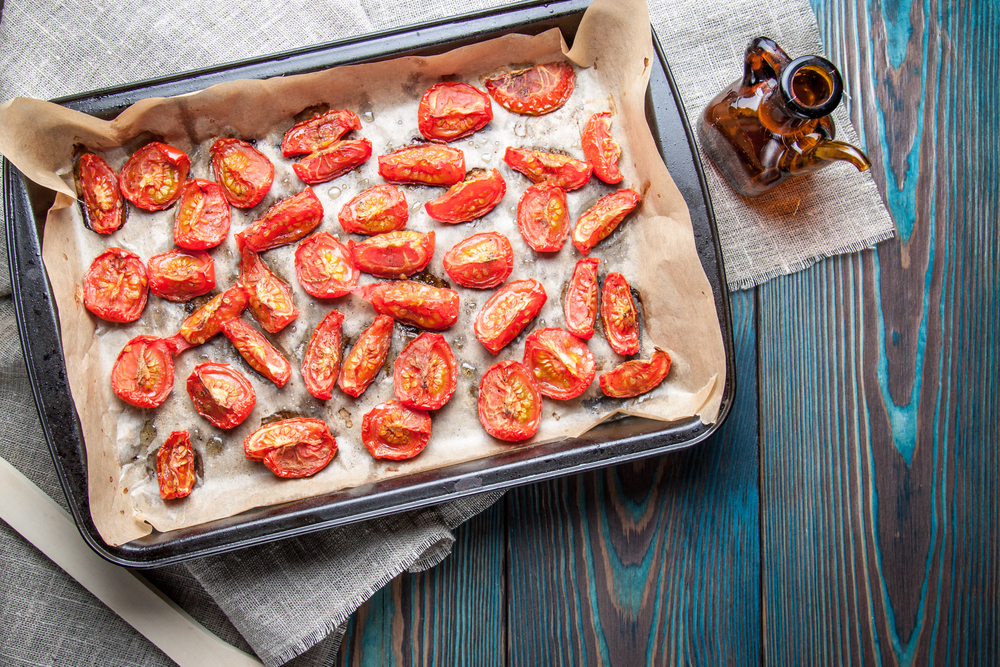
The best fruits to dry in the sun
- Apricots
- Tomatoes
- Plums
- Grapes (raisins)
- Apples
- Pears
Pretreating fruit for sun drying
Be thorough in washing all fruit, and always cut uniform slices to ensure that they dry as evenly as possible. In the case of pears and apples, you can soak them in fresh lemon juice or an ascorbic acid mixture to help them prevent from browning.
Remember to use cheesecloth or netting to keep flies, bees and other insects off the fruit while drying.
When it is nearly dry to your liking, move the racks to a more shaded area to prevent them from “cooking”.
How To Oven Dry Fruit
If the sun doesn’t happen to shine down upon your short dehydrating season, and you haven’t yet stumbled upon a dehydrator to get the task done, there is always the oven. And what a great job it can do!
Here it is possible to use the baking sheets you already own, no special equipment is needed, though parchment paper is a blessing, when it comes to removing the dried fruits from the pan.
Just as with sun drying, you first need to prepare your produce by thoroughly washing the ripe fruits or berries.
Pit what needs pitting, remove stems and seeds at the same time. Then cut the slices evenly thin, so they can all dry out in a similar time, making sure that the slices do not touch.
Oven temperatures for dehydrating fruit
Preheat your oven to its lowest temperatures, between 130-160 degrees Fahrenheit and place your baking tray full of fruit into the gentle heat.
More important than the temperature, however, is the airflow. If your oven has a fan, use it. If not, make sure to open the door frequently to let out excess moisture.
And be prepared to wait!
It will take several hours with minimal attention, keeping in mind that some fruits will need to be flipped a few times for the best results.
In general, it takes apples 6 to 10 hours to achieve that perfect crispiness you adore. Bananas take 2 to 3 hours to dehydrate in the oven at a slightly higher temperature of 225 F, and strawberries take 2 and a half hours at 200 F.
Ovens vary, so learning how to dehydrate fruit, does take some trial and error.
Using your oven as a dehydrator is the least energy efficient way to dry food, but if you are only making a few small batches a year, then it beats buying a bulky dehydrator, especially when you are not going to use it often.
Best fruits to dehydrate in the oven
- Apples
- Oranges
- Cherries
- Nectarines
- Strawberries
- Pears
- Peaches
- Bananas
How To Dry Fruit With A Dehydrator
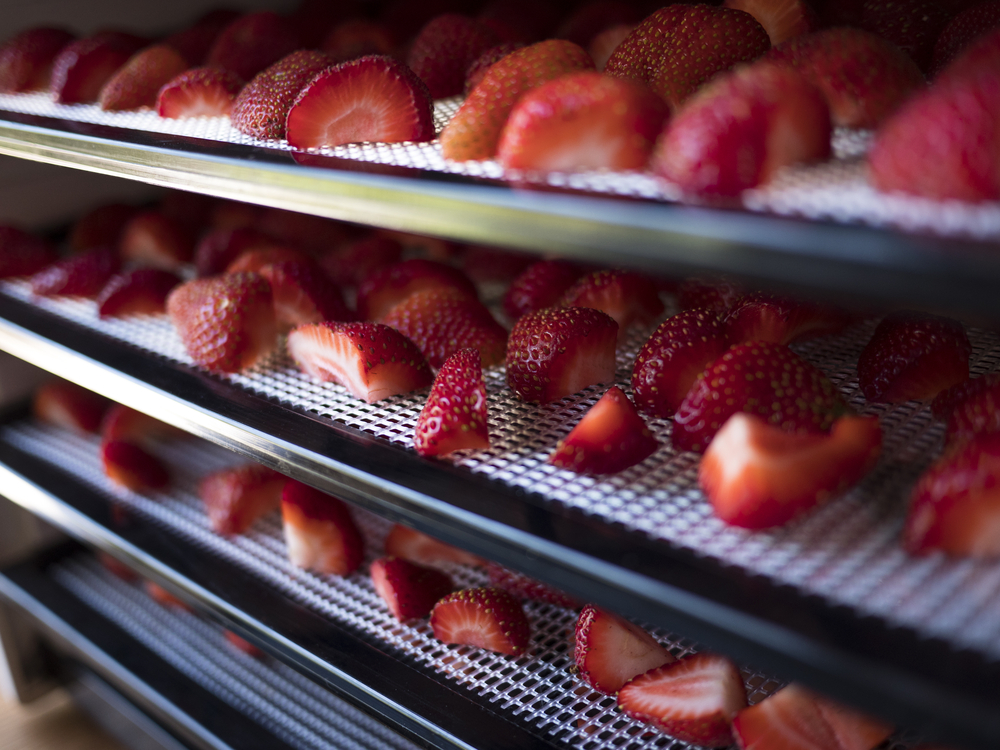
If you really adore dried fruit and consume it year round, rather than on the random occasion, then a professional dehydrator may just be the gift for you!
There are an abundance of models to choose from, so think carefully about your dehydrating needs.
How much space do you have to share with a new appliance, how often will it be in use? Perhaps you could make extra dehydrated fruits for gifts. You could even consider selling your dehydrated foods as a way to make money from your homestead?
This is the most popular affordable dehydrator for those wishing to dabble with dehydrating. For the more serious dehydrators, this piece of kit is ideal.
With a dehydrator anything and everything is possible. Papayas, pineapples, lemons, limes, kiwis, no problem.
Benefits of dehydrated foods
- Dried fruits take up little space
- Perfect for travel as they are light weight and usually not very fragile
- Takes neither freezer, nor refrigerator to store them (saves energy)
- Ready-to-eat treats
- Can be added to soups, salads, oatmeal or smoothies
- Allows you to buy in season and save for later or to preserve your garden bounty.
7 Dehydrated Fruit Recipes
1. Dehydrated Blueberries
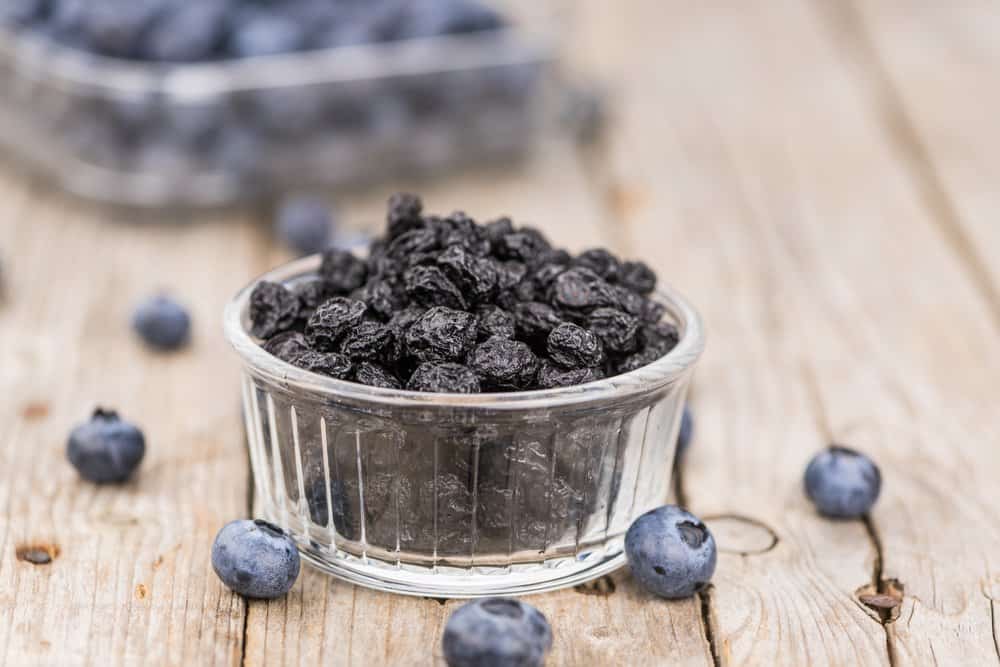
When it comes to blueberries, fresh is best, frozen is nice, yet when dried, they can make it feel like summer all year long. Dehydrating blueberries is super simple:
- Rinse organic blueberries and dry them thoroughly, the drier the better.
- To speed up the dehydration process, with the tip of a sharp knife, poke a small hole in each berry.
- Spread on trays with screens.
- Set your dehydrator to 135 F and leave for 24 hours or longer, until done.
- Store in an airtight container.
2. Dehydrated Watermelon
Watermelon candy is a sweet gift from nature.
Strips of “unwatery” watermelon are very curious things indeed. Use them as fruit tortillas for yogurt or devour them plain and simple. Once you try them, you will wish you would have made more
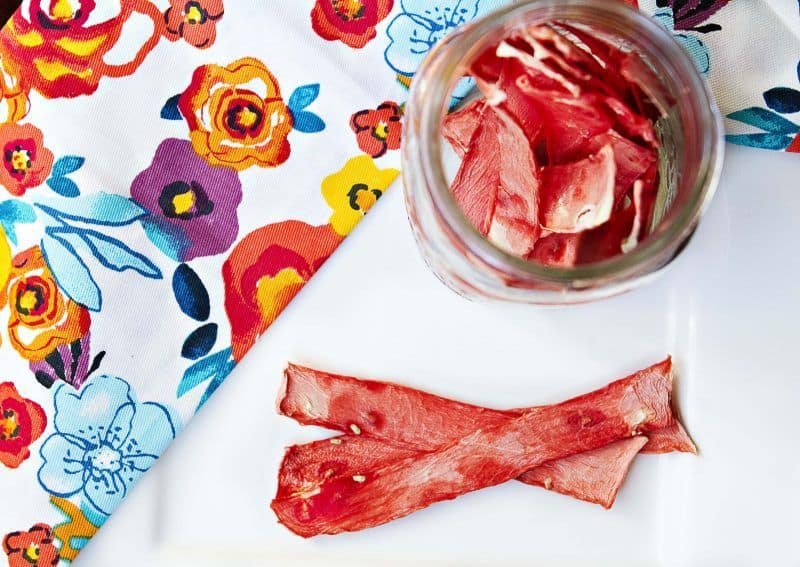
3. Fruit Leather

Fruit leather is the perfect snack for hiking (or taking a quick break on the homestead) and the opportunities for exciting flavors are absolutely endless.
These recipes include a fruit roll-up made with rhubarb, strawberries and honey; and another with blueberries, banana, chia seeds and dates. You might also try one with raspberries, peaches and honey. Which one will you try first?
4. Dehydrated Pineapple Chunks
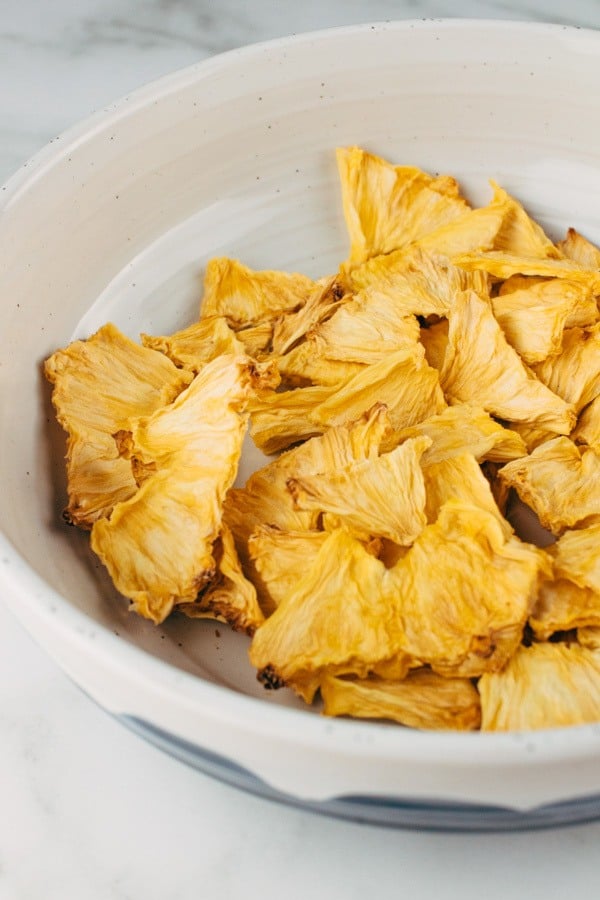
Dehydrated pineapple chunks are health-affirming bites of tasty nutrition. Pineapples have anti-inflammatory properties and are rich in vitamin C, so they are a great snack to have on hand when you are feeling down.
Cut the fresh pineapple in 1/4 inch slices, set in the dehydrator trays and allow them to “bake” overnight.
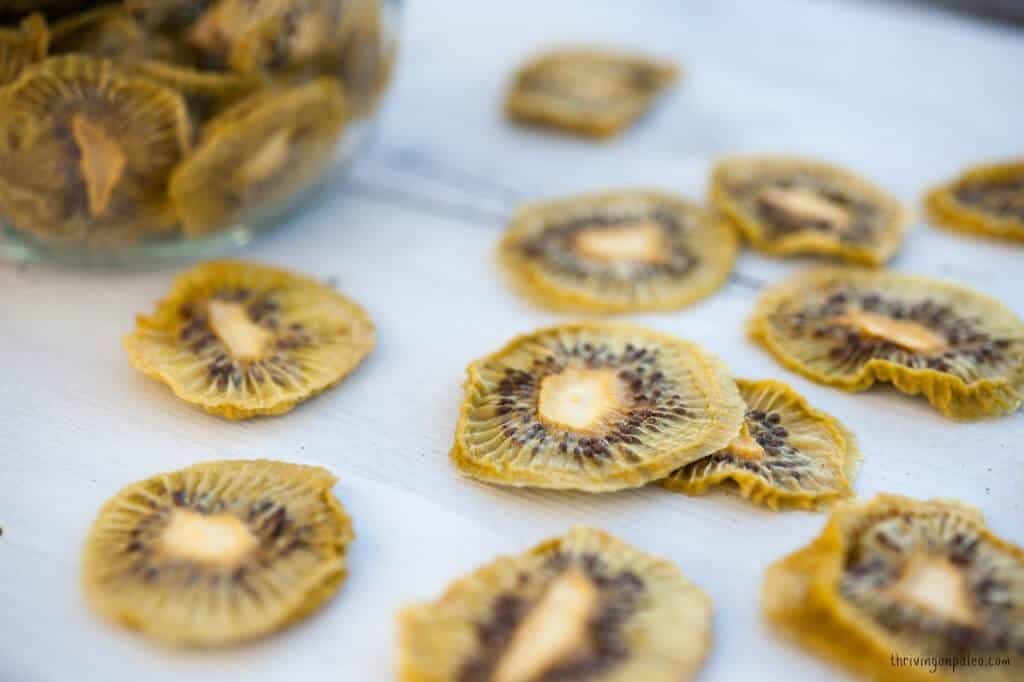
5. Dehydrated Kiwi
Dehydrated kiwi chips might just be the next best snack food, perhaps mixed with some cashews, dried bananas and raw cocoa nibs. These can be dried in an oven or a dehydrator and are oh so easy to make. Just dried kiwi and nothing more!
6. Dehydrated Citrus Slices
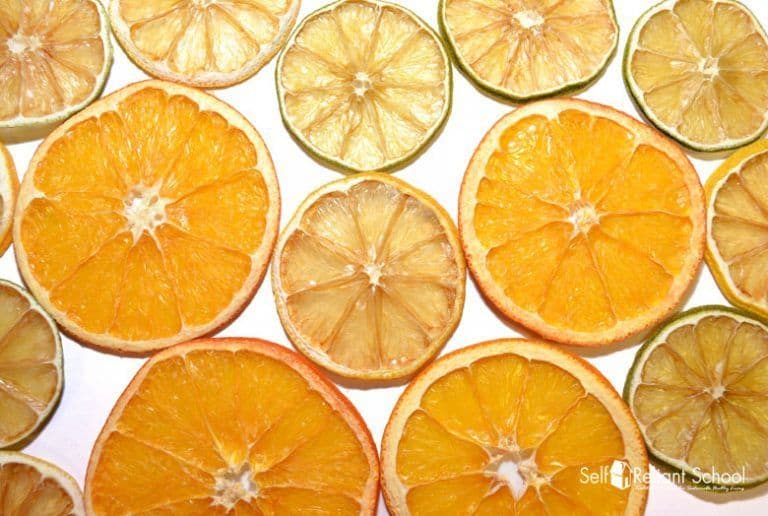
Dehydrated citrus slices (lemons, limes and oranges) are slightly more bitter in dried form than fresh, though the amazing benefits of the citrus are still in there.
The beautiful dried fruit can be used in teas or lemonade, while the skins can be used in a healing citrus powder – perfect for those winter months when you need a little zest to get you through the darker days.
7. Dehydrated Pear
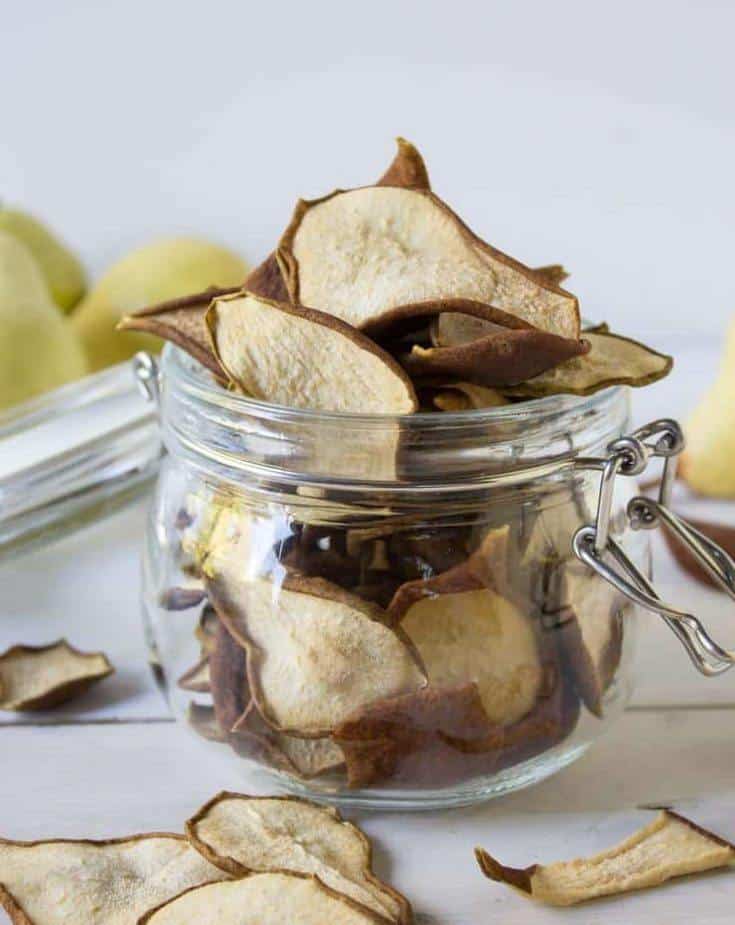
Pear chips are what you make when you have a bushel of pears. Now, you don’t want to wait till they are totally ripe, a little bit green is nice. Plain is perfect, though a dash of cinnamon or clove brings out the best in a pear chip.
Dehydrate your own fruit snacks at home
Rather than sneaking a cake or a cookie, how about grabbing a handful of apple crisps instead? It is better for your body, and also a plastic-free treat when you store your dehydrated fruit in glass jars.
Whether you are dehydrating apples, oranges or bananas the process is essentially the same.
Start with the best fruit you can find, wash it, cut it evenly, space the slices (untouching) on your dehydrator racks or baking sheets and wait till the time is right to remove them from the heat.
It is all a matter of time, moisture and temperature combined with patience that determines your success. If you don’t get it right the first time, try and try again. In the meantime, enjoy every sweet little bite.
When you have mastered the art of dehydrating fruits, next you can move onto vegetables, mushrooms and meats.
It is fun stuff, and that is a promise!
Please share your fruit dehydrating successes and failures with us in the comments below!
Pin This To Save For Later


Get the famous Rural Sprout newsletter delivered to your inbox.
Join the 50,000+ gardeners who get timely gardening tutorials, tips and tasks delivered direct to their inbox.