


If you’ve ever wanted to try your hand at making cheese give mozzarella a try.
- It’s super simple.
- It only takes about half an hour.
- And you can eat it right away.
No aging, no waiting, just delicious cheese in half an hour.
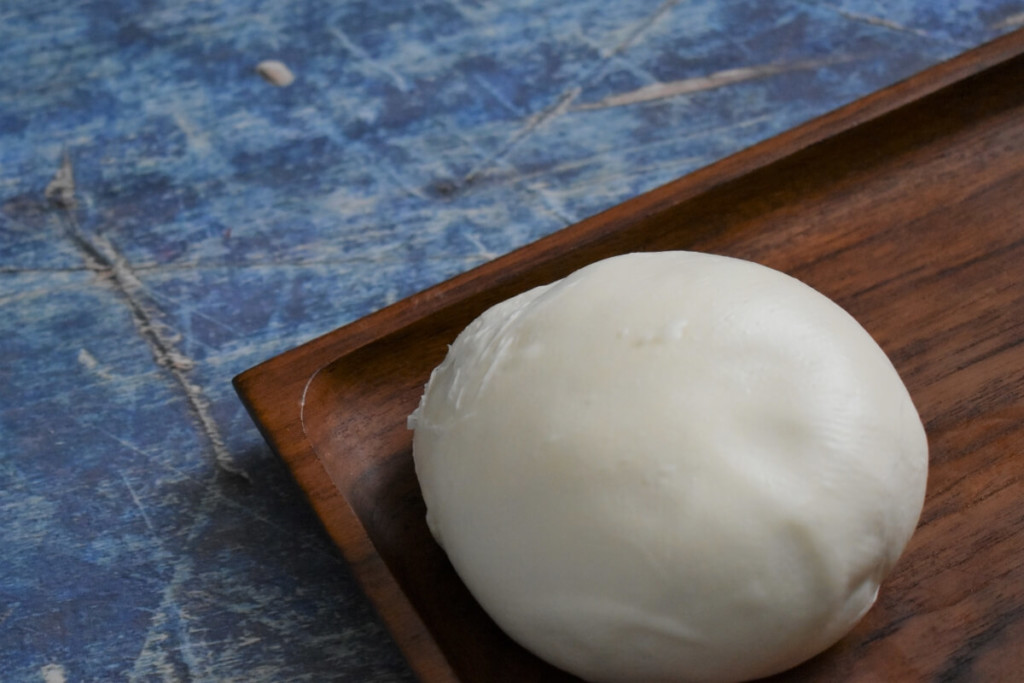
Homemade fresh mozzarella is unlike any mozzarella you’ve ever eaten.
Forget that shredded stuff in a bag. Forget those tasteless bricks wrapped in plastic.
Even the fancy ‘fresh’ mozzarella you can get at the store bobbing in vats of whey doesn’t compare to the wonderful pillow of cheese you are about to make.
In fact, I would be seriously surprised if this mozzarella even makes it to the fridge.
Mine sure didn’t.
Before you begin, I strongly encourage you to read through the directions a couple of times.
You’ll understand the process better, and you can move smoothly from step to step. Making mozzarella isn’t complicated, but it can feel a little daunting if you’ve never made cheese before.
I promise, soon you’ll be eating delicious mozzarella and thinking about buying another gallon of milk so you can make another batch.
Ingredients
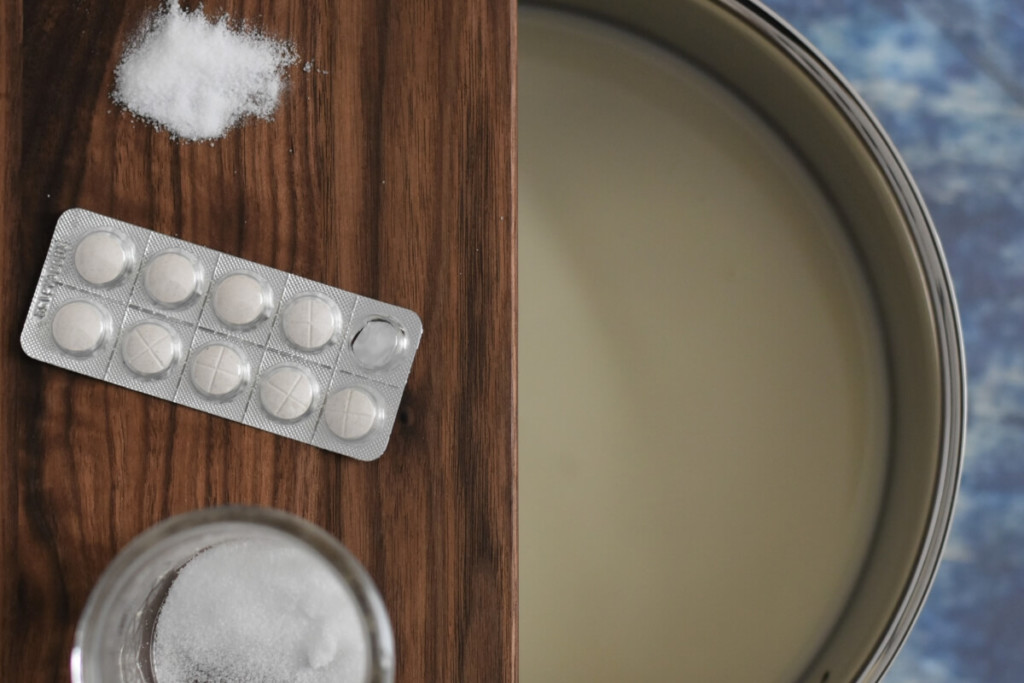
You only need salt, milk, rennet, and citric acid to make mozzarella.
That’s it. Four simple ingredients, all of which you can find pretty easily.
- One-gallon whole milk
- 1 ½ teaspoon of citric acid
- ¼ teaspoon of liquid rennet or a rennet tablet crushed (for tablet, read manufacturers instructions, you need enough to render one gallon of milk)
- 1 tablespoon of kosher salt
A few things of note when choosing milk:
If you have access to a reputable dairy that has raw milk, I would recommend this over any other option. It’s going to give you a fantastic cheese.
If raw milk isn’t an option, then be sure you purchase milk that is not homogenized or ultra-pasteurized.
Ultra-pasteurized milk is processed at a much higher temperature than standard pasteurization. The proteins in the milk end up broken down and it makes it nearly impossible to make a good curd.
And of course, the fresher the milk, the better the cheese.
Rennet can easily be found in most health food stores or homebrew supply stores, or you can purchase it online.
I prefer liquid rennet when making cheese because it’s one less step I need to worry about.
You can use rennet tablets, which is what I had on hand, but you’ll need to crush the tablet well and mix it in water until it’s dissolved. It’s not difficult, it just adds another step to the process, and I’m all about easy and quick in the kitchen.
And again, powdered citric acid is quite easy to get your hands on. Most homebrew supply stores carry it, or you can purchase it online if you can’t source it locally.
Equipment
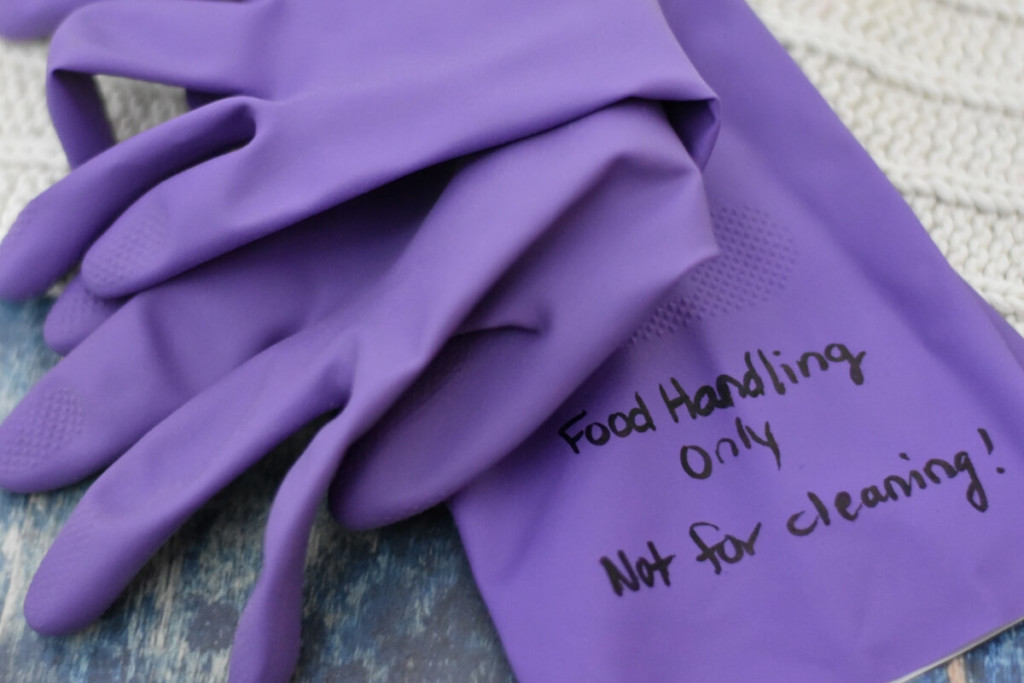
You’ll need two pieces of ‘specialty’ equipment to make mozzarella.
Rubber kitchen gloves. Yeah, I know, you probably already have a pair, but do you really want to make cheese with the same gloves you clean the bathroom with?
I thought not.
Get yourself a new pair and mark them ‘food handling only’ and store them someplace where they won’t get confused with the bathroom cleaning pair.
I keep mine in my drawer with my potholders and kitchen towels. They come in handy for many other hot food handling chores beyond cheese making.
The second item is an instant-read digital thermometer.
Yes, I know, your grandmother made cheese without a fancy thermometer, but she had been making cheese for a long time. Eventually, you’ll get to that point too.
For now, though, you’ll want the thermometer.
This little ThermoPro digital thermometer is inexpensive and will serve you well beyond mozzarella making.
Beyond that, you’ll need a large stockpot, a fine-mesh sieve or strainer, a wood spoon, a long skinny knife or an off-set spatula (like the kind you would frost a cake with), a slotted spoon, a couple of bowls (heat-proof), and a bowl of ice water.
Great, let’s make some mozzarella!
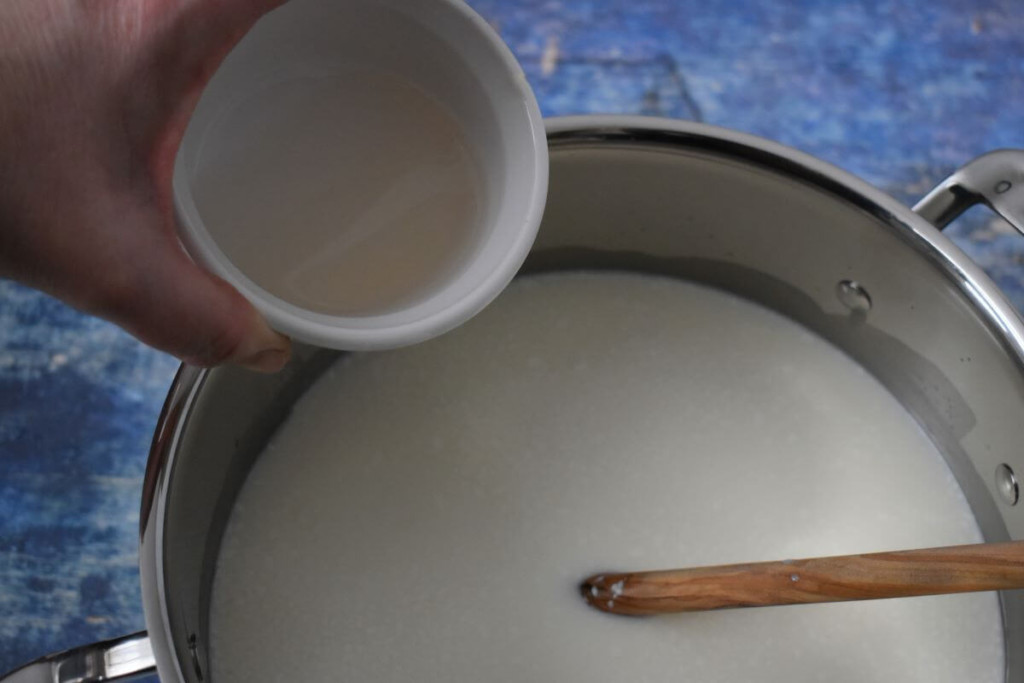
Prepare the citric acid and rennet solutions. Mix 1 ½ teaspoons of citric acid with one cup of lukewarm water, stir until dissolved, and set aside.
Mix ¼ teaspoon of liquid rennet or crushed rennet tablet with ¼ cup of tepid water and set aside.
Pour the gallon of milk into the stockpot and add the citric acid mixture. Stir well and heat over med-low heat. Stir gently every few minutes until the milk reaches 90 degrees F. Remove the milk from the heat.
Rennet magic!
Add in the rennet mixture and stir gently for 30 seconds. Cover the milk and let the rennet do its magic for five minutes.
No peaking!
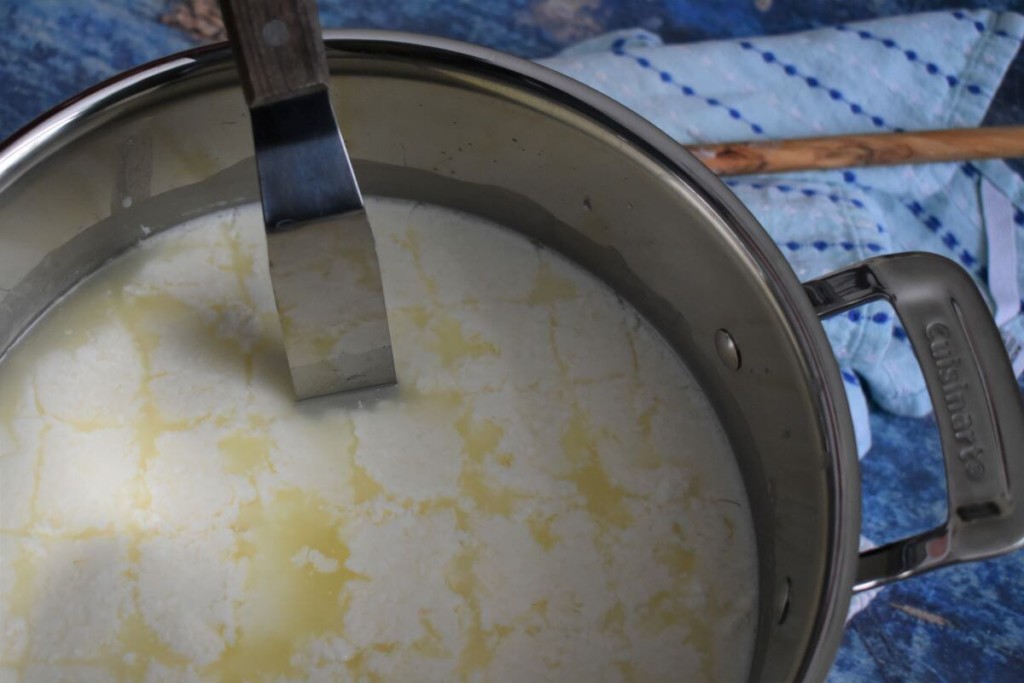
After five minutes, curd should form. You can test by slipping the wooden spoon in at the edge of the pot. The curd should pull away from the side, kind of like milk gelatin. If it’s still a liquid, cover the pot again and let it sit for another five minutes.
Once your curd is set, take your knife or spatula and make slices, all the way to the bottom of the curd in a cross-hatch pattern.
And now we cook!
Place the pot back over the heat, set to low, and bring the curds up to 105 degrees F. You want to stir them occasionally being very gentle. Try not to break up the curds.
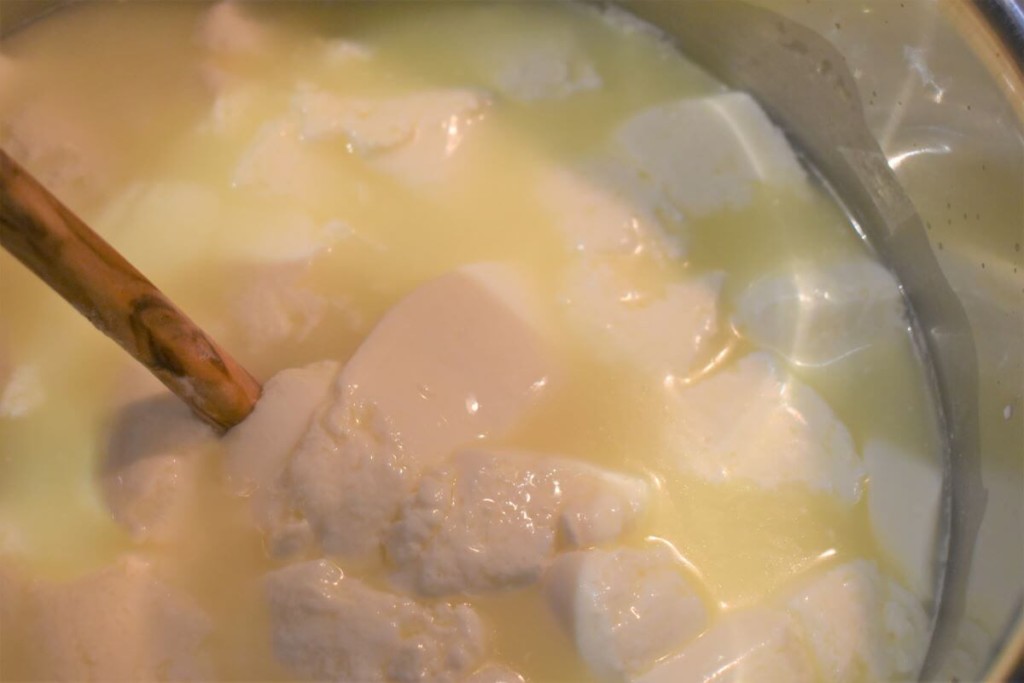
Now remove the pot from the heat and let it stand for about 5-10 minutes.
Put a sieve or strainer over a bowl and using the large slotted spoon scoop out the curds and into the sieve.
Gently press the curds down to squeeze out the whey.
Once you’ve removed all of the curds to the strainer, let them drain for about 10 minutes.
At this point, the curds will mostly be in one large mass.
Remove the curd to a clean cutting board and cut into two or three similar-sized masses.
While you’re waiting, put the pot with the whey in it back on the stove and add the tablespoon of salt. Heat over medium heat to 180 degrees F.
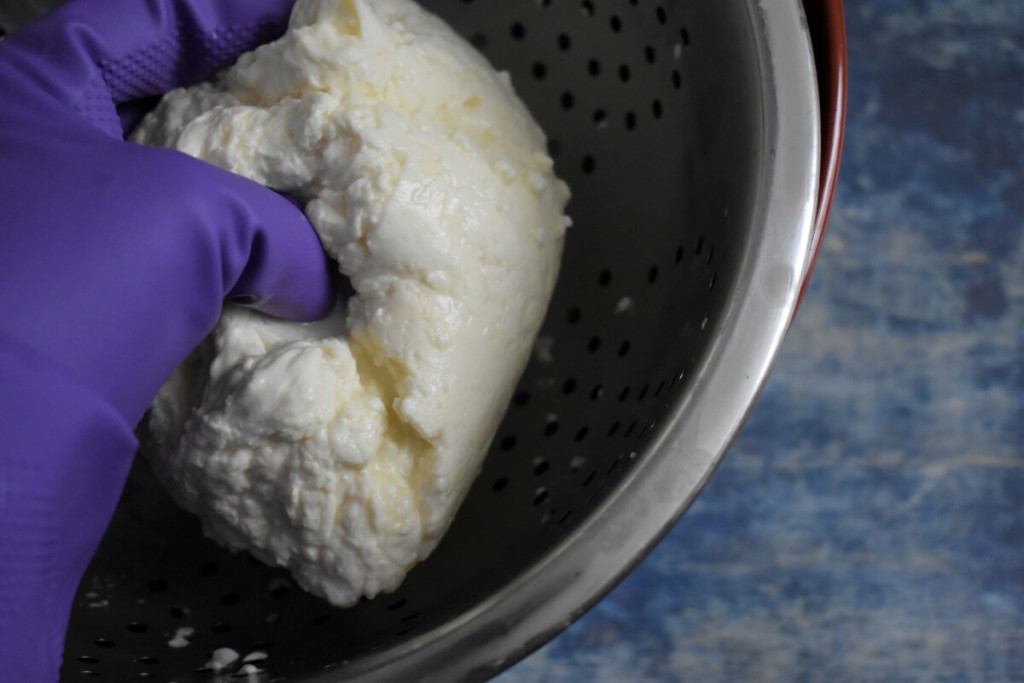
Pour some of the hot whey into a bowl and add one of the curd blobs. Put your gloves on and get ready to stretch some cheese!
Pick up the curd mass and check the temperature when it reaches an internal temperature of 135 degrees F begin to pull the cheese.

Easy does it!
Basically, slowly pull your hands apart and let gravity do the work. Try not to tear the cheese; it should be smooth, silky and elastic.
If the cheese gets too stiff, return it to the hot whey and let it return to 135 degrees F.
You want to end up with cheese that is smooth and shiny; this doesn’t take much stretching. Between 3 to 5 stretches should do the trick.
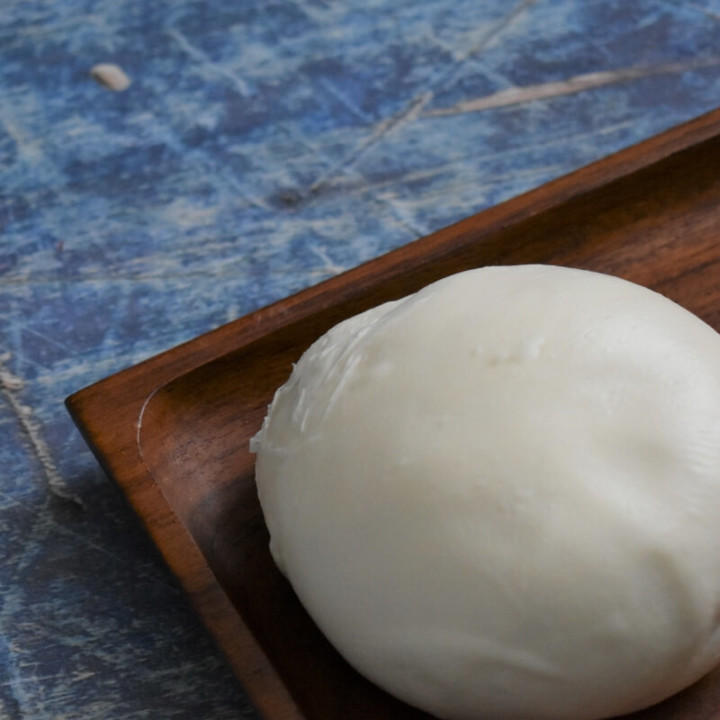
Now comes the hardest part, and it’s not that hard at all – making a ball.
Wrap the cheese curd in on itself, forming a ball and tucking the edges up under the bottom. You may have to exert some pressure and twist it a little to get it to stick.
This is why it’s easier to do three smaller mozzarella balls rather than one large mass. I dipped my mozzarella ball back in the hot whey for a moment to get the edges to fold under properly.
Setting your cheese
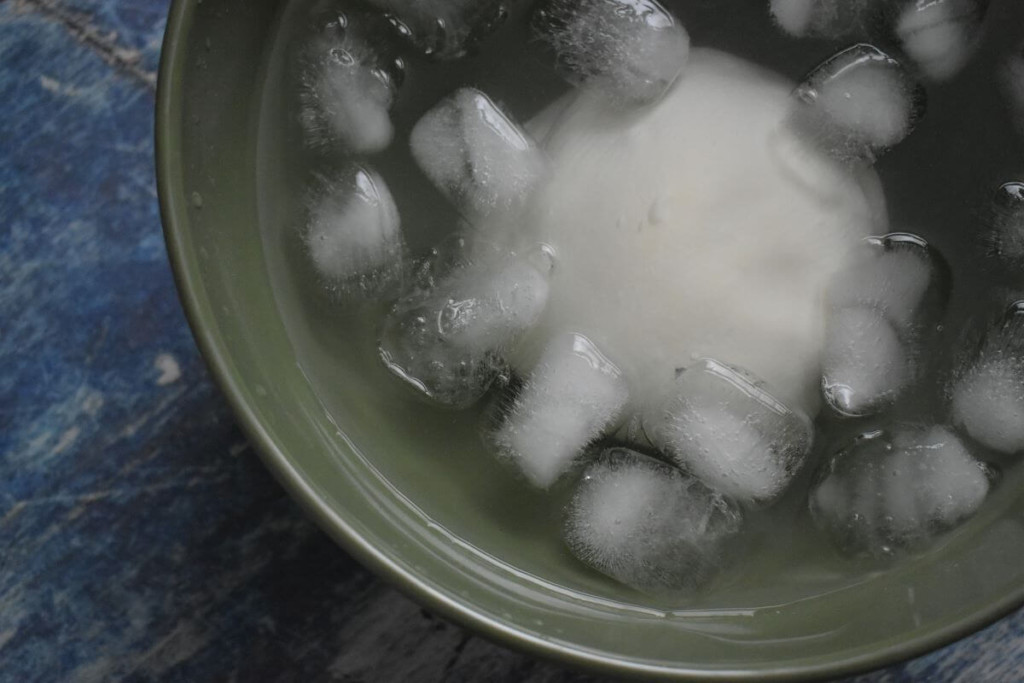
To set your cheese, you can place it in a bowl of ice water for 2-3 minutes or put it in a bowl of room-temperature salted whey for 10-15 minutes.
If you’re impatient, ice water is best, but for the best flavor, go with the whey.
Enjoy!
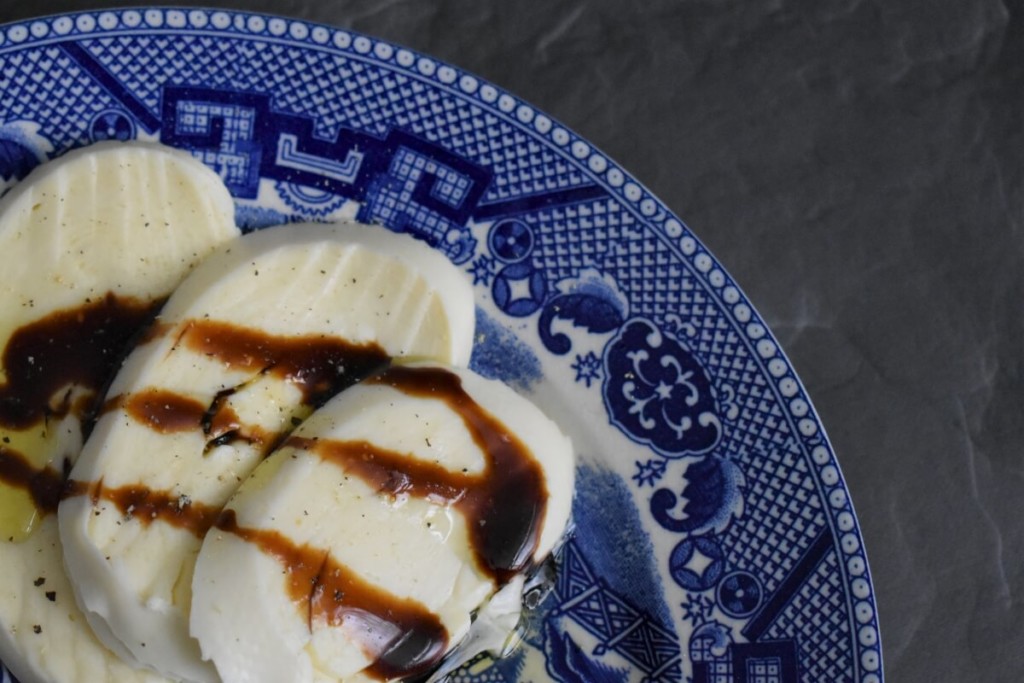
Pat dry and gobble it up drizzled with good olive oil, fresh basil, and balsamic vinegar. If any of it doesn’t get eaten immediately, store it in a bowl or jar immersed in whey. Eatthe mozzarella within a couple of days.
And save that whey, you can put it to good use.
And no, it’s not too late to get another gallon of milk and make more.
Tips and Troubleshooting for the Best Mozzarella
- Remember when I said you should read the instructions through once or twice before beginning? Yup. Go back to the top, and I’ll see you down here again in a few minutes.
- Enlist the help of a partner. Until you make a few batches and begin to remember the process, it helps to have someone who can read the next step or two out loud while you’re working.
- If you choose to make a smaller batch and use less than a gallon of milk, measuring the rennet can be tricky. To make it easier, mix the rennet with the tepid water as if you were making a full gallon and then divide the rennet and water mixture for use with a half/third/or quarter gallon.
- After cutting the curd and heating them back up to 105 degrees be sure to stir those curds slowly! Even the word stirring is misleading. You want to shift the curds gently, not slog them around.
- Make sure you’re using an accurate thermometer. Having the correct temperature is critical. If you’re not sure, test your thermometer on boiling water. A digital thermometer is best; they’re relatively cheap these days and give you much more accurate readings.
- Be mindful of your ambient temperature. Making cheese in a cold (below 65 degrees) or a hot kitchen (75 or higher) can affect your cheese. If you’re working in either of those conditions, check your milk/curd temperature more often.
- Watch that temperature! Raising the temperature beyond 105 degrees can result in crumbly, ricotta. Which if that happens, by all means, use it. But remember to watch your temperature in the future.
- When mixing your rennet solution, non-chlorinated water is best. If your city has chlorinated water, you can set your water out for 48 hours for the chlorine to evaporate.
- If you’re not getting a lot of curds, check the date on your rennet. Rennet does have a shelf-life, and it should be stored somewhere dark and cold.
- Fresh, fresh, fresh! Use the freshest milk possible! Check those dates. Milk slowly acidifies as it ages, meaning you’ll get crumbly curds if you use older milk.
- If at first, you don’t succeed, try try again. Now and then, I’ll get a batch that doesn’t turn out. I go back and look at what I did and can usually pinpoint where I went wrong. But sometimes things just go wonky for reasons we can’t figure out. Don’t give up, keep trying. Eventually, you’ll get it right.
Homemade Fresh Mozzarella In Under 30 Minutes
Fresh mozzarella is one of the quickest and easiest cheeses to make! It only takes about half an hour and you can eat it right away!
Ingredients
- One-gallon whole milk
- 1 ½ teaspoon of citric acid
- ¼ teaspoon of liquid rennet or a rennet tablet crushed
- 1 tablespoon of kosher salt
Instructions
- Mix 1 ½ teaspoons of citric acid with one cup of lukewarm water, stir until dissolved, and set aside.
- Mix ¼ teaspoon of liquid rennet or crushed rennet tablet with ¼ cup of tepid water and set aside.
- Pour the gallon of milk into the stockpot and add the citric acid mixture. Stir well and heat over med-low heat. Stir gently every few minutes until the milk reaches 90 degrees. Remove the milk from the heat.
- Add in the rennet mixture and stir gently for 30 seconds. Cover the milk and let the rennet do its magic for five minutes.
- After five minutes, curd should form. You can test by slipping the wooden spoon in at the edge of the pot. The curd should pull away from the side, kind of like milk gelatin. If it’s still a liquid, cover the pot again and let it sit for another five minutes.
- Once your curd is set, take your knife or spatula and make slices, all the way to the bottom of the curd in a cross-hatch pattern.
- Place the pot back over the heat, set to low, and bring the curds up to 105 degrees. You want to stir them occasionally being very gentle. Try not to break up the curds.
- Remove the pot from the heat and let it stand for about 5-10 minutes. Put a sieve or strainer over a bowl and using the large slotted spoon scoop out the curds and into the sieve. Gently press the curds down to squeeze out the whey. Once you’ve removed all of the curds to the strainer, let them drain for about 10 minutes. At this point, the curds will mostly be in one large mass. Remove the curd to a clean cutting board and cut into two or three similar-sized masses.
- While you’re waiting, put the pot with the whey in it back on the stove and add the tablespoon of salt. Heat over medium heat to 180 degrees. Pour some of the hot whey into a bowl and add one of the curd blobs. Put your gloves on and get ready to stretch some cheese!
- Pick up the curd mass and check the temperature when it reaches an internal temperature of 135 degrees begin to pull the cheese. Slowly pull your hands apart and let gravity do the work. Try not to tear the cheese; it should be smooth, silky and elastic. Between 3 to 5 stretches should do the trick.
- Wrap the cheese curd in on itself, forming a ball and tucking the edges up under the bottom.
- To set your cheese, you can place it in a bowl of ice water for 2-3 minutes or put it in a bowl of room-temperature salted whey for 10-15 minutes.
- Pat dry and enjoy!
Pin This To Save For Later

Read Next: How To Make Butter From Cream In 20 Minutes

Get the famous Rural Sprout newsletter delivered to your inbox.
Join the 50,000+ gardeners who get timely gardening tutorials, tips and tasks delivered direct to their inbox.