

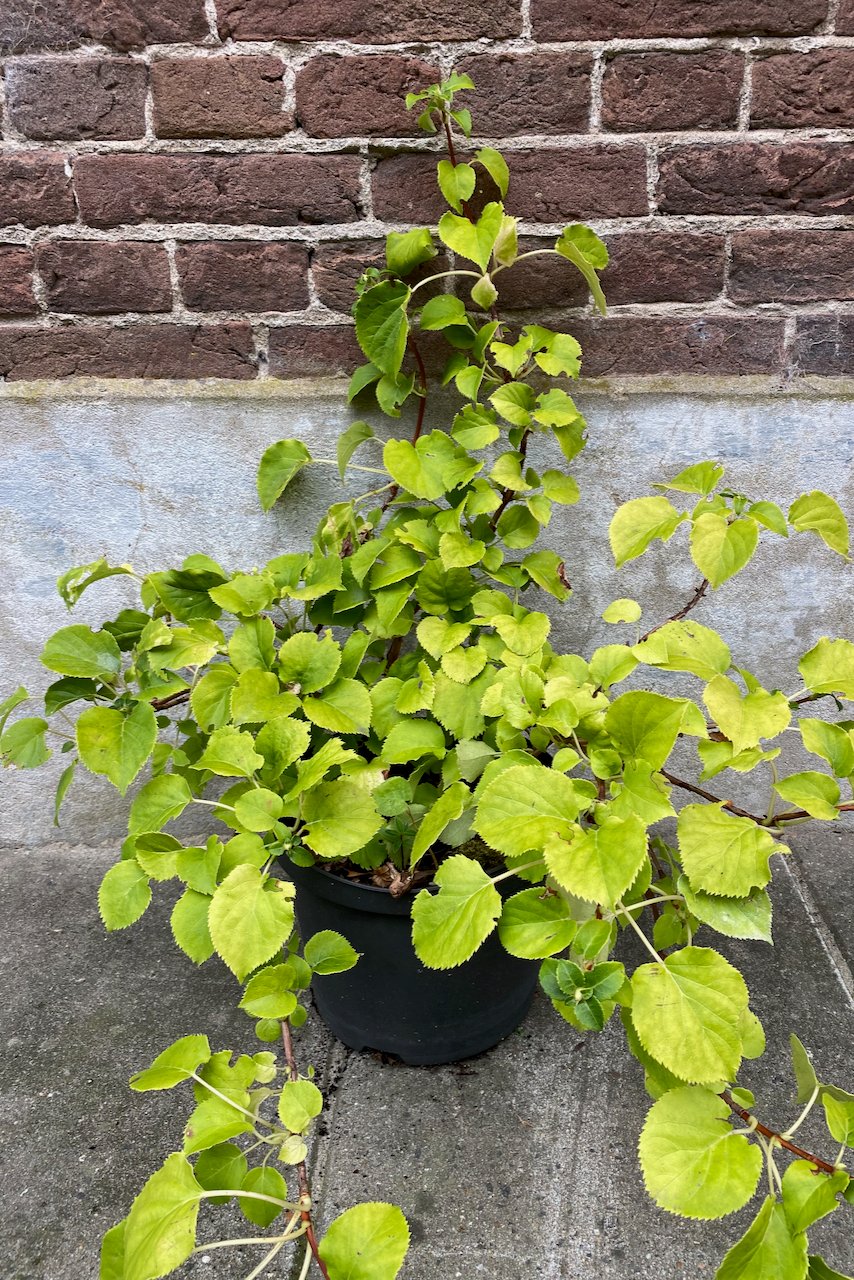
Back in August, we published an article in which I was advising our readers on what plants we can take cuttings from. Next to dividing plants (which I also talked about here), I think taking cuttings is the most straightforward way to make more plants for free.
But there’s another way to propagate that I think, frankly, should get more attention. I’m talking about layering.
In the context of gardening, you’d be forgiven for thinking that I’m referring to combining layers of plants of different heights to get a certain visual effect. At least that’s how I see it used quite often in gardening magazines.
Nope, that’s not what I mean at all.
Layering refers to a method of propagating plants that mimics natural processes.
I bet you’ll figure out what it means and how to do it if you think about how ivy propagates. As soon as a leaf node touches the ground, it starts growing roots. (To be fair, the ivy in my garden started growing roots also when it touched the wooden deck, so the soil part is not mandatory.)

This process is also how strawberries send runners out that turn into new baby plants. Or even lower tomato branches that start growing roots the second they make contact with some bare soil. Houseplants, such as pothos and spider plants, are pretty good at layering, too.
When we propagate by layering, we’re the ones who nudge the plants along to make contact with the soil.
Once new roots form and become sturdy enough to sustain the new plant, we can then cut off the baby plant. And just like that, we get more plants!
In a sense, we are taking a cutting, but we’re delaying the actual cutting part for a couple of months.

I should probably mention now that both cuttings and layering are methods of vegetative propagation, which means that the new plant is an exact clone of the parent plant. Genetically, it will have the same characteristics, including color, leaf shape and size at maturity. All other environmental factors being equal, of course.
What’s the best time to do layering propagation?
The nice thing about this method is that we can set it up at any point in the year. Because we’re not cutting or disturbing any part of the plant, it doesn’t have a season, per se.
I’ve done it successfully both in the spring and in the fall. In spring, the plants are restarting their active growth, so there’s plenty of energy for growing new roots. In the fall, there’s still enough moisture and warmth in the soil, and the plants haven’t entered their dormant period yet. Hopefully, the plants are also over the stress of hot and dry long summer days.
Here’s why I think you should give layering propagation a try!
I’m a big believer in having a lot of tools under my belt. (And not just because I constantly lose my garden shears.) In this case, tools means skills and knowledge and perhaps the curiosity to try new things, even if they seem intimidating at first.
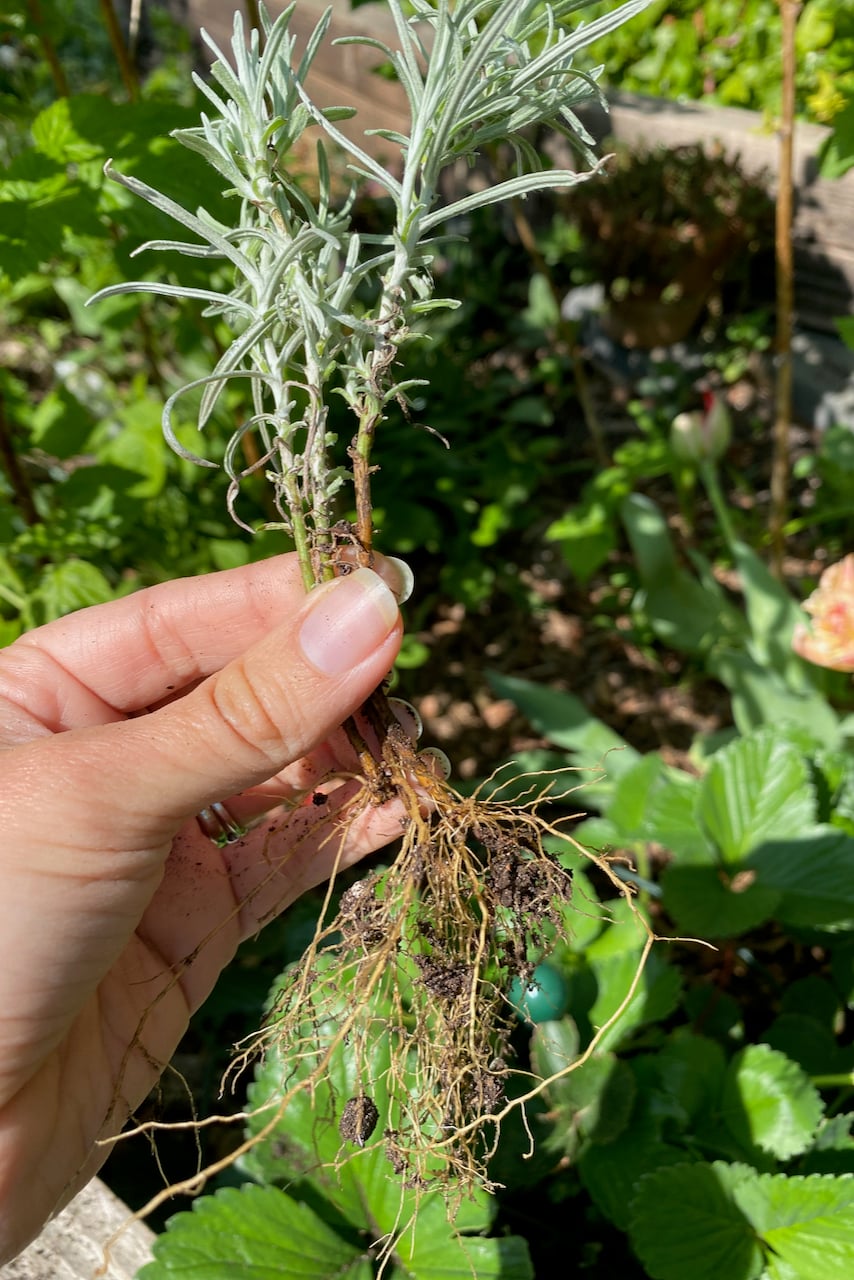
Propagating via layering can help us avoid the pitfalls of taking cuttings.
Since the stem we’re layering remains attached to the parent plant while the roots form, it also receives nutrients and water from the main plant.
Conversely, when we take cuttings off the main plant, we are the ones who have to provide the water and nutrients for that cutting to form roots.
Some cuttings are easy to root, but others are a bit more fussy. Usually, I fully embrace the fuss. But sometimes I get frustrated that methods that work flawlessly for one type of cutting won’t work for another type.
I confessed in this article that I was taking a lot of rhododendron cuttings just as a backup because I’ve had a high failure rate with propagating these shrubs. Luckily, rhododendrons are one of the shrubs that we can propagate via layering.
Propagating via layering doesn’t shock the plant like division does.
Again, I will not shy away from dividing plants. I’m a big fan of the magic of taking one plant and turning it into three or four. There are also times when division is necessary for the health of the plant when it becomes too large for the space it occupies.
But having done it so many times, I also recognize the downsides of this method. Digging out the entire root clump is a shock to the system for perennials. And once we’ve done it, we have to baby them into recovery – usually by mulching them with a layer of nutritious compost and keeping them watered (but somehow not drenched).
When we’re propagating via layering, nothing gets dug out. The parent-plant stays in place. And the propagated stem also stays in place until it grows roots strong enough to survive on its own.
Propagating via layering gives us larger baby plants.
When we take cuttings, we generally take a small piece of the plant, usually between six and ten inches. It wouldn’t make sense to take a large cutting (a whole branch of sage, for example).
First of all, the cut piece wouldn’t have enough energy to sustain itself before root formation if it were too large. And secondly, we can’t really take whole branches, cut them off a shrub and plop them in a pot. They would be cumbersome to handle and impossible to keep properly watered.
So we have to keep cuttings small in order to give them a better chance to grow roots and turn into their own plant. And when they do turn into a stand-alone plant, the bummer is that it’s always a small one.
Sure, it will grow over time. But wouldn’t it be nice to be able to skip this interim period?
When we propagate via layering, we can often use larger pieces of the parent plant to make new plants. So in the end, we end up with larger plants.
Are there any downsides to propagating by layering?
I hope that at this point I’ve convinced you that knowing how to do layering propagation is a good skill to have for a gardener. But are there any cons we should be aware of when we choose this method?
I think the main one is having the space to layer on. As in, the ground space around the main plant. Especially if you have a small garden, like I do.
There may not be much space at the base of and around the plant to bend a rhododendron or camellia branch to the ground and set it in place for a couple of months.
There are ways around that, though, with different setups. We can layer straight on the ground, next to the parent plant. We can stretch the branch from a planted shrub to a container next to it. Or we can layer from one potted plant to another pot.
How long does it take for a layered plant to start growing roots?
That depends a lot on the type of plant. Vines and berries, for example, will root in about a month. Shrubs may take a few months; trees and larger shrubs even longer.
It also depends on the time of year you’re doing the propagation. Is the plant in active growth?
Or has it slowed down in the fall, or just getting started in the spring?
Of course, it matters how well we’re taking care of the layering. Is the soil underneath it, where it touches the ground, well-watered but still well-draining?
Also, is the layering still touching the soil, or has it lifted off the ground? One time, I didn’t notice that the Spirea japonica branch that I had hoped to turn into a new plant was no longer pinned down to the ground. The roots had forme,d but they were now out of the ground and had dried up. So I had to start all over again with a new branch.
Ok, but how do I actually do layer propagation?
I’ve convinced you to give this method a try. Let’s get to it!
Below, I’ll explain three methods we can use to propagate via layering:
- Simple layering (also called ground layering);
- Serpentine layering (also called compound layering);
- Tip layering (also called terminal layering).
All three are useful methods for propagating some herbaceous perennials, as well as vines and shrubs.
You’ll probably notice some plants appear under more than one method. You can have some fun and try more than one method to see which one works better for your garden.
There are two other methods – mound layering and air layering – that I won’t cover in this article, as I believe they’re a bit more complex. And they’re generally reserved for larger shrubs and trees.
Simple Layering Propagation
Here’s how to do simple layering propagation.
Step 1: Select the right branch or stem to layer.
Have a look at the lower branches of the plant you want to propagate. We need to select a branch that’s flexible, healthy and young. First, we should test to see if we can bend this branch without snapping it.
If possible, and especially if we’re layering in spring, we should select a branch that doesn’t have a bud or a flower on it. If it does, we will have to remove it in order to redirect the branch’s energy away from flowering and towards forming roots.
Step 2: Prepare the branch for rooting.
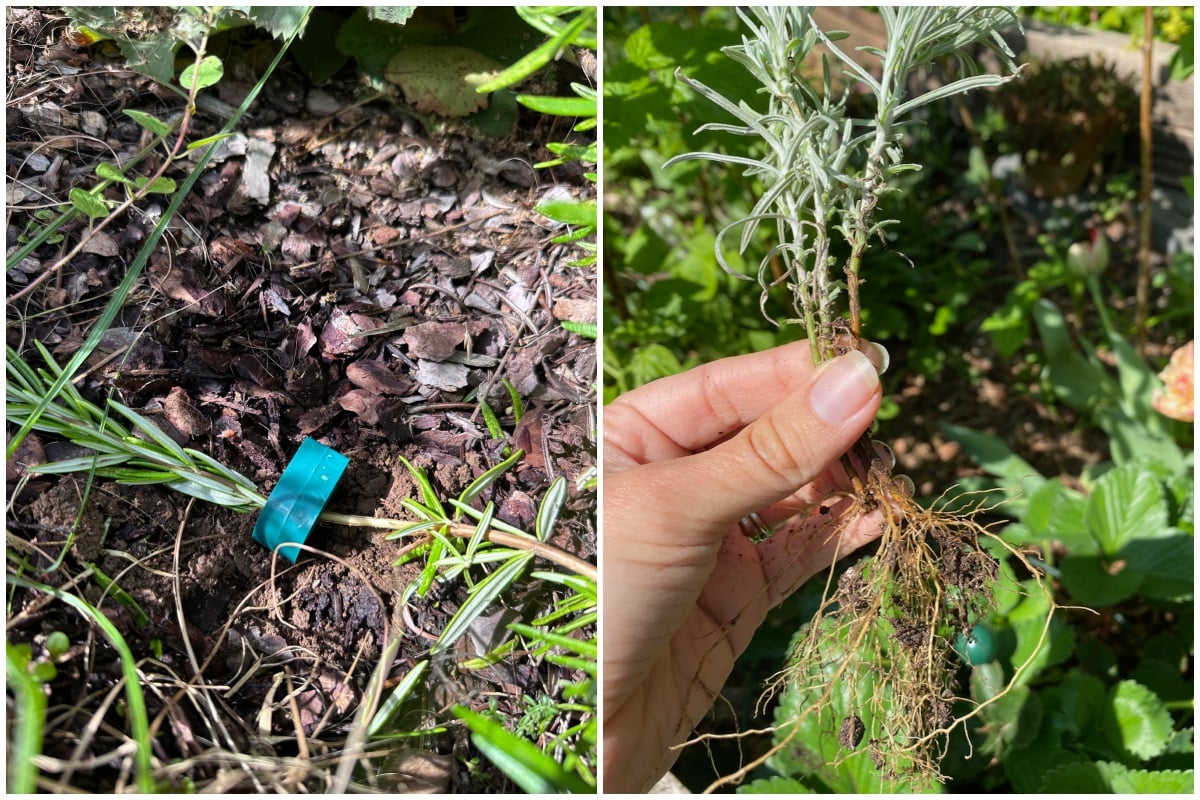
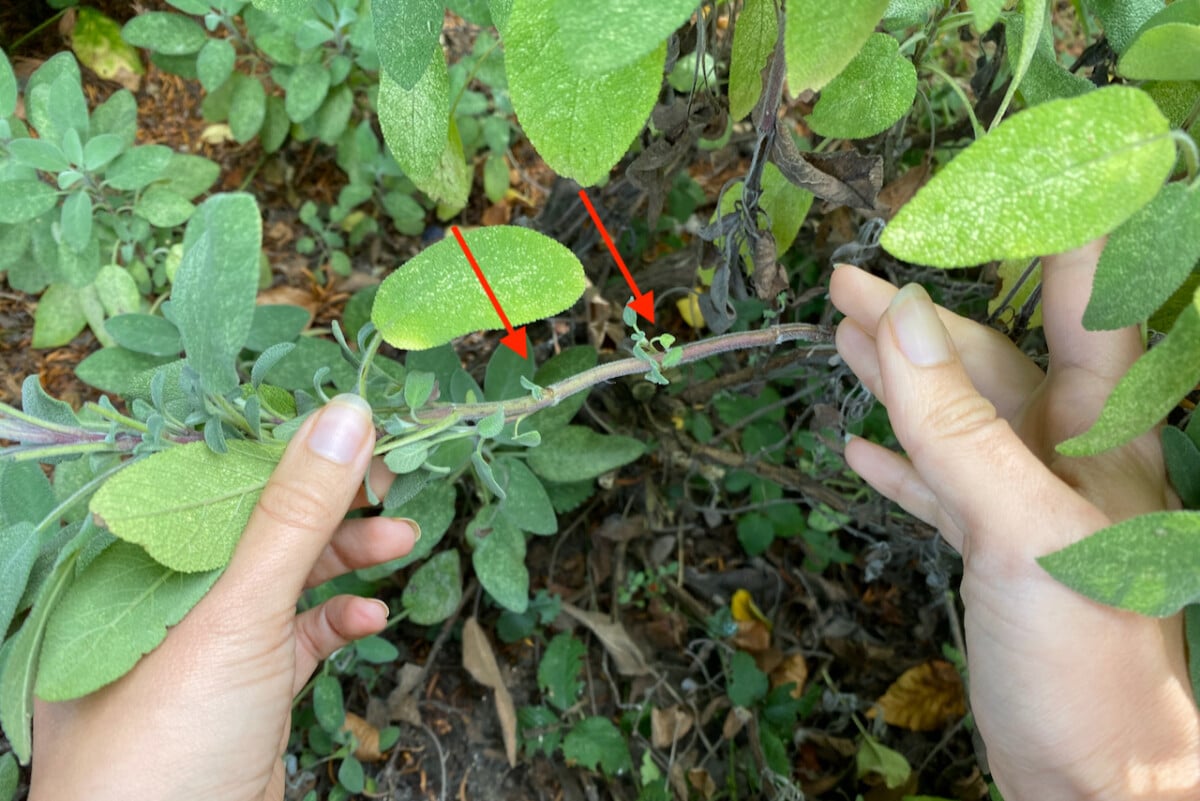
Now that we have our branch selected, we’ll gently lower it all the way down to the ground. Notice where it comes into contact with the soil. Are there any leaf nodes there? Then we have to strip off the leaves to expose the leaf nodes. This is where the new roots will eventually grow from.
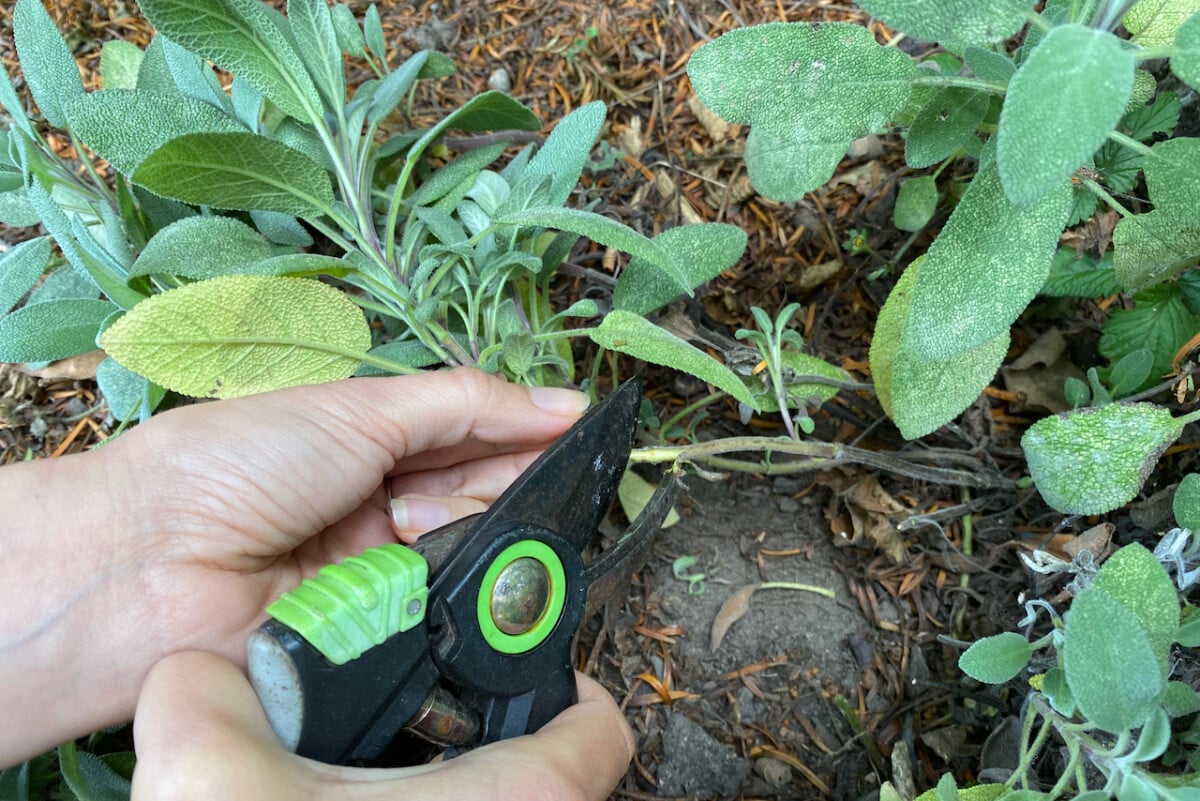
And to speed up the root formation process, we’ll scratch (or score) the first layer off the stem. Don’t cut too much into it. Just enough to uncover the cambium, that light-green or white layer underneath. Remember, the spot where we’re scoring needs to touch the ground.
You can use rooting hormone on this part to speed up the rooting process. Don’t worry if you don’t have any. It will work just as well without it.
Do all these steps sound a bit familiar?
Yes, this is exactly how we prepare cuttings. But you’ll notice that we haven’t made any cuts yet. And we won’t, for quite a long time.
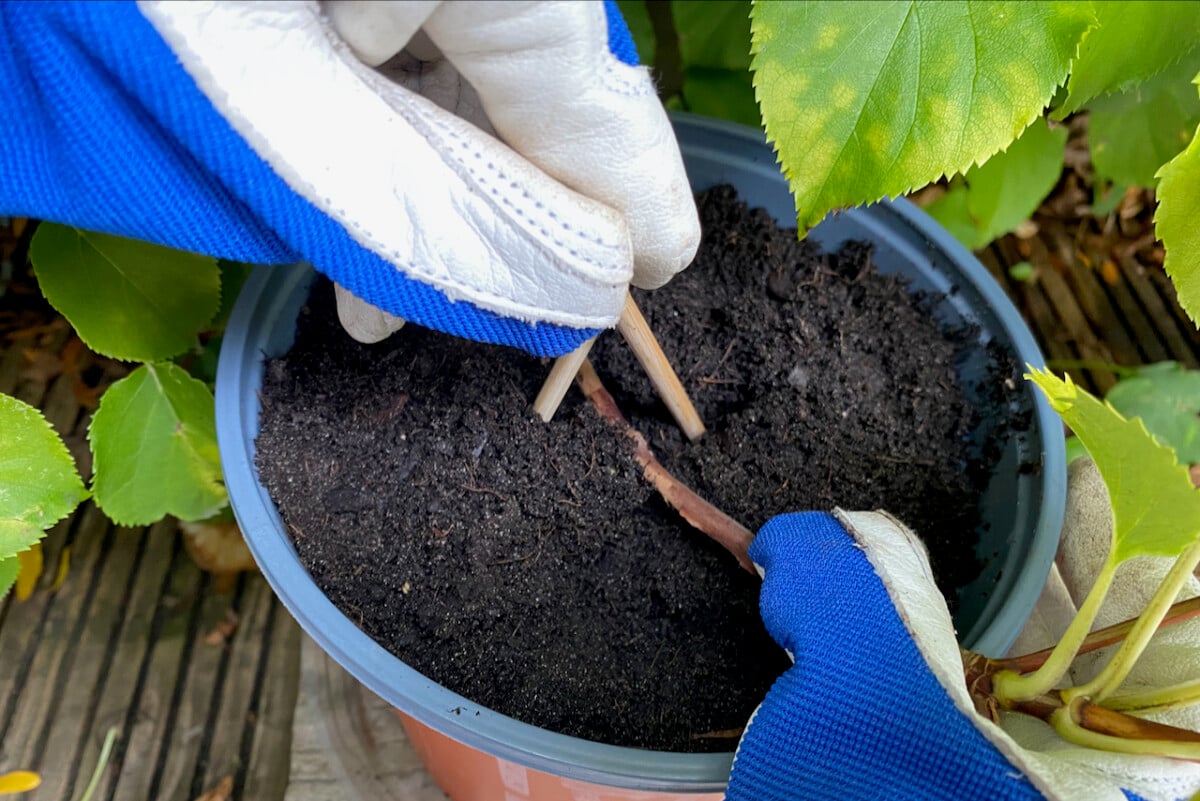
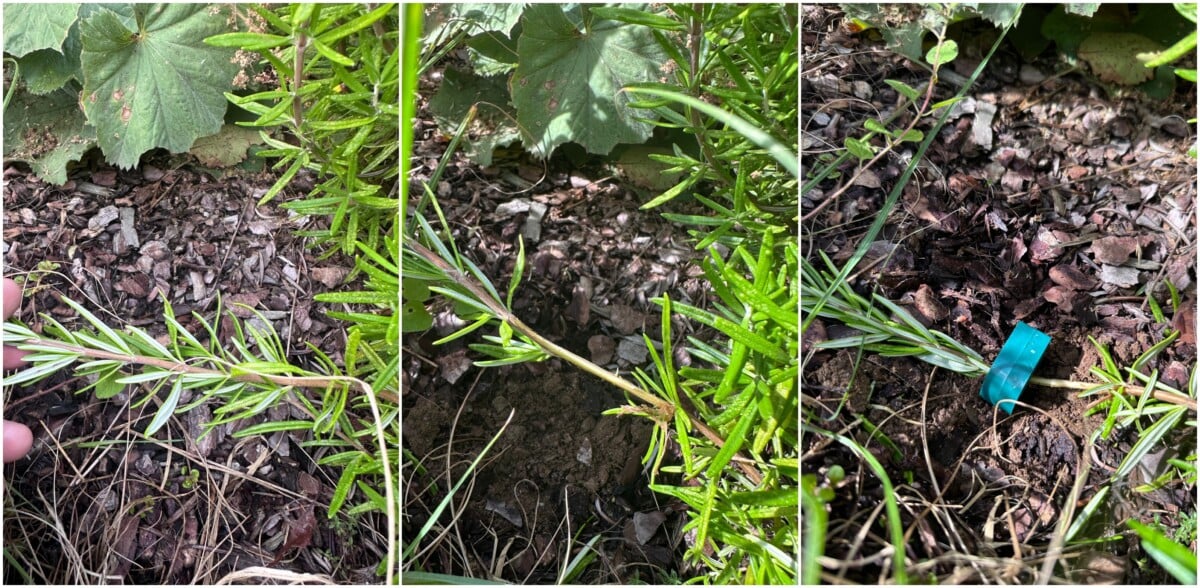
Step 3: Secure the layered propagation in place.
Now that the branch is prepared, it’s ready to layer. Either place it on the ground or dig a shallow “trench” – not more than a couple of inches deep, at most – where the branch touches the soil.

Next we need to secure the branch horizontally. You can use whatever you have to hand, such as some lightweight ground pegs. I prefer to use the chopstick method. Basically inserting two chopsticks in the ground at an angle and having them criss-cross at the top. It’s easier if I show you. I sometimes secure them in place by tying the tops with twine. Once the branch is horizontal and secured, we pile up a bit of soil on top of the portion where it touches the ground.

I’ve also seen some gardeners put a weight – such as a rock or a terracotta pot – on the layered branch to keep it in place. I prefer not to put too much weight stress on the plant if I can make it work a different way.
If you do need a bit of extra weight to keep it down, you can use a small bag of compost or horticultural sand. Something that distributes the weight, not something that concentrates it on the plant that we’ve already bent.
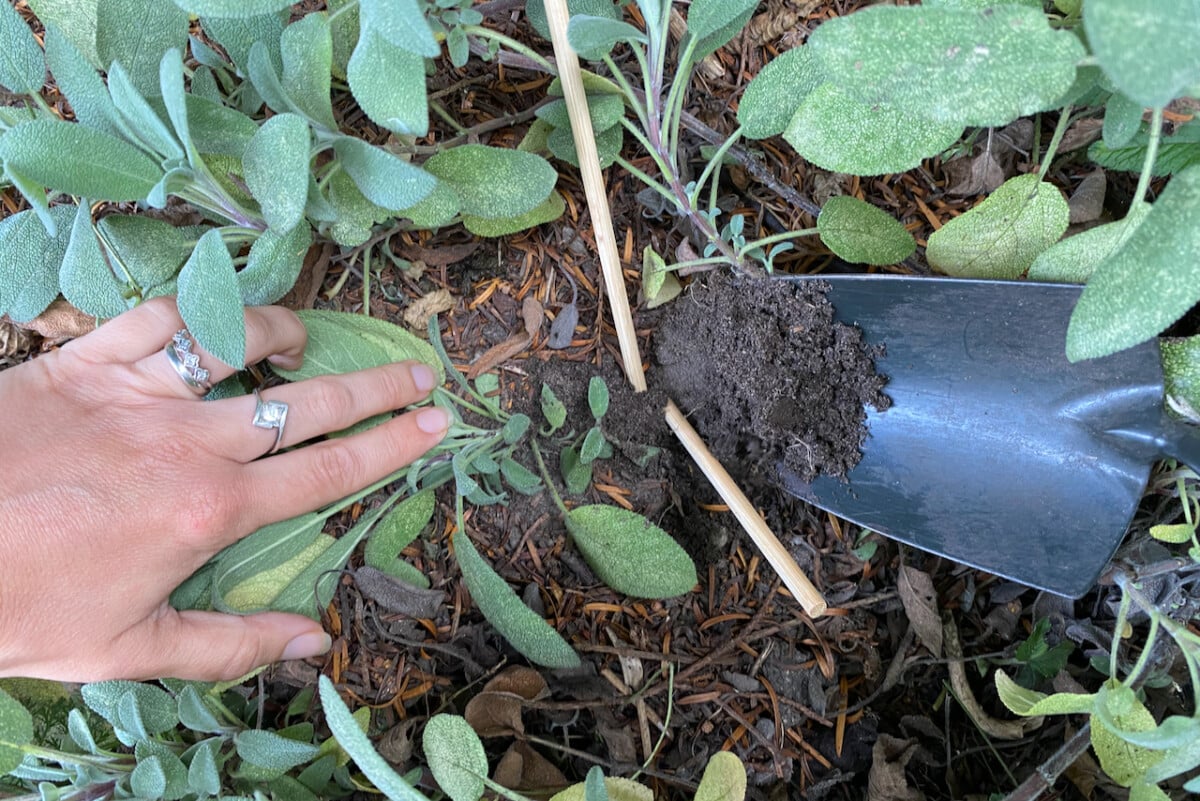
Please note that we will leave the leaves at the top on the layered branch. They will continue to grow and will become part of the new plant.
This method works well for propagating the following plants:
- Abelia
- Bougainvillea
- California lilac (Ceanothus)
- Camellia
- Clematis
- Climbing hydrangea (Hydrangea anomala petiolaris)
- Clusia
- Cola plant (‘Artemisia abrotanum ‘Maritima’ or ‘Cola’)
- Coleus
- Cottoneaster
- Creeping Jenny (Lysimachia nummularia)
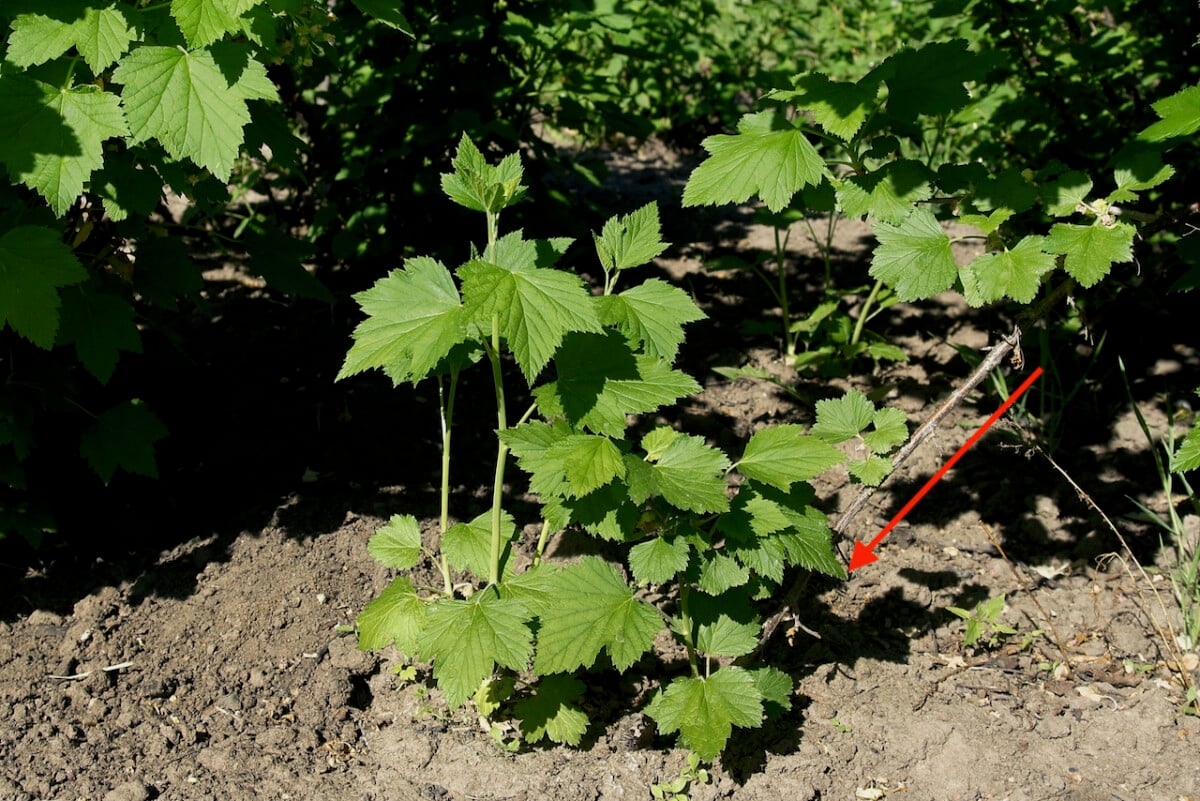
- Currant shrubs
- Curry plant (Helichrysum italicum)
- Daphne
- Fig trees (while they’re young and still have growth close to the base)
- Forsythia
- Heather (Calluna vulgaris)
- Holly (Ilex)

- Honeysuckle (Lonicera) – even better if you’re propagating North American native honeysuckle, such as Lonicera sempervirens , Lonicera canadensis, Lonicera hirsuta or Lonicera flava.
- Hops (Humulus)
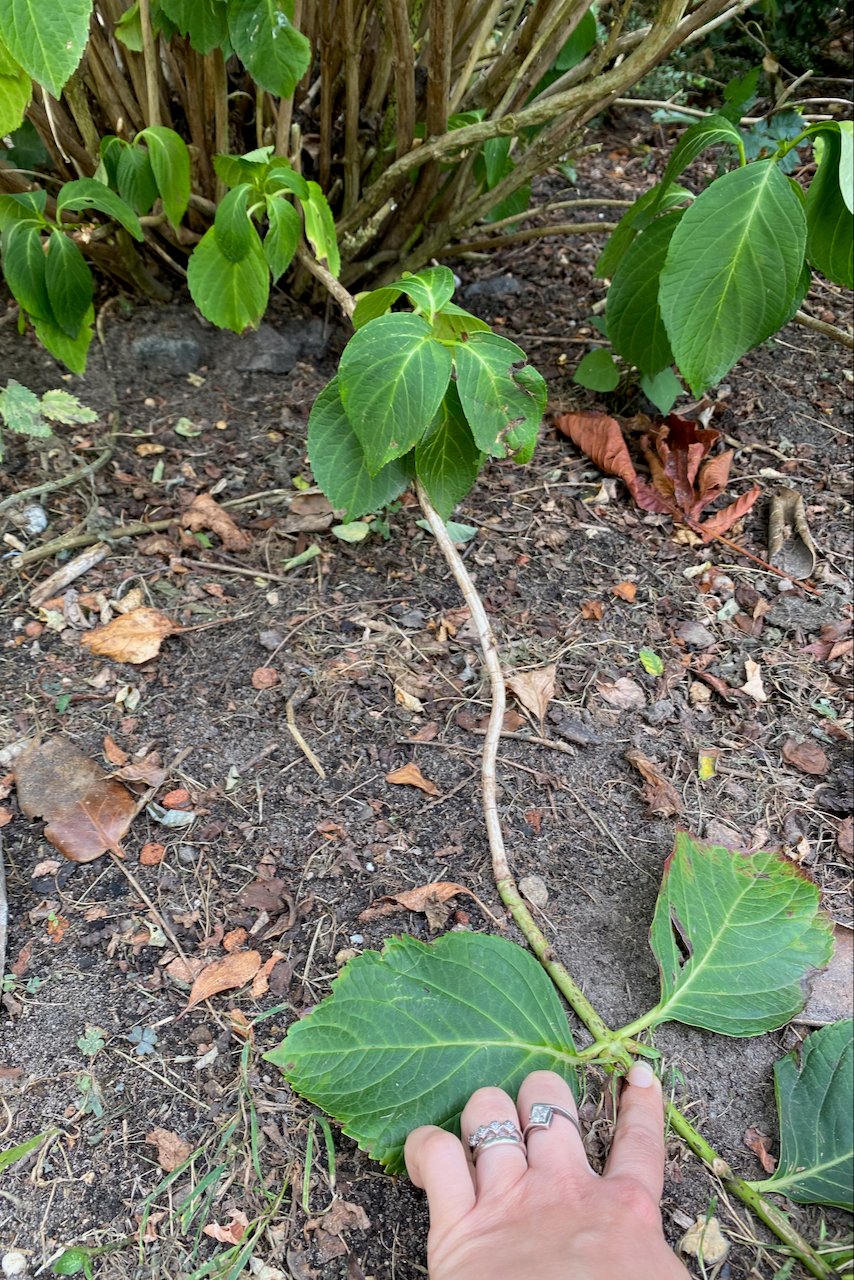
- Hydrangeas, in general, but only the ones that grow on old wood
- Japanese laurel (Aucuba japonica)
- Juneberries (Amelanchier)
- Lavender
- Lavender cotton (Santolina)
- Magnolia
- Mountain laurel (Kalmia latifolia)
- Perennial candytuft (Iberis sempervirens)
- Photinia
- Potato vine (Solanum)
- Pyracantha

- Rhododendron
- Rosemary
- Savory (Satureja)
- Sage
- Smoke bushes (Cotinus)
- Spirea japonica
- Star jasmine (Trachelospermum jasminoides)
- Summersweet (Clethra)
- Southernwood (Artemesia abrotanum)
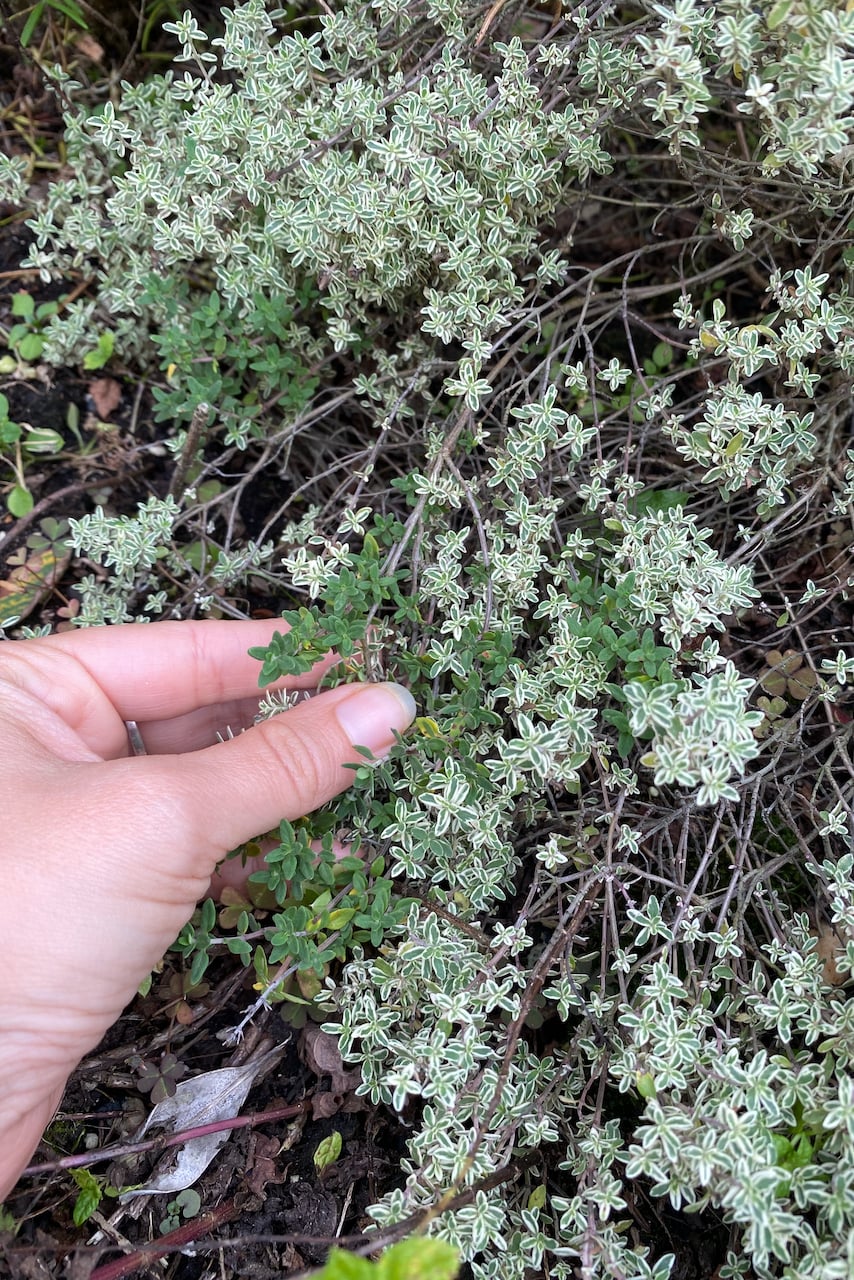
- Thyme
- Wax myrtle or bayberry (Myrica cerifera)
- Weigela
Serpentine Layering (also called compound layering)
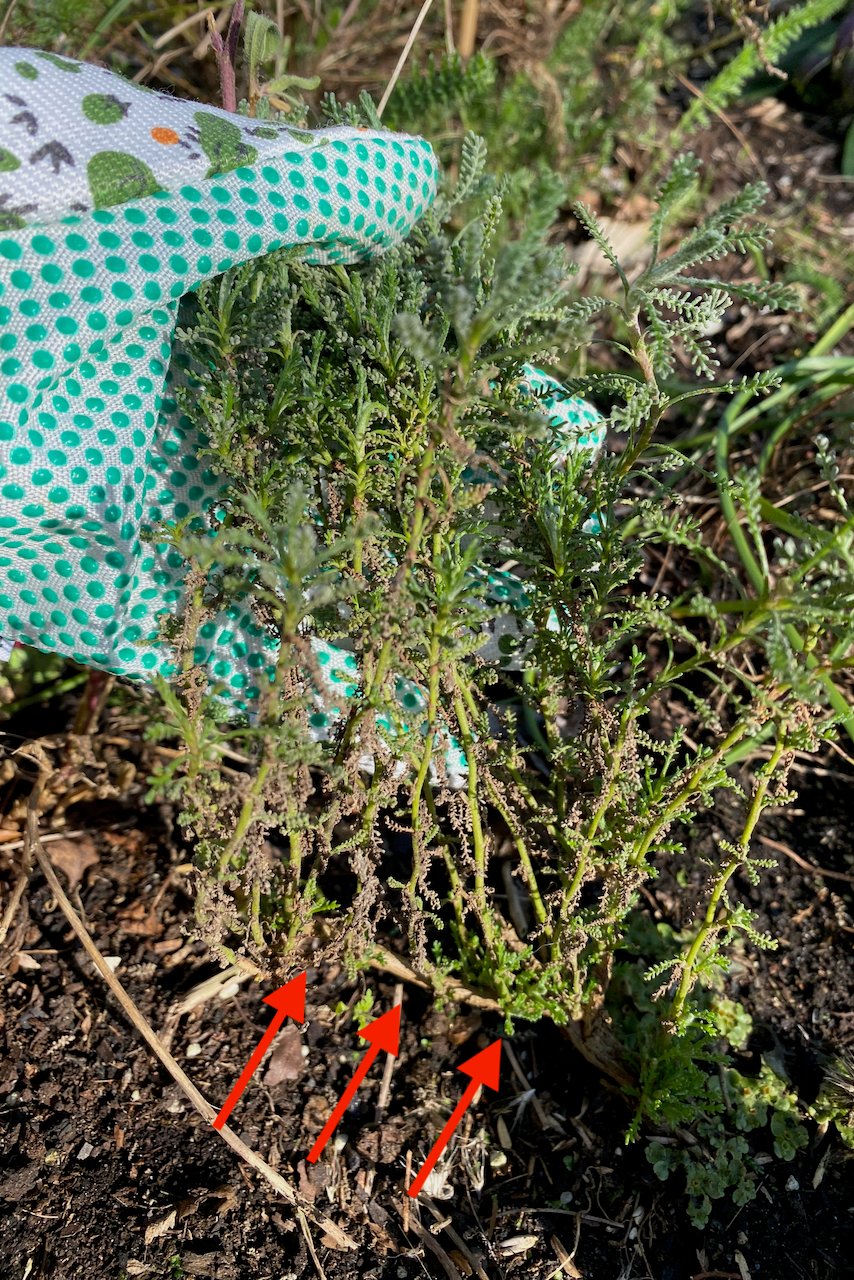
You may have guessed from the name of this method that we’re going to snake our way in and out of the ground with this one. It’s a layering method we use for vigorous vines and climbers. It makes sense, because these are plants with vines long enough to coil around on the ground.

Let us start the same as we did above, by selecting a branch.
These being vines and climbers, the branch will naturally be longer. So after we bend it, we’ll have it touching the ground in multiple places. We’ll alternate between sections (with stripped leaf nodes) covered by soil and sections that we leave exposed above ground.
Imagine a snake going in and out of the ground at multiple points.
We have to treat each buried section as separate, so we’ll strip the leaves, expose the leaf nodes and score the stem at every point the branch goes into the ground.
Can you guess the advantage of this method of layering?
We get more plants from a single branch. Every section that we’ve buried will grow its own roots and turn into its own separate plant.
Tracey, our editor, uses this method with hairpins to help her vining houseplants grow fuller and stronger – you can read about that here.
This method works well for propagating the following plants:
- Bougainvillea
- Clematis
- Climbing roses and rambler roses
- Honeysuckle
- Grapes
- Lemon-scented jasmine (Jasminum azoricum)
- Pothos
- Star jasmine
- Wisteria
Tip Layering (also called terminal layering)
You must have seen this one in action. If not in somebody’s garden then probably in the wild or on a hike. This is how blackberry shrubs often self-propagate. The young canes grow long, bend naturally and touch the ground.
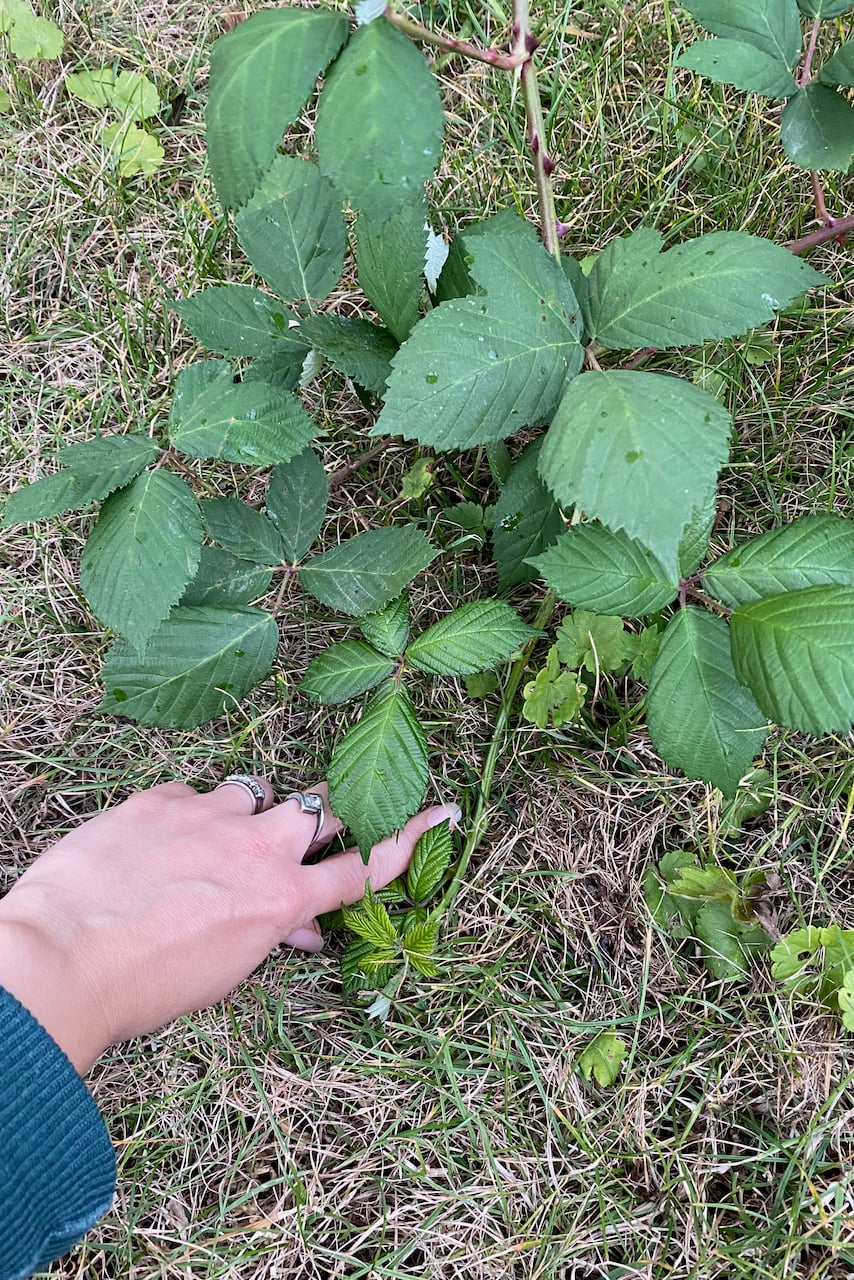
At the point where they touch the ground, they start growing roots. These roots then sustain and start growing a new plant.
Once again, we can mimic nature’s process. All we have to do is bend a flexible branch and prepare it for layering (just as I explained above). We then bury the tip and the section right underneath it (which upside down becomes the section right above it).
Cover it back up with soil. And just to secure it in place, we can stake it to a piece of bamboo.
This method works well for propagating the following plants:
- Blackberries
- Climbing roses
- Dewberries
- Dogwood
- Juneberries
- Loganberries
- Raspberries
- Viburnum
With all these three methods, when the time comes and the new plant is starting to put out its own growth, we can cut the cord that connects it to the main plant. Our baby can stand on its own two feet (its own roots!) and we can delight in knowing that we have mastered yet another way to make more plants for free.
Read Next:

Get the famous Rural Sprout newsletter delivered to your inbox.
Join the 50,000+ gardeners who get timely gardening tutorials, tips and tasks delivered direct to their inbox.