

I was reading a gardening magazine recently, which proclaimed that September is the most productive month in the garden. With veggies basically jumping into our harvest baskets, there’s little arguing with that assumption.
I love me some fresh edible harvest but I also don’t want to overlook the bounty of August. Yes, it’s a month of vacations and generally lounging around. But if the mornings are cool, I’ll take any chance I get to potter around in the garden.
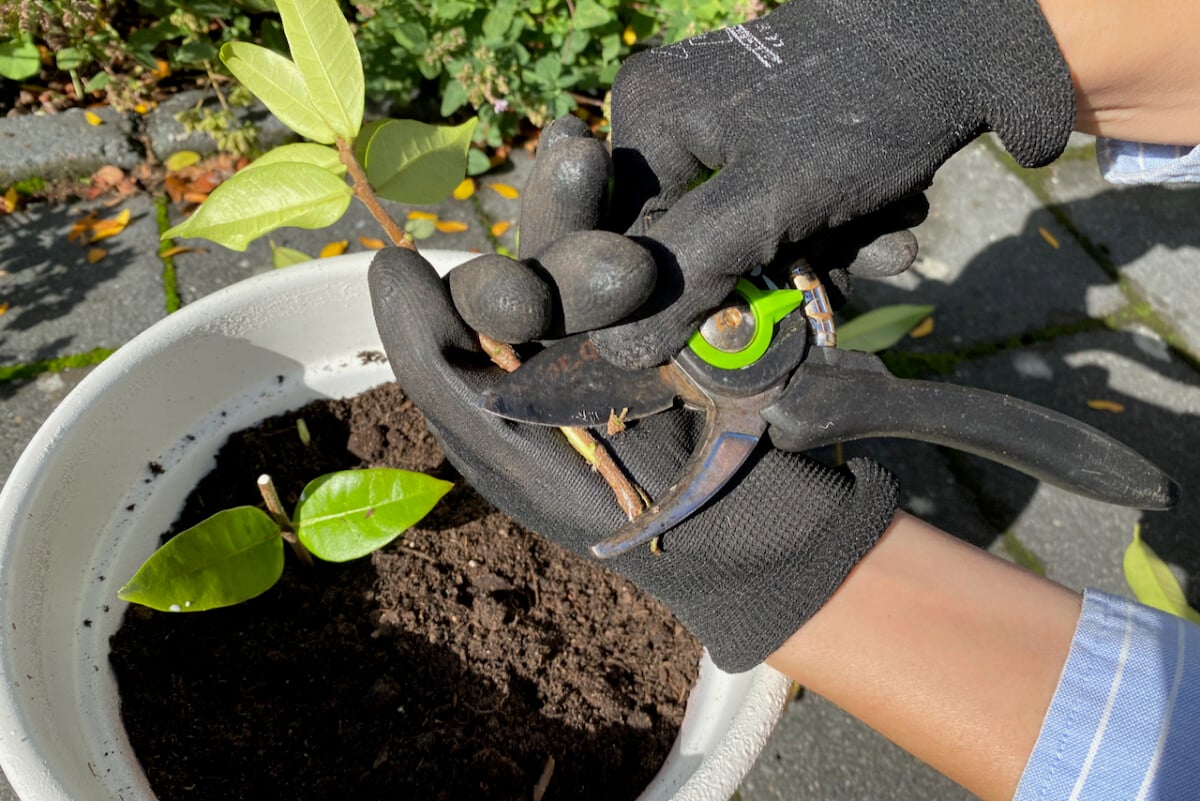
Since nothing beats free plants, let’s talk about a way to make sure we’re all set for a garden expansion come next spring. Grab your garden snips because we’re about to take a handful of cuttings.
Can you really take plant cuttings in August?
Yes, you absolutely can.
I often mention that spring and fall are the optimal times to take cuttings. But we can take cuttings in summer too, as long as we follow a few simple rules.
In my experience, most cuttings fail to form roots due to two reasons.
We either keep them too wet (and the cuttings rot) or we let them get too dry (and the cuttings dry up). When we take cuttings in August, it’s this latter scenario that we have to prevent.
What kind of cuttings can we take in August?
In the summer months, we usually take semi-ripe cuttings. They’re also called semi-hardwood cuttings, which I think is a better way to describe them. It’s neither the fresh growth of spring (softwood) nor the hard stems of fall and winter (hardwood). It’s something in between. A sort of middle-age cutting, if you will.
I put together a list of popular plants that we can take cuttings of during August. You know, just in case you have some time to spare in the garden in between all that holiday making.
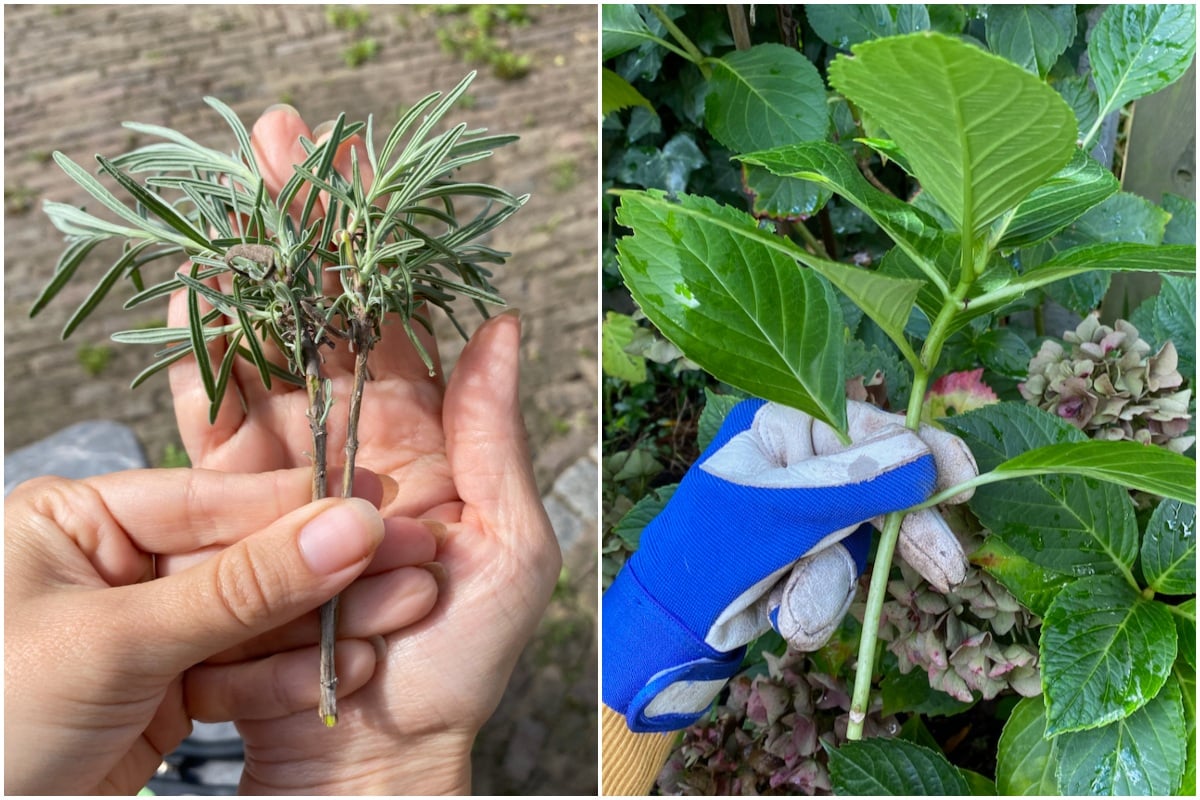
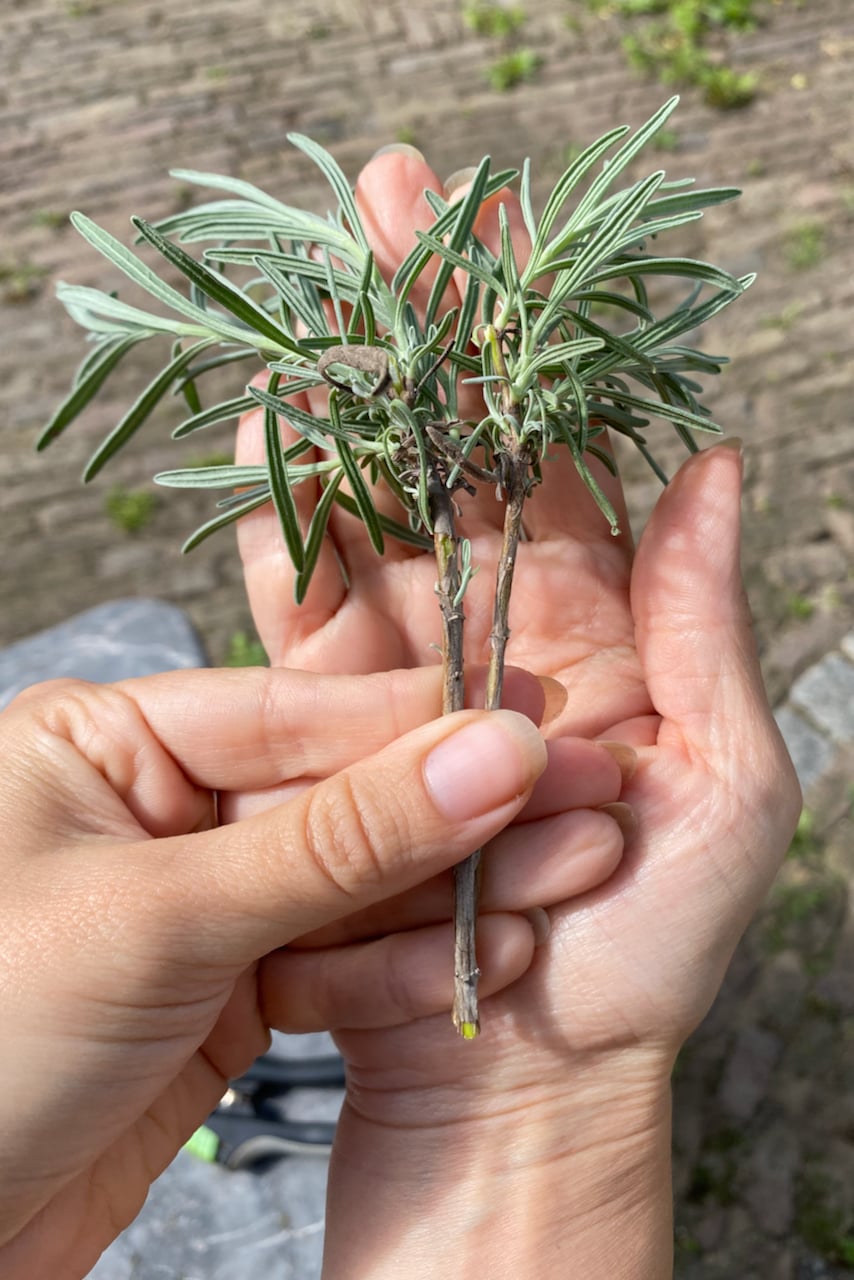
1. Lavender
Let’s start with one of our favorite plants: lavender. What’s better than lavender? More lavender, of course. Luckily, it’s so easy to take cuttings and, with a bit of maintenance, easy to keep them alive.
Simply trim off a flexible, non-flowering shoot. It doesn’t have to be too long, so about 6 inches should do (15 cm). Shorter is fine too, as long as it has some leaf nodes.
Then strip off the leaves from the lower three-quarters of the stem. Leave the top quarter of leaves intact on the cutting.
You can probably fit a few cuttings in a pot filled with well-draining soil. However, you’ll have to remember to keep the pot well-watered, but not soggy. You should start seeing signs of root growth in as little as six weeks. I’ll admit I don’t have a hundred percent success with my lavender cuttings, so I always take plenty of cuttings (up to 16-20, if I can squeeze four cuttings in each pot). I’ll be happy if at least half of them survive.
Or, you can do what our editor, Tracey, does and skip the lavender cuttings and do lavender layering instead.
2. Rosemary
Taking rosemary cuttings is just as easy as taking lavender ones. The process is pretty much the same, with one simple (and delicious) exception. To make the most out of my cuttings, I always save the rosemary leaves that I strip off the stems. I chop them finely and either dry them or use them fresh in cooking.
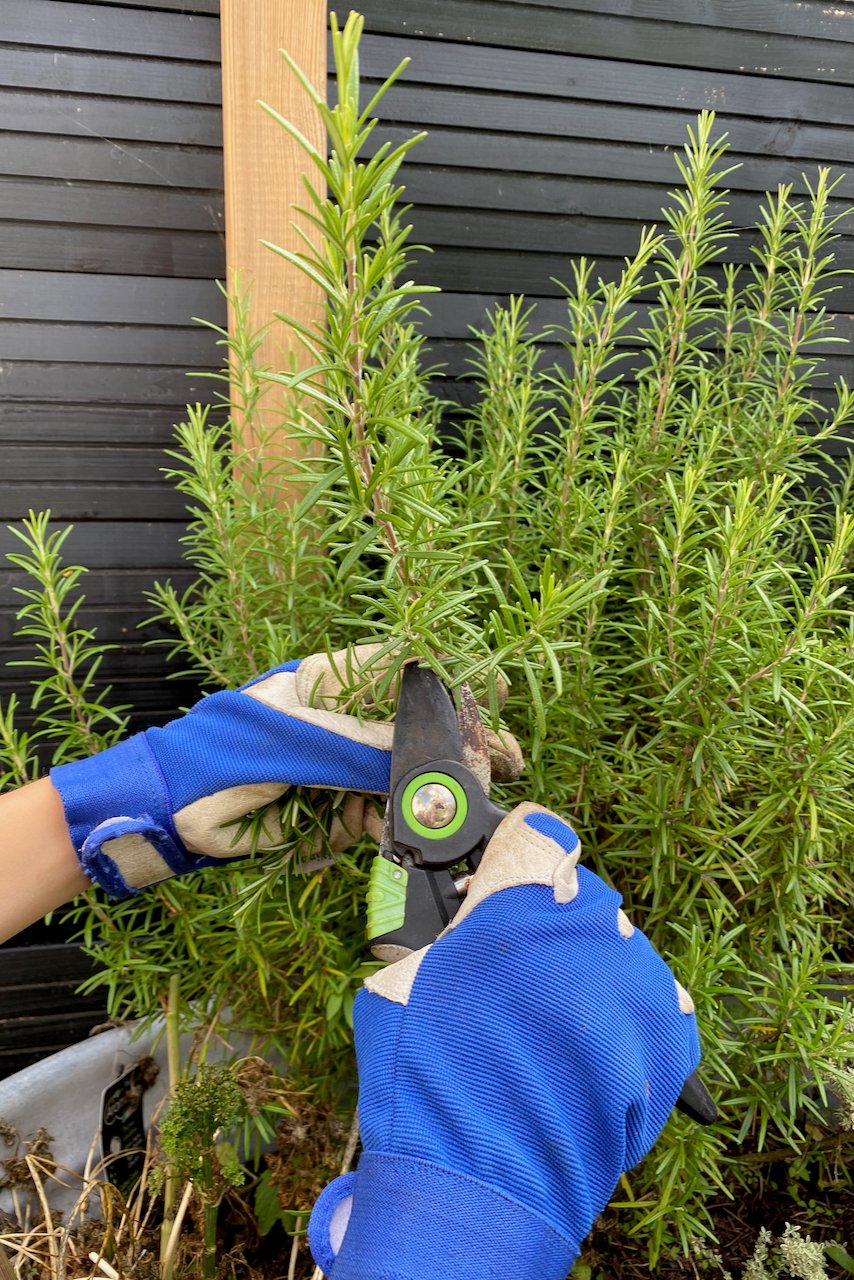
Good drainage is equally important to the success of rosemary cuttings. So I sometimes incorporate perlite or horticultural sand to my propagation potting mix in order to improve the moisture retention.
3. Pelargonium geraniums
In a temperate climate, such as the one I’m gardening in, pelargonium geraniums are considered annuals. They’re simply too tender to grow as perennials.
Trust me, I tried. After the first frost, all I had left was a mushy pile of brown leaves.
So in this case, we take cuttings not necessarily to make more plants, but to keep the same plants safe indoors over the winter months. Next spring, the cuttings will become new plants without us having to repurchase pelargoniums every year.
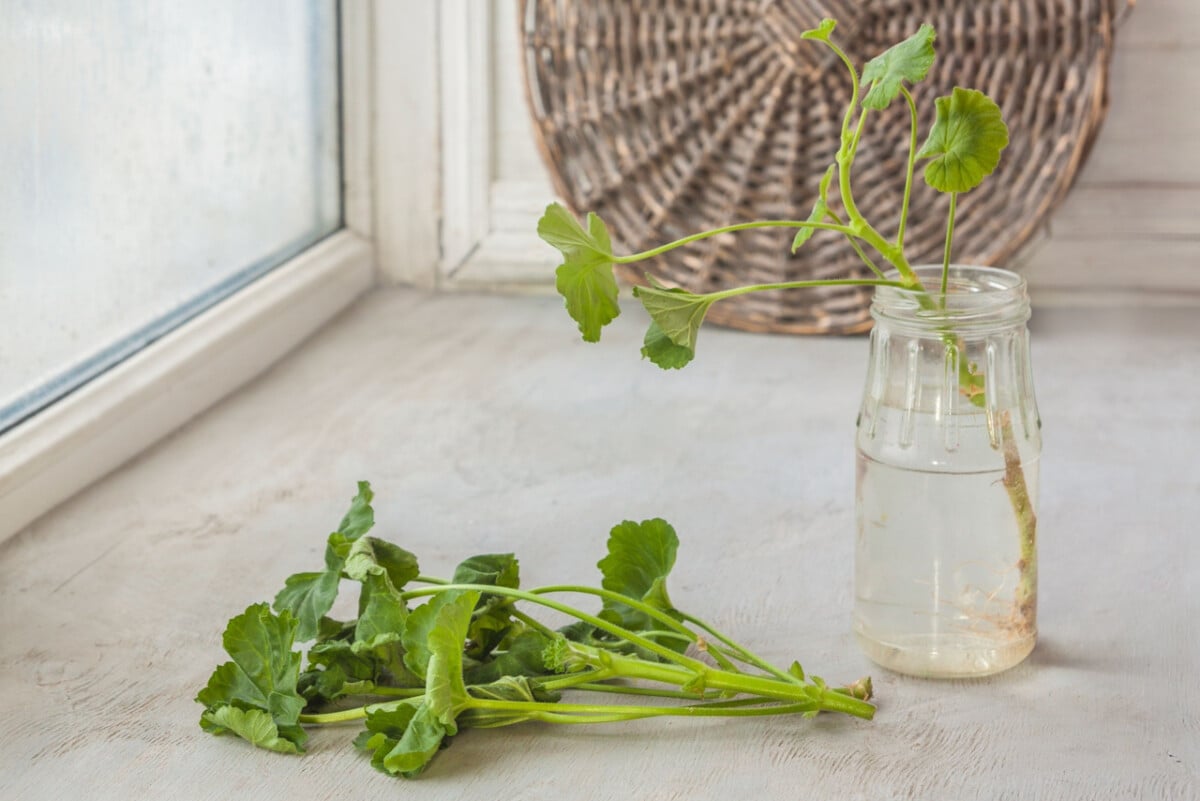
In my experience, overwintering cuttings works best when the source material is at its most vigorous. In other words, don’t wait until winter is knocking on your door to take pelargonium cuttings. Trim them off now, store them in a glass of water until they root, then pot them up and keep them on your windowsill until next spring.
If you’re not sure whether you’re growing pelargonium geraniums (annuals) or perennial geraniums, have a look at this guide I wrote on how to tell the difference and for a few more ways to overwinter pelargoniums.
4. Coleus
Just like pelargoniums, coleus is a wonderful garden ornamental that will not withstand cold temperatures. And just like with pelargoniums, I take coleus cuttings in the summer to plant outside next year.
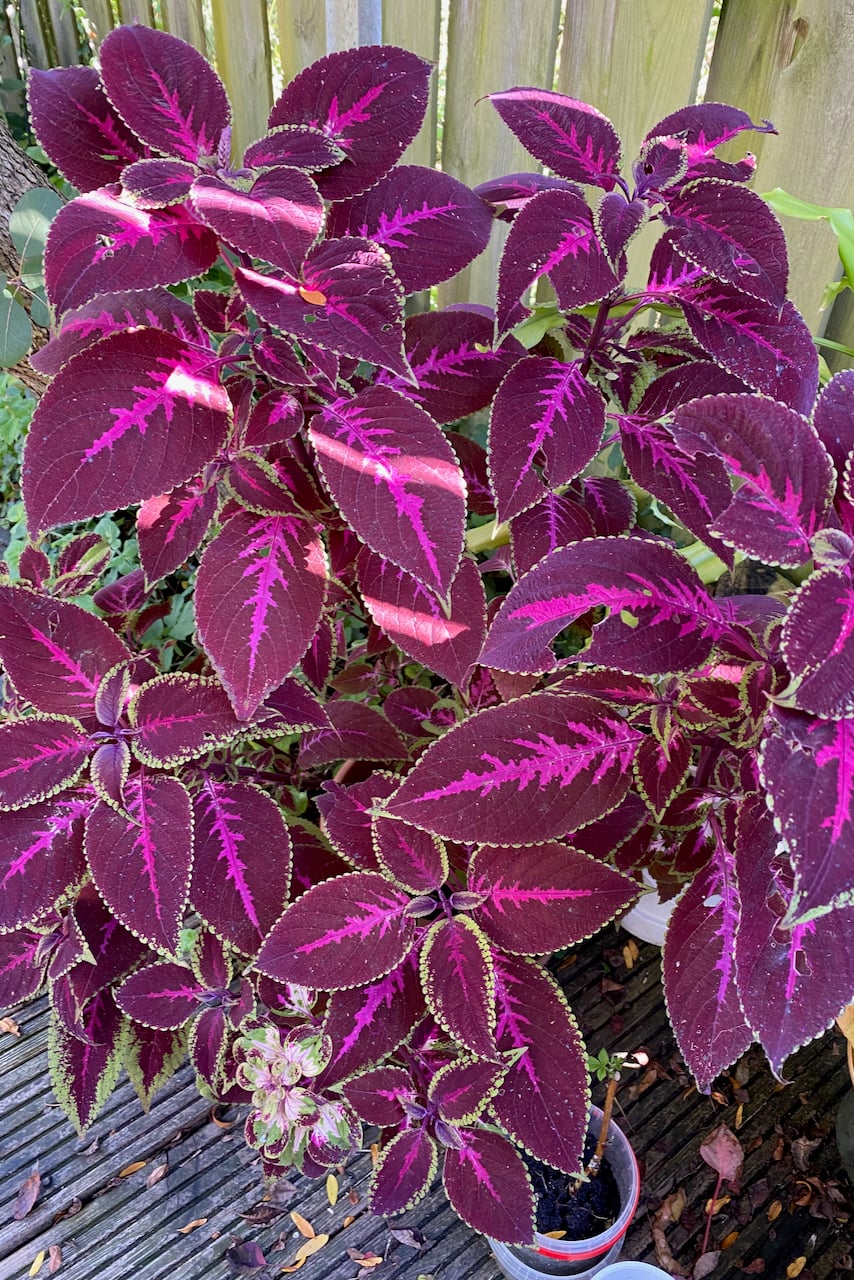
I think I’m currently on my fifth generation of coleus cuttings, though I still keep a mother plant indoors. I love watching the transformation of the foliage colors over the cold months, which is something I don’t get from my tropical houseplants.
Simply trim off a few branches, cutting right below leaf nodes, and plop them in water. Remember to refresh the water every week, if possible.

And don’t worry if your cuttings start losing leaves. That’s normal. As long as there’s a root structure forming in the water, the cutting will be just fine. (I may or may not have ended up with a stick with roots one year, and it recovered amazingly well when I planted it in soil the following May.)
5. Sage
Sage cuttings are my favorite ones to give as gifts or place in the little free plant libraries in my city. The cuttings are edible, smell amazing and may even bloom profusely when young, much to the enjoyment of our pollinator friends. Depending on where you’re gardening, they also stay green in the winter. Well, silver, in the case of the shrub sage.

I take sage cuttings in August, strip the leaves off a length of the stems, and just plant them in a pot full of soil. So far, my success rate has been close to one hundred percent. I can’t remember the last time I had to throw one away.
Sage cuttings are foolproof and very forgiving. Although the plant loves the sun, keep the cuttings in part shade. At least until they start growing a root structure.
6. Hydrangea
Who doesn’t want more hydrangeas? With so many cultivars available on the market, there’s always another one on my wishlist.
I have explained, in quite a lot of detail, my best tips for taking hydrangea cuttings in this article. So I’ll just give you the gist of it now.
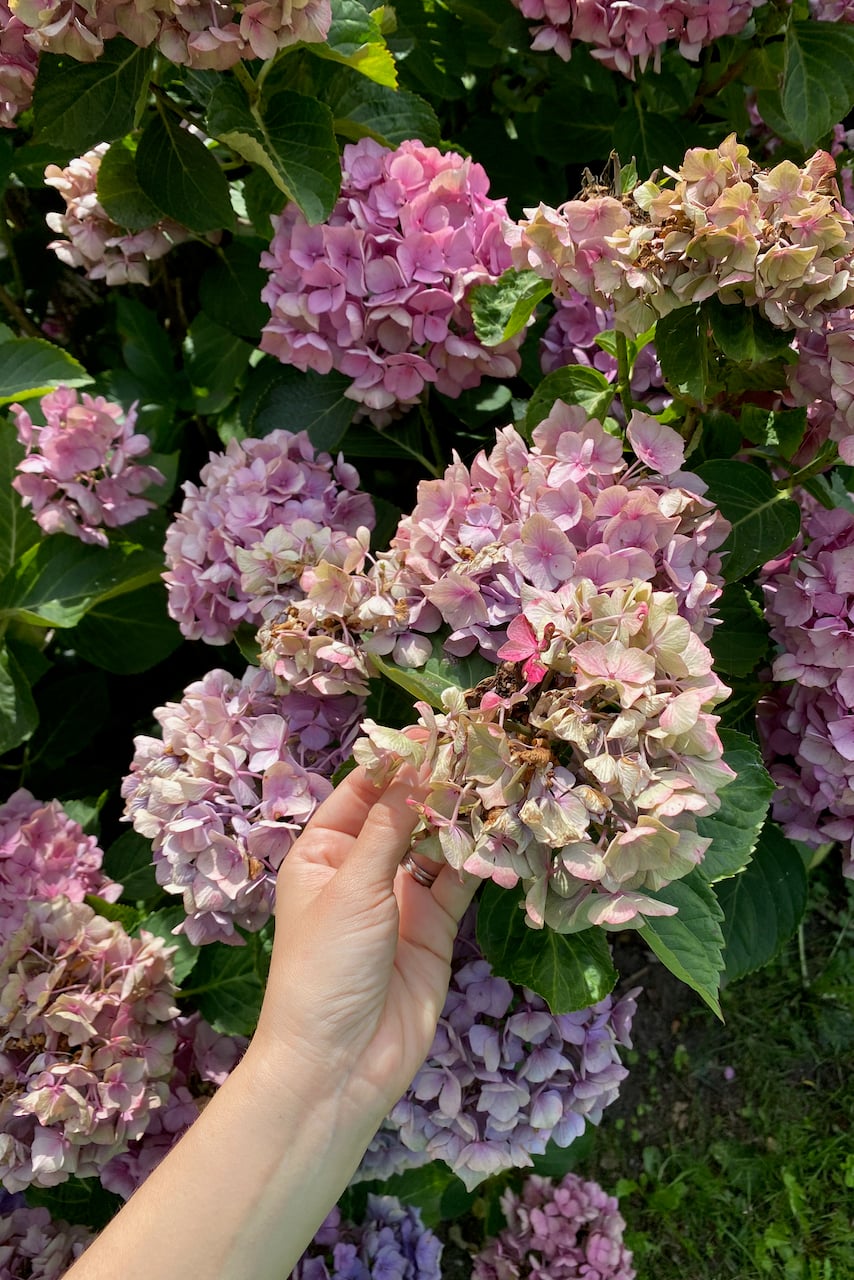
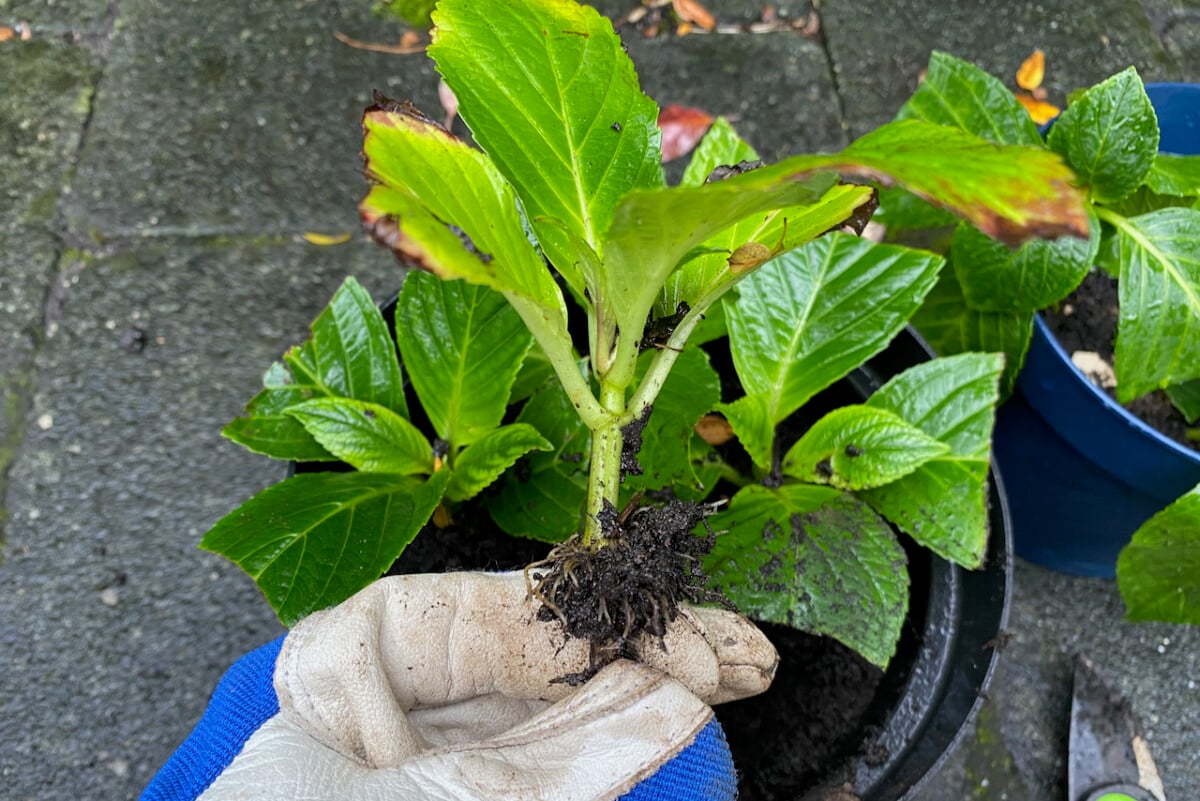
If there’s one thing you need to remember, let it be this: we only use non-flowering stems for cuttings. Most hydrangeas (including the uber popular French hydrangea) flower on last year’s stems. This means that the blooms we’re just admiring now are formed on last year’s hardwood. Not good for cuttings.
We need to take a cutting from a stem that grew this year – a semi-ripe (or semi-softwood) stem. Cut right below a leaf node. Strip off the bottom leaves and reduce the size of the top leaves, if needed. (And it generally is needed.) We perform this last step to slow down the loss of moisture through evaporation.

It’s really important for hydrangea cutting success to remember to keep them watered. And equally important: do not place them in direct sun. In fact, if you’re taking hydrangea cuttings in the heat of August, it may be better to put them in the shade (or late afternoon sun) for the first month.
7. Clematis
Out of all the ornamental plants on this list, I would say that taking clematis cuttings is the trickiest one to do right. Clematis may be breathtakingly beautiful, but it is a finicky plant. That’s why I wrote an entire guide that focuses on clematis cuttings and my best tips on how to get them rooted. But be prepared for some trial and error.
The tricky part, in my experience, comes from having to take (and find, in the first place) the semi-hardwood material. And then, after we’ve taken the cutting, we make sure to plant it the right way up, which is not as easy as with other plants when the clematis twists and twirls through the fence or the trellis.
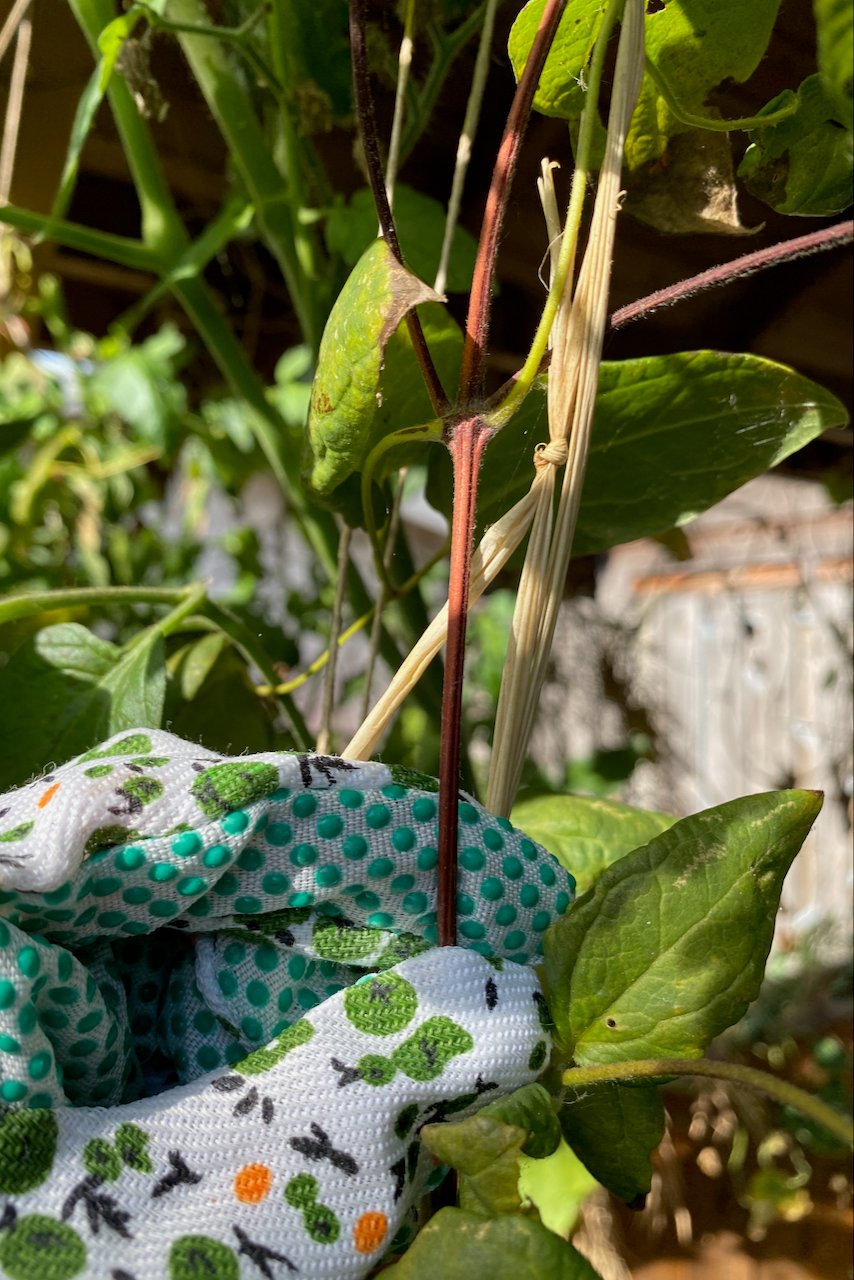
We propagate clematis with internodal cuttings, so we have to section off about two inches (5-6 cm) below a node and about one inch (1.5 cm) above it.
We cut just above a leaf node at the top, but the bottom cut is not right below a leaf node (like with the other cuttings). It is midway down the stem, between the node above and the node below. Please have a look at the guide I wrote on how to propagate clematis, in which I explain the process using photos.
8. Rhododendron
Propagating rhododendrons is similar to propagating hydrangeas. For both, we’re using semi-hardwood cuttings of non-flowering stems. And for both, we should decrease the leaf surface to reduce evaporation before the roots have had a chance to form.
Another thing they have in common is that they both do better in part shade, and that applies to the cuttings as well.
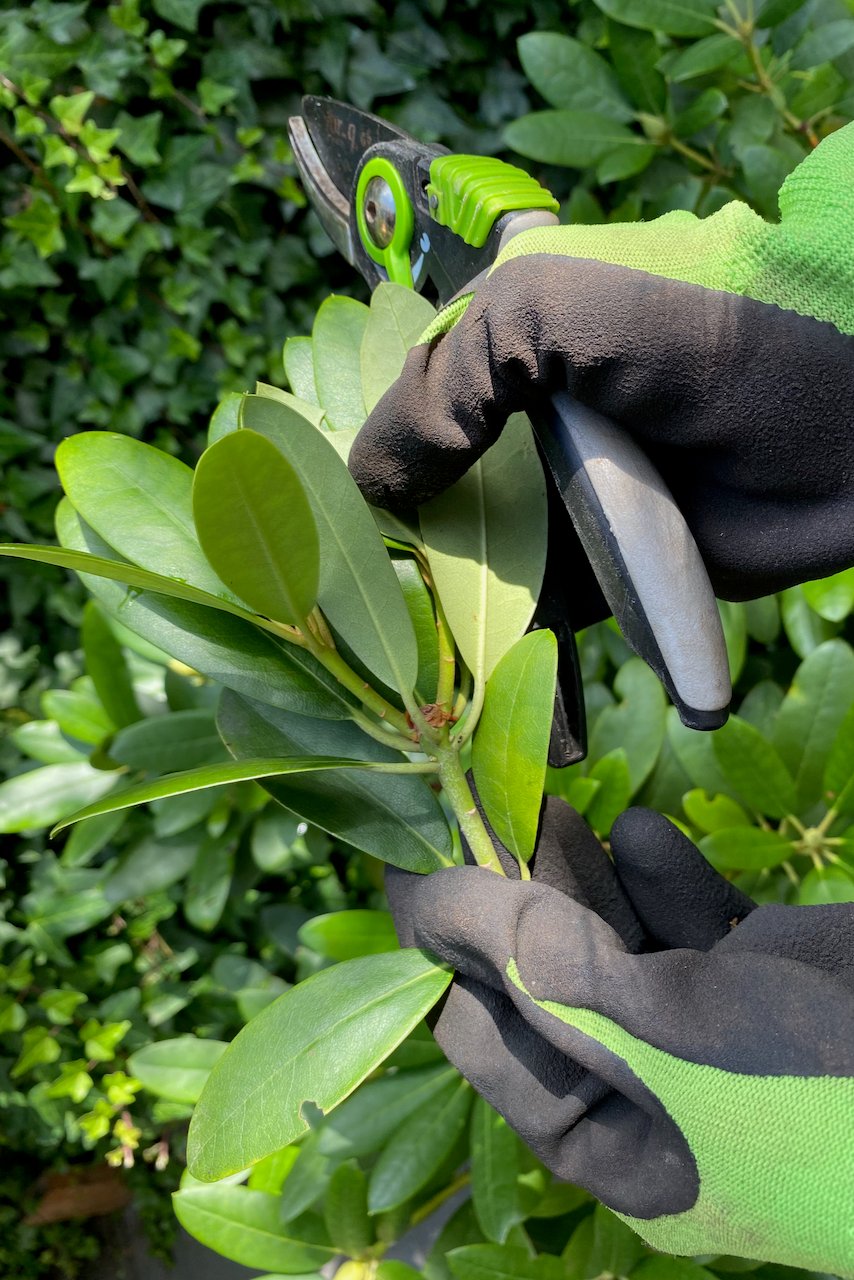
One difference I did notice, though, is that rhododendron cuttings won’t need as much water. Their waxy leaves and thicker stems mean they don’t get thirsty as quickly as hydrangeas and don’t absorb water as fast.
It might not surprise you, by this point, to learn that I have an in-depth tutorial ready to go. Have a read for all of my tips on how to propagate rhododendrons from cuttings.
9. Star jasmine
If you think clematis propagation is a bit too tricky and want to muster up some courage first, star jasmine (Trachelospermum jasminoides) is the vine that will boost your confidence the most. We’re back in “below leaf node cutting” territory with this vine.

In this article, I showed you how I propagate my star jasmine from semi-hardwood stems. Using sharp secateurs, I take a few long vines, then cut each of them into sections of about 8-10 inches (20-25 cm). Each section should start right below a leaf node at the bottom. Then I strip off the first set of leaves (or the first two sets), as each new leaf node will become a root node.
Since the stems are a bit woody in vines, I usually score them. This means that I simply scratch off and remove a section of the protective layer to expose the cambium layer (the light green one). This will encourage the plant to produce more cells that will eventually grow into roots.
10. Begonia
Do you know what happens when a begonia is left outside in the winter? It gets absolutely frozen to a crisp. Is that even a thing? Yes, it gets so frozen that all the water in its juicy leaves turns into crystals. And then it just crumbles between your fingers. Not that I know anything about it.
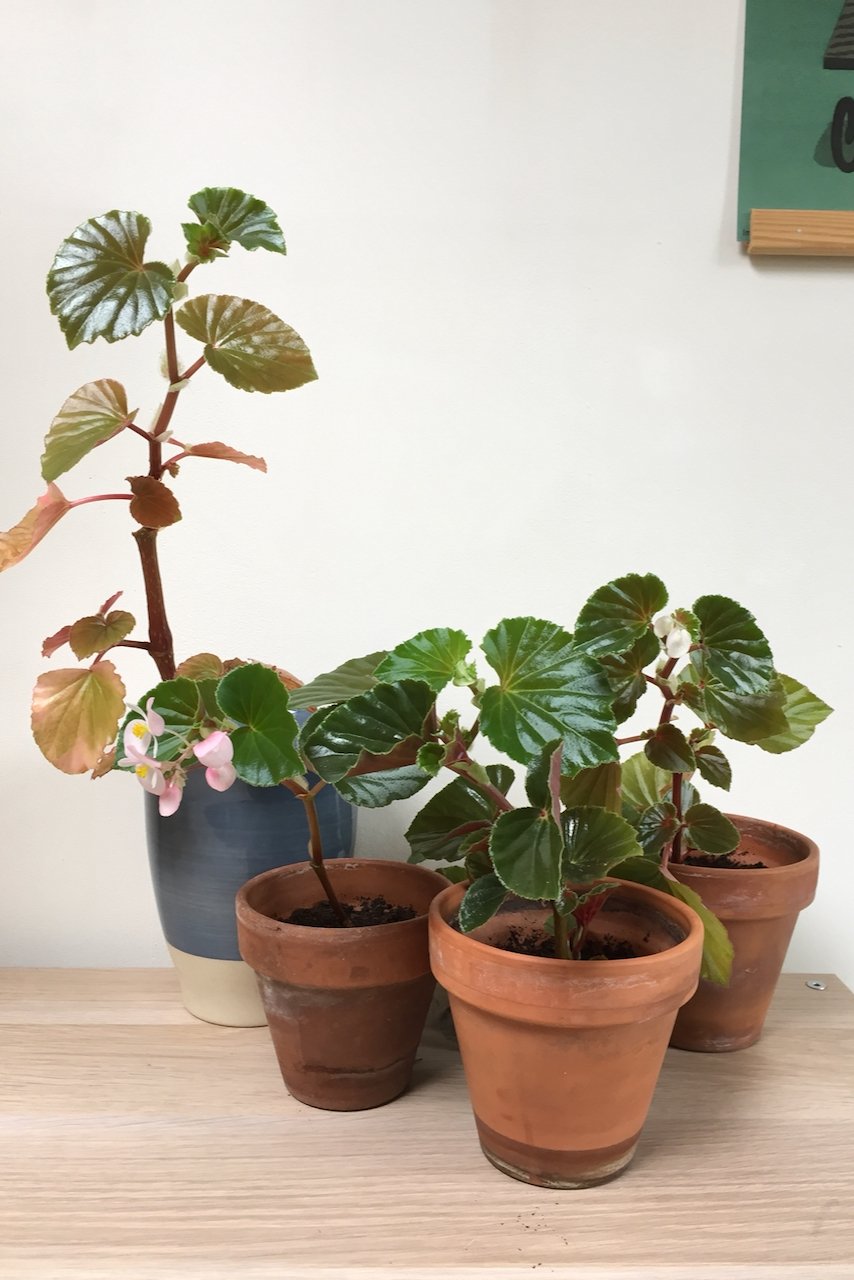
So I had to add begonia to my list of plants to take cuttings of in August and then overwinter indoors.
You know the drill by now. Cut right under a leaf node, strip off the leaves and pop the cuttings into water. It’s super satisfying to make more begonias from cuttings because they start growing roots in just a few weeks.
Just like with coleus, there will be some transformation in the leaves during their overwintering period. They’ll probably get paler, and you might even lose a few. As long as the cutting has roots, it will definitely bounce back.

Get the famous Rural Sprout newsletter delivered to your inbox.
Join the 50,000+ gardeners who get timely gardening tutorials, tips and tasks delivered direct to their inbox.