

There’s a saying in gardening that goes like this: “We prune for a reason, not for a season.” This means that there are no set times to prune plants, only good reasons to do so.
Why am I mentioning this now? Because late spring may seem like a weird time to be pruning plants. After all, aren’t we supposed to get pruning done in early spring or wait until the fall?
That would be pruning for a season, wouldn’t it?
The perennials that we prune in late spring are the ones that I advised our readers not to touch last fall or earlier this spring. This is because in the fall, they had already formed this year’s buds. And earlier in spring, some of them were in full bloom while others were getting ready to pop open their flowers. But we can’t delay pruning indefinitely. We have to get the timing right in order to avoid interfering with bud formation for next year. And now’s the right window to prune them.
And this would be pruning for a reason.
Here are some popular ornamentals that could use a tidying up this May.
1. Forsythia
At some point in mid-February, the social media algorithms pushed a whole host of forsythia hate posts to my feed. I don’t know if it was a coordinated campaign by Big Lilac or if those content creators just influenced each other into trash-talking this lovely shrub. I suspect the latter.
Their argument was that forsythia is in bloom for such a short period of time, and after that, it doesn’t have anything else to offer for the rest of the year. (In temperate climates, forsythia blooms in late February, March and early April.) Imagine enjoying a shrub that has the audacity to just be green!

I’m still very much a fan of this little drop of sunshine shrub, even after the drops are replaced with the emerald green of the leaves. It’s not a particularly fast grower, but if we want to shape it, late spring is the best time to do it. Forsythia is just coming into leaf, but it hasn’t yet started to push out next year’s buds.
If you want to shape it into a round shrub (bowl-shaped), start by cutting back some of the branches sticking out, then taper up at the top. If you prefer a smaller shrub, take some height off the top. My advice is don’t cut back more than about a fourth of the total height. Forsythia is not a fast grower, so it will not bounce back quickly from hard pruning.
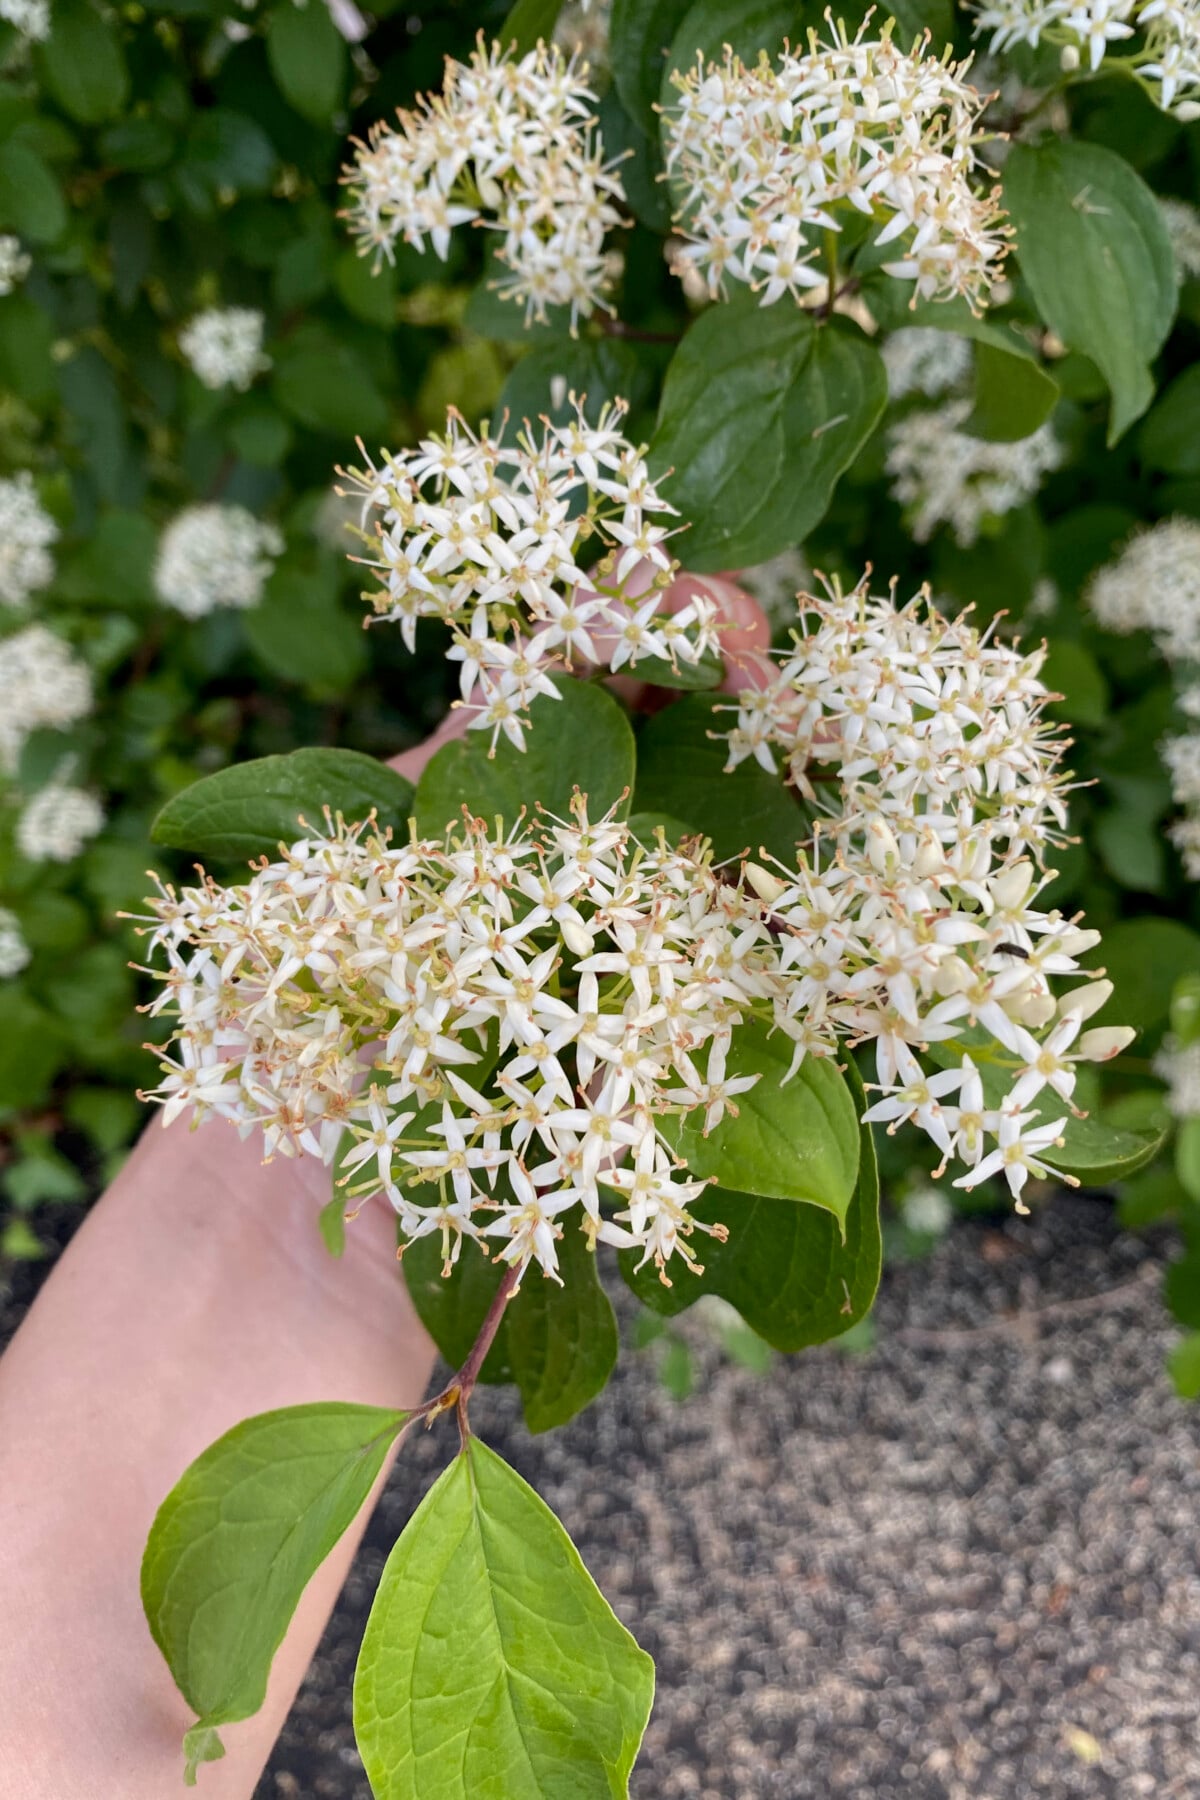
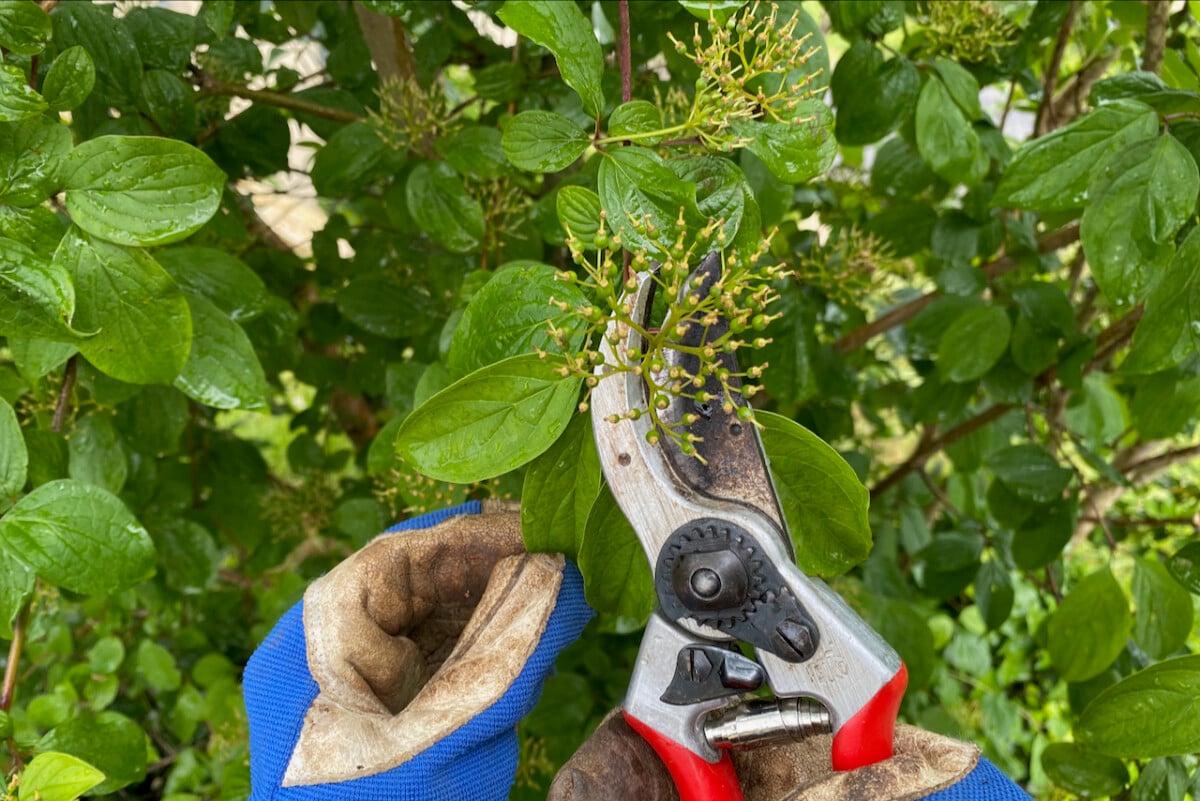
2. Dogwood (Cornus)
I’ll start this one with an explanation because I tend to mention dogwood a lot in my pruning articles. There are two types of dogwood that we generally use as a landscaping shrub.
There’s Siberian dogwood (Cornus alba or Cornus sanguinea). This is a very popular winter garden plant due to its bright stems that come in shades of red, orange and yellow.
Then there’s Cornelian cherry or Cornelian dogwood (Cornus mas) that we generally plant for its spring flowers and summer berries. The berries are edible, but quite sour. They’re more similar in taste to rose hips than to cherries. Nevertheless, I did see it on the list of shrubs with edible berries on the website of the online retailers I buy from. (Though there are much better edible hedges to try.)
I think you should try to cook with Cornelian cherries at least once before you cross them off your list of edible fruit. So we’ll be leaving this one alone to form fruit for now.
Which leaves us with the Siberian dogwood.
If we want to have young, colorful stems next winter, the window to prune them is closing now.
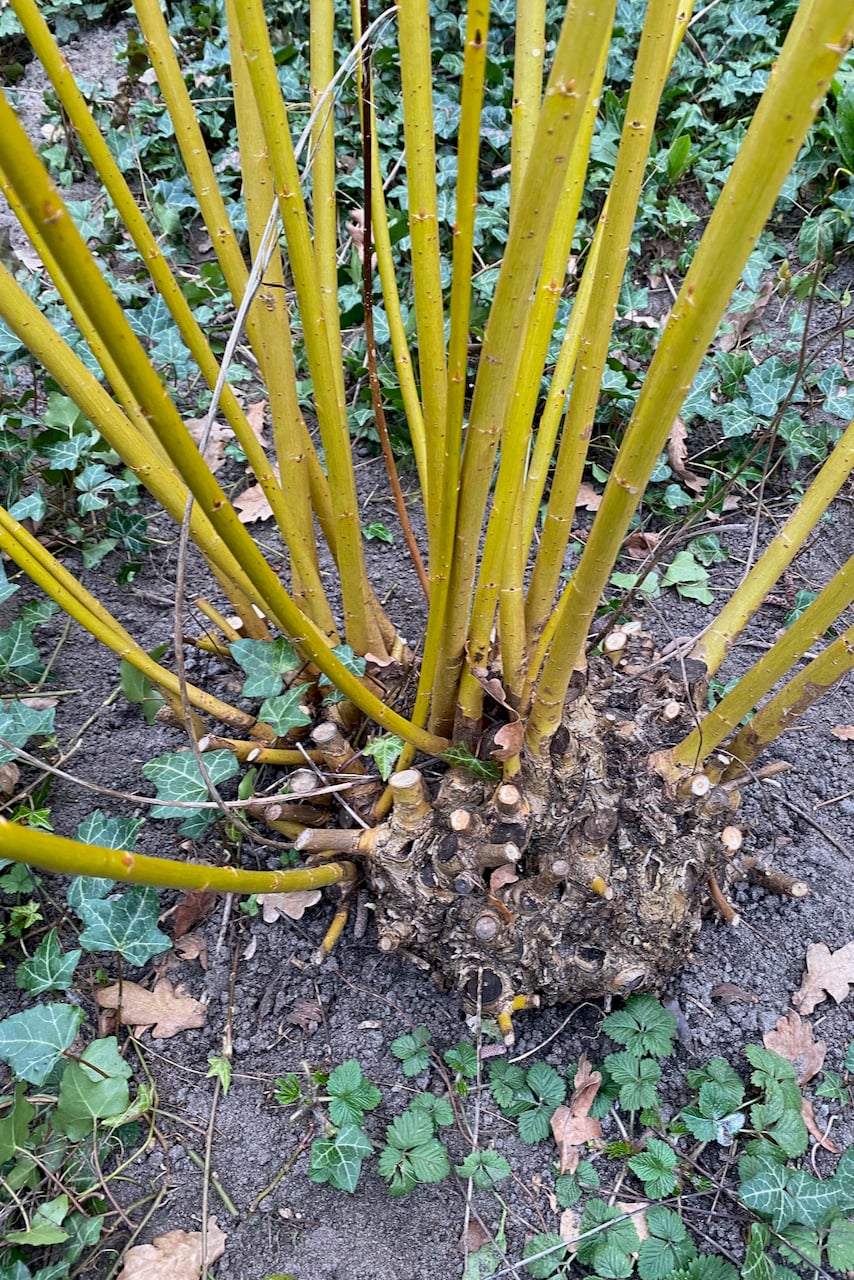
We can coppice all of the shrub, half of it or a third. Coppicing means cutting the branches all the way back to the stump in order to encourage new shoots to grow back from said stump.
Or we can pollard it – cutting it back to a supporting trunk, again to encourage new shoots from this growing point. The brightest shoots are one to three years old, so it’s generally better to start with the oldest branches first, then repeat it every year with the oldest ones that year.
If it’s your first time coppicing or pollarding, I recommend you do it little by little. Just to get the hang of it and observe what happens when we cut back entire stems.
Just doing a light deadheading of the spent flowers can also be enough if you’re not particularly interested in the shrub pushing out fresh, colorful growth. This is what I do with my younger dogwood shrub that I need for summer privacy.
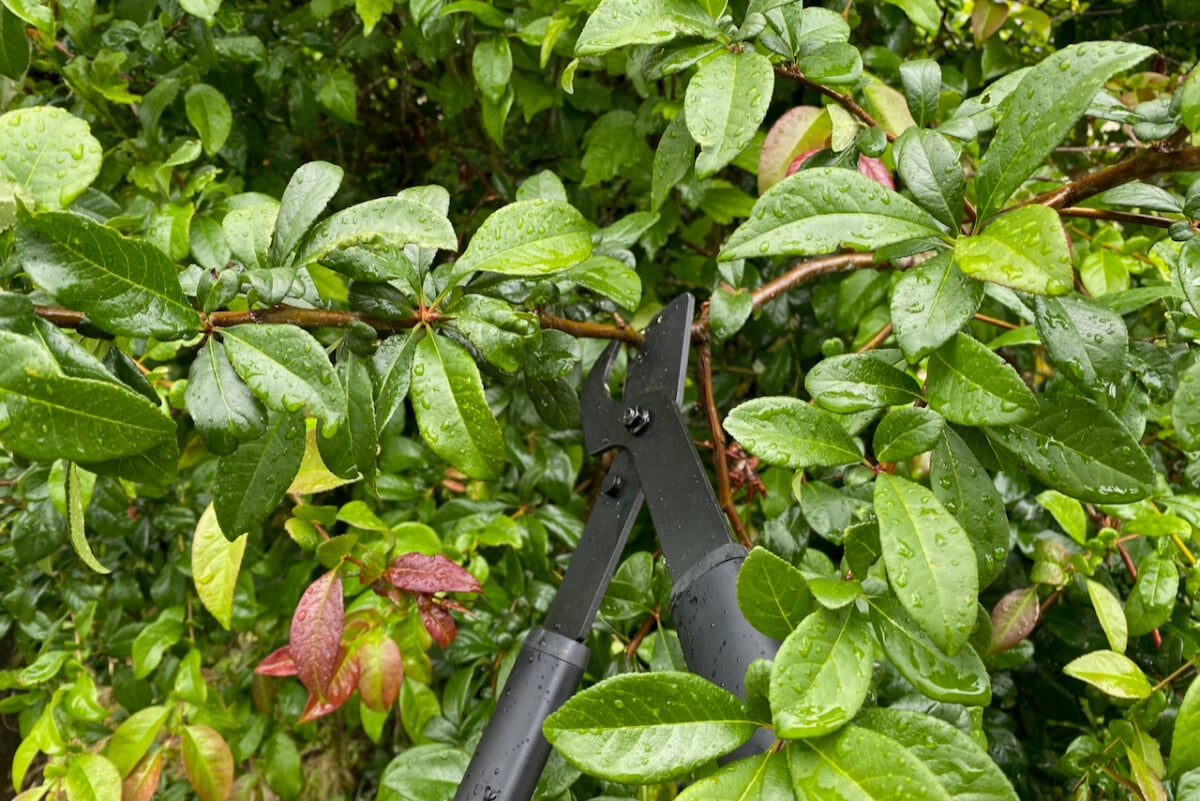
3. Early-flowering viburnum (Viburnum tinus)
There are about 175 species in the Viburnum genus, so giving general pruning advice for this shrub can be tricky. There’s a viburnum for every climate and every gardening scenario you can think of, but I prefer evergreens.
I grow a few types of evergreen viburnums that start forming their blooms in November and keep going all the way into March.
So the one I’m talking about now is the one I mentioned in this article on plants we shouldn’t prune in the fall.
But the flowers are gone this late spring, so there’s no reason to hold back anymore. Unless you want to leave the berries for the birds.
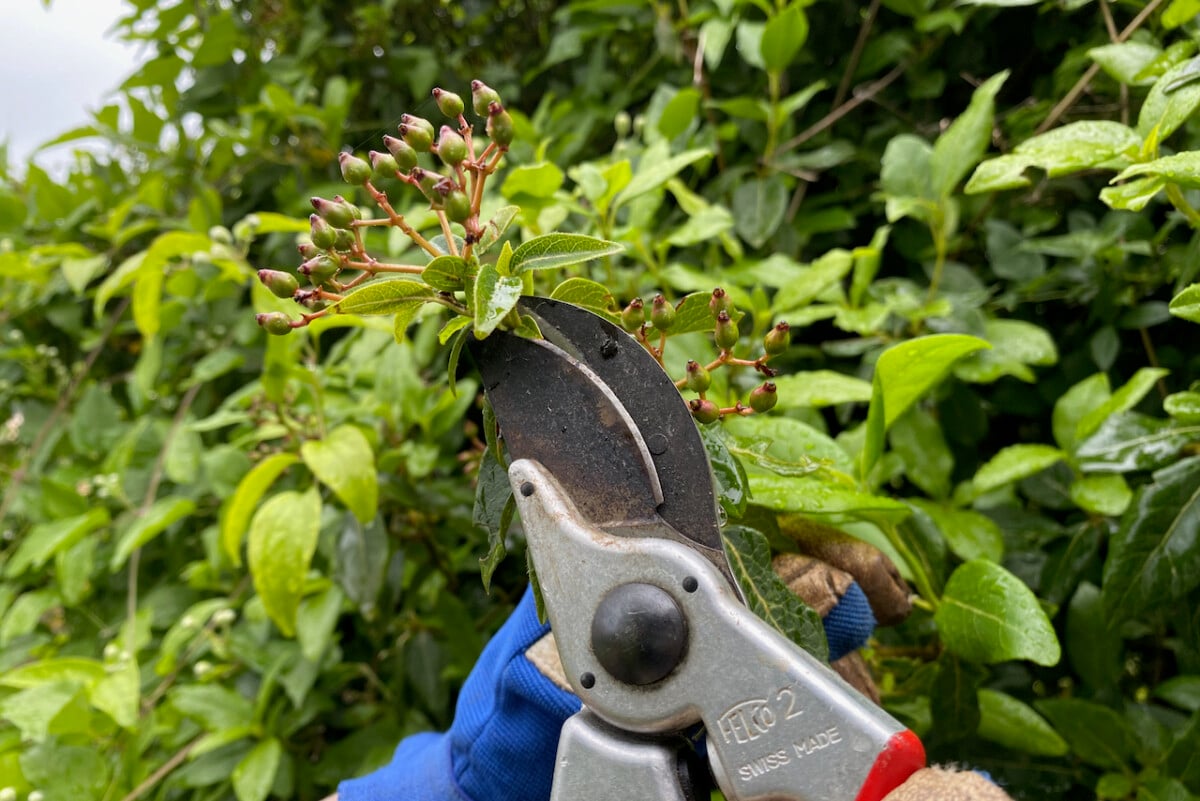
In my garden, I think the birds have now had enough of berries (traditionally a winter source of calories for them) and are looking for fresher meals.
So I will leave some berries at the top (where I can’t reach that well), but I also want to get some tidying done before next year’s buds start to form. I’ll start by deadheading what are now the old seed pods. Then do a cut-back just to maintain its shape. For me, viburnum has been one of the most healthy-growing shrubs, so there’s rarely a dead or diseased branch in sight. But if there was, now would be the time to get rid of it.
We can prune evergreen viburnum harder than the deciduous one, but only if needed, if the plant has been growing too straggly.
4. Magnolias
Whether you’re growing a magnolia shrub or a magnolia tree, late spring is a good time to think about pruning it. Again, if needed.
By this point in the year, this year’s flowers are gone, but next year’s buds haven’t yet formed. Also, all the branches are in full leaf, so it’s easy to see which branches are bare and very much dead.
I’m rejuvenating a couple of magnolia shrubs in my garden, so this year I’m cutting away all the dying branches. Hopefully, new growth will emerge in their place.
Here’s what it looked like in bloom. Plus some recipes for magnolia buds that you can save for next year.
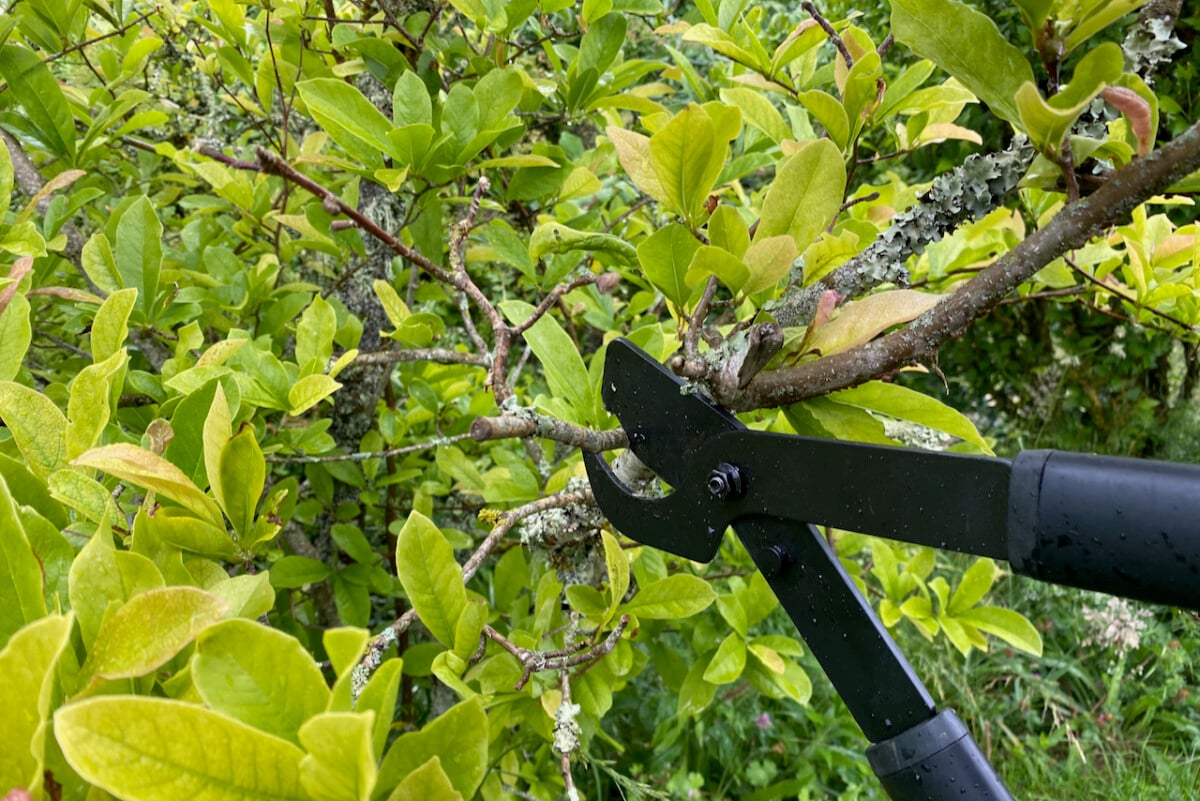
(And just as a note, that I’ll probably expand on at some point in a separate article, please let’s agree to stop blaming the lichen for the death of a branch. Lichens are not parasitic, and they do not kill trees. The cause and effect are flipped, in fact. Lichens tend to attach themselves to branches that are already dying, mostly because they prefer places that retain moisture and get enough light filtered through.)
Magnolias are relatively slow growers, so they don’t need constant yearly pruning by default.
Also, keep in mind that pruning your magnolia in the spring will encourage basal shoots to pop up. This kind of growth, also known as sucker growth, unnecessarily crowds the plant from within. An overcrowded plant reduces airflow and may lead to a fungal problem later in the growing season. This will only give us another reason to prune next spring.
So when it comes to magnolias, prune sparingly and only for a good reason.
5. Rhododendrons
Here’s what my rhododendrons look like in early May.

The flowers are mostly gone, but next year’s buds haven’t started to push out yet. Which means now’s the perfect time to act if we want to do some tidying up of these shade garden sweethearts.
We’ll start by deadheading this year’s spent blooms. You may be tempted to leave them, but I’d advise you to take them off just to prevent the shrub from going to seed.
Every single flower turning into a seed (that we will not use because there are better ways to propagate rhododendrons) will waste a lot of energy at a time when the shrub needs it to put out new growth.
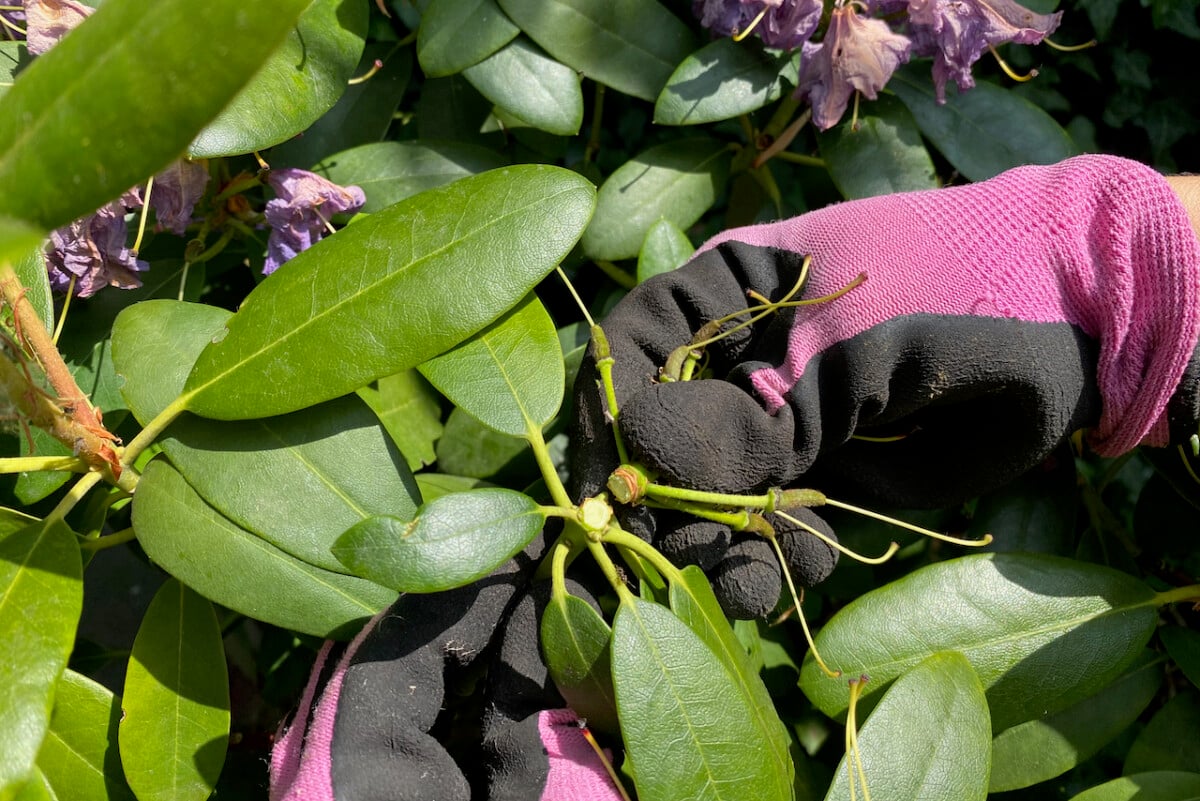
Deadheading is easy, and we can do it either by hand or using shears. Make sure you wear gloves, though, since the sap released by the stems and the seeds is pretty sticky.
Let’s start by identifying the end of the flower cluster (also called a truss).
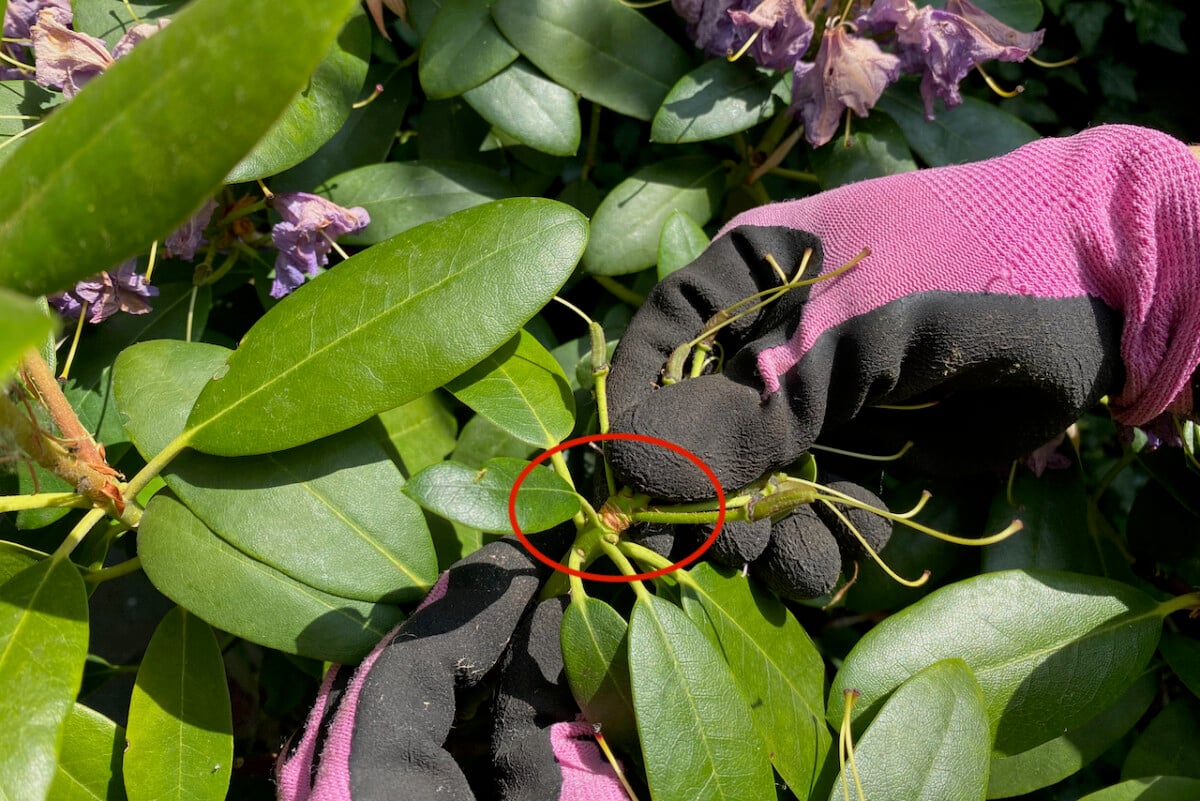
This is the point where these trusses connect to the main stem, and it looks like a ring around the stem. Hold the main stem steady with one hand, then simply grip the truss close to the ring with your other hand. Rotate it gently until the flower cluster breaks off.
You can also use shears to cut right where the ring is. I prefer to do it by snapping off the trusses because I can get a bit more precise than with shears.
Other than that, rhododendrons are slow and steady growers, so they don’t need hard pruning. You can remove dead or diseased branches any time, but an over-pruned rhododendron will take a year or more to recover.
However, if you want to reshape your rhododendron shrub, do a gradual rejuvenation over a couple of years. Don’t cut off too much at the same time, especially from younger plants.
6. Camellias
Just like the rhododendrons above, camellias are evergreens that start forming next year’s buds this summer. So timing our pruning before the new buds and leaves start growing is crucial.
And just like rhododendrons, camellias are slow-growing shrubs that stay mostly compact. But if you want to shape your camellia, there’s no way around pruning.
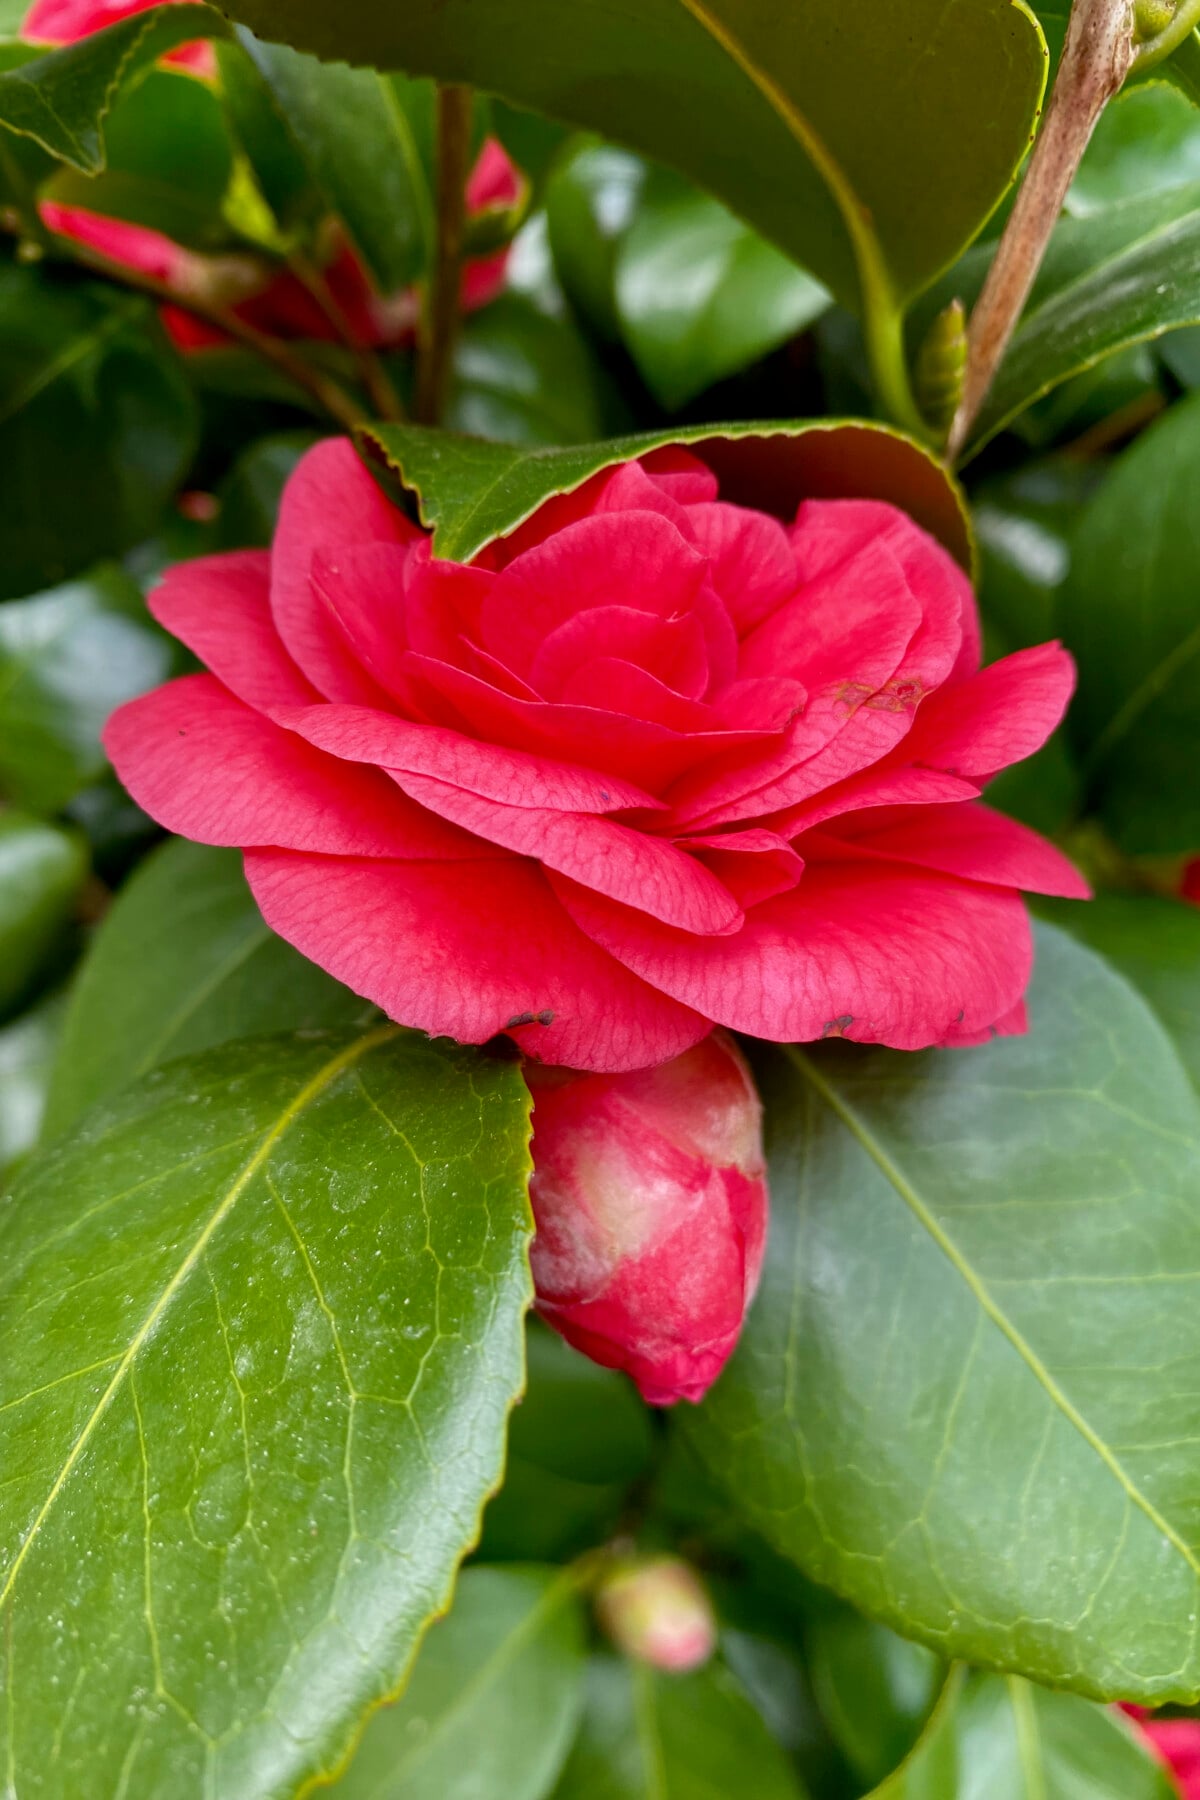
My camellia fills up a space in my garden along a fence. I like to keep it shorter and fuller, so every year I trim some of the top growth that sticks out.
It just so happened that I’ve added a small compost bin next to this one. The bin bottom was perforated, for the worms to go in and out. Let’s just say they fertilized this shrub in real time. The result was that it grew so much that I had to raise the canopy a bit and shorten a handful of branches. It’s looking nice and lush, though, so the extra composting in place was worth it.
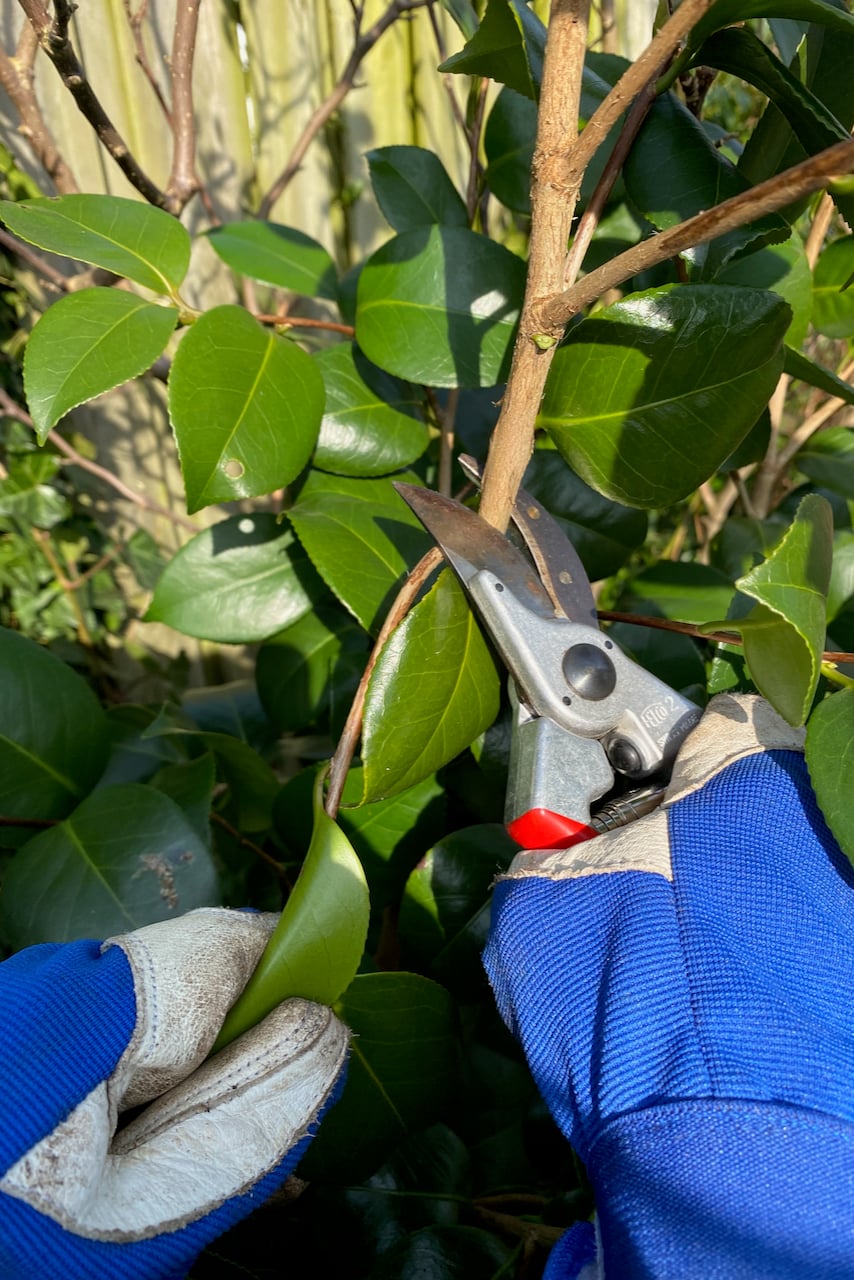
If you’re growing your camellia tree-shaped, you would have to do the opposite. Trim back lower branches to encourage the plant to focus its growth at the top. To get a tree shape, make sure you’re starting with a larger cultivar, not with a dwarf camellia.
7. Lilacs
I’m working on a separate article all about pruning lilac after the blooms are gone. (Plus a few more tips on why now’s the best time to propagate it.) So I’ll keep this one brief.
If you sign up for the Rural Sprout newsletter, you’ll get links to all of our new articles, including the upcoming one on pruning lilac. Plus seasonal gardening advice from our extensive archives.
Anyway, back to lilac.
If yours is done blooming, you really shouldn’t procrastinate on pruning it. If needed, as not all lilac shrubs need to be pruned. And certainly not every year.
Lilac shrubs start growing next year’s buds in early summer, so the longer you wait, the more likely it is that you’ll be cutting those off.
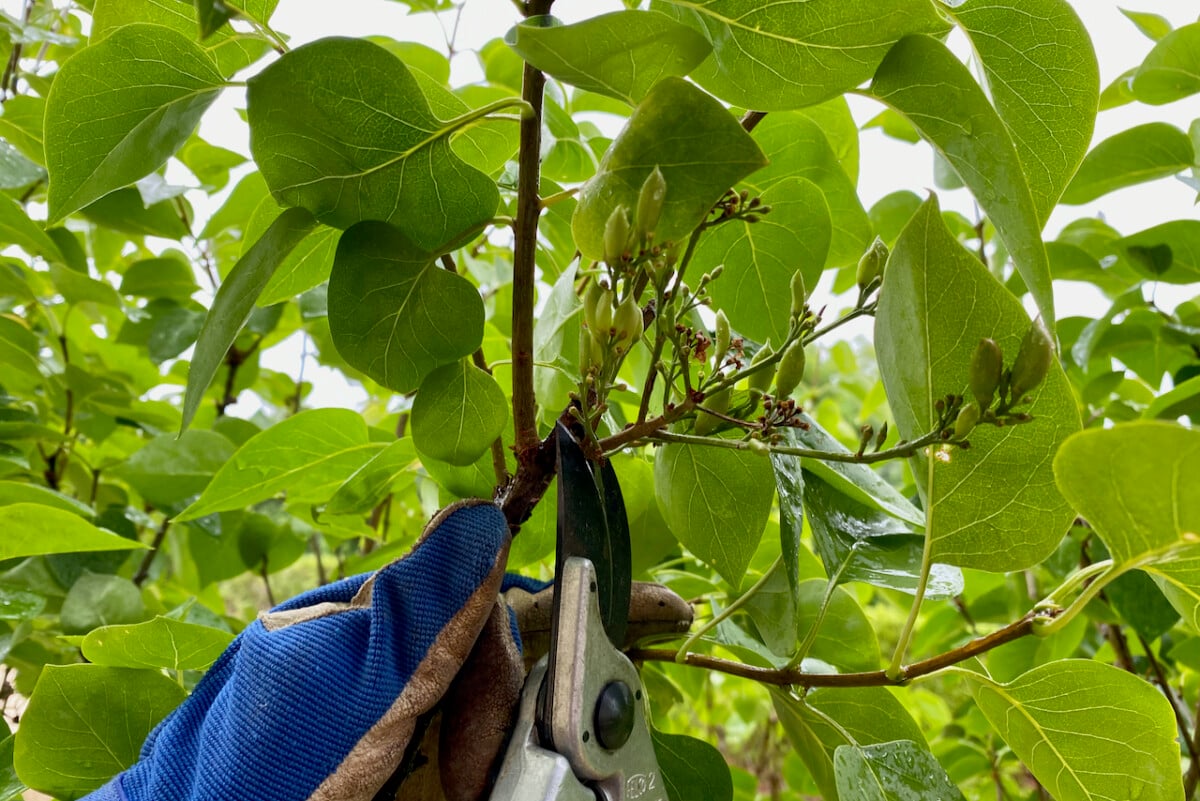
If your lilac shrub hasn’t outgrown its space and it’s still producing an abundance of flowers, you may just want to tidy it up. Start by removing the branches that are visibly dead, diseased or dying.
You can also remove the spent flower clusters, cutting back to an outward-facing bud.
You may have noticed that older lilac shrubs that haven’t been pruned for many years tend to raise their flowering canopy, so they’ll bloom at the top, but not so much all around. To fix this, we need to do some rejuvenation pruning, but spread out over the course of three years.
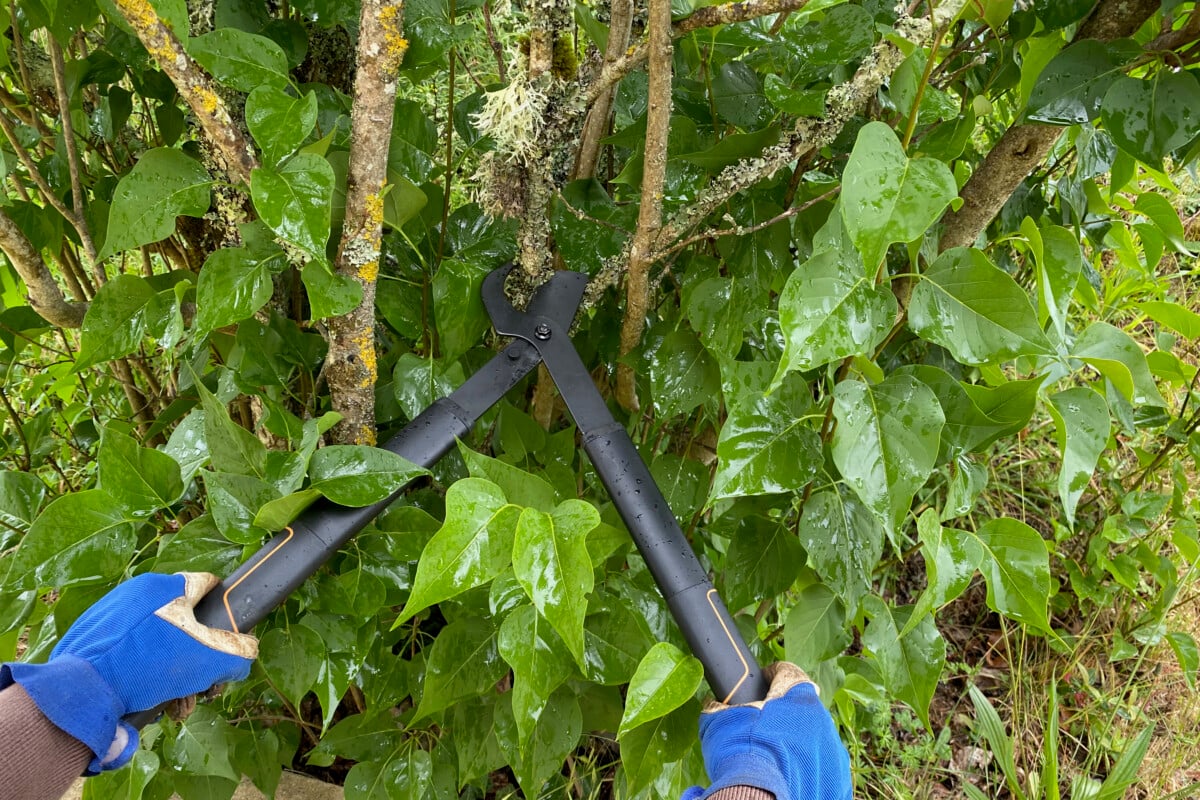
To begin with, this late spring, all you need to do is cut back a third to a quarter of the oldest branches. By this, I mean either cut them all the way down to the ground, or cut them halfway. This all depends on how tall you want your lilac to be.
Then repeat this pruning pattern next spring (after bloom) with the oldest remaining branches. And the spring after that (same rules). In about three years’ time, all the existing branches on your lilac will be about three years old, and you’ll have managed to lower the flowering canopy.
8. Flowering quince (Chaenomeles japonica)
Despite its name, flowering quince is closer to the rose family than to that of edible quince. But it got its nickname for a reason – the fruit is edible, and you can harvest it in the fall, around the same time as we would pick quinces.
You may remember this shrub from my article on plants you can propagate from hardwood cuttings as early as January. It’s in full bloom by mid-March, and by mid-May, the pollinated flowers will start turning into fruit.
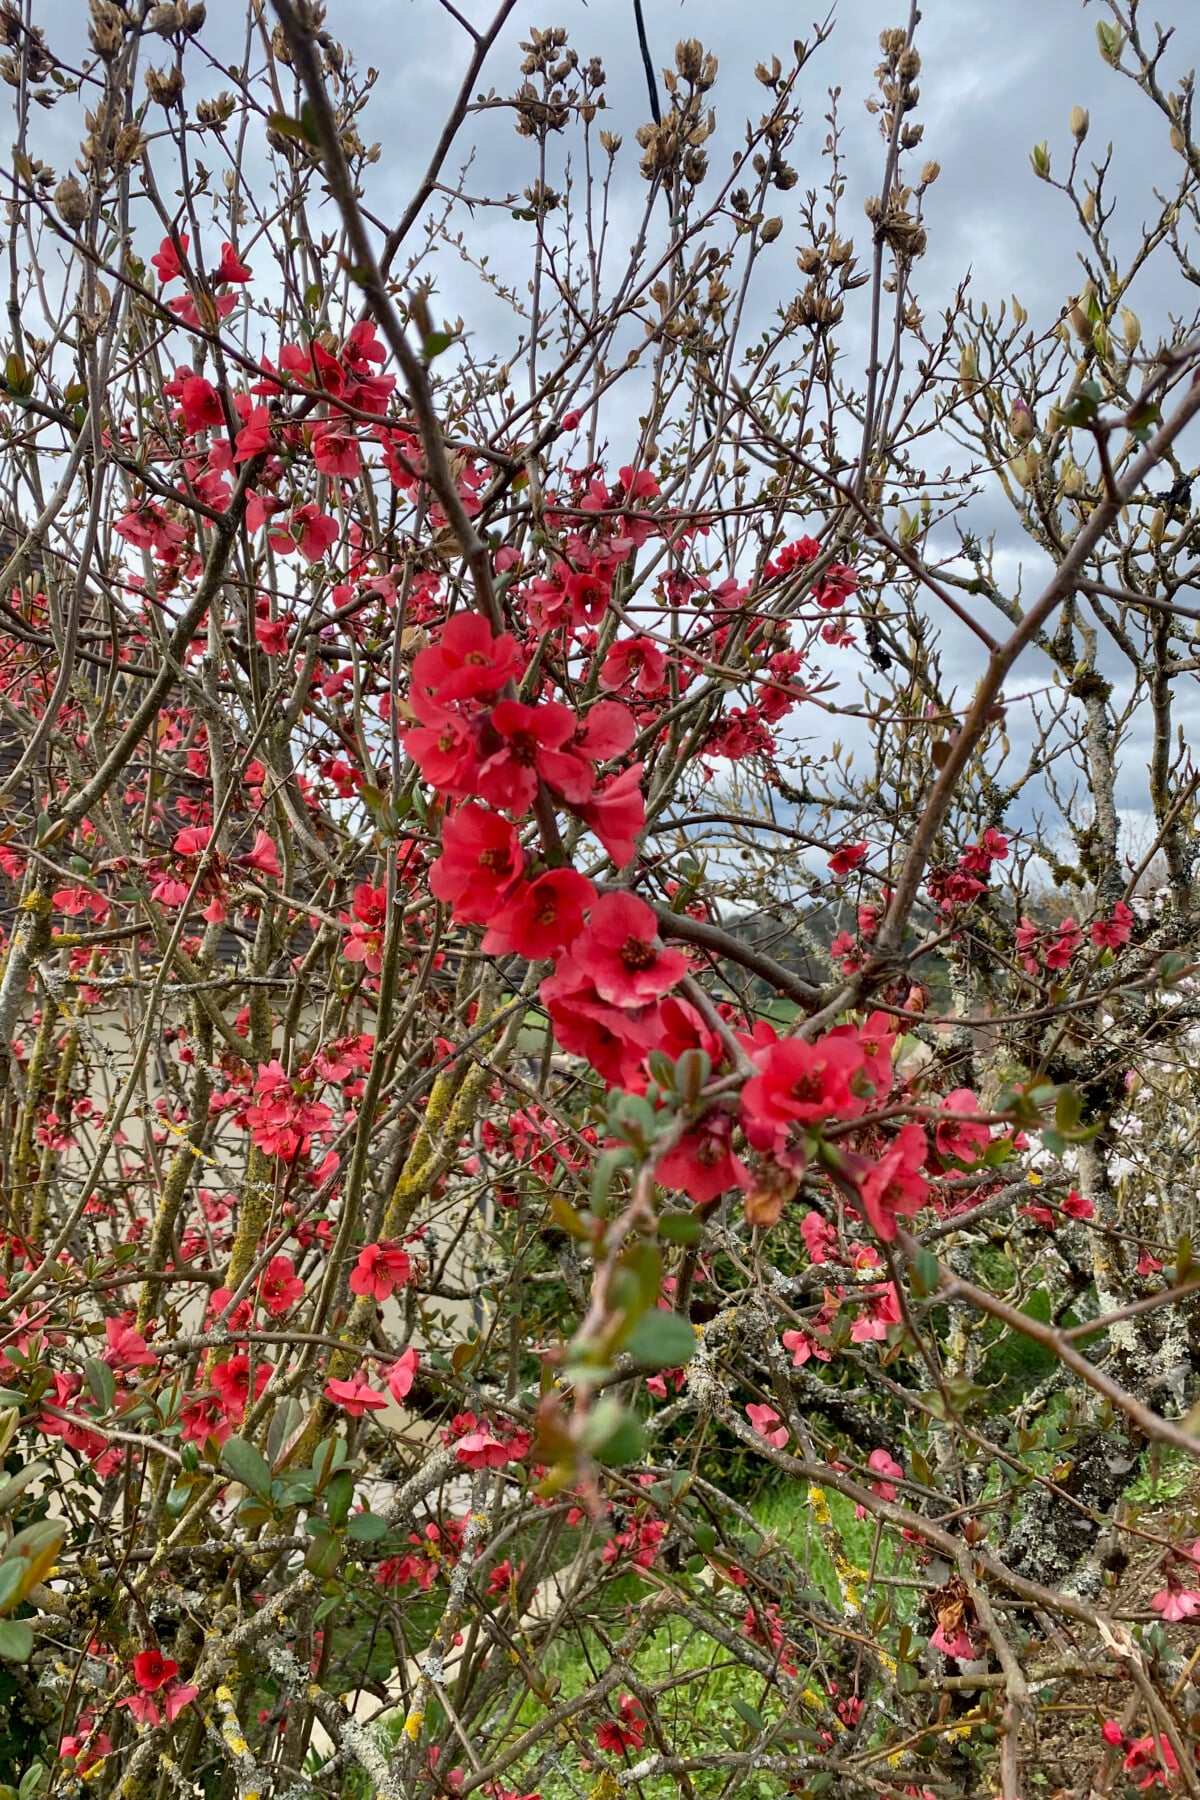
So, here’s the thing!
If you want to keep all the fruit, then naturally you shouldn’t prune your flowering quince now. Wait until fall. But if you’re not so keen on cooking with the fruit, now’s the time to do a bit of trimming. (And forget about eating the fruit raw. They’re so incredibly tart, even my heart puckers when I think about it.)
Since I have a mature shrub that flowers abundantly, I do a bit of both. I keep some of the fruit intact (varying which side every year), then cut back some of the older branches to make room for fresher growth. This way, I won’t have to embark on a full rejuvenation project. The rest of the branches, I’ll cut back to a framework.
If you’re keeping the fruit, when can you prune it? Trim it lightly once you’ve picked everything – usually in September or October, depending on your climate.
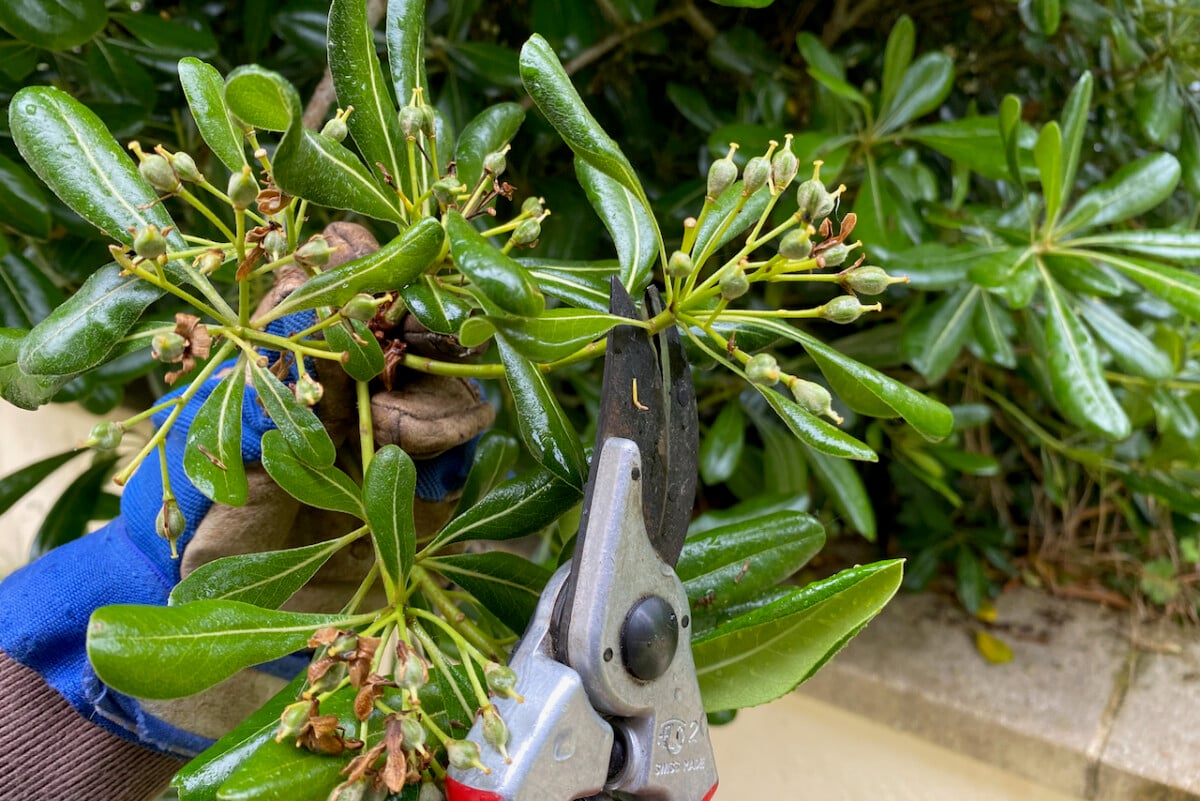
9. Mock orange (Pittosporum tobira)
There are a few shrubs that carry the nickname mock orange, but in this article, I’m purely referring to Pittosporum, an evergreen ornamental that blooms in mid-spring.
To me, the foliage looks very similar to that of rhododendrons, but the flowers have an unbelievably strong fragrance. They smell of orange, vanilla and nutmeg. If you’re gardening in a zone with warm, humid winters, Pittosporum is a good choice that adapts really well to all types of soil. It also does well in summer drought, especially if it’s planted in a half-shaded location.
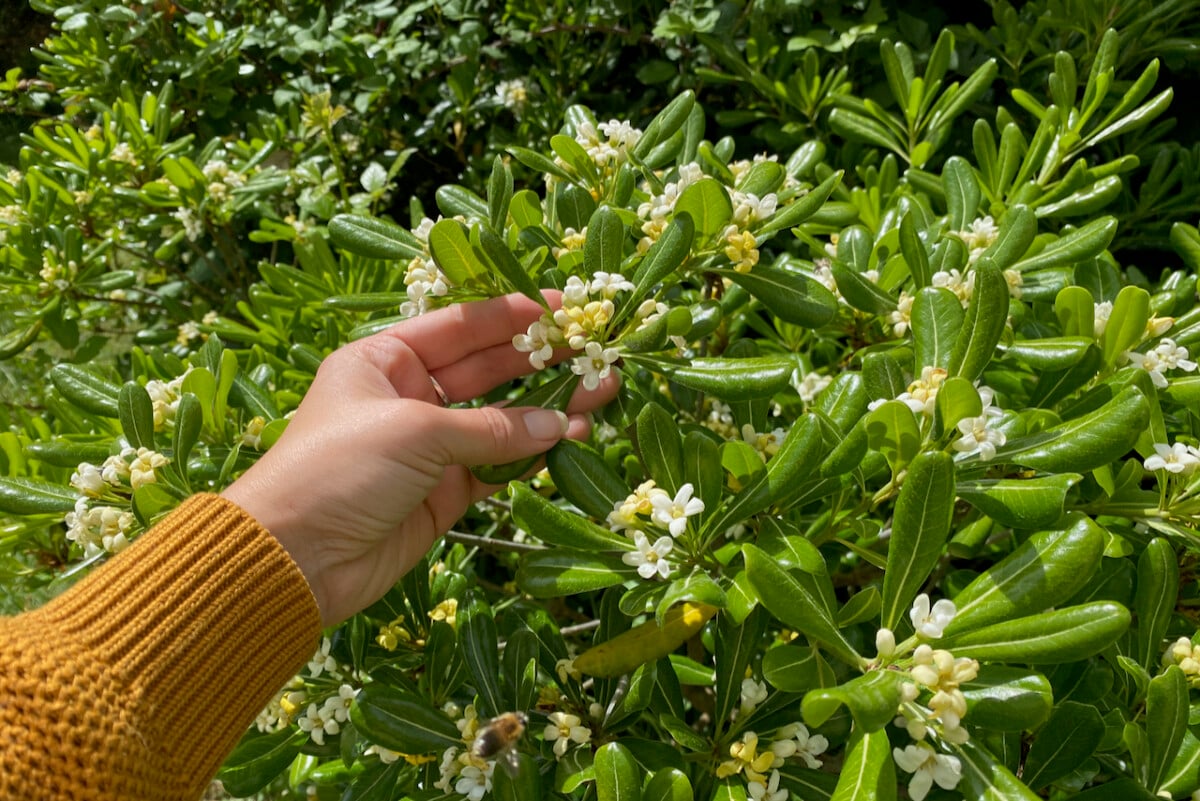
My own mock orange shrubs have been buzzing with the nonstop hum of pollinators for about three weeks this past April.
By mid-May, the flowers are starting to turn into hard-shelled seed pods. Just like with rhododendrons, there’s no point in letting it go to seed, especially in a younger plant that needs the energy elsewhere. However, some birds do snack on the seeds, so perhaps leave a few at the top.

We can deadhead the spent flowers as they die back, then trim everything back to a healthy leaf bud to keep the shrub looking tidy.
If your shrub is outgrowing its allotted space, you can cut some of the mature branches all the way down to the ground. But any rejuvenating pruning of mature shrubs should be done over three years. Before you prune this shrub, please check for bird nests first. If they feed on the seed pods, they tend to build their nests in mature shrubs or nearby.

Get the famous Rural Sprout newsletter delivered to your inbox.
Join the 50,000+ gardeners who get timely gardening tutorials, tips and tasks delivered direct to their inbox.