

When I first started gardening in earnest, my learning zeal was as high as the leggy tomatoes I was growing. I was humble enough to know that I didn’t know much, so I’d devour one book a week on the topic of organic gardening.
Composting was the one thing that baffled me the most.
The stiff and didactical explanations in some of these books triggered unpleasant flashbacks to my eighth-grade chemistry teacher. She talked at us rather than to us and didn’t care if we understood as long as she’d said her bit. You need this much nitrogen and this much oxygen at this high a temperature. It can’t be too dry or too wet or too compact or too aerated.
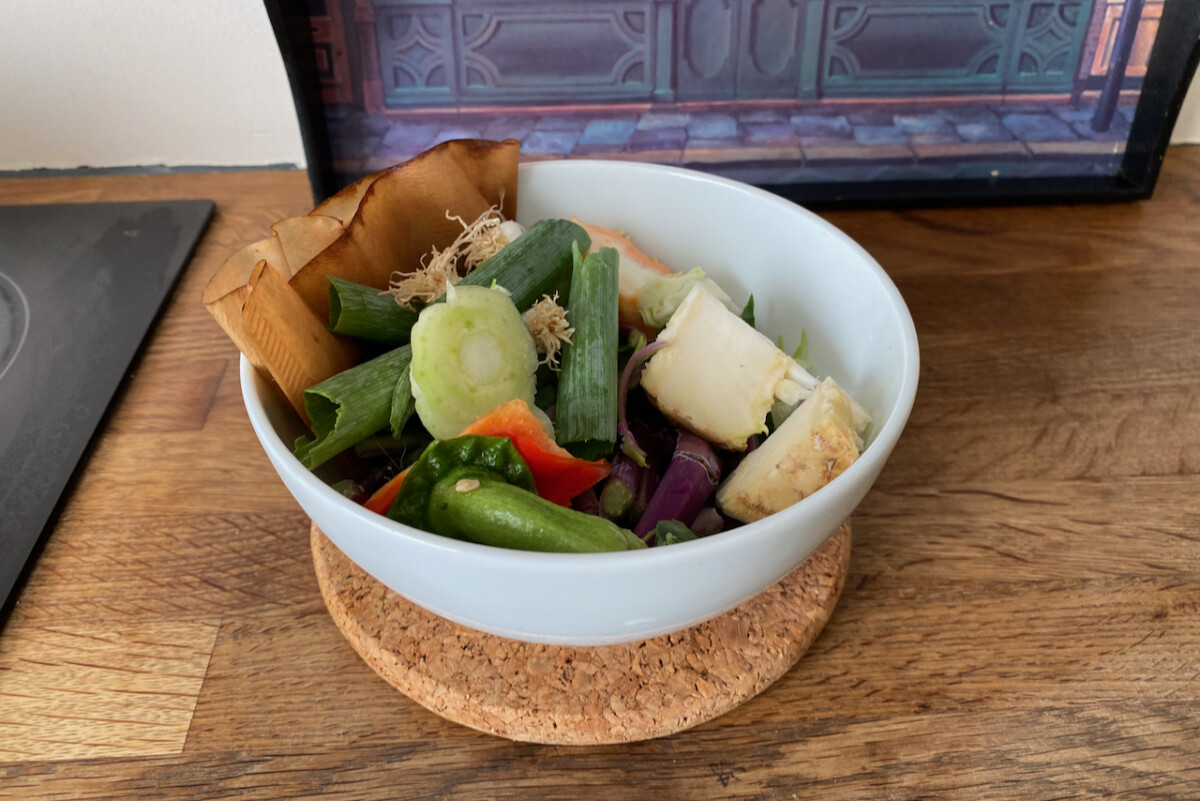
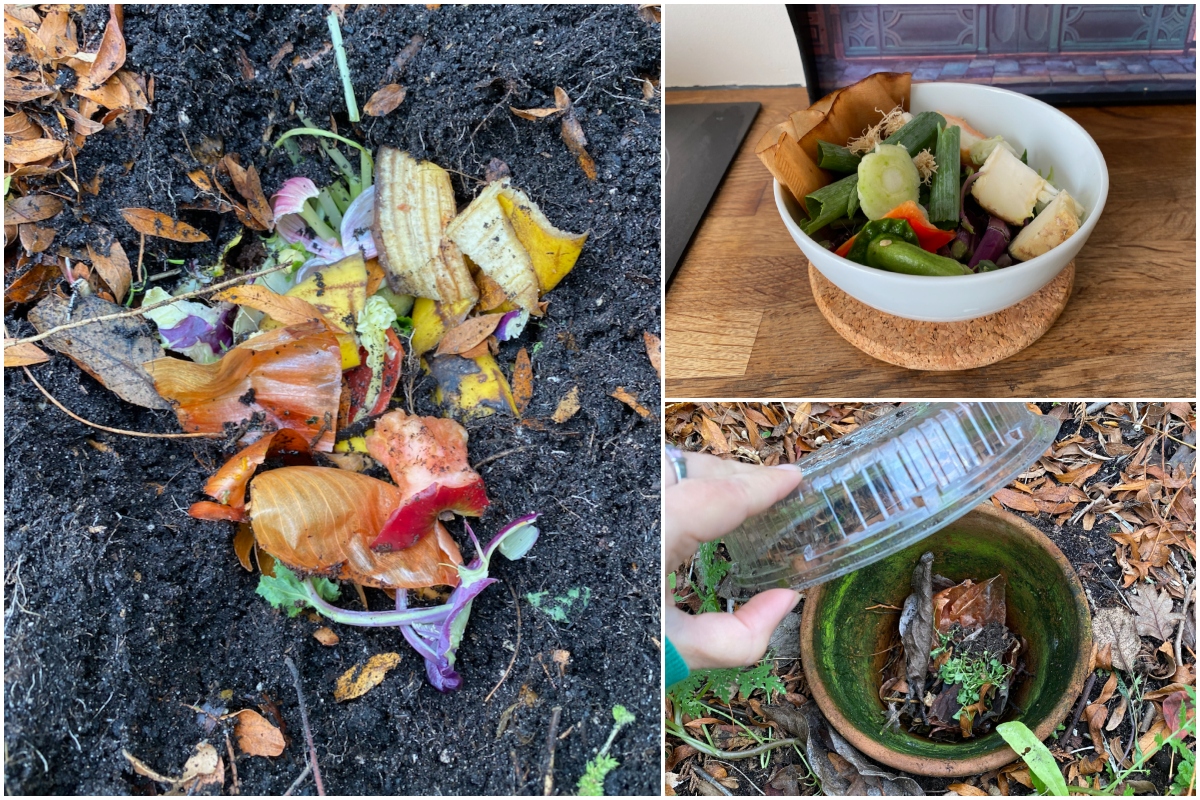
Then one day, on a visit to my mother-in-law’s, I saw her taking a bowl of vegetable peelings to her veggie patch; I followed. She dug a hole in the ground and just dumped the scraps in.
“What are you doing?” I asked, bewildered as she covered up the hole with dirt.
“Composting straight in the garden. It’s how my mother used to do it.”
This was one of those gardening lightbulb moments that will stay with me forever.
What is composting in place?
And more importantly, why did none of the gardening books I had been reading mention it as a possibility? My mother-in-law’s stunning, mature garden was all the proof I needed that this method of composting worked.
When we’re composting in place (also called composting in situ), we’re cutting out the middleman and putting the plant material straight into the ground. In this scenario, that middle man just happens to be the traditional compost pile, or its fancier version, the three-bin compost system.
We’re burying the veggie scraps in the ground so that the underground worms and bacteria have direct access to decompose it. In the process, they also enrich our garden soil.
5 Reasons to Try Composting in Place
Composting in place works particularly well in a few scenarios.
- If you’re gardening in a small space and don’t have enough room for a compost tumbler, heap or system. Burying the compost in the small patch that you have is a space-efficient way to get rid of organic scraps.
- If you find it physically hard to move around compost. Let’s face it, turning compost to aerate it, then sifting it, moving it into wheelbarrows then spreading it on your garden can take more physical effort than one can manage. By composting in place, you get to skip all these steps.
- Composting in situ is the closest you can get to how composting happens in natural ecosystems. Can you imagine Mother Nature building three-part compost systems in the woods? I don’t think so! In nature, as plants die back, they’re covered with a layer of fallen leaves or other vegetation. In spring, new plants emerge from below this layer and start the process all over again.
- You start improving the quality of your soil right away. True, it happens very gradually and very slowly. But you don’t have to wait a full year or two before the results of your composting efforts are ready to go into the garden.
- Similarly, you don’t have to worry about harvesting your compost at the right time (when the compost is “cooked” enough) to feed your soil. Because you are feeding your soil all the time, no pitchfork needed!
And one Reason to Avoid Composting in Place.
Time to deal with the elephant in the room. Or rather the mice, rats or raccoons in the garden. If your space is prone to a rodent infestation, then burying scraps might not be a good idea. Definitely don’t bury any traces of cooked food, meat, grains or dairy.
If you decide to give composting in situ a try anyway, there are three solutions that might help with the pest problem.
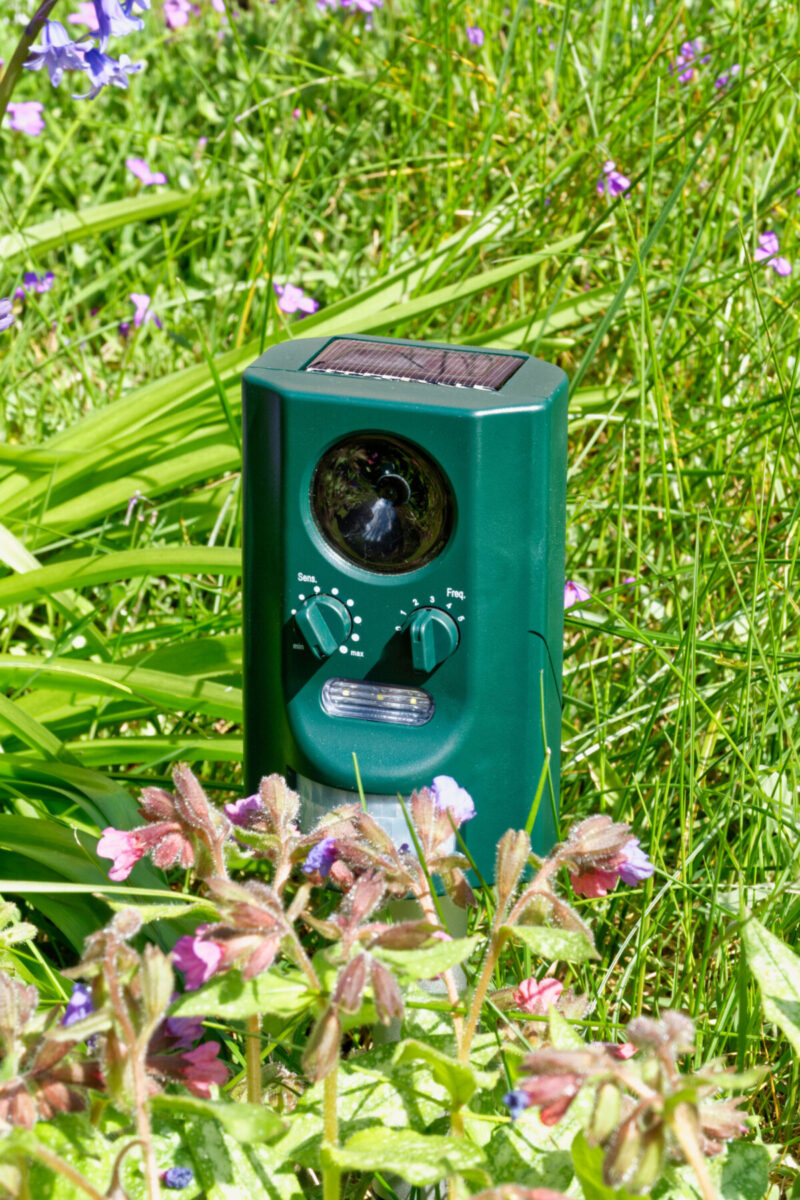
An ultrasonic pest repeller works well for smaller spaces. Keep in mind you won’t necessarily see mice running away, covering their ears. That’s not how this works. But an ultrasonic device will make your garden inhospitable, and the pests will move on in a week or two. Just make sure you get an anti-pest device that’s designed for outdoor use.
Secondly, make sure you bury your compost material at least ten inches deep in order to mask the smell.
As a last resort, you can use composting in place just for your garden waste. Send the kitchen waste to your municipal collection or add it to a closed compost tumbler.
5 Ways You Can Compost in Place
By now, you’re probably thinking: Ok, but how exactly do I do this?
There are a few different ways to compost in situ. What follows is a brief introduction to each of them, including the advantages and disadvantages of each method. But I’d love to continue the conversation and get more tips from our own community of knowledgeable gardeners on Facebook.
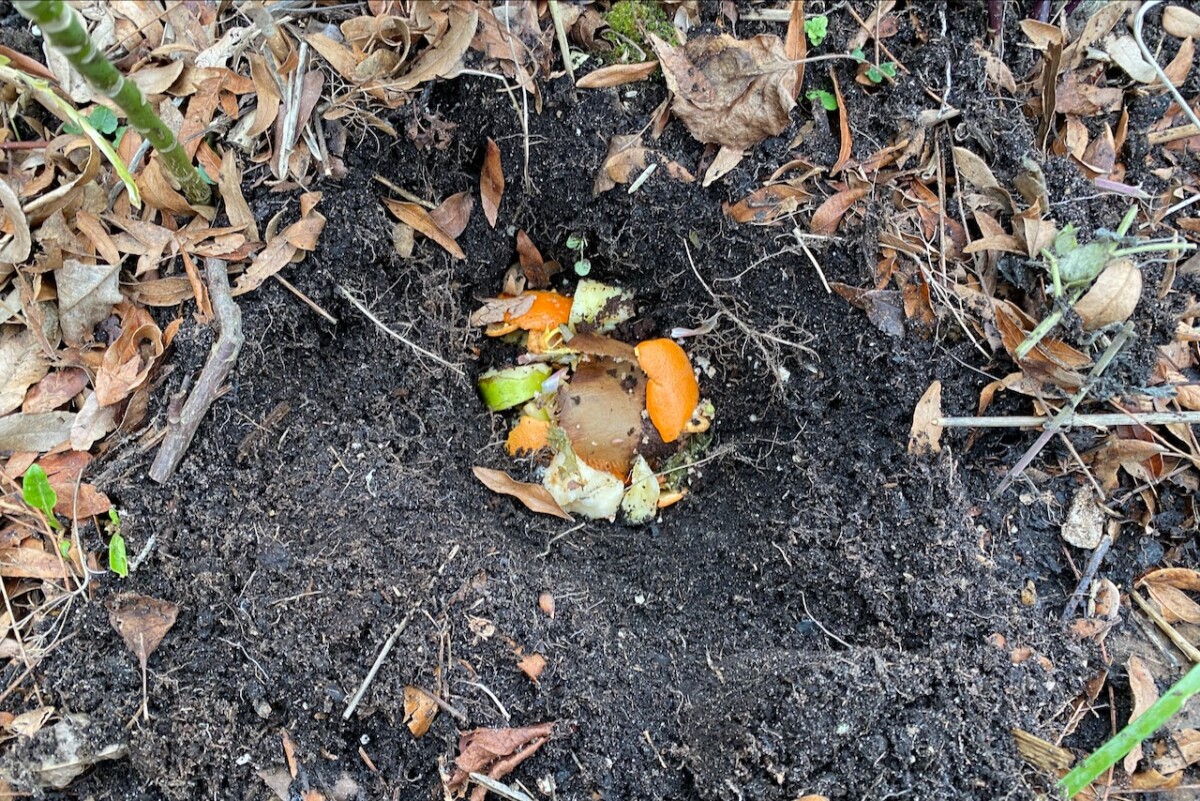
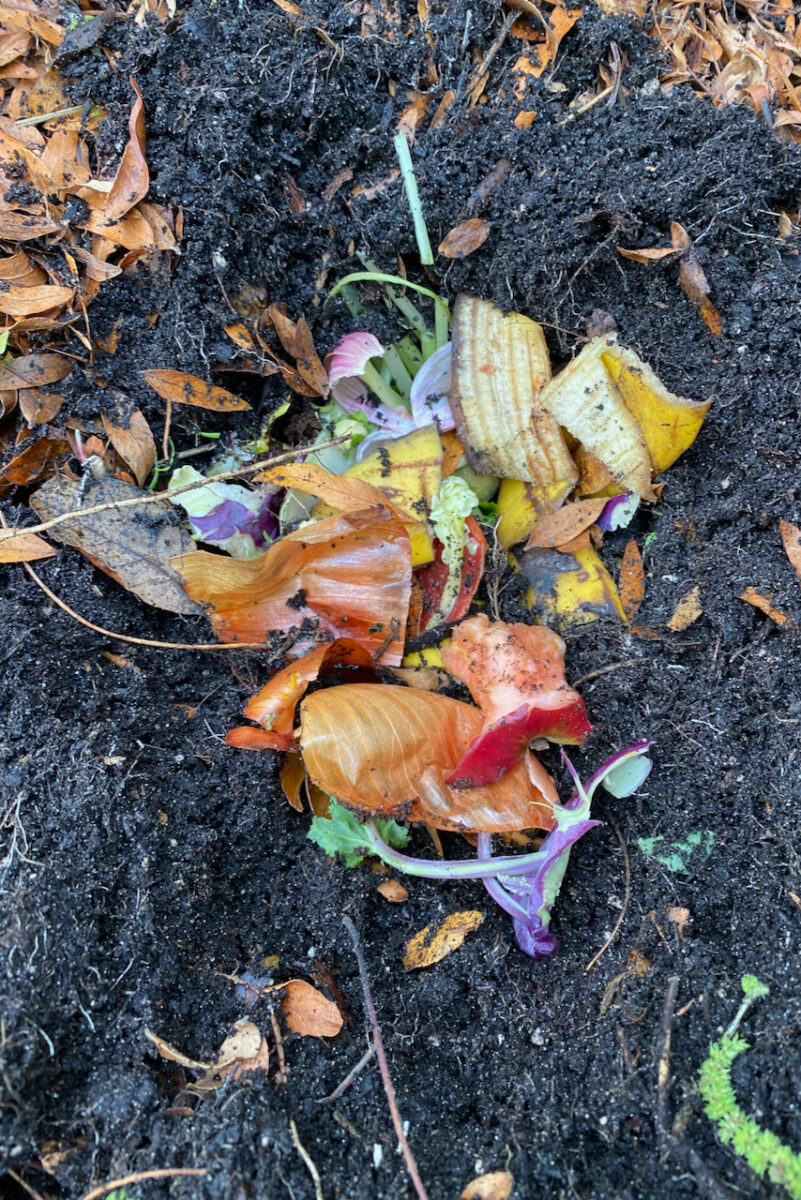
1. Bury scraps straight in the soil (The dig-drop-cover method).
This is what we’re essentially doing in all these methods, but some will be more complex than others.
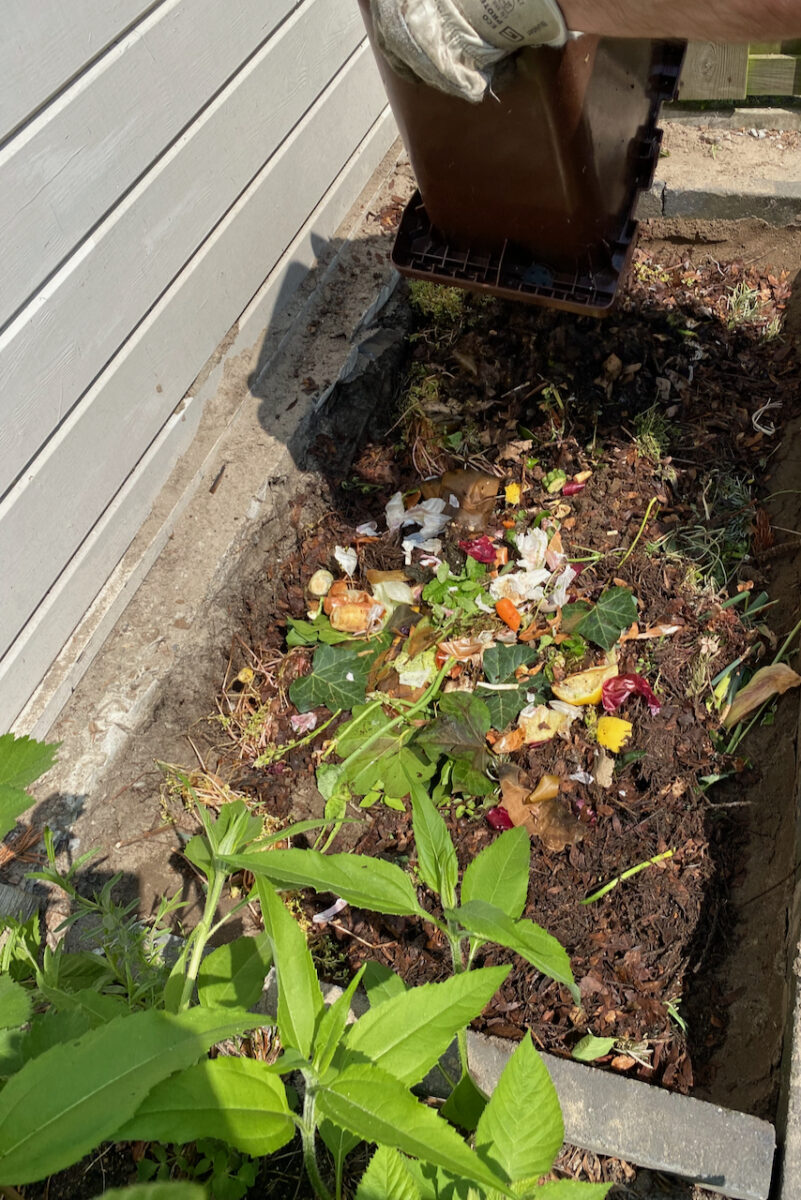
The easiest way to compost in situ is to grab a hand spade, dig a small hole, add the organic material, then cover it up. The worms will sense a new source of food, travel to the location, and indulge in a bit of on-the-spot snacking. They’ll then go deposit their castings (their waste) all over your garden. What could be simpler?
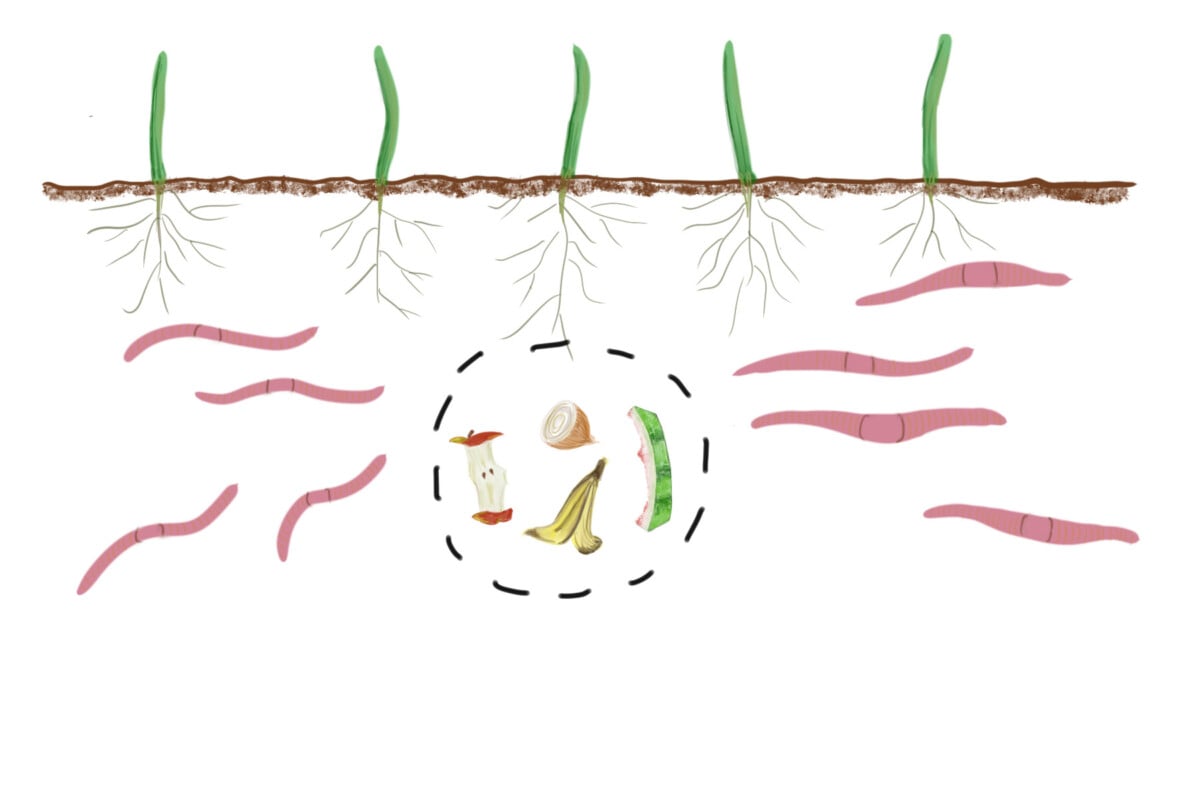
By going around my garden beds clockwise every time I dig, I avoid burying too much compost material in the same place. And by the time I’m back to where I started, there’s no trace of undecomposed scraps in the ground. Except for eggshells, which will always take longer to break down.
The pros of this method
You can do it anywhere you have a patch of dirt to dig in. You don’t need any special equipment other than a hand spade to dig with. If you so choose, you can do it every day or collect your scraps longer in the fridge and bury them about once a week. I prefer to do this more often because I don’t like having to dig a large hole to accommodate all our scraps.
The cons of this method
I found that this method works best in the off-season, from late fall until late spring. That’s when the soil is bare enough to allow me to dig without disturbing any roots.
This is not a con for me, as I use this method in conjunction with a regular compost box method. So all I need to do is switch to the compost pile when the garden is too packed with growing plants to allow digging.
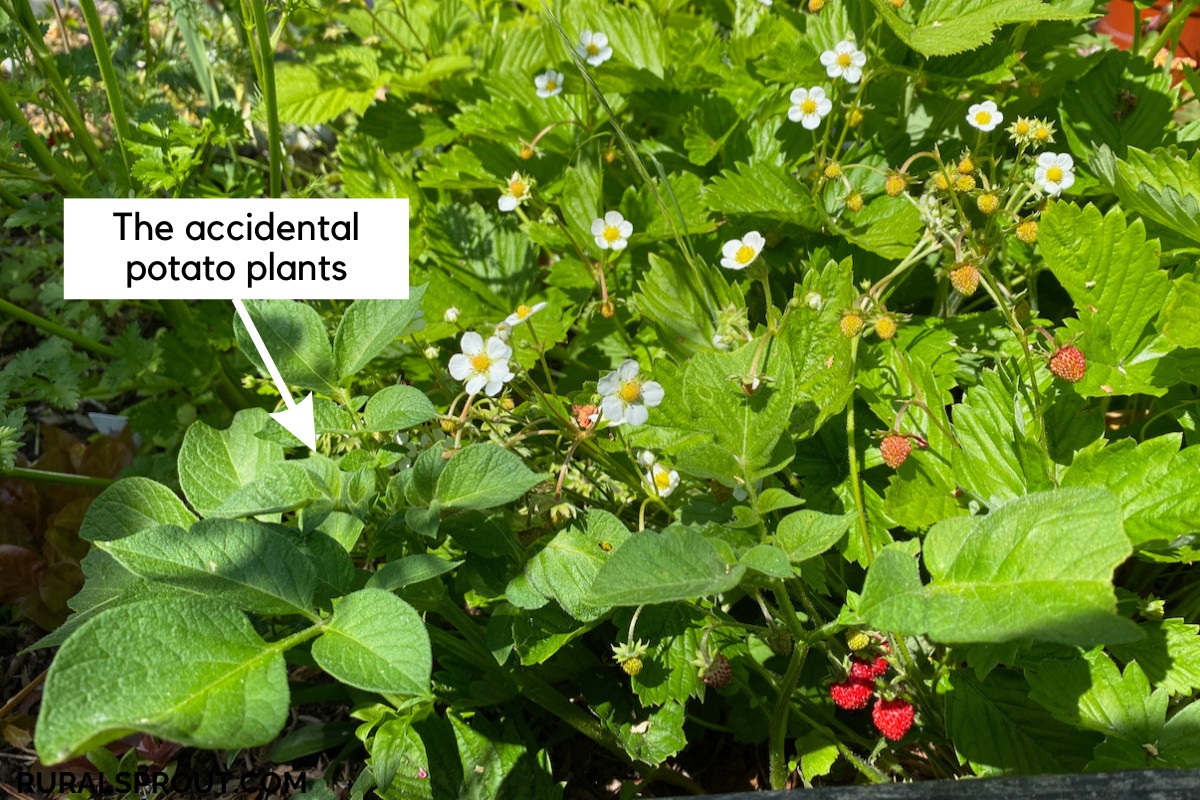
Another detail worth mentioning is that this composting method might yield some surprises. Quite literally! Now if you’re a neat and tidy gardener who does not like interlopers, you might consider this a disadvantage. I, for one, love a good “what is this and when did I plant it?” head-scratcher come spring.
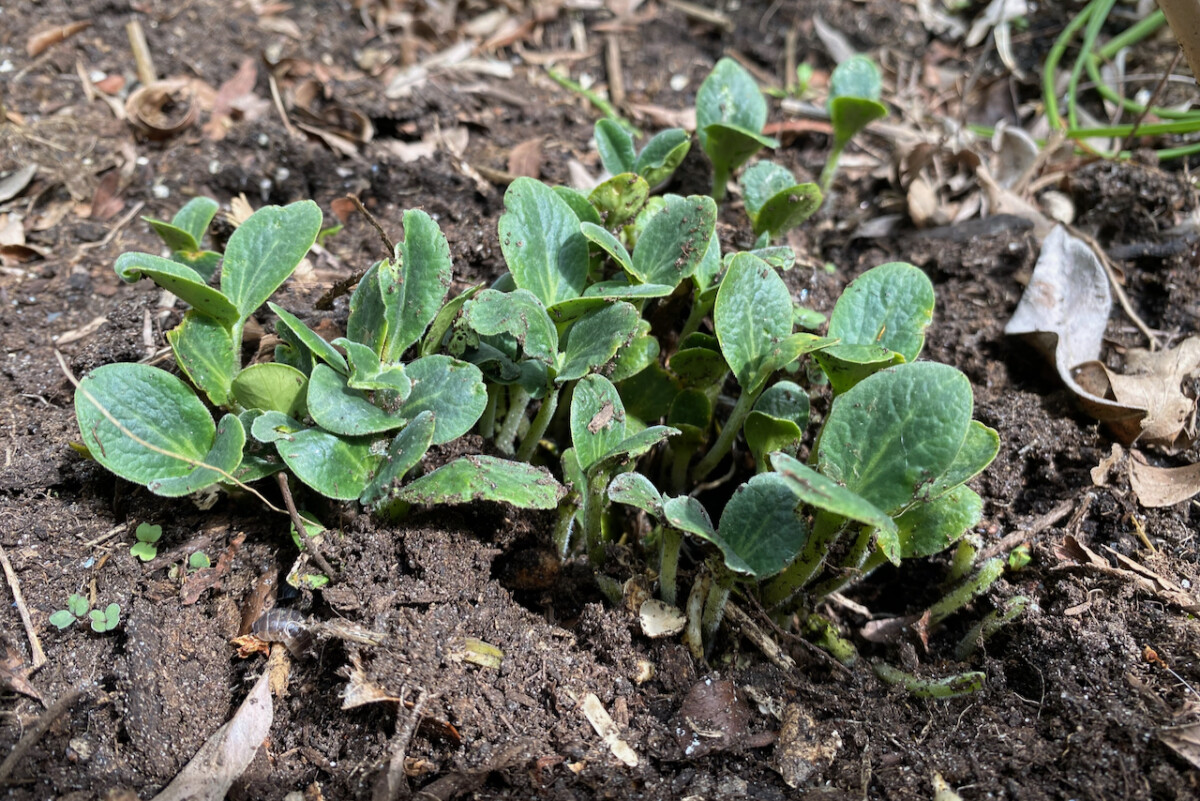
This month, for example, I realized that I have potato plants growing through my wild strawberry (Fragaria vesca) plants. I didn’t plant potatoes there, but I’m sure I buried kitchen scraps there. I live for the mystery of what sprouts up next.
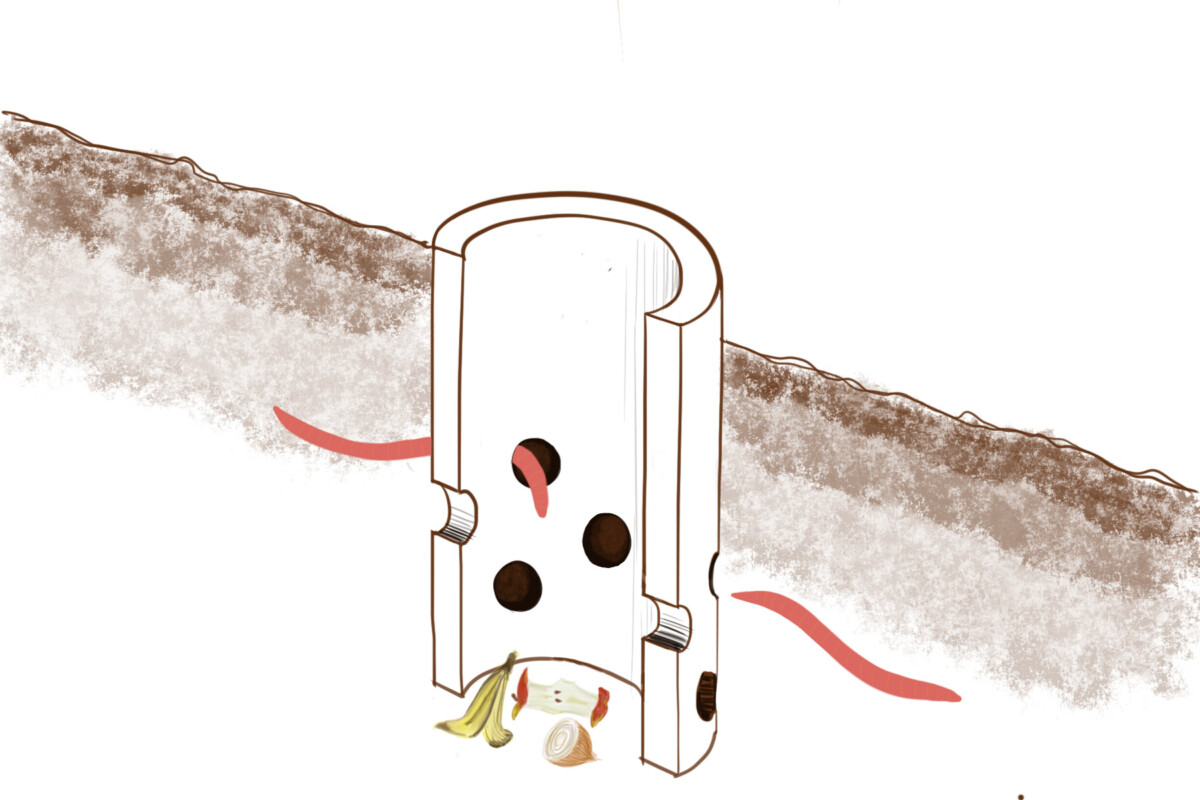
2. Composting in place in a buried vessel.
This is a variation of the method above, except that you drop all your organic material in one vessel that is buried deep in the ground, with its opening at or above ground level. The vessel has holes that serve as a passage for worms and other microorganisms to access the kitchen scraps you’re adding at the top.
Again, the worms come in, feast on your scraps, then “disseminate” the results all over your garden.
I keep using the word “vessel” because there are a few options you can go for. The container that you use can vary as long as it follows these two simple rules:
- It needs to have holes for the worms to go in and out;
- You need to have a lid that fits properly, to keep the critters away (and the smells in).
The pipe method
To give credit where it’s due, I first learned about this system from a permaculture course run by Morag Gamble. Morag is a well-known Global Permaculture Ambassador whom I’ve been following for years. I really like her no-nonsense approach to teaching about no-dig gardening and how to lower soil disturbance.
However, there was one problem with the way she was doing in-ground composting, in my opinion. She half-buried a PVC pipe with holes in it. She would then add scraps to this pipe (via the top of the tube), which were then used by the underground worms. Morag moved between several such structures in her garden so as not to overfill one and to give the worms enough time to consume the organic material.
Doesn’t this sound brilliant? Yup, it does.
However, I did not want to use a PVC pipe. Mainly because I’d be growing food right next to it and couldn’t find a PVC pipe that was graded food-safe. And even if I could (in the plumbing department), it would be very hard to guarantee this once you started drilling holes in it. Plus, I was trying to avoid as much plastic as possible in my garden. (Not always possible, but I sure as punch wouldn’t want to introduce more plastic when other natural materials are available.)
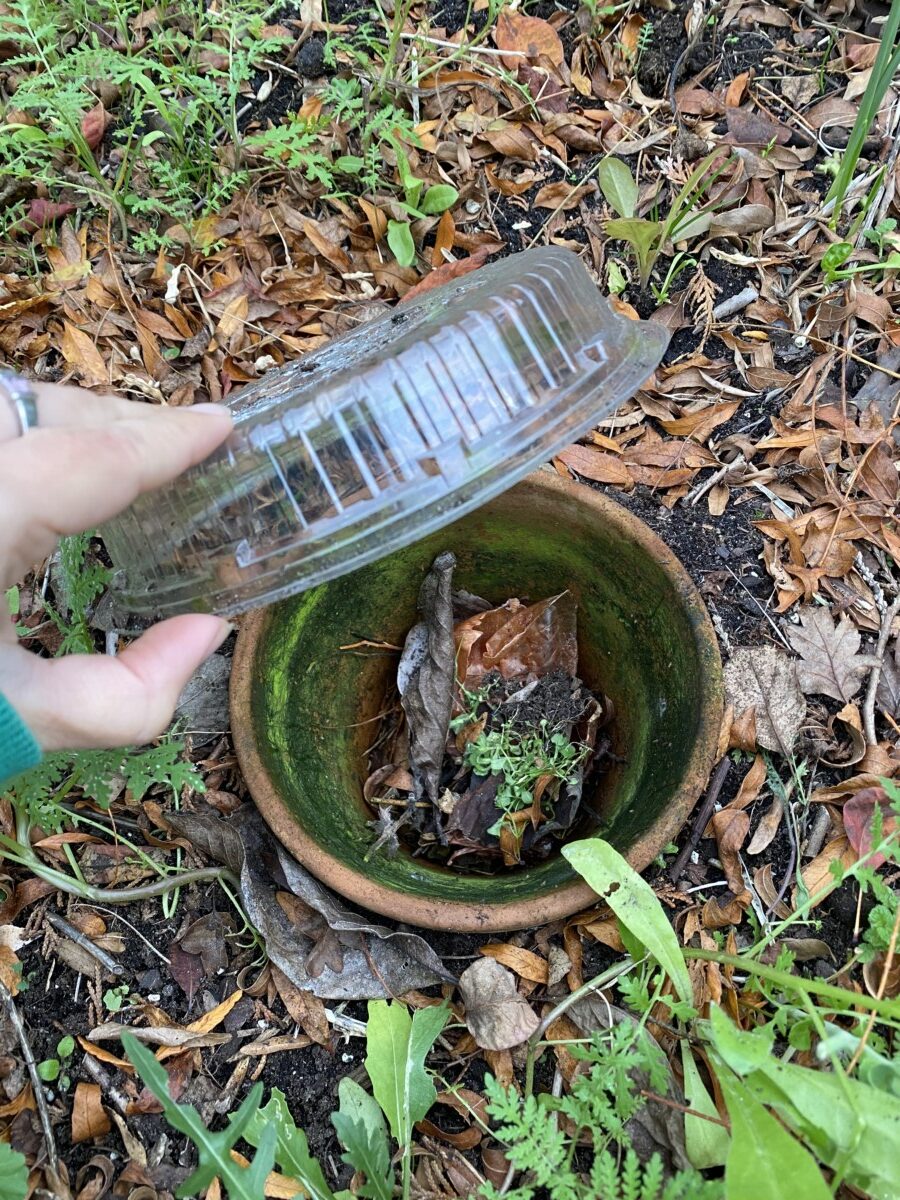
Here are a few ideas for vessels that I have used with great success:
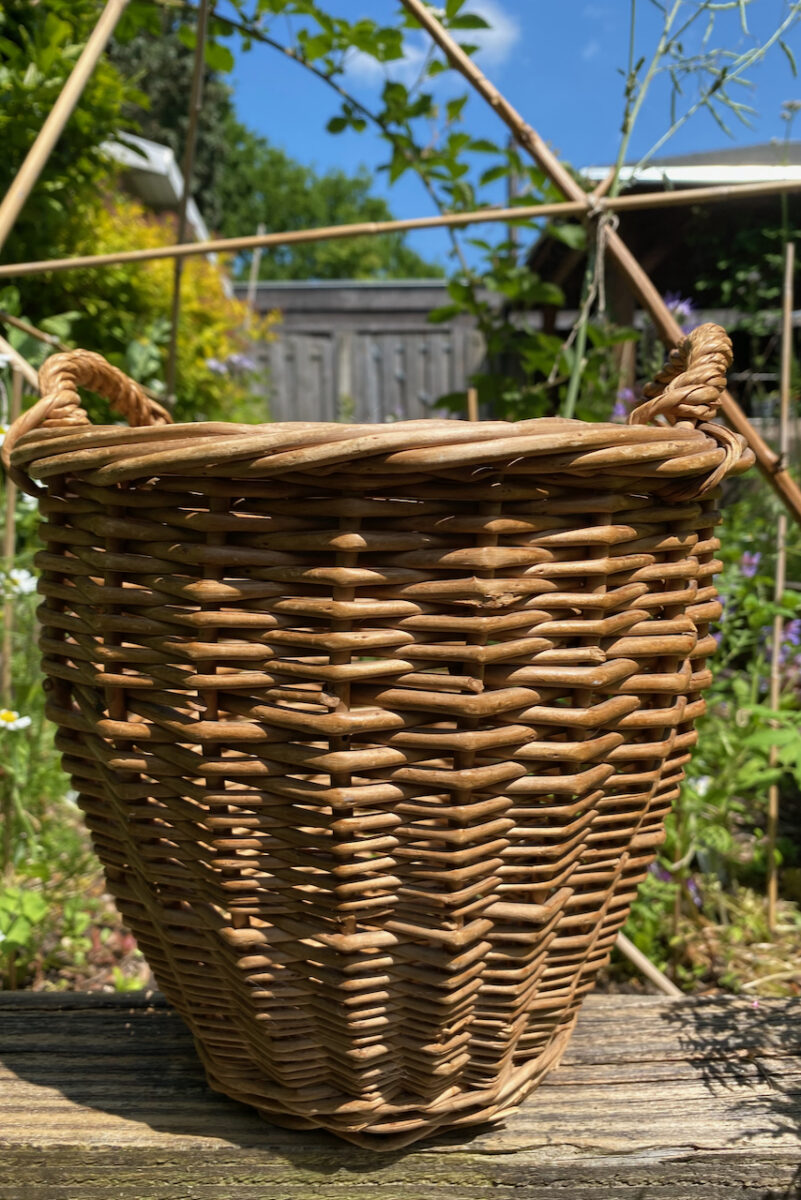
- A basket made of natural materials (preferably one with a loose weave). I used a mid-sized wicker basket and buried it all the way to the top rim. Since this was a picnic basket, it already came with a lid.
- A wood box with perforated sides and without a bottom; so basically a wood tube structure; We made this at home as a try-out and it worked great.
- A terracotta pot with a large drainage hole; this one started as an olla in the summer (an in-ground irrigation system) which I then turned into a composting in place container in the winter and spring.
- A large bamboo tube with holes drilled in it.
The pros of this method
Unlike the previous method, you only dig a few times (depending on how many vessels you scatter around your garden). You don’t have to dig and bury every time you want to dispose of scraps.
The cons of this method
It requires some extra materials. But a couple of rounds around your local thrift stores should secure at least a few vessels to get you started. Do keep in mind that whatever you buy must either be already perforated or easy to drill into. It should also either come with a lid or you should find something else that works as a lid.
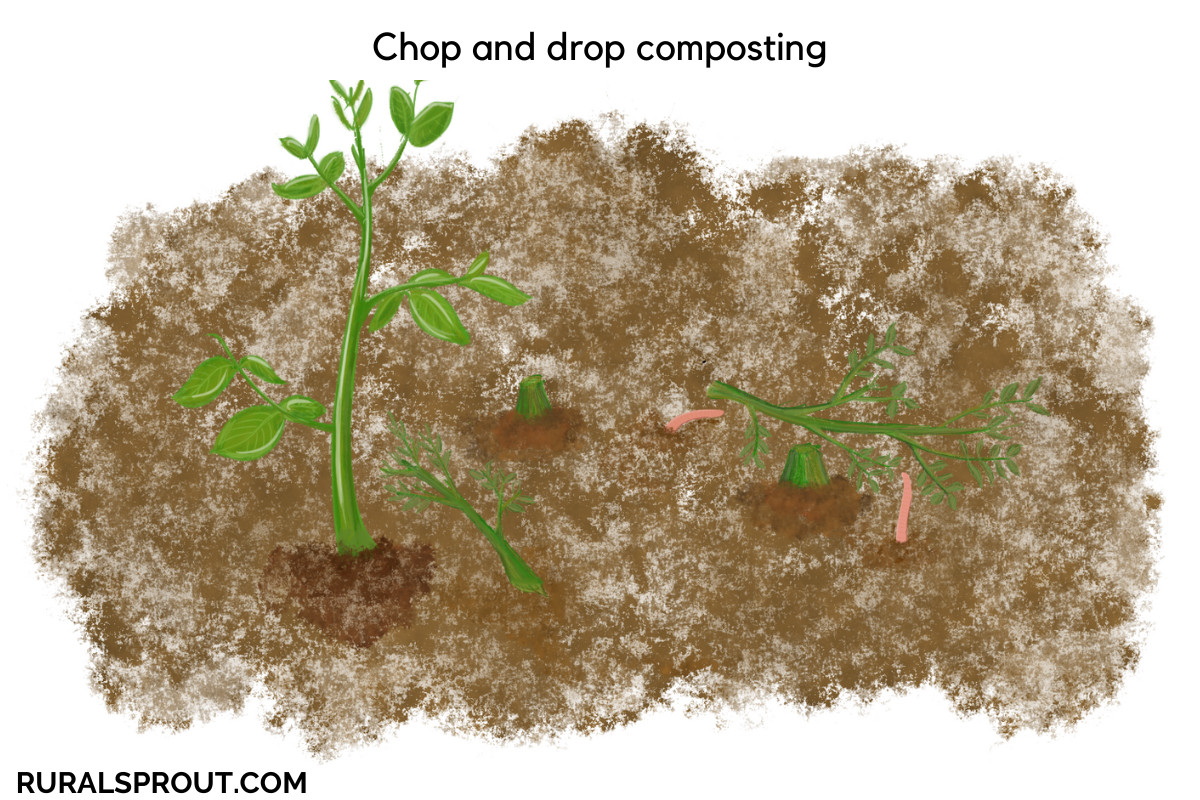
3. Chop-and-drop composting in place
We may not think of the chop-and-drop method as composting in place, but that’s exactly what we’re doing. We are not taking the dead plant, adding it to a compost pile, then bringing back the finished compost. Instead, we’re letting the plant decompose on the surface of the soil, in the same location where it was growing.
True, it’s not as “in place” as burying your organic material. But it still happens in situ. You may even bury it in the spring by adding another layer of fresh compost on top, but not all gardeners do that.
Chop-and-drop is a method that works really well in the fall when the garden usually produces a large quantity of chopped material. So once we’re done with pruning, we can leave the plant debris in situ and let the worms and soil bacteria do the rest. Optionally, you can cover this with a layer of dry leaves or straw later in the fall.
Usually, by the time spring rolls around, the organic material has either been taken down by the worms or has been significantly decomposed. A good layer of fresh compost and mulch is enough to cover what’s left.
Can you chop-and-drop in spring?
Yes, you can use this method of composting year-round. In fact, I do a good amount of my chop-and-drop composting in the spring. I’ve mentioned before that I garden in a small backyard, where every inch needs to do quadruple duty. That means that once spring crops are done and dusted, summer crops will follow closely. That’s how my spring bulbs and my tomatoes have ended up sharing a bed. The timing worked surprisingly well one year, and then I stuck to it.
I garden in a climate where transplanting tomatoes outdoors before late May is an exercise in frustration. (Ask me how I know!) So rather than biting my nails in frustration while looking at a forecast in the 30s or 40s Fahrenheit (that’s single digits in Celsius), I’d rather bide my time and hold off on transplanting my tomato babies until the last weekend in May. That’s usually a safe bet.
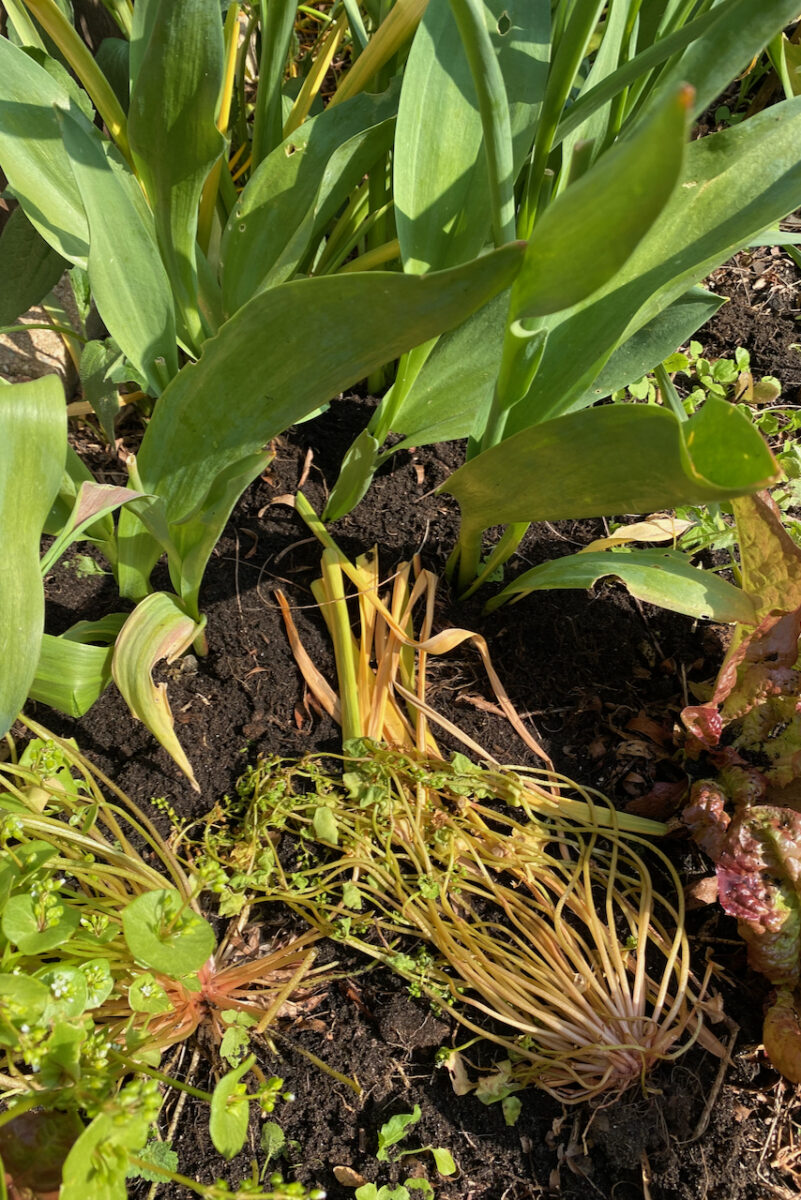
This delay means that I can repurpose some of the spots where I had spring bulbs planted without affecting the integrity of the bulbs. By the end of May, the leaves on the tulips, hyacinths, muscari and fritillaria have dried naturally, so the bulbs have stored enough energy for their next blooming season.
Most of the bulbs are naturalized in my garden, so they’ll stay in the ground year-round. All that’s left for me to do is gently remove the foliage that comes off and set it on the ground next to the bulbs. I do the same for other crops that are past their prime, such as miner’s lettuce (the earliest salad green that I can grow), purple nettles and the leaves of the saffron crocus.
Voila! The spring chop-and-drop.
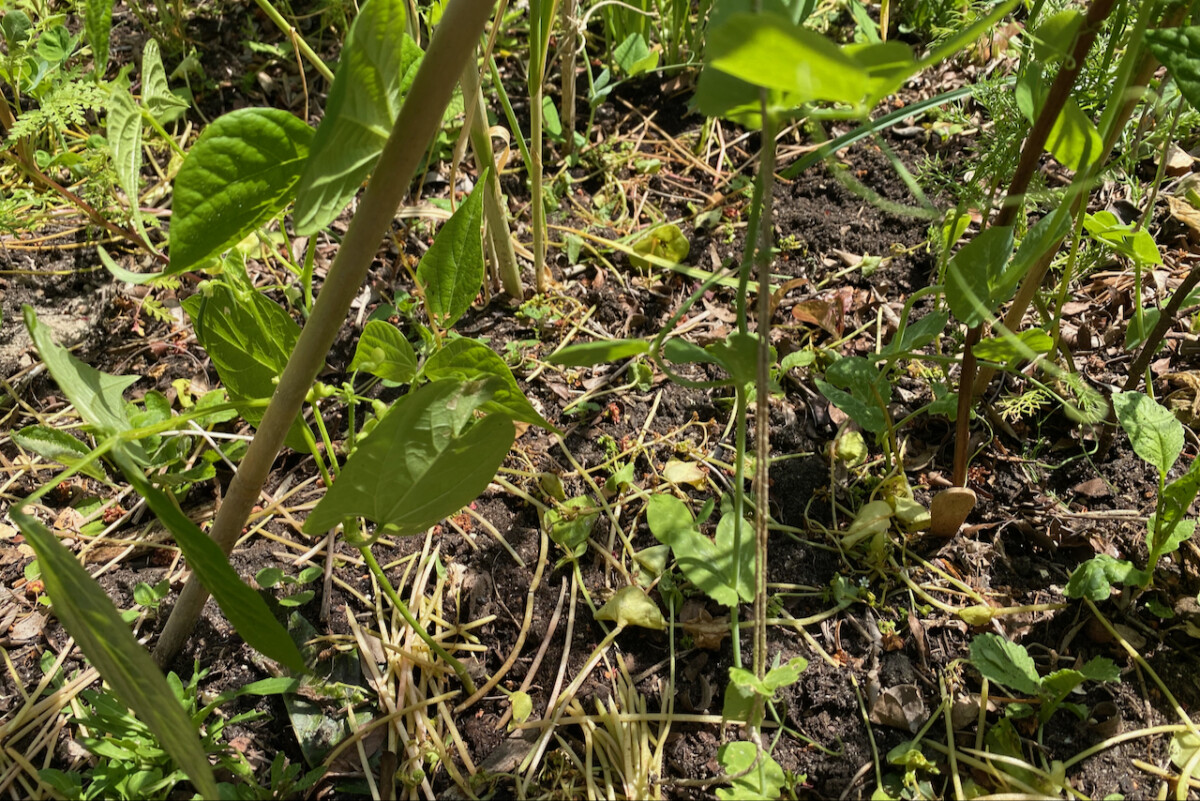
This will act as a mulch for the tomatoes over the summer months. If the bed needs a top-up, I can also cover the chop-and-drop layer with another layer of finished compost at any point during the growing season.
The pros of this method
First of all, not having to worry about whether my small compost box can accommodate all the prunings generated by my garden in the fall is the most obvious advantage of this method. The consistency of this method is also very much in line with my gardening philosophy.
It adds a constant supply of nutrients to garden beds. I’m building up rich soil exactly where I need it. This allows me to plant two intensive crops (bulbs and tomatoes) in quick succession in the same bed.
The chop-and-drop method also acts as a mulch against soil erosion and compaction, especially during the cold months when not much else is growing.
The cons of this method
If you’re a gardener who likes a neat and formal garden, the chop-and-drop method is probably not for you. It may end up looking a bit too messy and random.
In this case, a compromise solution might work. You don’t have to do the drop part as long as you do the chop part.
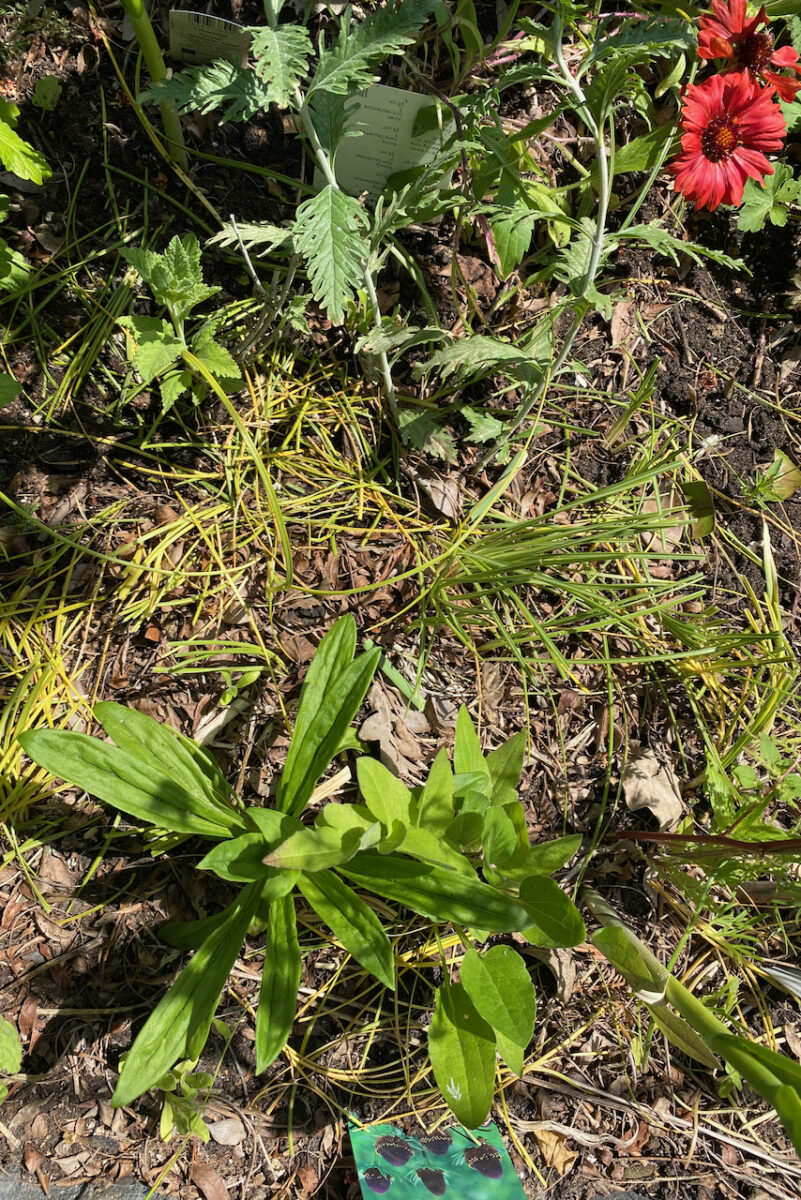
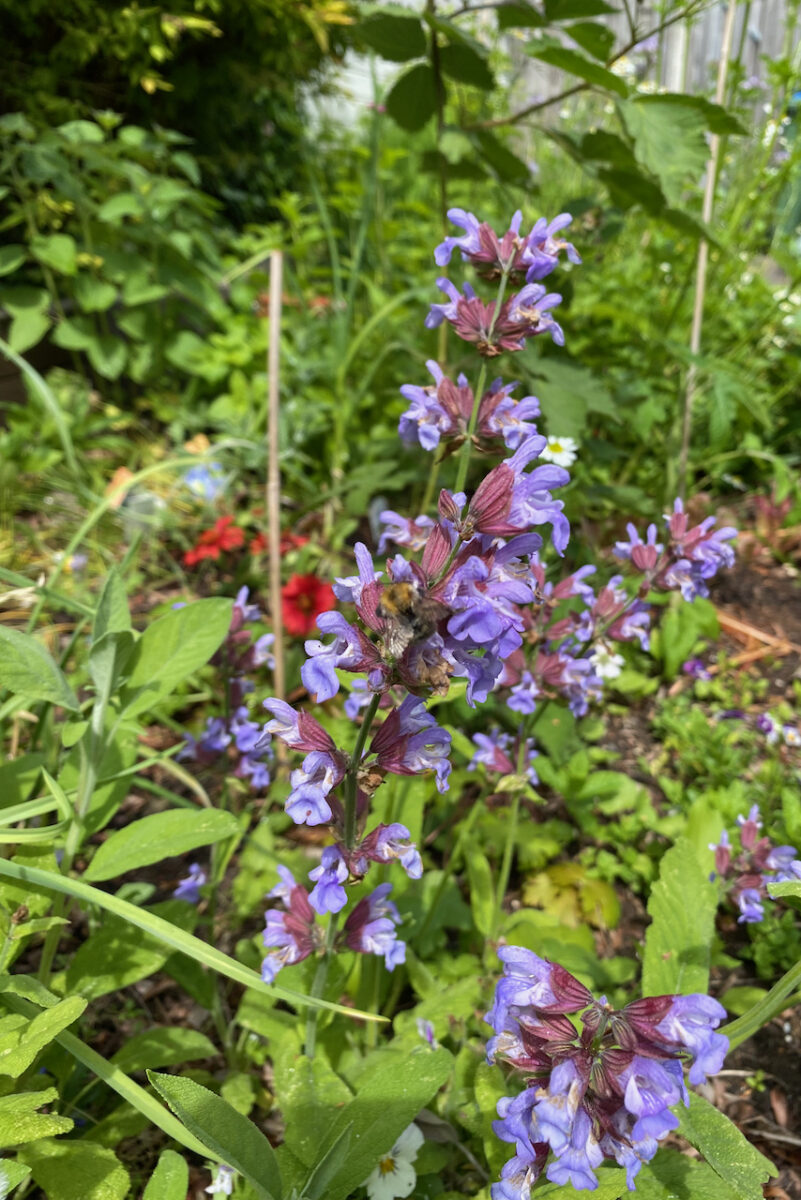
Chop-and-drop saffron crocus over rudbeckia, Russian sage and blanket flowers. This method doesn’t always look neat and tidy, but it’s very nutritious for the plants.
So instead of pulling out veggies and annuals at the end of the season, simply cut them at ground level and leave the roots in the soil. The root system will simply decompose in the ground, feeding the good guys and keeping the soil aerated. You can add the part of the plant that you’re cutting to a regular compost bin.
Another detail to pay attention to is removing diseased plants from the garden instead of dropping them in situ.
This is especially important for fungal diseases, such as tomato blight and rose black spot.
These first three methods are suitable for composting as you go. So as you generate the organic material, you can start composting it right away.
For the following two methods, you need to collect a bit of organic waste before you start composting it. (I call it waste, but there’s no such thing as waste in nature. And that’s what we’re aiming for when composting in situ.)
4. Trench composting between rows.
There are several variations of trench composting, but I’ll focus on composting between rows because it’s truly different from the other “in-ground” methods. This composting in-place method is more suitable for fall when, in addition to scraps, you also have garden debris to process.
And it’s especially effective if you’re gardening in raised beds. You’re basically using the empty real estate space in between your garden beds in the off-season to compost close to where you need the end product.
Start by digging a trench in between your garden beds. Set aside the soil that you’re digging out. You’ll be using some of it to top up your compost trench. What’s left of the soil that you displace will be added to your raised beds.
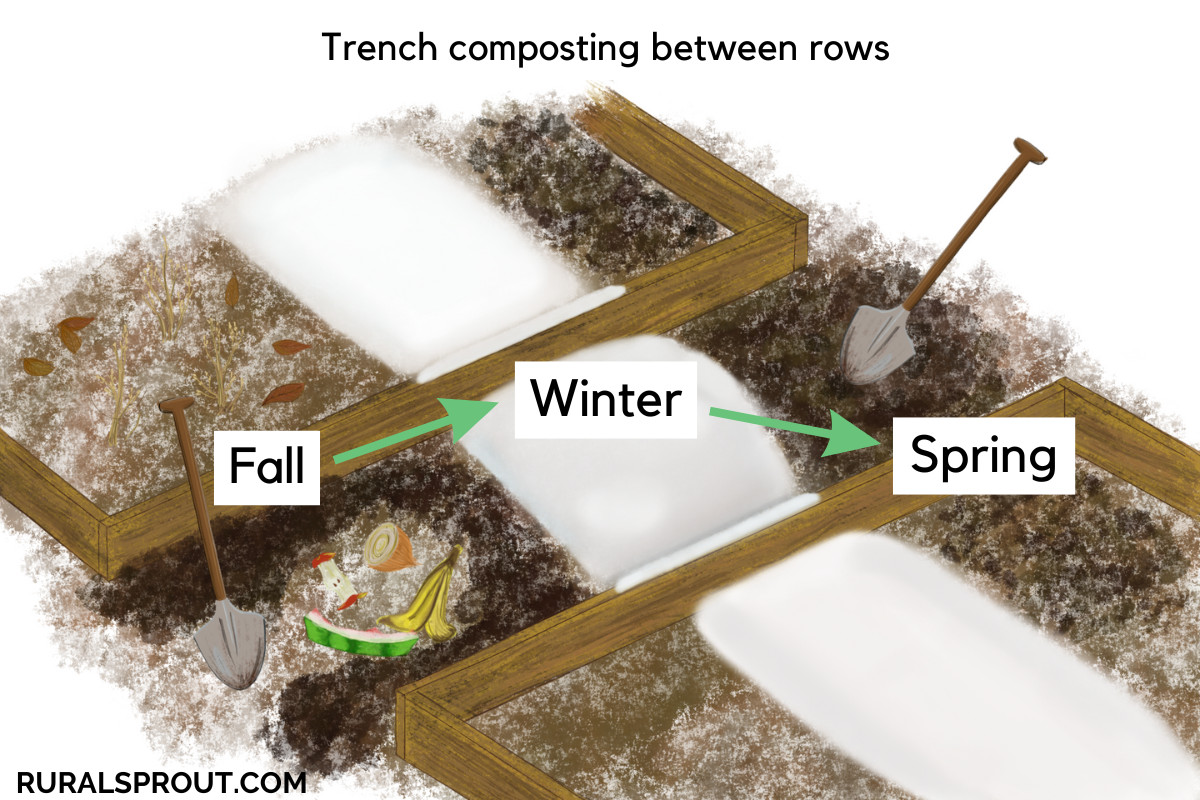
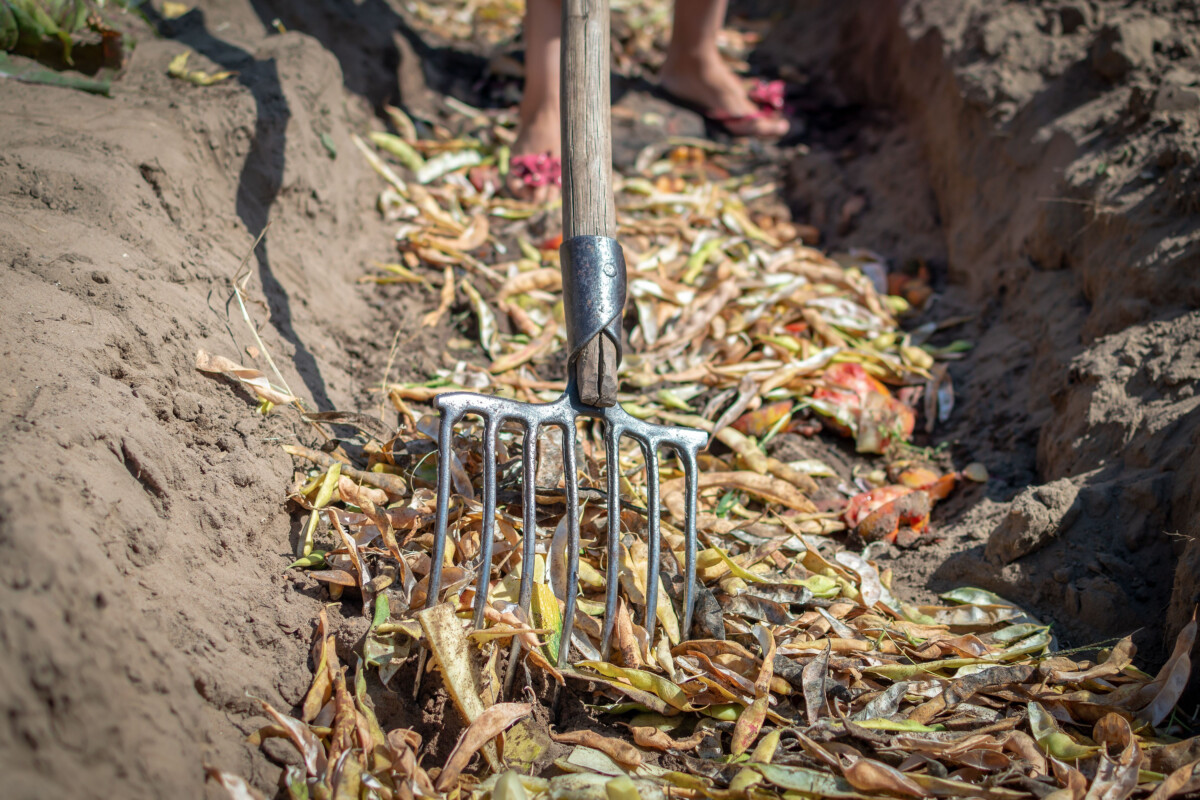
Dig your trench deep enough – about one to two feet (30-60 cm), depending on what you have underneath. Then start filling it back up with a combination of fruit and veggie scraps, dry leaves, grass clipping and shredded garden waste. Bury everything under a layer of dirt and forget about it for the rest of the fall and winter. The mound will slowly decompose.
Come spring, right before you start planting in your beds, the compost trench will have turned into nutritious soil. Dig it up and top up your garden beds with this super-soil. The pathway between your beds will no longer be trench-shaped by this point, so you can walk on it as usual. By letting nature do the job, you’re making your own clean soil amendment for free.
Trench rotation variation
Another variation of this method is to decommission one of your garden beds by turning it into the designated trench area. Depending on what season you’re doing this, it may take about three to four months (or longer) for the compost materials to decompose.
Once the material in the trench bed has decomposed, that specific garden bed can be put back into veggie growing rotation. You will grow amazing vegetables with this super-soil. It’s great at feeding nutrient-intensive vegetables, such as tomatoes and cucumbers.
The pros of this method
You only dig once since you’re digging a larger surface area. You can also dispose of a larger quantity of organic material than you would with the previous two methods.
The cons of this method
Just like the previous methods, you still have to bury your compost deep enough to prevent critters or pets from digging it out. Another disadvantage is that you can’t use this method all year long. Unless, that is, you dig your trench away from your garden beds.
In addition to these two cons, you also need to collect quite a lot of material in order to be worth digging a trench. I usually start freezing my kitchen scraps about a month ahead of starting my trench. Couple that with the bags of dry leaves, brown paper bags (unwaxed and non-glossy) and all my fall pruning debris, and I have plenty to compost.
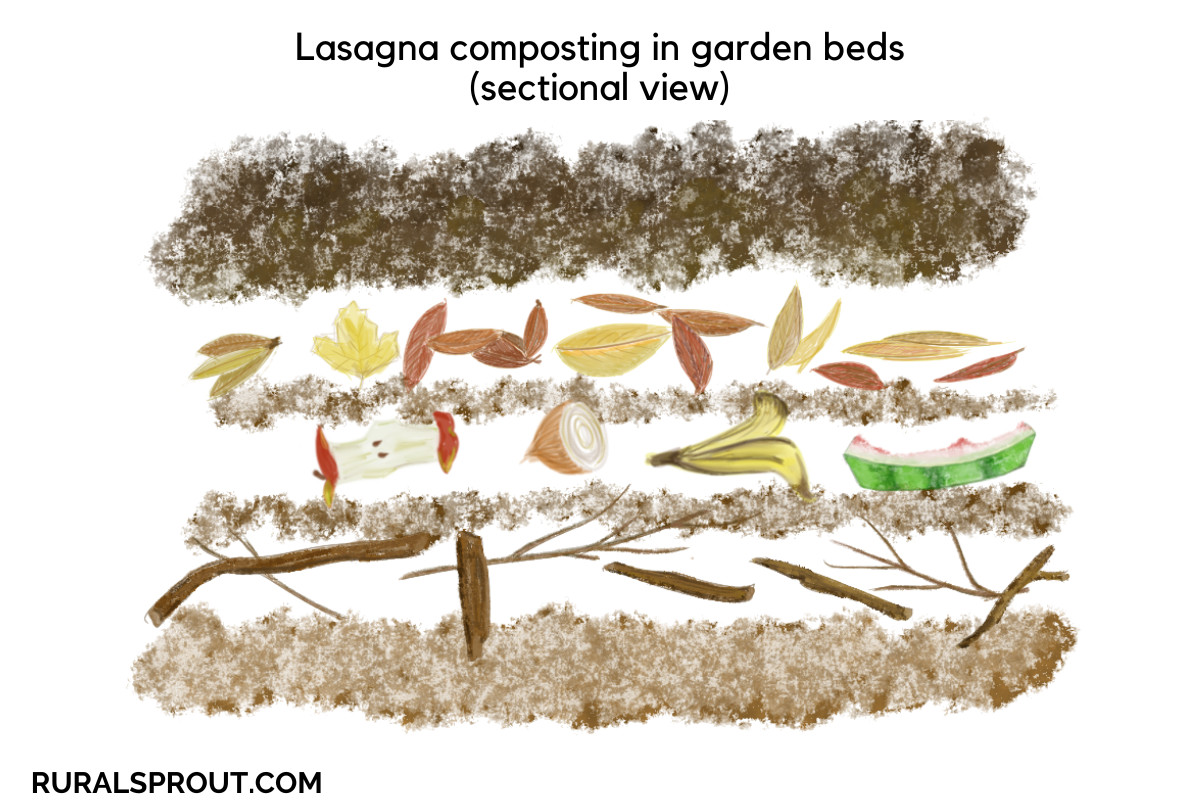
5. Lasagna composting in your garden beds.
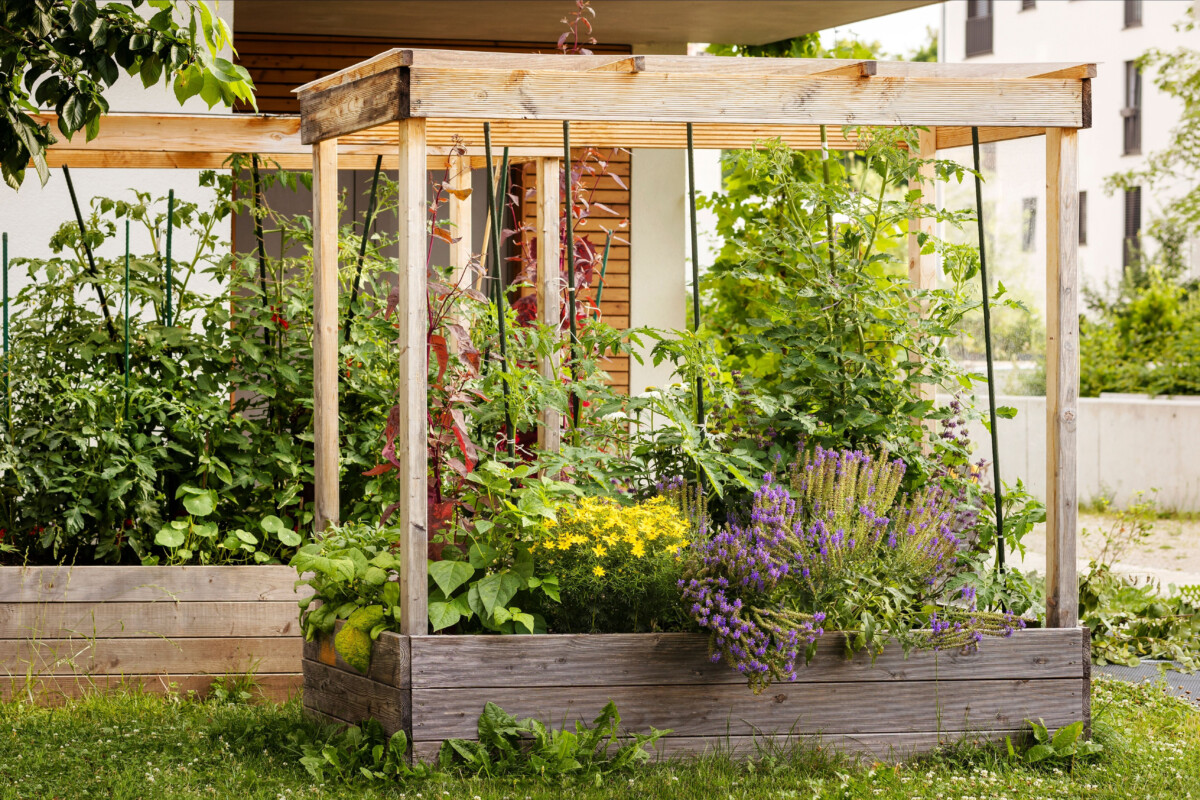
My colleague, Cheryl, has an amazing no-dig garden that is not only super-productive but also a joy to look at. She wrote an extensive guide on how to build a no-dig garden, and creating a garden bed lasagna-style is part of the process.
In the fall, you’re layering compost and organic matter (including kitchen scraps) in the spot where you’re building your bed. As all these “lasagna ingredients” decompose, they’ll form the backbone of your new garden bed.
But you don’t have to build a no-dig garden. You can simply use the lasagna method to fill a regular garden bed. I’ve done my own share of lasagna bed building over the last three years, as I’ve been converting part of my paved backyard into sunk garden beds. It was, and still is a process.
After gradually removing about two hundred concrete pavers and the one-to-two-feet-deep layer of sand we found underneath, we had a large hole to fill back up.
Enter lasagna bed building.
We built our beds back up using all the prunings we’d cut in the fall, small blocks of decomposing (untreated) wood, as much organic kitchen waste as we could save in our freezer and bags of leaf mold. We topped it off with finished compost from our own compost bin. (Yes, we have one of those too.)
The pros of this method
Using the lasagna composting method to build up our veggie and perennial beds has saved us a significant amount of money. As we created our garden beds gradually, over the course of three years, we actually saved more and more by using the “fillers” that our garden generated.
In the first year, we had to buy compost to top up the beds. But by the last bed we built, everything we used had been collected and grown in our own garden. The feeling of satisfaction (dare I say, smugness) is priceless.
The cons of this method
Just like the previous method (trench composting), this one also requires a bit of planning. You have to collect your organic material diligently over the course of several months. Perhaps more of an inconvenience is having to store all of this material during the collection phase.
We had bags of dead leaves (turning into leaf mold) stacked in our shed. Bags of kitchen scraps in our freezer. And various piles of garden debris stashed away in the corners of our backyard. Even though they were out of sight, I still knew that they were there, so it was grating on my sense of order.
But filling a garden bed without buying an ounce of compost was well worth it.
Wow! That was quite a composting-in-place tour de force, wasn’t it? Long gone are the days when I was intimidated by the thought of making my own compost. I’m sure there are many other ways and variations to do it. And I’m curious to find out how you’re composting in place if you’d like to share with our Facebook community.

Get the famous Rural Sprout newsletter delivered to your inbox.
Join the 50,000+ gardeners who get timely gardening tutorials, tips and tasks delivered direct to their inbox.