

As an overly-protective gardener, I’m equally excited and anxious about my vacation plans for this summer. I’m more than ready for a change of scenery, and the anticipation that comes with planning days of doing absolutely nothing.
On the other hand, I am slightly anxious about leaving my garden unattended for a few weeks at a time in the hottest month of the year. Yes, we will have housesitters, but they’re here to be at the beck and call of our pets, not our tomato plants. That would be especially cumbersome if we have another drought like we did last summer.
Last summer, I found a solution that worked really well for keeping our garden watered while we were away. Unfortunately, it was after our long summer vacation, so a lot of the damage had already been done. But it worked wonderfully when we went away for a week in August.
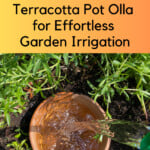
Said solution is called an olla (read kind of like oh-yeah). It’s a very old and very efficient way of putting moisture into the ground, right where the roots of the plant need it.
What is an olla?
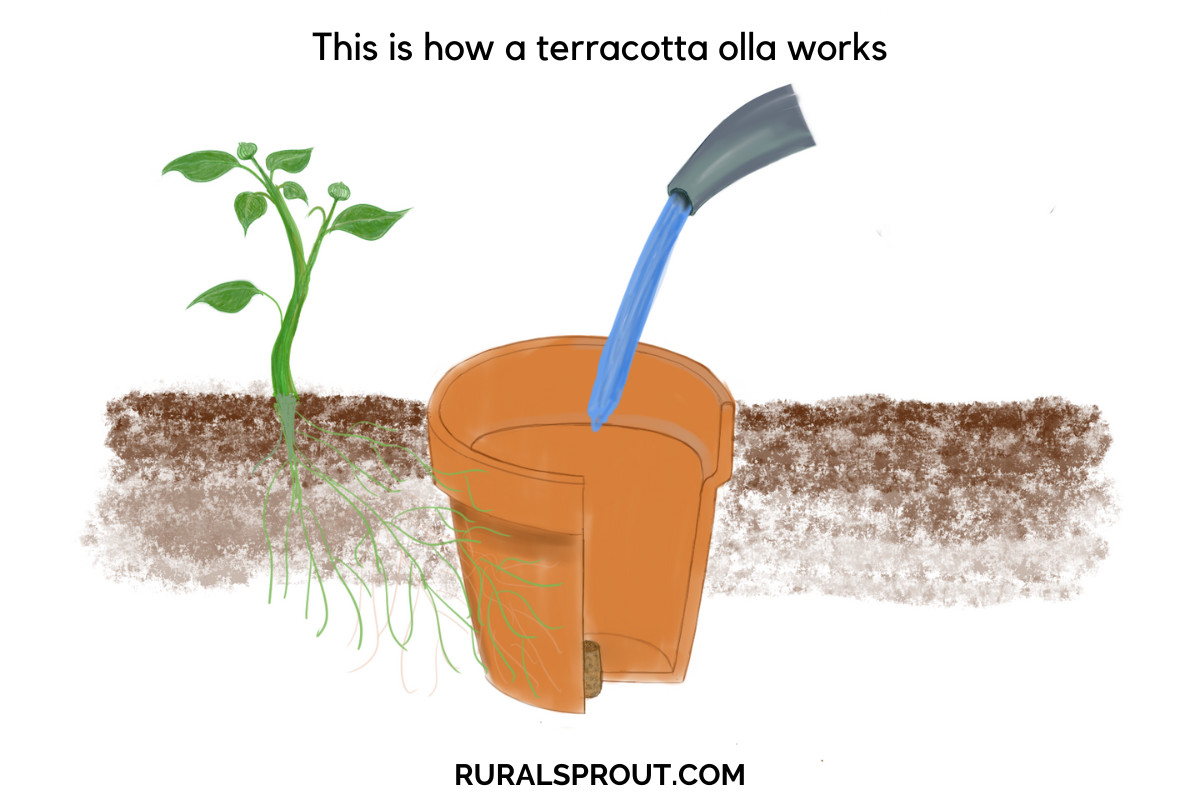
Simply put, an olla is a terracotta (or any other type of unglazed clay) vessel that you bury in the ground and fill with water. Gradually, and only if it’s needed, this water seeps out through the pores of the terracotta and feeds the roots of the plants nearby. Over time, the roots of the plants in the vicinity of the olla will start growing towards this source of water.
You can buy ready-made ollas, but even a houseplant-sized one will cost a pretty penny. The larger ones meant for outdoor use can go for sixty dollars or more. So the obvious choice is to DIY some ollas using terracotta pots.
Related Reading: 8 Things You Need To Know Before Using Terracotta Pots
6 Reasons to Use an Olla in Your Garden
1. Home-made ollas are a low-tech solution.
We can keep our olla system as simple as 1-2-3. That’s because we only need three “ingredients” to make it work:
- The terracotta pot;
- Something to plug the hole of the terracotta pot;
- A cover for the pot.
For my small garden, a few ollas strewn about where I’m planting thirsty fruit-bearing plants is enough to make a difference. If I had a bigger garden, I could hook up the ollas to a more elaborate irrigation system. But the magic of ollas is that the simple and frugal solution is often enough.
2. Ollas reduce the time you spend watering.
We don’t have to wait for vacation before you set up ollas in your garden. We can do it as soon as you transplant your seedlings in the ground in spring and keep this system running all the way until late fall. That means an entire growing season where we focus on keeping the ollas filled, rather than on watering our entire garden.
3. Ollas cut down on the amount of water you use.
In addition to saving us time, ollas will also save us water. Because the water is directed deeper underground, it will not evaporate as quickly as a top sprinkle might.
4. Ollas help us water below mulch level.
I mulch my garden diligently during the summer, but I still have to water it. Surely, I can’t be the only one finding it hard to water below the level of the mulch, as close to the roots as possible. Ollas solve this problem by dispersing the water underneath the mulch.
5. Ollas prevent water stress.
Even when we have the best of intentions, during a hot and dry summer, plants will go through cycles of being (over)watered and underwatered. By making the water available in an underground reservoir right next to the roots, we can avoid this cycle of too wet followed by too dry.
6. Ollas prevent soil compaction.
Because we’re directing the water deeper underground, we are not compacting the soil every time we water.
How to make an olla
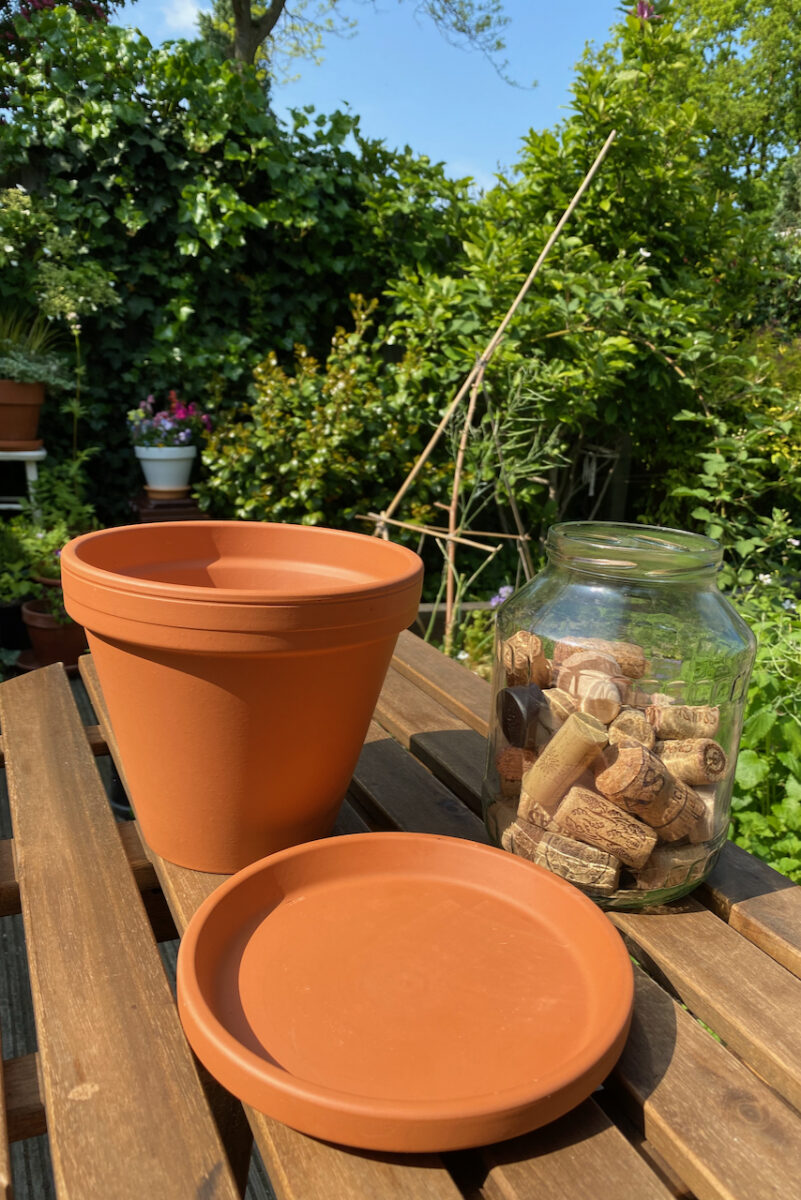
Step 1: Collect your materials.
You only need three things to make a basic olla:
A terracotta pot.
If there is such a thing as a terracotta pot without a drainage hole, I couldn’t find one. At least, not an unglazed one. You really need an unglazed pot because it’s that microporosity that lets the water seep through. Once the pot has been glazed, that property of the clay is gone.
If you’re planning on relying on only ollas for watering your garden, you’ll need to place one every four feet or so. The larger the diameter of the olla, the further apart you need to place them. The terracotta pots I’m using are about 14 inches wide at the top (about 35 cm).
I’ve decided to install them gradually and test the ground first (pun very much intended), so I’m only adding ollas to my tomato beds this year.
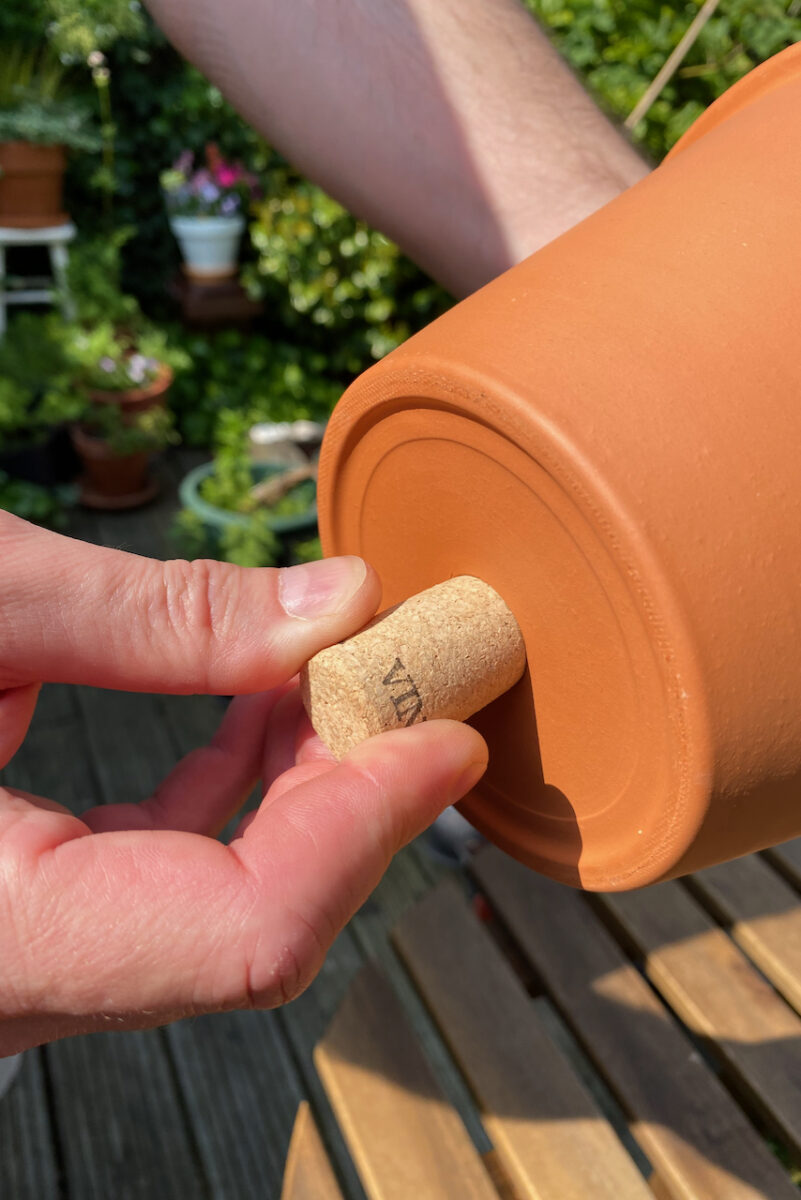
A plug for the terracotta pot.
In order for this system to work, you need to plug the drainage hole of the pot in order to prevent water from pouring out too fast. There are several options for this. You can use a cork, a wax seal, some food-grade putty (look for ones made out of flaxseed oil) or a non-toxic sealant from an aquarium supply store.
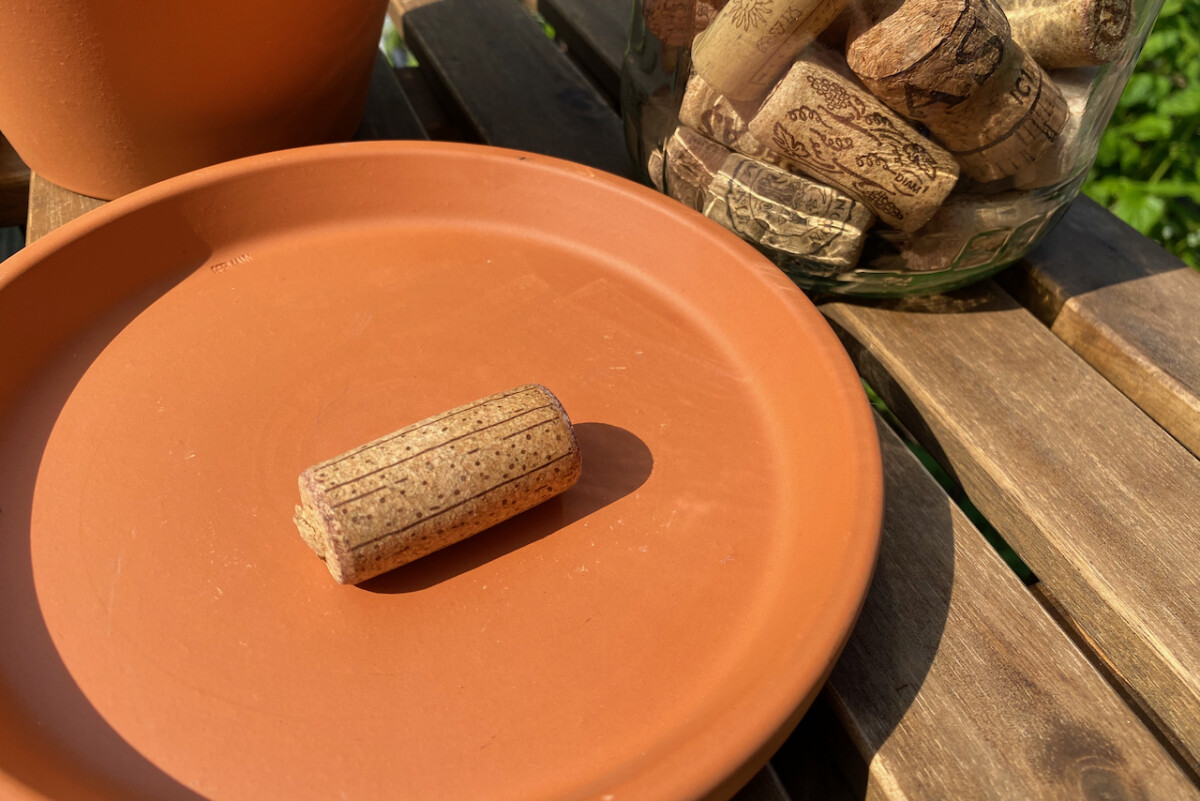
It only took me three bingo-like draws out of my vino cork jar to find the right size cork for the pots I had bought. If you have a cork jar (are you even a DIY-er if you don’t have one?), I suggest you start there.
As a backup, I also had a block of wax that I could have heated and used as a seal. I might still do that with the smaller pots that I’ll use as ollas in larger containers.
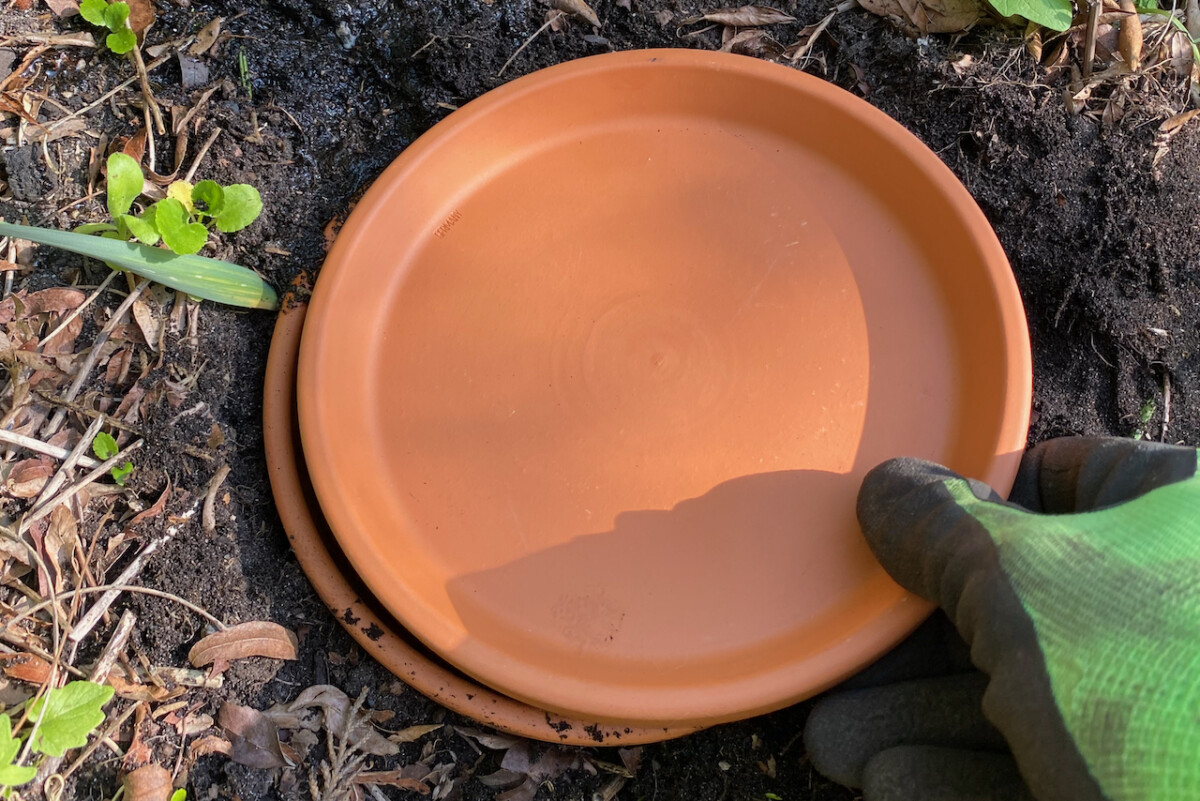
A cover for the terracotta pot.
Once you fill the pot with water, you don’t want to leave it open. First of all, the water will evaporate much faster, thus defeating the purpose of the olla in the first place. You also don’t want it to become a drowning spot for insects or a breeding ground for mosquitoes. You can use whatever you want as a cover, as long as it fits snugly enough on top.
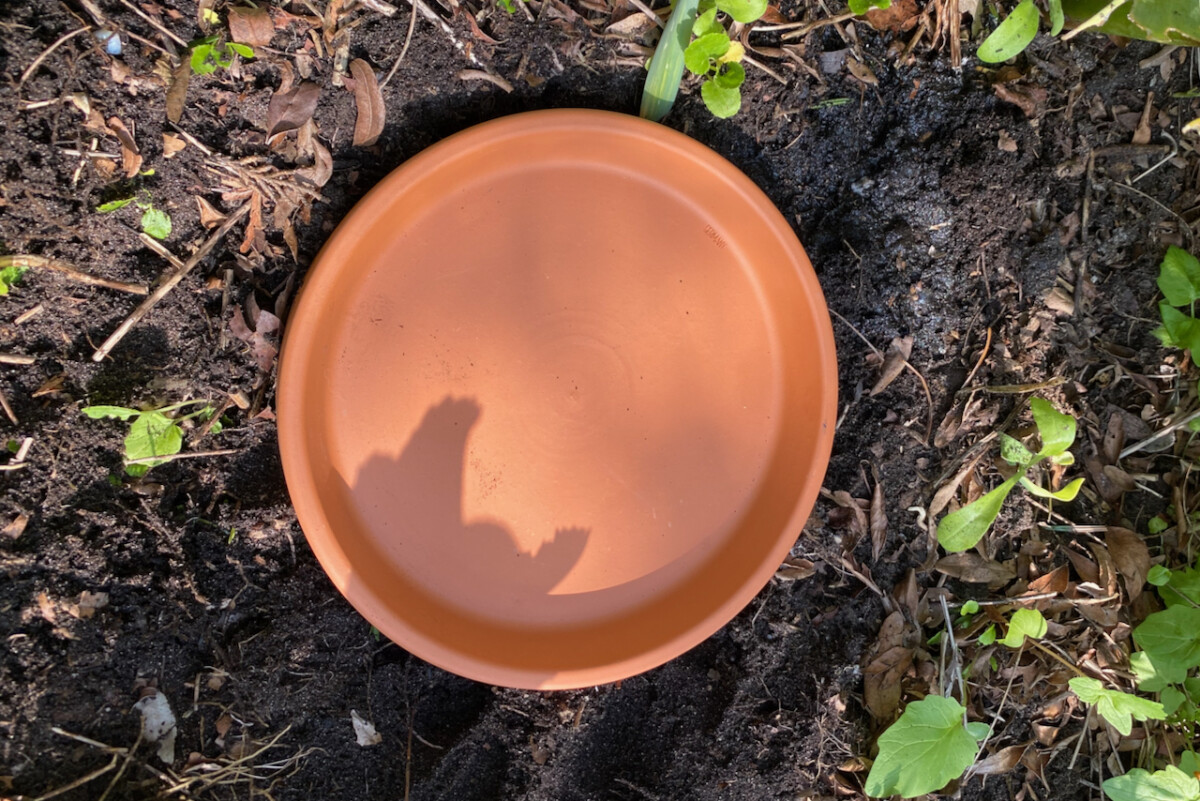
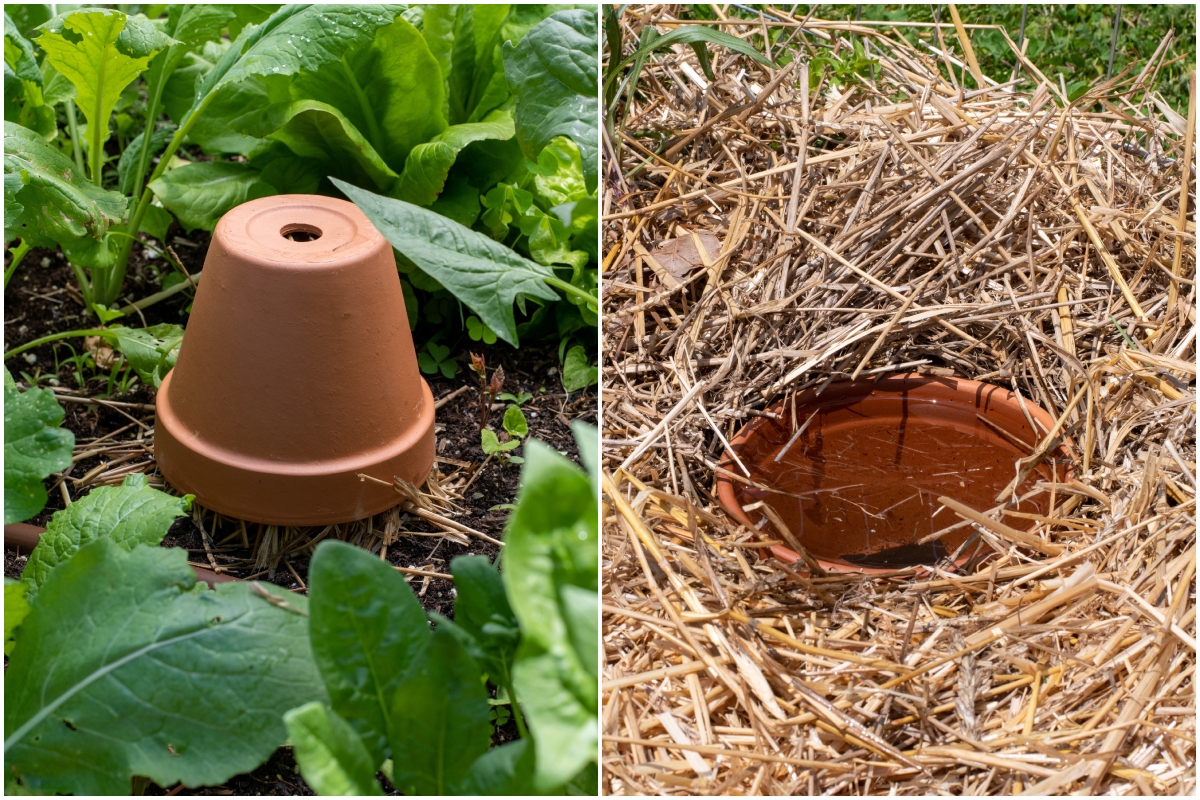
I found that a matching terracotta saucer was just the right cover. I did get the saucer from a different terracotta set – not the one that fits the bottom of the pot (in diameter), but a larger one that fits the top. Luckily, you can buy them separately and mix and match at most garden centers.
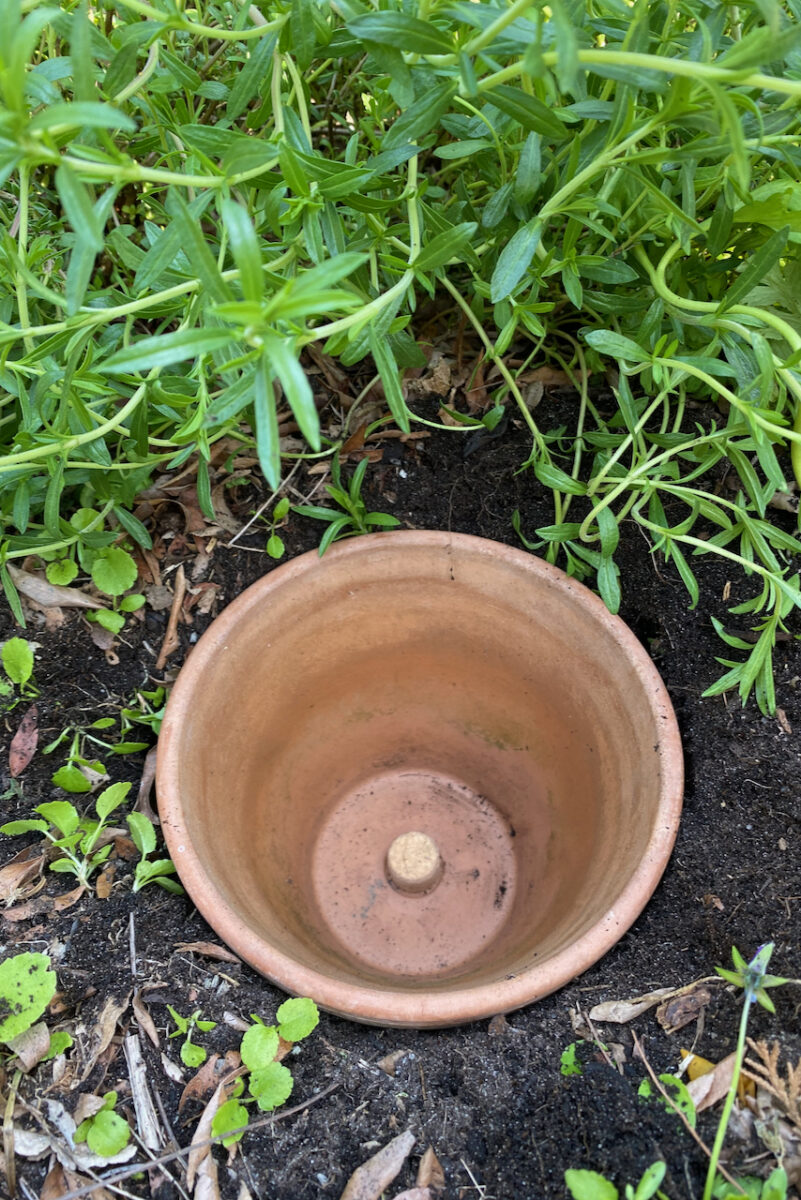
Step 2: Plug the drainage hole.
I’m using a real cork wine stopper (as opposed to a plastic “cork”) to plug the hole. It fits pretty snugly in the drainage hole. Over time, as it gets saturated, it will expand and have an even tighter fit.
I’m not worried about the cork biodegrading in the ground because I won’t leave the olla in the ground forever. Since terracotta may break in below-freezing temperatures, I will take it out of my garden bed during the winter months. This will also be a good opportunity to clean the terracotta pot and scrub off the salt deposits that may reduce the clay’s porosity.
Related Reading: 10 Practical Uses For Broken Terracotta Pots
If you don’t have a cork, the next best thing would be a wax seal. You can melt the wax, put the pot on a tray covered in wax paper and pour the wax inside the pot. Aim to cover the drainage hole and a small radius around it. Then let the wax dry and use a knife to gently pry it off the tray. Turn the pot around (with the waxed drainage hole facing up) and do the same operation from the other side. This should give it a nice seal that will last the growing season.
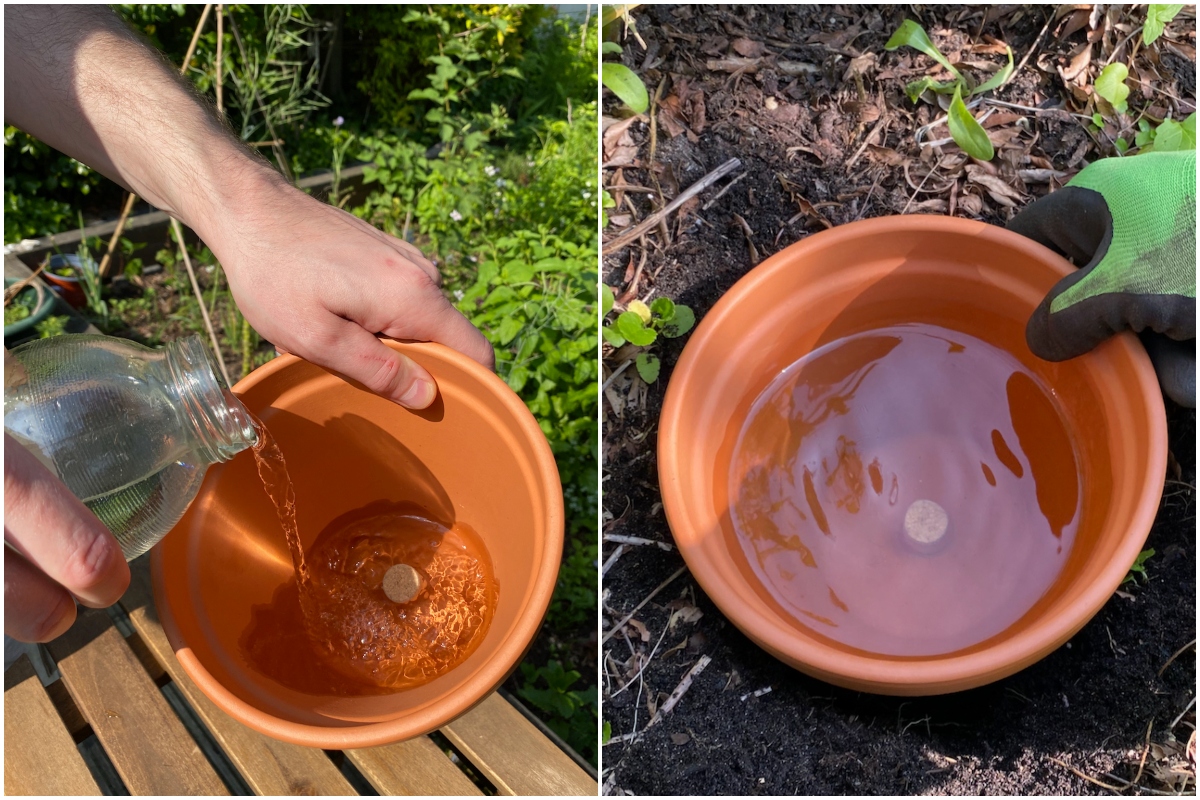
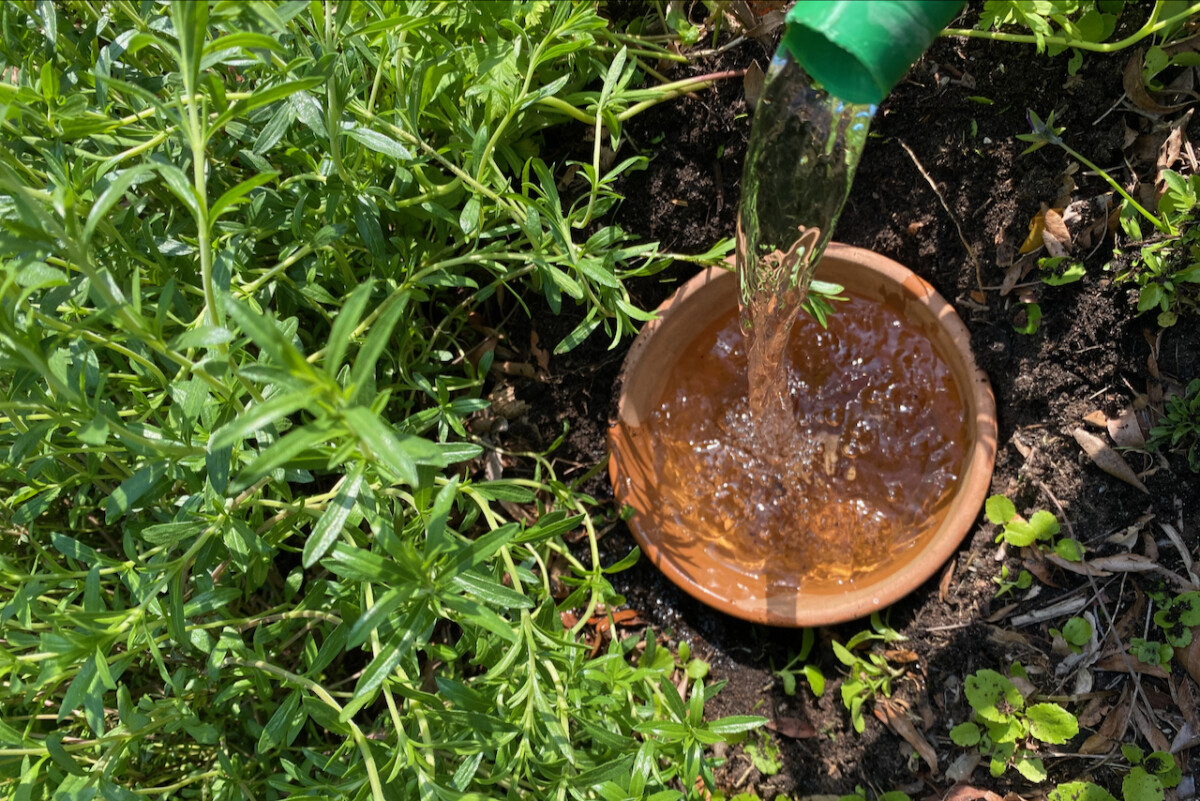
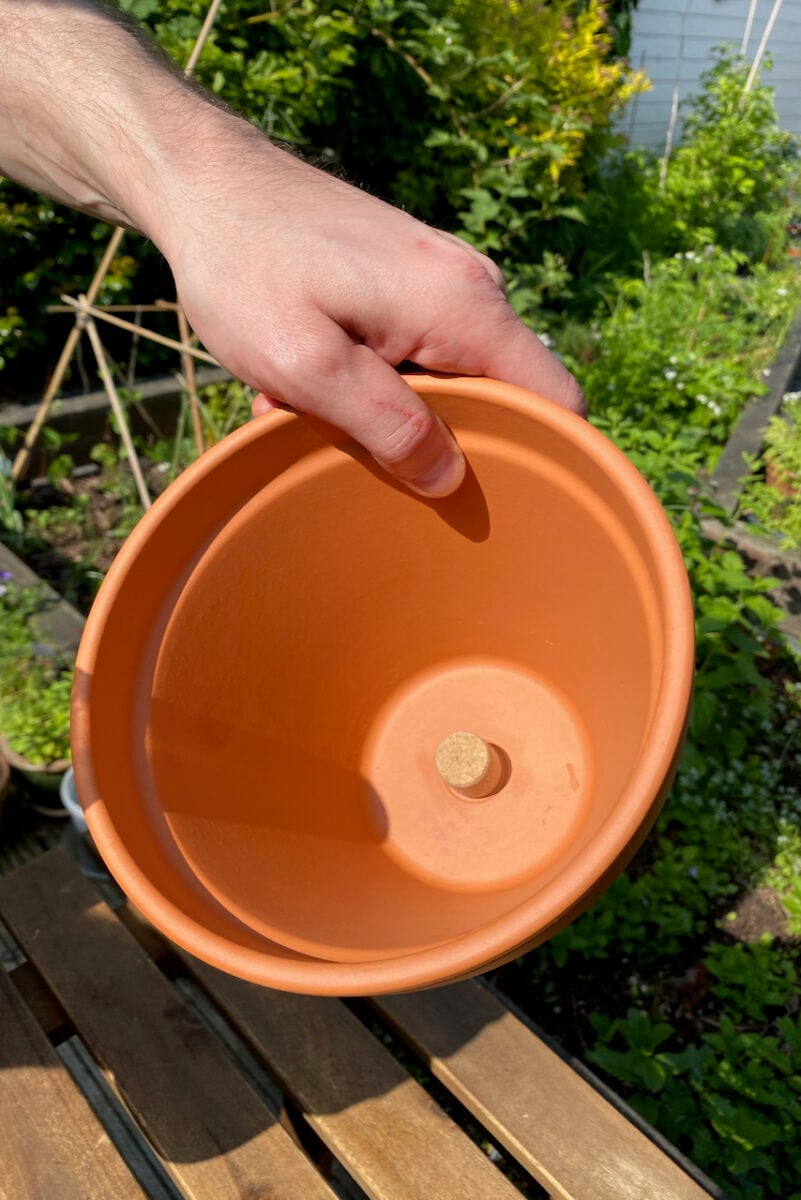
Step 3: Test the seal.
I think this is a very important step that’s easy to overlook in the excitement of the moment. Before you bury your olla, always test whether your seal prevents the water from escaping.
Pour water into the olla as you would when it’s underground. If you use a flat seal (such as wax or putty), you can set down the pot while you dig your pot.
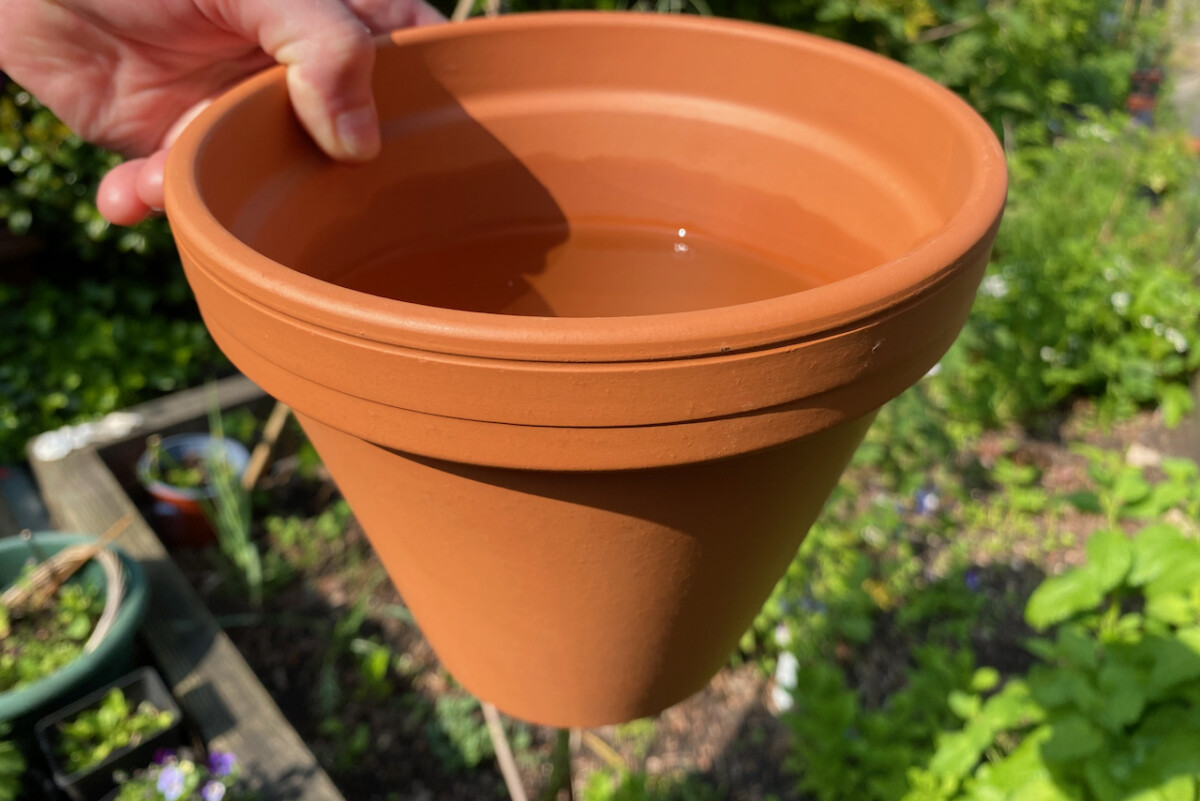
My seal wasn’t exactly a flat surface, so after hovering it about for five minutes, I propped it up between two other pots. Half an hour later, not a single drop had leaked. Mission accomplished!
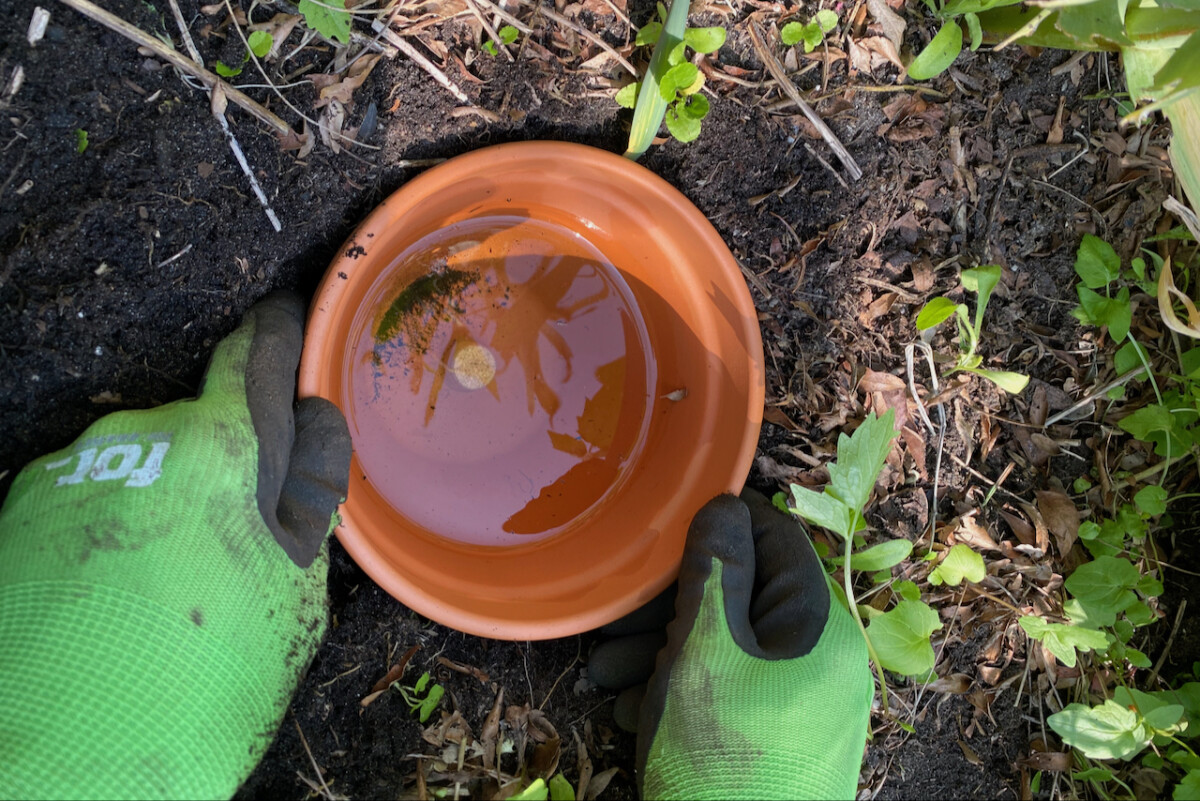
Step 4: Bury the olla.
Now it’s time to start digging. You want to make a hole as deep as the pot, but not deeper. You’ll have to leave the edge of the olla slightly sticking out of the ground. That will give you enough grip to take off the cover when you want to refill the pot.
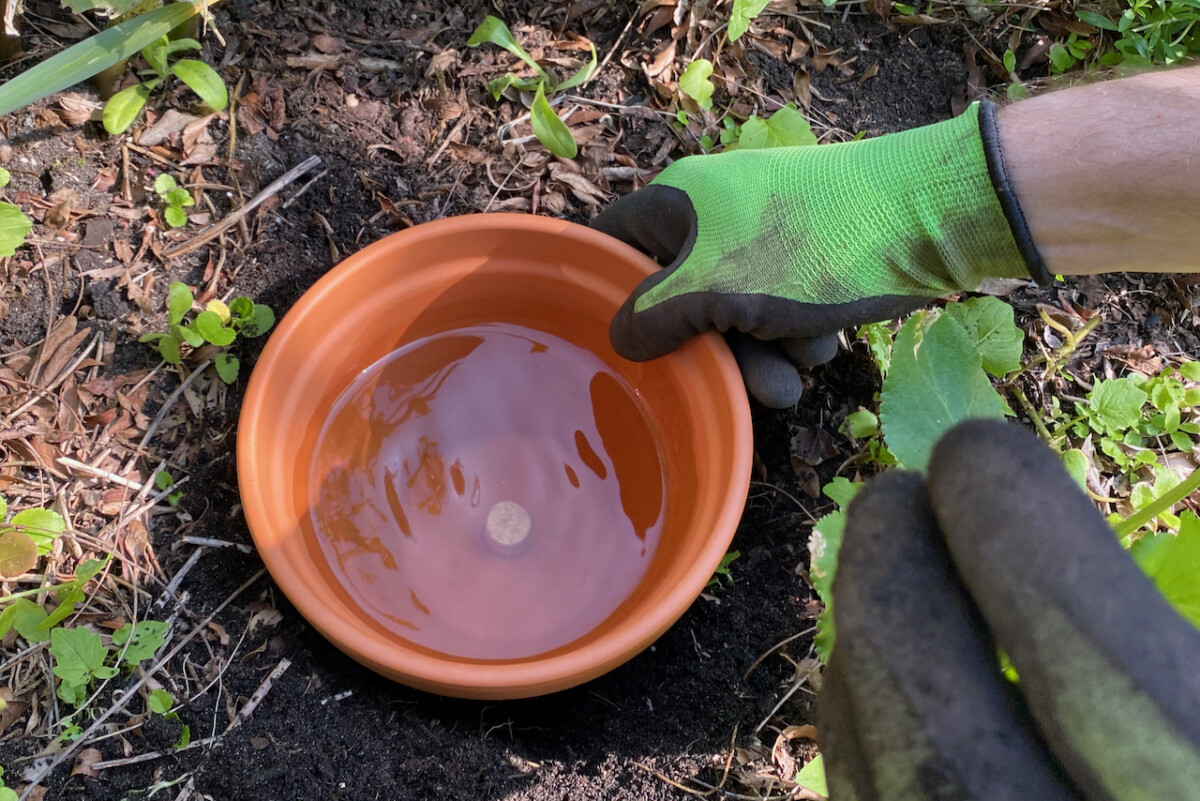
Then place your olla snugly in the hole. Tuck in the edges so you don’t lose any water through evaporation where it’s sticking out of the ground.
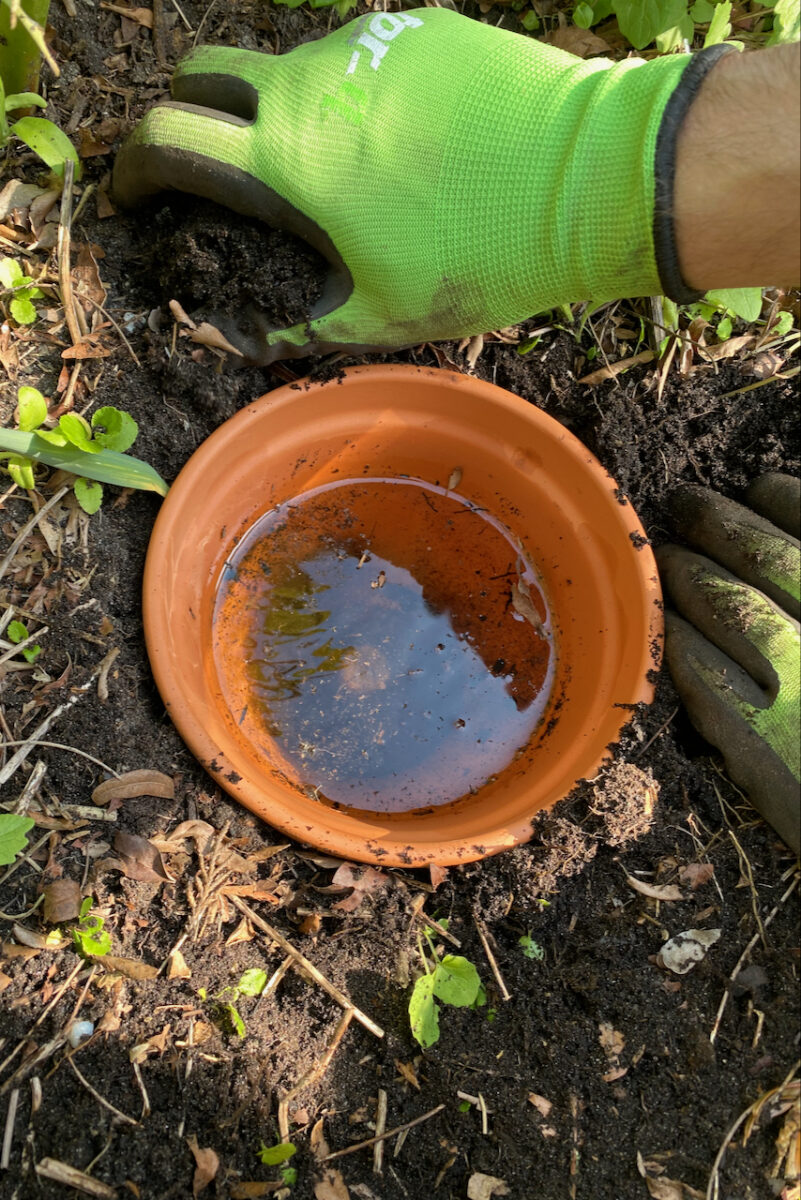
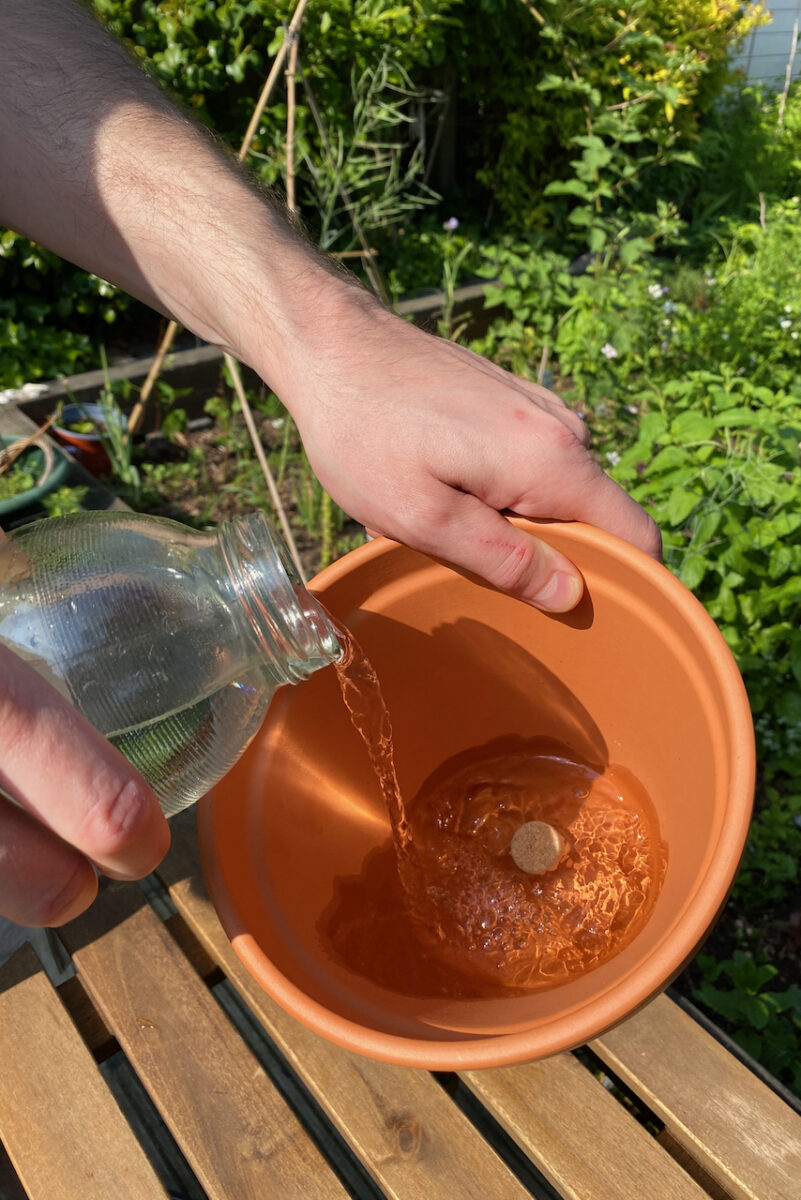
Step 5: Fill it up and cover it.
Time to fill up your olla. Pour water all the way to the top, then cover it up. If your lid isn’t heavy enough, you can place a weight on it, such as a rock or a small garden gnome if you’re feeling cheeky.
Remember that this cover won’t be permanent. You’ll have to take it off every time you refill your olla, so don’t jam it on too hard.
It will take a few weeks of observation to figure out how often to refill the olla. It will depend on how much rain you’re getting, the size of the plants and the type of soil in your garden.

That’s it! My olla is done and I’m ready for summer to start in earnest. I can’t wait to travel, but I’m equally excited to come back to my backyard haven. And to fresh tomatoes!
Got more spare terracotta pots? Here are some more ways you didn’t know to use them:

Get the famous Rural Sprout newsletter delivered to your inbox.
Join the 50,000+ gardeners who get timely gardening tutorials, tips and tasks delivered direct to their inbox.