

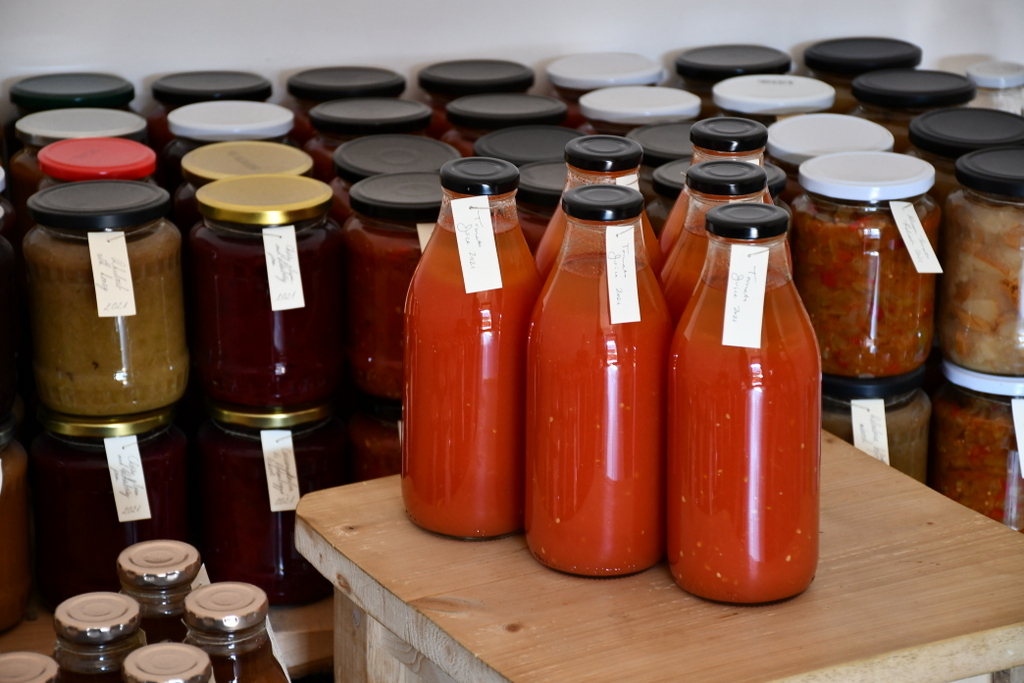
Tomato juice is a staple food that should be in every pantry and behind every cupboard door. A staple food being one that can be stored easily and eaten throughout the year: this doesn’t necessarily have to be a grain or tuber.
You can use tomato juice as the base for winter-warming soups, tenderize a pot roast, add some flavor to a simple pot of rice, use it as a salad dressing or drink it straight from the jar. The possibilities for using up jars and jars of tomato juice in the kitchen, are endless. Tomato juice is only one of the 26 ways to preserve a bounty of tomatoes.
Don’t forget to can, freeze and dehydrate as many tomatoes as you can get your hands on. Because, once the summer season is over, the supermarket shelves go back to offering hard tennis ball shaped red things that look (but don’t taste) like real tomatoes. There is so much to be said for eating seasonally, that we’ll have to save that for another post.
One thing is for sure, the flavor of sun-ripened tomatoes is superior. So, go out there and do your best to grow your own tomatoes, or pay someone well for doing the job for you.
Best Tomato Varieties For Canning Tomato Juice
We’ll get to the varieties and the step-by-step instructions in just a second. But I’d like to present the following question, just so we are all on the same page.
Why would anyone want to make tomato juice when you can buy it readily from the store?

Well, there are times when it may be temporarily out of stock. Another reason is to preserve what you grow – and not let food go to waste. Finally, because you want to know what is in your food. If you are eating blindly from the store, you may be surprised to find out what ingredients industry tosses into many “basic” things.
Will it save you money to make your own? Not necessarily. Will it make you feel better about yourself, your way of living, your survival skills? Definitely. Make your own tomato sauce anyway.
It’s a superpower we could all use.
So, where’s the tomato juice?
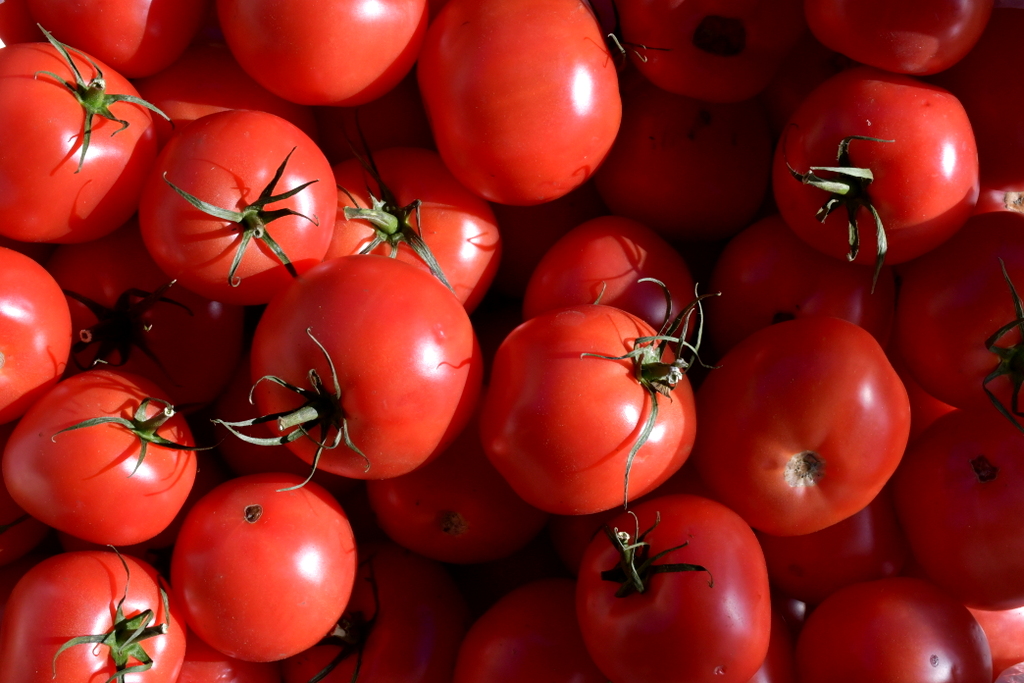
It goes without saying, the larger the tomato, the more juice you are likely to find inside. We all know this from experience. Smaller tomatoes tend to be harder, with thicker skins. Better for sauces and puree.
Choose larger tomatoes that are fully ripe, that dimple every so slightly when you test their readiness to become juice.
Brandywine is an excellent heirloom tomato that produces tons of juice. It’s fantastic when consumed raw too. Beefsteaks, Better Boys and Royal Flush are all varieties that produce large fruits that are wonderful for canning.
From some smaller varieties of tomatoes you can also choose from Early Girl or Roma tomatoes.
Best of all, you can cook up multiple varieties together in the same pot. This helps to balance acidity as well as give you a less watery end product. Juice should be juice, but there are no rules about how thick or thin that needs to be.
When all is said and done, you can use just about any tomato for canning, with varying results. Sometimes you just won’t know how it will taste until you cook it up and use it.
If you aren’t sure about a particular variety, start with a small batch and can a couple of jars. If it’s pleasurable on the palate, go ahead and increase that amount to however many jars you have available so late in the season.
Be sure to save a few jars for canning apples too.
Ingredients and Tools for Canning Tomato Juice
- juicing tomatoes – as many as you can harvest or purchase at once
- salt – an optional pinch of good taste
- a source of acid – apple cider vinegar, bottled lemon juice or citric acid (in that order)
- large basin for washing tomatoes
- bowls, pots, sharp knives
- wooden spoon for stirring
- ladle
- funnel
- food mill or blender and strainer
- jars, lids
- water bath canner
- jar lifter
Canning Tomato Juice
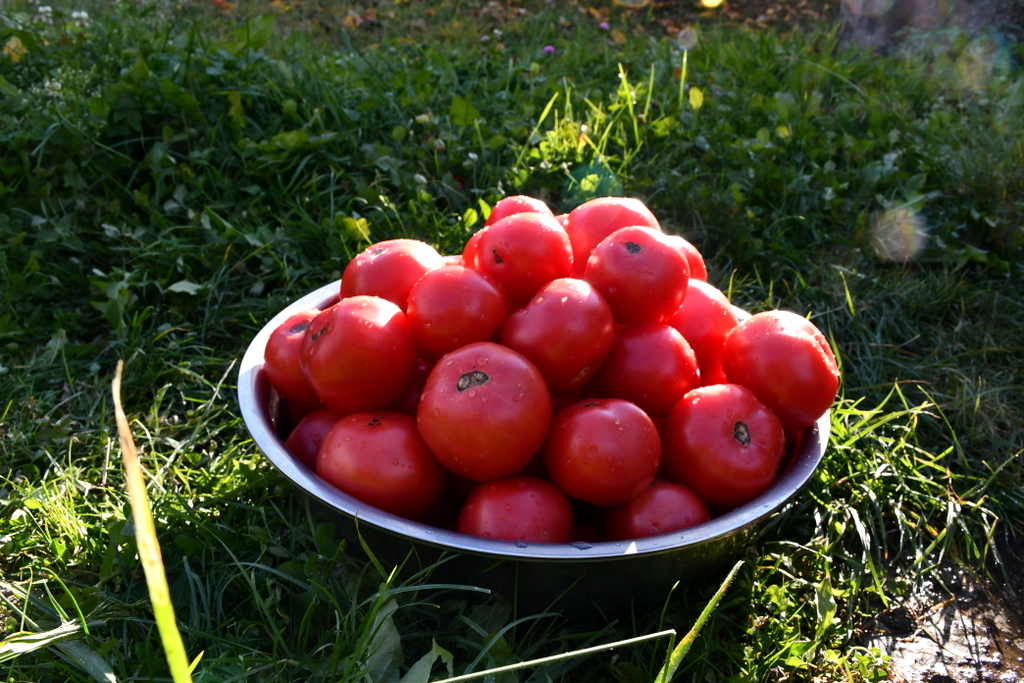
Step 1: Pick Your Tomatoes
This is the step where you take the information acquired from above and harvest or purchase all the tomatoes you need to make your juice happen.
When canning tomato juice, we like to make a batch that starts with about 22 pounds (10 kg). You can either base this amount on your garden haul, or go by how many jars are left empty on your shelf.
Make sure the tomatoes are about equally ripe.
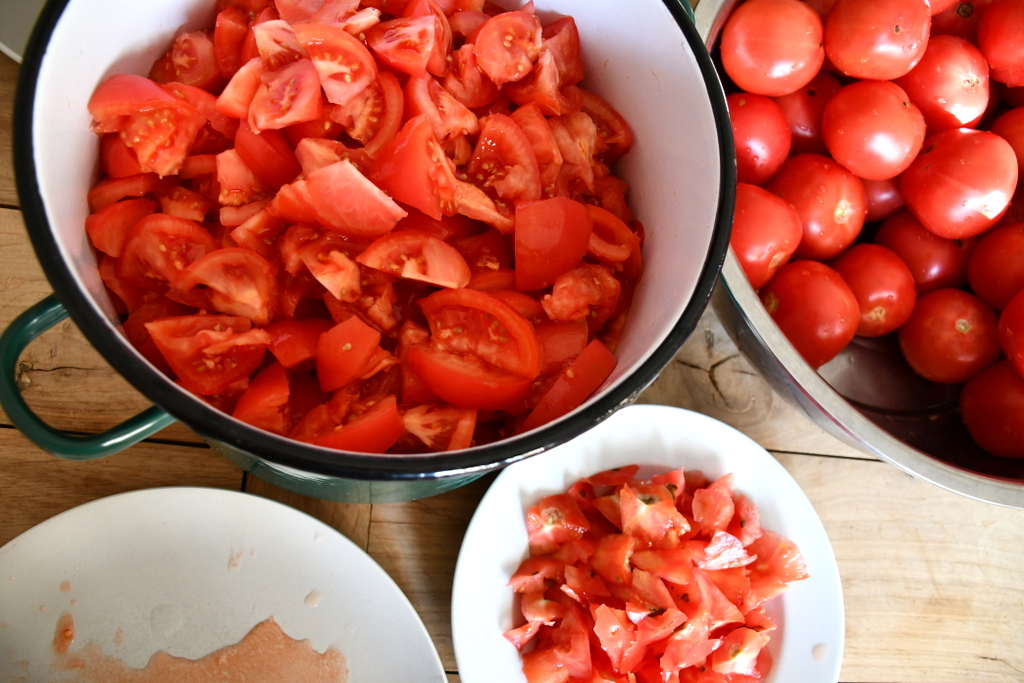
Step 2: Wash and Cut
Preserving food should be both easy and fun. Some recipes tend to overcomplicate this, so let’s keep it simple.
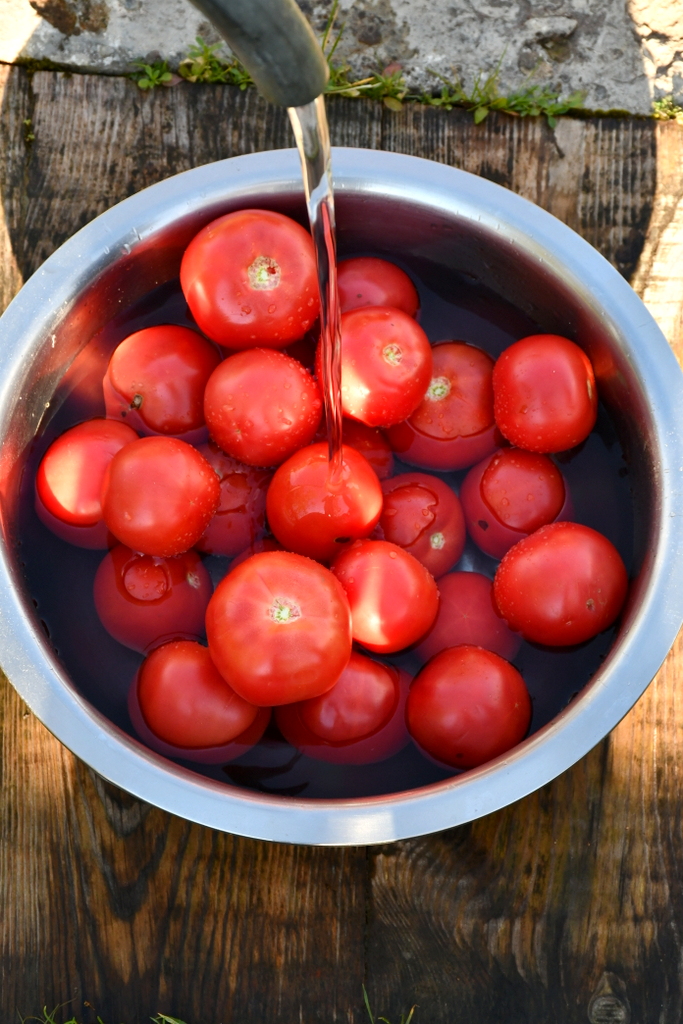
Wash your tomatoes with cold water and bring them to the preparation table.
Don’t forget to admire them first, for you’ll never see them this way again.
Then cut into them.
Remove the cores and any bad spots. Roughly chop them up into eighths or quarters. It really depends on the size of the tomato.
You don’t even have to peel the tomatoes! Save your energy for more important tasks throughout the day.
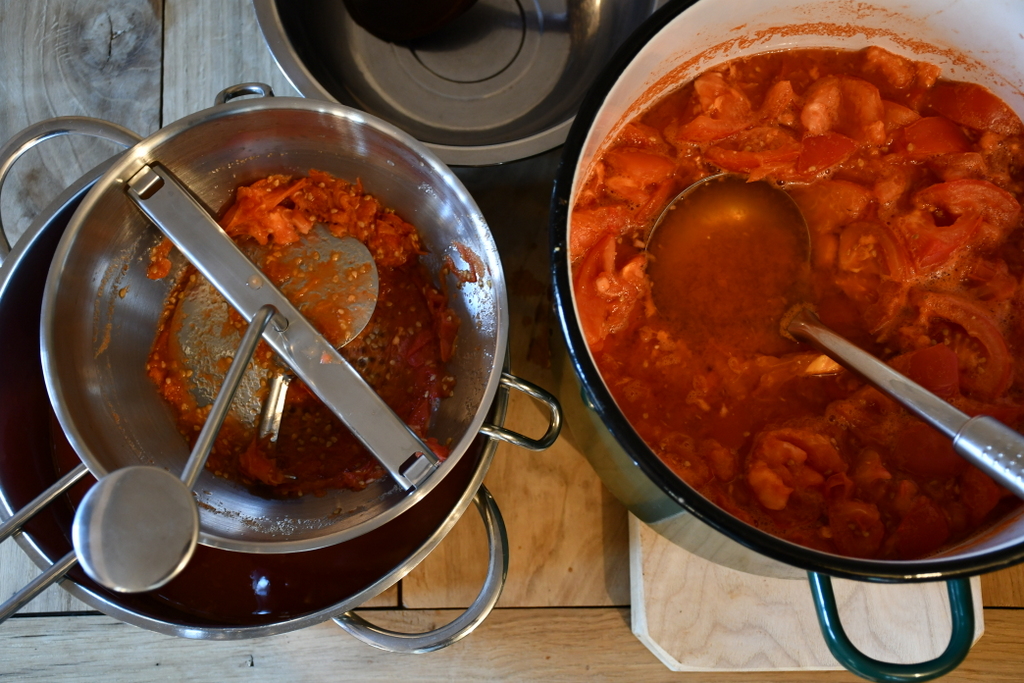
Step 3: Toss Tomatoes in the Pot and Cook Them Down
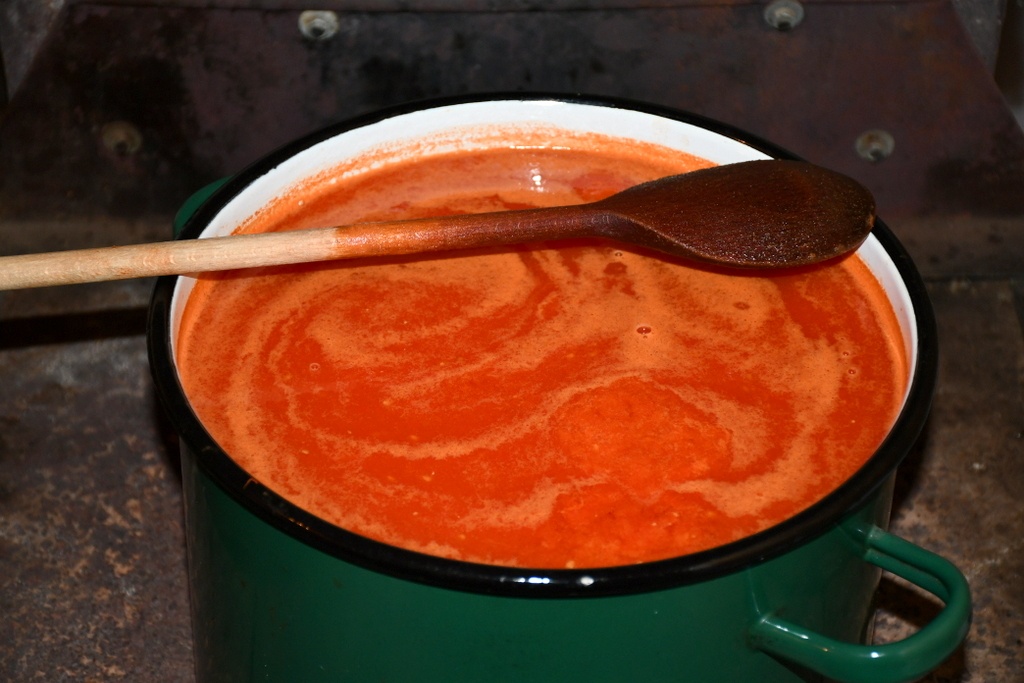
Nothing special here, just put those chopped tomatoes directly in the pot, then put the pot on the stove. There’s no need to add water. Simply stir, in the early stages, to prevent them from sticking to the bottom of the pot.
If you prefer, you can always mash a few pieces with a potato masher in the bottom of the pot, to pre-juice them. Thus preventing any chance of sticking.
Cook over medium heat until the tomato slices start to become a frothy juice. Again, depending on the mass you are cooking at once, this can take anywhere between 10 and 25 minutes.
Stir while cooking to ensure all pieces are similarly soft. Bring the top pieces to the bottom, the bottom to the top.
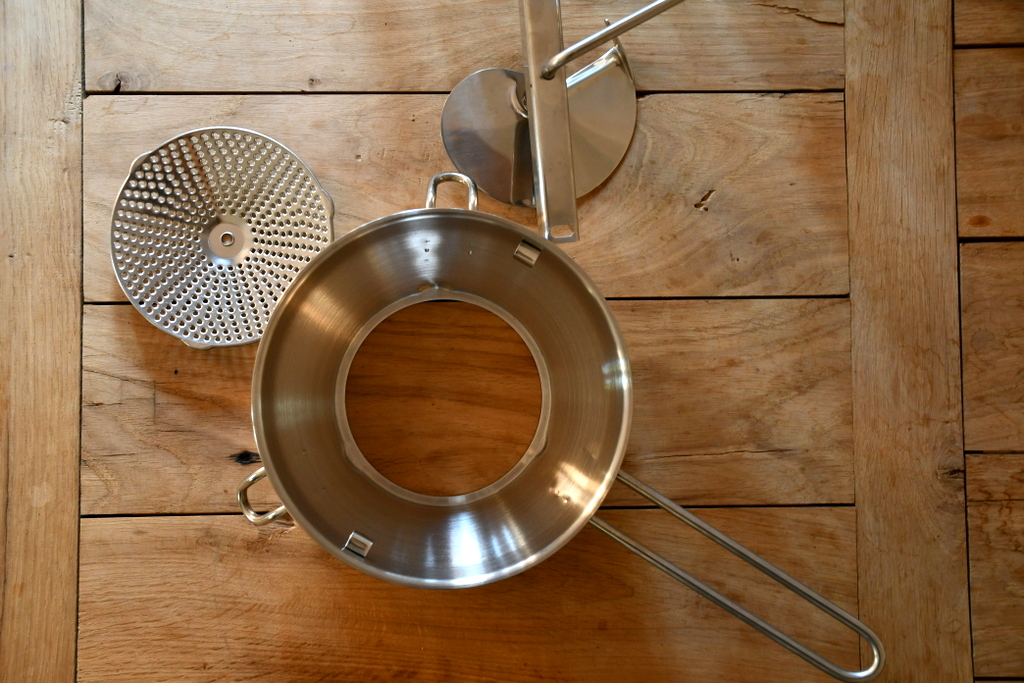
Step 4: Grinding Your Tomatoes
Again, simple does it well enough.
You don’t need a lot of fancy equipment to can your own food. Though you can buy it all if you want. Bottom line, there is something for everyone.
If all you have is a hand crank food mill, set it up and get ready to build some kitchen muscle. It’s great when healthy food helps you keep in shape, isn’t it?
Ladle a few scoops of hot stewed tomatoes into the hopper and give it a spin. Be sure that it fits well over a bowl, or another pot, before making a mess.
Do this a few ladlefuls at a time, grinding until the mill needs cleaned of the tomato skins.
Be sure to scrape off all that lovely juice that clings to the bottom before giving the pan a cleaning. Remove the skins and keep juicing.
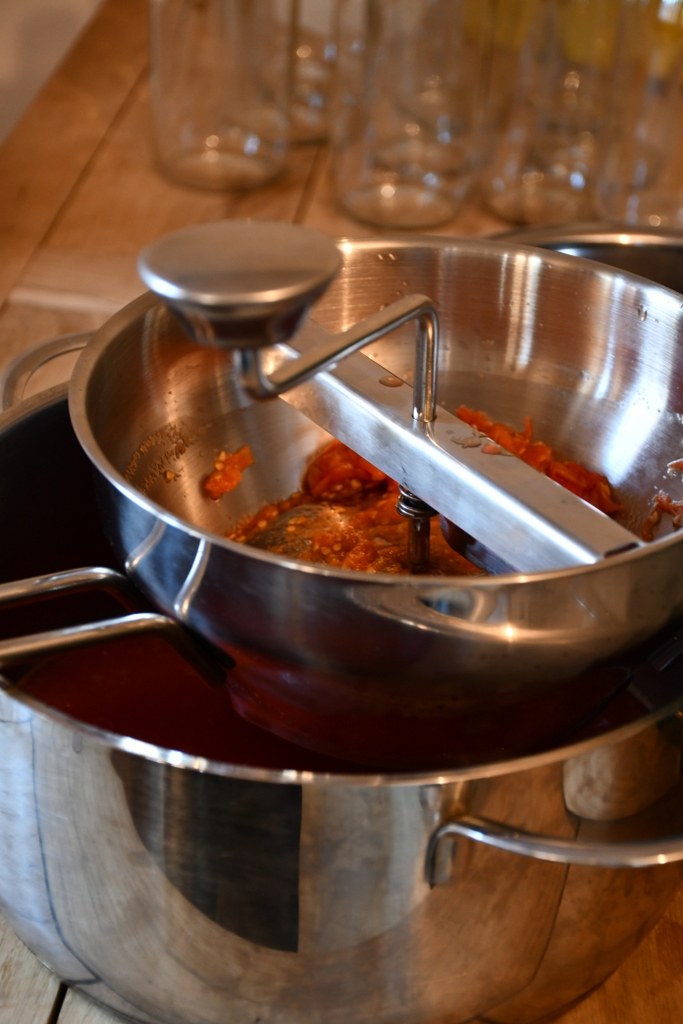
Use as fine a grinding disc as you like. Even if you end up with some seeds in your end product, it will taste great. In fact, it probably tastes better that way.
Don’t aim for refined purity. Go for that all-natural home-style effect. Unfiltered is best.
Then, toss those scraps on the compost.
Step 5: Add Heat, Salt and Acidity
If you’ve successfully made it this far, all that’s left to do, is to get your beautiful juice into jars.
Before jarring up, we like to bring the juice back up to almost simmering. At this point it is good to add the salt (optional) and the acid of your choice.
Since salt isn’t necessary for canning tomatoes, you can make the wise assumption that you should add it to taste. About 1 tsp. per quart is usually sufficient for enhancing the flavor.
As far as acid goes, it’s up to your preference. One year you might try lemon juice, the next apple cider vinegar. Since we always have organic apple cider vinegar on hand, that is our go-to additive for everything we preserve, from zucchini pickles to chutneys.
If you are canning quarts, you’ll need to add 1/2 tsp. citric acid, 2 tablespoons of bottled lemon juice or 1/4 cup of apple cider vinegar per jar.
Still aren’t sure which acidity regulator is best for you? Read this article about citric acid, vinegar or lemon juice from The Home Preserving Bible.
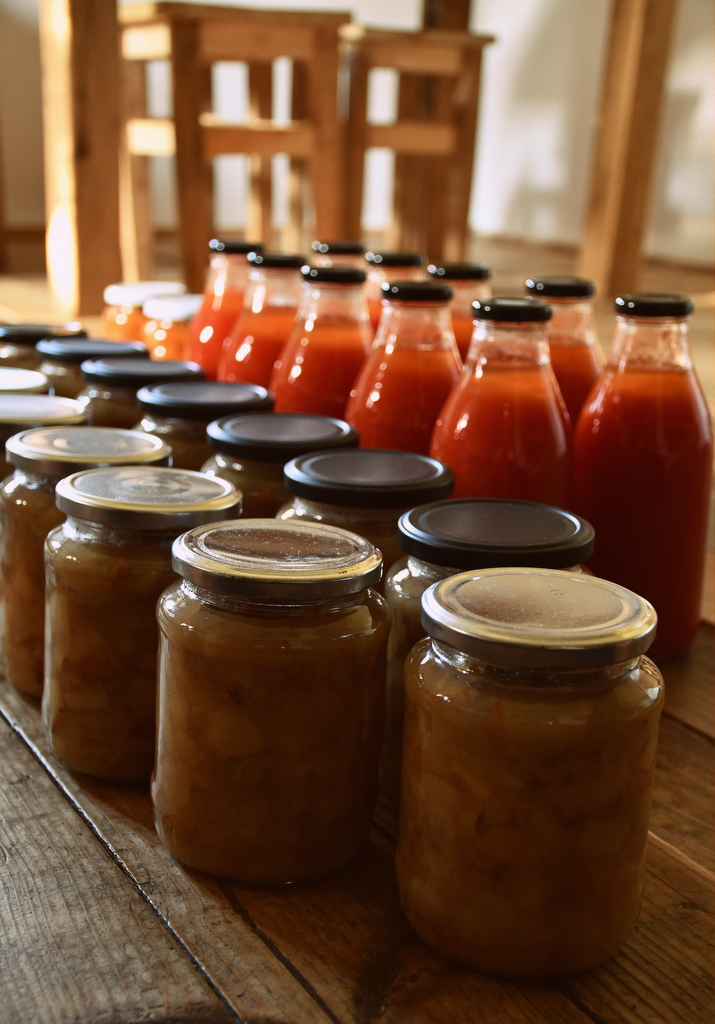
Step 6: Canning Your Tomato Juice
Once your tomato juice is beyond warm, but not boiling, bring the pot back to the table for putting it in jars.
Naturally, your jars should have been pre-washed, lids included. Your water bath canner should be at the ready as well.
Fill the jars with tomato juice, using the help of a ladle and funnel. Be sure to leave a 1/2″ headspace.
Wipe any spills, particularly on the rim of the jar. Tighten the lids and gently add them to the hot water bath. Cover the jars with 1-2″ of water and process quart jars for 40 minutes.
Step 7: Wait, Then Label Your Jars
Anytime you are canning, it’s never guaranteed that whatever you are cooking up will fill all the jars without a slight surplus. That’s okay. Just set the leftovers aside in the fridge and use them up within a couple of days.
This gives you a pretty good idea what your winter is going to taste like. Of course, the flavors can meld or settle in the matter of six months. Try to enjoy new flavors and textures in your homemade food.
It should also be said at this time, that there is no limit to the dried herbs you can put in your tomato juice, should you want something even more flavorful. Toss in some oregano, basil, thyme, whatever it is you have excess of.
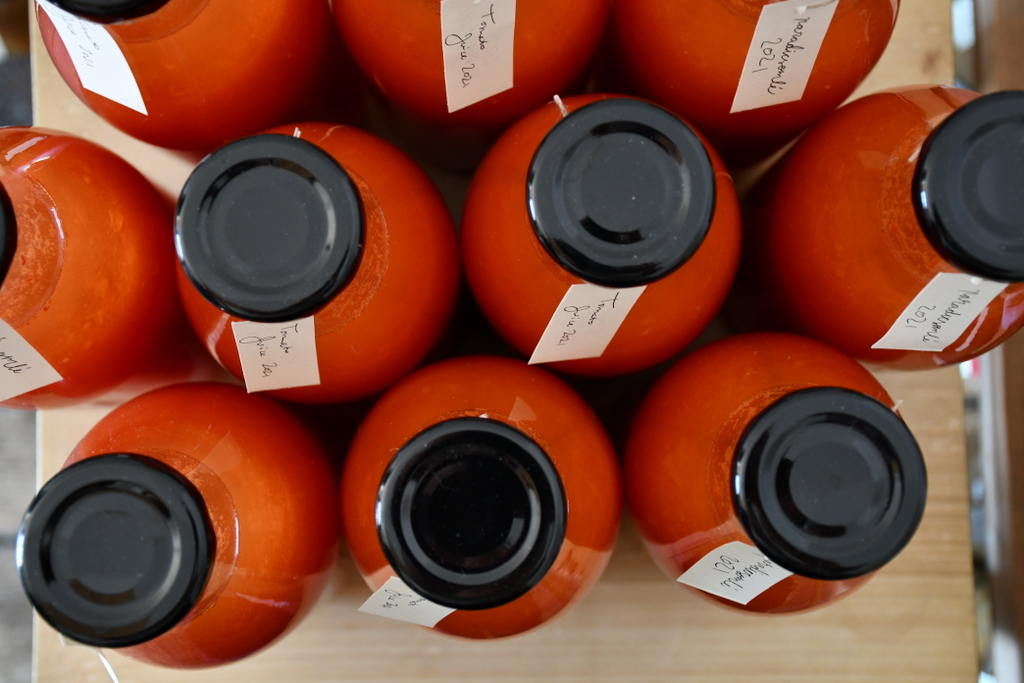
Once your jars are cooled, take time to label them all, just so there is no confusion later in the year when you just can’t remember which jar is full of what.
A note on grinding your tomatoes…
In an attempt to live a simple life, we prefer to utilize non-motorized tools, those that do not require electricity. That being said, we’d never suggest you to do the same if it doesn’t work for you.
There is more than one way to make tomato juice, just as there is more than one way to do anything.
So if you aren’t the hand-crank kind of cook, here are a couple more options for juicing your tomatoes:
- food processor – toss finely chopped tomatoes into a food processor and liquify until they are just juice.
- blender and strainer – blend small portions of cooked tomatoes, then pour through an appropriate sized strainer. The tomato juice will be more watery this way.
- electric food mill – let the power do some of the work for you.
Yes, you can do this for fresh from the vine tomato juice as well.
Enjoy your tomato juice!
And be sure to think about growing your own tomatoes next year.

Get the famous Rural Sprout newsletter delivered to your inbox.
Join the 50,000+ gardeners who get timely gardening tutorials, tips and tasks delivered direct to their inbox.