

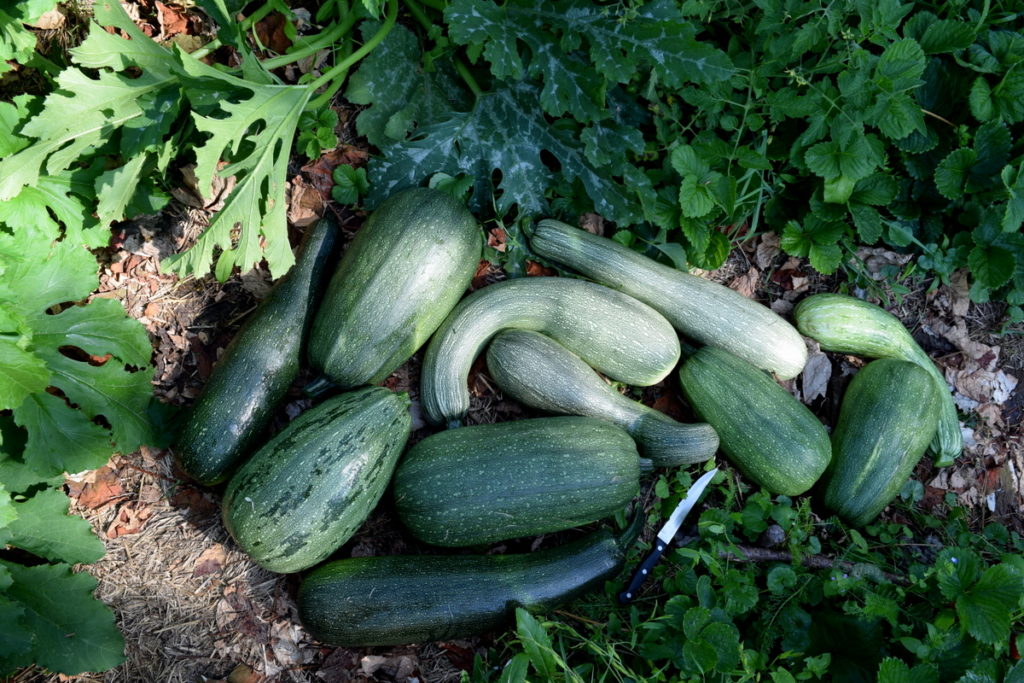
Zucchini has a tendency to just grow and grow (as long as you don’t make these growing mistakes!), often leaving you with the feeling that there is no end in sight. As soon as you harvest one, you lift the next leaf and spot another.
Yet another enormous zucchini to add to the growing pile…
It is one thing to pick a young and tender zucchini fresh from the garden for a breakfast scramble, but what is one person, even an entire family, supposed to do with several pounds of mature zucchini – harvested all at once?
We’ve already covered 14 ways to preserve a glut of zucchini which will have you freezing, dehydrating and canning your crop of zucchini in no time at all. That is a wonderful starting point for zucchini inspiration.
Today, however, we are discussing pickles. Not just any kind of refrigerator zucchini pickles that seem to be popular and/or trending.
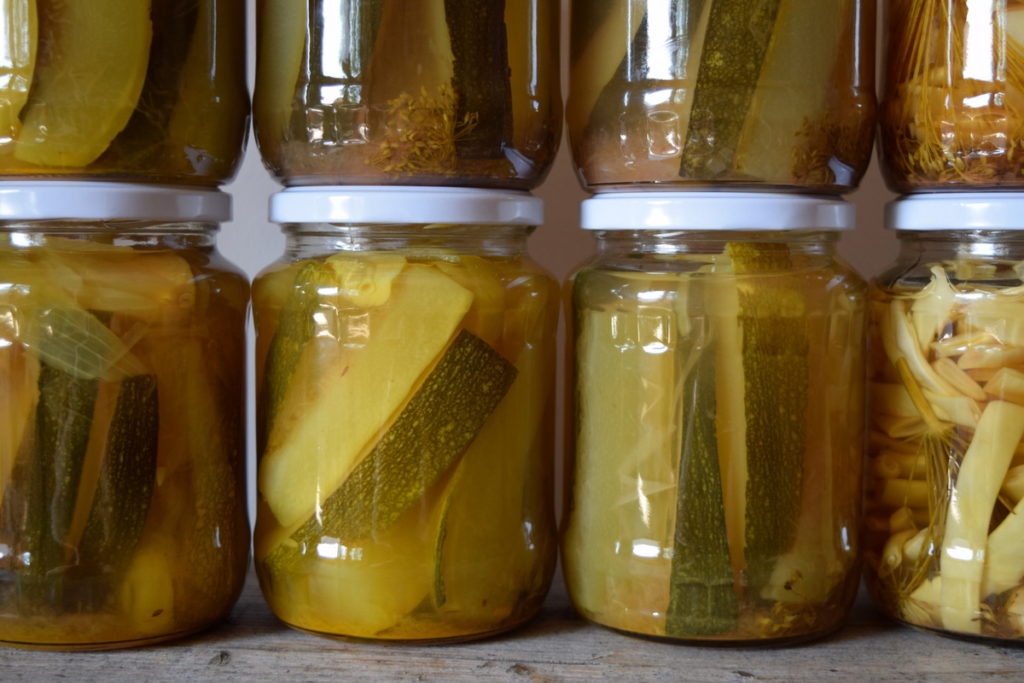
We are talking about the zucchini pickles that last not 2 weeks, but up to a year or more in your pantry or your cupboard.
More and more homemade food. That was a subtle suggestion to keep on canning your own harvests. While you are at it, be sure to learn how to save your garden seeds too.
A few wisdoms about zucchini
One morning we harvested more than 40 pounds of zucchini in a matter of minutes.
See, the thing is, if you leave them on the vine, they will keep growing to enormous proportions. As long as there is sufficient rain (or irrigation) and cool weather, they will be joyously happy.
It may look cool to harvest some big green beauties, at the same time making you feel like a seasoned gardener, but the truth in eating and preserving them lies somewhere in between.
Smaller zucchini is always best for fresh eating while the skin is thin and tender.
Medium sized zucchini is best for frying, breading or baking stuffed zucchini boats.
You might already be asking yourself, is it okay to eat the zucchini skin?
Of course it is! So long as you rinse the zucchini before cutting into it, it is perfectly safe and incredibly tasty to enjoy.
The only thing to remember is to sample it first. If the zucchini is older and the skin feels too hard, resists pressure from your fingernail, or cracks slightly when cut, then simply peel it before cooking. In the case of zucchini boats, however, it becomes the vessel for saving all your toppings. Go ahead and scrape down to the bottom to finish it off, then throw the zucchini skins on the compost.
Which brings us to another question: can you eat zucchini raw?
This can only be met with another resounding yes.
Raw zucchini is mild and slightly sweet with a tinge of bitterness.
Eat it in salads with cheese, lemon and olives, toss it over your cooked pasta, or make spiralized pasta with it. There is almost nothing a zucchini cannot do.
Outside of quick preservation methods and yes, chocolate zucchini bread, let’s go over briefly why you may want to make pickles with your abundance of zucchini instead.
By the way, the oldest, hardest zucchini are also useful, they are best for making zucchini relish and for saving seeds.
6 reasons to make zucchini pickles
Not every summer do we get the chance to preserve dill pickle slices and spears. They either fail to thrive in our often wet and mountainous climate, or the quality from the market is subpar. They are a luxury – and it is sometimes hard to preserve them as crisp as store-bought pickles.
Given the fact that cucumbers do not grow well under stress (who does?) they can even become bitter in drought. All the while, your zucchini may survive and be delightfully edible. That is reason number one for making pickles with zucchini, rather than cucumbers.
- zucchini is hardier than other vegetables, making it a number one choice for pickling
- a little bit goes a long way! (one large zucchini can fill 2-3 jars)
- zucchini preserves well with the right brine ratio
- it goes well with several spices, including dill, caraway, cumin, garlic, turmeric, coriander, black or cayenne pepper
- no part of the zucchini needs to go to waste
- one can never have too many pickles in their pantry, only too many jars of jam…
If you are into the act of eating from blossom-to-stem (nose-to-tail, so to speak, in the animal realm) know that zucchini has lots to offer in terms of its age and variety.

The older zucchini gets, the harder the skin becomes. At the same time, the seeds continue to develop inside. And yes, you can eat those zucchini seeds too! When young, they are delicate and tender. A joy to bite into. As they age, they become hard and a little less appealing to chomp on. If they have reached that stage, do not add them to your pickles. Scoop them out as you prepare your zucchini for canning.
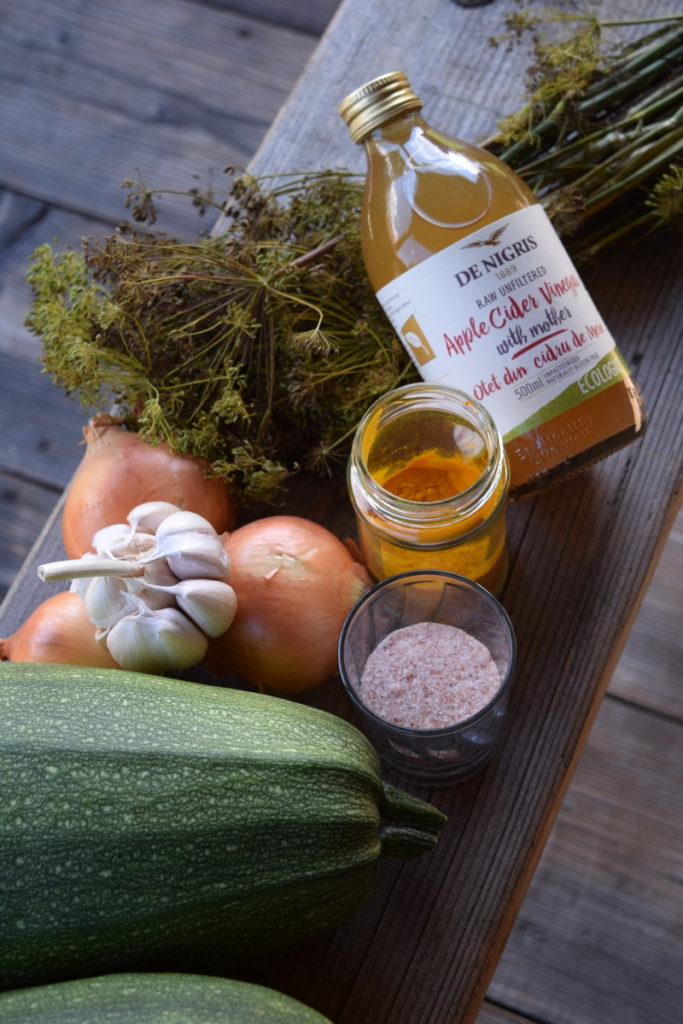
Zucchini pickles ingredients
Preparation time: 30 minutes
Cooking time: 15 minutes
Yields: approximately 8 pints (will vary depending on size and how you cut your zucchini)
Difficulty: easy
Here it is, the list of ingredients you’ve been waiting for, so you can get started on your own batch of zucchini pickles:
- 3-4 pounds zucchini, cut into spears, slices or chunks
- 3 onions, thinly sliced
- 4 cups apple cider vinegar
- 4 cups water
- 1/2 cup salt
- fresh dill flowers (one per jar) or 2 tsp. dill seeds
- 1 head of garlic – or as many cloves as you like
- optional spices – 1.5 tsp. black peppercorns, 1.5 tsp. mustard seeds, 1 tsp. turmeric
Don’t forget that you can also add your favorite spices such as coriander seeds, a generous dash of cayenne pepper or red pepper flakes – just think about proportions. You don’t want to make these vinegary pickles overly spicy.
You can, however, also add some sweetness to your zucchini pickles if you crave your pickles that way. Anywhere from 1/2 cup to 1 cup of sugar added to the brine should give you the flavor profile you are looking for.
Zucchini pickles: step-by step canning instructions
Not only is this zucchini recipe delicious, it also happens to be super easy too. If you are new to canning, you will want to try this as you grow your food preservation skills with new recipes.
Step 1: Sterilize your jars
Cleanliness is the key to success. Use hot water to wash your jars and let them air dry. Do not wipe dry them with a towel, as this can leave fuzzes as well as bacteria from your dishcloth. Once you’ve done this, be sure to set up your water bath canner, as it doesn’t take long to prepare the zucchini.
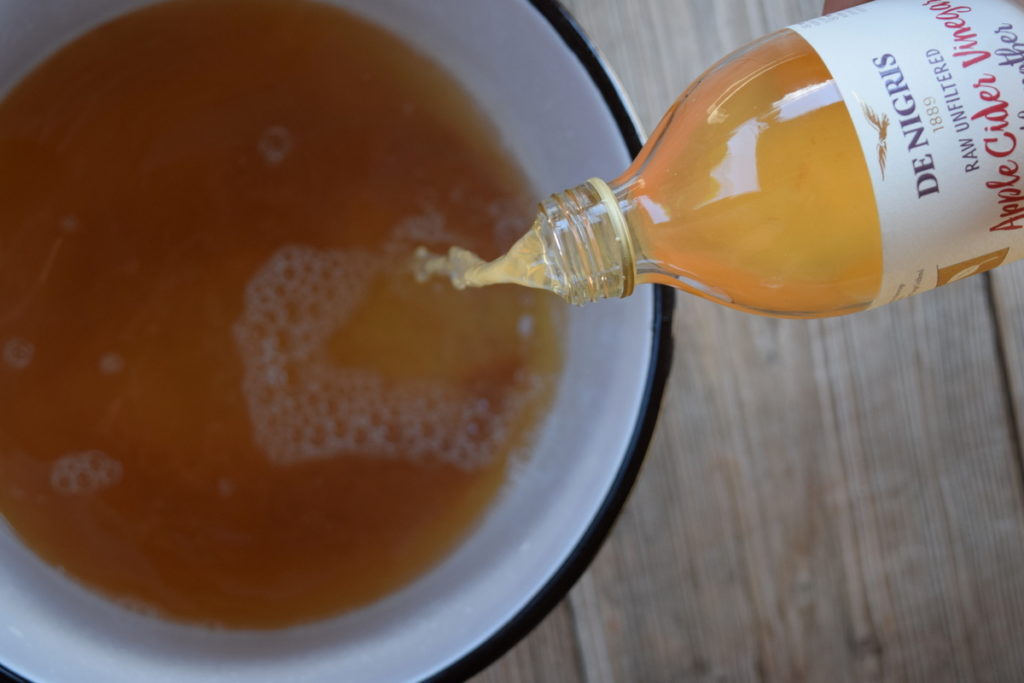
Step 2: Making the brine
In a large pot, bring the apple cider vinegar, water and salt to a boil, then bring it to a very gentle simmer. At the same time begin to prepare your zucchini.
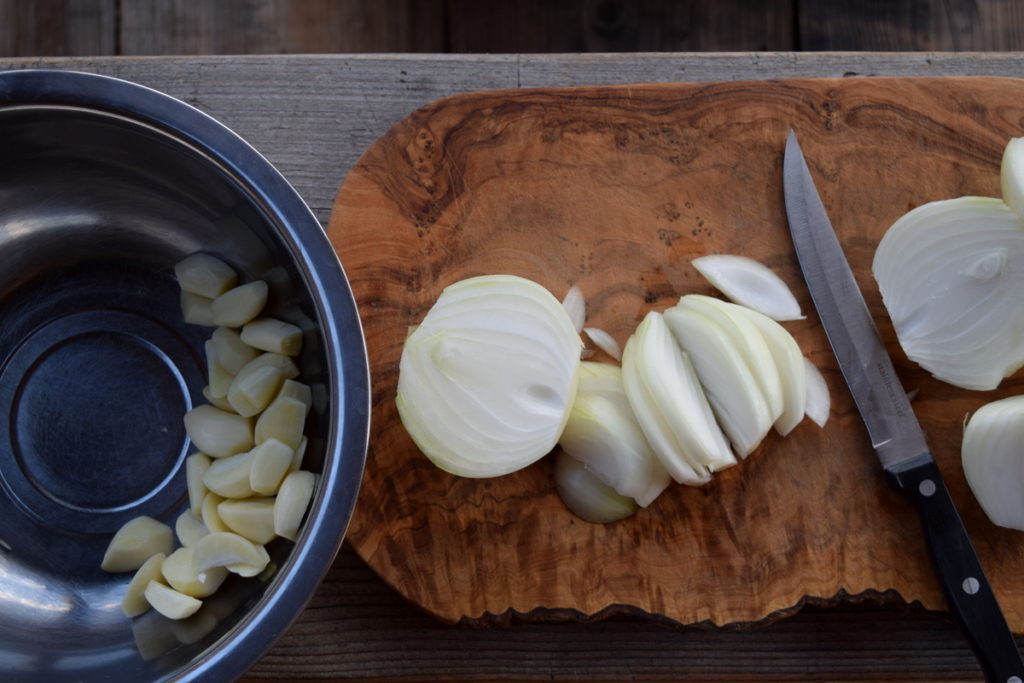
Step 3: Preparing the onions, garlic and zucchini for pickles
Before getting started on your zucchini, clean your garlic and chop up your onions first.
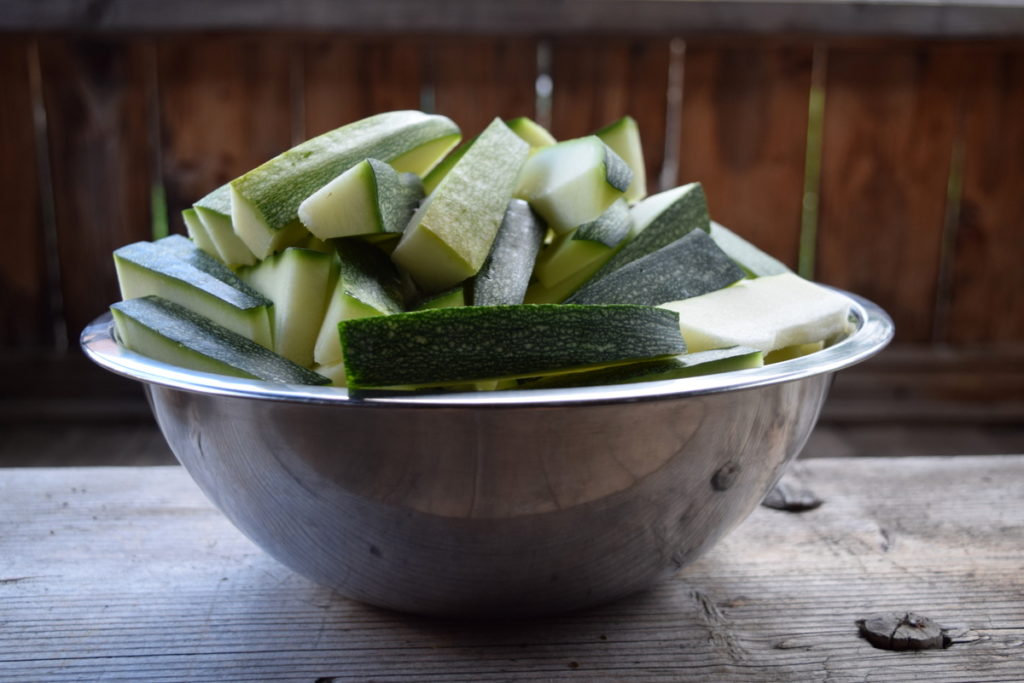
Wash your zucchini well, as it is perfectly acceptable, even encouraged, to make pickles with the skin on.

One thing to consider, and perhaps something you have never heard before, is that slightly older zucchinis are perfect for making pickles. Once the flesh has just started to harden and there is something to bite into – leaving you with a crunchy, not mushy, pickle.
Plus, more mature zucchinis make hot packing your jars easier, as there is something to “fork” into.
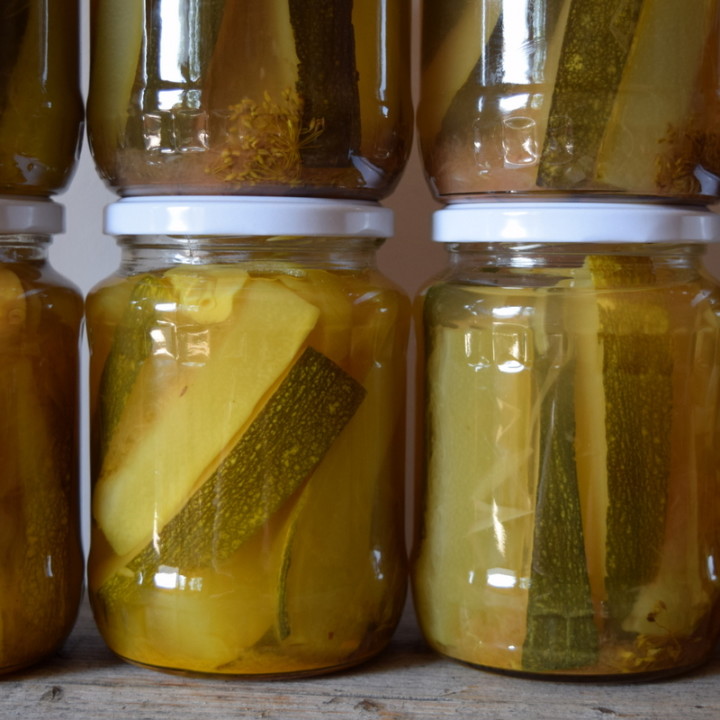
At this point, you need to decide how you like your pickles: spears, rounds, thin slices, etc. If you are making spears, be sure that they are uniform and that they can stand in the jars without bending.
Quickly, and mindfully, chop those up and get ready for the next step.
Step 4: Hot-pack pickles – adding everything to the pot
The biggest difference between hot pack and cold pack canning is that hot-pack canning removes air from the fruits or vegetables that you are preserving, which in turn shrinks the food. At the same time, it prevents the contents from floating in the jar.
It is our preferred method of canning, because in our experience it not only looks better, it tastes better too. It improves the shelf life of whatever you are canning and it increases the amount you can fit into each jar – in the case of canning zucchini, you will need all the space you can get!
With your brine simmering on the stove, add the onions and garlic. Let it cook for about 10 minutes to soften.
Then add the cut zucchini and bring everything back to a boil. Let it cook for 5-10 minutes until it is heated through.
Step 5: Filling the jars
Add dill to each jar and other optional spices, if using.
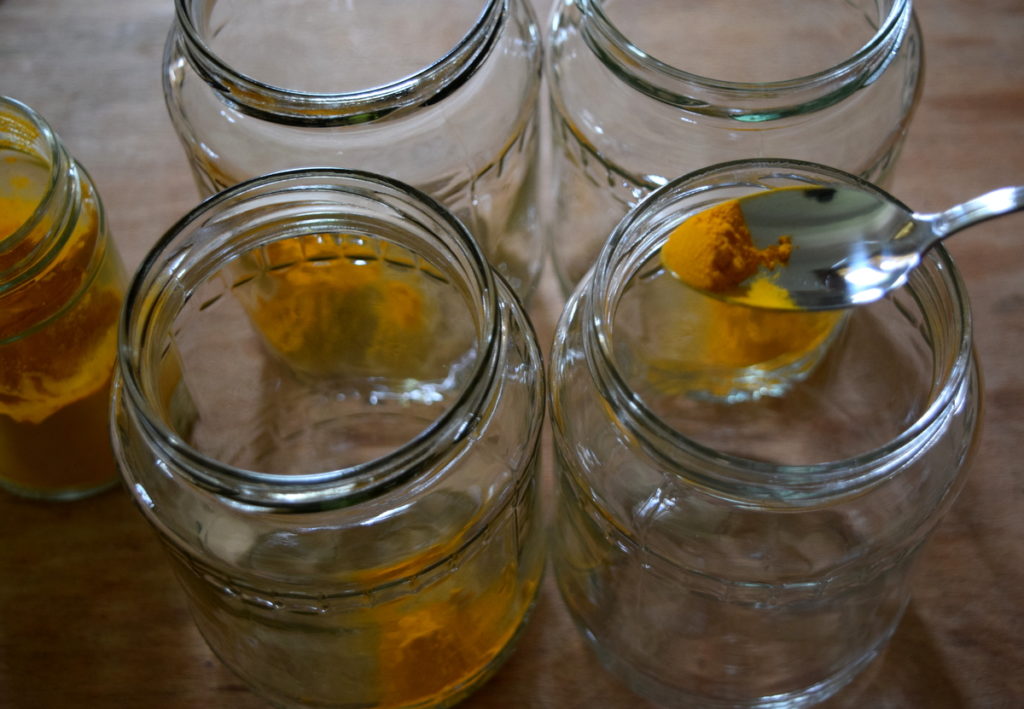
Tip: It is far easier to add a small amount of turmeric to each jar, rather than adding it to the brine.
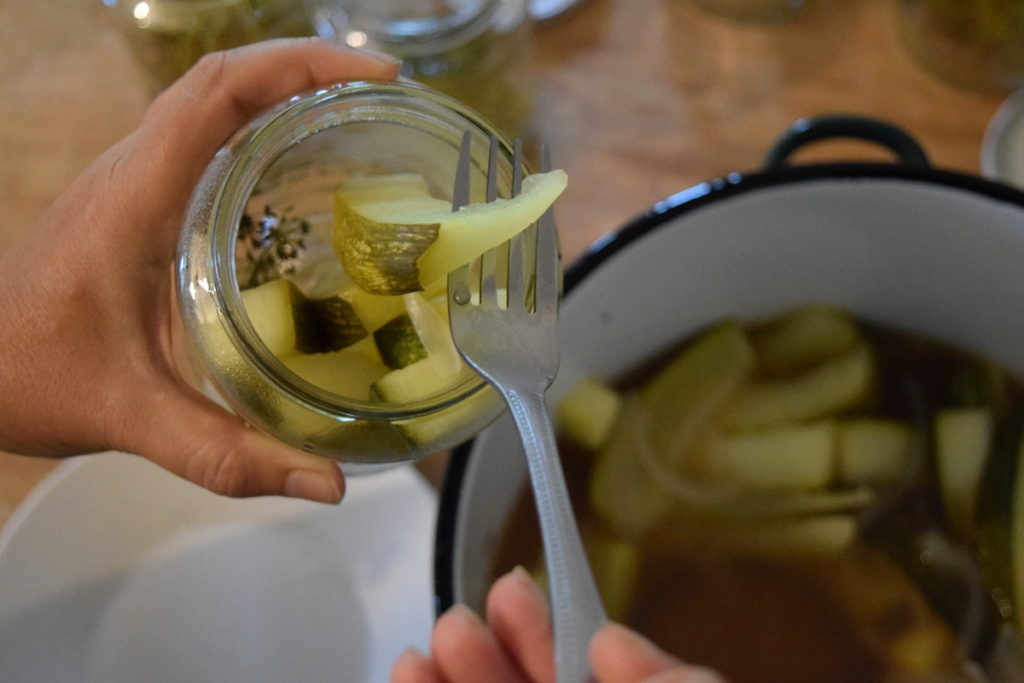
Pack the zucchini firmly into each jar, using the help of a fork and/or slotted spoon. Once your jars are full, ladle hot brine into jars, leaving a 1/2-inch headspace.
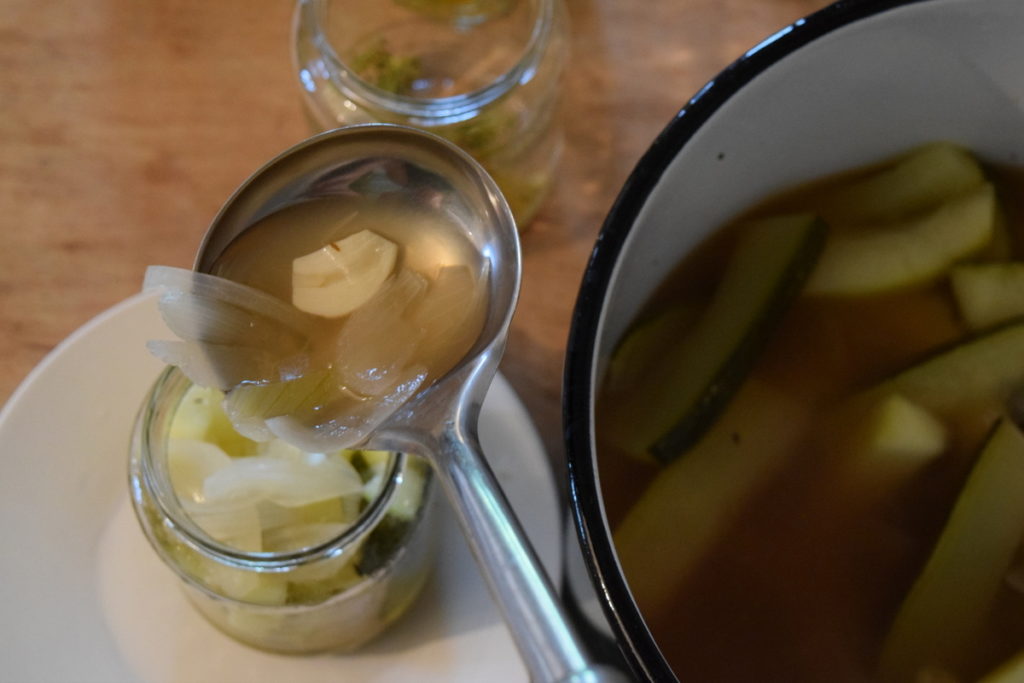
Remove any bubbles with a wooden stick.
Step 6: Sealing the jars
Be sure to wipe any spills, taking special attention to wipe the rims of the jars before sealing. Apply your lids and rings, if using, as with canning any other recipe, then place the jars in a water bath for 10 minutes.
Remove the jars and set them on a kitchen towel to cool at their own pace.
Step 7: Check that jars have sealed and label them!
Before putting your beautiful jars of zucchini pickles directly on the shelf, make sure that all lids have sealed.
Give them a label – even if you are sure that you will remember what you pickled – and give them one last admiring look until winter comes around.
In the meantime, one can only assume that you still have lots of gigantic and fresh zucchini to sink your teeth into!
Happy zucchini feasting to each and every one of you with an enormous harvest. Don’t forget to share the zucchini love.
Easy Zucchini Pickles For Long-Term Storage
These crunchy zucchini pickles are so easy to make and will last for a year or more in your pantry.
Ingredients
- 3-4 pounds zucchini, cut into spears, slices or chunks
- 3 onions, thinly sliced
- 4 cups apple cider vinegar
- 4 cups water
- 1/2 cup salt
- fresh dill flowers (one per jar) or 2 tsp. dill seeds
- 1 head of garlic – or as many cloves as you like
- optional spices – 1.5 tsp. black peppercorns, 1.5 tsp. mustard seeds, 1 tsp. turmeric
Instructions
- Sterilize your jars.
- In a large pot, bring the apple cider vinegar, water and salt to a boil, then bring it to a very gentle simmer.
- Peel the garlic and chop your onions. Clean your zucchini and cut into the size and shape you want - slices, spears, thin rounds.
- Add the garlic and onions to your simmering brine and cook for ten minutes. Add your cut zucchini and bring back to the boil, cooking for 5-10 mins.
- Add dill to each jar and the spices you are using. Pack the zucchini firmly into each jar, using the help of a fork and/or slotted spoon. Once your jars are full, ladle hot brine into jars, leaving a 1/2-inch headspace. Remove any bubbles with a wooden stick.
- Wipe any spills, taking special attention to wipe the rims of the jars before sealing. Apply your lids and rings, if using, then place the jars in a water bath for 10 minutes. Remove and set on a kitchen towel to cool.
- Check the jars have sealed and label them.

Get the famous Rural Sprout newsletter delivered to your inbox.
Join the 50,000+ gardeners who get timely gardening tutorials, tips and tasks delivered direct to their inbox.