

As garden season approaches, it’s time to think through your growing strategy. One of the best ways to get a head start on food and flower production is to learn how to start seeds indoors.
But for the beginner, this process feels overwhelming.
What kind of space commitment do you need, and how much will all the necessary equipment cost you?
I’ve been starting seeds indoors in the winter at home for many years and have perfected a strategy that works well in small spaces.
Here are my twelve best tips for starting seeds indoors this winter so you can reap the rewards all summer long.
Why Start Seeds Indoors?
There are good reasons to consider starting your own seeds indoors this winter. Here are four of them.
You Save Money
Though many people start gardening to save money on groceries, the reality is that buying plants can be just as expensive. It’s not unheard of to pay $5 or more for a single pot of basil from commercial nurseries.
In contrast, I paid $2.75 for a packet of Genovese basil seeds three years ago and continue to use the packet today to start dozens of basil plants each spring—filling my freezer each year with more pesto than I can ever get through.
Greater Plant Variety
Commercial nurseries offer only the illusion of choice and actually limit you to just a few established plant varieties.
Starting your own seeds lets you dive deeper into the world of heirlooms and sample unique flavors and colors in your garden that are only available from seed.
Your Planting Zone May Require It
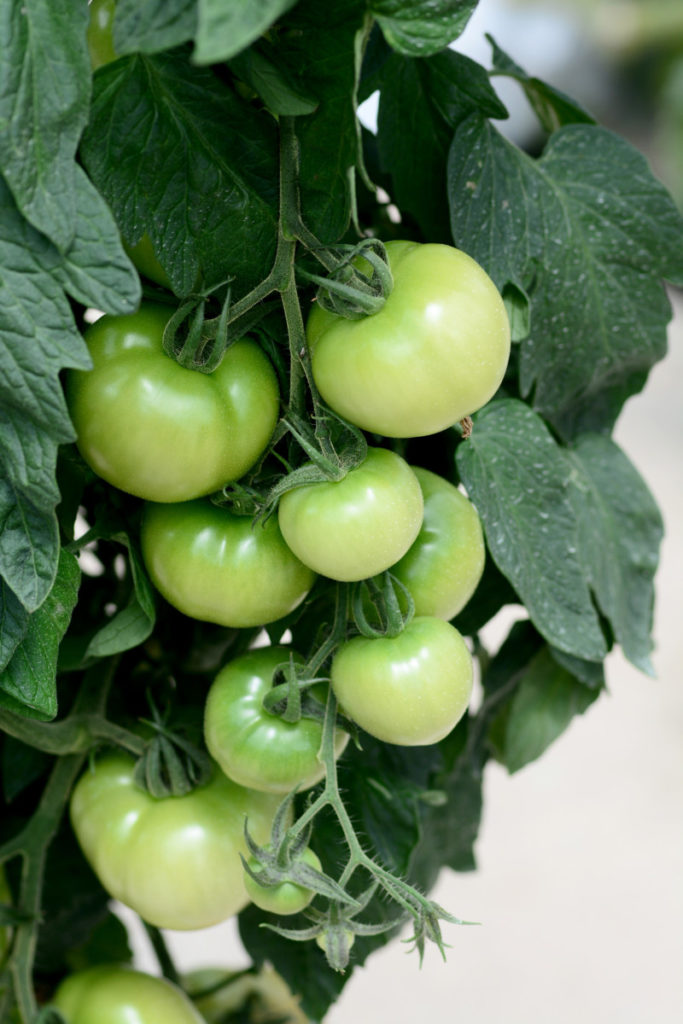
While the length of your growing season limits what you can grow outdoors, starting seeds at home gives heat-loving plants like tomatoes and peppers a head start. Sow seeds indoors in late winter and you’ll enjoy a month or more of harvest time by the height of summer.
Related Reading: 10 Steps For Starting Tomatoes & Peppers Indoors + The Secret Trick For Sturdy Transplants
If you waited for the weather to warm enough to plant them directly outdoors, the plants might not mature enough to produce by the first frost.
Bigger, Earlier Yields
Starting seeds indoors gives plants the luxury of comfy conditions to germinate in. They tend to sprout faster and grow more vigorously than when seeded outdoors, and you can start your growing season months earlier than seasonally appropriate.
The result? Faster maturing plants for larger, earlier harvests all summer.
12 Tips for Starting Seeds Indoors In Winter
Your overall goal with starting seeds indoors is to give plants a head start and optimal growing conditions so that they explode with growth once they make it to the garden.
While every plant has specific requirements that might slightly change your seed starting techniques, these tips should serve as guidelines for most species.
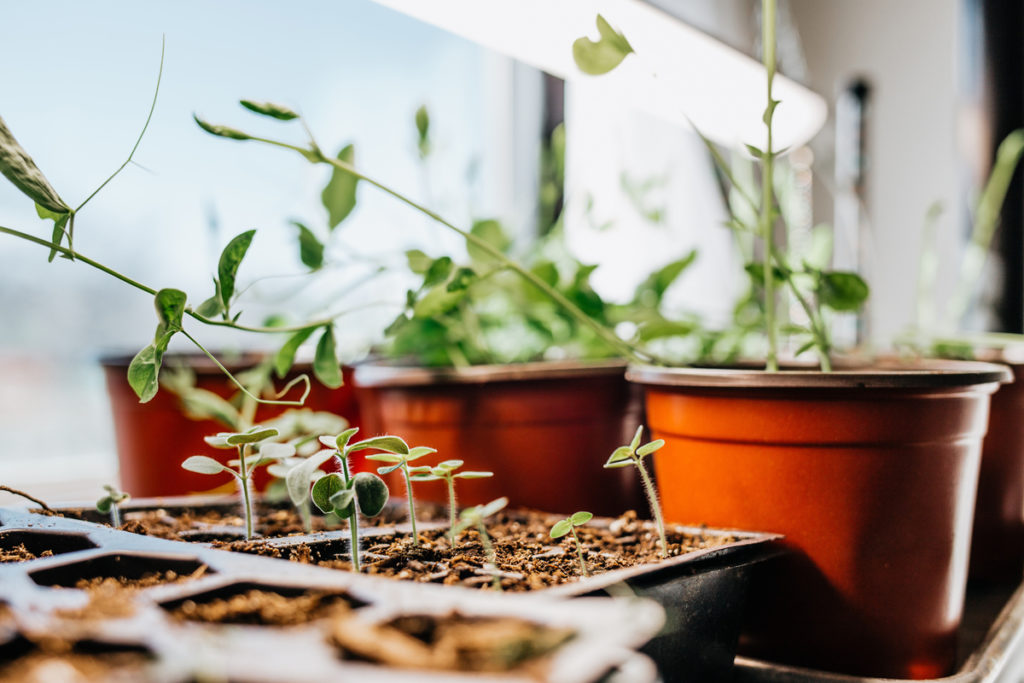
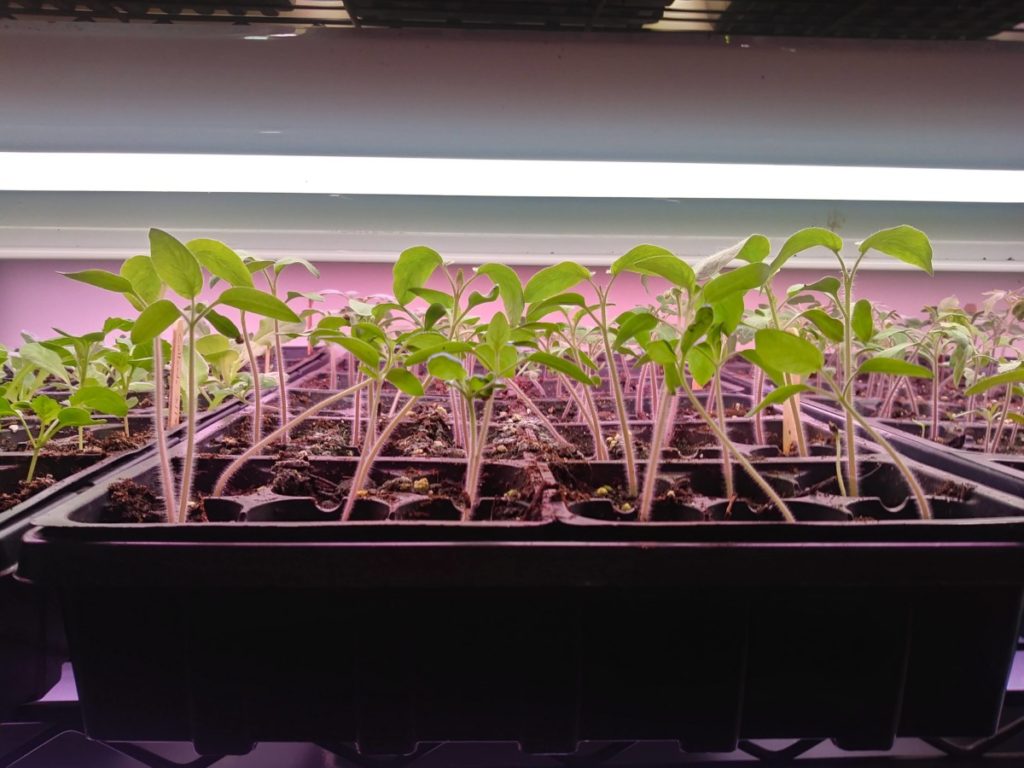
1. Find a Warm, Undisturbed Location
Your first step is ensuring you have the proper space to start seeds. Ideally, you want a bright, warm spot where your plants can grow without the threat of getting knocked around by pets. At a minimum, seedlings need 6-8 hours of direct light per day.
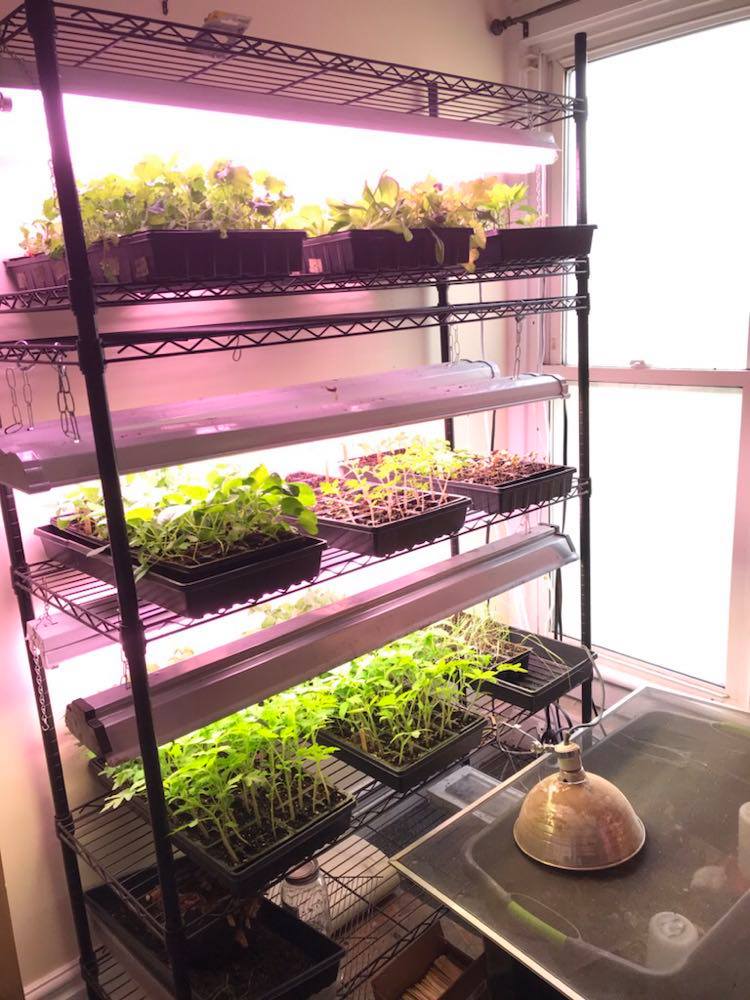
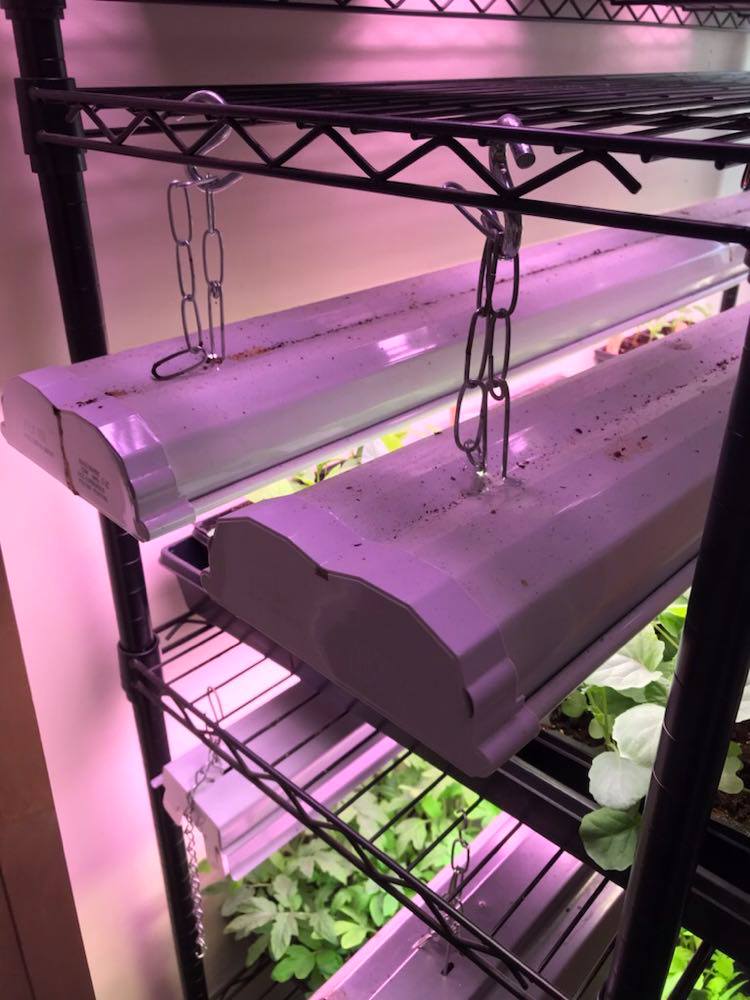
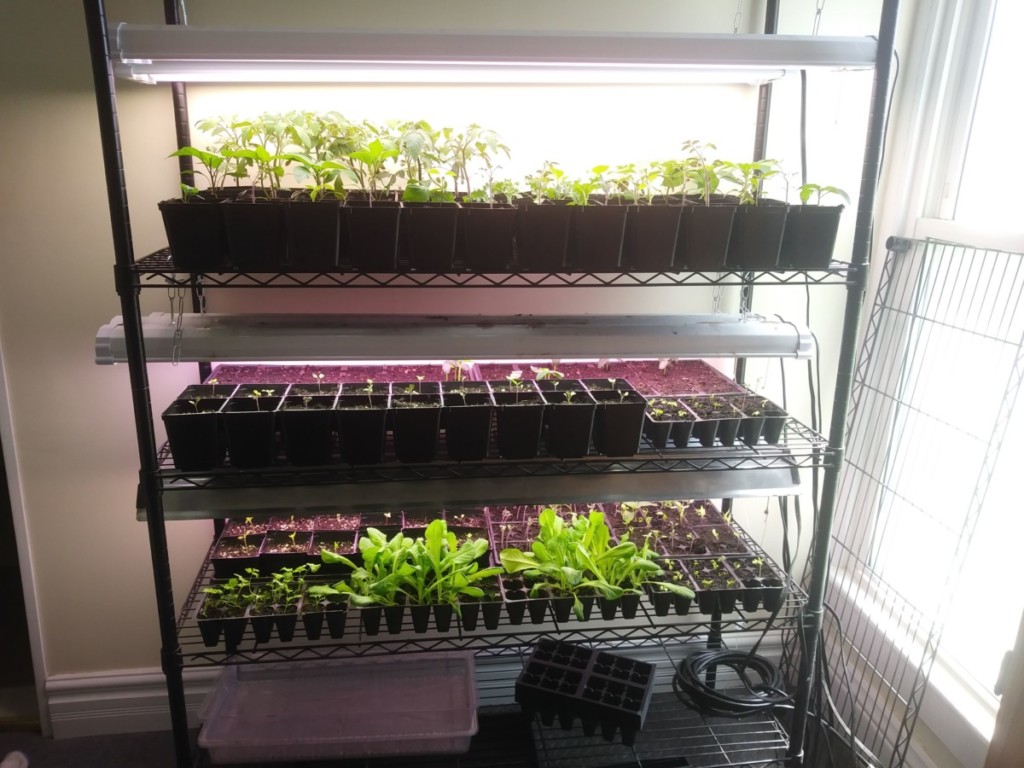
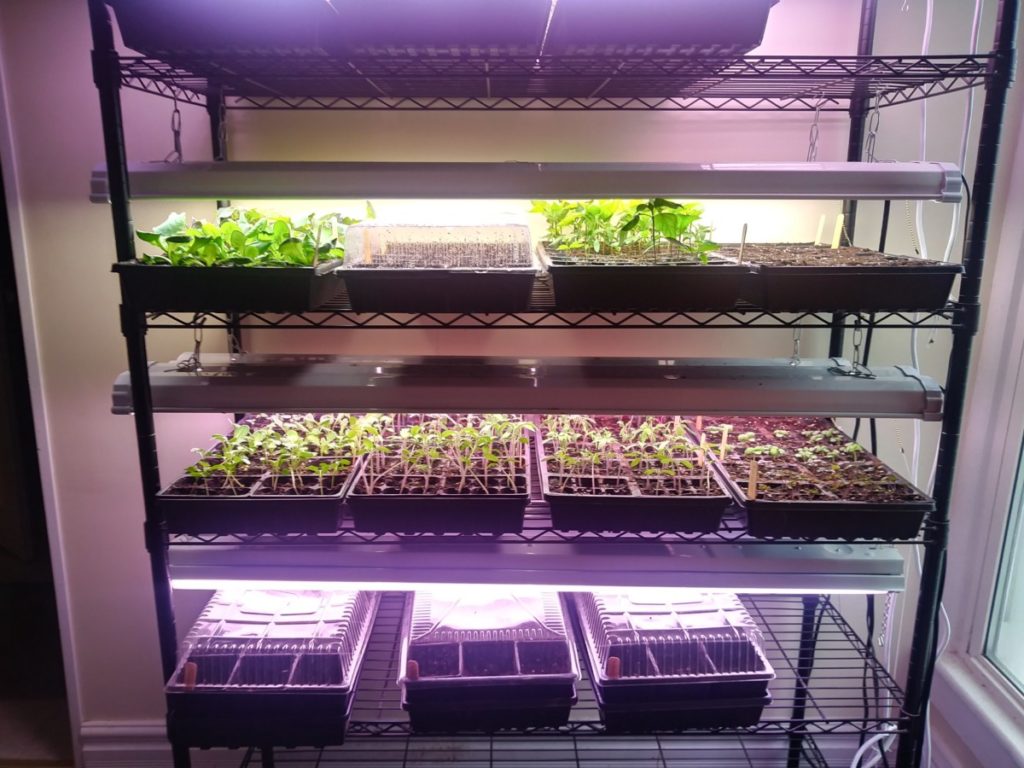
I start seeds in an unused corner of my laundry room with a south-facing window because the room is out of the way, and I can shut the door to keep the humidity. I set up a metal storage shelf in the room’s corner and outfitted it with two shop lights per shelf.
Each light is set on an outlet timer to give the plants twelve hours of supplemental light each day.
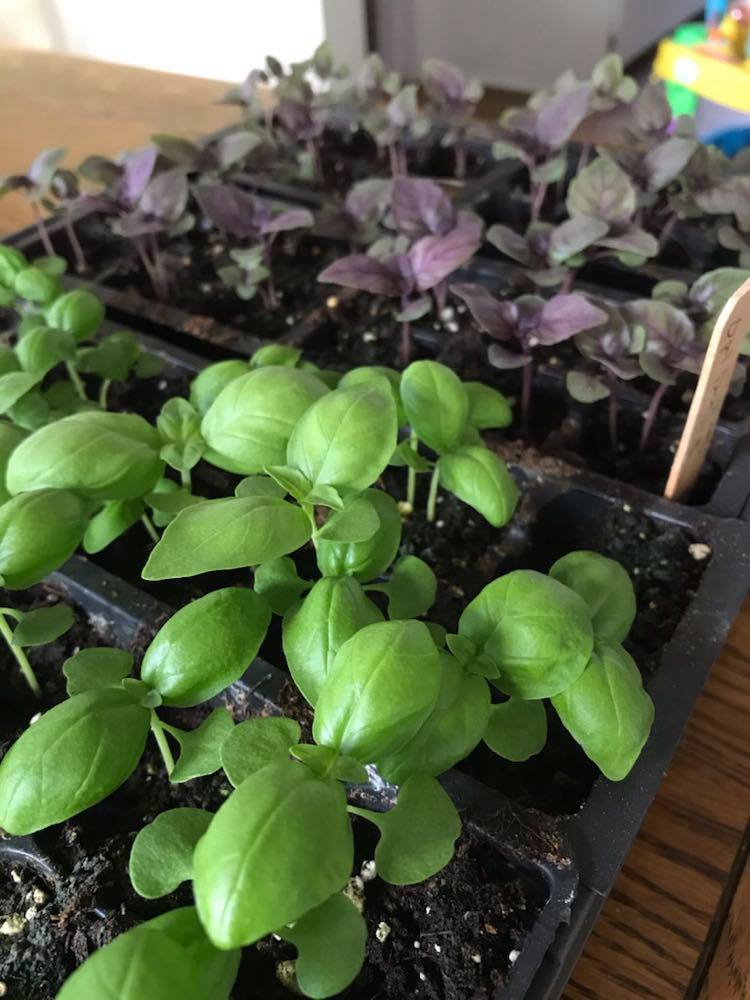
2. Choose Your Seed Varieties Carefully
Not all seeds make sense for starting indoors. Long-season crops such as tomatoes, peppers, winter squash, and okra make the most sense because indoor growing gives you a jump on the growing season.
I also start greens like kale, collards, and lettuce indoors to enjoy them early in the summer.
Most root crops like carrots, radishes, or turnips don’t do as well, as the transplanting process disturbs the roots and ruins any advantage you had from the early start. For me, beets are the exception. I’ve had great success starting beets in soil blocks.
A seed packet will typically provide all pertinent information for determining whether the variety does best when started indoors or sown directly.
But most importantly, show restraint when choosing what to plant. Less is more when gardening—commit to too many varieties, and you might get overwhelmed and give up everything.
I suggest starting with six or fewer plant types your first year and scaling up by one or more each spring as you master your techniques.
3. Set Up a Seed Starting Calendar in Advance
Indoor seed starting success comes down to timing. Start too late, and you’ll barely get a head start, but begin too early, and you’ll soon have huge plants in your home weeks before the outdoor weather has warmed enough to handle them.
The best strategy is to plan out your planting schedule in advance. First, find your region’s predicted last frost date.
Next, read the instructions on each seed packet to determine how many weeks (usually shown as a range) before this date you should start the seeds. From there, you can work backward to set up a calendar for when to plant each variety.
Note: Consider staggering your plantings by two weeks or more for crops you harvest once, like greens and some herbs.
4. Choose Your Growing Substrate and Containers Carefully
The soil you use for your seeds determines what kind of start they will have in life, so never skimp on quality.
You can avoid many common problems by choosing a sterile seed starting mix that’s guaranteed free of disease spores. Most aren’t soil, but instead of a blend of porous organic and inorganic materials like peat moss, perlite, coconut fibers, and vermiculite.
Look for mixes that are relatively light and fluffy, as this means that they won’t trap moisture and potentially trigger fungal growth. Go too heavy, and the soil will compress and make it challenging for delicate roots to work their way through.
Here’s our recipe for making your own peat-free soilless seed starting mix.
The next step is determining how to contain it. My system is simple. I use basic growing trays with six-cell seed trays inside. If I need to transplant larger varieties like tomatoes or squash before bringing them outdoors, I use larger square nursery pots that fit into the same trays.
However, you can be creative. Some gardeners prefer biodegradable paper cups, while others use reclaimed materials like egg cartons or yogurt containers. Most materials will work, so long as you add drainage holes to the bottom and use another container to catch the water that seeps out.
I’m currently experimenting with skipping the container by forming soil into self-contained blocks with a soil block maker instead.
Some growers prefer to skip soil altogether and plant seeds in individual pellets. Most are made from peat or coconut husk fibers and expand when watered.
5. Prep Seeds Before Planting
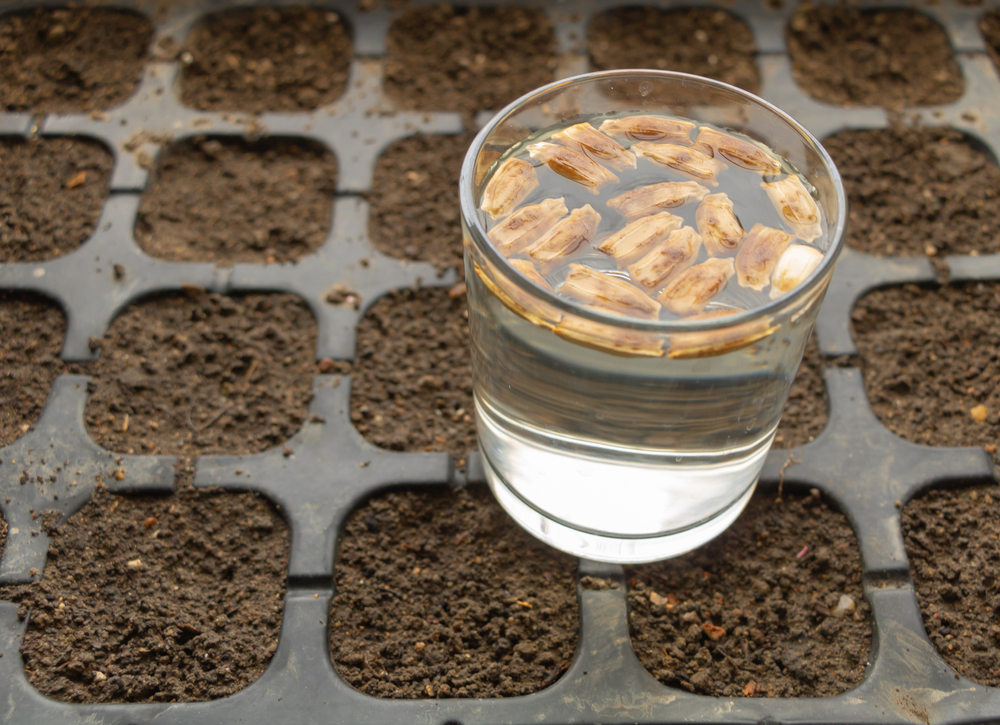
Some seeds need attention before you plant them. Read the packets carefully to see whether you need to soak them in warm water overnight or follow other measures.
If you’re using older seed, it’s wise to perform a germination test by placing some on a wet paper towel, placing them in a Ziploc bag, and watching for about a week to see what percentage shows signs of growth.
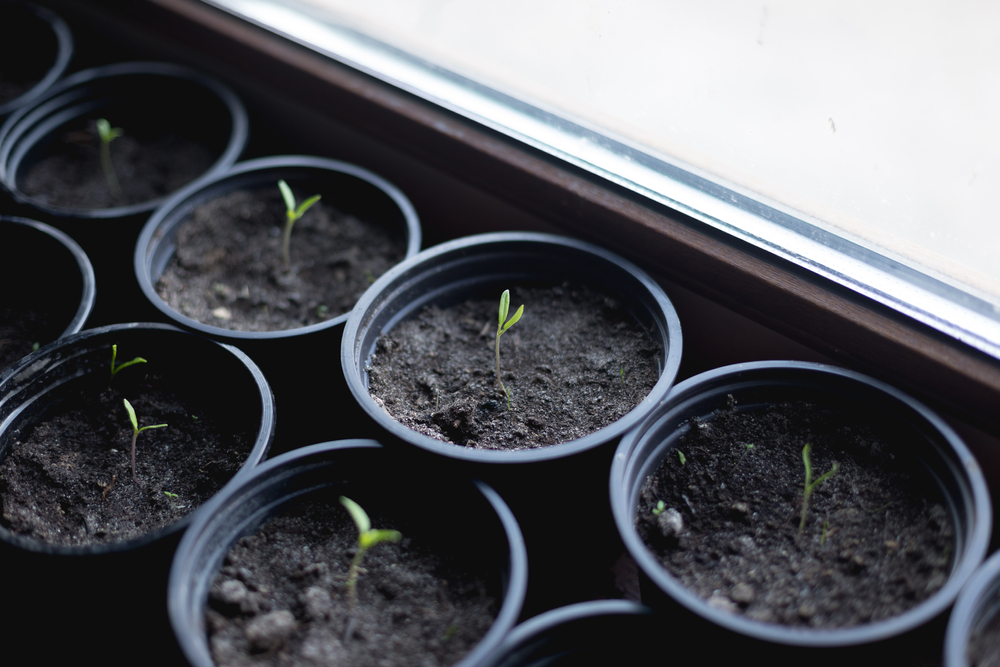
6. Plant to the Appropriate Depth
Far too many gardeners mess up their seed starting goals by planting too deep and then suffering poor germination.
Some varieties, such as snapdragons, certain lettuces, and some peppers, require light to sprout at all. Read your packet carefully and resist the urge to eyeball planting depth—a planting ruler helps with precision.
It’s best to wet the soil down before planting and to add more water right after. This ensures the seeds settle into the potting mix and are ready to take off.
7. Label Carefully!
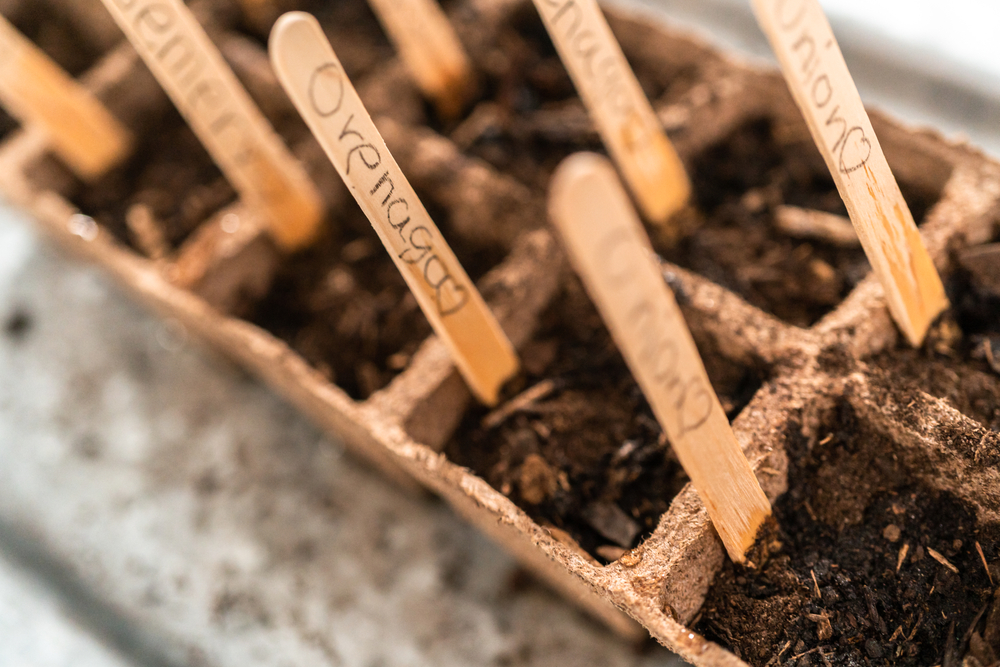
Post planting, label each seed tray with the plant variety and date with a plant label. You may think you’ll remember what is where, but trust me—you won’t.
8. Cover and Heat for Better Germination
You can speed up seed germination by creating greenhouse conditions indoors with a plastic dome cover. This traps both moisture and heat near your seeds so they sprout faster. Remove it entirely once the sprouts come close to touching the lid.
Another way to support speedy seed growth is with heated germination mats. They are helpful when you start seeds in relatively chilly spaces as they will keep the trays an average of ten degrees F warmer than the air temperature.
Place one mat under each tray for the best results, and remove once the air is consistently 60-70 degrees F.
Related Reading: 5 Best Seedling Heat Mats For Faster Germination
Alternatively, place seed trays on top of the refrigerator so they can draw in its heat. Seedlings don’t need supplemental light until they sprout, at which point you can move them somewhere better lit.
9. Water Gently and Often
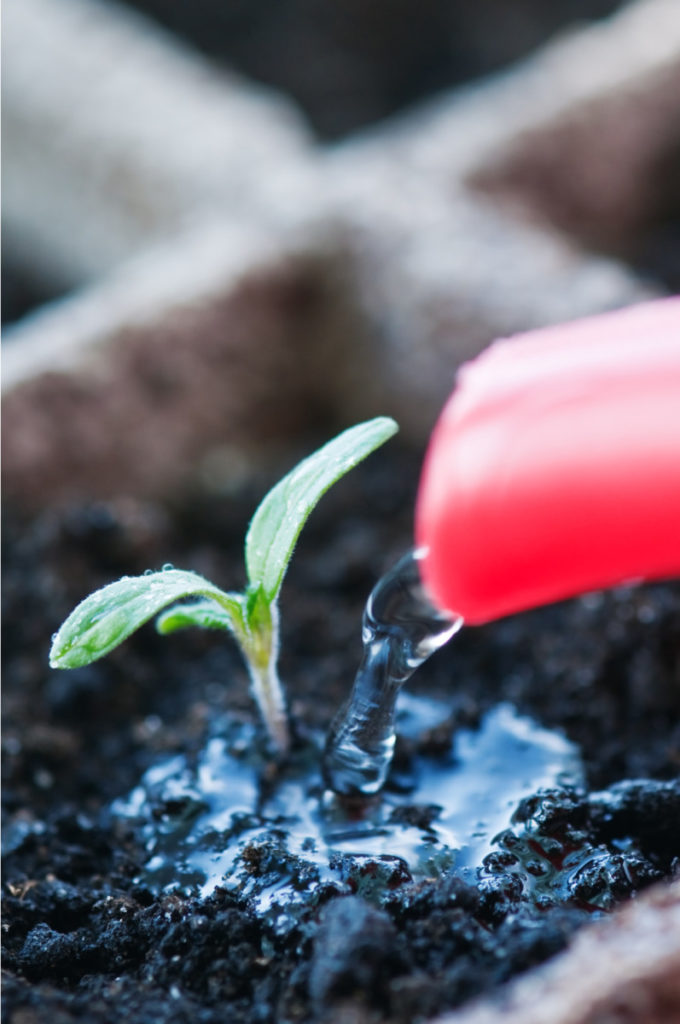
Inspect your seed trays every other day to determine whether the soil is still moist. Water carefully whenever dry, being cautious not to dislodge tiny seeds. Spray bottles tend to work best through the earliest stages.
Take care not to overwater either, as overly damp soil can lead to fungal disease or even rot the seedlings. Maintaining good airflow with a fan can help prevent the risk of sitting water while also strengthening the seedlings for outdoor conditions.
Related Reading: 10 Reasons Your Seeds Will Never Germinate
10. Fertilize and Separate Into Larger Containers (If Needed)
Seeds contain everything a plant needs for a good start in life. Still, they often appreciate some fertilizer once they develop their second set of leaves, especially if compost wasn’t included in the seed starting mix.
You can add a diluted dose of liquid fertilizer to each tray for a jump start, but avoid doing so the week before you plant to start hardening the plants outside.
This is also the time to transplant space-loving plants, like squash or tomatoes, into larger pots. Doing so prevents them from getting rootbound before they’re ready for their permanent location.
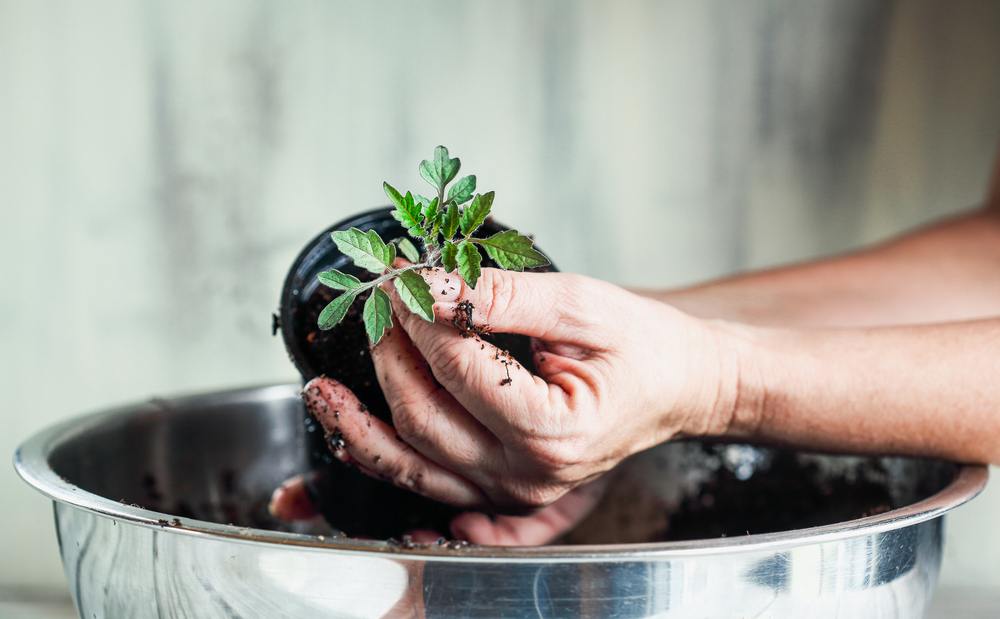
You can separate seedlings growing in the same container that are getting crowded once they have their true leaves, so long as you take care not to disturb the roots.
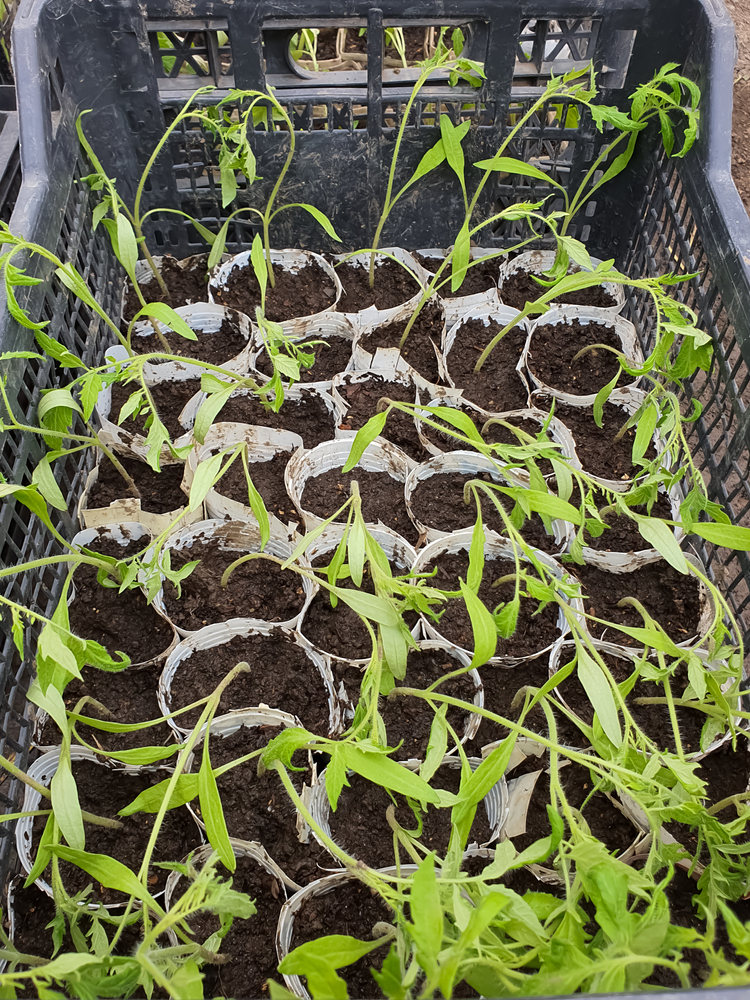
11. Harden Off to Prep for Life Outdoors

Once your seedlings have sized up, it’s time to prepare them for life outside by hardening them off. This is a multi-week process during which you leave the plants outdoors in protected spaces for increasing amounts of time so that they can acclimate to wind, rain, and sunlight.
Start with an hour at a time in a shaded location about two weeks before your ideal transplanting date, and increase both the time and sun exposure until planting.
Note: Patience is key here! I’m guilty of rushing this step and have suffered many sunscalded leaves and snapped tomato stems for my haste.
12. Transplant Into the Garden
At this point, your plants are ready for their second stage of life in your garden beds. Choose an overcast day after the risk of frost has passed and plant outdoors according to the spacing instructions on your seed packets.
If the weather looks iffy, err on the side of caution and keep plants indoors a few days longer.
It’s wise to research how to treat each plant variety’s roots before you start. For example, tomato roots can be spread apart to encourage growth in multiple directions, while squash roots should be handled as little as possible to minimize disturbance.
Water everything thoroughly after planting, and consider using a breathable netting to create low tunnels for weather protection if the temperature is still unpredictable.
At this point, your seed-starting process in gardening is complete, and it’s time to transition your efforts towards nurturing your plants to maturity in the great outdoors instead. Best of luck!
Seed Starting Troubleshooting Guidance
Sometimes plants struggle, and it’s hard to determine why. Here’s how to combat four common problems.
Leggy:
Plants become tall and spindly when they don’t have enough light exposure, as they strain themselves to access as much as possible. Consider moving the seedlings to a better lit area or adding additional grow lights.
Wilting:
Seedlings might wilt and die off due to a fungus that gets established when plants are overcrowded or too wet. Using a brand new seed-starting mix reduces the risk of fungal contamination, as does keeping adequate airflow around the plants with a small fan.
If the soil feels dry, the plants might be wilting from dehydration. Water and check back in a few hours to see if they have perked up.
Pest Problems:
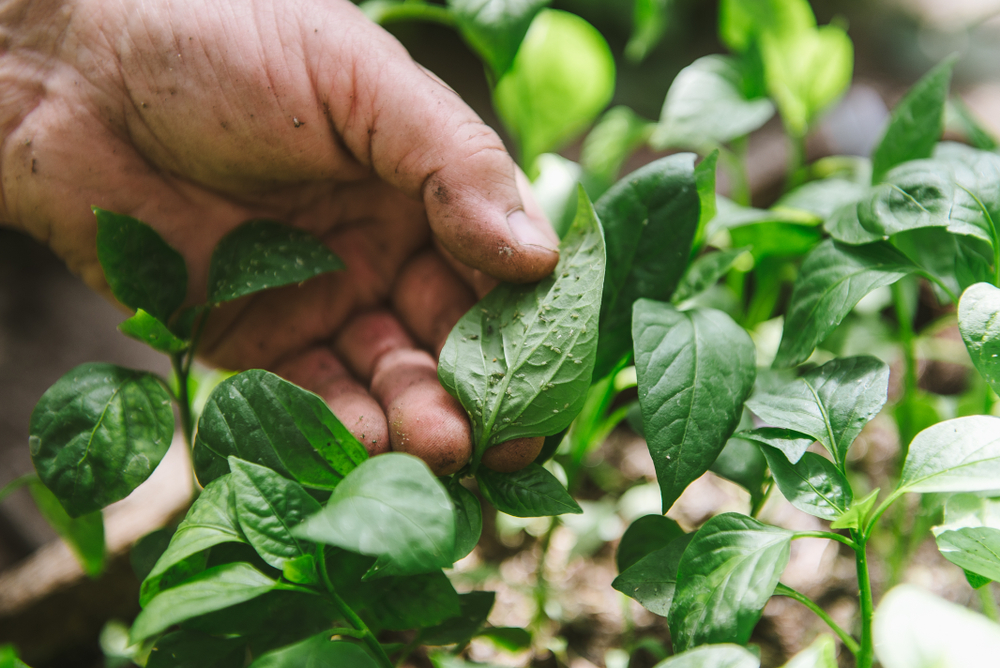
Even indoor plants are susceptible to insects. Check the undersides of each leaf while watering for signs of aphids or egg sacks, as an infestation could ravage your indoor plants quickly.
Poor Root Growth:
Problems with root development are often linked to drainage problems or too low of temperatures. Check the plant containers to ensure they will let water through and consider adding a germination mat under each tray.

Get the famous Rural Sprout newsletter delivered to your inbox.
Join the 50,000+ gardeners who get timely gardening tutorials, tips and tasks delivered direct to their inbox.