

One of my biggest pet peeves with kale is the long, hard stem that runs up the center of the leaf. It’s the most bitter part of the leaf, and no matter how high-quality the kale stripper, it’s darn near impossible to separate that stem from the leaf quickly and cleanly.
Plus, it’s kale. It’s certainly not the most exciting vegetable, and for as bitter as it can taste, it really has no business being that difficult to prepare.
This is why I love baby kale, no hard stems, and because it’s smaller, they’re less bitter and more tender. But growing tons of tiny kale takes up a lot of room in my garden, so I don’t do it.
Well, thank goodness for Tozer Seeds of the UK! Around two decades ago, someone across the pond looked at the frilly leaves of kale and the wee cabbage-like shape of Brussels sprouts and thought, “I wonder what their babies would look like?”
Okay, I don’t think that’s actually how it happened, but the idea was simple: create a more flavorful, bite-sized kale.
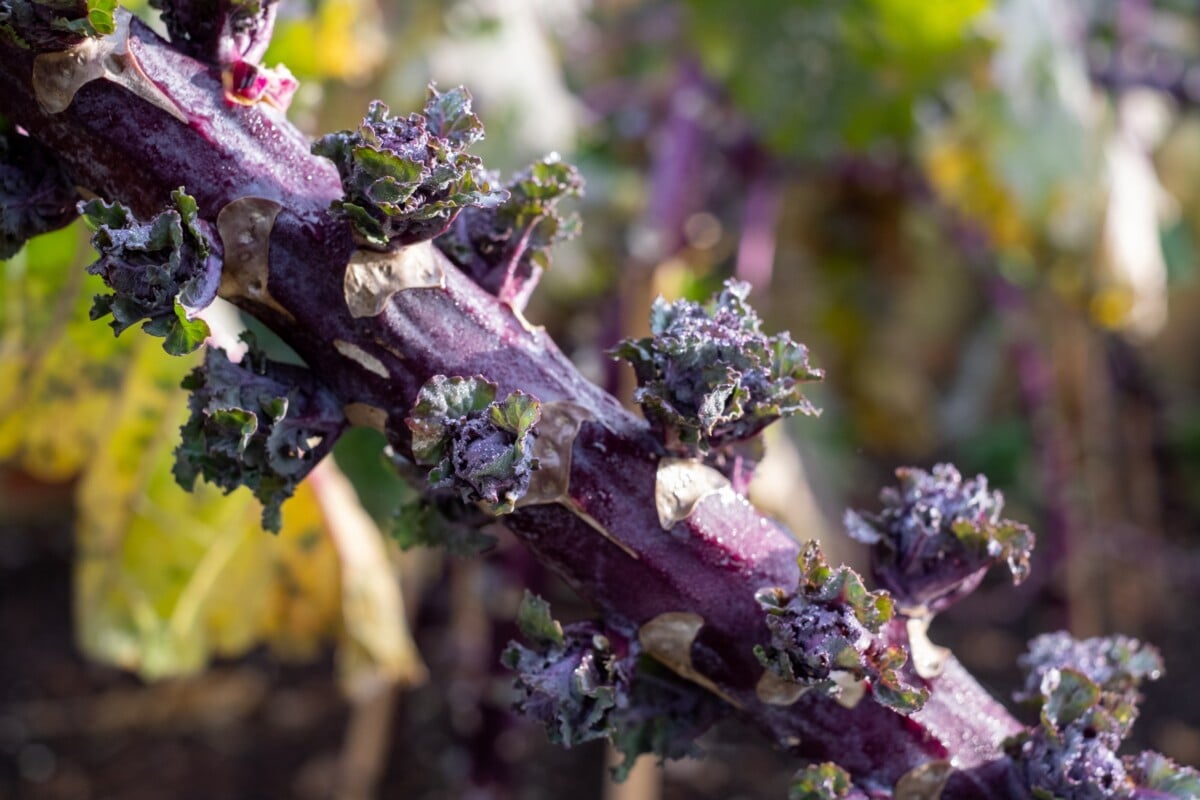
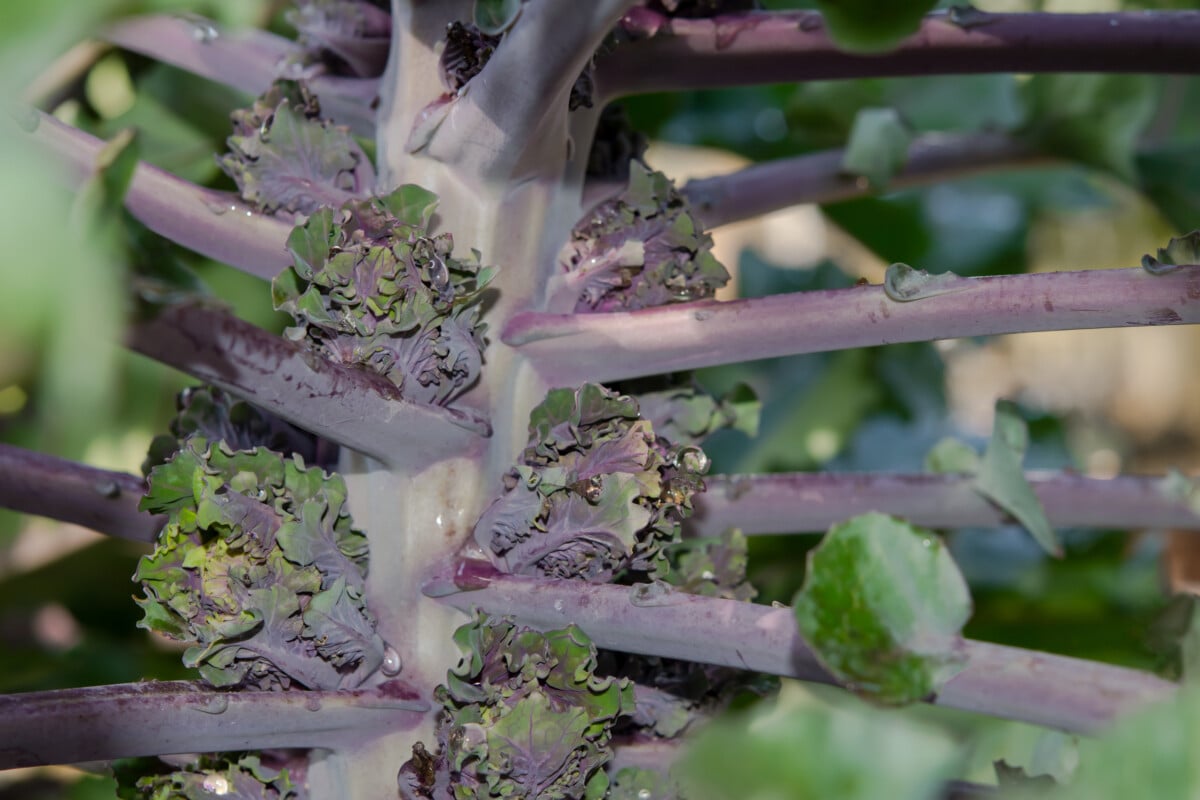
So, a breeding program was born – crossing kale with Brussels sprouts to create tiny rosettes of tasty kale leaves. Kale as a finger food. (Leave it to the Brits to improve upon the almighty sprout!)
The Kalette is the culmination of nearly fifteen years of plant breeding the old-fashioned way (no GMOs), breeding kale and Brussel sprouts, and selecting successive generations with the desirable traits they wanted. In 2010, the Kalette was ready to meet gardeners and supermarkets in the UK.
Here in the states, Kalettes were quietly introduced in 2014 to small commercial growers.
The seeds have only recently become available to the wider public through Johnny’s Selected Seeds and now Territorial Seed Company, which puts the adventurous home gardener at an advantage.
We get to grow them before they show up everywhere.
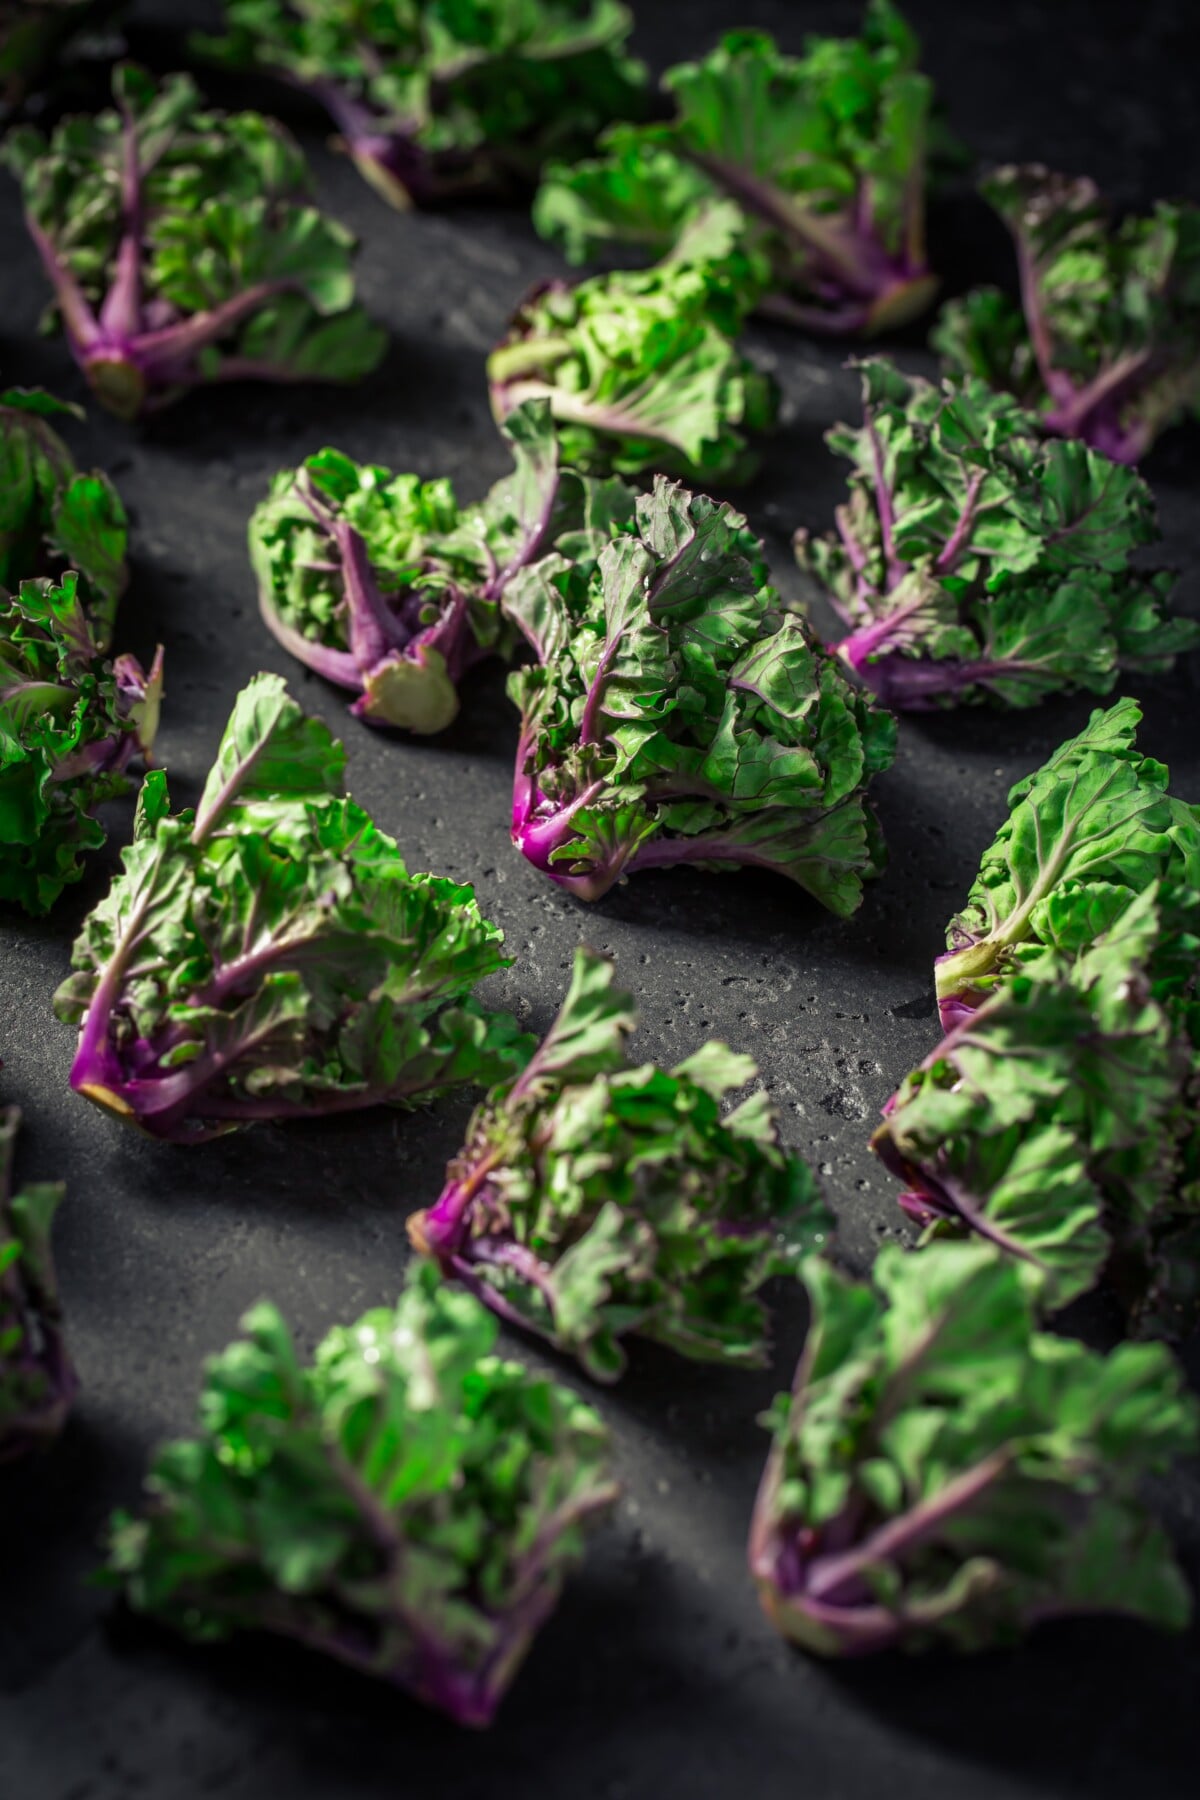
And you’re definitely going to want to make a little room in your garden for these colorful, crunchy cuties. Aside from being absolutely gorgeous in purple and green, they’re packed with all the nutrients kale and Brussels sprouts are famous for: Vitamin C, Vitamin K, antioxidants, Beta-carotene, Omega 3, and 4 grams of protein in a 1.5 cup serving, but with a nutty flavor reminiscent of Brussels sprouts. (Bye-bye, bitter kale.)
Not Just a Novelty
Yes, they are absolutely beautiful as far as vegetables go, but Kalettes were bred for the foodie gardener (hi, friends). Not to mention those of us with a soft spot for cute vegetables. I can’t help myself when it comes to mini veggies.
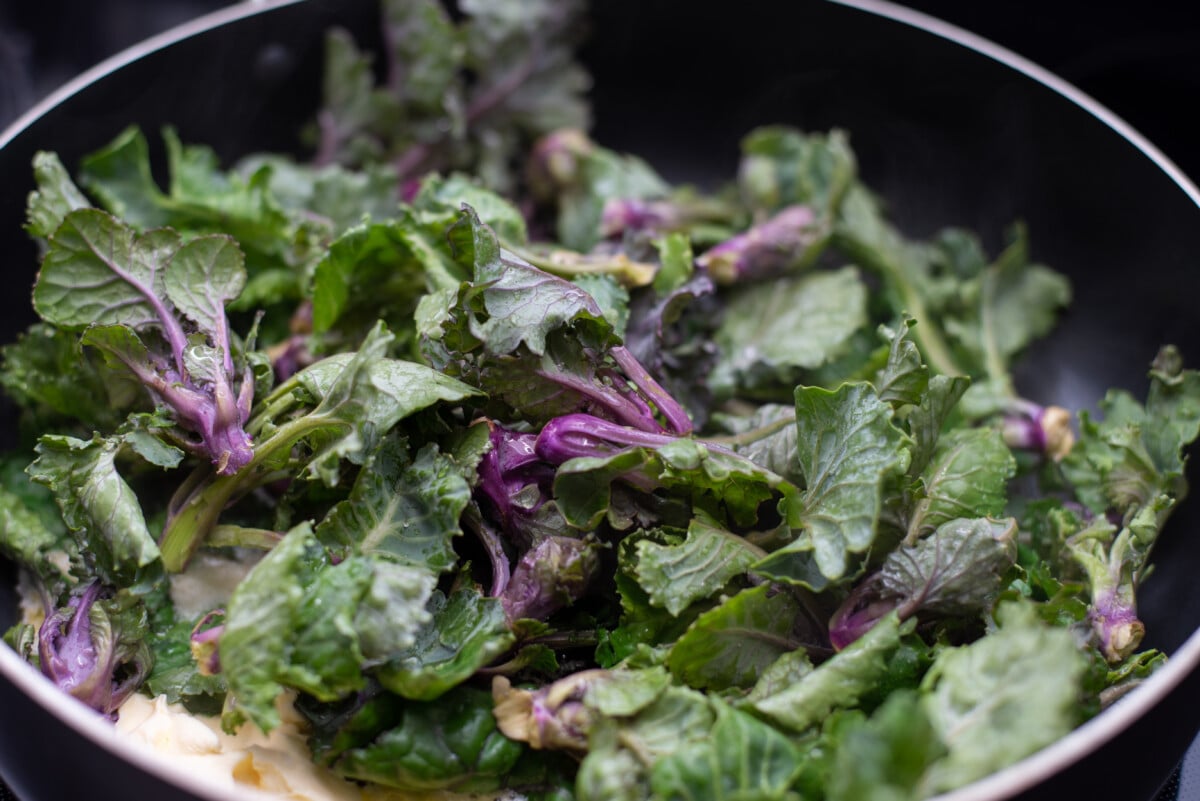
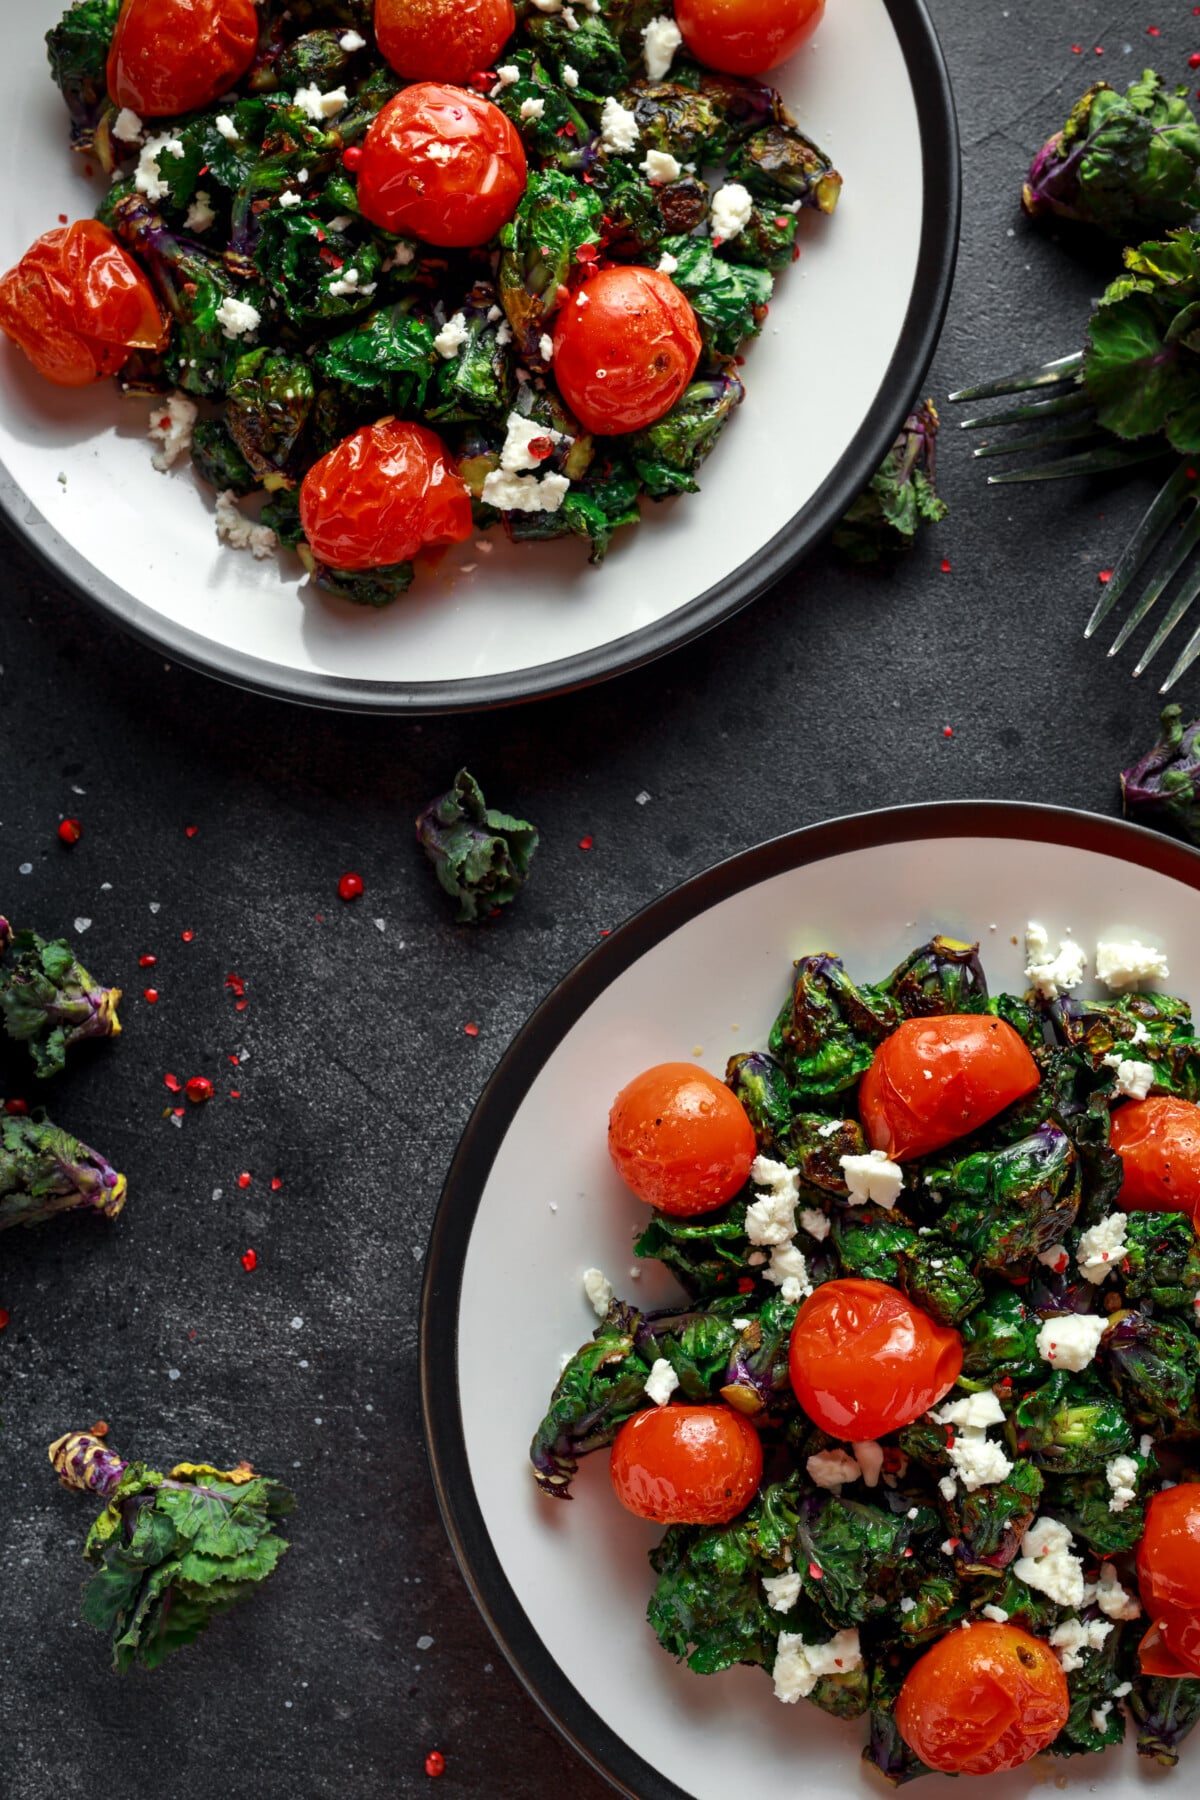
Despite their resemblance to a dollhouse-sized head of lettuce (the rosettes average about 2” across), they are sturdy enough to stand up to high-heat cooking, making them an excellent candidate for sautéing, roasting, braising or stewing.
I’m envisioning air-frying a batch with Everything Bagel seasoning and munching on them like chips or popcorn – guilt-free. Or swapping out my traditional Brussels sprouts for my roasted butternut squash sheet pan dish: Kalettes, cubed butternut squash, dried cranberries, toasted pepitas and crumbled blue cheese. Yum!
Plus, because they are a firmer, cold-hardy vegetable, they store beautifully in your crisper drawer for weeks, much like Brussels sprouts do.
It’s been ages since I’ve been this excited about a new vegetable.
If you’re a fan of sturdy greens, I highly recommend you head on over to Johnny’s or Territorial to get your seeds. Although, as of this writing, only Territorial offers all three varieties of Kalettes.
Kalette Varieties and How to Grow Them
Kalettes need a long growing season, even longer than most Brussels sprouts. So, it’s recommended that you grow them similarly, which means starting seeds indoors and transplanting them outdoors at the appropriate time.
What part of the country you live in dictates what variety you can grow and when to transplant them outdoors. As usual, California requires special handling with brassicas, which I will cover as well.
There are three different varieties of Kalettes, which, when planted together, will give you Kalettes to harvest one after the other: Autumn Star (mature in 110 days), Mistletoe (mature in 125 days), and Snowdrop (mature in 140 days).
As you can see from how long it takes each to mature, when you plant them outdoors depends largely on your growing zone.
But regardless of where you live, the goal is to transplant your seedlings early enough so that the mature plants reach 2-3 feet tall before your cool weather arrives. Just like other brassicas, Kalettes get sweeter after the first frost.
According to Johnny’s Selected Seeds, if you live in the North and Midwest part of the United States, you can grow all three varieties for a fall harvest, transplanting your seedlings outdoors in mid-May, starting with Snowdrop, then moving on to Mistletoe and Autumn Star through early June.
Mid-Atlantic gardeners (Hi, friends!) can do the same, but starting in mid-June through July.
Down South, you folks are going to want to get your seedlings in the ground in September, which will give you Kalettes late in the fall and on into the winter. However, because of your warm winters, it’s best to stick with growing only the earliest maturing variety, Autumn Star, as once we enter true winter, there isn’t enough light for the later maturing varieties.
And finally, our good friends out on the West Coast in California, you can grow all three varieties, planting your seedlings in August, which will give you late winter harvests.
Regardless of where you live, you can plant a super early spring crop if you’re able to work the ground in early February, but it’s not really recommended. Kalettes were meant to be grown as a fall and winter crop in our climate.
Soil, Sun, Fertilizer and Water
Kalettes, much like Brussels sprouts, prefer rich, well-draining loamy soil, filled with organic matter. They need 6-8 hours of direct sunlight. Kalettes prefer slightly moist soil, so don’t let them dry out for too long. They need a pH of 6.0-7.5.
Work in some compost and well-rotted manure when you plant your seedlings outdoors. Like most foliage vegetables, Kalettes are heavy nitrogen feeders; however, you don’t want to go overboard. It’s best to taper off fertilizer as they begin producing florets.
These days, I’ve been leaning more towards Farmer’s Secret brand of liquid fertilizers. I found their Tomato Booster a few years ago. I had such great results with it that I started checking out their other formulas, too. They are super concentrated and easy to mix up, which means I don’t have to mess with heavy bags of pelleted or powdered fertilizer.
I’ve been feeding all of my indoor seedlings (not just Kalettes) with their nitrogen-rich Rose Booster formula (NPK 10-8-4) to give them a big, lush boost before they go outdoors. I’ll continue to use it on the Kalettes and my other brassicas out in the garden. Whatever you choose, make sure it’s high in nitrogen. Follow the package directions, lessening the amount once they start growing Kalettes.
Spacing
Transplant your Kalette seedlings 18” apart and in rows 24” apart.
Topping and Harvesting Your Kalettes
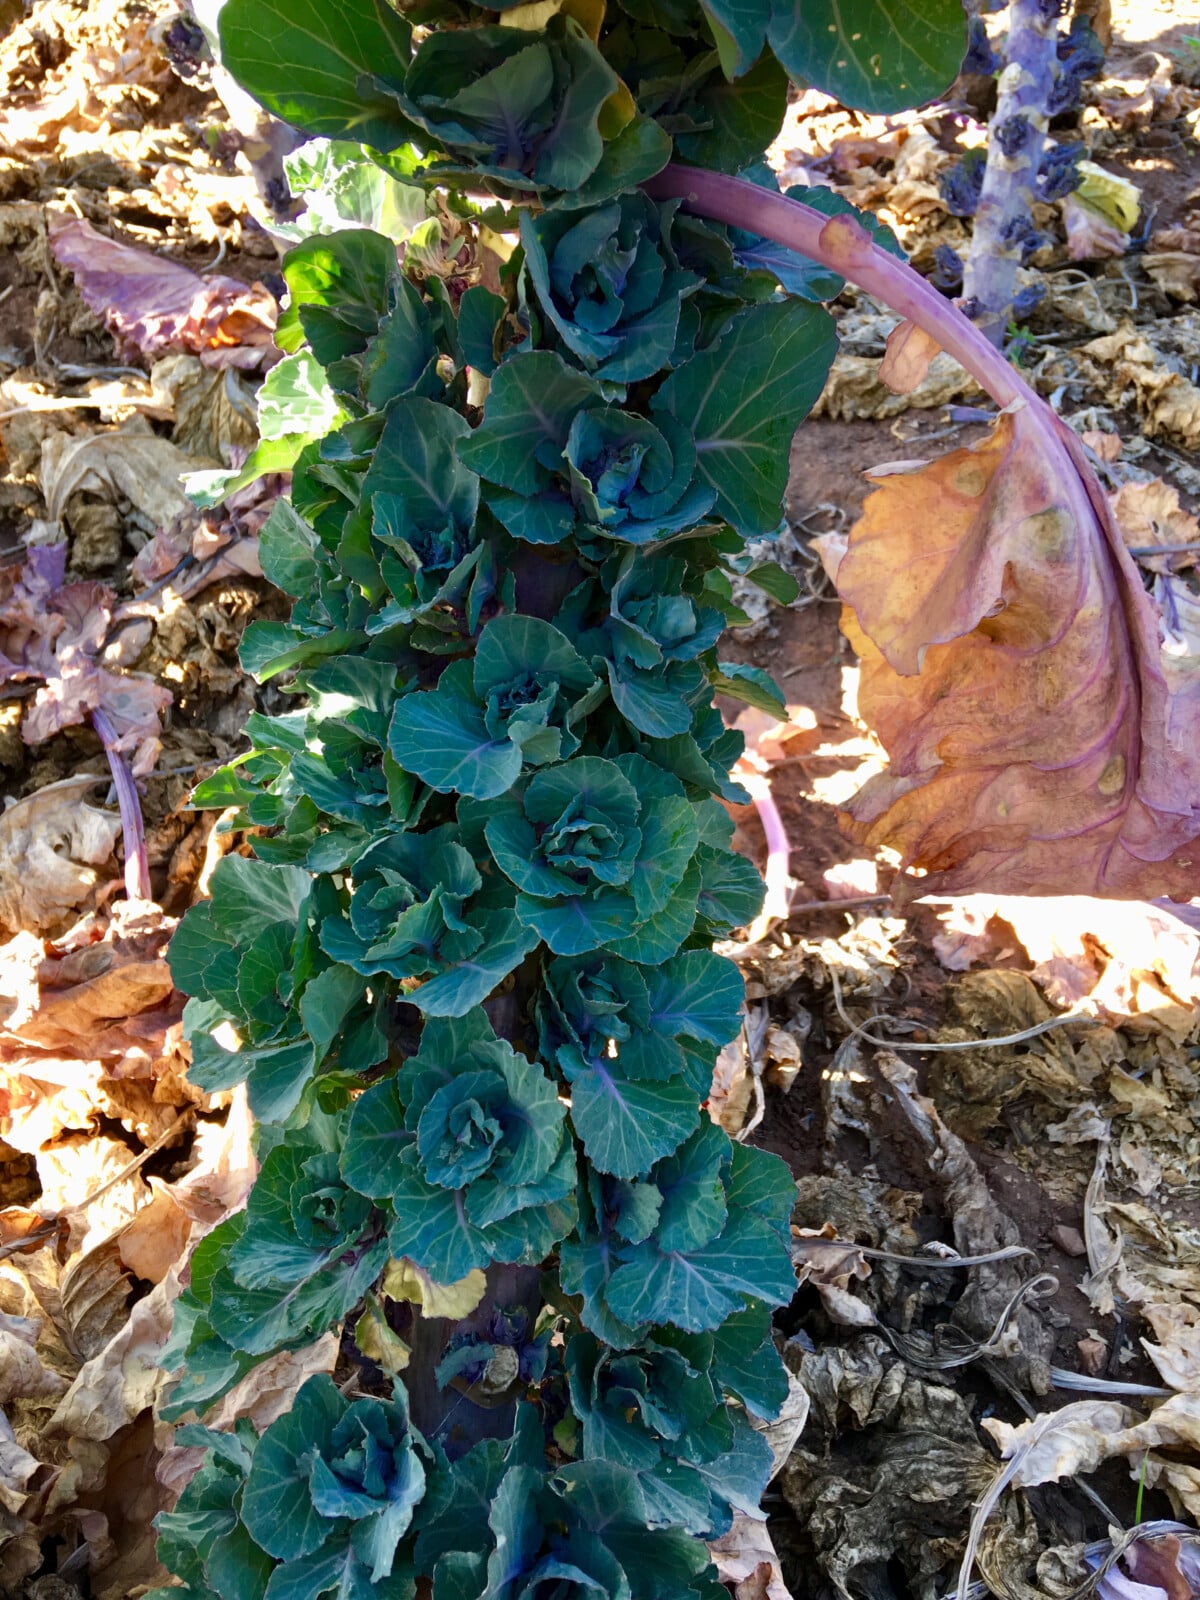
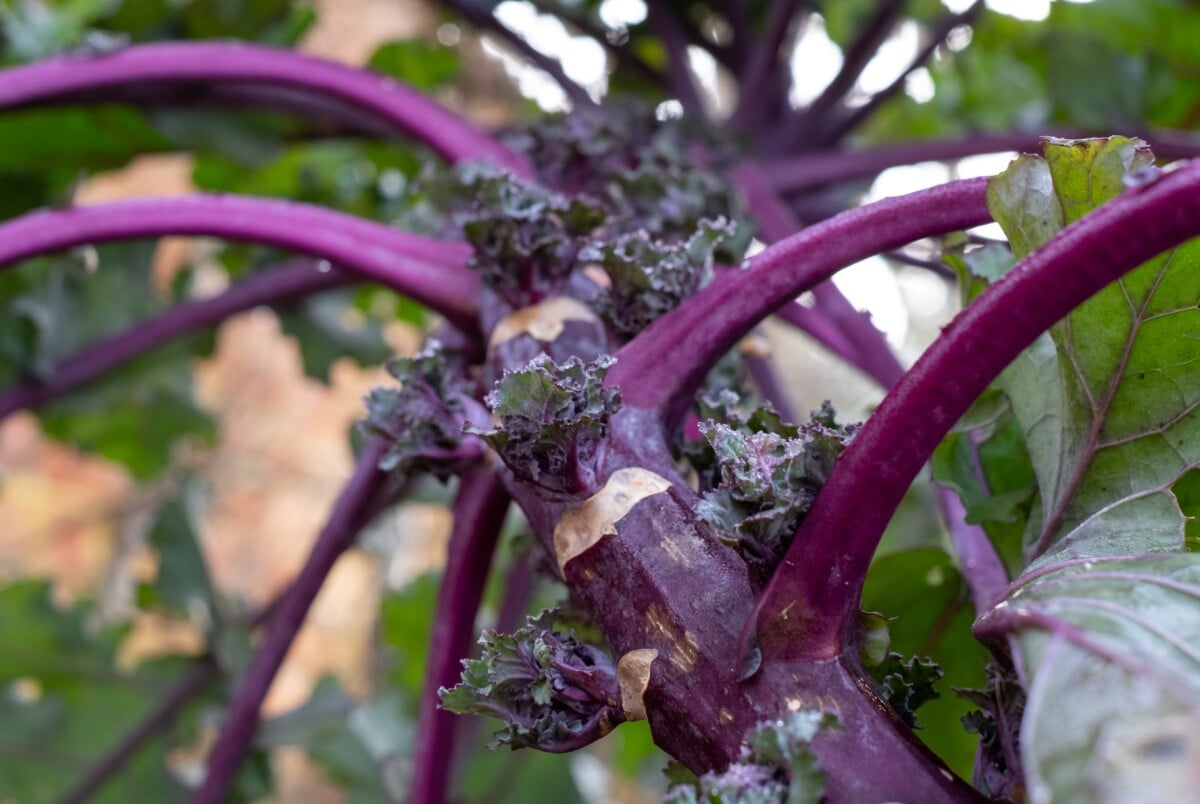
If you want to maximize your yield and ensure you get nice, full rosettes, you’ll want to top your Kalettes. Once the stalk begins putting out Kalettes, watch the ones lowest on the stem. When they reach ½” to ¾” across, use a pair of clean hand pruners to cut the top of the plant off.
This will force the plant to put all of its energy into the developing Kalettes, rather than growing taller. Within a week or so, you’ll notice that the rosettes will begin to mature from the top down.
Pick them when they are 1 ½” – 2” inches across. Just like Brussels sprouts, you can cut them off individually as they develop. Or you can cut the entire stalk and store it in the fridge. These hearty greens keep very well.
Keeping Kalettes Bug-Free
Like most brassicas, Kalettes have a habit of attracting cabbage worms, flea beetles and other foliage-munching pests. Over the years, I’ve fed the local bug population more brassicas than probably made it to my table. I finally got smart and figured out how to manage these munching pests.
I’ve found the easiest way to keep pests out of your brassicas is to grow them under cover. Naturally, the same goes for Kalettes.
Get yourself some insect netting (this is the stuff I have). As long as you dry it thoroughly, then bring it indoors at the end of the season, it will last you years.
Alternatively, I’ve always had pretty good results using Bacillus thuringiensis to put the kibosh on cabbage worms. But for it to work, you have to be consistent. That means spraying every single week and every time after a heavy rain. Do it before you find the cabbage worms.
Do yourself (and your hands) a favor and skip the spray bottle. The premixed bottle with the trigger sprayer is always more expensive. It would leave my hand cramped after trying to spray everything down. I finally got wise and bought a bottle of the concentrated stuff, and now I mix it up in one of these. A few pumps and I can spray away. I get far better coverage, and I can get underneath the leaves easily.
And that’s that.
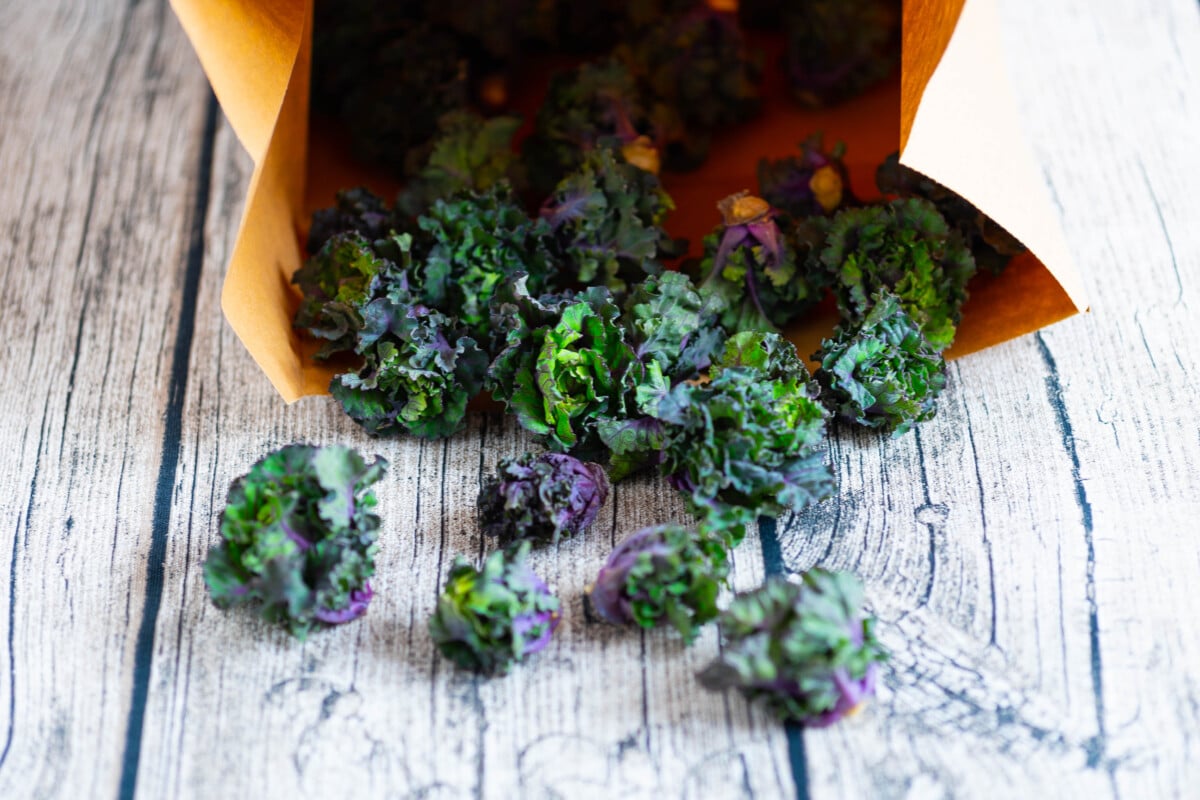
If you’ve grown Brussels sprouts, you can grow Kalettes. If you’ve grown kale, you can grow Kalettes. This fun little hybrid makes a beautiful and tasty addition to the home garden. Don’t tell my Brussels sprouts, but I’m actually more excited about growing Kalettes this year.
I love the idea of Brussels sprout flavor in the shape of crunchy, mini florets. I hope you’ll decide to pick up a packet or two of Kalette seeds. If you decide to join me in growing Kalettes this year, drop me an email and let me know.

Get the famous Rural Sprout newsletter delivered to your inbox.
Join the 50,000+ gardeners who get timely gardening tutorials, tips and tasks delivered direct to their inbox.