

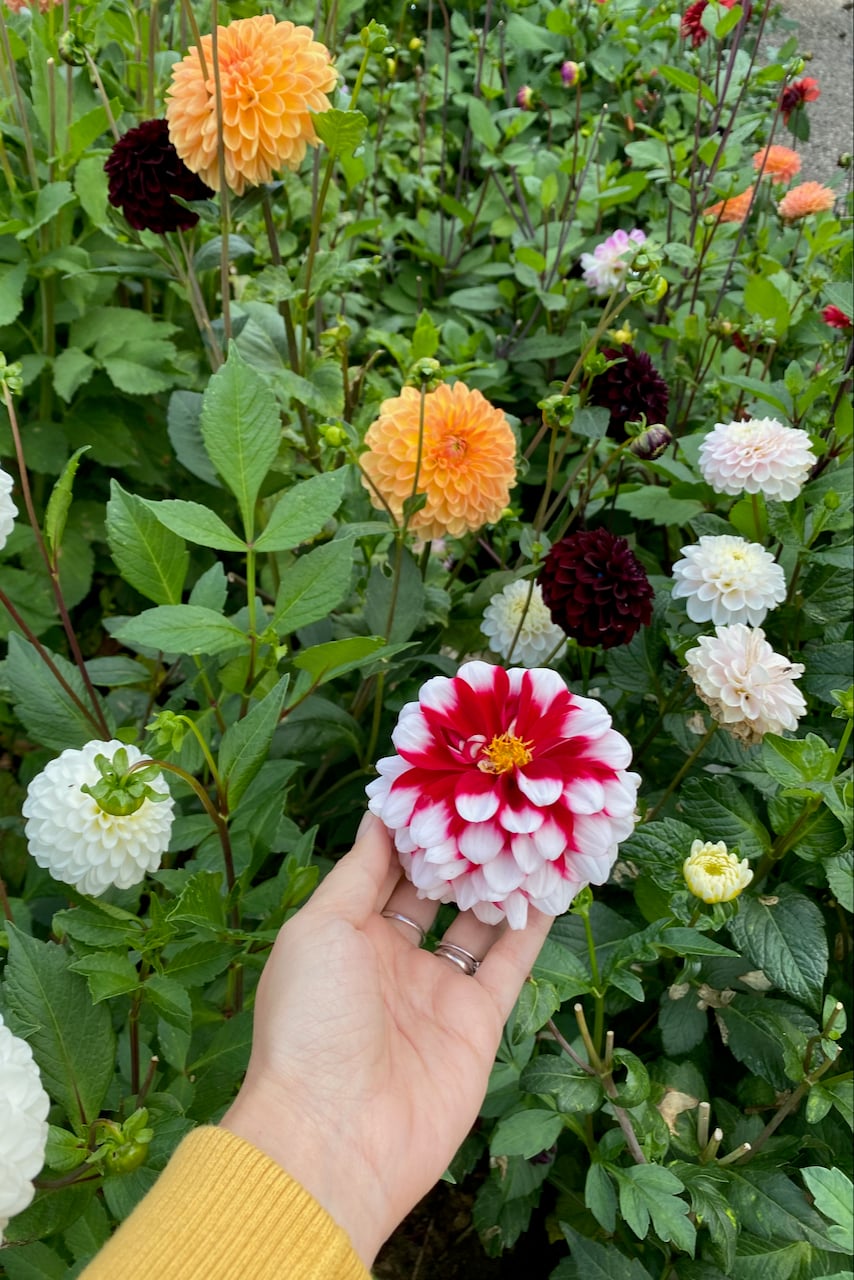
This past weekend, I found myself dangerously close to buying a bucket of dahlias. I didn’t realize dahlias came by the bucket. It only took a couple of strolls down the bulb aisle at the store to convince myself that I needed more dahlias, and I also needed the bucket.
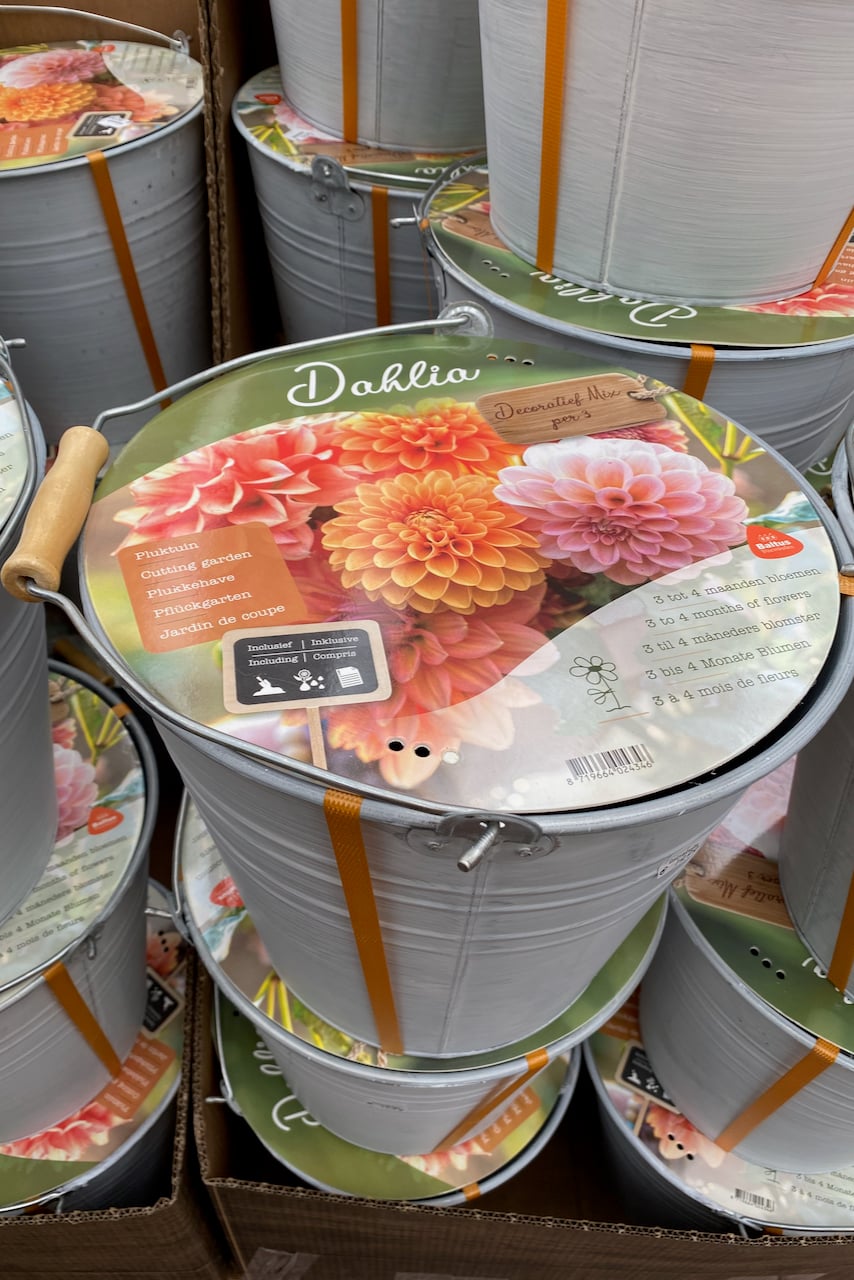
The only way I managed to talk myself out of this purchase was by reminding myself that I have plenty of tubers at home, neatly tucked away in a box. And in a familiar truce pattern that I often make with myself, I promised myself that I would be allowed to buy more dahlia bulbs as soon as I get all my dahlia spring jobs done.
If you want to play along, here’s what’s on my dahlia spring to-do list.
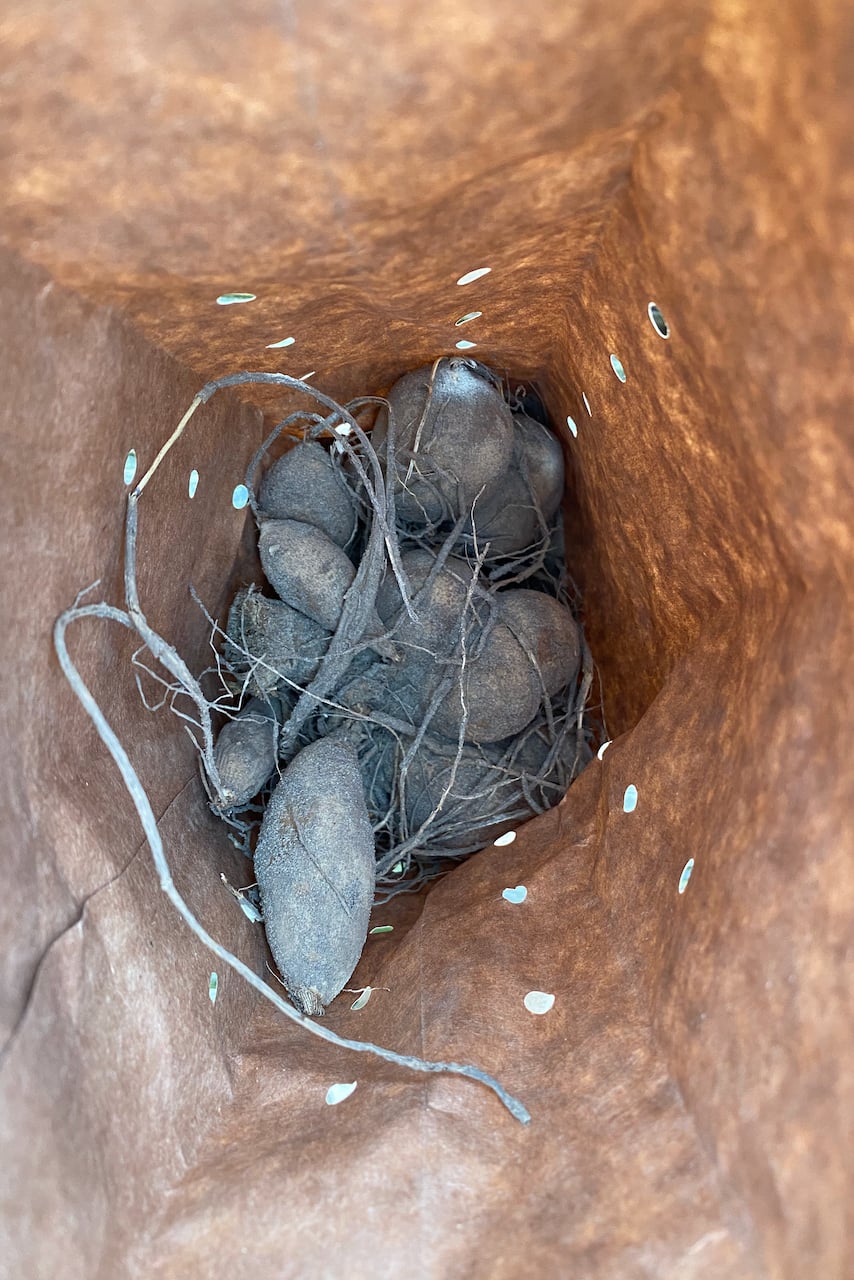
1. Inspect and select stored dahlia bulbs.
If you’re reading this article in early spring, your dahlia bulbs are probably still in storage. I usually keep mine in the garage, wrapped in perforated paper bags in a cardboard box filled with shredded paper. I’ll also save and reuse any natural packaging material (such as straw) that comes with ordering bulbs.
The trick is to keep dahlia bulbs dry, cool (between 40 and 45°F or 4-7 °C is the optimal temperature) and away from wildlife that might want to snack on them.
I’ve already been checking my dahlias every now and then (honestly, less often than I should have) since I placed them in storage last November. And even before storing them, I had already gone through the process of cleaning, separating and sorting the tubers.
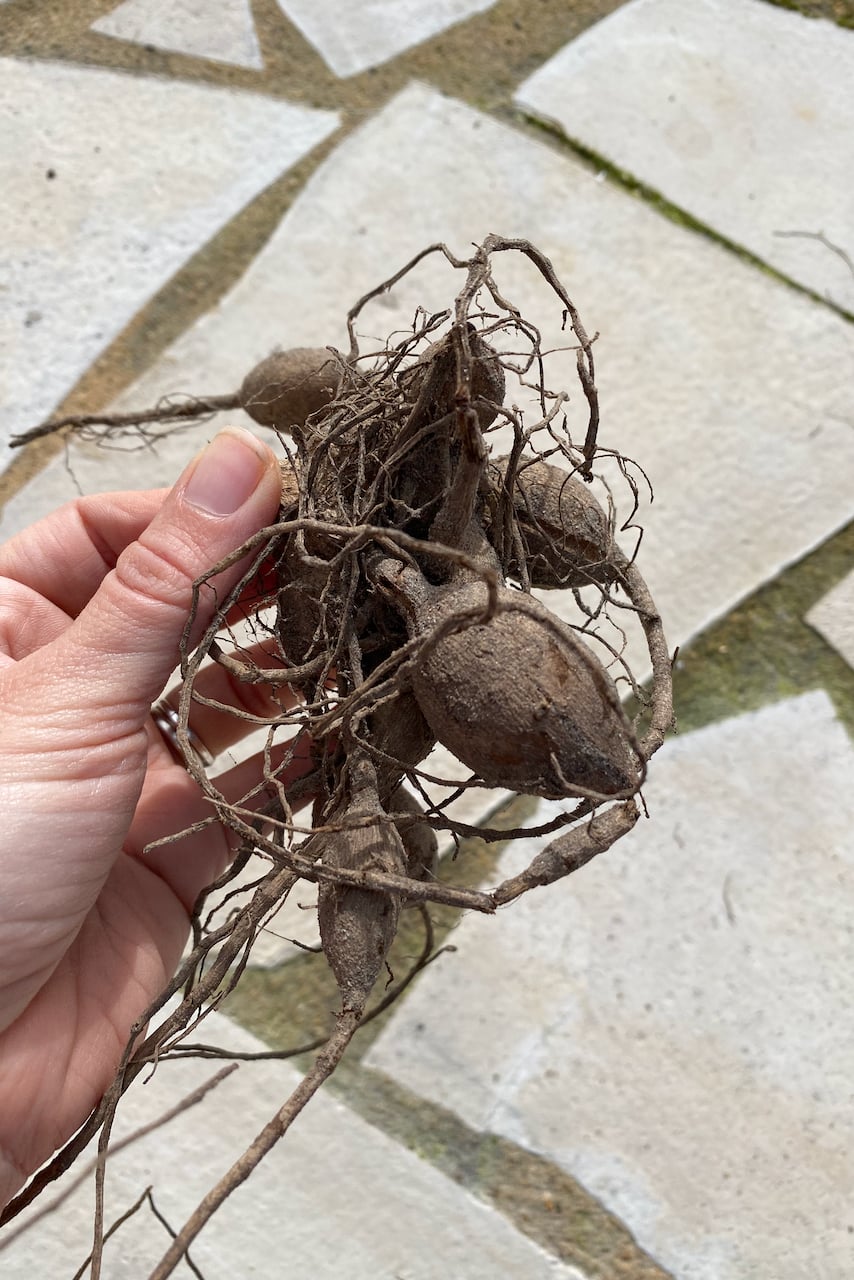
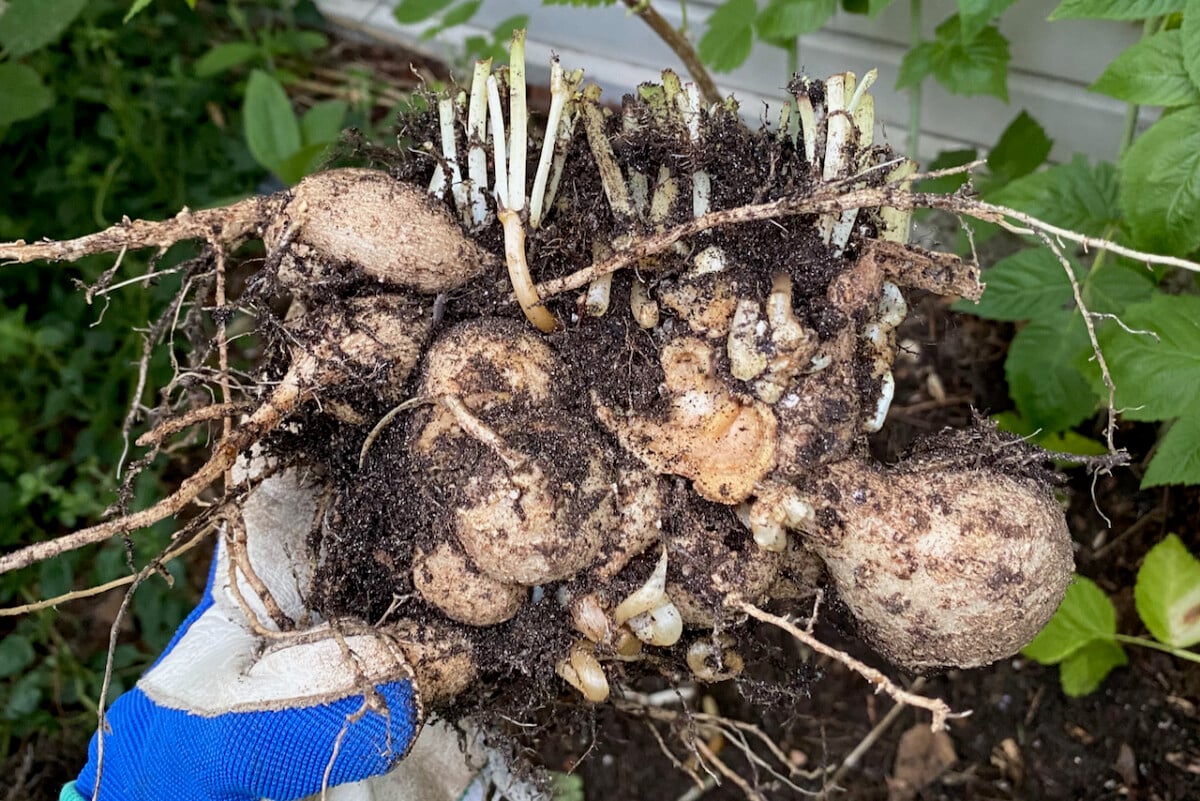
But now, in early spring, it’s the perfect time to do a more thorough inspection of my dahlias, just to have an approximation of how many tubers I’ll have ready to plant this year.
What am I looking for?

I’m assessing whether the bulbs are viable and whether they will grow flowering stems this year. I don’t have a lot of space to dedicate to dahlias, so every inch taken by a bulb that won’t produce flowers is an inch I’m taking away from something else that will.
Which brings me to my second point.
2. Know which dahlia tubers to discard. And actually do it!
Right before we plant the bulbs is the right time to be a bit ruthless about discarding some if necessary. Just as I wouldn’t cook with spoiled ingredients, I won’t garden with “ingredients” (be it seeds, bulbs, rhizomes or tubers) that won’t get me any results.

Rotting dahlia tubers need to go.
Moldy tubers need to go.
Soft and mushy dahlia tubers need to go. Even if they’re not visibly moldy or rotting.
Shrivelled tubers need to go.
I am a garden optimist, evidenced by the number of plants I rescue and revive every year. But I’m also a realist with limited resources in terms of space, time and energy. And I know that once a dahlia tuber has started rotting, it’s already a lost cause. The same goes for moldy tubers.
It might have been my mistake in overwintering them. Perhaps I didn’t dry them enough before putting them into storage. It might have been the material they were stored in – the most common culprits are plastic bags. Maybe it was too warm and humid in the area I stored them in. Or perhaps the dahlia bulbs were already showing minor signs of rot due to a very rainy season.
There’s nothing we can do about it now, except learn the lesson and try not to make the same mistake next time we overwinter bulbs. I make that mental note to self on my way to the compost bin, because that’s where the discarded bulbs end up.
However, there is an area where I allow a bit more leeway: damaged tubers.
Obviously, I’m not talking about dahlia tubers smashed to bits. (Say you left the box of bulbs on the floor of the garage, maybe a bit too close to where you park the car? Hypothetically, of course.)
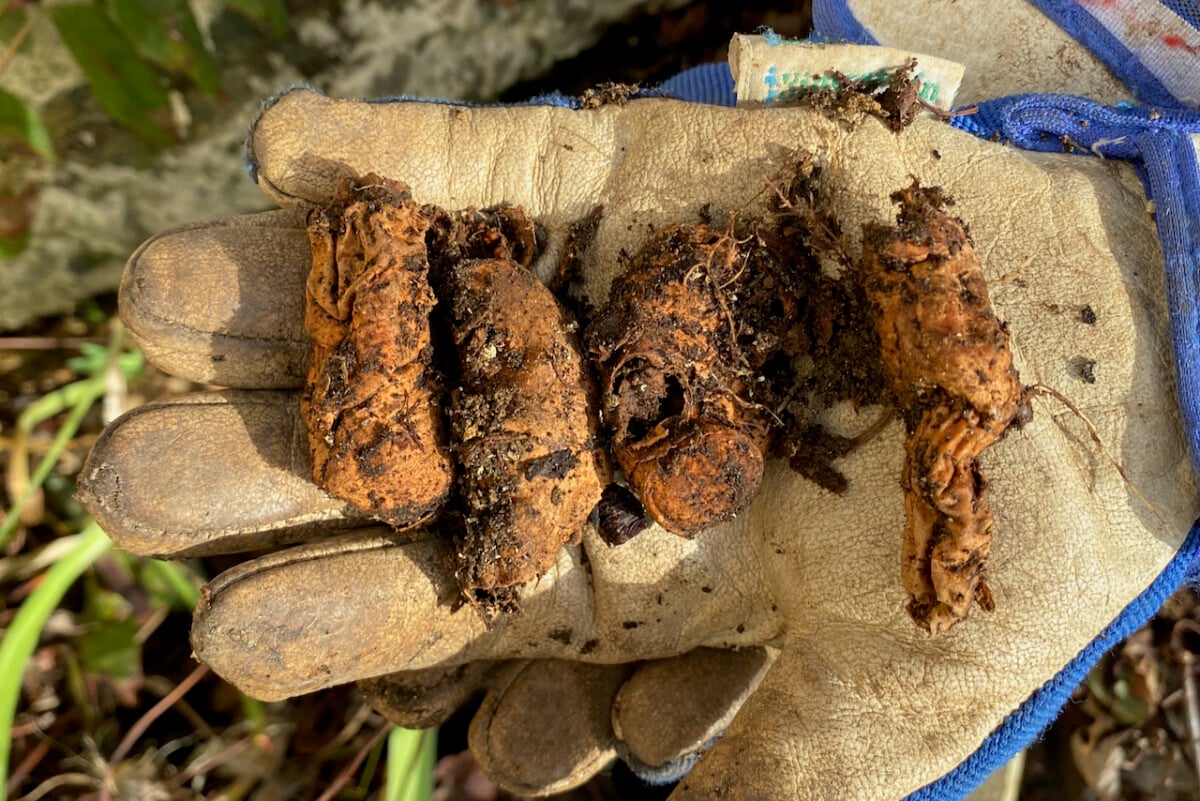
But if it just looks like mechanical damage, where you nicked the tubers with your spade as you were digging them out, I think you should give them a chance and plant them.
As long as the area where the sprouts are coming out is still in good shape, especially if you see “eyes” already forming, the dahlia tubers should still grow. But first, let the damaged area dry out and form a callus.
3. Plant dahlias in pots to get a head start.
I have a relatively short growing season, so the best way to get a few rounds of blooms out of my dahlias is to start them early in containers. I keep them indoors, of course, since it’s still too cool for them outside in March, especially at nighttime.
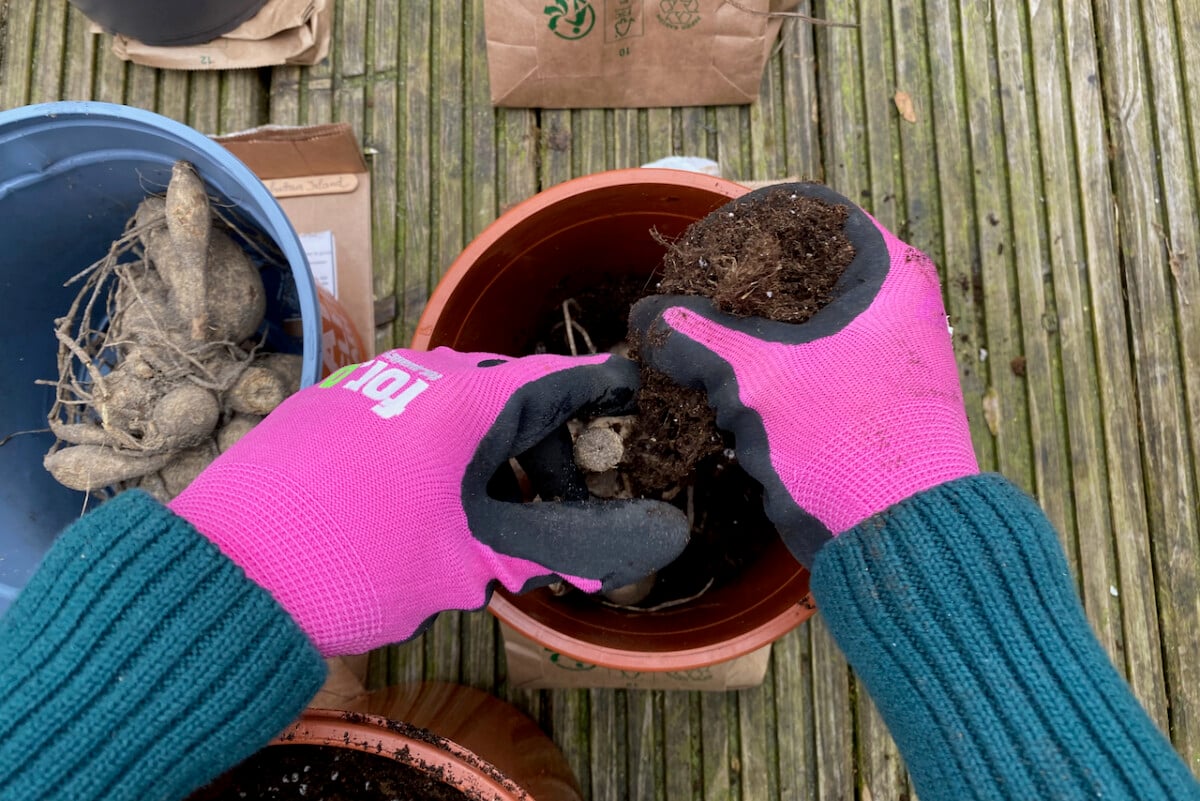
Just like when we start seeds, we need a container, well-draining potting soil and viable dahlia tubers.
Make sure you choose containers that are large enough to accommodate a whole tuber structure without being too cramped. But at the same time, too large a container might invite too much potting soil. That’s not a problem, as long as you don’t overwater the pot.
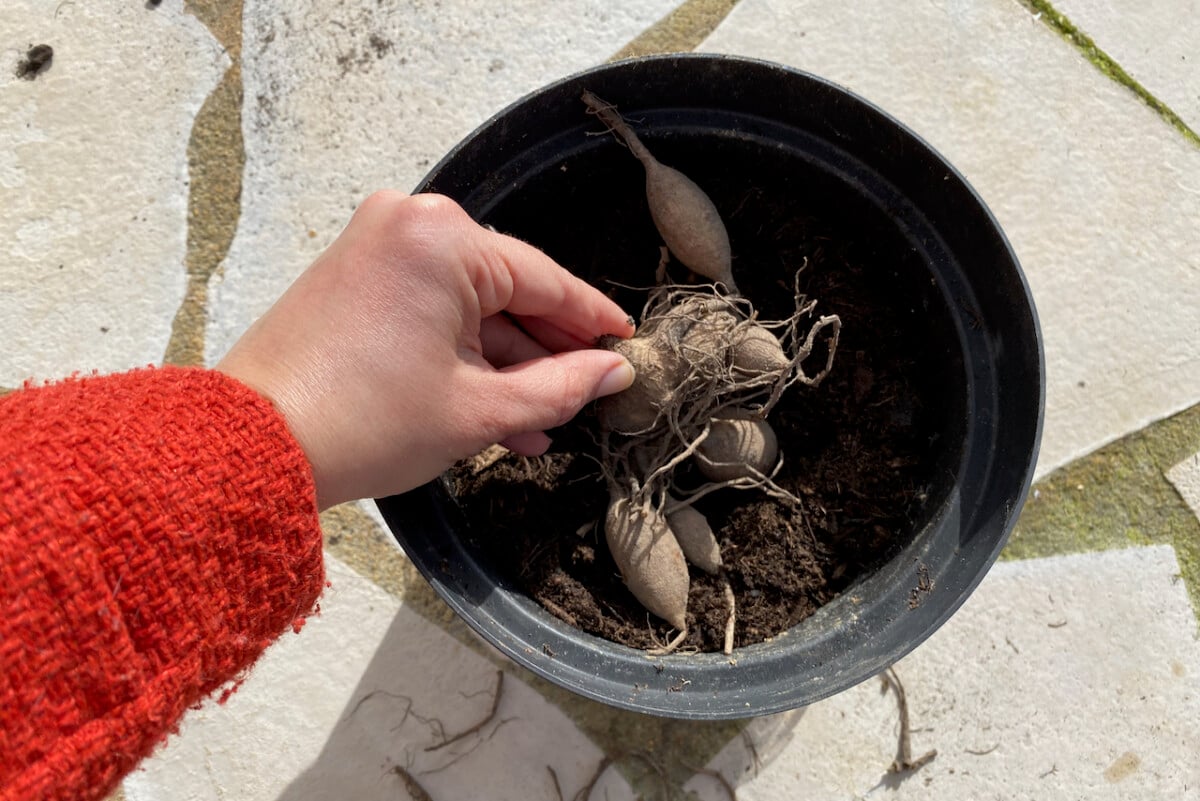
Start by adding a layer of potting mix to the pot. Then place the tuber on the soil, spreading its roots as much as possible. Hold the dahlia crown by the stem and top up the potting soil until you’ve covered the entire tuber.
There’s no need to bury them deeply; an inch or two below soil level should be enough. Remember to tap the pot a few times to eliminate air pockets and allow for the potting soil to percolate down between the tubers.
Keep the pots watered, but not soggy. And store the containers in a frost-free spot at a temperature above 65-70F (about 18-21C). They won’t need light for the first month or so, but once the dahlia sprouts start coming up, it’s time to move the containers to a sunny windowsill.
For a more detailed explanation (including a few “don’ts” I learned through trial and error), have a look at this article I wrote about starting dahlias in pots.
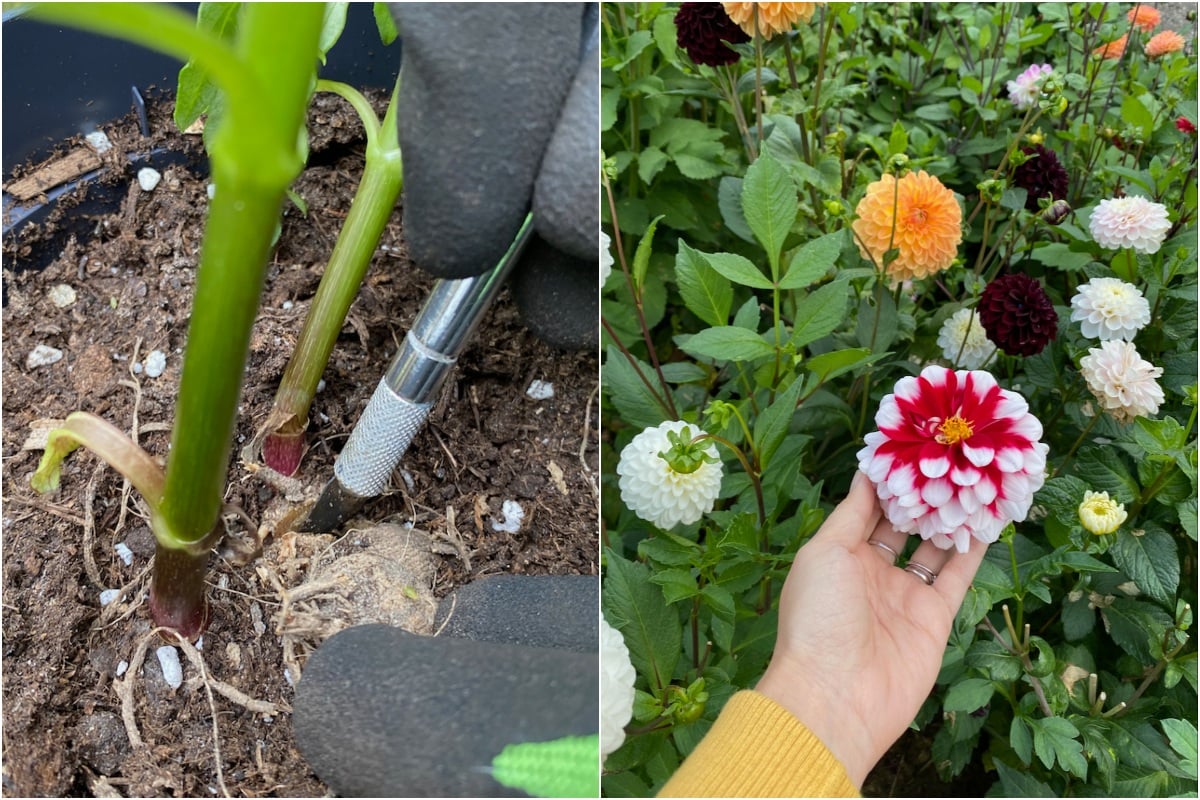
4. Take cuttings in late spring.
If you’re reading this article in early spring, you might want to bookmark it for later. In about six weeks or so, when the tubers we’ve started in pots have some shoots growing out of them, we can take cuttings and expand our dahlia collection.
What are we cutting? A chunk of the tuber, right where the shoot is sprouting from. Choose a vigorous shoot that has at least a couple of sets of leaves already growing.
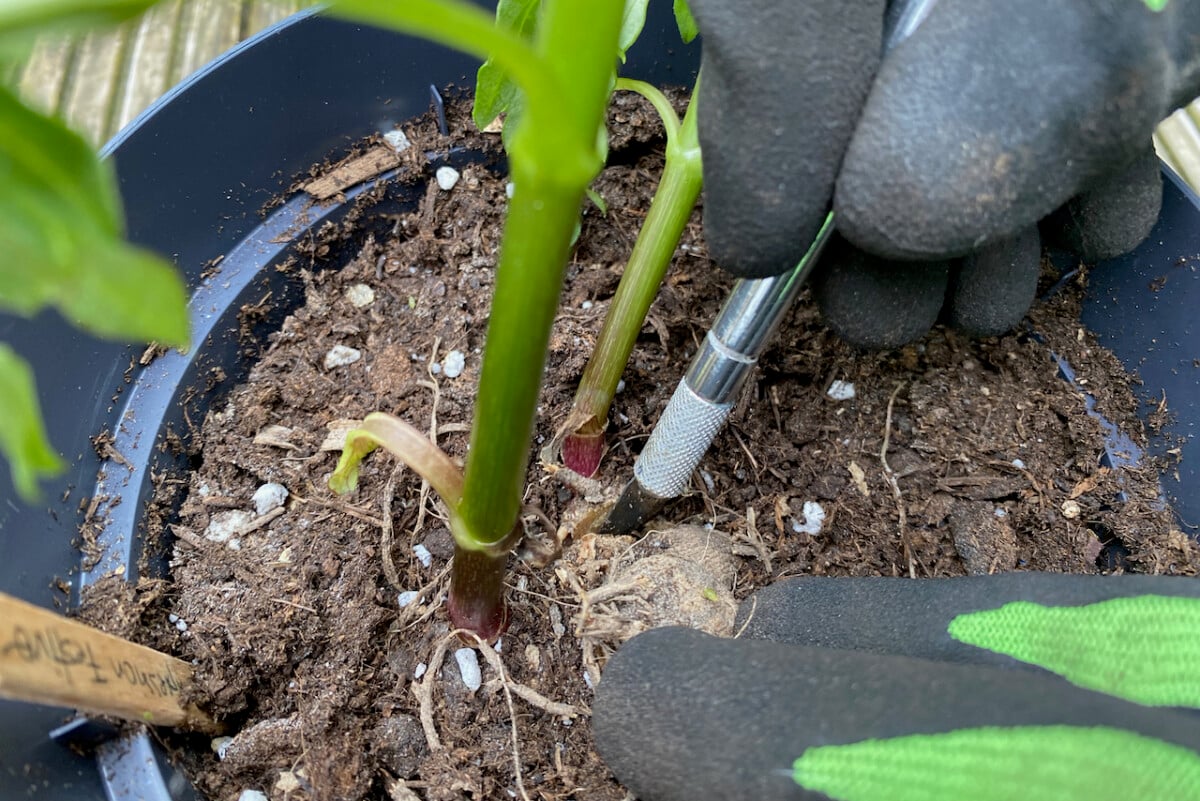
I know, I couldn’t believe it either before I tried it myself, but this method really works. We simply cut into the tuber around the base of the sprout, remove everything and give it its own container to grow in. (Make sure you use a clean and very sharp craft knife.)
Here is the article I wrote about how to take dahlia tuber cuttings (and you’ll get to see what they look like once the cuttings root).
5. Inspect and protect the dahlia tubers left in the garden.
So far, we’ve only been talking about dahlia tubers that are either freshly bought or overwintered out of the ground.
But what if we left our dahlias in the ground over the cold months? Is there anything we need to do in the spring?
I don’t get deep, prolonged freezing in my area, so I got in the habit of leaving mature dahlia tubers in the ground one fall a few years ago when my plate was full of other commitments. Of course, I tucked them in under a thick layer of compost and topped it all up with mulch.
Overwintering dahlias in the ground worked a treat for a few years. Until one particularly wet year when the slugs took over. By May, every single dahlia shoot had been razed to the ground by hungry slugs. Here’s what it looked like.
There were no dahlias growing that year in that part of the garden. But I did learn a valuable lesson: don’t ignore in-ground tubers.
I know I can’t completely eliminate slugs from the garden, but I can mitigate the damage they cause. They seem to like young tender shoots, so I now cover the new growth with a cloche (often a cut plastic bottle turned upside-down) until the leaves get larger and less appetizing.
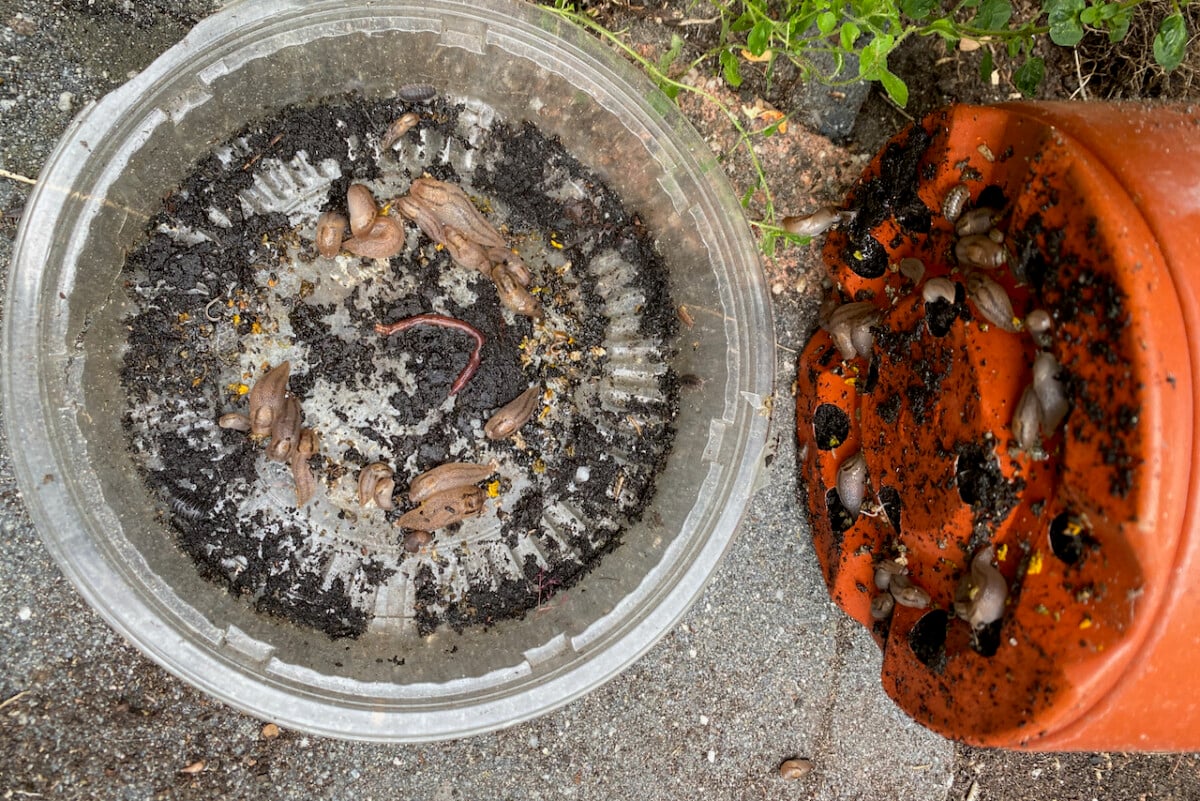
Also, I removed the debris around the area where slugs and their eggs might hide. They love to hide under pots, so I don’t leave any pots next to the dahlias. I will also set up some beer traps for slugs where I’ve left dahlias in the ground.
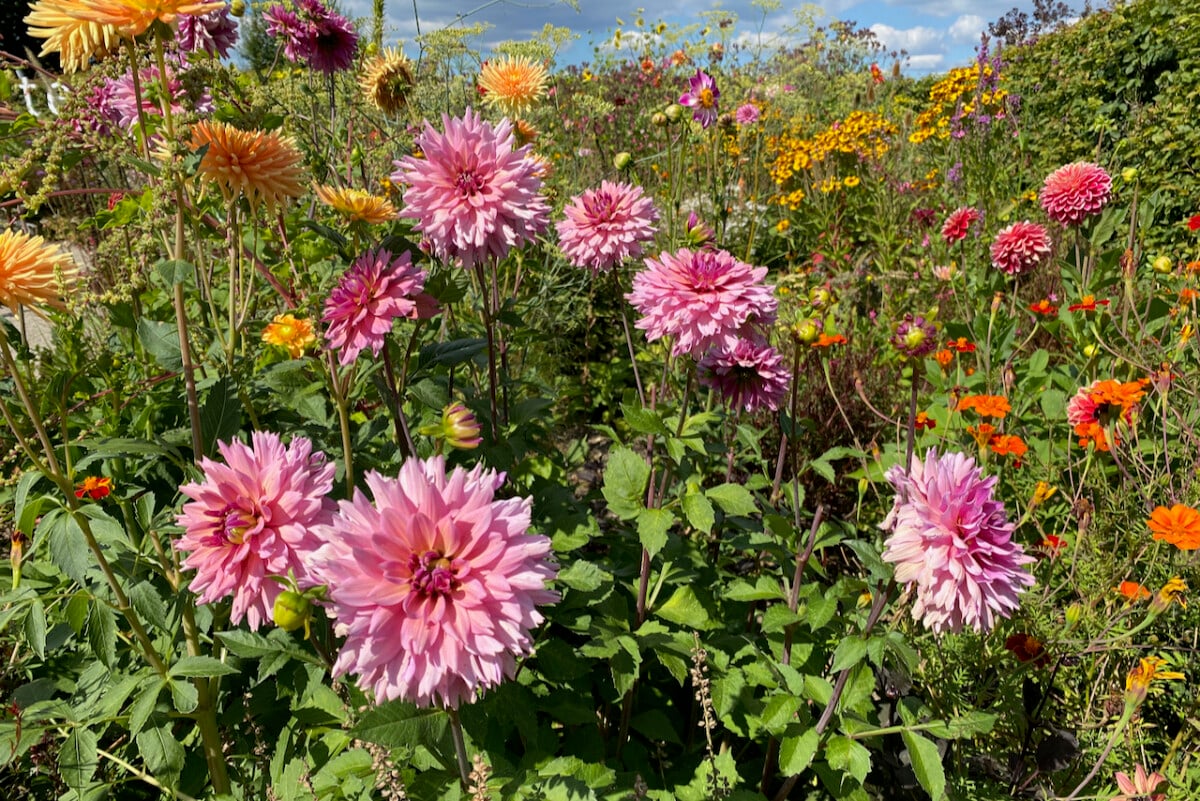
Sure, it takes a bit of extra planning in spring to set my dahlia plans in motion the right way. But once I do, I know I’ll enjoy buckets of blooms for at least a couple of months.
Which reminds me. I might go back to the store to see if those buckets are still for sale.

Get the famous Rural Sprout newsletter delivered to your inbox.
Join the 50,000+ gardeners who get timely gardening tutorials, tips and tasks delivered direct to their inbox.