

Polytunnel, hoop house, row cover – whatever you want to call it, they’re dead useful in the garden. There are plenty of benefits to be gained by adding a polytunnel to your gardening space.
They’re surprisingly easy to make, and this one will last forever. If you don’t have one yet, let’s make one. This will be the year you say, “Now I get why everyone uses polytunnels!”
Why You Should Have at Least One Polytunnel In Your Garden
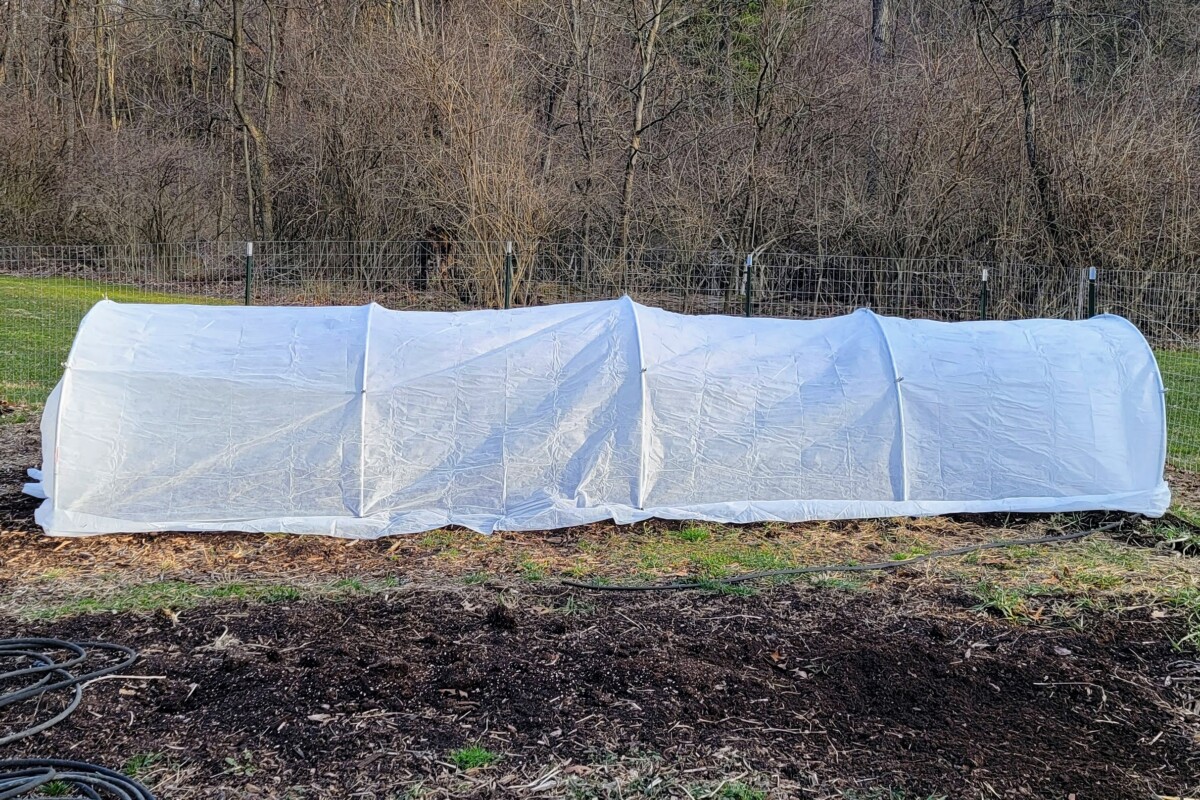
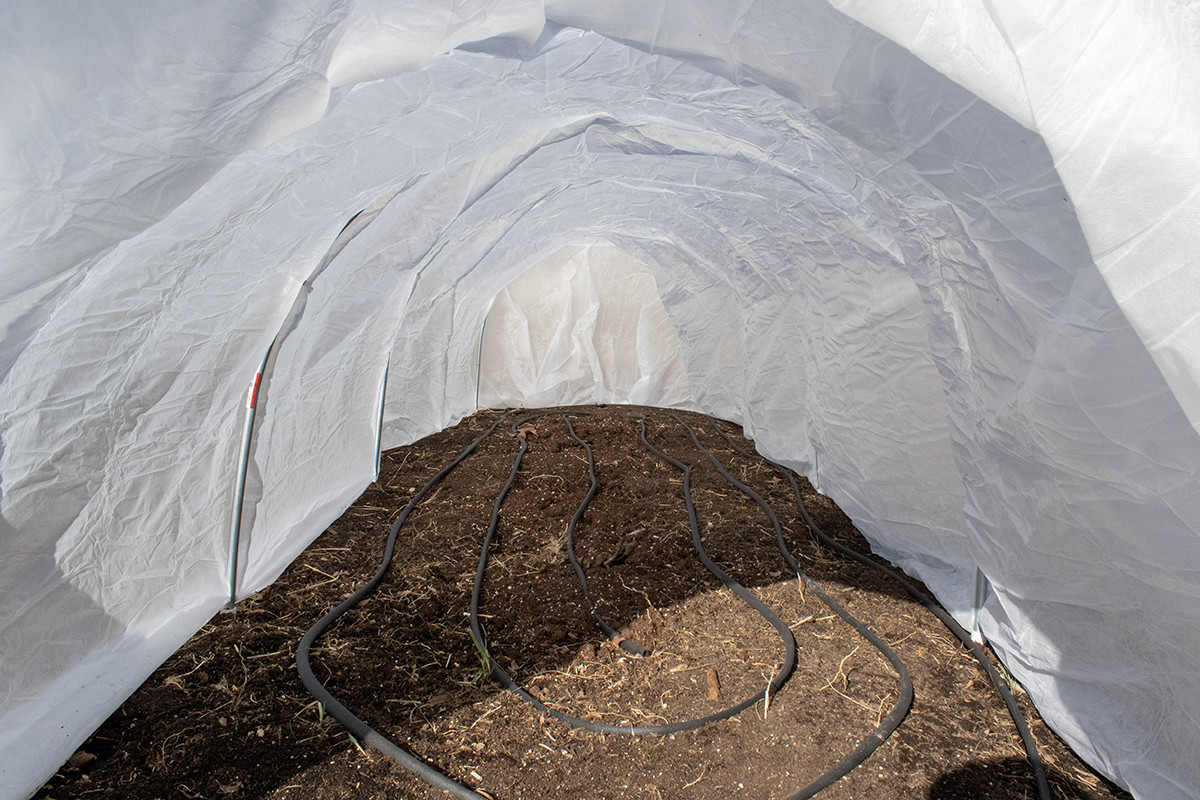
It’s such a simple thing, really, a bunch of hoops stuck in the ground with some sort of sheeting over the top. But they’re more than the sum of their parts, affording protection, bigger yields and longer seasons. I like to think of them as the gardener’s blanket fort.
And yes, I think everyone should have one, even a small one.
1. Much Cheaper Than a Greenhouse
Most of us would love a greenhouse filled with moss-covered terracotta pots and well-loved gardening implements straight out of a Beatrix Potter story. Unfortunately, it’s not always in the cards. But you can still enjoy the benefits of having your own little “hothouse” by adding a polytunnel to your garden.
2. You Can Move It to Where You Need It
Unlike a greenhouse, you can move a polytunnel. Crop rotation is a natural way to ensure the nutrients in your soil remain balanced and can be replenished based on what you grow there. If you’re planting crops in a different location each year, having a moveable polytunnel makes the process easier.
3. Remove Pests from the Guest List
Japanese Beetles, Colorado Potato Beetles, Imported Cabbageworm, do any of these guys show up and make your growing season a nightmare? Sure, you could mix up all sorts of potions to spray on your vegetables or buy some nasty insecticide to wipe them out. But why go to all that fuss when you can grow your veggies undercover and remove certain pests from the guest list entirely.
4. Protect Your Plants
Even if nibbling insects aren’t a problem, polytunnels can keep rabbits, deer and kids out of your garden. If fencing in your garden isn’t an option, using polytunnels to protect your veg is the next best thing.
5. Extend Your Growing Season
Look, I’ll fess up if you will too. Gardeners are downright competitive. Oh, your prize tomatoes produced two bushels last year? That’s great; mine produced two and a half.
We’re always looking for that extra edge, even if the only person we compete with is ourselves. And getting plants in the ground as early as possible is a great way to make sure you’re the first one with ripe tomatoes. Depending on where you live and what type of poly sheeting you use, you could start your garden a month or two earlier than normal.
That also applies to the other end of the growing season.
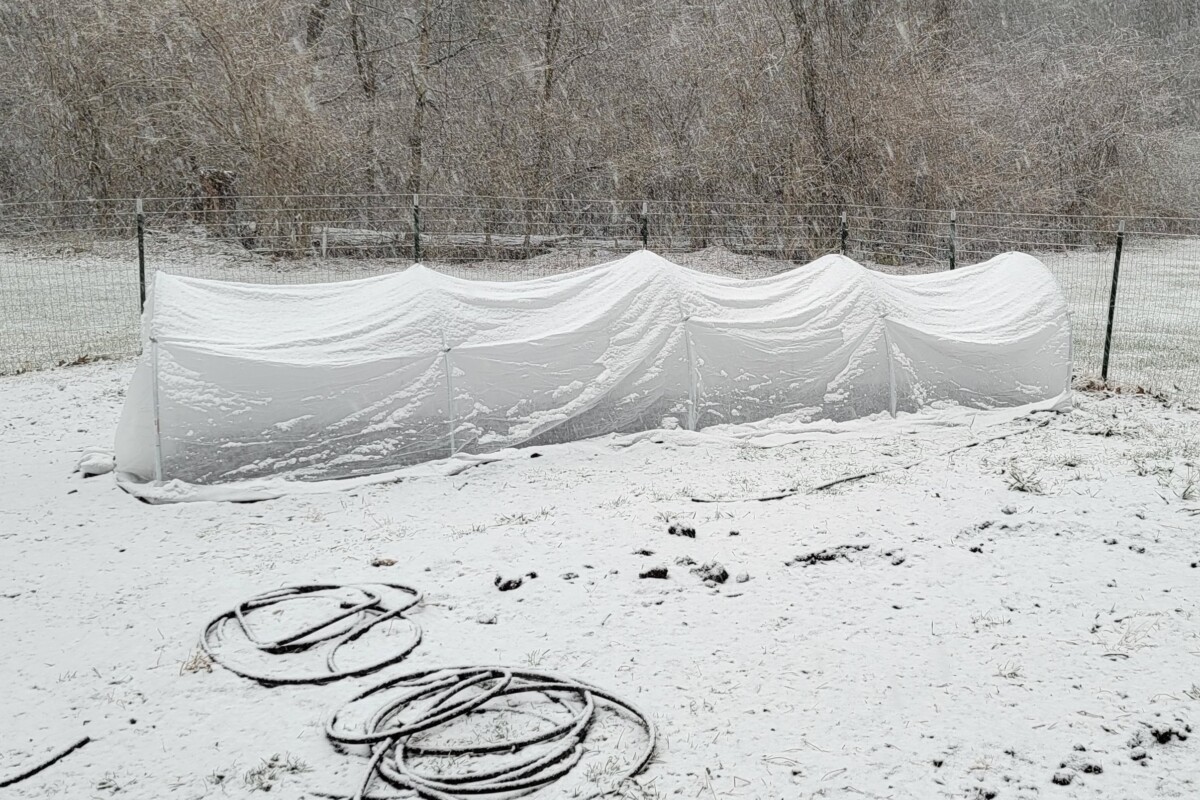
There is something downright magical about walking out to the garden in a white, snow-covered landscape and lifting the cover of your tunnel to find dark brown soil and beautiful, crisp lettuce growing.
Pretty great, right? Let’s make a polytunnel that will last you ages. We’ll be skipping the traditional PVC pipes for this one.
Skip the PVC for a Sturdier Frame That’s Better for the Environment
For the longest time, it seemed everyone used PVC pipes as frames for their polytunnels. It’s cheap; it bends easily, and you can find it everywhere – why not?
PVC isn’t great for the environment to begin with, but also, it’s not a great building material for this kind of project. PVC is best reserved for projects where it won’t be exposed to light. Over the course of the season, the PVC becomes brittle from long-term sun exposure. Eventually, it will snap, and your veggie blanket fort will come tumbling down.
When it finally breaks, it will be in lots of sharp plastic shards that are now all over your garden. Yay!
For this project, we wanted something that was much more durable. We chose EMT or electrical metallic tubing, also known as electrical conduit. Normally, it’s used to house electrical wires in buildings.
But it’s also cheap, bends easily, and you can find it everywhere. It’s only about $2 more per 10’ piece than PVC. Not to mention, if you ever decide you don’t want your polytunnel anymore, you can take your EMT to your local scrapyard and get cash for it or recycle it. All in all, it’s a much better alternative to PVC.
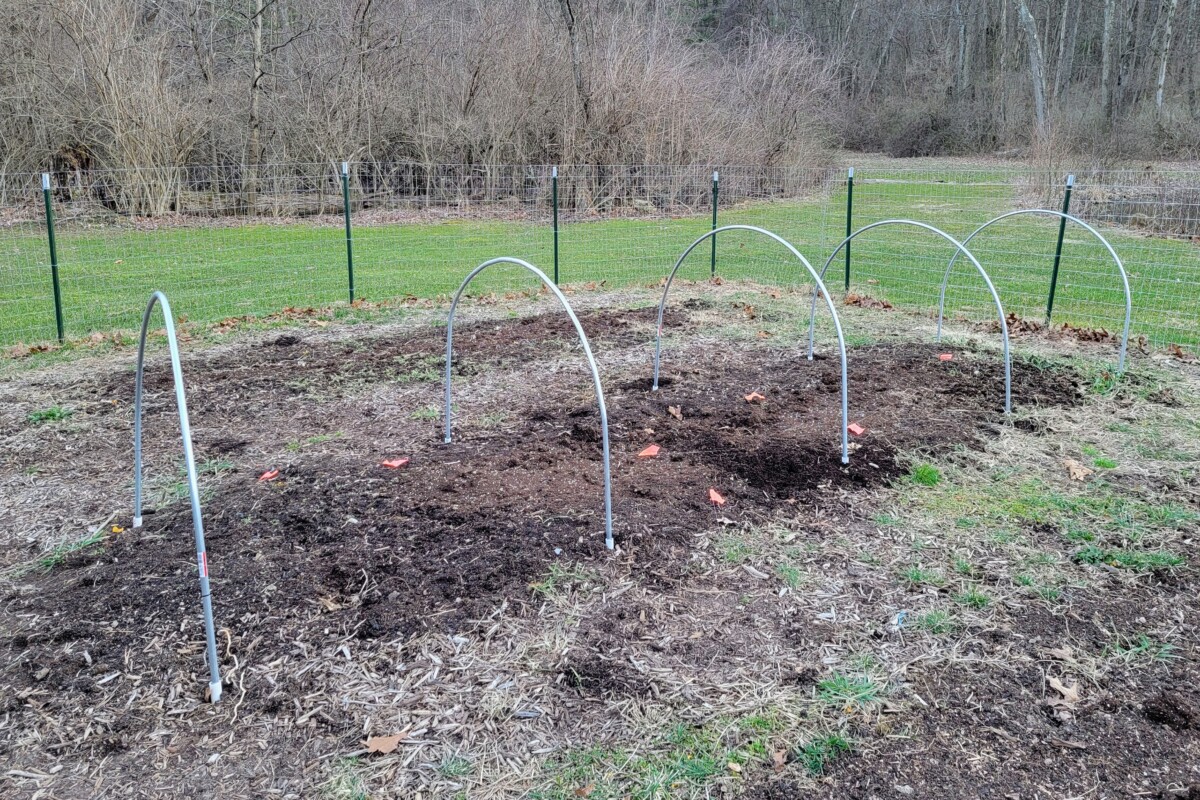
How to Make a Polytunnel
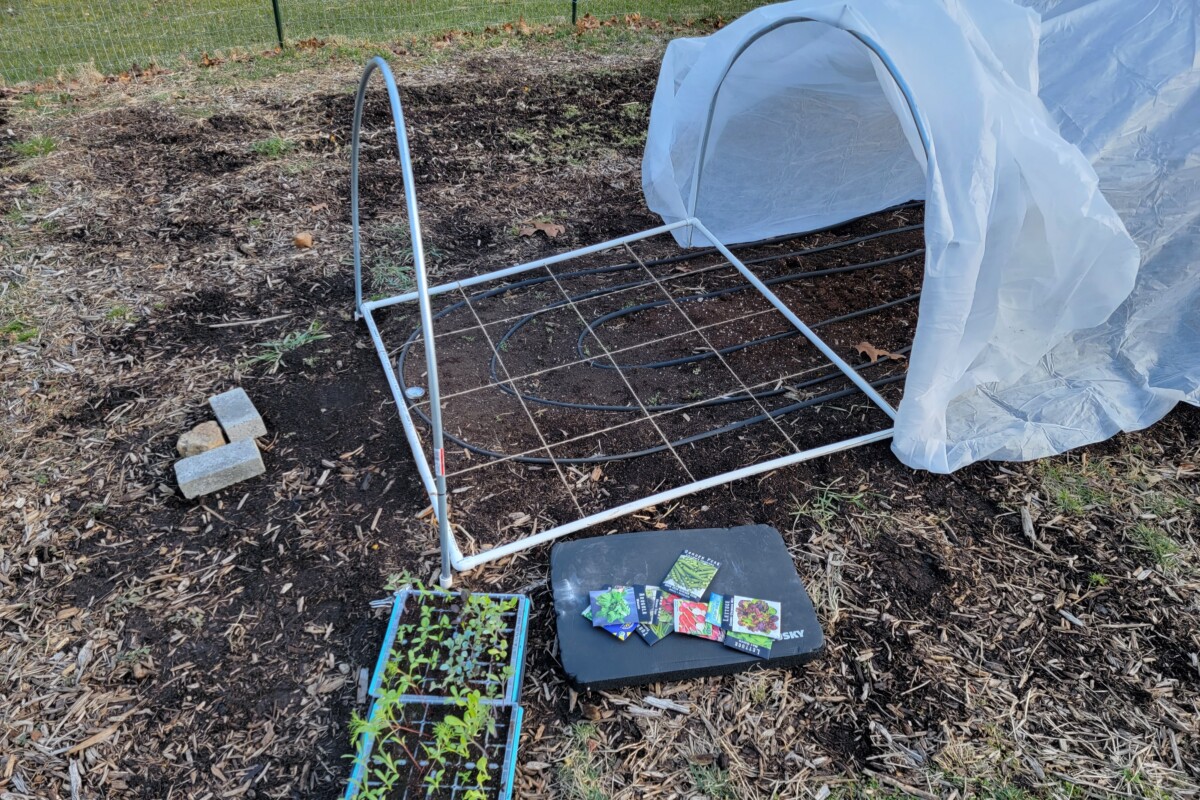
EMT comes in 10’ lengths making it the perfect size for polytunnels, whether your rows or raised beds are 4’ or 3’ wide. After the EMT is bent and inserted into the ground, you’re left with the perfect height and plenty of space for tall plants.
Materials
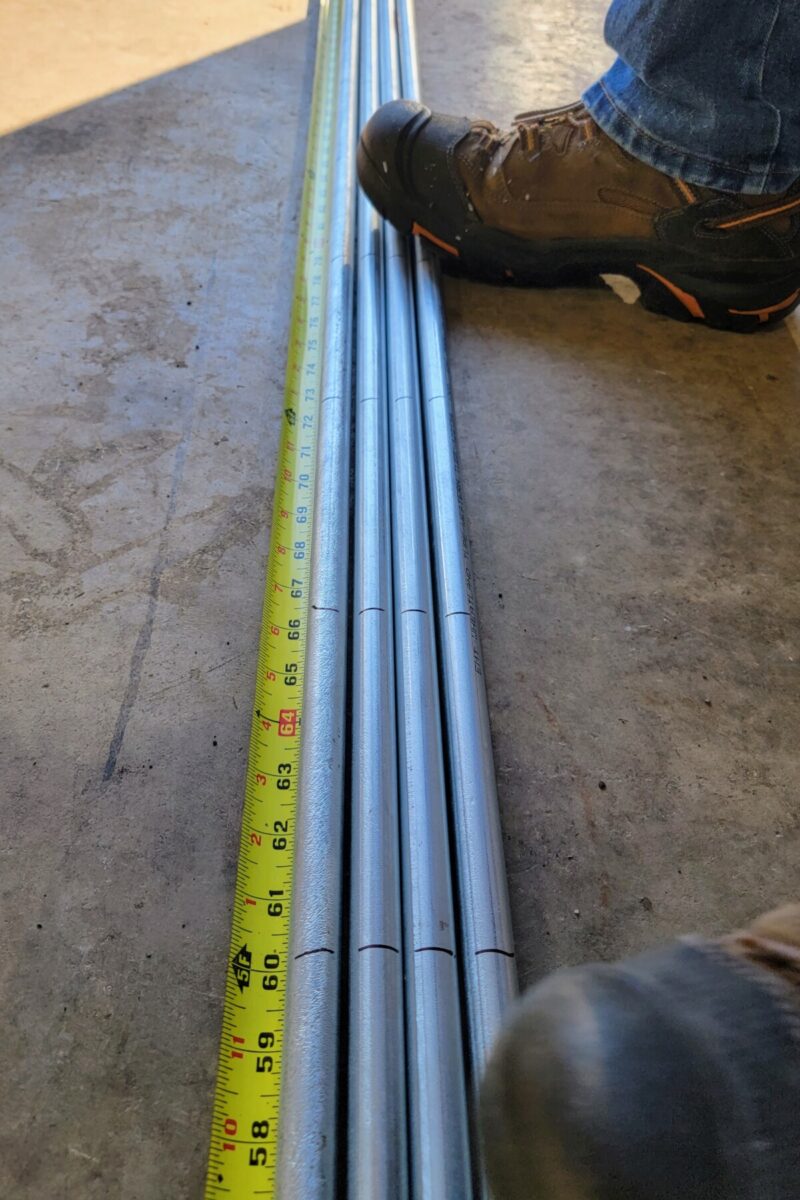
- ½” diameter EMT in 10’ lengths – you will need two pieces, one for each end of your row and one-piece every 4’ of the length of your row. For example, our 16’ long rows needed five pieces total.
- Sheeting – what you choose will depend on where you live, how long you want the sheeting to last and what you want to accomplish.
- Poly sheeting is better at protecting from cold temperatures as it’s thicker and impermeable, so it’s great for extending the season. But it doesn’t breathe, so you may need to vent your tunnel occasionally if you use it for the entire season.
- Row cover fabric is lighter, breathable and easier to manipulate. It’s great for keeping out pests. While it does offer some cold protection, it’s not as good a barrier as poly sheeting. Because it’s a fabric, it can also tear.
- You may wish to use both at different times during the season.
- Sturdy clips – I chose these metal spring clips because they’re much easier to get on and off than other options. You’ll need five clips for each hoop.
- Two bricks or large rocks to hold down the ends of your sheeting.
Bending the Conduit
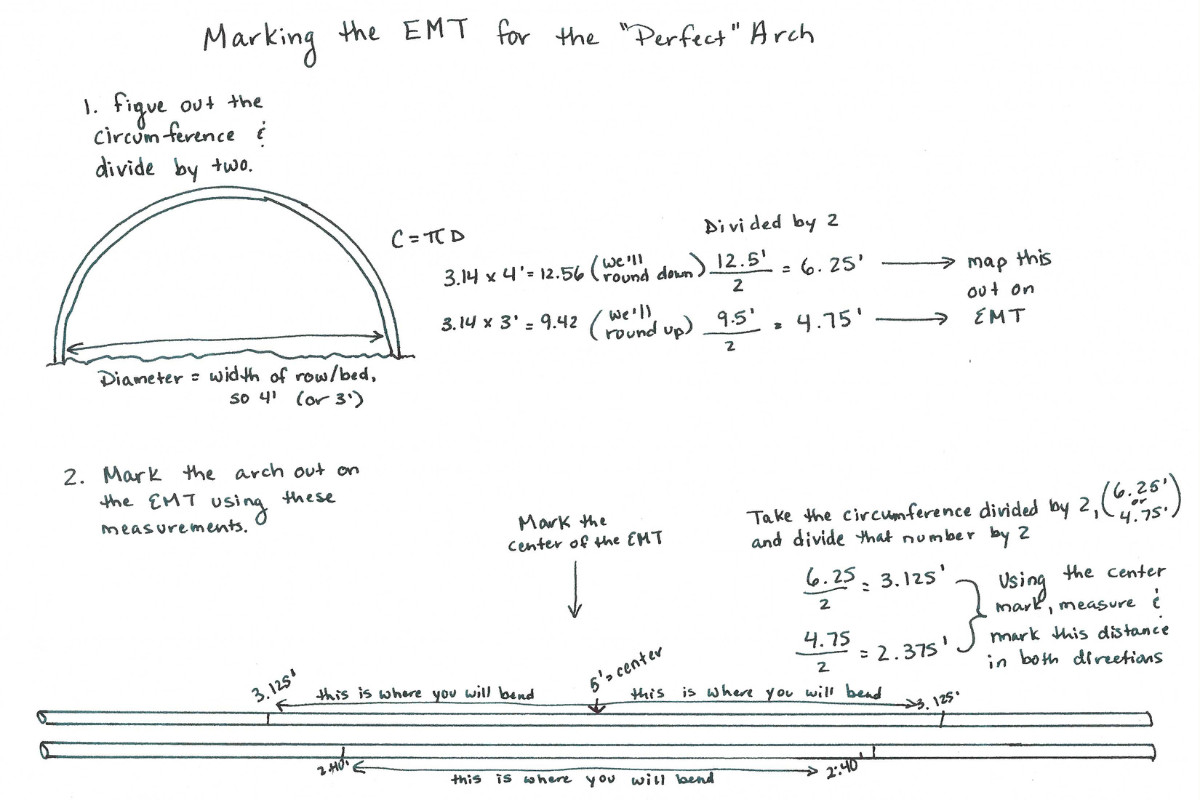
To form a (mostly) perfect arch, you will need to do some math. Okay, okay, I did it for you.
There are a few different ways to bend conduit, all of which require a tool. You may already have one of these tools, or you may want to build a jig. I’ve made a note about options for sourcing these tools as well.
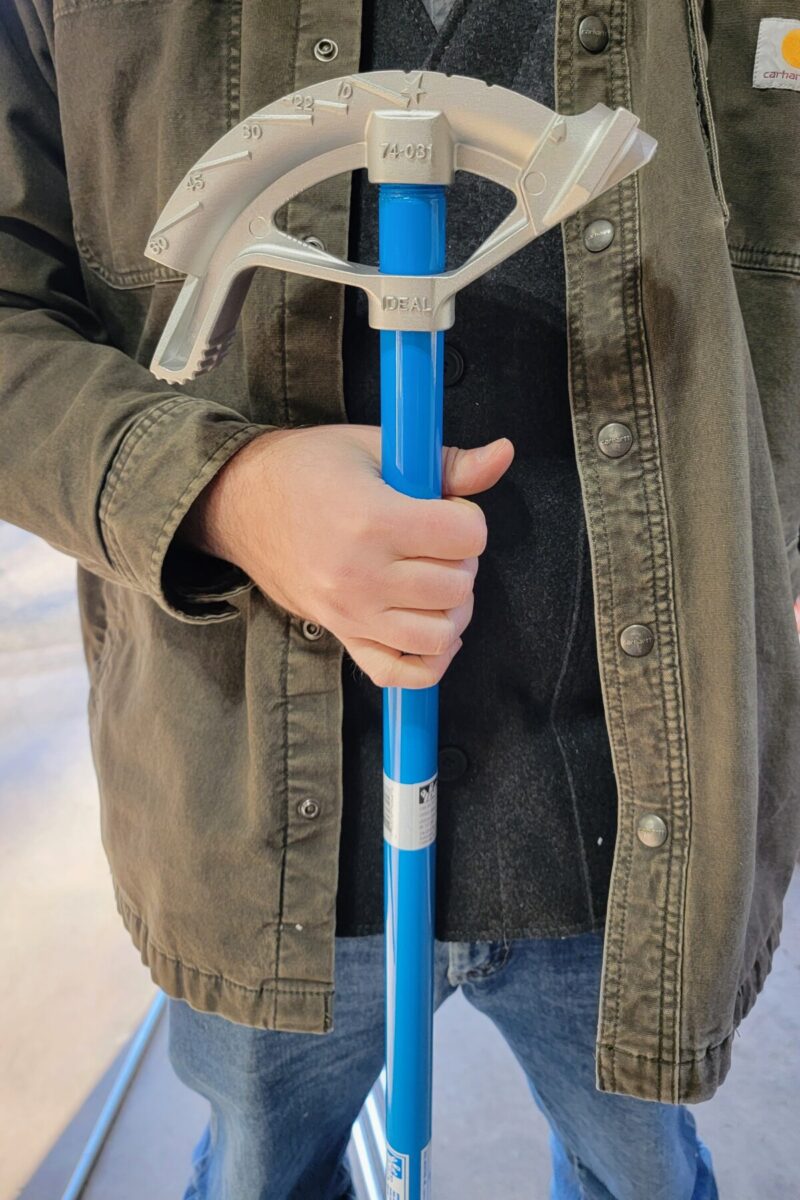
A conduit bender is the most inexpensive option for bending your hoop frames. You can find them in your local hardware store or big box home improvement store, or you can even order one on Amazon. They also require the most elbow grease; although it’s not hard to use them, it’s only in comparison to the other two options.
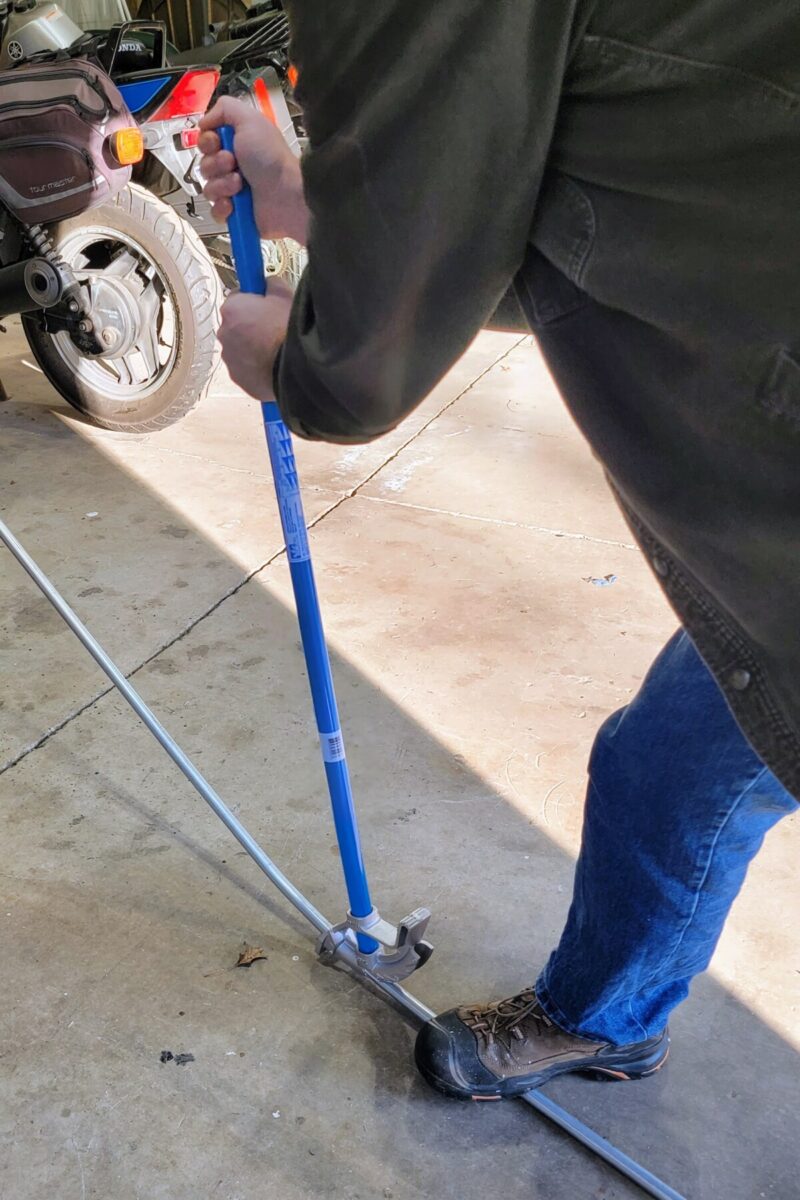
(Once you have where you will be bending marked out on your EMT, place a mark every 4.2” (3.2” for 3’ wide beds). Use these marks for bending 10 degrees at a time with the conduit bender.)
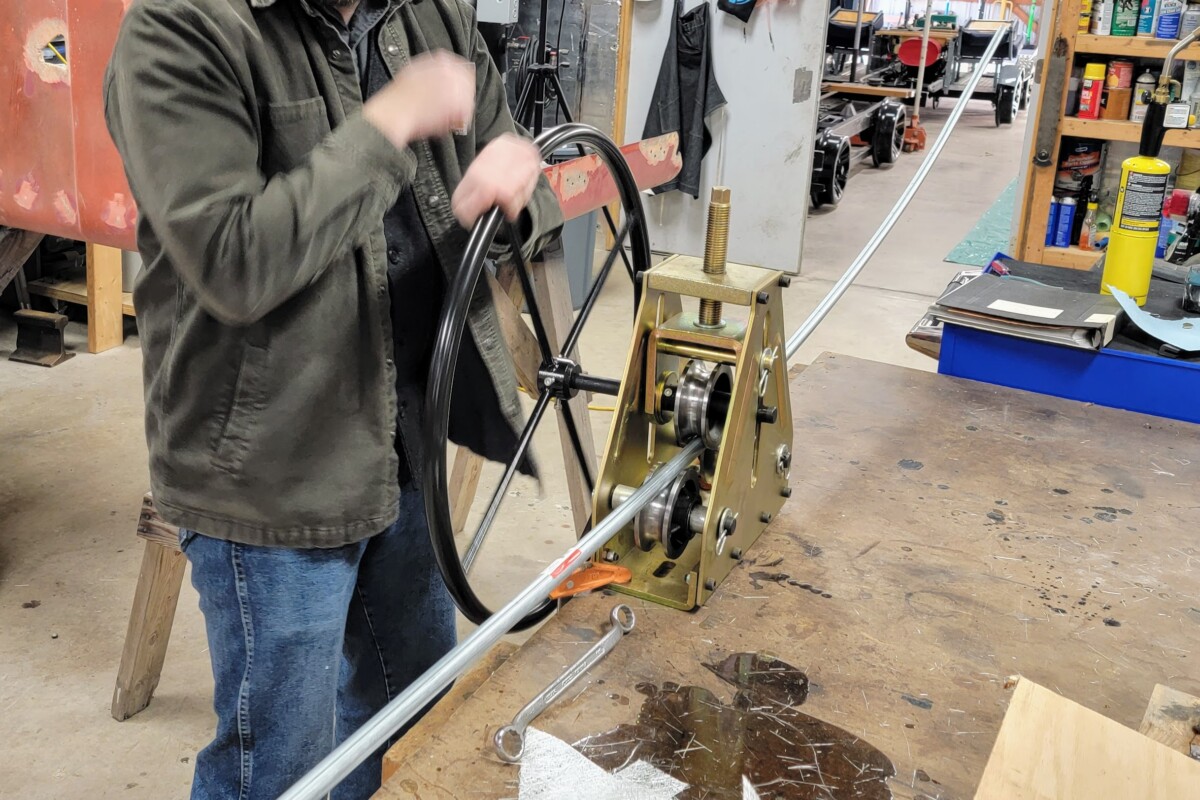
Tubing rollers can make quick work of bending the conduit into the proper arch if you already have one. Even without the right size roller, it can be done if you’re careful.
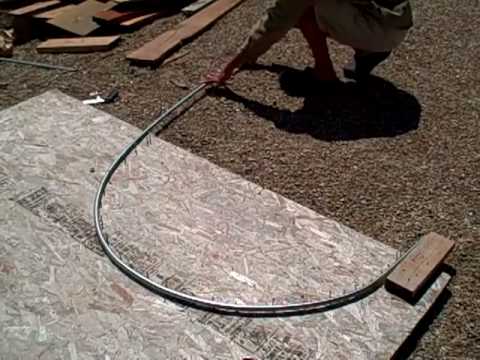
You can purchase a jig specifically for this purpose; they’re pretty easy to find on the internet. You can also make a jig with scraps you already have; it doesn’t have to be fancy to get the job done. Here is a YouTube tutorial showing you how.
Note: Sourcing These Tools
If you only need to bend a few pieces of conduit, it doesn’t make sense to purchase a tool. Unless, of course, you see yourself being able to use it again for other projects in the future.
- Ask family, friends or neighbors if they have a conduit bender or tubing roller; even better if they offer to help you use it.
- Call your local hardware store or equipment rental place and ask about renting the tool for the job. Most of these places rent out oddball hand tools as well as large equipment.
- Check Facebook Marketplace, Craigslist or Freecycle and see if you can find the tool you need second-hand. Alternatively, I have often purchased specific tools new for projects and then resold them in these same outlets. Tools, in general, seem to get snatched up quickly, especially if they’ve only been used once or twice.
Once you’ve bent your hoops, they can be inserted into the ground. You should be able to do this by hand, but a rubber mallet can be helpful if your ground is hard.

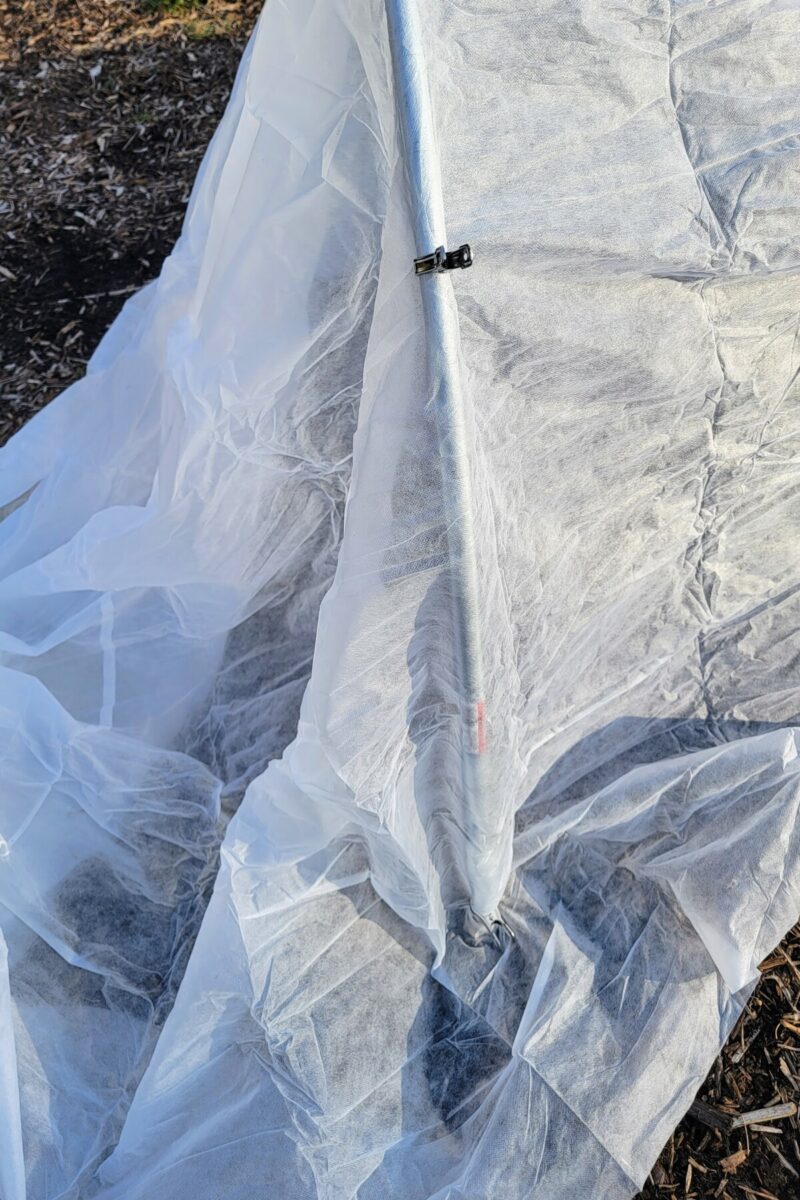
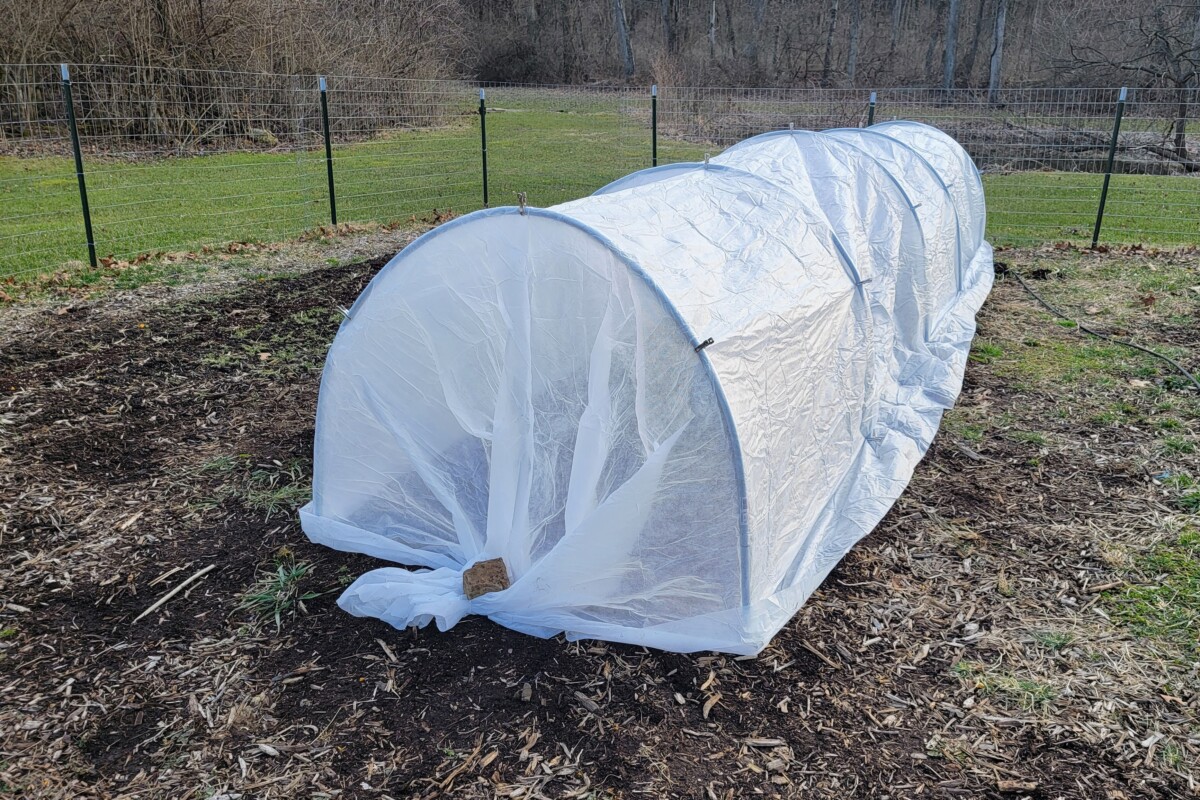
After that, you cover the frames with your preferred sheeting material. Make sure you don’t stretch it out too tightly. You want a little give in between hoops so it can flex in the breeze without tearing.
Place five clips on each hoop to hold the sheeting in place snuggly – one at the top of the hoop, one at each base and one on each side about midway between the top and bottom clips.
Fold any excess sheeting on each end and secure it in place with a brick or a rock.
And that’s that. This is one of those projects that will take a couple of hours out of your Saturday, but you’ll have a great setup that you can use year after year.

Get the famous Rural Sprout newsletter delivered to your inbox.
Join the 50,000+ gardeners who get timely gardening tutorials, tips and tasks delivered direct to their inbox.