

Are you tired of planning your garden on paper, only to find it’s a bit more difficult to transfer those neat lines and groups of veggies to the soil?
This simple planting grid is easy to make, lightweight, and packs away neatly for next year. It only takes about thirty minutes to make. And the best part is, it will cost you around $15. Probably less if you already have twine on hand.
Frustration and Swearing are the Mothers of Invention
When it comes time to plant the garden every spring, my palms sweat. You see, I am a perfectionist. I stand at the edge of our 4’x16’ beds, garden plans in hand and know that I’m absolute crap at putting in the ground what I’ve carefully plotted out on graph paper.
It never goes according to plan.
Nothing ever lines up, my rows or squares end up wonky, and I’ve made a mess of things before I know it. I’ve used too much space and do not have enough room for everything I need to plant. Or I plant everything so close together that I have a ton of space leftover and cramped plants.
Last year I tried to map out gridlines with string and landscaping pins, but I ended up in a tangled, sweaty, sweary mess.
Naturally, this was the time my sweetheart found me in the garden. He asked if I needed any help. I said no, I could do it myself. (Did I mention I’m also stubborn, too?) I explained what I was trying to do (with more swearing) and told him what I really needed was a solid grid, nothing too heavy though, that I could lay on top of the soil, plant my seeds and seedlings and then put it away for the season. I didn’t want goofy-looking gridlines to be a permanent fixture in my garden for the summer.
He helped me up and suggested a trip to the hardware store.
My sweetheart is a Red Green fan and wholeheartedly embodies, “If the women don’t find you handsome, they should at least find you handy.” Except he is handsome and an engineer. He’s very handy to have around.
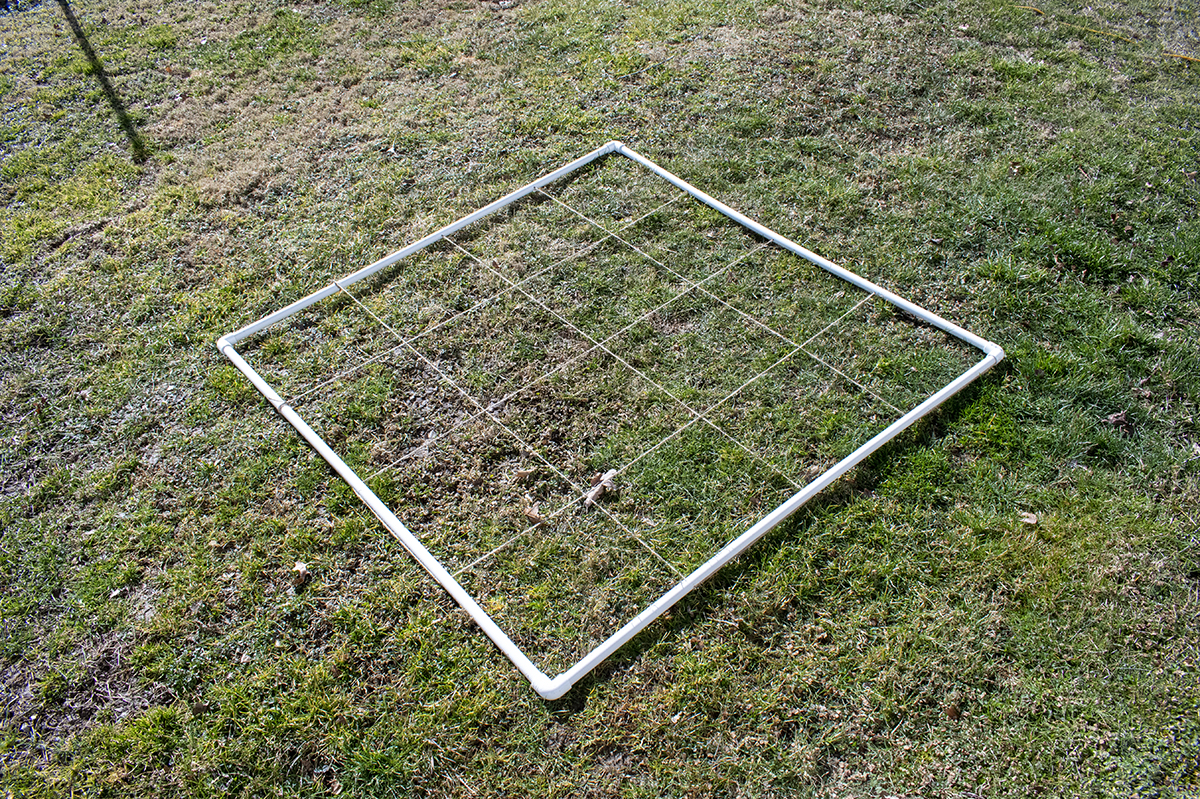
This is the brilliant grid he came up with for me. It’s just what this lazy perfectionist gardener needed.
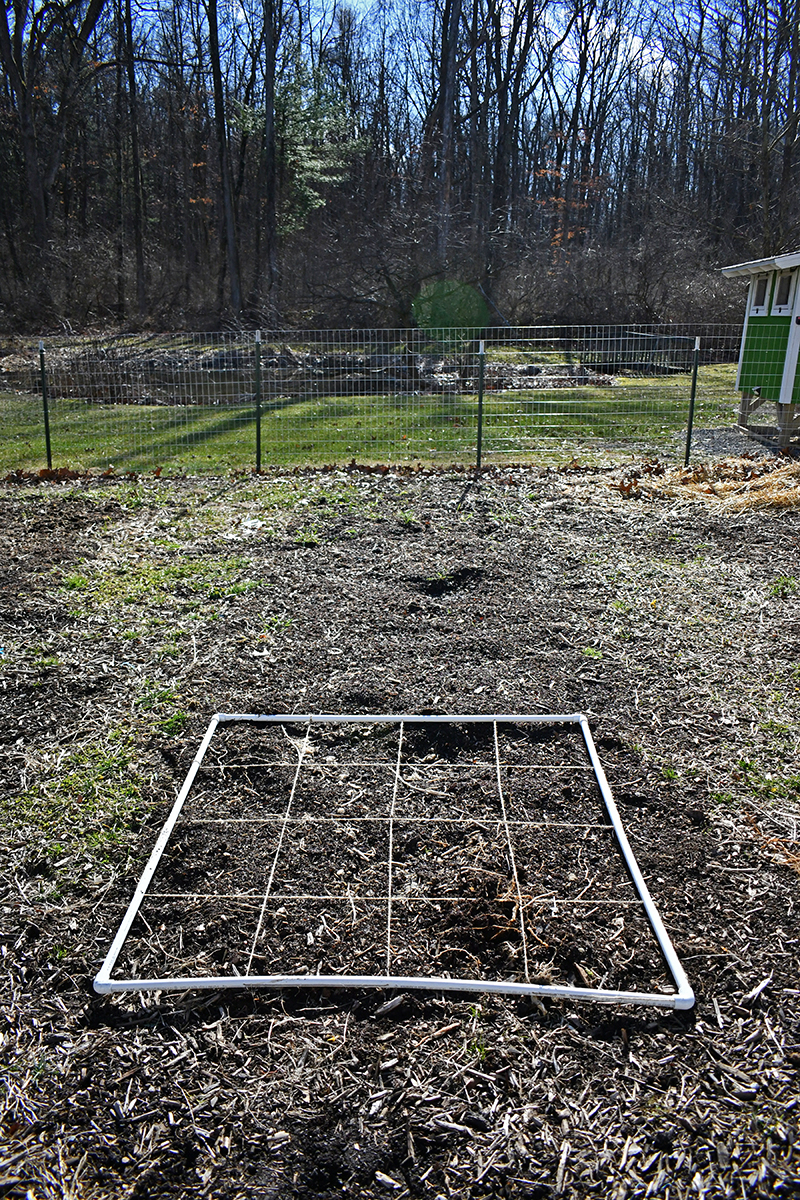
We initially made ours 4’ x 16’ as that’s how big our garden beds are, but it was kind of awkward to lift after everything was planted. So, this year, I reassembled it as a 4’ x 4’ square after I realized that one small square was all we needed. (Duh, Trace, the length of your garden beds is divisible by four.) I can flip it over to the next portion of the bed once I’m finished planting. This makes it much easier to use solo.
As most garden beds are usually 4’ wide, this square works for nearly any size garden. However, I’ve also included measurements for a 3’ x 3’ square for 3’ wide beds.
Here’s what you will need to make the grid:
Materials:
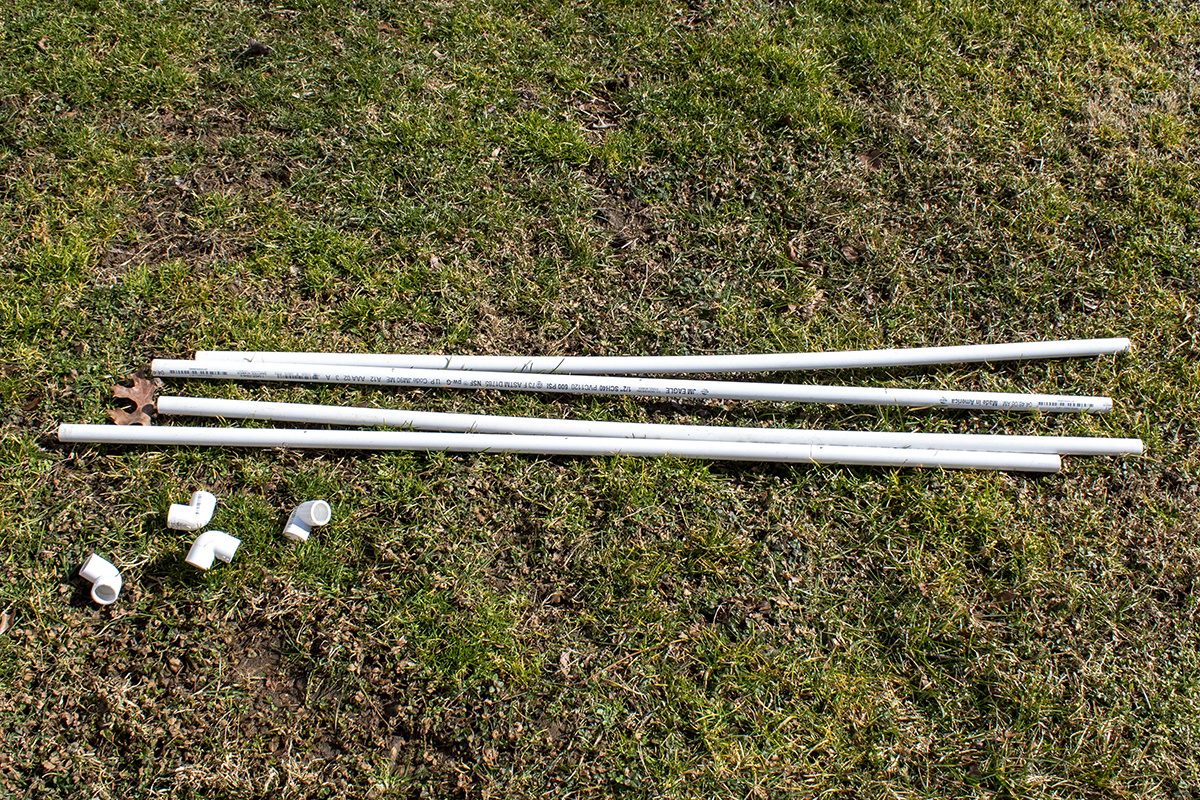
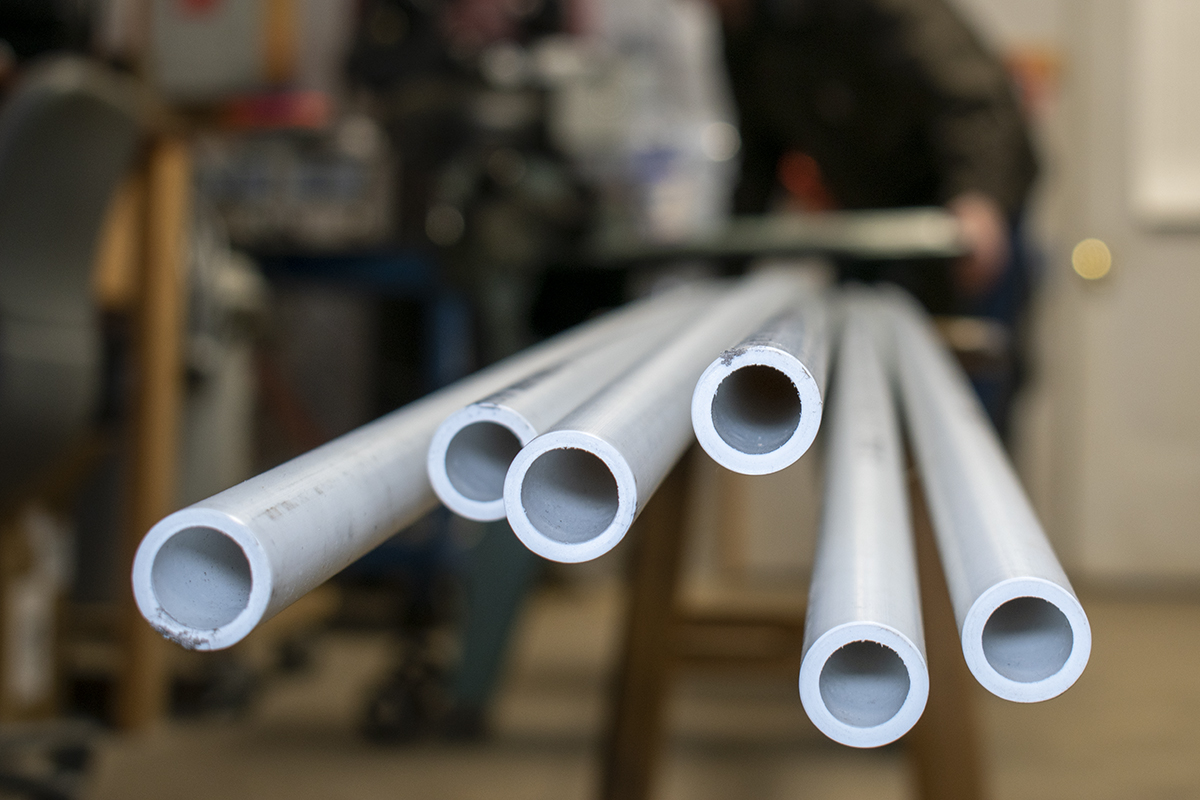
- 2 – 10’ lengths of ½” PVC pipe
- 4 – ½” PVC elbows
- Nylon string or heavy-duty twine
Tools:
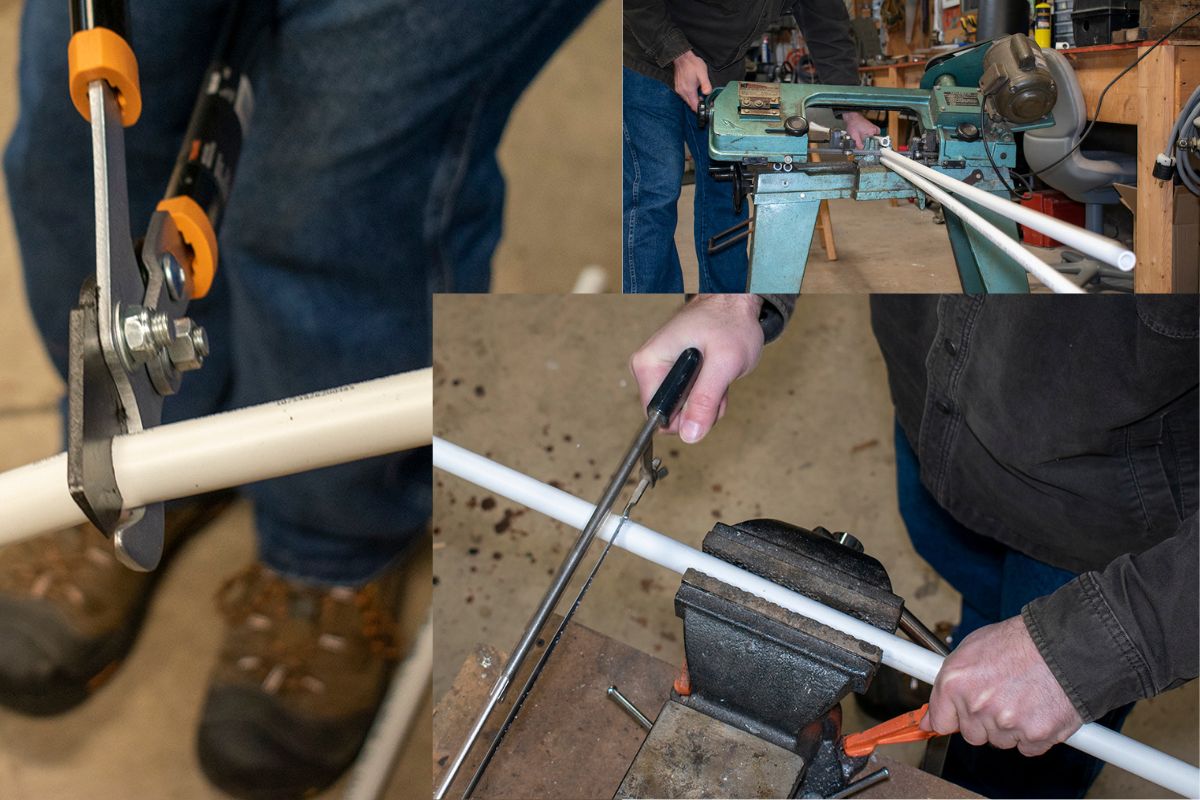
- Something to cut the PVC pipe with – a bandsaw, hack saw or heavy-duty garden loppers
- Drill with ¼” drill bit
- Measuring tape
- Sharpie
- Large blunt sewing needle
- Scissors
To Make Your Planting Grid:
Measure and cut the PVC pipes into 4 lengths, each 47” long (35” long for 3’ beds). When we attach the elbow fitting, it will make up for the lost inch.
PCV is pretty easy to cut with various tools; use whatever you have on hand.
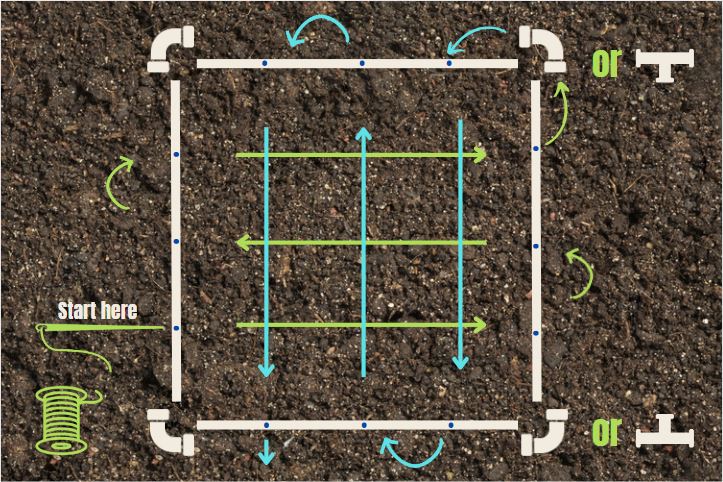
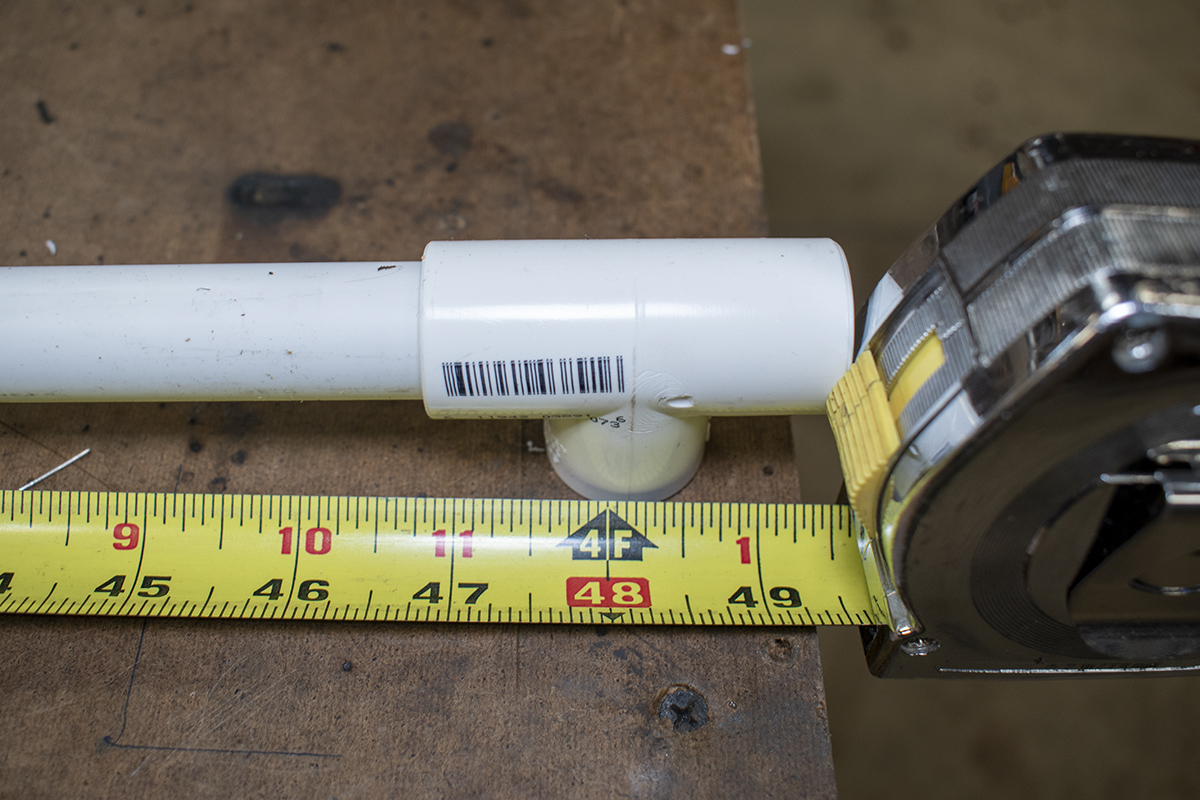
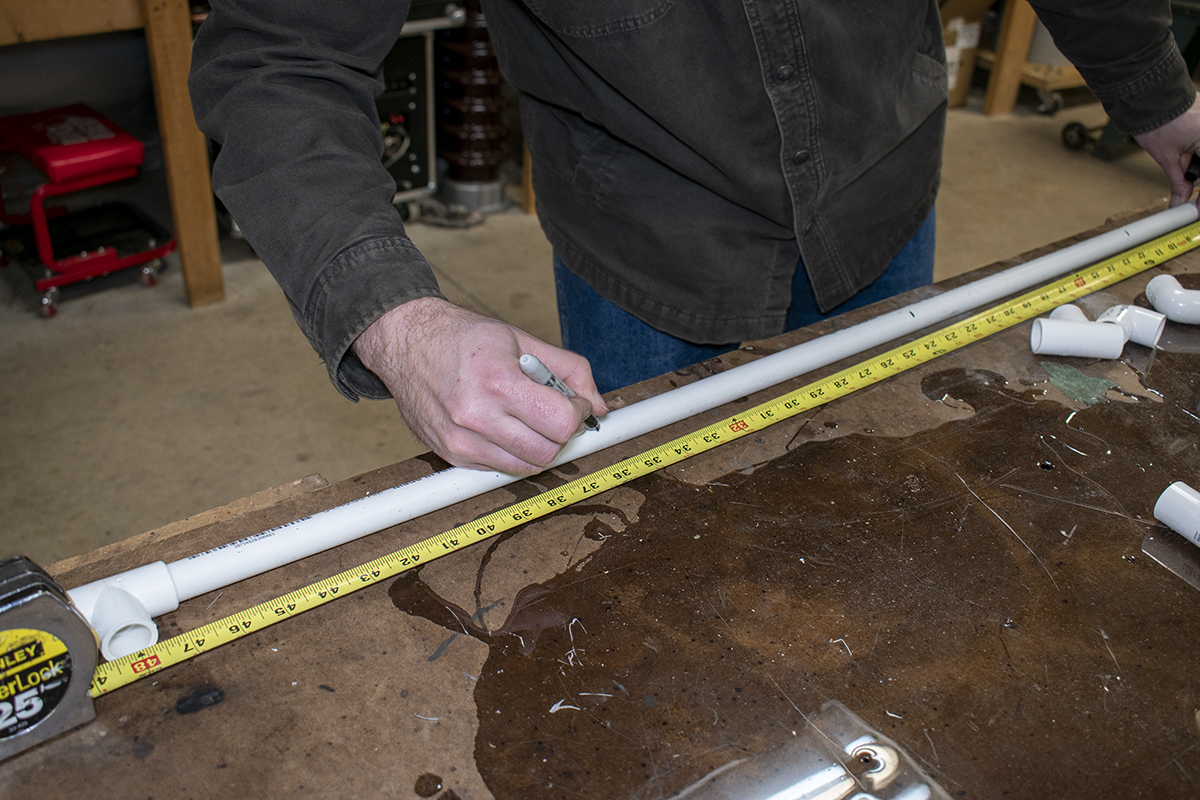
Measure and make three marks. We found it easiest to lay the pipe next to the measuring tape, centering the 47” long pipe between 48” on the tape, taking into account that it would be ½” shorter on both ends. (36” for 3’ beds) Now mark 12”, 24” and 36” on the pipe. (Mark 12” & 24” for 3’ version.)
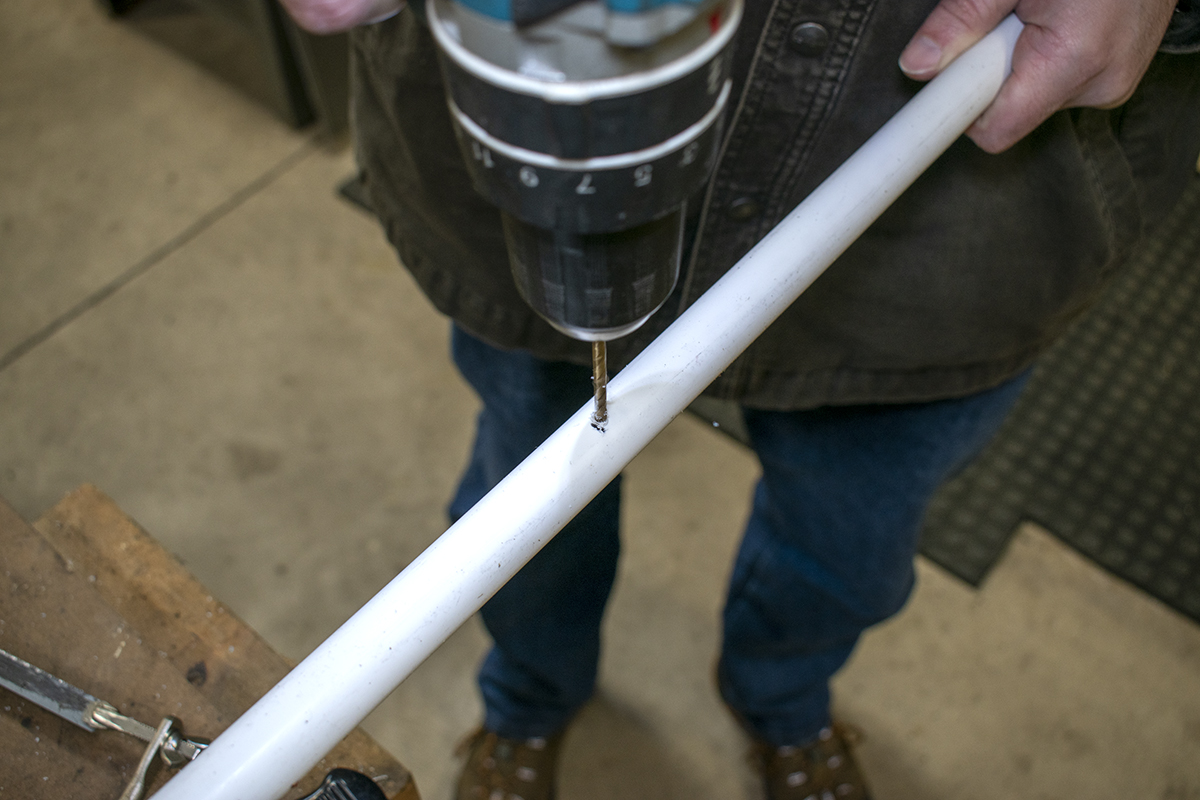
Using a drill fitted with a ¼” drill bit, drill holes through the pipe at the markings. You might want to sand off any sharp edges if they’re especially ragged.
Assemble the square will all four lengths and all four elbows. Take care that the holes face inward in the same direction on each pipe, so the string will lie flat.
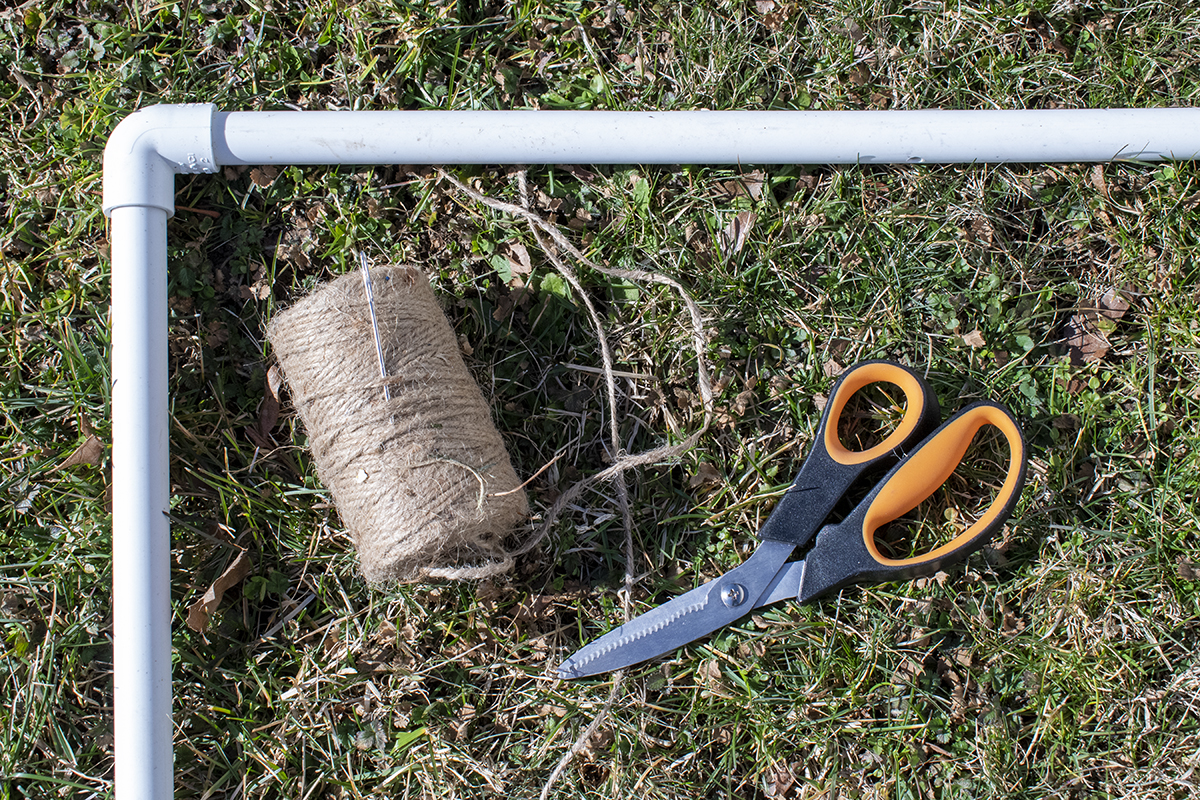
Using the needle and twine, lace the square to make your grid. Use the diagram below for help. Once you’ve laced the lines in one direction, you’ll need to pop off the nearest elbow and thread the needle through it, so the string lines up again to go in the opposite direction. Cut and tie the twine off securely.
Go plant a neat and tidy garden!
Project Notes:
If you want to make the grid longer to fit a specifically sized bed, and it’s a multiple of four, simply add a ‘T’ at two ends instead of elbows. Now, fit the ‘T’s with another 47” length of pipe, adding more ‘T’s and pipe until you have the correct size, at which you would use the elbows on the end.
But I Don’t Have Those Tools
Most of us have the tools to complete this little project at home. However, if you don’t or don’t want to mess with cutting and drilling, ask an employee at the store where you’re purchasing your materials if they can help you out. I know Home Depot and Lowes usually do this. P.S. It always helps to be super polite when asking.
Pick Up a Used Drill
As someone who went a long time without owning a power drill, I wouldn’t be without it now that I have one. Purchasing a new drill isn’t necessary; mine is second-hand and a beast. Check out Facebook Marketplace or Craigslist for a used power drill.
Yeah, I Know, PVC
I’m not super chuffed that it’s made out of PVC. It’s not the greatest choice for the planet. But it’s also not a piece of equipment that will be sitting out in the sun, leaching chemicals and growing brittle year after year. It sees a few days of use before it’s packed away for next season. I know it will last us forever.
If you want a more earth-friendly building material, consider using EMT conduit (electric metallic tube) and elbows. It’s more expensive, and you’ll need proper tools for cutting and drilling it, but it’s recyclable if you choose not to use it anymore.

Get the famous Rural Sprout newsletter delivered to your inbox.
Join the 50,000+ gardeners who get timely gardening tutorials, tips and tasks delivered direct to their inbox.