


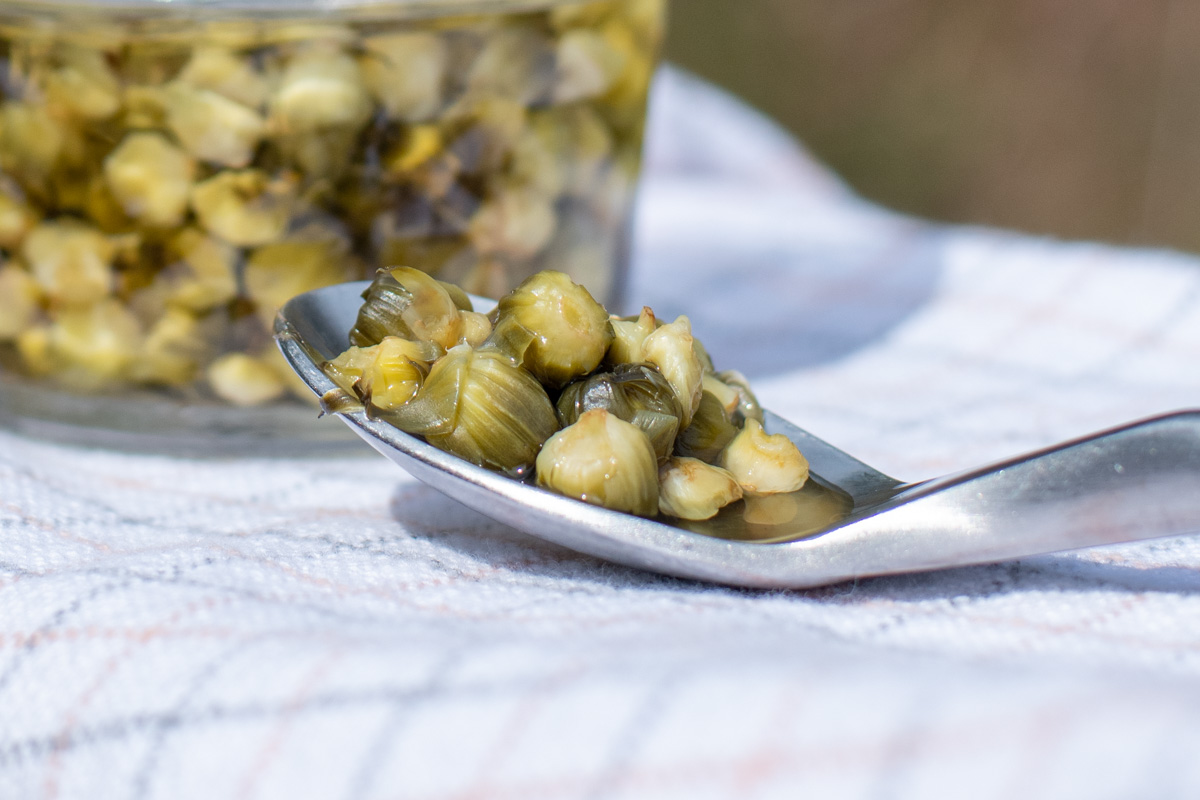
Crunchy, tangy capers are a staple in Mediterranean dishes. These tiny buds pack a flavorful punch and go great in everything from seafood to the classic chicken piccata.
Normally, there’s no way you could pickle your own, as they’re from the Capparis spinosa bush that grows wild in the Mediterranean. However, one easy-to-find plant offers an excellent substitute – the dandelion.
Once you’ve made homemade dandelion capers, you may find yourself passing up those tiny imported bottles in the grocery store.
You can make dandelion capers in the spring using dandelion buds. You have to catch them before they bloom, as you want the buds to be small and tight. If the buds are too far along, you end up picking a fully formed flower. Not only does this not taste great (it’s a bit like eating dental floss), but it also lacks that characteristic crunch in a good pickled caper.
A good rule of thumb is not to use buds where the outermost leaves have unfurled.
By the way, it’s also the perfect time of year to pick dandelion greens to eat. I’ve got you covered with seven delicious ways to eat them.
The Usual Route
If you check out most recipes for dandelion capers, they’ll have you out foraging for dandelion buds, with the advice to pick the visible bud and any buds you can see beneath it. That’s all well and good if you want to spend the next six hours picking dandelion buds here and there.
Oh, you don’t want to spend six hours picking dandelion buds to substitute a product readily available at most grocery stores?
Yeah, me neither.
That’s why we’re going to make delicious pickled dandelion capers my way – the lazy way.
How I Quickly Fill My Basket With The Perfect-Sized Dandelion Buds
Look, you can totally go frolicking around a field, picking a bud here and there if you want to; no judgment here. But there’s an easier way.
Weed your garden.
Yup, seriously. It’s that simple.
Instead of picking buds, pick the whole flower. Don’t have a garden? Weed your yard. I’m assuming if you’re a Rural Sprout reader, you probably aren’t spraying your yard with anything you shouldn’t be eating, so all those dandelions are fair game. Look for dandelions close to home that haven’t bloomed yet and pull ‘em up.
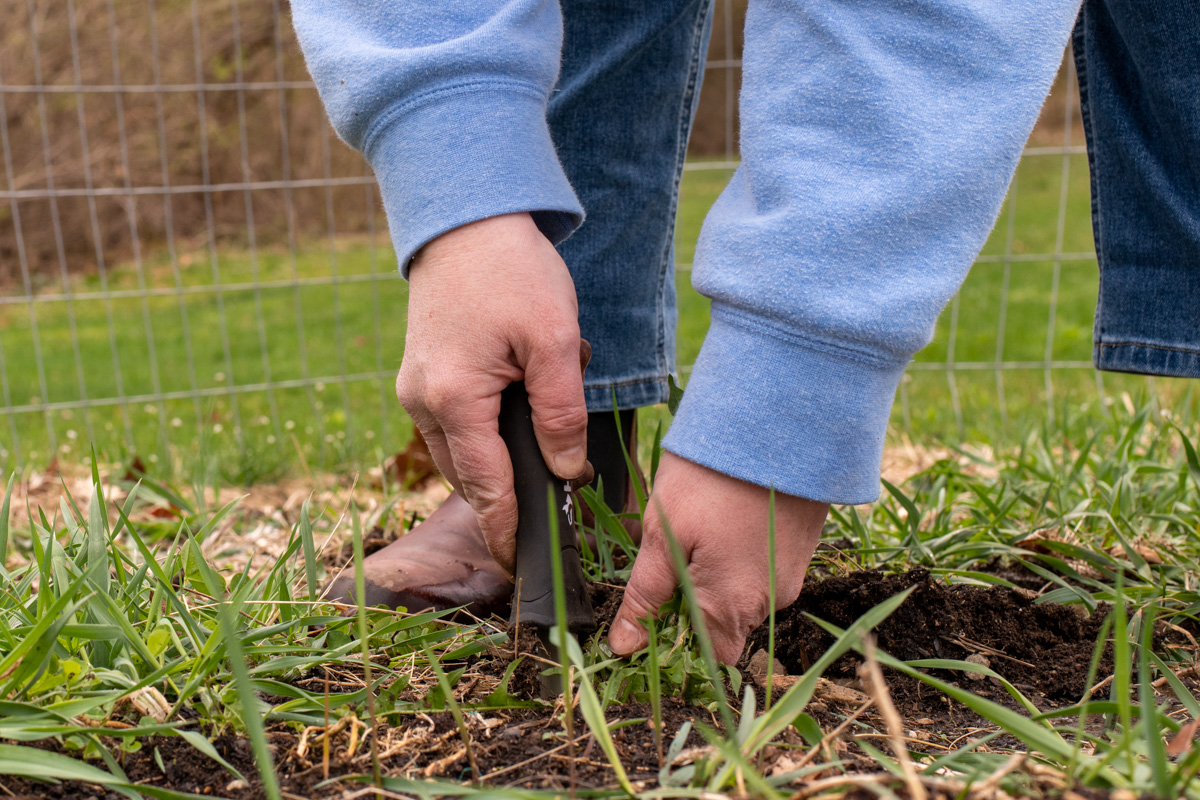
Get down in there and get as much of the tap root as possible.
The problem with picking only the buds (aside from the fact that it takes the whole day) is you’re leaving behind scads of tiny, compact super-crunchy flower buds that aren’t easily seen even if you do remove that top bud.
Let me explain.
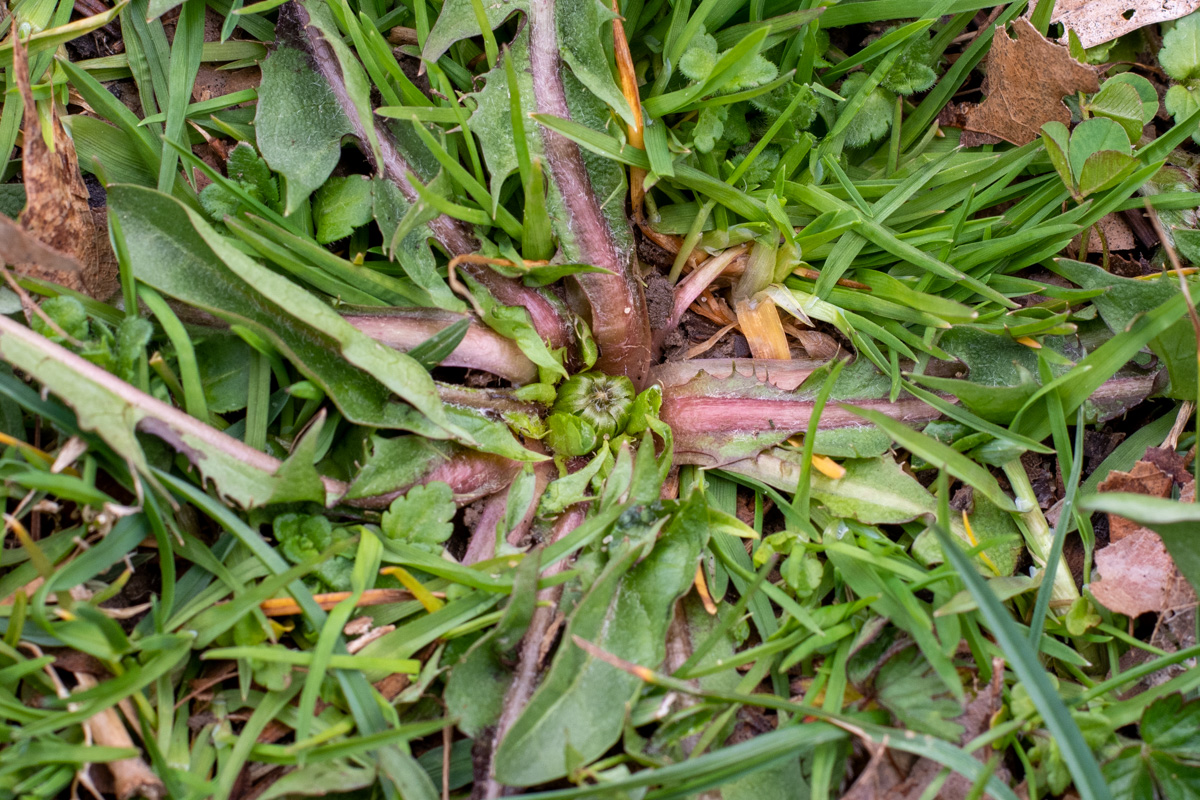
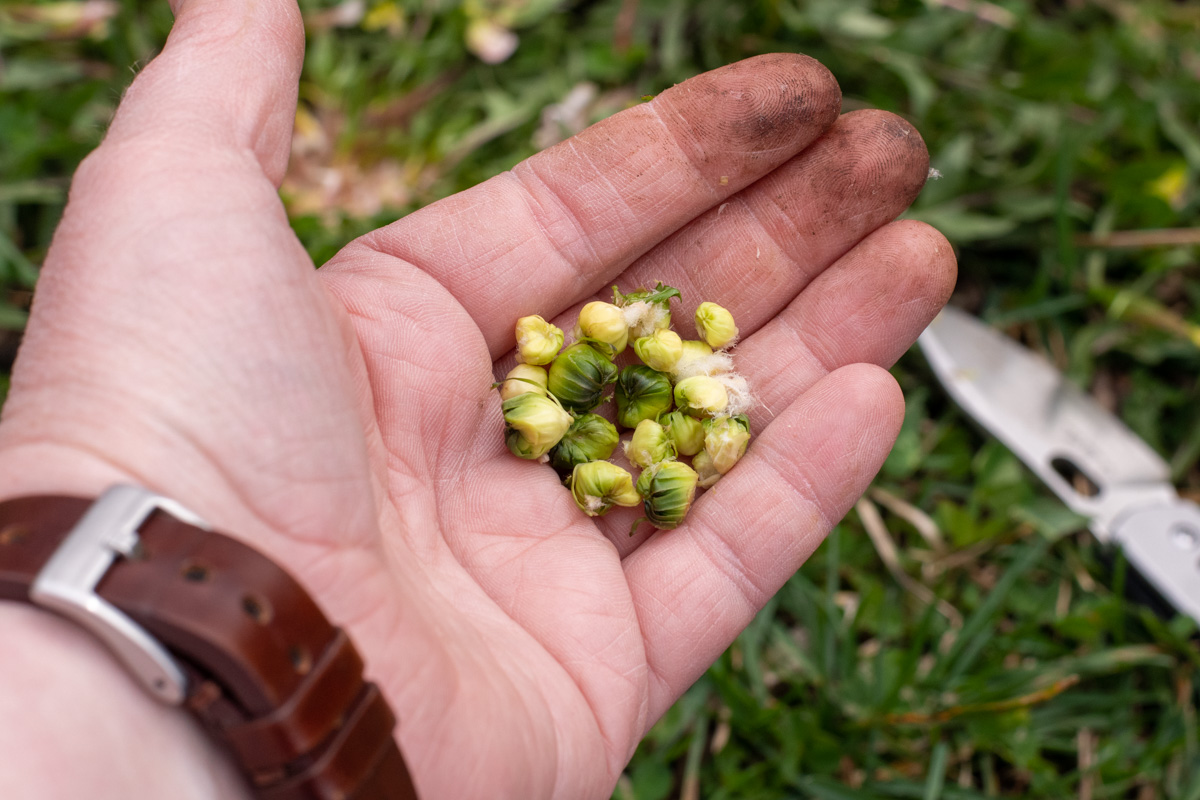
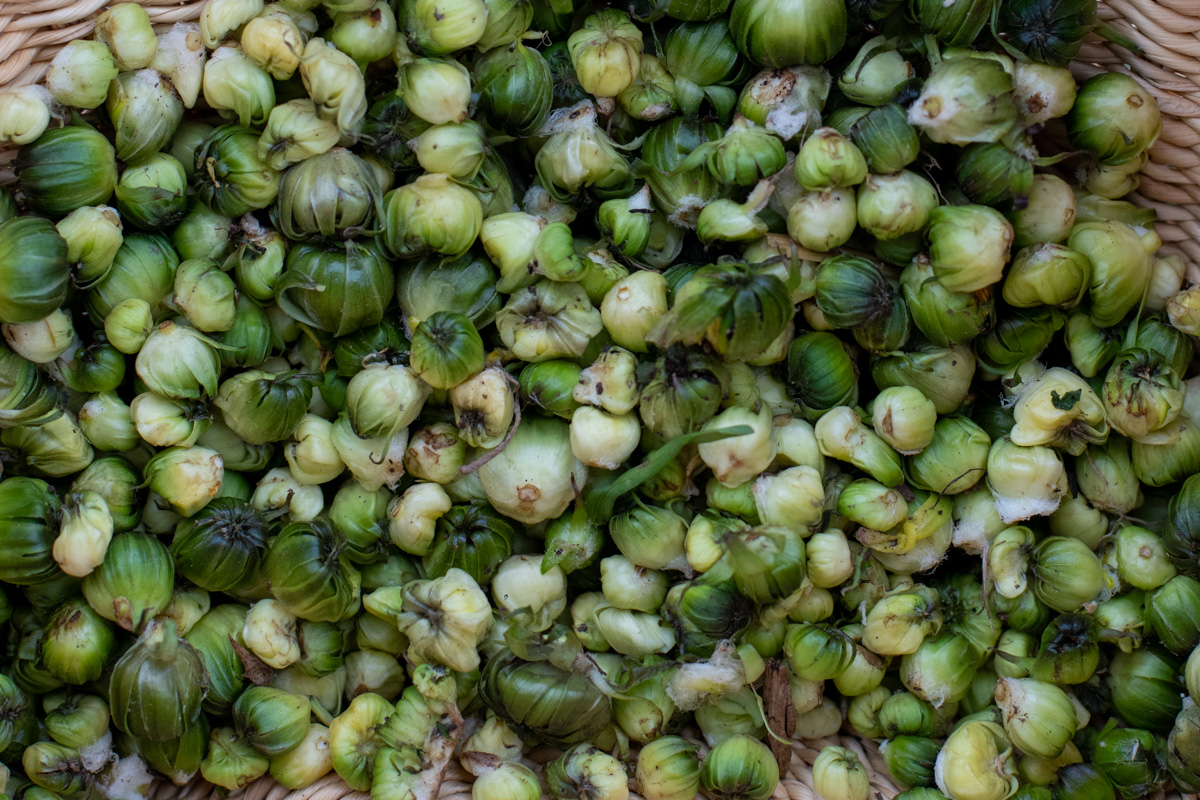
Dandelions don’t make one flower. As I said, if you pick that one central bud you can see, you’ll usually find three or four more beneath it. But if you pick the entire plant, you’ll find a dozen or more buds hiding at the very base of the plant, which you can’t see unless you dig it up.
So, head out to your garden with your hori hori and pull up all the dandelions you can find.
Toss them into a pile.
Keep going; you need to weed your garden anyway.
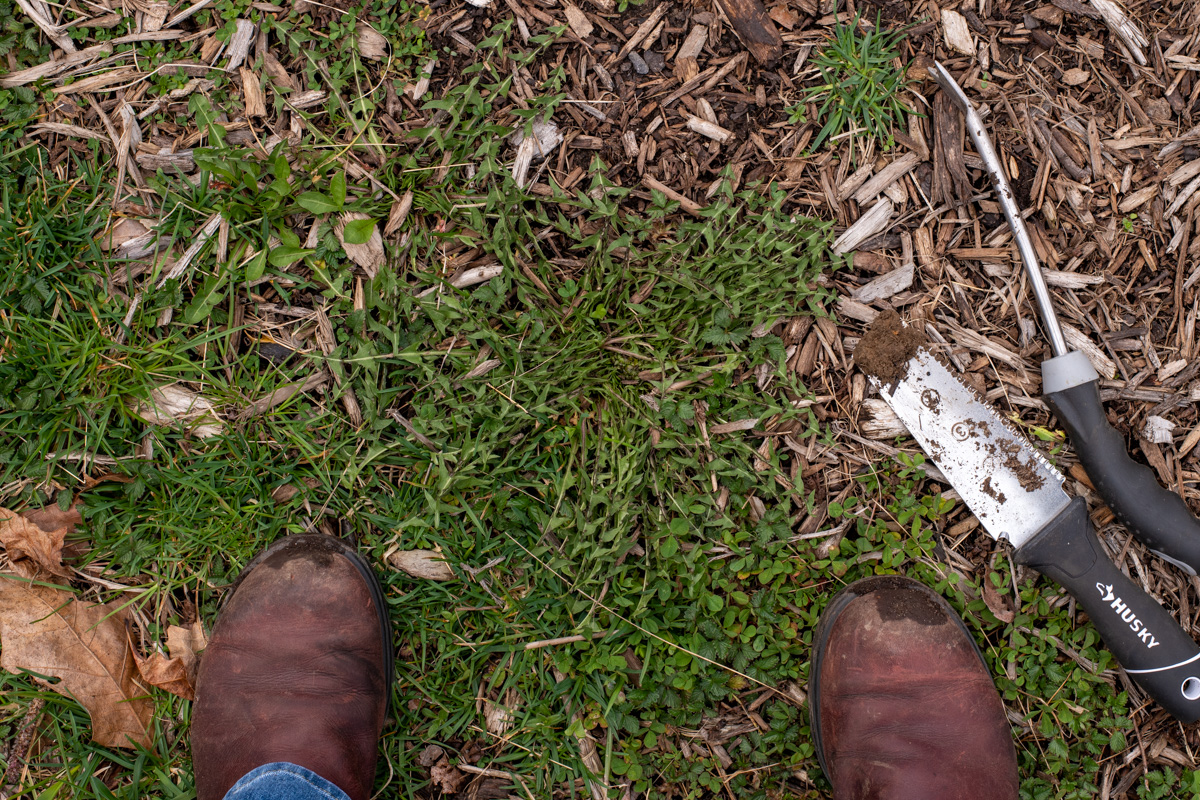
Get those big honkers, too. You know, the ones as big as a dinner plate. A few of these, and you’ll be finished in no time.
Once you’ve successfully removed all the dandelions from your garden (Ha, who are we trying to kid, we both know they’re going to come right back.) and you’ve got a nice little pile, grab a bowl or a basket.
Now get a glass of lemonade or switchel and put on your favorite podcast.
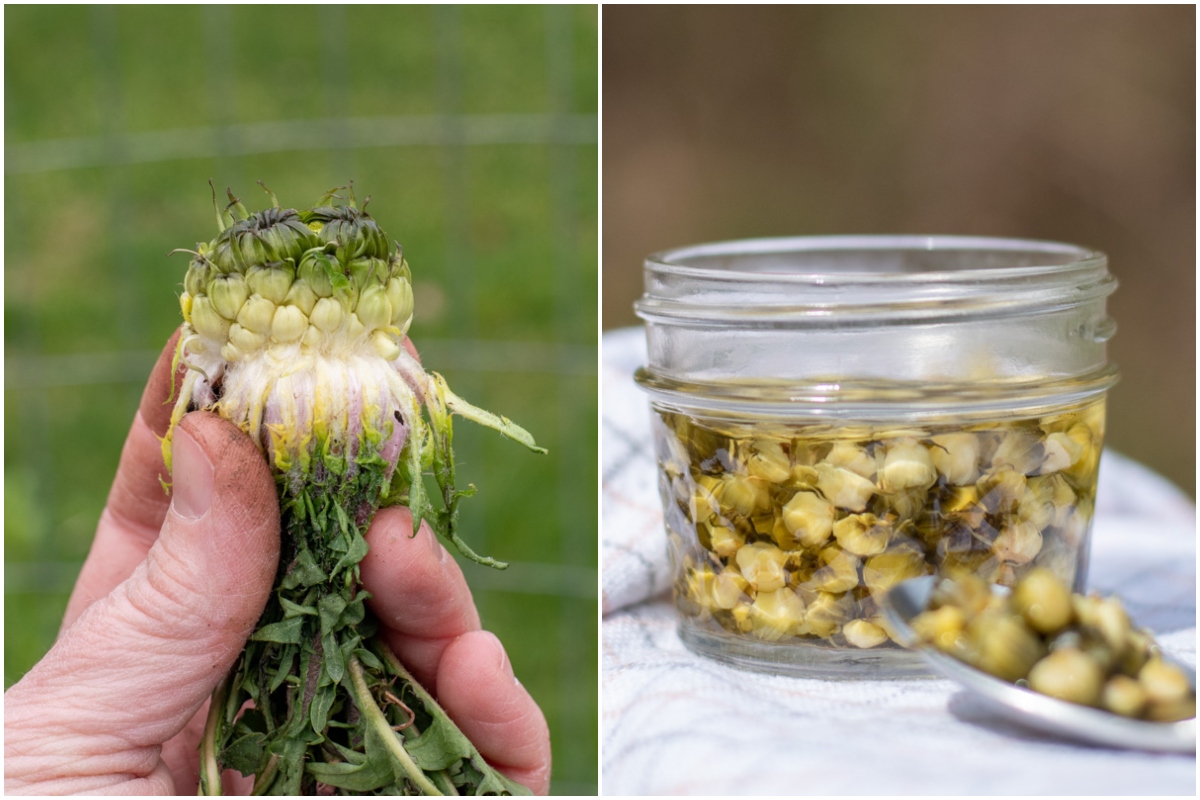
Grasp each plant at the base of the leaves and gently peel the leaves back, pulling them out of the way of the flower base. Ta-dah! These are all the buds that the dandelion would grow this season. That’s a whole lot of flower buds in one go.
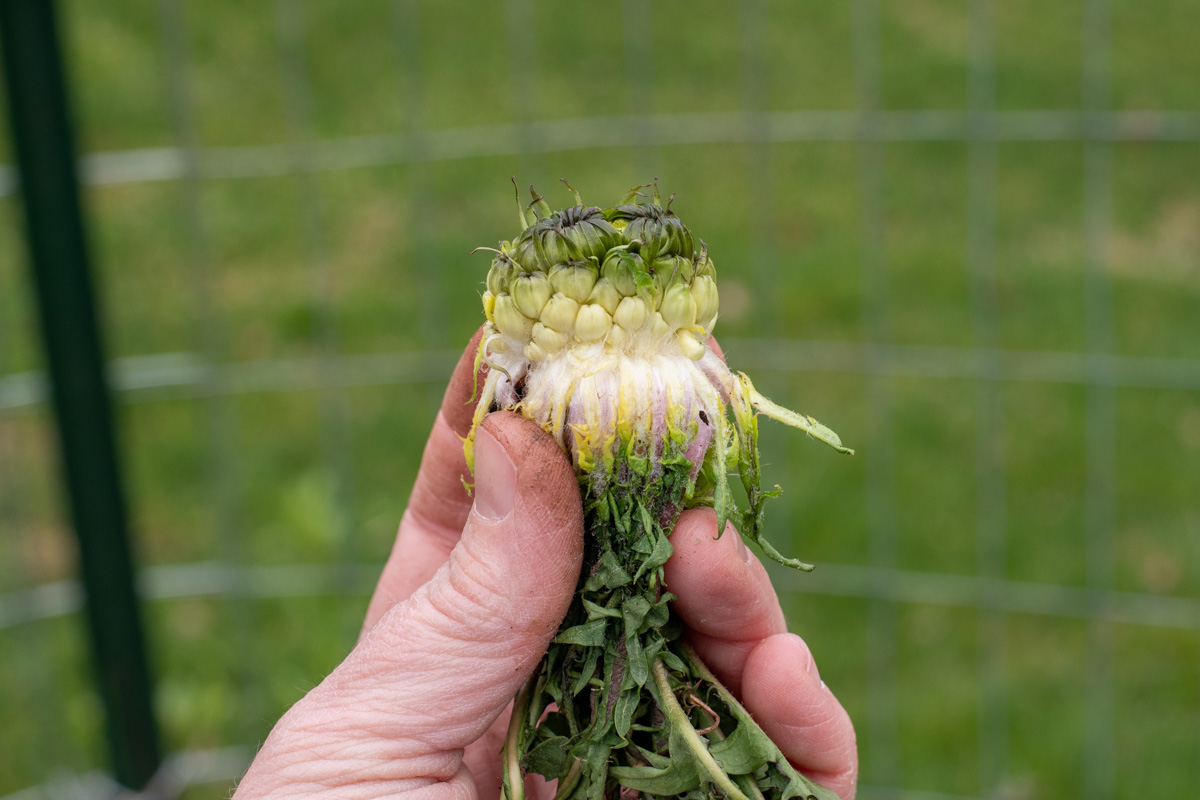
You can pull the individual buds off or, if you prefer to be more precise, use a pocket knife or paring knife to cut them away from the plant gently. (You get less fuzz attached if you cut them off.)
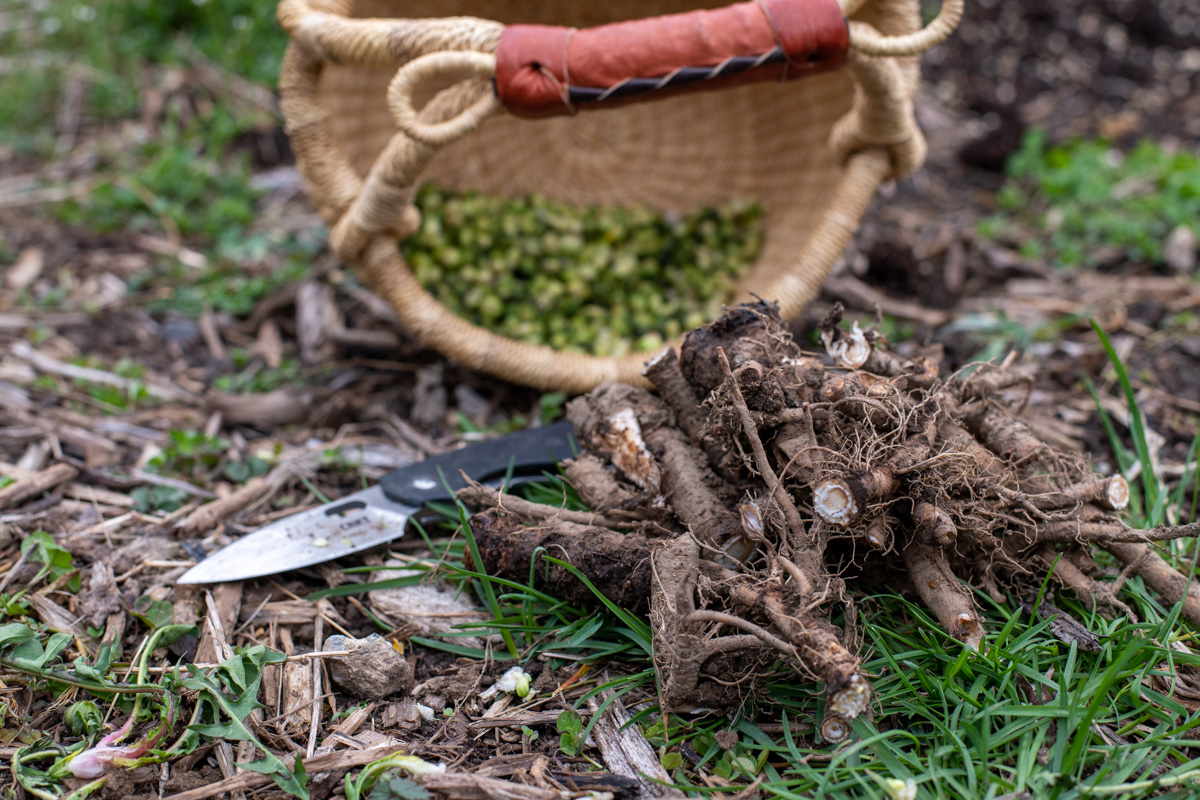
Before you know it, you’ll have a cup of dandelion buds and a dandelion-free garden (for now), and if you do the thing right, you’ll have dandelion roots to roast.
This method is by far the easiest way to pick dandelion buds for capers. I can already taste the chicken piccata.
Making Pickled Dandelion Capers
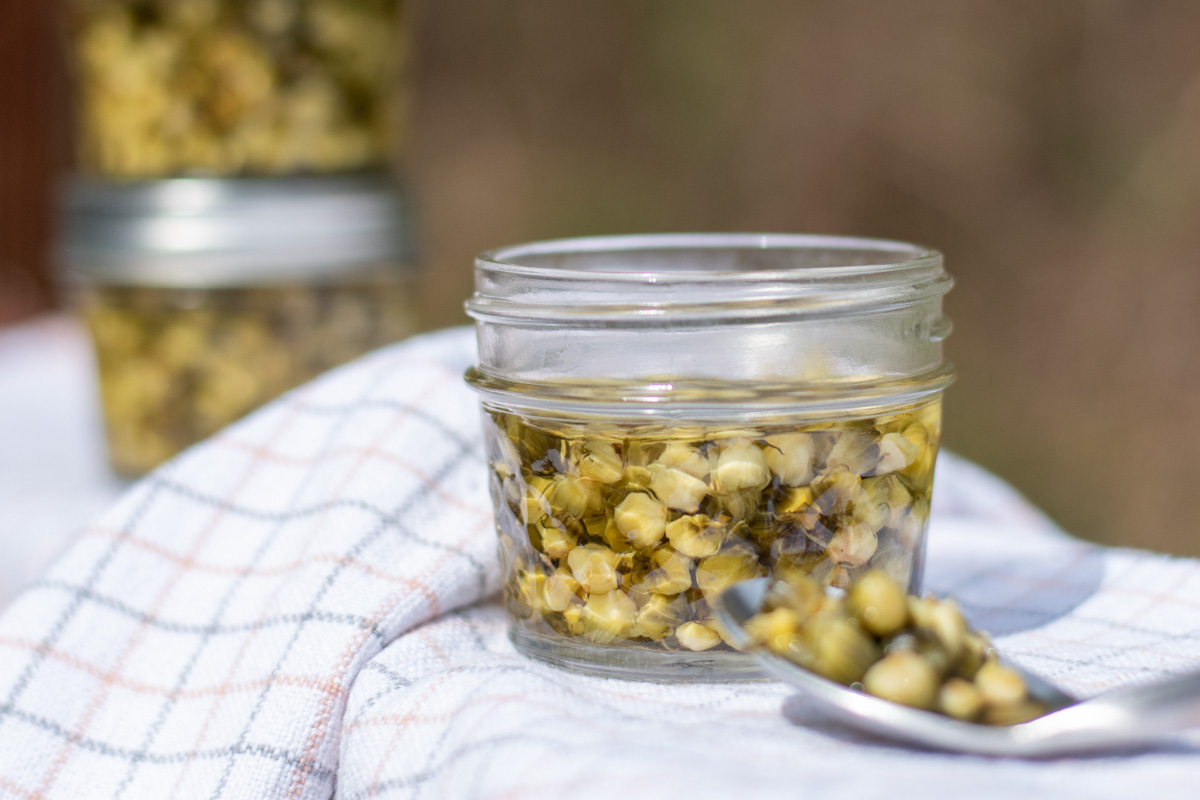
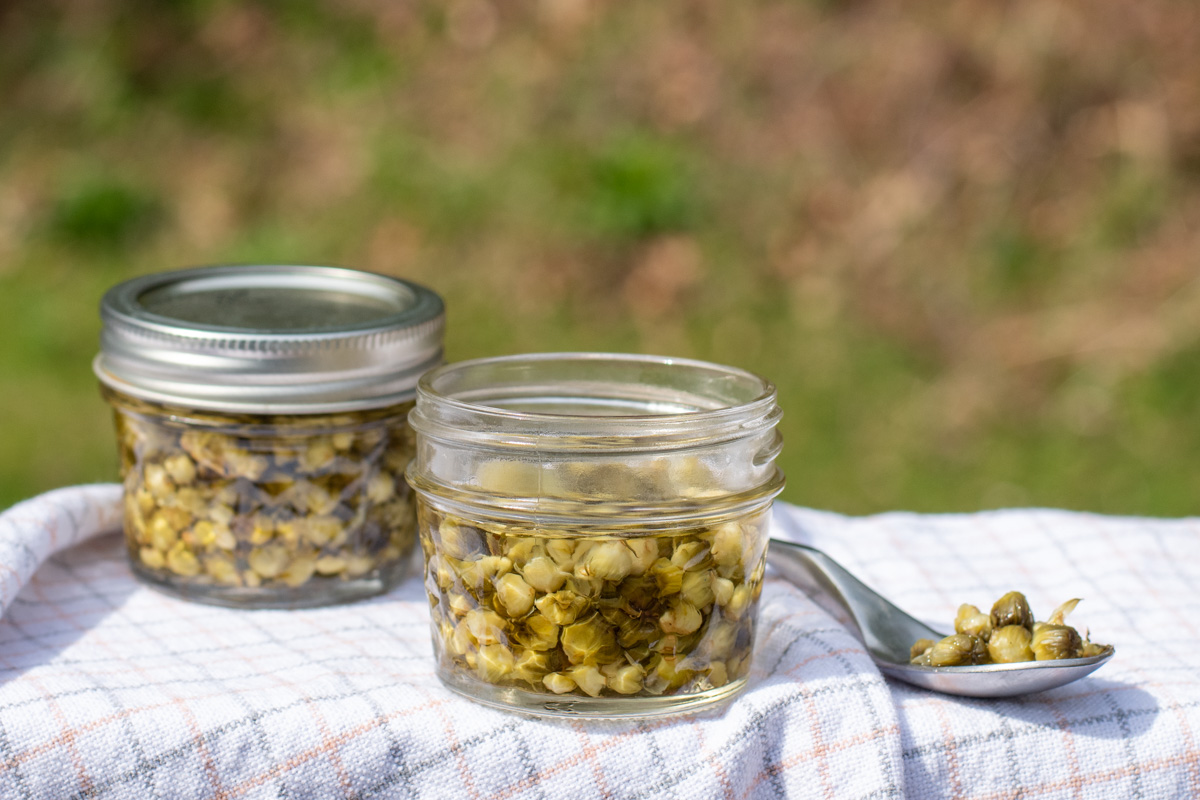
When all is said and done, one cup of dandelion buds will give you three ¼ pints (4oz) canning jars of capers. I like canning them in the smaller jars, as you don’t have to worry about using up a ton once you open them. There’s less waste this way. You can make refrigerator pickles or take the necessary steps to can them using the water bath method.
Refrigerator pickles will give you the most crunch, but that comes at the expense of a shorter shelf life. Canning dandelion capers leaves you with something more like traditional capers and a longer shelf-life. You may want to do one jar as refrigerator pickles and can the other two and see which you enjoy more.
No matter which method you choose, it’s best to let them age for about two weeks before you open them. This allows a nice pickled flavor to develop.
The ingredients are the same for both methods. Before you make your pickles clean the buds by swishing them around in a bowl of icy-cold water. Any dirt, sand etc., will settle out on the bottom, and the cleaned buds will float. Pick out any pieces of grass that may have come along for the ride. Remove the cleaned buds to a mesh strainer and let them drain.
It’s best to make the pickled capers immediately after you pick the dandelion buds. However, if you can’t get to them right away, store the buds in the fridge in a paper towel-lined air-tight container. Don’t let them go longer than 48 hours.
Ingredients
- 1 cup of dandelion buds, rinsed and drained
- ½ cup of white vinegar
- ½ cup of water
- 1 tsp salt
- Lemon zest, skin washed, no pith

Refrigerator Dandelion Caper Pickles
- Add a length of lemon zest to the bottom of each jar and gently pack dandelion buds into the jars, leaving 1/2” headspace.
- Add ½ cup of warm water to a measuring cup. Stir in the salt until it’s dissolved. Now stir in the vinegar to create your brine.
- Pour the brine over the dandelion buds, leaving ¼” headspace. Wipe the rim of the jar with a damp cloth and screw the lids on. Label with the date and keep the capers in the fridge. Refrigerator pickled dandelion capers should be eaten within three months.
Water Bath Canned Dandelion Capers
If you want your tasty capers and hard work to last a little longer, canning them is the way to go. Because you’re not preserving many jars with this recipe, there’s no need to drag out all of your canning equipment. All you need is a pan that will hold the three jars, plus an inch of water over them. A large, heavy-bottomed saucepan should do the trick. Place a washcloth in the bottom of the pan to set the jars on.
- Heat your jars in the saucepan filled with water just until boiling, then turn off the heat to keep them warm.
- In a small saucepan, stir the vinegar, water and salt until the salt is dissolved. Heat until the brine starts to simmer, then turn off the burner and remove from heat.
- Remove the heated jars from the water and add a length of lemon zest to each. Gently pack dandelion buds into the jars, leaving 1/2” headspace. Pour the hot brine over the buds, leaving ¼” headspace.
- Use a clean wooden spoon handle or chopstick to stir and squish out any air bubbles. Wipe the rim of the jar with a damp cloth and screw the lids on until fingertip tight.
- Process in boiling water for ten minutes, then remove jars to a kitchen towel to cool and seal. Label the jars with the date once they are fully cooled. Canned dandelion capers will last for a year. Store them in the fridge once you open them, and use them up within a month or two.
Since you made dandelion capers the easy way, you’ve got time to kill. Why not go frolicking through a meadow picking violets for delicious violet simple syrup?
Read Next:

Get the famous Rural Sprout newsletter delivered to your inbox.
Join the 50,000+ gardeners who get timely gardening tutorials, tips and tasks delivered direct to their inbox.