

Beans, beans, the musical fruit. The more you eat ‘em the more you…erm, sorry. Childhood nonsense is getting the best of me. But I do love beans! String beans, snap beans, green beans, dried beans, whatever you want to call them, whichever variety you grow, these easy-to-grow legumes can be found in nearly everyone’s garden.
And while they are high up there on the list of vegetables that anyone can grow, there are a few things you have to get right to grow them successfully. Since they take up a substantial bit of garden real estate, it makes sense to maximize your bean harvest for huge yields.
Planting Beans
Let’s start at the beginning: putting seeds in the ground and getting them off to a solid start.
Wait for the Soil to Warm Up
This one catches people off guard more than any other bean-growing issue. It’s tempting to start poking beans in the ground as soon as you reach that all-important last frost date. But like so many other vegetables, the soil temperature is much more important than the air temperature.
Beans will not sprout in cold soil.
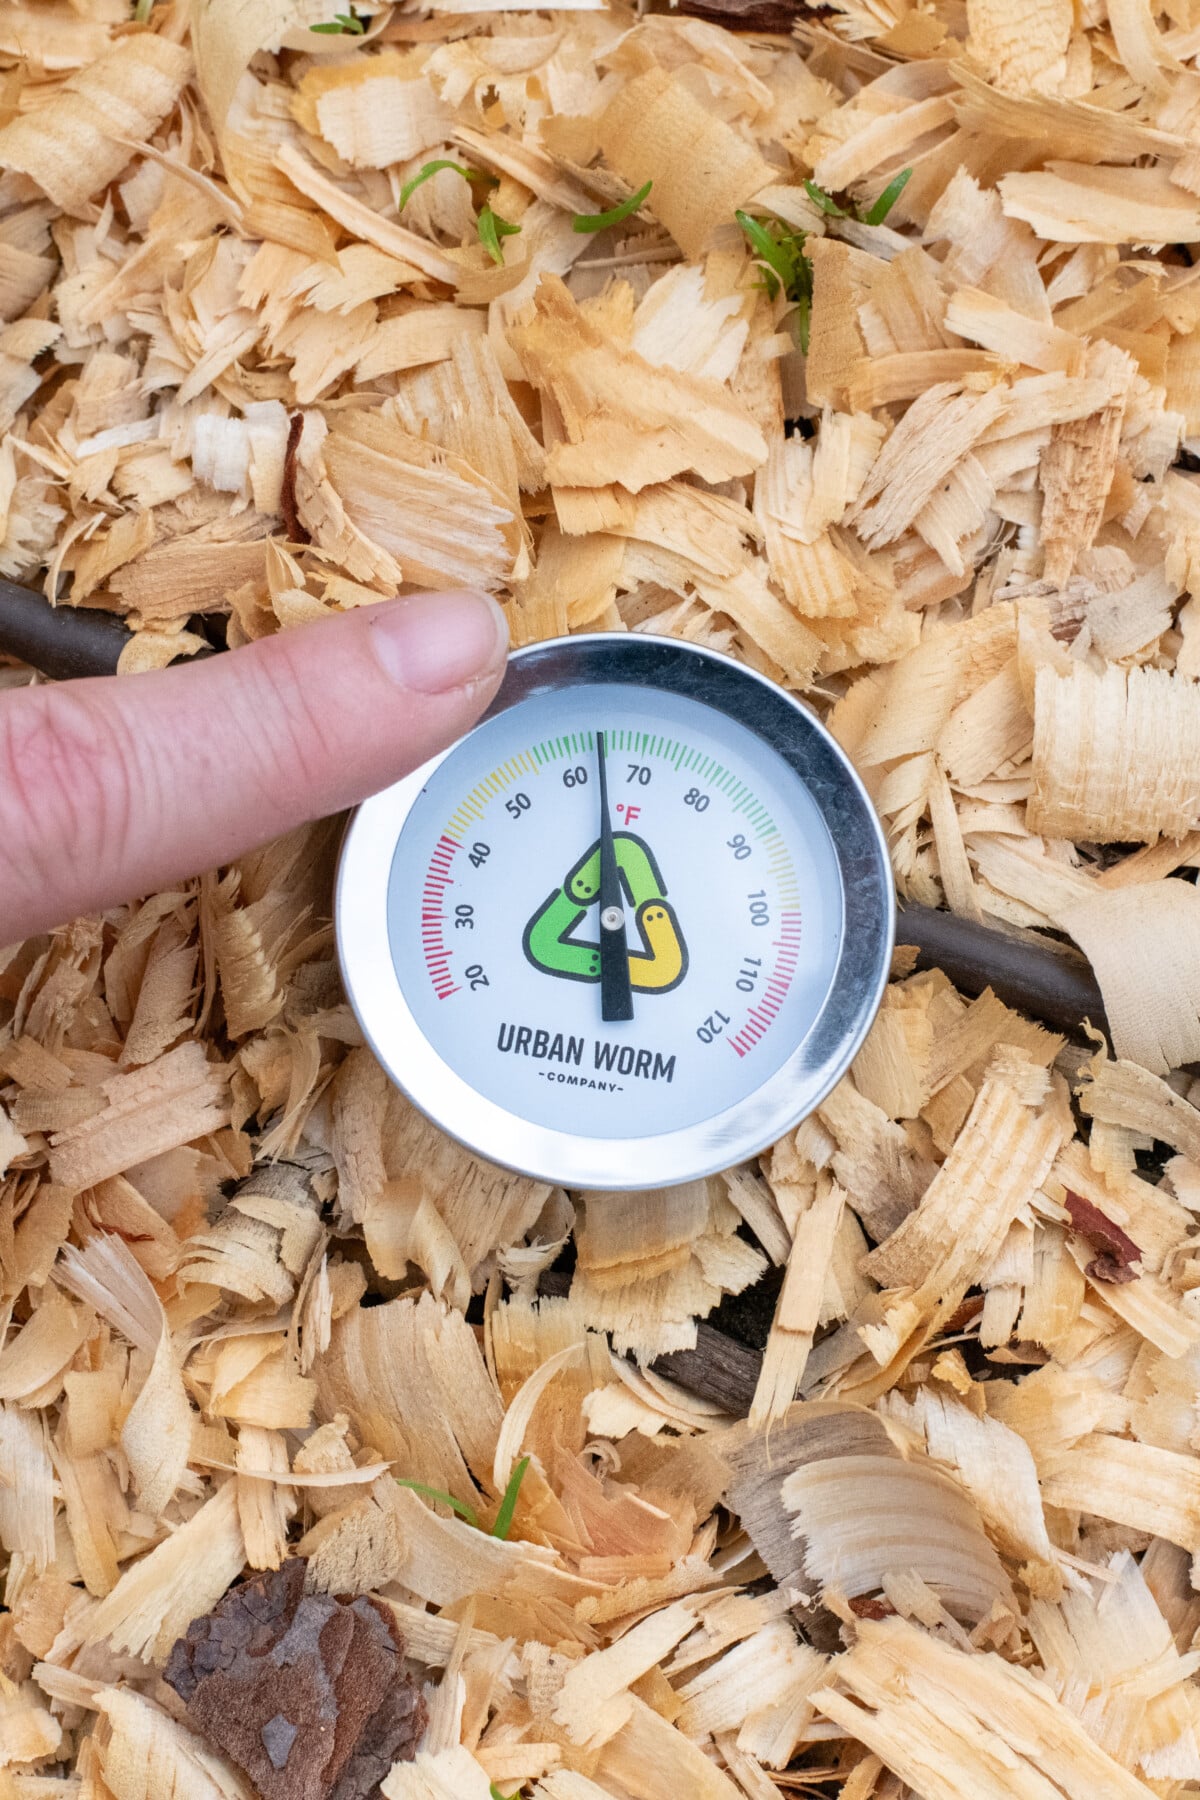
Sure, you have to wait for that last frost date so your beans don’t get zapped by a frost, but if you plant beans before the soil warms up, you’ll end up with rotted seeds that never germinate. So, poke a soil thermometer in the ground and keep an eye on it. You need consistent temperatures of 60°F or above. That’s the bare minimum.
I don’t like wasting seeds, so I always wait to plant beans when my soil reaches 70°F.
By waiting a little longer (really, it’s usually only a week), I ensure that I have much better germination rates and don’t have to go back through and poke more seeds in the soil.
I’m sure longtime readers of Rural Sprout are sick of me talking about this silly thing, but this little soil thermometer has been one of the smartest purchases I’ve ever made for my garden. I own several of them these days, and they live in my raised beds and flower beds.
Beans Should Only Be Direct-Sown
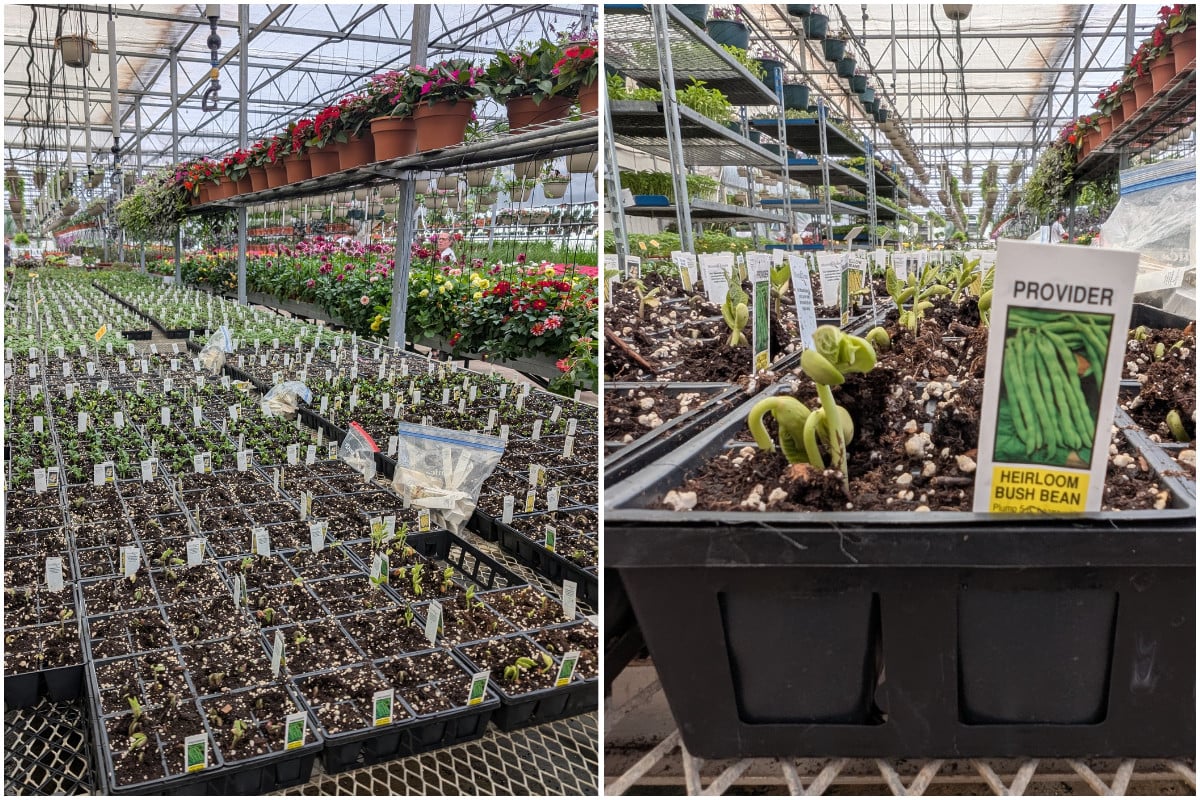
Look, I know all of us are looking for ways to get a jump on the growing season, but this is one veggie you should not be starting as a seedling. Beans hate being transplanted. Most will either up and die, or sulk and under-produce for the rest of the season.
I get frustrated when I see bean seedlings for sale. It’s just a money grab.
One of the first things beans develop is a long tap root.
That tap root is highly sensitive to changes in its environment, like being transplanted. Beans germinate ridiculously fast anyway, so you’re truly not saving yourself much time by trying to grow them as a seedling.
- Bush beans: plant 1 inch deep and 4-6 inches apart
- Pole beans: plant 1 inch deep and 3-5 inches apart in rows or plant 4-6 beans in hills around the base of each pole.
Skip the Nitrogen
You know all those crop rotation articles that tell you to plant heavy feeders where you last grew legumes because legumes are nitrogen fixers? Yeah, it’s bunk!
Not the nitrogen-fixing part, but the idea that legumes somehow leave a bunch of nitrogen in the soil for the next plant. Beans create their own fertilizer via naturally occurring bacteria in the soil that create little nitrogen-storing nodes on the roots of the bean plants. (You can learn more here.)
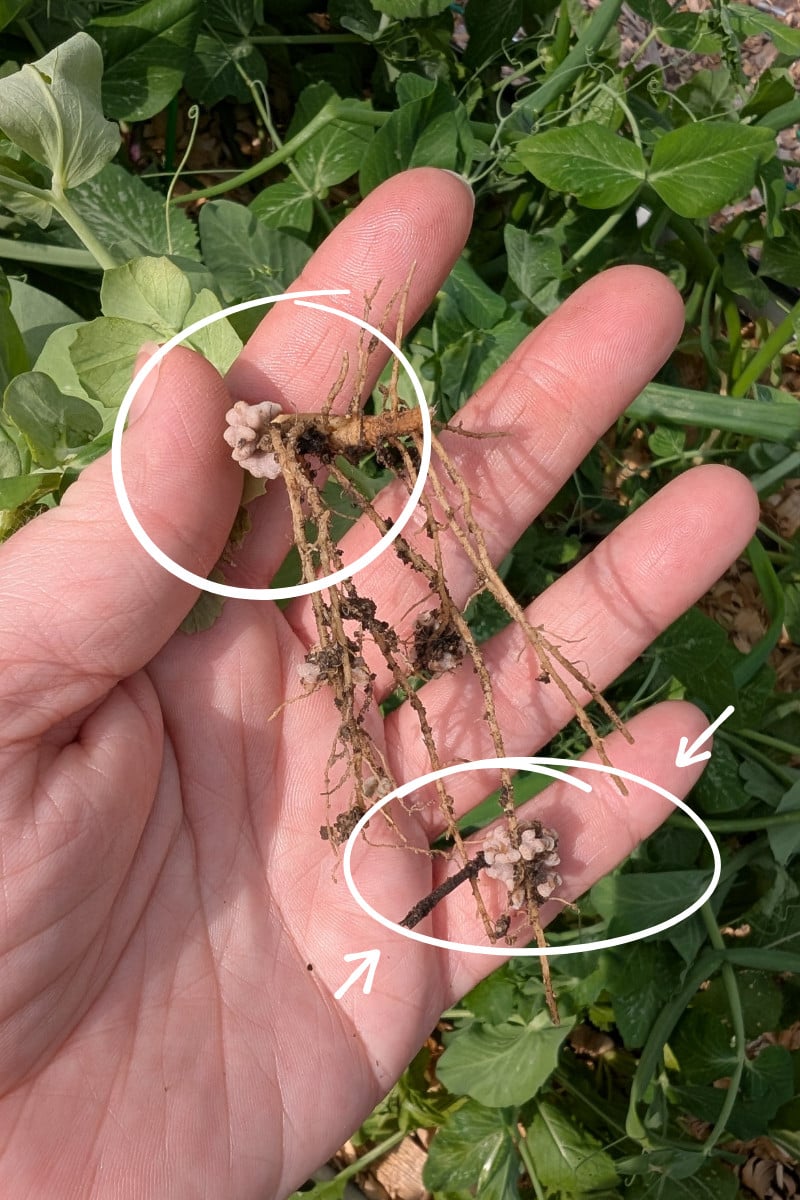
The nitrogen they create is for the plant to grow, not for next year’s plants.
Beans are their own little fertilizer factory.
So, if you want to make sure you have lots of tender beans to eat, skip the nitrogen-heavy fertilizer. Your bean plants have got it covered for you. Instead, opt for a low-nitrogen fertilizer that has plenty of phosphorus and potassium, as these are needed for root, flower and bean development. Farmer’s Secret Fruit & Bloom Booster is an excellent option.
Unless you’ve recently done a soil test and your soil is completely depleted of nitrogen, adding it is unnecessary and will only lead to lots of leaves and very few beans.
Inoculated Beans Are Optional
You need to inoculate your beans! This is another one of those bits of gardening advice that gets passed around like gospel, but under scrutiny, it all falls apart. I think a lot of it comes from seed catalogs wanting to sell inoculant.
The bottom line is, if you’ve grown beans (or other legumes) in your soil before, then you probably don’t need inoculant.
Remember those cool bacteria we just talked about that help beans make nitrogen? That’s what the inoculant is for; we’re adding those bacteria to the soil. However, there’s a pretty good chance they are already hanging out in your soil, just waiting on their bean buddies to make nitrogen together.
If you’ve successfully grown beans in your soil before, then you already know the bacteria are there.
There are really only two instances when you need inoculated beans. The first is if you’re growing beans for the first time in a garden, or if you have new soil. (Hello, fellow raised bed gardeners.) By using inoculant, you’ll successfully introduce the Rhizobium bacteria to your soil, and be set thereafter. The second is if you struggle to grow beans in your soil, but have been doing everything else right. There is a chance it’s because these helpful little bacteria haven’t established and colonized in your soil. Inoculated beans will see to that.
Mulch Your Beans
Beans need consistent moisture, and mulch locks water into the soil and slows evaporation. I know sometimes mulching your garden can seem finicky, but I promise it’s a huge time, energy and plant saver.
Once your beans are several inches tall, go ahead and mulch them. Or, if you’re a lazy gardener like me, you can plant your bean seeds and then use my favorite mulch material to mulch immediately. (This stuff has been a game-changer in my garden.)
Now that we’ve planted our beans and got them going, it’s time to…
Get the Most Bean for Your Buck
As I said at the beginning, beans eat up a lot of your garden, so let’s get the most of them.
Succession Plant Bush Beans
It can be tempting to plant all of your beans in one go. And that’s fine if you want all of your beans ready at the same time, say if you plan on canning or freezing them. But if you grow beans more for fresh eating, then you’ll want to plant smaller batches more frequently.
For example:
- Plant six beans now
- Wait two weeks and plant six more
- Wait another two weeks and plant six more
(Six is just an arbitrary number I used for illustration. Plant however many you’ll need to feed your crew with each succession planting.)
This will keep you in beans without being buried in them and then suddenly having none.
Alternatively, if you want a large crop of beans to preserve, I highly suggest you pull up your first harvest as soon as bean production begins to slow down, and plant another big harvest. As the plants mature, they will naturally start to produce fewer beans. By cutting the mature plant’s time in the garden short, you’ll end up with more beans in the end from two large, heavy harvests rather than one that piddles out over time.
Again, succession planting works best with bush beans, as pole beans produce consistently throughout the season, as long as you keep picking them.
Look for Flowers, Then Grab the Hose
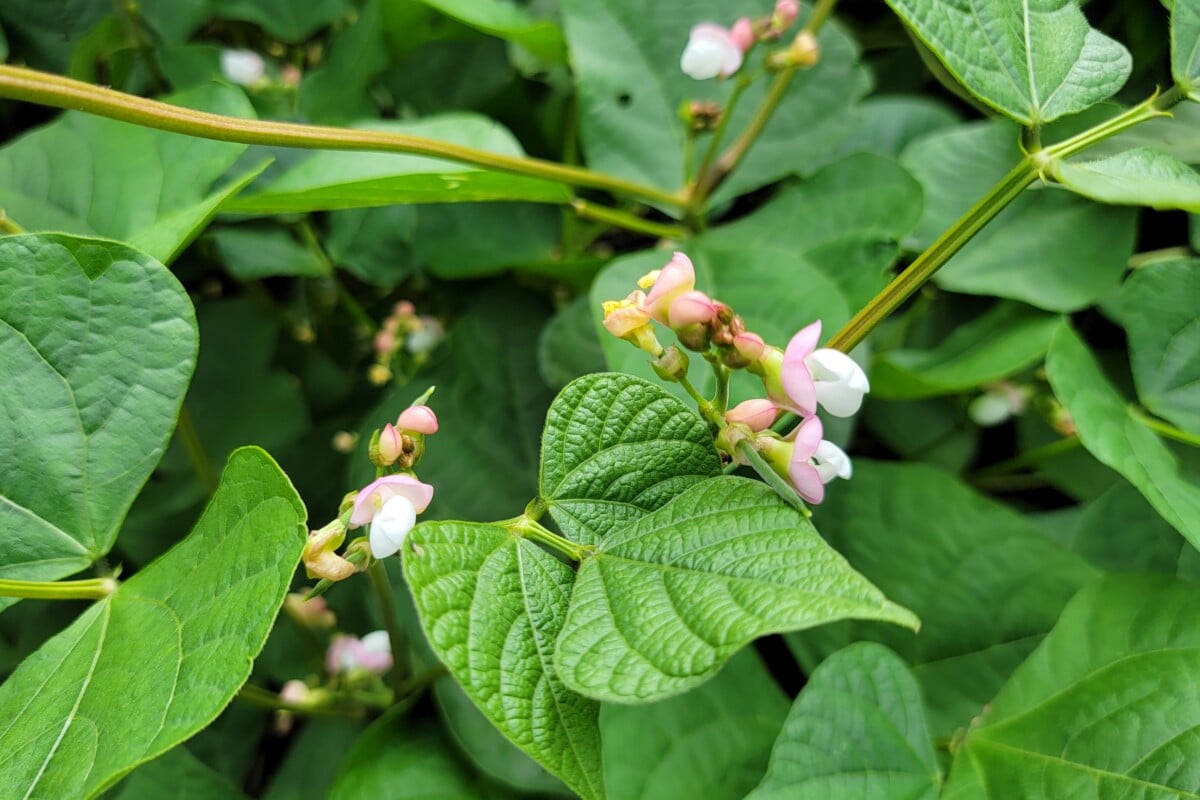
Beans need consistent moisture to grow well, yes, but they are also pretty drought-tolerant and can take a week or two without rain unless they are flowering. If you want beans, then you have to stay on top of watering while they are flowering.
As soon as you notice your beans blooming, make sure they get an inch of water every week. You’ll need to water more during heat waves. Ultimately, you don’t ever want your flowering beans to dry out completely.
Consistent moisture is the key to making sure you have good pod-set.
Pick Your Beans Early and Pick Them Often
Finally! Some old gardening wisdom that holds true: the more beans you pick, the more beans your plant will make.
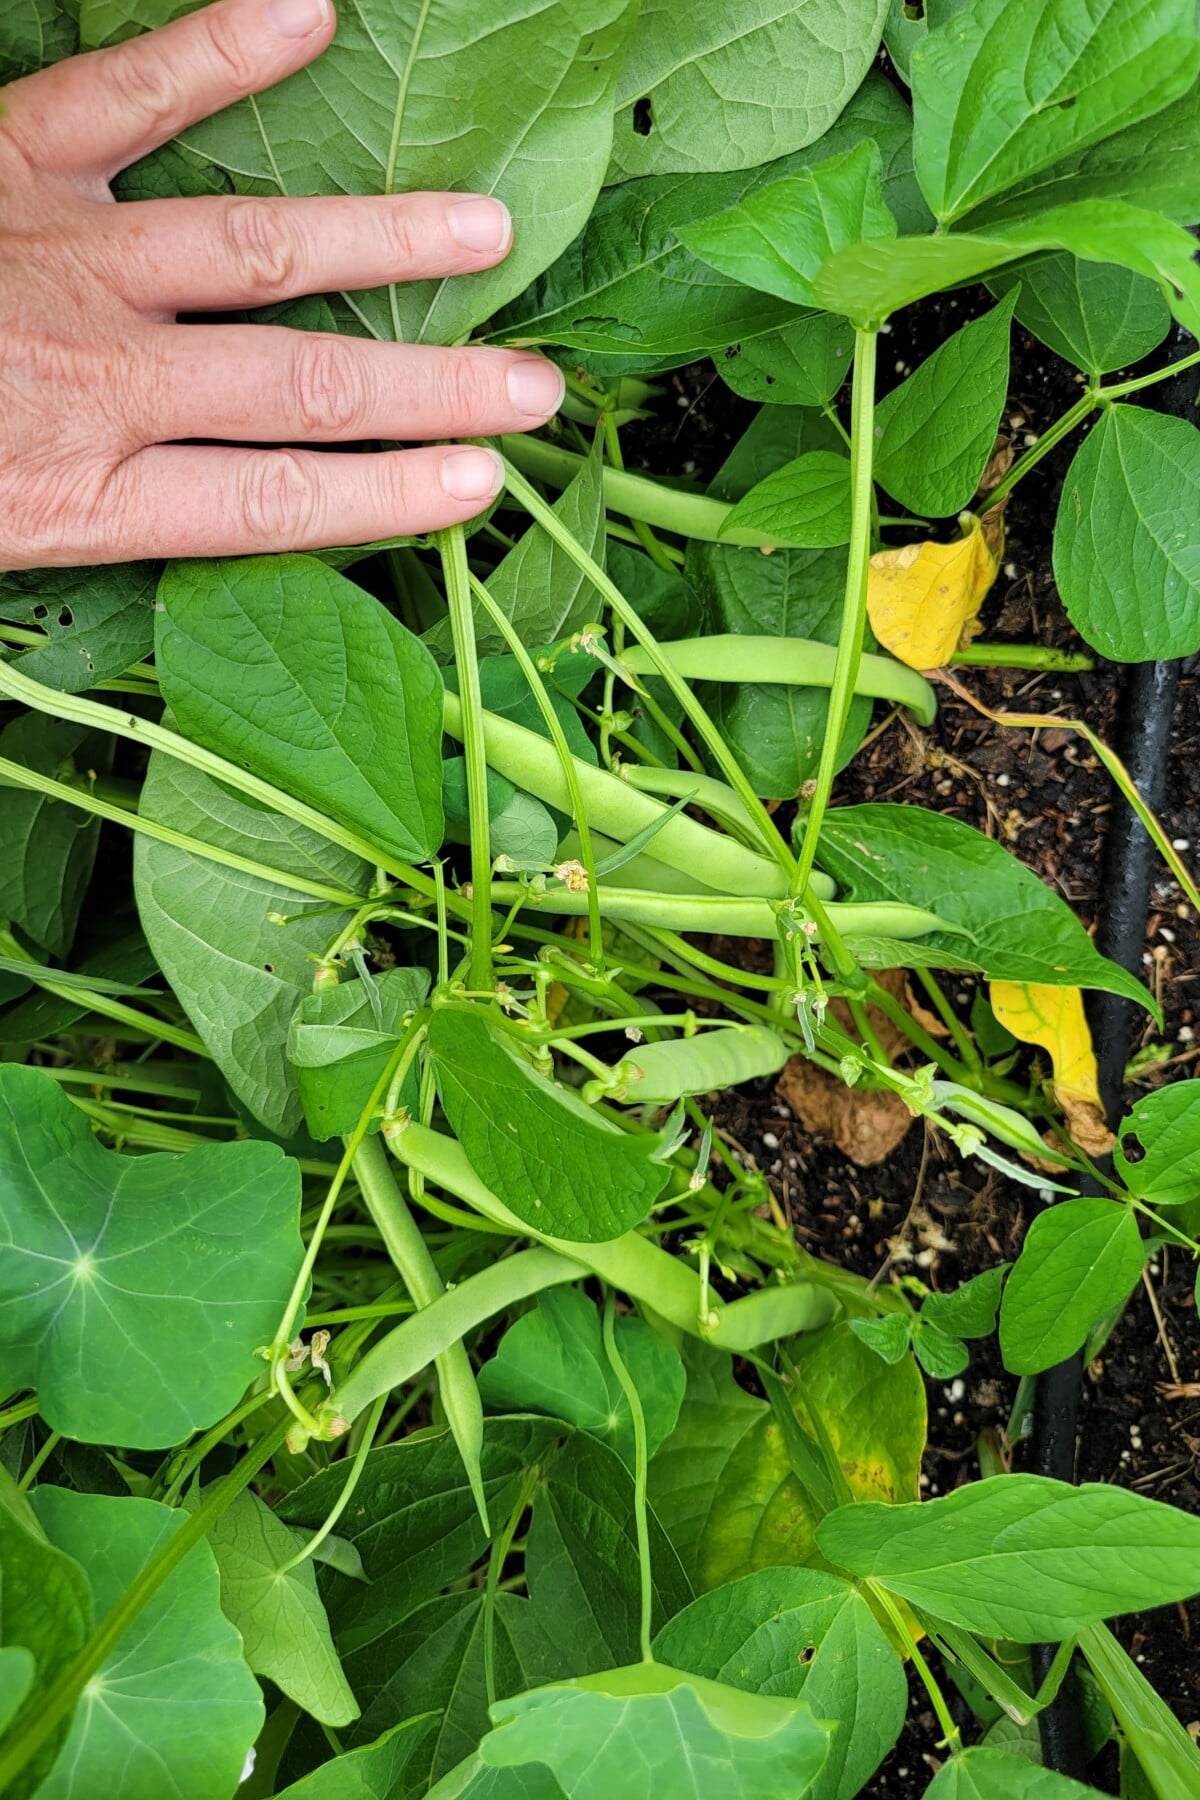
For snap beans, you want to pick them early before the plant has time to mature. Look for pods that are firm and smooth. You don’t want the seeds to bulge from the pod noticeably. If you leave mature pods on the plant, the plant sends a signal that says, “Our work here is done, let’s close up for the season.”
Pick, pick, pick!
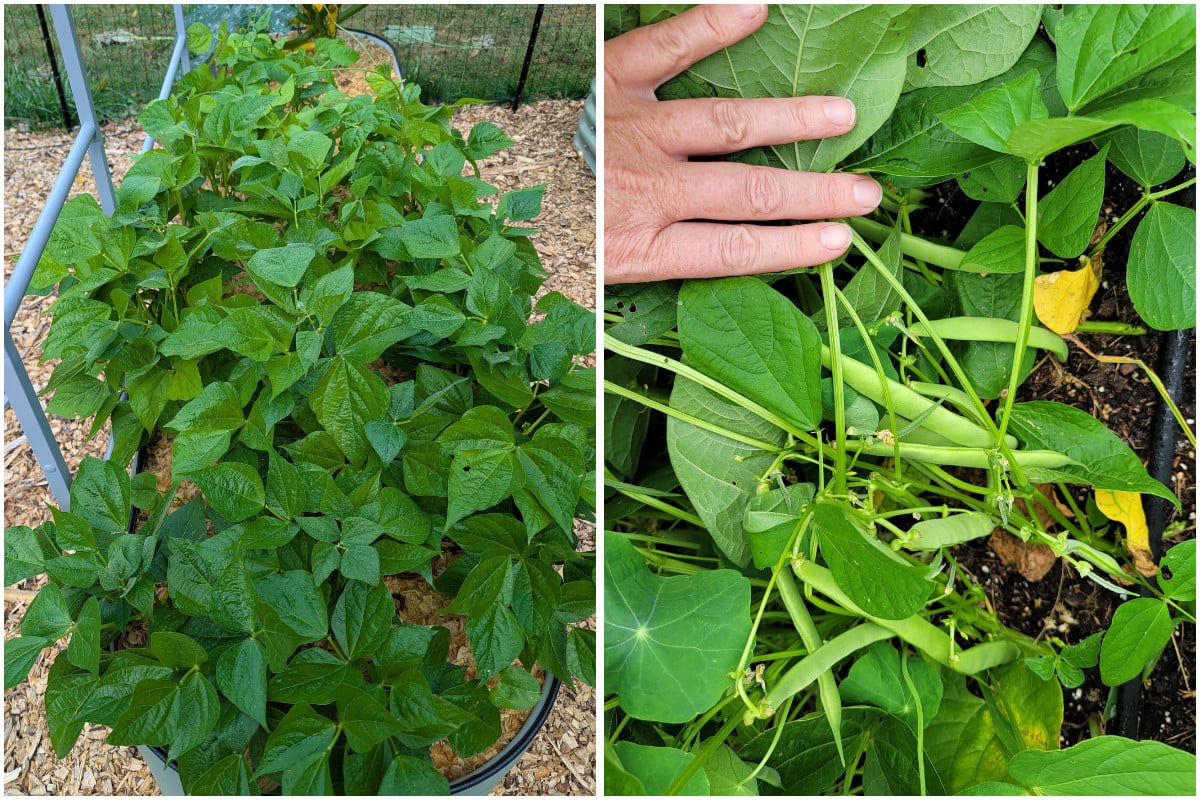
Get on the Pole!
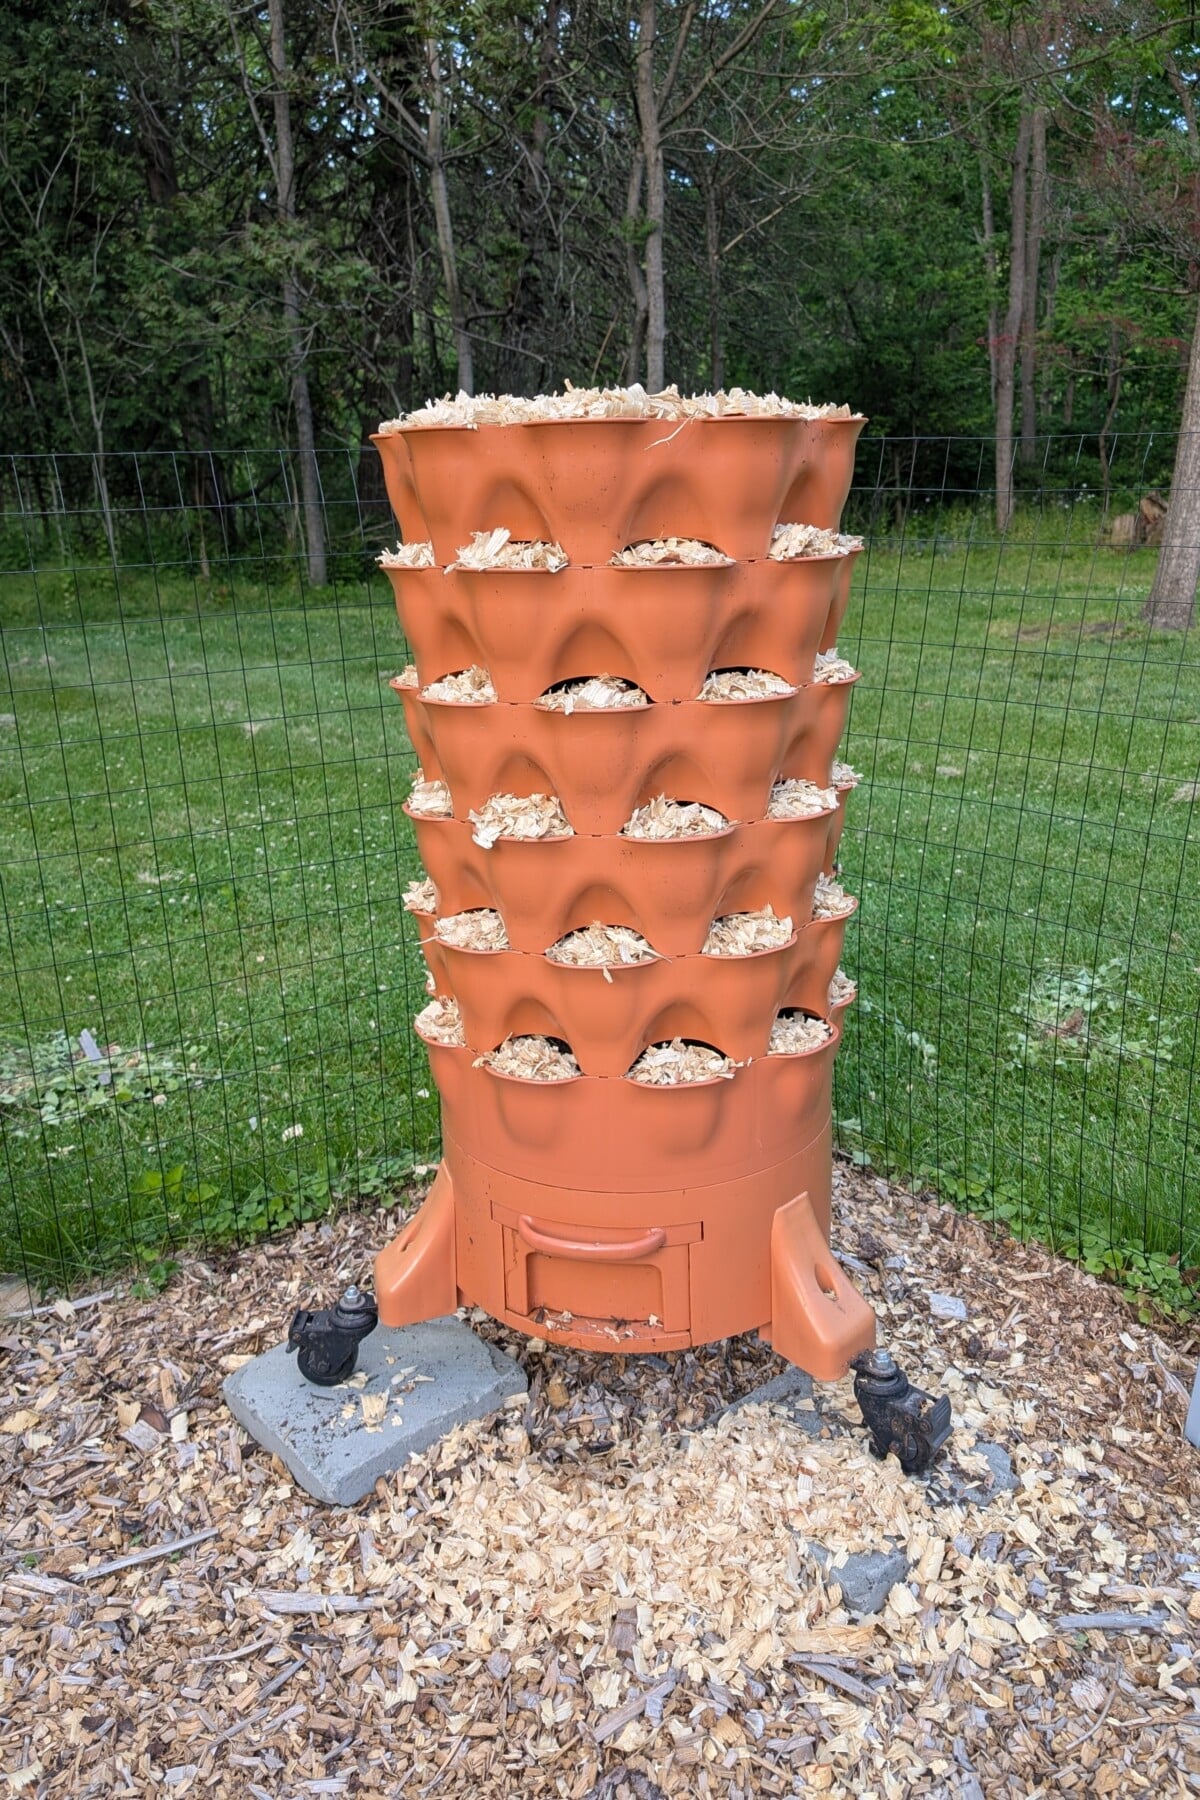
Yup, bush beans are easy. And if you don’t want them to take up so much room, you can grow them in a gardening tower, like I’m doing.
But pole beans are more productive.
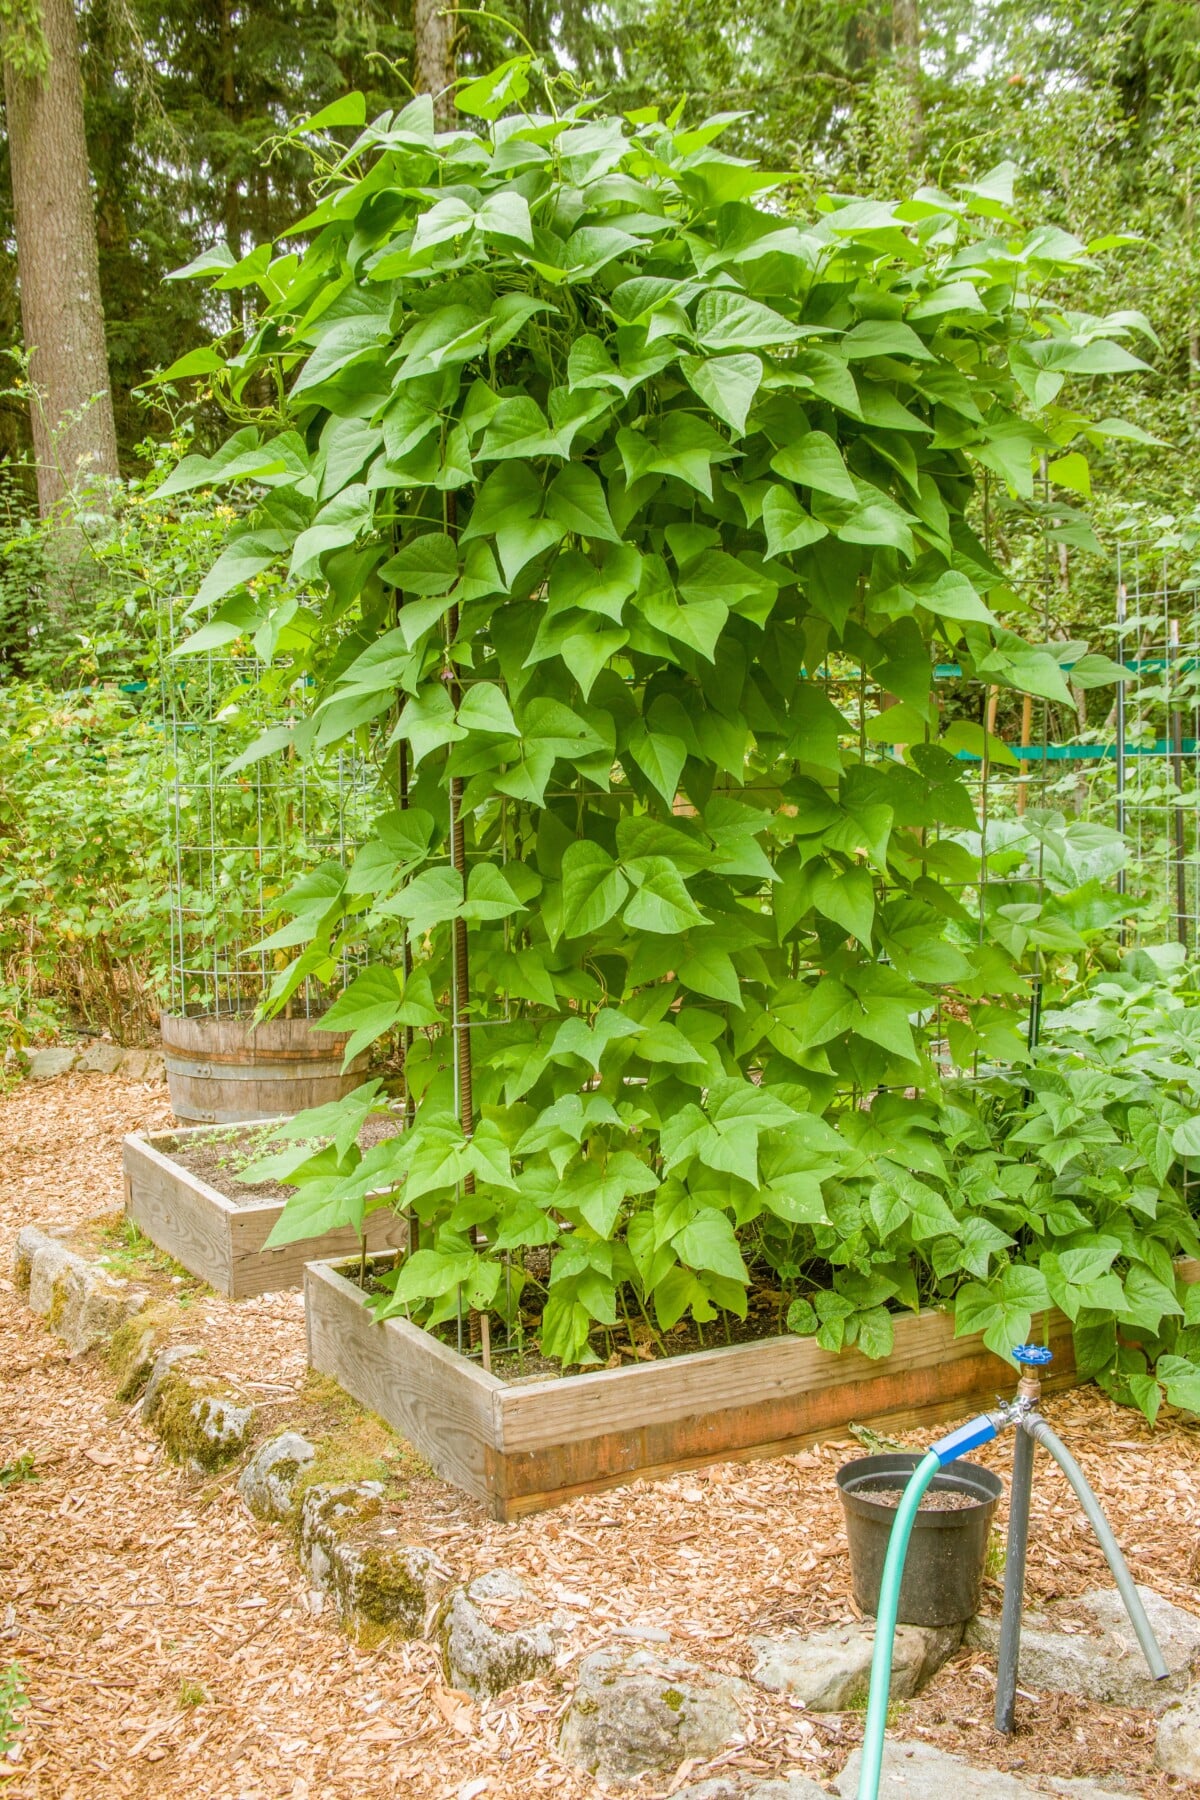
If you have the space for several trellises or you can grow them along a fence, pole bean varieties like ‘Kentucky Wonder,’ Blue Lake Pole,’ and ‘Fortex’ can have you in beans for months rather than weeks.
Grow both bush and pole varieties and decide which you like best. Also, it’s just fun. Pole beans always have a charming rustic look to them in the garden.
Mexican Bean Beetles
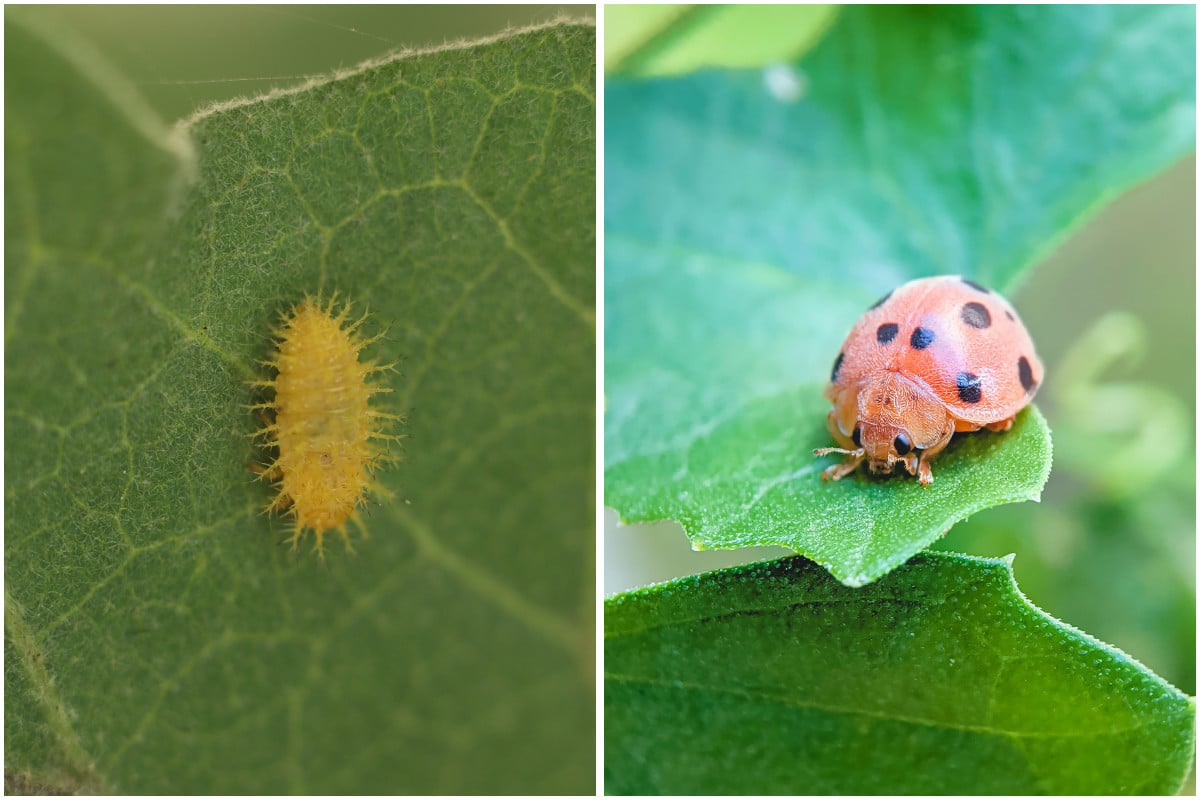
This is one ladybug that has very unladylike habits. While every other species of ladybug feasts on other insects, making them a beneficial insect in the garden, the Mexican Bean Beetle makes a meal out of your beans.
And you’ll want to keep an eye out for it, as it’s one of the few bean pests that can come in and wipe out your crop.
Prevention is the best way to beat them. As your beans grow, check the underside of leaves frequently. Look for yellow egg clusters and fuzzy yellow larvae. Squash and egg clusters you find. The larvae and the beetle are best dealt with by dusting your bean plants regularly with diatomaceous earth. Don’t try to sprinkle it, you’ll only make a mess of yourself and your plants. Get yourself a good DE duster. (I like this one because it has a telescoping nozzle, which saves my back. I’m not getting any younger!)

Get the famous Rural Sprout newsletter delivered to your inbox.
Join the 50,000+ gardeners who get timely gardening tutorials, tips and tasks delivered direct to their inbox.