


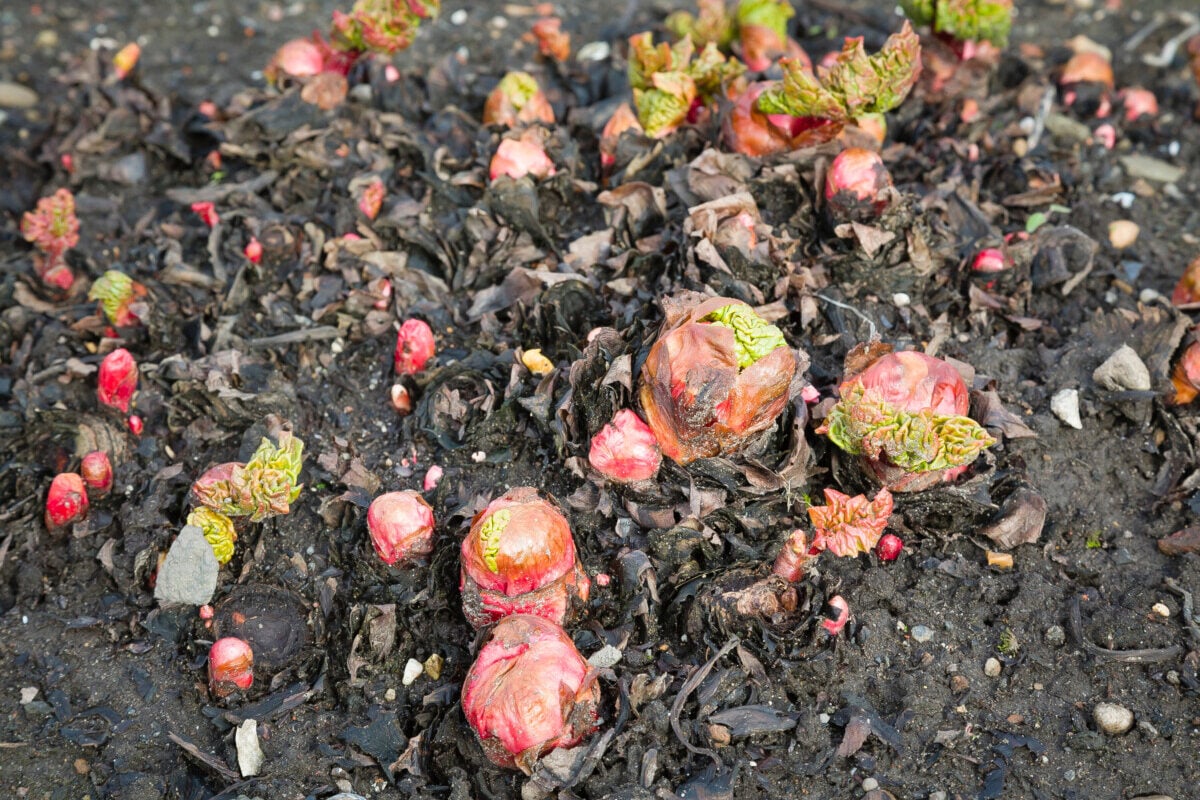
I know what rhubarb looks like. My grandmother and my dad both grew it. I grow it in my garden, so I’m familiar with this plant. Yet it never fails, every spring when that first crazy alien-shaped bud emerges from the ground, it catches me off guard. My immediate thought is, “What the heck is that?”
Once my memory kicks in and I realize that, oh yeah, it’s my rhubarb, I know it’s time to get to work.
Rhubarb – first fruits of the garden
You have to love rhubarb. (Otherwise, why would you be reading this?) Long before most vegetables are planted in the garden, rhubarb is already growing and ready to be picked. This vegetable, treated as a fruit, is one of the first things we get to eat from our gardens each year. And, let’s be honest, after a long winter of creamy soups, rich casseroles and heavy roasts, it’s the sweet-tart kick in the pants we all need.
Rhubarb is an annual spring palate cleanser, priming our taste buds for the lighter, fresher, greener fare yet to come.
Spring is probably the most important time of the year to care for this common perennial edible. So, now is the time to tick off a few essential rhubarb chores from your spring gardening to-do list. Getting these items taken care of as soon as your rhubarb emerges will set you up to harvest brilliant pink stalk after brilliant pink stalk right up until early summer.
Grab your garden trowel and put on your boots, and let’s get some chorin’ done.
Divide or Relocate
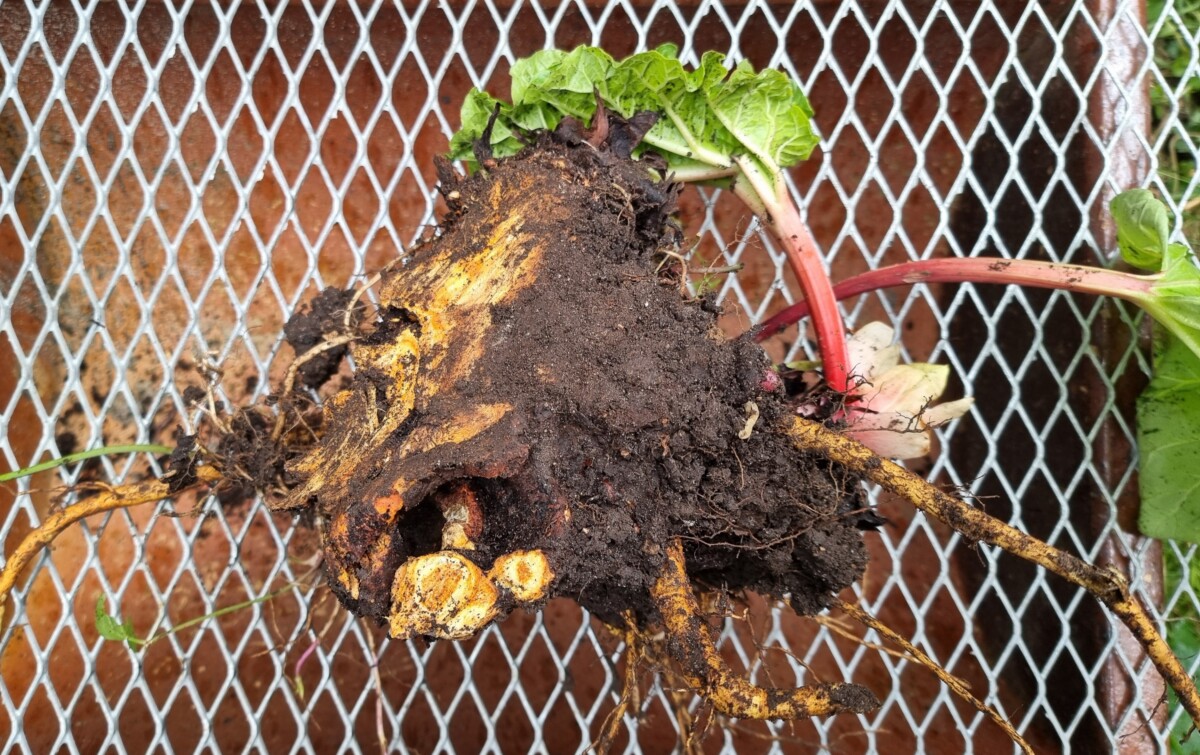
Early spring, as the plants are just starting to emerge from the soil, is the best time to move rhubarb. Yes, you can do it in the fall, too, but spring is always the easier option. You aren’t fighting with a lot of foliage, so it’s much easier to see the crown and surrounding rhizome growth.
With the buds just popping up out of the soil, you get a clear ‘map’ of where your rhubarb is growing.
Rhubarb is not a fast spreader, like some rhizomatic perennials. You really only need to divide it every three or four years. As rhubarb gets older, the center becomes woody and produces fewer stalks than the newer, outer areas of the plant. To continually enjoy fresh rhubarb each spring, you’ll need to dig up the plant and divide it, removing these woody parts.
You’re going to need something sharp to cut and pry up the rhizomes.
A shovel with a point is good, but if you want a more precise cut and a little more control over what you’re doing, may I suggest a Japanese hori-hori knife? A fellow Rural Sprout writer turned me on to them a few years ago, and it is the most reached-for garden tool in my collection. (The one I linked to is the same one I own.)
Use the shovel to dig up the entire plant. Now use a sharp knife, trowel, or hori-hori knife to cut the plant into smaller sections, disposing of any areas that are extremely tough and woody. Don’t make the divisions too small; you want to ensure each one has enough rhizomes to make a good start.
Replant the sectioned pieces, being careful to keep the crown of the rhubarb above the soil.
For a more detailed breakdown of the process, check out Lydia’s tutorial here.
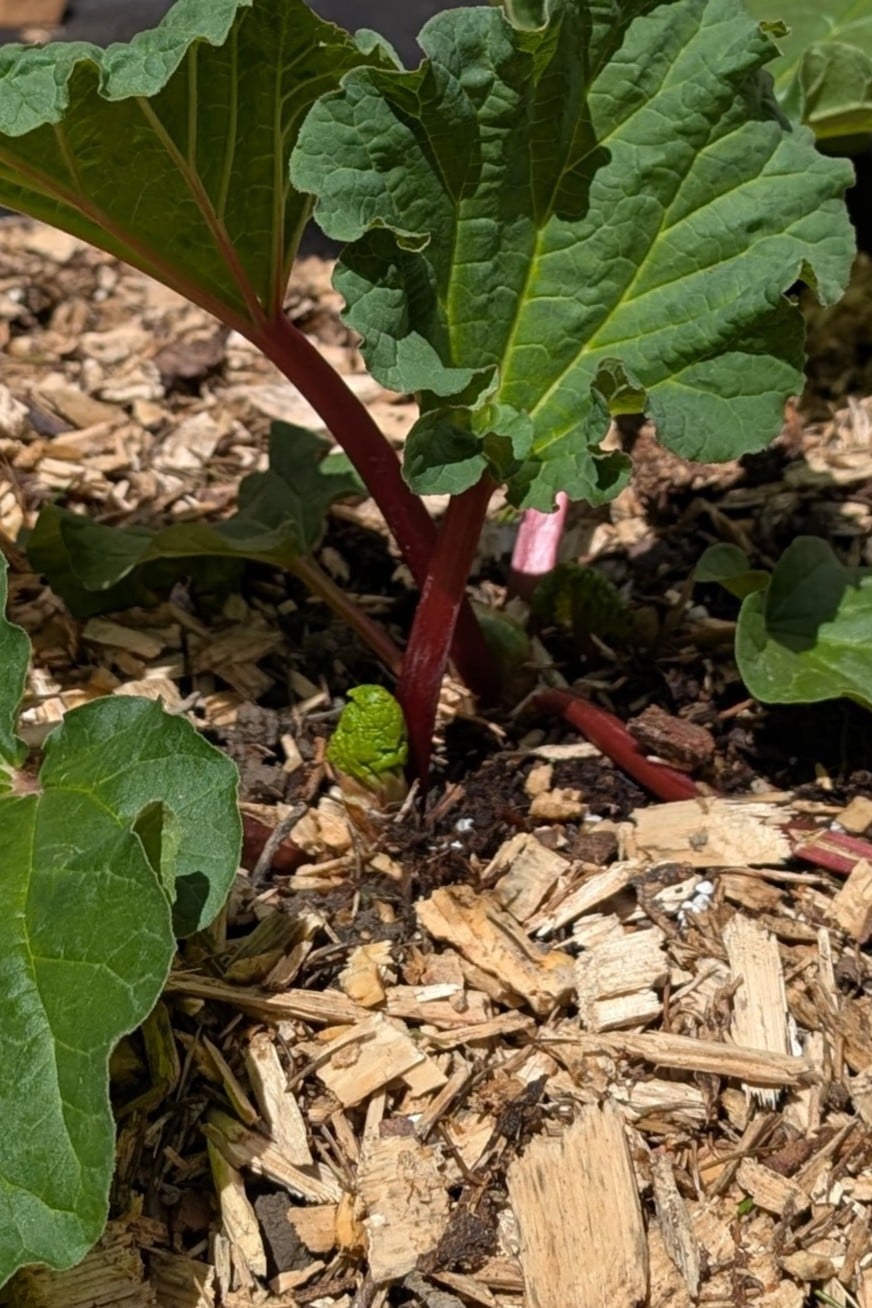
Spring is also the perfect time to move rhubarb plants that aren’t thriving to an area that will better suit their needs. Remember, rhubarb likes moist, well-draining soil and needs between 6-8 hours of sunlight a day. Morning sun is best as the afternoon sun can bake them.
The same process applies to relocation as to division, only without any cutting. You’ll need to lift the entire plant, being careful to get beneath it and get the whole mass. Then replant it in a more suitable location, ensuring the crown remains above the soil.
Fertilize & Mulch
Rhubarb is a heavy feeder and loves rich, loamy soil, so fertilizing and mulching every year will keep your rhubarb in tip-top shape. Choose a balanced fertilizer such as Espoma’s Garden-Tone and lightly scratch in about a cup around the base of the plant.
Just as important as fertilizer is mulching around your rhubarb.
You want to use well-composted manure, leaf mold or even straw. Put down a 2-3-inch layer of mulch around the base of the plant, keeping it away from the crown. The mulch helps retain moisture, suppresses weeds and keeps the soil cool when summer temps arrive.
More importantly, that mulch slowly breaks down each season, helping to enrich the soil and slowly add nutrients back to the soil for your rhubarb, especially if you’re using manure or leaf mold. Because rhubarb is a heavy feeder and picky about soil, it’s important to add organic matter every year.
Force for Flavor
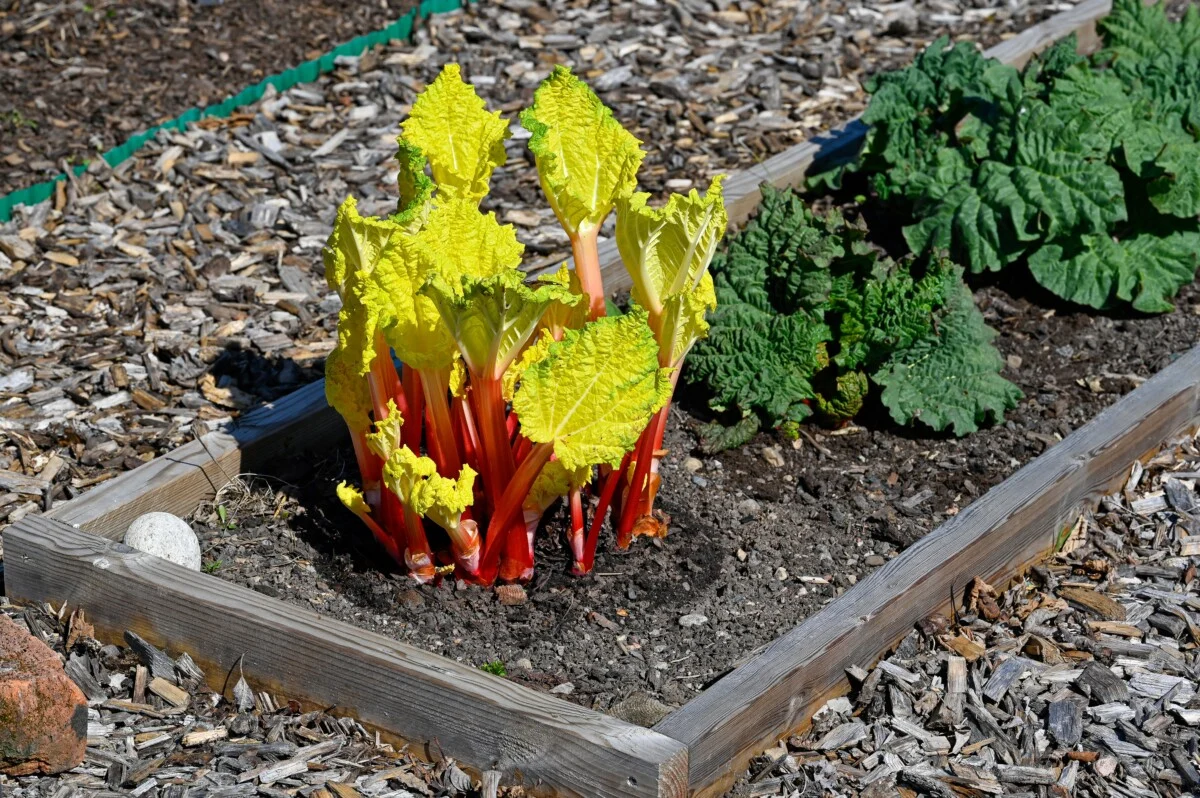
In late winter to early spring, you have a once-a-year opportunity – you can force your rhubarb. The trick is to catch it before it starts growing.
Um, okay, Tracey, what the heck does that mean?
The process is simple: you stress the plant by depriving it of light. The rhubarb responds by quickly putting out stalks, searching for light. Because they’re grown in the dark, these stalks are pale pink and extremely tender.
The end result is tender, juicy, pale pink stalks that are ready to eat much sooner than traditionally grown rhubarb. It’s even said that forced rhubarb is sweeter.
It’s important to note that since we’re intentionally stressing the plant, you should only force rhubarb that’s already established (two years or older). To force rhubarb, you’ll need a dark colored 5-gallon bucket and the full tutorial here.
Snap those Heads
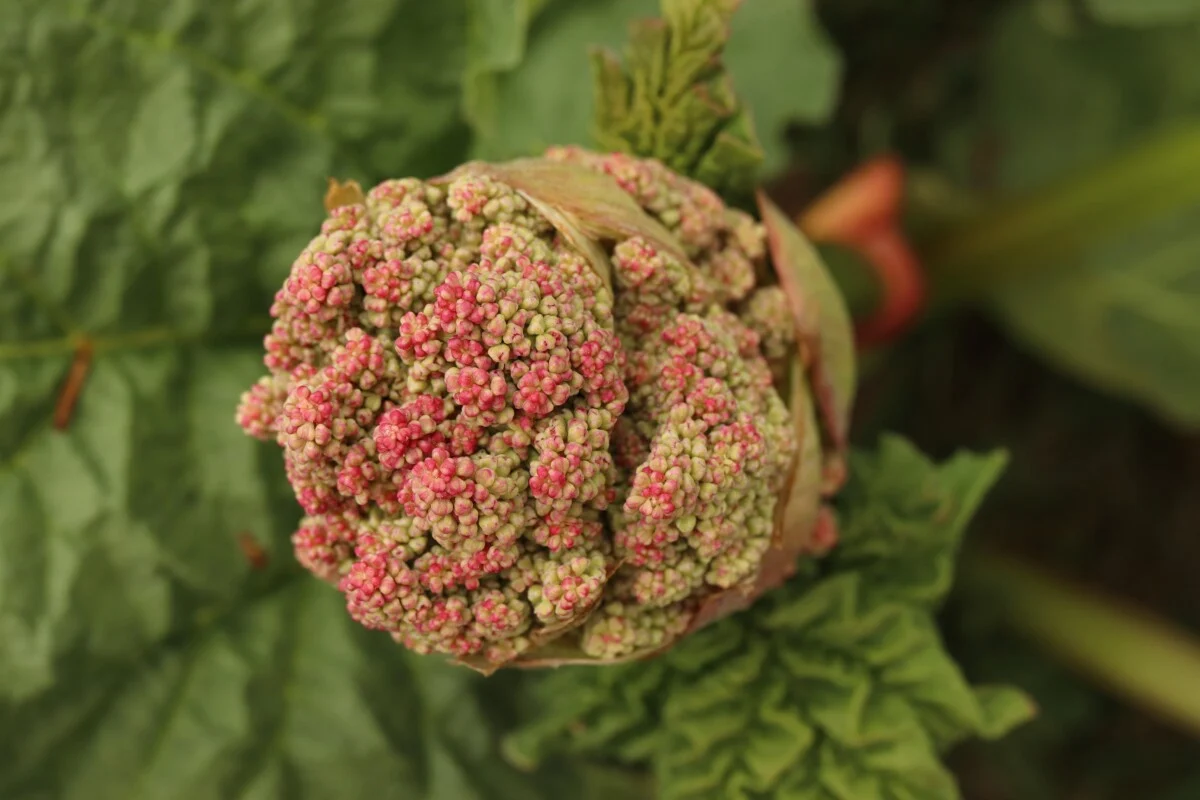
If you have an unseasonably warm or dry spring, your rhubarb might try to go to seed. Some varieties will also go to seed much quicker than others. Check your rhubarb often and cut off any seed heads as soon as they start to form. The flower heads look a bit like a small pink or white cauliflower.
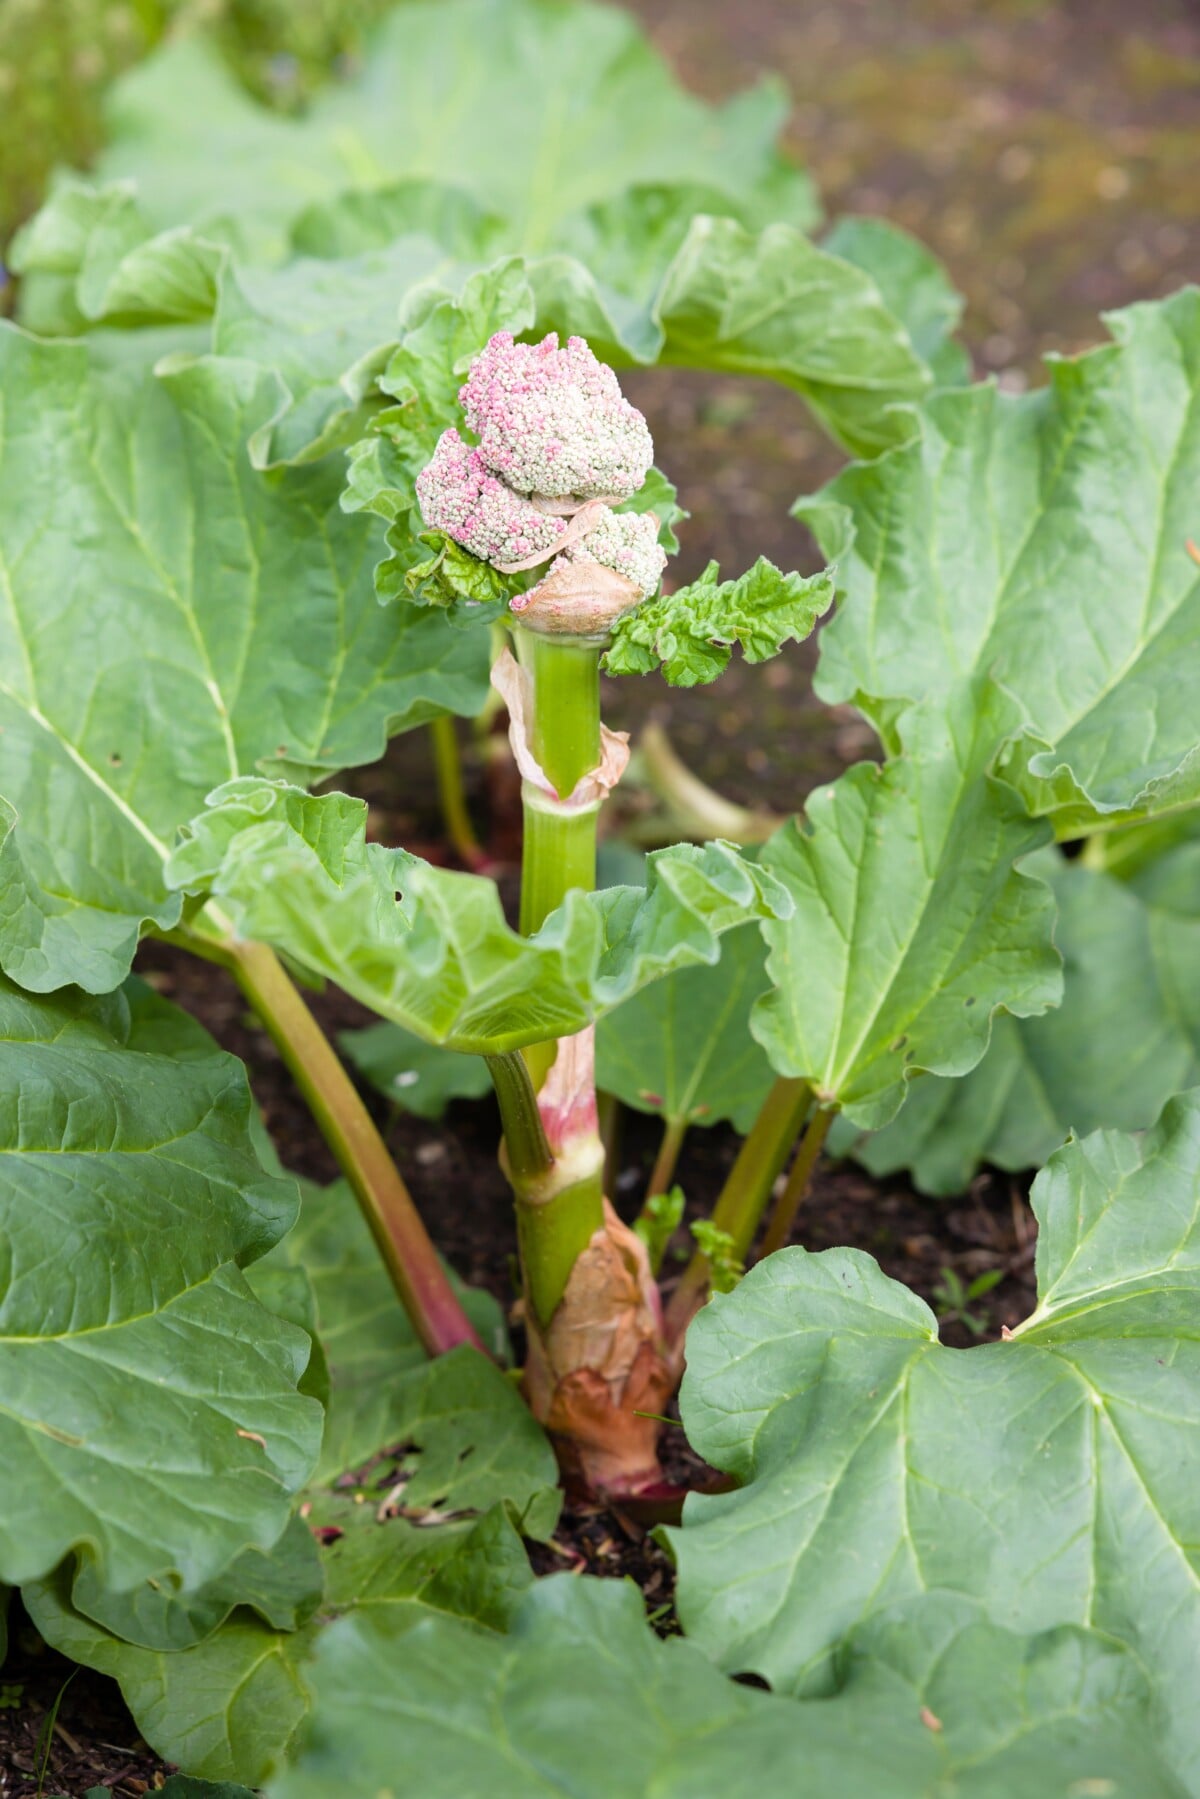
They’re usually pretty easy to spot before they begin flowering, as the flower stalks themselves are much thicker and rounded instead of having that classic U-shape. These flower heads will suck up nutrients, which ultimately means fewer edible stalks. Cut them off as soon as you can. Use a sharp, sterilized knife or garden snips (these are my favorites, they’re so handy) and cut it close to the ground.
Later in the season, when you’ve harvested about as much rhubarb as you can stand, it’s kind of fun to let a few stalks go to seed and grow flower heads. They’re quite beautiful in their own way.
Enjoying your rhubarb

Now that your spring rhubarb chores are done, it won’t be long until those first ruby red stalks are ready to pick. So here are a few things to keep in mind when harvesting and eating rhubarb.
Never eat the leaves.
The leaves are toxic, containing high levels of oxalic acid. Always cut the leaves from the stalk. (I prefer to do this as I’m picking rhubarb, as it’s one less thing to deal with once I take them to the kitchen.) The leaves can safely be composted or put to some interesting non-edible uses around your garden.
Don’t over-harvest new plants.

If you just planted rhubarb this spring, head to the farmer’s market to satisfy your rhubarb cravings. Your plant needs time to get established before you can harvest stalks from it. Here’s a breakdown of how much you can harvest in the first, second and third years with new plants until they are established.
Pluck your rhubarb, don’t cut it.
Up until last year, I had been harvesting rhubarb wrong. To be fair, I had no idea there was a ‘right’ way to pick rhubarb. I’ve always cut mine, but it’s better for the plant to twist and pull it from the ground. It makes for a cleaner break between the plant and the stalk as there is no open wound left. Read more about the how and why of this method here.
Finally, enjoy it!
In a world where you can go to the grocery store and buy pretty much any fruit or vegetable all year long, rhubarb is one of the last truly seasonal plants we grow. Its short season makes it all the more tasty, and worth waiting for. Make the most of this tangy treat this spring and don’t forget to freeze some for later.

Get the famous Rural Sprout newsletter delivered to your inbox.
Join the 50,000+ gardeners who get timely gardening tutorials, tips and tasks delivered direct to their inbox.