

Is there a better wintertime drink than hot chocolate? Here at Rural Sprout, we don’t think so.
Enjoyed by young and old, this classic is the perfect way to warm up on a cold, windy day, especially if you’ve been out in the snow.
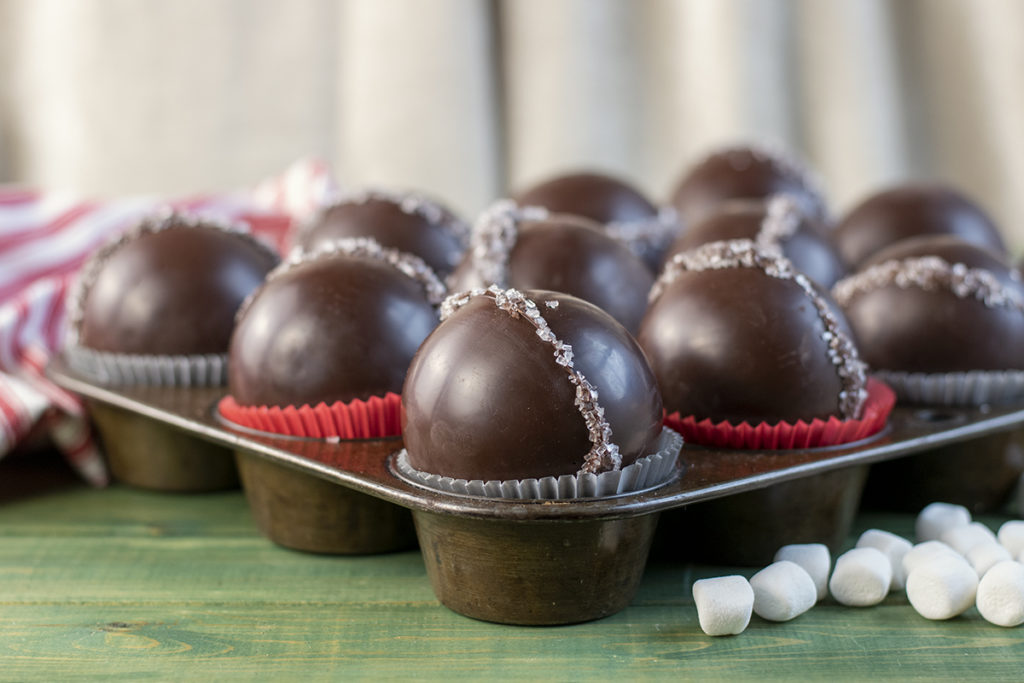
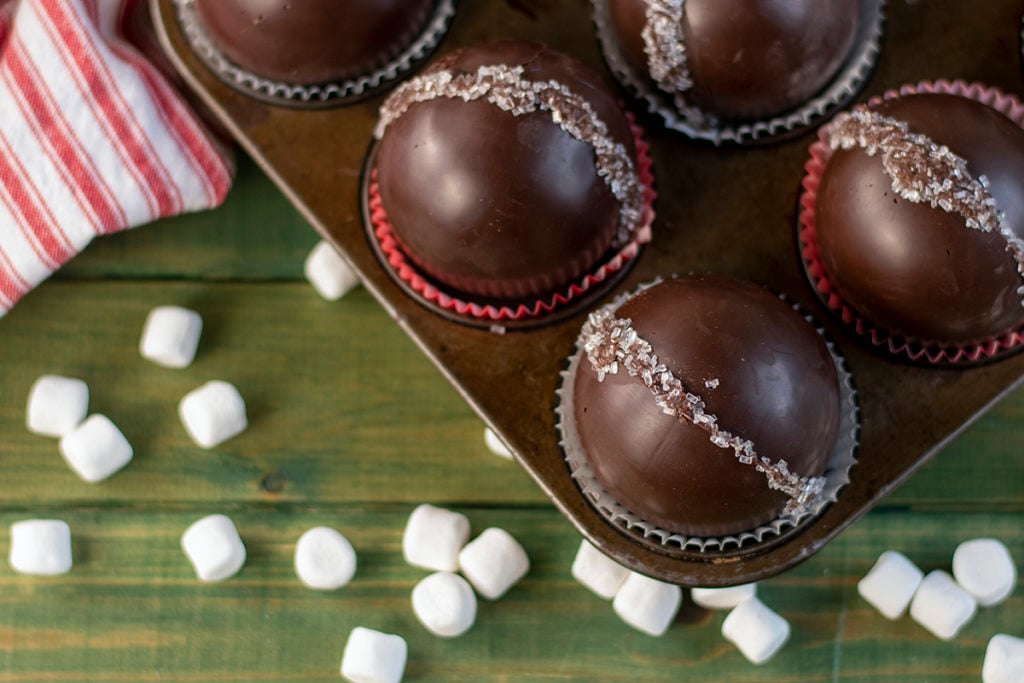
Hot chocolate bombs take hot cocoa to a whole other level of enjoyment.
If you’ve ever experienced one, then you know the thrill of seeing the chocolate melt open to reveal a flurry of cocoa mix and chubby marshmallows.
Last Christmas, I bought hot cocoa bombs for everyone’s Christmas stockings, and all enjoyed them. I decided to make them myself this year, as buying them was quite spendy. The resulting cocoa bombs are just as good as the ones I purchased; only I get to choose what goes in them.
Keto hot cocoa mix, anyone?
To make hot cocoa bombs, you’ll need a few pieces of special equipment, but nothing too expensive or hard to find. If you spend a lot of time in your kitchen, you’ll most likely already have everything you need. Patience and a good block of time are needed, too, because we’ll be tempering chocolate.
Yes, I know. I find it intimidating, too; this is why I’m the cook, not the sweets creator in our family. Good chocolate outcomes require specific temperatures.
But trust me, tempering chocolate isn’t as scary as it sounds. I’ve got a couple of tips that will make it go smoothly. To get the best results, read through these instructions a couple of times so you’re familiar with the process before you begin.
Working with chocolate is an altogether different experience than baking or cooking. I think it’s something everyone who loves to cook should try at least once.
First, let’s take a look at what we’ll need.
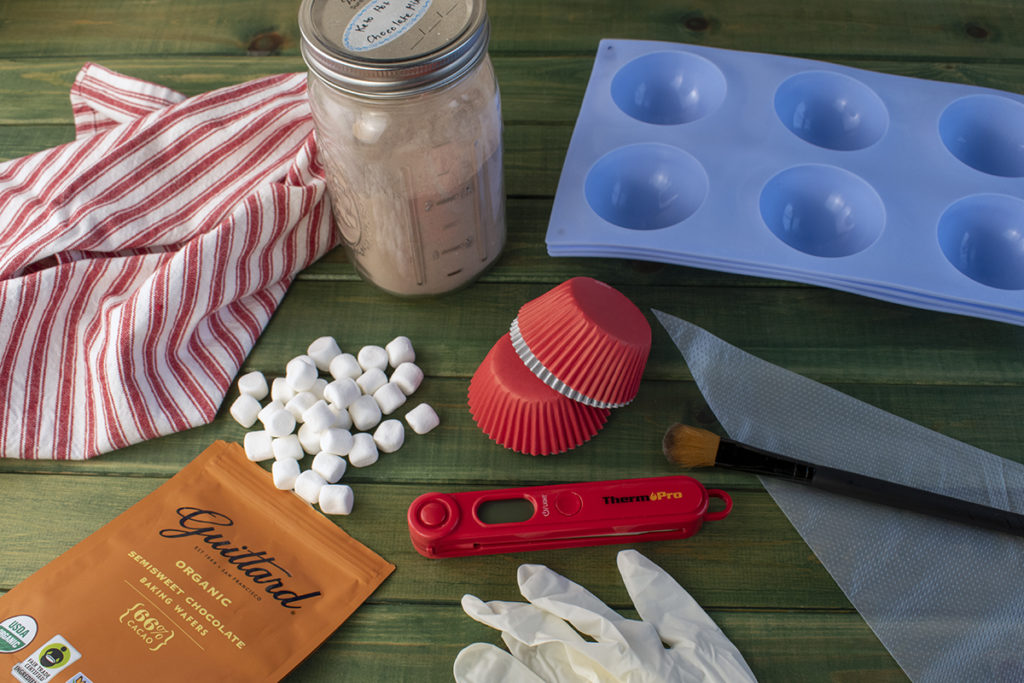
1 ½ to 2 lbs. of Quality Chocolate
This is ultimately what will make or break your hot cocoa bombs. For starters, skip the candy-making chips meant to be used for melt and pour type projects. Yes, this type of chocolate is easier to work with, but the flavor is terrible.
I would also skip milk chocolate for these; it’s harder to work with and can give you an overly sweet hot cocoa. Good semi-sweet chocolate will give you the best hot chocolate. Your cocoa mix is already going to be sweet, so you don’t want to use a chocolate that will make it too sweet.
Tip #1
Bar chocolate is the easiest to work with, and we’ll talk about why later, but as you’ll see, I opted for semi-sweet baking chocolate that came in large chips. They were fussier to work with, and I’ve learned my lesson. Bar chocolate is the way to go.
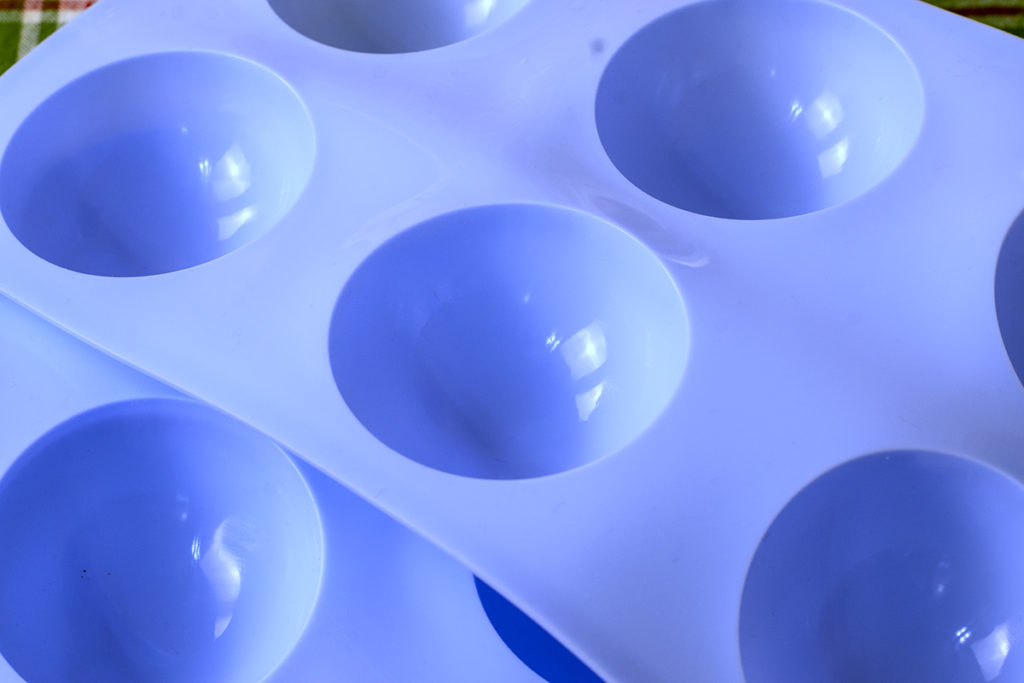
Silicone Molds
I’ve seen tutorials that use acrylic molds, but in my opinion, silicone is much easier to work with if you’ve never worked with chocolate before. Plus, the molds are less expensive.
Choose a mold that is on the larger side, around 2.5″ across. You’ll need plenty of room to hold cocoa mix and marshmallows. I used these large six-hole molds for this tutorial.
Although silicone is dishwasher safe, it’s best to clean your molds by hand in the hottest water you can stand (kitchen gloves help) and use a good degreasing dish detergent.
Tip #2
For shiny chocolate, you want super clean silicone. Soak your silicone molds in a sink full of hot water with a cup of vinegar for half an hour. Then rinse your molds and wipe them dry with a microfiber dishtowel. If you have hard water (like me), this will remove the powdery residue that can occur.
Hot Cocoa Mix of Your Choice
I am not a fan of sugary cocoa mixes, so I make my own hot cocoa mix using this keto recipe. You can use whatever cocoa mix you prefer. You’ll be adding two tablespoons of cocoa mix to each bomb.
Marshmallows
Seeing all those marshmallows pop up is part of the fun of making a hot cocoa bomb. Mini marshmallows work best as you can fit quite a few, and they’re soft, unlike the super tiny marshmallows that usually come in hot cocoa packets.
Disposable Gloves
This is entirely up to you, but you will leave fingerprints on your bombs if you handle the chocolate spheres barehanded. If you’re making them for you and your family, it’s not a big deal, but if you’re planning on giving them as gifts, you may wish to use gloves.
Digital Thermometer
Yes, you have to have a thermometer, and yes, it has to be digital (or infrared). As I mentioned above, chocolate requires very specific temperatures. You need to be able to have an exact measurement, quickly, of your chocolate while you’re tempering it.
Lucky for you, you can pick up an inexpensive one on Amazon. As you can see in the picture above, I have this ThermoPro thermometer. It’s around $15 bucks and works like a charm.
Piping Bag or Quart-sized Plastic Zipper Bag
You’ll need to pipe melted chocolate around one half of your bomb to “glue” the two pieces together. If you don’t have a piping bag, a plastic zipper baggie works just as well. Just snip one of the corners.
Clean Paintbrush
You will need an unused, clean paintbrush to brush the chocolate into the molds. Do not use one you’ve used for other crafts; remember, we’re making food. If you wash the brush first, make sure it’s 100% dry before dipping it into your chocolate, or you could cause your melted chocolate to seize. Melted chocolate and water don’t mix!
Paper Baking Cups
Regular-sized paper muffin cups work great to set your finished hot cocoa bombs in.
Muffin Tin
While it’s unnecessary, I found that putting my sphere halves in paper cups in a tin made filling everything and sealing them easier.
Sanding Sugar or Sprinkles
I’ve seen plenty of tutorials that show how you can use your finger to smooth the seal of chocolate that holds the two halves together. Despite my very best efforts, I could not get it to look nice. I kept getting the halves together crooked, or it looked like a toddler with fingerpaints smoothed the chocolate.
So, to make this project as easy as possible, I rolled the finished seems in sanding sugar while the chocolate was still soft. They looked much nicer, and it was so much easier.
Once you’ve gathered all of your supplies, it’s time to make hot chocolate bombs.
Prep your work area before you start melting your chocolate. It’s easier to work quickly with your chocolate all in one go than to have to remelt it because you’re looking for a piece of equipment or you weren’t ready for the next step.
Open the bag of marshmallows and put them in a bowl. Get a spoon for the hot cocoa powder. Line your muffin tin with your muffin papers if you’re using one. Put your gloves on, etc.
Chopping, Melting and Tempering the Chocolate
First thing is first – finely chop your chocolate. Yes, it’s time-consuming, but it will make tempering so much easier. This is why using bar chocolate is the way to go; it’s much easier to chop from a block.
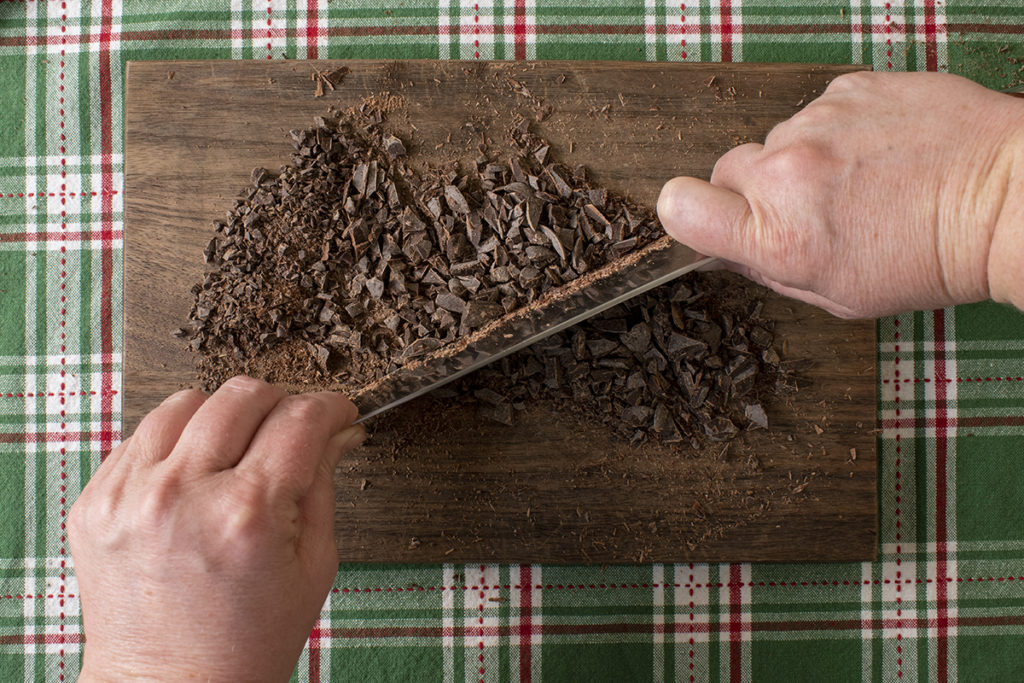
Learn from my mistakes! I didn’t chop my chocolate because it was in chips. I figured it wouldn’t make that much difference, but it took forever and a day to slowly melt and temper the chocolate.
Use a sharp chefs knife and chop, chop, chop your chocolate into fine slivers. Then chop it a bit more for good measure!
To make hot chocolate bombs, first, the chocolate must be tempered. What exactly does this mean?
In a nutshell, tempering chocolate means we’re heating it and cooling it to a specific temperature, which causes the cocoa butter to crystalize and gives you that nice hard, shiny chocolate finish. Otherwise, your chocolate will be soft, won’t set and hold its shape.
Tempered chocolate should be glossy and snap when broken in two.
Traditionally, you temper chocolate using a double boiler over steam, but this method has its drawbacks: the steam can get into the chocolate and cause it to seize. (Get all grainy and gross.)
We want to make tempering as painless as possible, so we will use the microwave and a glass dish.
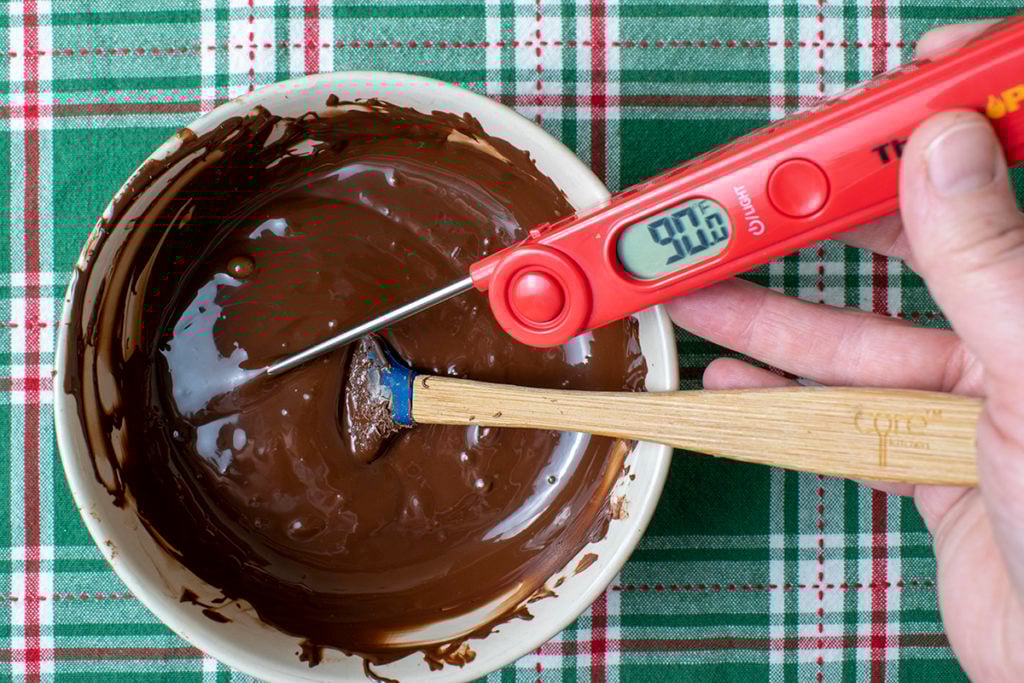
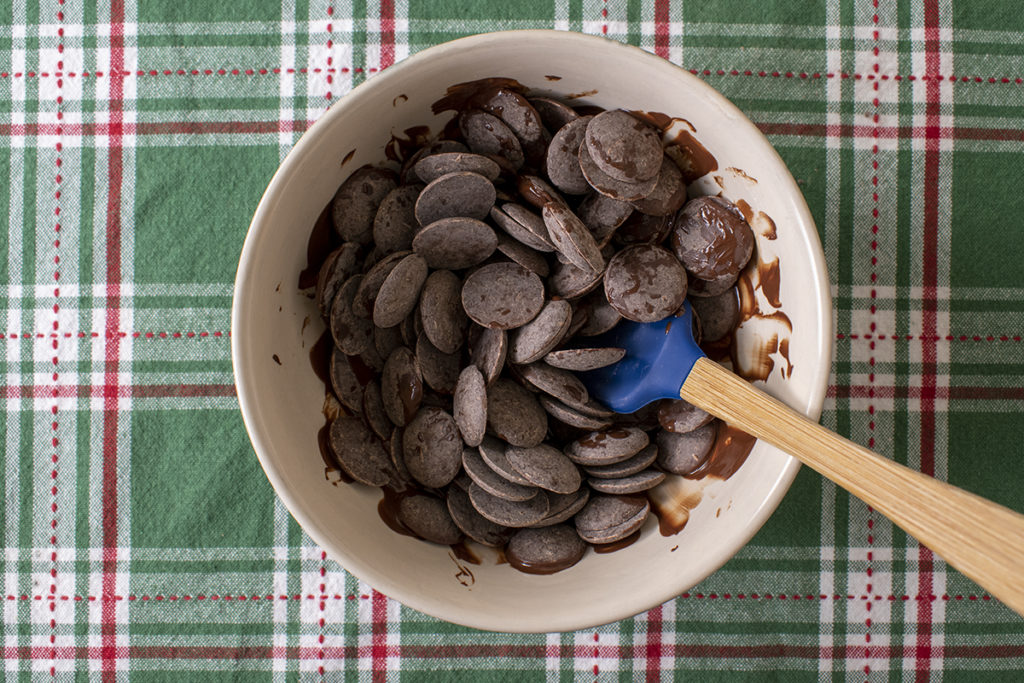
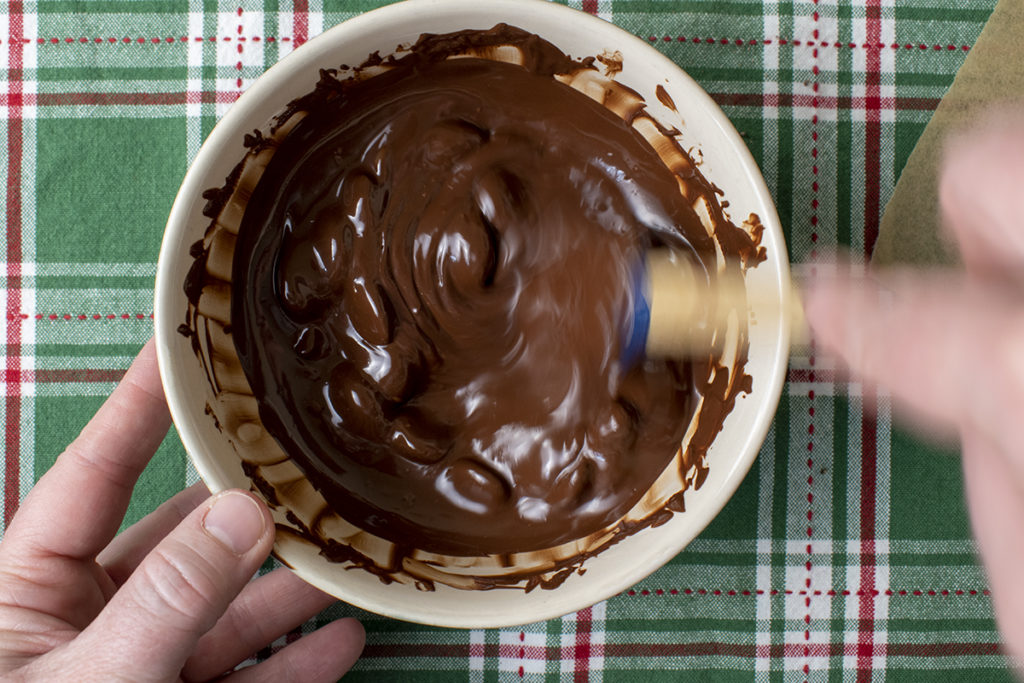
Place your finely chopped chocolate (nice chopping, by the way) into a microwave-safe glass bowl and have your digital thermometer handy.
The key here is low and slow.
We’re not using the heat from the microwave to melt the chocolate. We’re heating the bowl in the microwave and using the residual heat in the bowl to melt the chocolate at low heat, slowly.
Microwave the chocolate for 30 seconds. That’s it, just 30 seconds.
Begin stirring your chocolate, scraping the sides as you go. Check the temperature of your chocolate; according to the Sugar Geek Show, you don’t want it to go above 90 degrees F. Keep stirring until the chocolate cools down a few degrees and isn’t melting anymore.
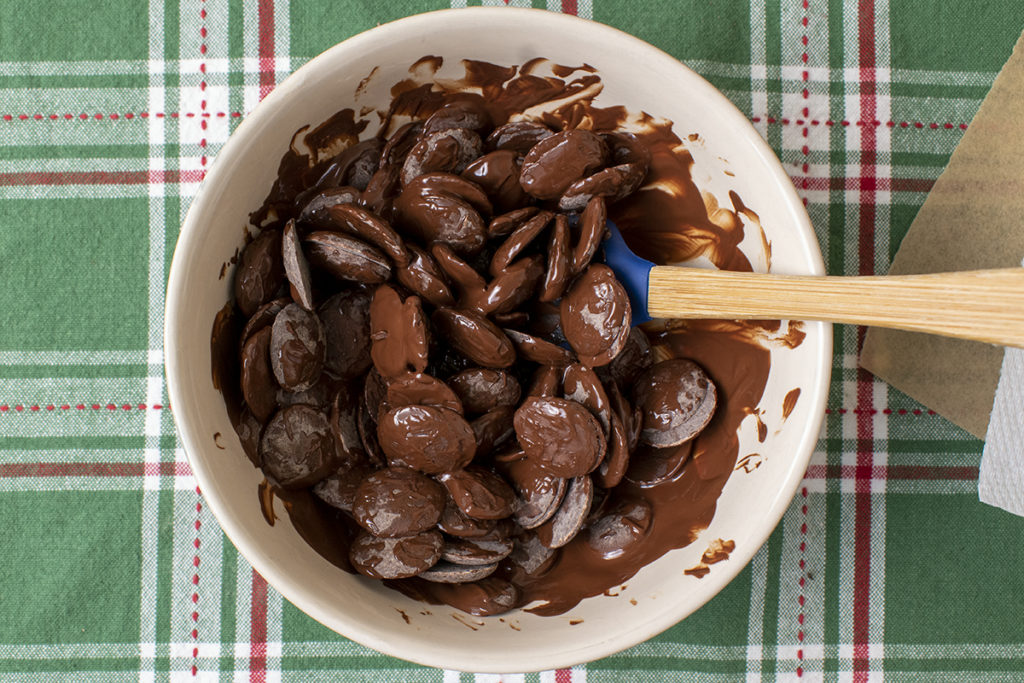
Pop it back into the microwave for 15 seconds.
Again, stir, letting the residual heat in the bowl melt the chocolate. You’ll want to repeat this process, heating for fifteen seconds until your chocolate is melted completely. Always be sure your chocolate cools a bit before microwaving it so you don’t go over 90 degrees.
If you happen to go over 90 degrees F, don’t panic; add in a bit more chopped up, un-melted chocolate and continue stirring and reheating.

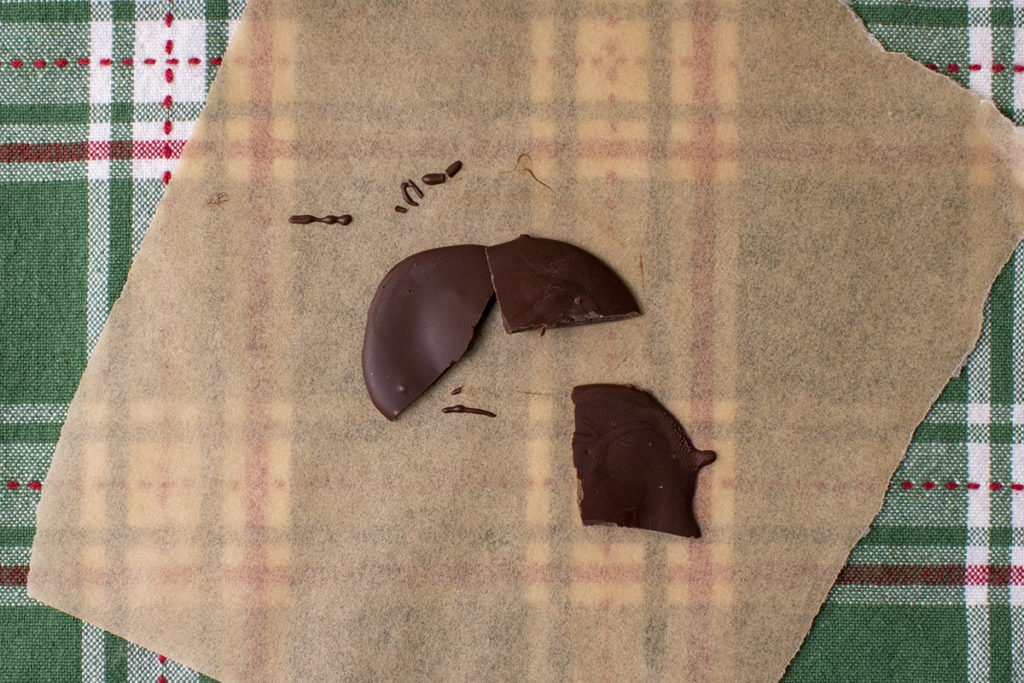
Once your chocolate is completely melted at 90 degrees, spread a bit on a piece of parchment paper and pop it into the fridge for five minutes. After that time, it should be slightly shiny and snap cleanly in half when you break it.
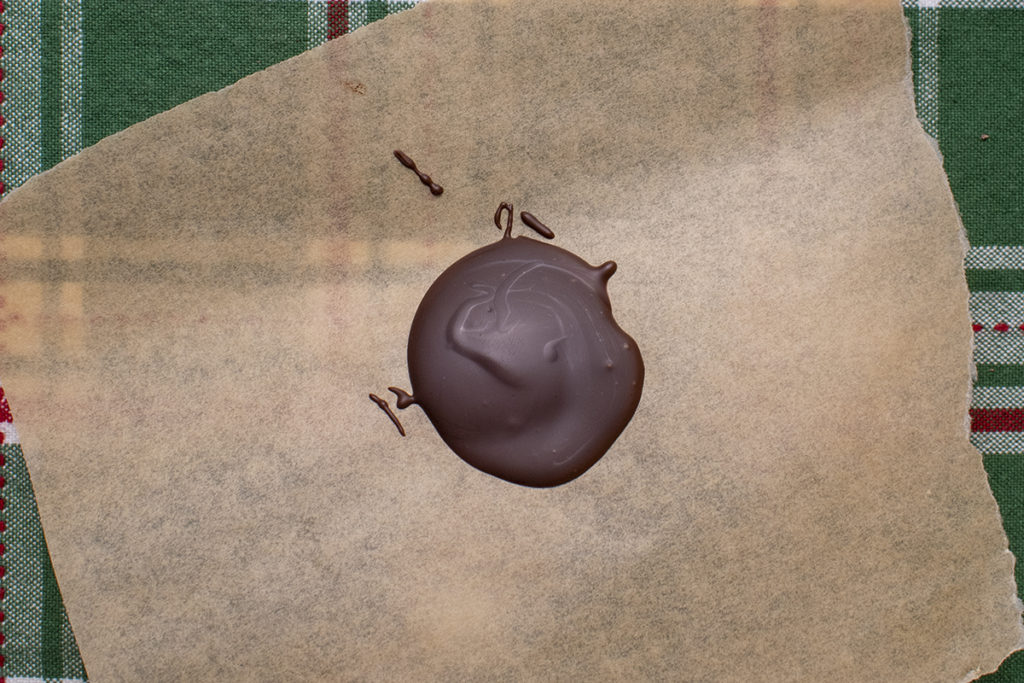
If your chocolate is still soft and bendy or has a white residue on top, add more chopped chocolate to the bowl and slowly melt it. Then retest.
Throughout this project, if your chocolate hardens and you have to remelt it, always do a fridge test with a bit of chocolate. You don’t want all of your hard work to fall apart with untampered chocolate.
Make the Chocolate Shells
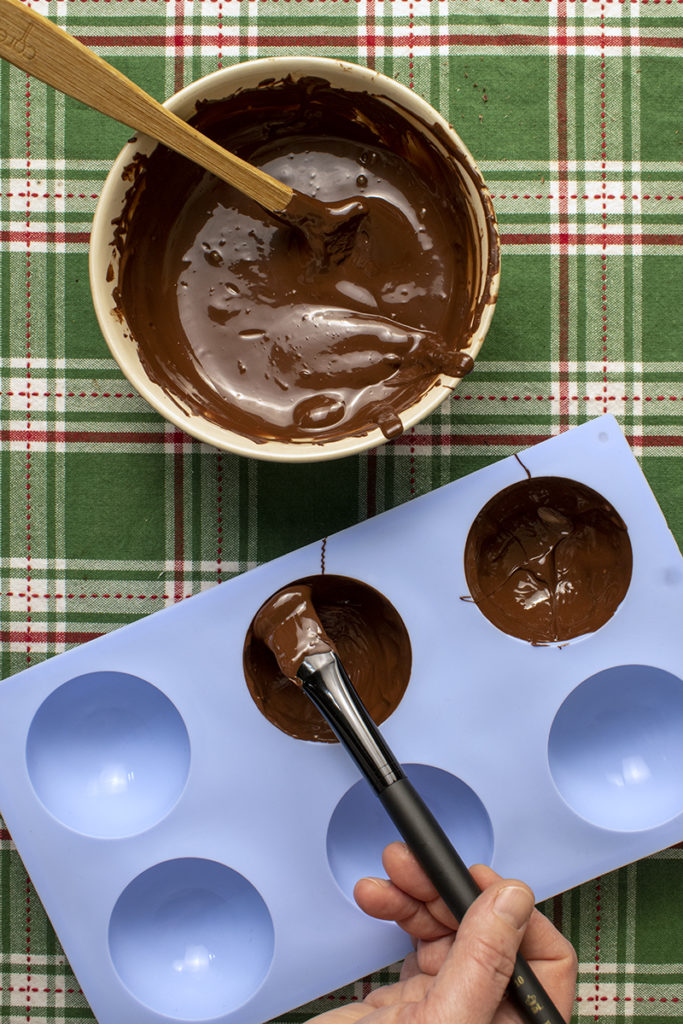
Now that your chocolate is tempered paint each mold’s insides with chocolate using the clean paintbrush. You want a good, thick layer of chocolate, and it’s important to make sure you form a thick lip at the top of the mold as that’s where your seal will be. I found that scraping the excess chocolate off the brush at the top of the mold makes for a good, thick lip.
Once your molds are filled, place them in the fridge for ten minutes. Take them out of the fridge and gently remove them from the mold.
Repeat this process as many times as needed to make your desired number of hot chocolate bombs. I made a dozen bombs with about 1 ½ lb. of chocolate.
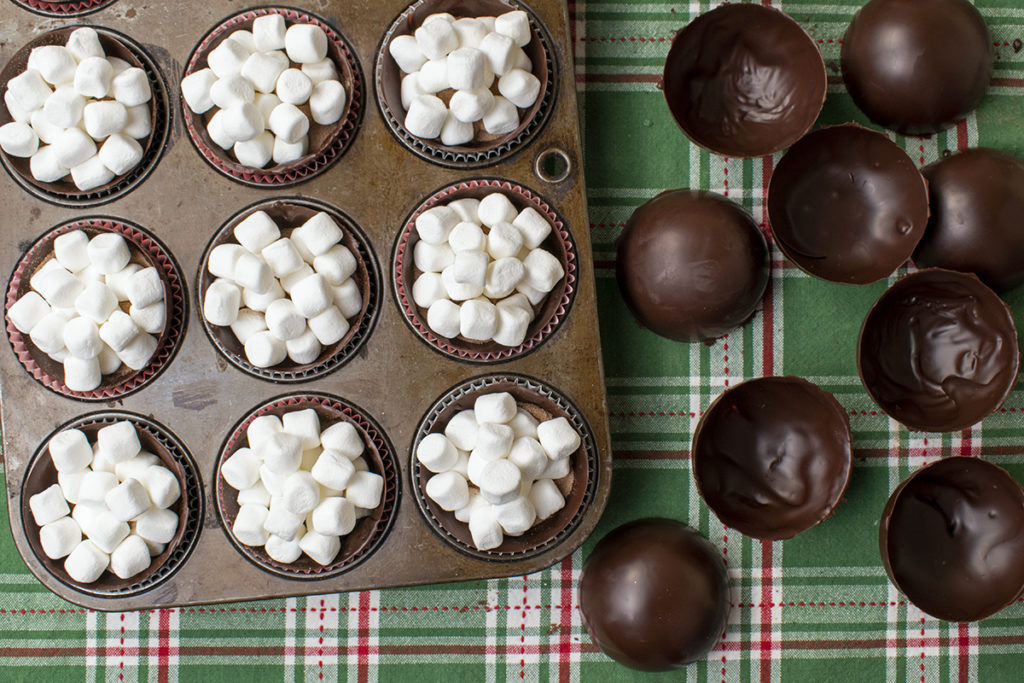
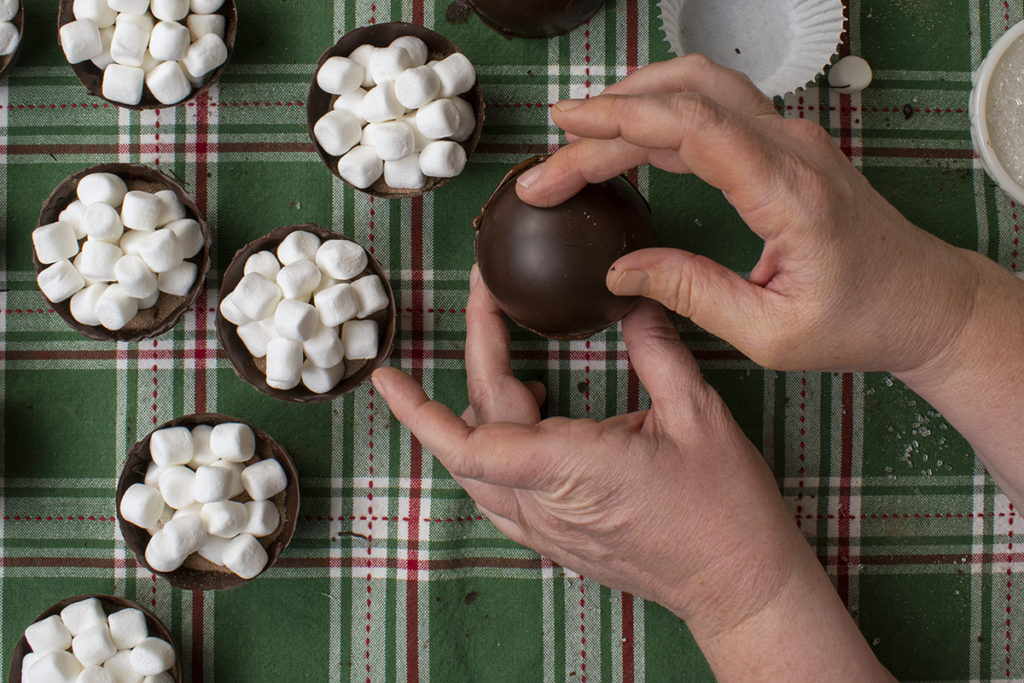
Divide the spheres in half, one half for filling with marshmallows and cocoa mix, and the other to use as lids.
Fill & Seal the Molds
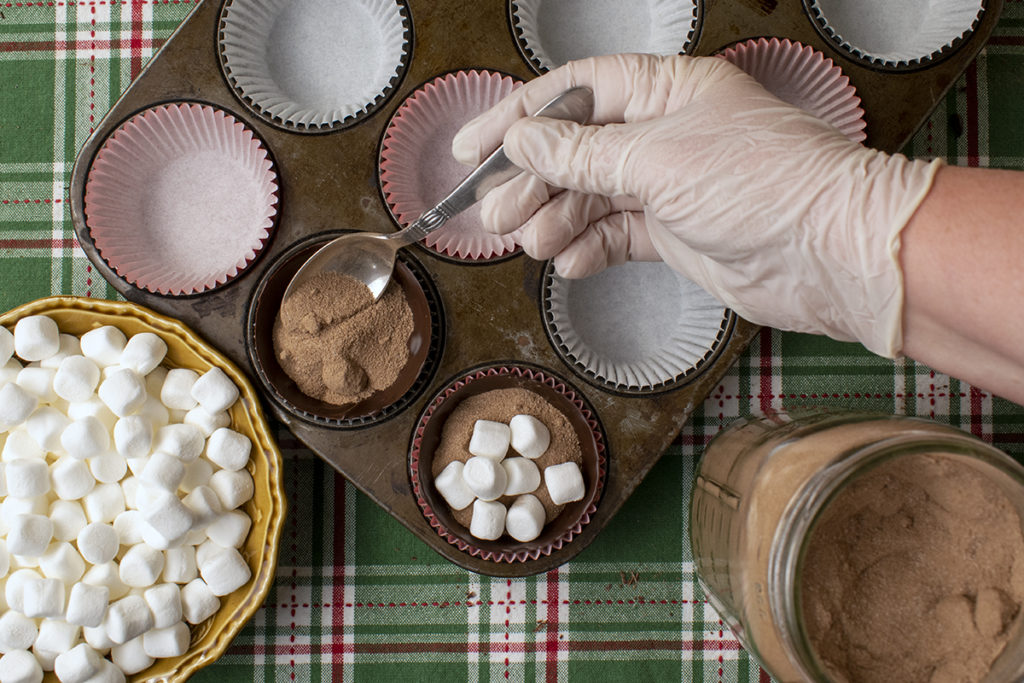
Spoon two tablespoons of cocoa mix into the chocolates and fill them with marshmallows. Be sure not to overfill, or sealing it will be difficult. I found with the mold I have mentioned above that I could fit roughly a dozen mini marshmallows inside it.
Remelt your chocolate and put it in a piping bag. Working quickly, pipe a line of chocolate around the rim of the filled bottom half, then place an empty mold on top, gently squishing it into place.
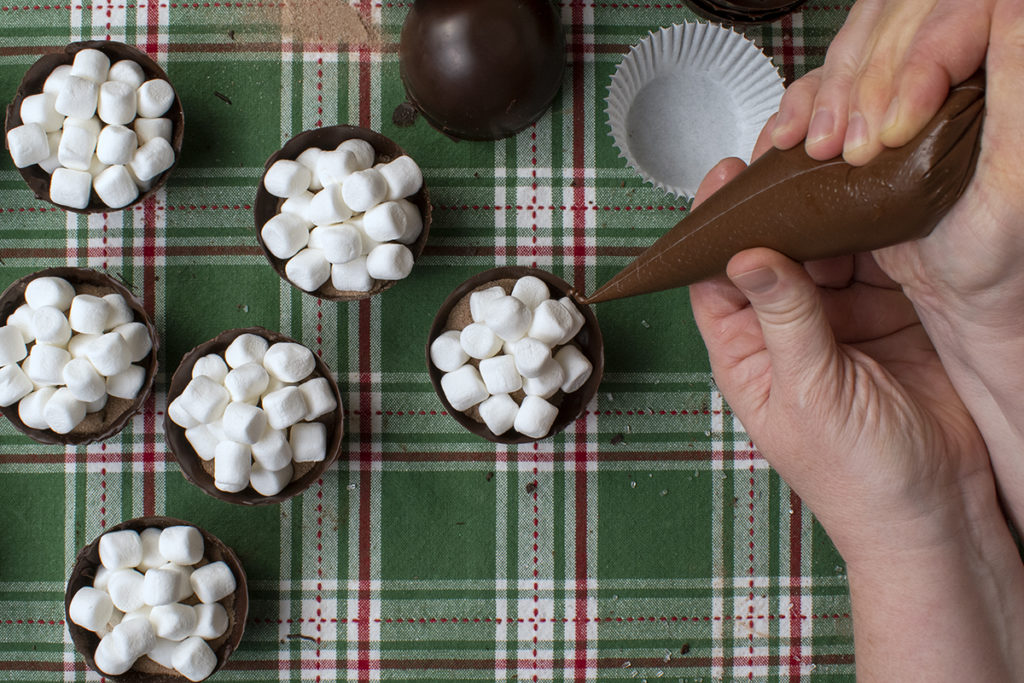
There must be no gaps; otherwise, the cocoa mix will spill out. I piped a thin bead of chocolate around the seam to seal each cocoa bomb completely and then rolled it in sanding sugar.
Tip #3
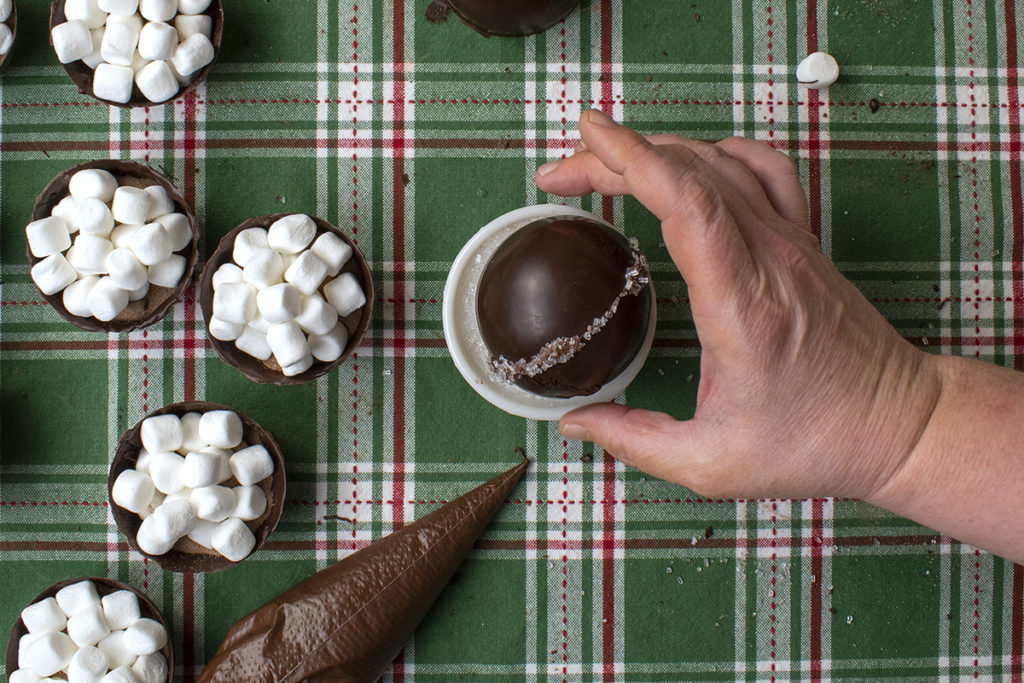
Work quickly when doing this and change positions while holding the chocolate bomb; otherwise, you will melt a dent in your chocolate sphere from the warmth of your finger. Ask me how I know.
The chocolate will dry, holding the sanding sugar in place. And that’s that!
Making Hot Chocolate with Your Bombs
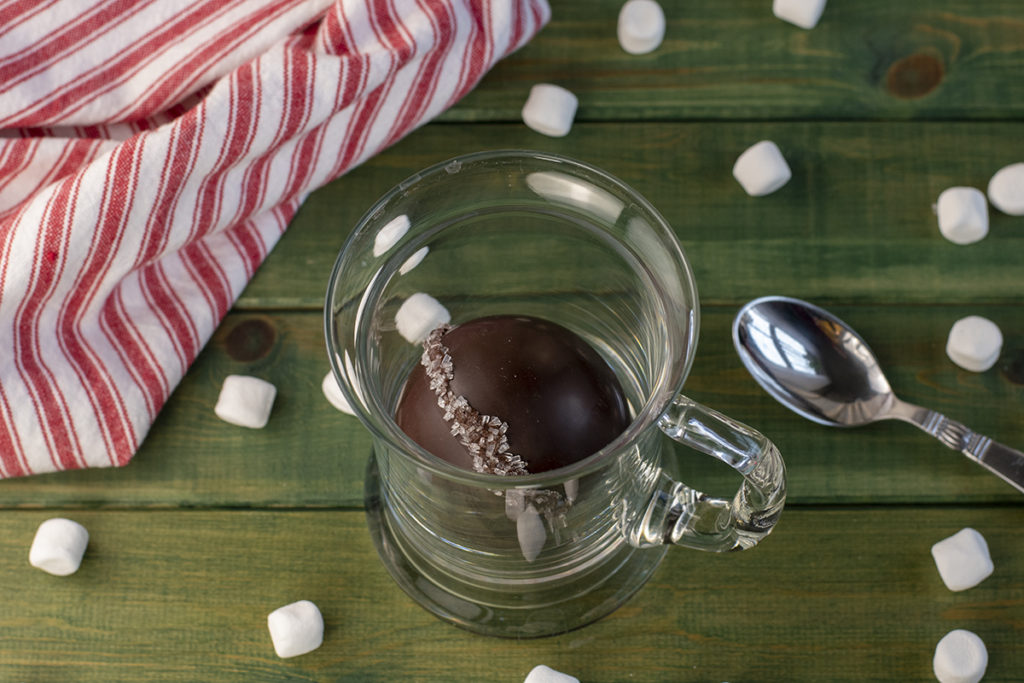
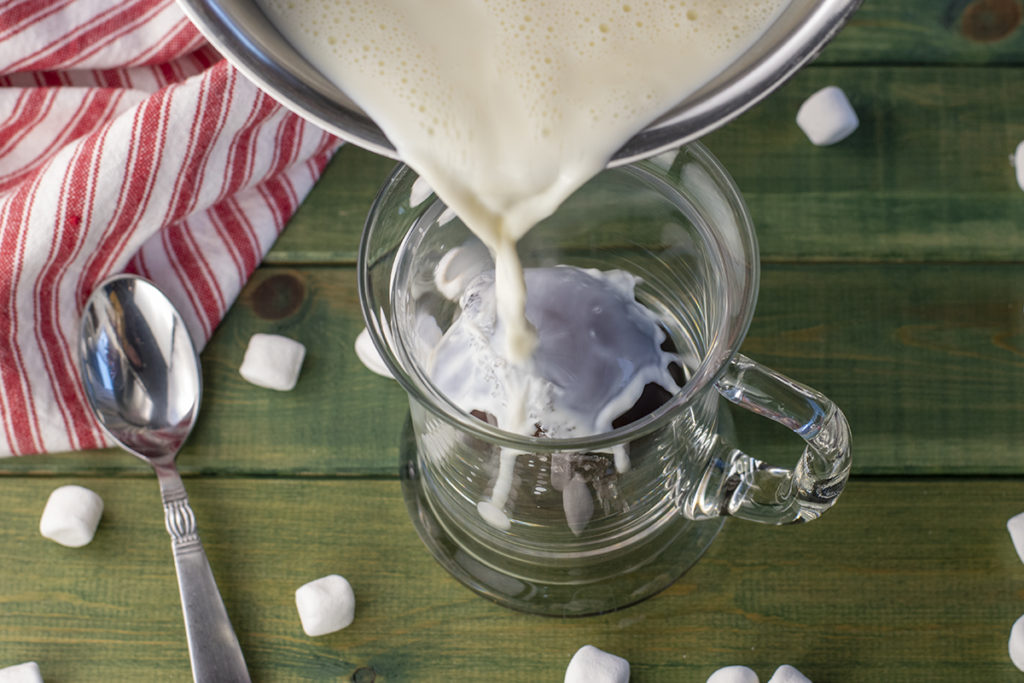
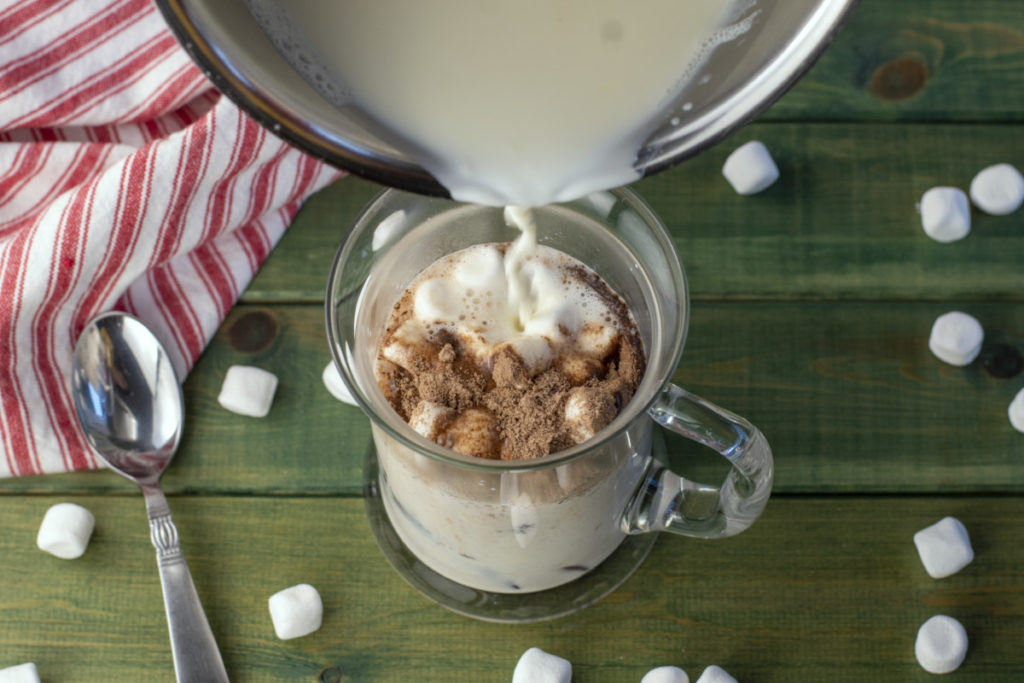
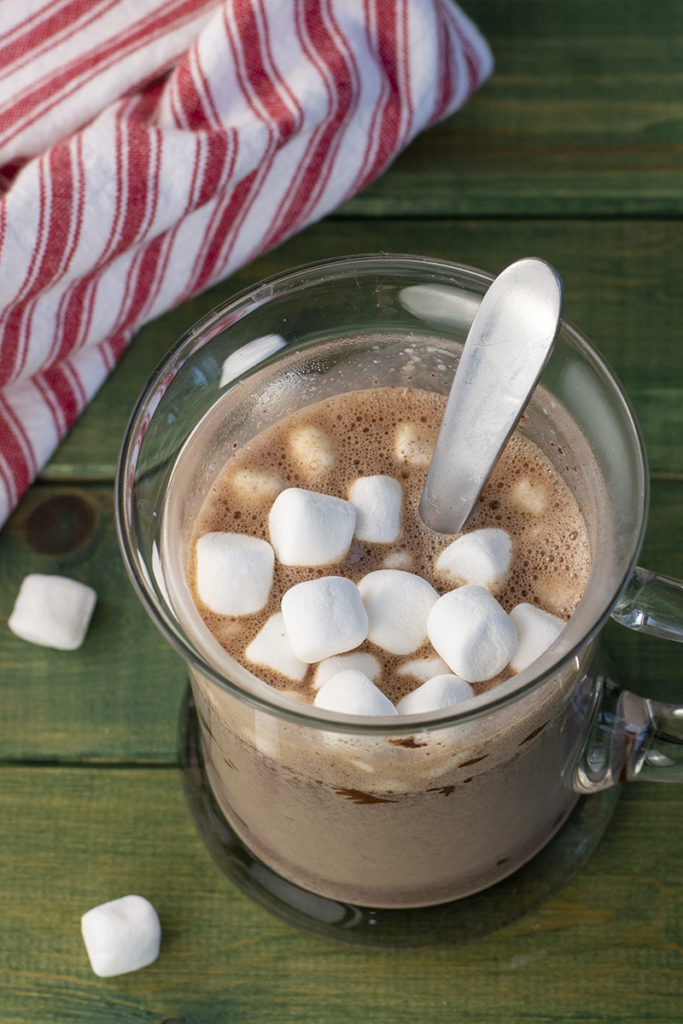
To enjoy one of your tasty hot chocolate bombs, place one in a mug. Heat 12 to 14 oz of milk to steaming (around 200 degrees F). Pour the milk over the cocoa bomb and watch as the chocolate melts into marshmallowy cocoa goodness. Stir to dissolve the rest of the chocolate and enjoy!
Notes
If you’re unfamiliar with the candy-making process, this project is a lot to take on. It’s not hard, per se, just time consuming and fiddly. But it’s still a good beginner project.
Making hot chocolate bombs is definitely one of those projects that will leave your kitchen a mess at the end. You will be covered in chocolate.
I’ve seen some tutorials suggest this is a good kid’s project. I think most little kiddos would get frustrated, so save this for the tween and teen set.
After all, is said and done, I can see this is one of those projects that you’ll get better at the more you make. (I think next year I’ll buy them.)
You can skip the marshmallows and use other cocoa add-ins. There are so many great things you can put in these besides marshmallows. To name a few:
- Crushed candy canes
- Chopped Andes Mints
- Mini M&Ms
- Holiday-themed sprinkles
- Reese’s Pieces
- Malt Powder
I hope you have fun making these delicious hot chocolate bombs. They are definitely worth the time and mess. If you make them as gifts, be sure to save a couple for yourself. They make perfect stocking stuffers, too.
For more great stocking stuffer ideas, you’ll want to read:
30 Easy DIY Stocking Stuffers That Everyone Will Actually Love
Once you’ve mastered hot chocolate bombs, give tea bombs a try:
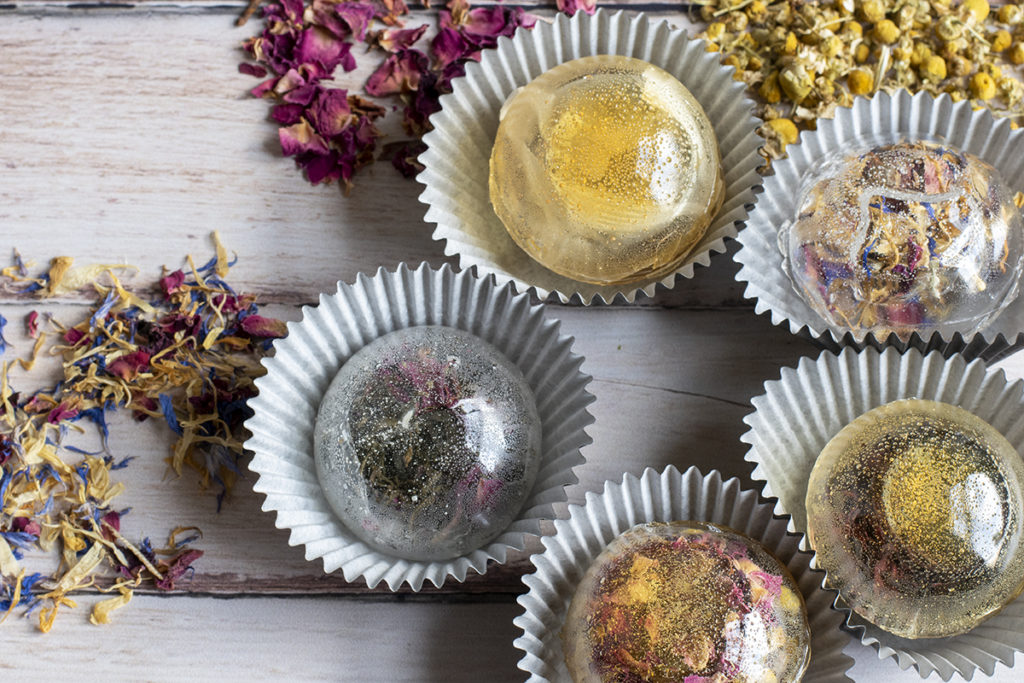
How to Make Tea Bombs – A Beautiful & Impressive Gift Idea

Get the famous Rural Sprout newsletter delivered to your inbox.
Join the 50,000+ gardeners who get timely gardening tutorials, tips and tasks delivered direct to their inbox.