

You’ve got to love dandelions.
They’re bright hey-look-at-me-yellow. You can often find these tough flowers growing up out of the cracks in the pavement in the middle of a city.
And boy are they prolific, creating a dazzling sunshine carpet on lawns and meadows everywhere.
And yet, how long have we been battling their persistent abundance?
The wise among us have known what a treasure these little flowers are – every part of the plant is edible and good for you!
And more importantly, these humble flowers are one of the first foods that nourish our pollinators each spring.
It’s only recently that we have begun to ease up our war against this ‘weed’.
And not a moment too soon.
We are learning the hard way about the importance of these flowers and their link to the pollinators they support.
So, let your lawn run wild, and the dandelions grow freely. You can make so many delicious things with them. Check out our post, where Cheryl Magyar shares sixteen great ways to use these magical flowers.
In this article, we’re going to learn my favorite way to enjoy these happy flowers – dandelion mead.

Liquid sunshine is the only way to describe it, one sip, and you’ll see what I mean. For countless foragers and homebrewers, this is the first ferment of the new season, made year after year.
I’m going to share two recipes for dandelion mead.
Both are for one-gallon batches. If you’ve never made mead or wine before, this is a great project to get you started. It’s easy to do, and you’ll have learned the basics of making mead by the time you’re finished.
If you start both recipes at the same time, you’ll have a gallon of pale, crisp, fizzy brew to enjoy just as the summer heat kicks in. There’s nothing nicer than sipping a cold glass of sparkling dandelion mead after a hard day of work in the garden.
And you’ll have one gallon – about 5 750 ml wine bottles – of bottle-aged mead to sip during the long dark hours of winter.
This second batch will be ready to drink right around the time you need reminding that spring is just around the corner. And its golden hue and bright taste will undoubtedly do the trick.
Our first recipe is for a wild-fermented short mead.
Short meads aren’t meant to age in a bottle, but instead, they should be enjoyed as soon as they’re done fermenting. They start with a lower sugar content, which means a faster ferment time and lower overall alcohol content.
We’re going to make it even easier to brew this gallon, by using the wild yeast already on the flowers to get our ferment going.
Wild yeast fermentation gets a bad rap in the home-brewing community; it’s often blamed for creating funky flavors within a brew or wine. And because you are using naturally occurring yeast, it’s harder to recreate consistent results if you get an especially good batch. Using a commercial yeast, ensures the same results, batch after batch.
However, wild yeast fermenting is how we have brewed for centuries. It’s starting to make a comeback due to its ease and the increased interest in more natural brewing methods without a lot of fuss and extra chemicals.
Nearly all of my homemade wine, cider, and meads are wild fermented; I have yet to have any weird tasting batches.
And having especially tasty meads, that I know I’ll probably never be able to recreate, is part of the magic of brewing with wild pixies (yeast).
The second recipe will be for a bottle-aged mead.
For the aged mead, we’ll be using commercial wine yeast. Since we’re going to be aging this mead, we want to ensure good results after all of our efforts.
While our first batch will be light and bubbly, this second gallon will be a still, golden mead. A bit heavier on the palette, but also full of that beautiful sunshine.
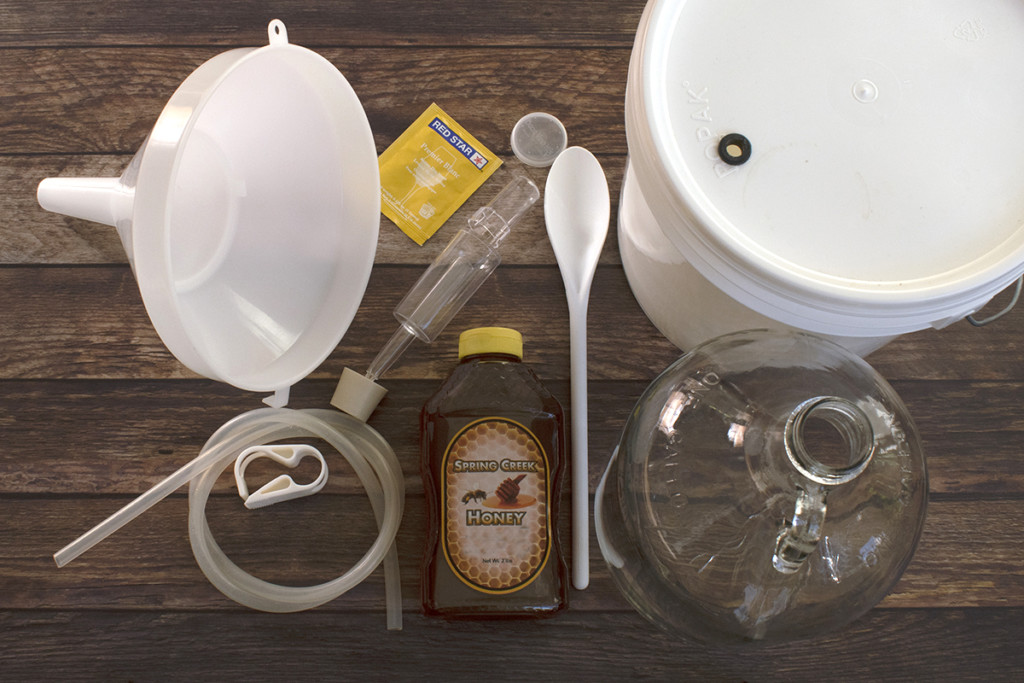
Brewing Equipment
You’ll need a few pieces of brewing equipment to get started. The great thing about this hobby is that it’s relatively inexpensive to get started with, and once you buy the equipment you need for this project, you’ll be set to make another batch of mead, wine, or cider in the future.
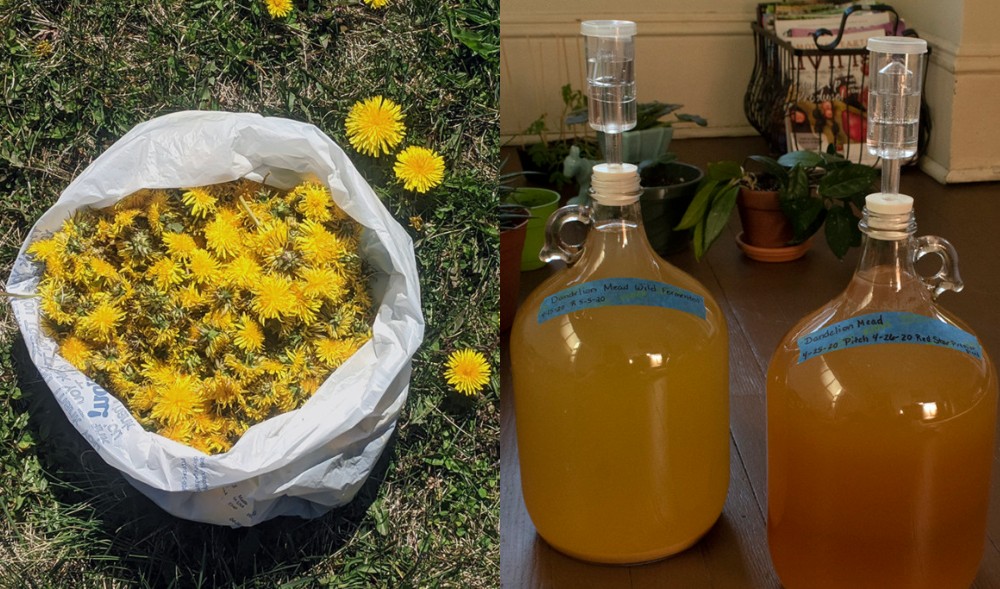
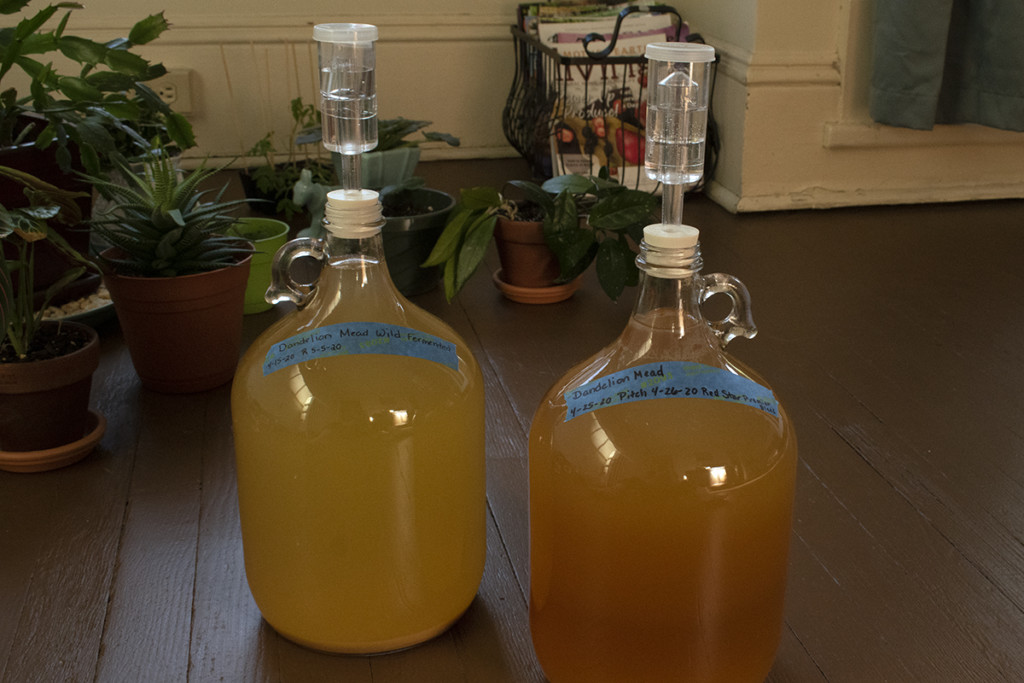
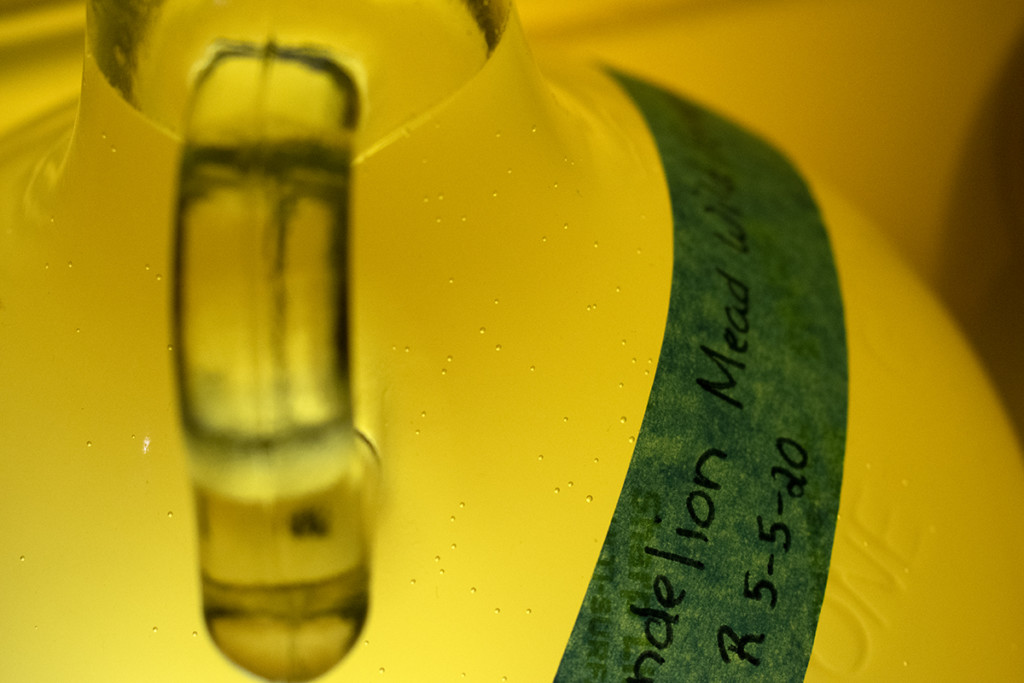
If you plan to make both of these meads at the same time, you’ll need two carboys, airlocks, and bungs. Start with the bottle-aged mead first, and once you rack your mead into the secondary, you will free up your brew bucket for the short mead.
- 2-gallon brew bucket with lid or a Little Big Mouth Bubbler This is your primary fermentation vessel – while both work just fine, and I use both in my brewing, I prefer the glass Little Big Mouth Bubbler simply because it’s clear, so I can keep an eye on my ferment without opening it up. It also makes it easier to rack your mead from the primary into the secondary because you can see the sediment (known as lees) at the bottom and avoid transferring them into the secondary.
- 1-gallon glass carboys – secondary fermentation vessel
- Drilled rubber bung (#6 fits a one-gallon carboy)
- An airlock
- Here is a nice set from Amazon that has the carboy, the bung, and the airlock all together.
- A 3 – 4-foot length of silicone or nylon food grade tubing, you’ll use this for racking and bottling
- A hose clamp
- A long-handled wooden or plastic spoon
- A funnel with strainer insert (be sure to get one whose neck will fit into a one-gallon carboy)
- Sanitizer
Bottling Equipment
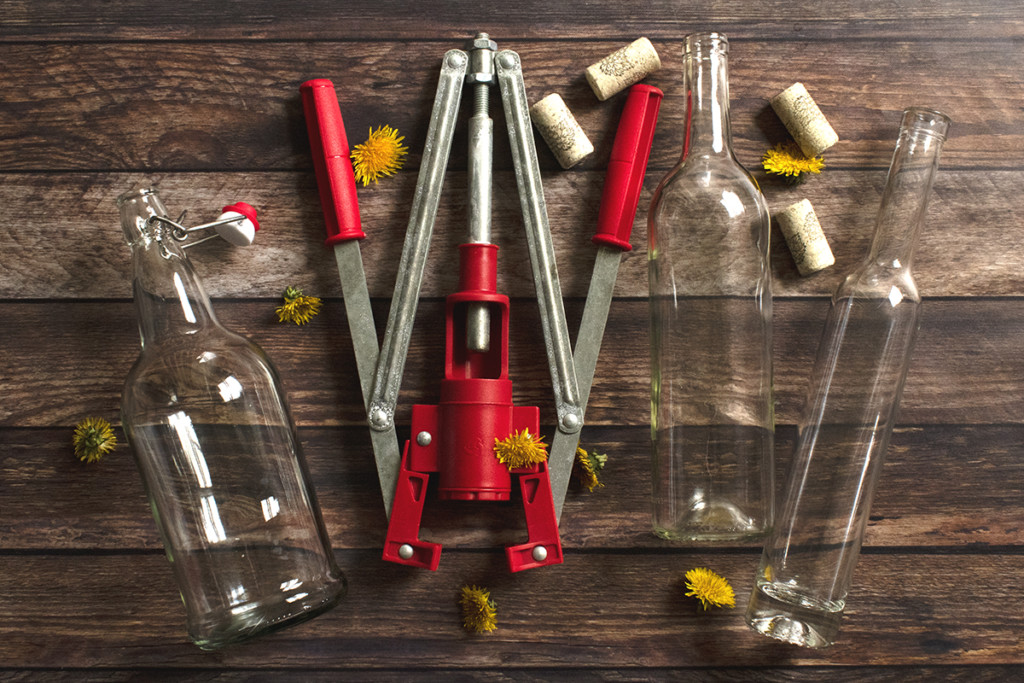
When it’s time to bottle, you’ll want something to put your lovely dandelion mead in.
- For the sparkling, wild-fermented mead, I suggest swing-top bottles. Be sure you purchase bottles that are meant specifically for brewing, as they can stand up to the pressure. EZ-Cap is a well-known brand in the brewing community. You’ll need to open them a couple of times to burp them, so corked bottles aren’t ideal.
- You can use the swing-top bottles for your bottle-aged mead too if you like. They make the bottling process quite simple.
- Or if you wish to put your aged mead in wine bottles, ask friends and family to save their empties for you. Give them a good soak and scrub to remove the labels.
- Never reuse screw-top wine bottles, they’re made of thinner glass and can break when you are inserting the cork.
- Corks
- Wine Bottle Corker
Ingredients
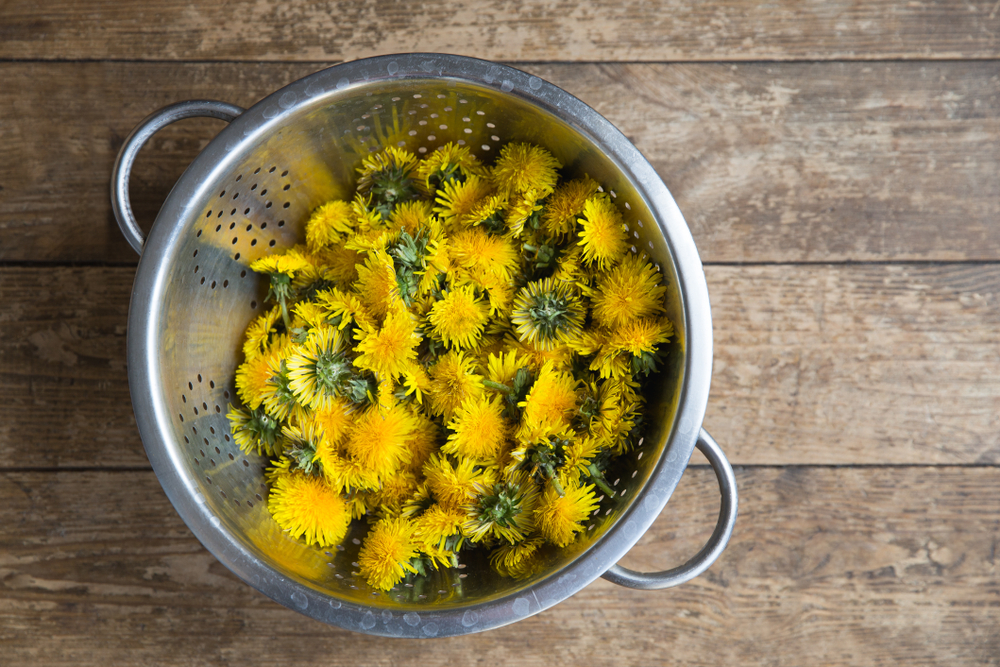
Well, the most obvious ingredient is also the one you need the most of – dandelions. You’ll need about 16 cups of dandelion heads to make both batches of mead or 8 cups for one.
The toughest part about making dandelion mead is collecting the dandelions. If you can, I recommend enlisting the help of short people – your children. Get the kids involved, and you’ll have enough dandelion heads picked in no time.
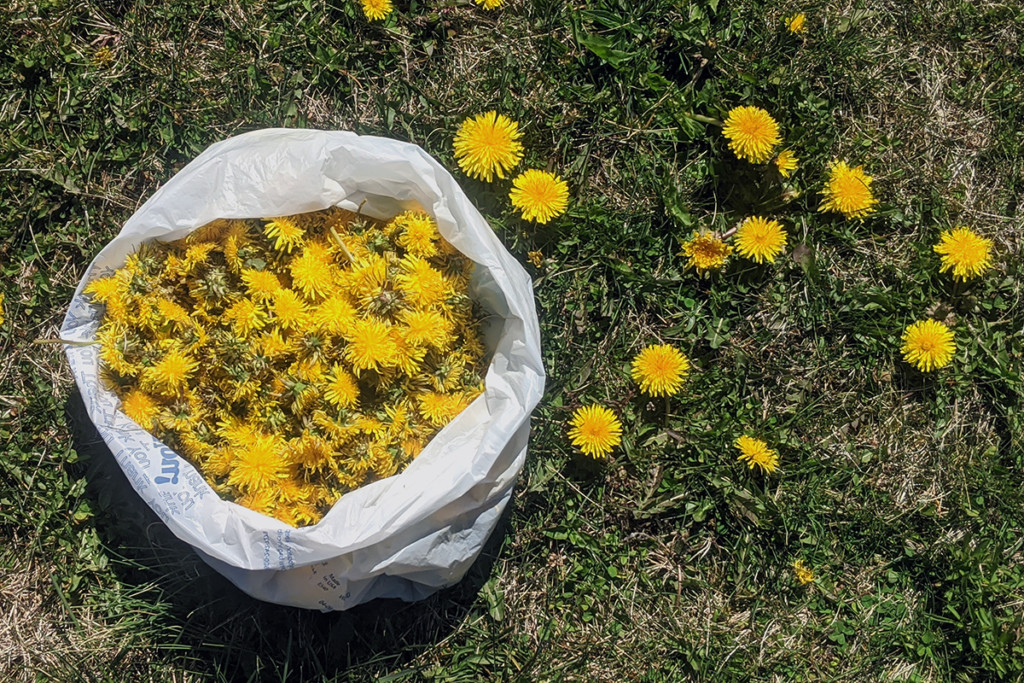
Never use dandelions that have been treated with chemicals.
For each mead you will need:
- 4 cups of dandelion petals, green parts removed, and rinsed (pull the petals away from the green parts of the flower, as that part is bitter)
- 1/8 cup of raisins or four dried apricots, chopped
- The juice of two oranges
- One-gallon of filtered or boiled and cooled water
- For the short mead, you will need 1 ½ lbs of raw honey
- For the aged mead, you will need 3lbs of raw honey and a packet of wine yeast (Red Star Premier Blanc, Red Star Champagne, or Lalvin D-47 are all good mead yeasts.) You can get a good selection of wine yeasts here.
Before you begin brewing or bottling, it’s important to wash your hands thoroughly and sanitize all of your equipment and any surfaces you will be working on. You want to make sure that only the right microorganisms are allowed to grow.
Dandelion Short Mead
Put the petals, raisins, orange juice, and 1 ½ lbs of raw honey into your primary fermentation vessel.
Heat your gallon of water to about bathwater temperature and add it to the primary fermenter. Stir until the honey dissolves.
You’ve just created the must; this is the mixture that will ferment into wine.
Stir the must well. And when I say stir well, I mean really give it a good stir. You don’t want it sloshing out of the bucket, but you do want a good whirlpool going. You’re aerating the yeast and waking it up.
Put the lid on your fermenter; don’t worry about the airlock just yet.
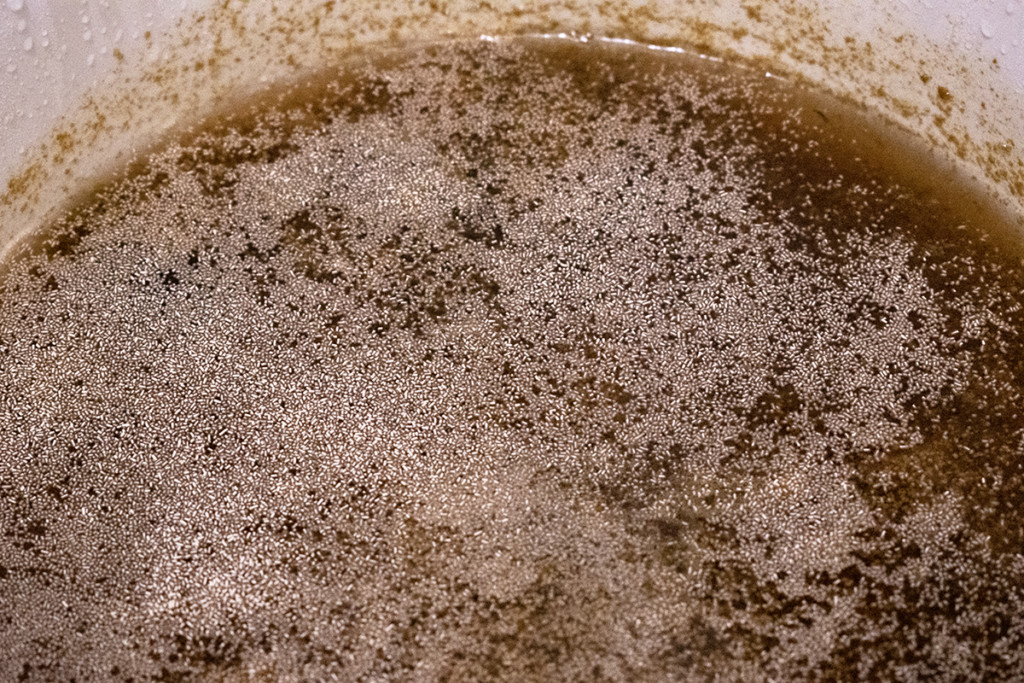
Stir the must well twice a day for the next couple of days. At some point, you will begin to see foamy bubbles, the must will have a pleasant tangy smell to it, and you will hear fizzing when you stir.
When this happens, you’ll know you have active fermentation!
Once you’ve got fermentation started, put the lid on tightly. Fill the airlock halfway with clean, boiled water, add the domed cap, and then snap the lid on. Fit the airlock into the lid.
Keep your primary fermenter someplace warm and out of direct sunlight.
After about ten to twelve days, you’ll need to rack your mead from the primary fermentation vessel into the secondary, the glass carboy.
Put your primary on the counter or chair. You want it to be a foot or two higher than your carboy. Place the carboy below the primary and put the funnel with the filter in the neck.
Slide the hose clamp onto one end of the tube about 6” inches up from the bottom. Now, put the other end of the hose into the fermentation bucket, you want it down below the cap of dandelion petals, but not so far down that it’s touching the bottom. You don’t want to pick up the sediment, or lees, that are sitting at the bottom.
Suck-start the mead flowing from the bucket into the carboy. Once the mead begins to flow, you can use the hose clamp to clip the hose to the side of the funnel, as shown in the picture below.
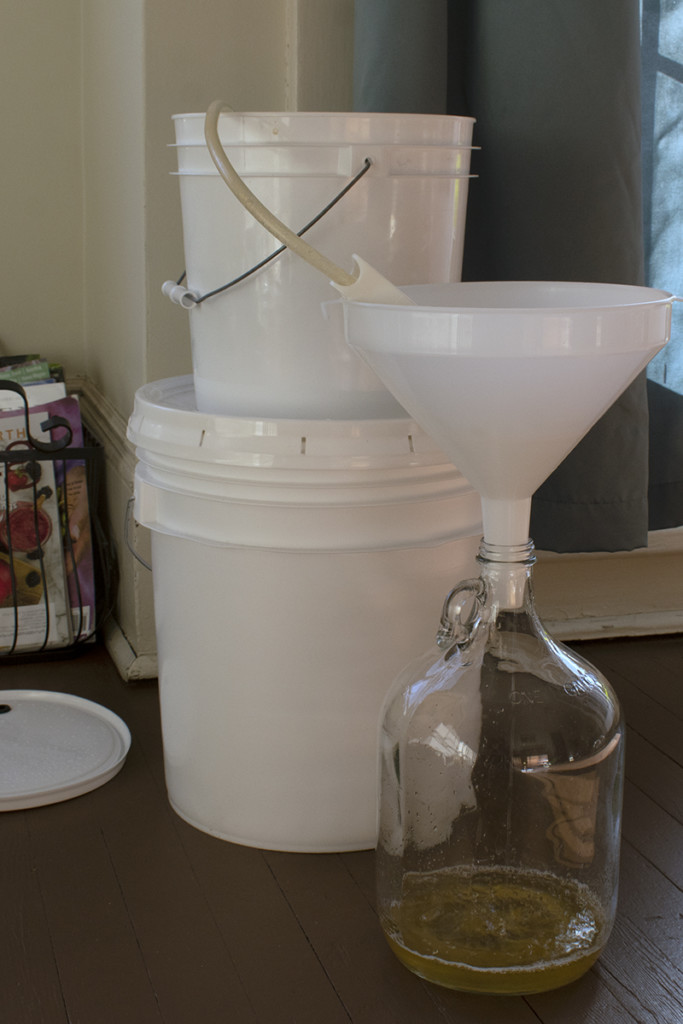
Keep an eye on it as it flows from one vessel to the other. I can’t tell you how many times I’ve walked away “just for a second” only to find a sticky mess all over my floor.
As the primary fermenter empties, keep your tube away from the lees. I tilt my bucket slowly when it gets down to the last couple of inches so that I can get the clear mead.
Once you have racked the mead into the secondary fermenter (the carboy), put the airlock and bung into the top and put it back in a nice warm place out of direct sunlight. Within 24 hours, you should see tiny bubbles rising to the top. You may even hear the soft glug-glug-glug of the airlock releasing carbon dioxide.
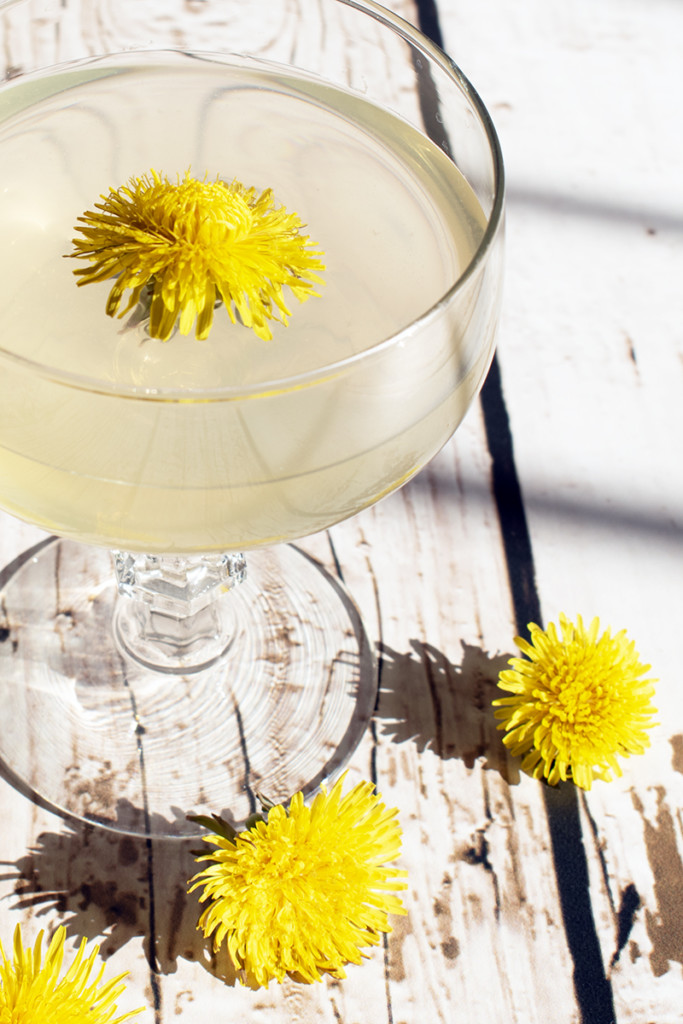
Your mead will be ready to drink about a month from the time you achieved initial fermentation.
You can either drink it straight, as is without bothering to bottle it. Just transfer it to another container, being careful not to stir up and transfer the lees. As it is, the mead will be slightly fizzy and mildly alcoholic. (Usually between 4-5% ABV)
Or you can bottle it in the swing-top bottles and store it in your refrigerator for a few days; this will allow more carbonation to build. If you go this route, you’ll want to ‘burp’ the bottles after about two weeks to make sure you don’t get any bottle bombs.
Enjoy your mead as the summer heat starts to roll in. This is a great drink to serve at barbecues or after working in the sun all day.
Now let’s move on to the bottle-aged mead.
This recipe will give you a golden elixir ready to sip when winter nights are long and dark. By using more honey and giving the mead a chance to age, you’ll end up with a wine with more body and a higher alcohol volume.
This will be an altogether different mead from the short mead you will be sipping in the summer.
Put your petals, honey, orange juice, and raisins or apricots in the fermentation bucket. Bring your gallon of water to a boil and pour it in the bucket. Give it a good stir and then put the lid on it. Wait 24 hours and then stir down the must and sprinkle the packet of yeast over the top of the must.
Replace the lid, add the airlock as instructed for the short mead.
Because we are using commercial yeast, we don’t need to stir this batch every day. Just let it ferment.
On the fourth day after adding the yeast, you will need to rack the mead from the primary fermenter into the secondary fermenter, again as described in the short mead.
Fit the secondary fermenter with the bung and airlock and let it ferment someplace warm and out of direct sunlight for around three months. You’ll know the mead is ready to bottle the tiny bubbles stop floating to the surface. A good way to check is to rap the carboy with your knuckle and watch to see if any bubbles pop up in the neck of the carboy.
Once the dandelion mead has finished fermenting, you’re ready to bottle.
Sanitize your bottles, and corks if you’re using traditional wine bottles. You’ll set up just as if you were racking, only you’ll be using the hose clamp to stop the flow between bottles. If using wine bottles, fill just up to the neck, leaving room for the cork.
Boil water in a saucepan, turn off the heat and add the corks. Cover with a lid and pull each cork out as you need them.
Once the mead is bottled, wipe the bottles down and place them on their sides, someplace cool and dark. Let them age for several months before enjoying it.
I hope you try making both of these dandelion meads.
Let me know which one you like best.
While you may find you prefer one over the other, I’m sure you’ll agree that both meads are the perfect way to enjoy those sunny dandelions throughout the year.
And if you have more dandelions than you know what to do with, here’s some more ideas:

Get the famous Rural Sprout newsletter delivered to your inbox.
Join the 50,000+ gardeners who get timely gardening tutorials, tips and tasks delivered direct to their inbox.