

Irises are often the first flower to kick off the summer perennial season. So it can be incredibly frustrating when that tall crop of sword-shaped leaves ends up being just that – all leaves and no flowers. There are some pretty common reasons why this happens, and luckily, they’re all relatively easy to fix.
Ghosted in the Garden
Ghosting, the act of abruptly ending a relationship by cutting off all communication without explanation, is a common occurrence in the dating scene these days. Things seem to be going great. You’re both chatting, getting to know each other and then…nothing. Just silence.
It stings. But not nearly as much as when your own garden ghosts you.
Maybe you’ve enjoyed your irises for years. Perhaps you’ve just moved and noticed those familiar rhizomes in a flower bed. Or you might have planted new irises last fall. Regardless of the scenario, you were expecting irises this year and got foliage instead or only a handful of flowers.
Wait, don’t these things have a reputation for practically growing themselves and being tough as old boots?
They sure do. But they also have opinions on things like sun, spacing, water and pests. And they will let you know how they feel about each. So, let’s break each of those down and get your irises flowering again.
A quick caveat: Before we get too far in, it’s important to mention that we’ll be talking about rhizomatous irises like Siberian irises. Not water irises or Dutch.
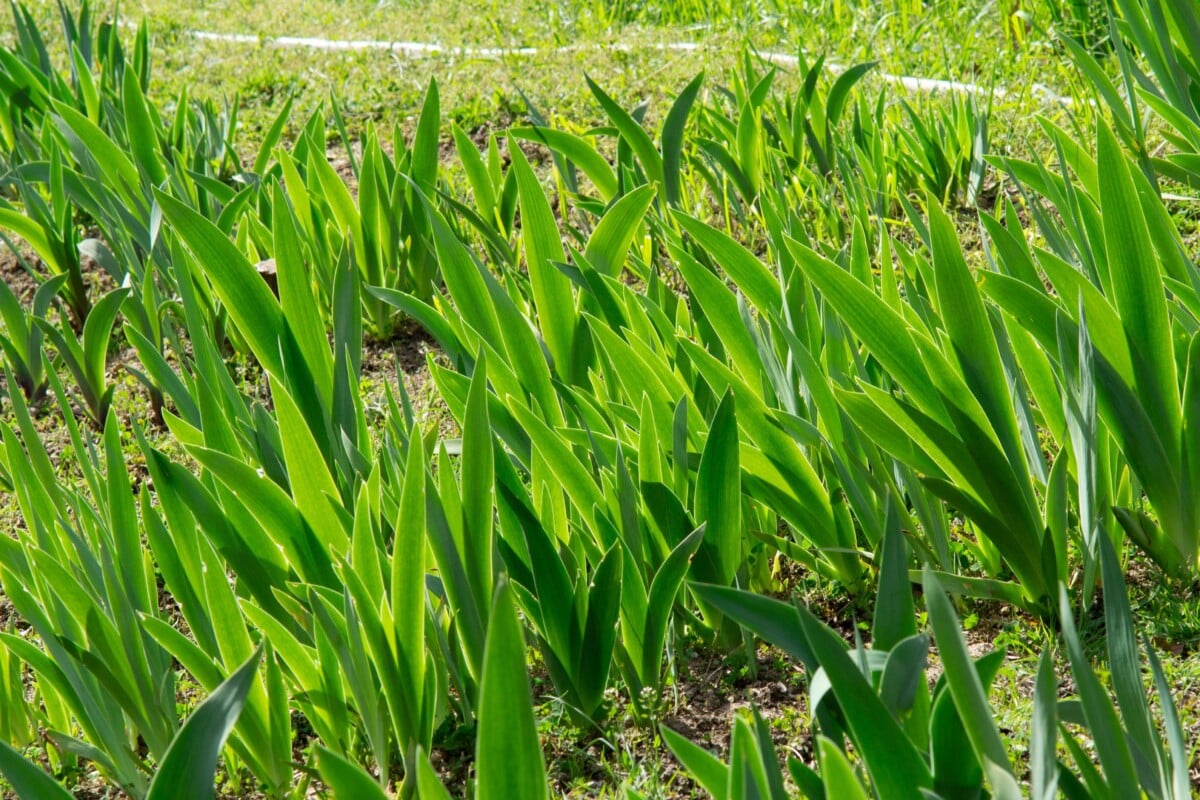
1. Your Irises Are Too Crowded
This is by far the most common (and easiest to remedy) reason why your irises have slowed their roll when it comes to blooming. Each year, the plants produce new rhizomes, gradually forming dense colonies that run just along the surface of the soil. And while this is a good thing initially, as it means more flowers, it will become a problem in a few years.

Think of it like a family reunion that keeps meeting in the same spot despite many family members getting married and having babies. Suddenly, what once was cozy and fun is now cramped with limited resources and everyone’s grumpy.
How to Spot It
You’ll likely have lots of healthy leaves but few to no blooms. The central clump may look a little on the sparse side, and if you dig around, you’ll find old, shriveled rhizomes surrounded by newer, fresher growth.
How to Fix It
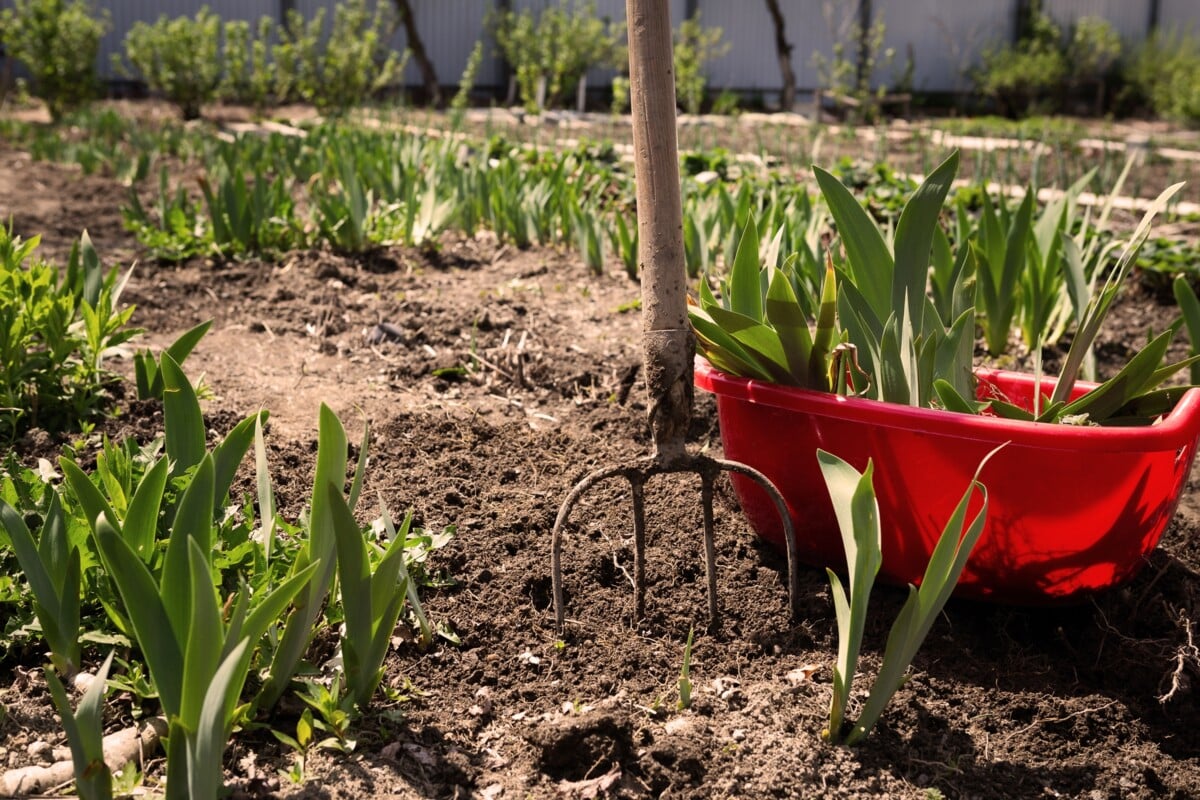
The solution is relatively easy and works much better on irises than family reunions – divide and replant. To ensure continued flowering, you need to divide your irises every 3-4 years. If you live in a warmer climate, you may need to divide them more often, as their growth doesn’t slow or go dormant during winter.
Wait to divide irises until about a month after they finish blooming. Funny right? You’re here because they aren’t blooming. So divide 4-6 weeks after when they normally would have bloomed, usually mid to late summer.
How to Divide Rhizomatous Irises
- 1. Grab a garden fork (not a shovel—you want to lift, not slice and dice).
- 2. Moving around the clump, gently push the fork beneath it and lift the rhizomes out of the soil. It’s kind of like serving lasagna.
- 3. Trim the leaves down to 4–6 inches. This reduces stress and makes handling them easier.
- 4. Use a clean and sterile knife to cut healthy rhizomes into sections. Each piece needs at least one firm, unblemished fan of leaves.
- 5. Dispose of anything soft (think old potato), moldy, or discolored.
- 6. Replant 12–18 inches apart with the rhizome tops just at soil level or give them away to friends and neighbors
- 7. Water well and wait for next year’s grand return.
ProTip: Work in a little compost before replanting. Your irises will thank you with extra blooms.
2. Your Irises Have Been Planted Too Deeply
Far too often, new gardeners treat iris rhizomes much the same way they would spring flowers like daffodils and tulips. They bury them like a bulb. The problem here is that they aren’t bulbs; they’re rhizomes. And rhizomes are like swimmers; they do best when they grow slightly submerged, not beneath the soil.
Mulching is usually a huge help in the garden, but when it comes to rhizomatous irises, mulching can cause problems.
How to Spot It
This one is easy enough to spot. Are the rhizomes partially buried or completely covered by soil or mulch? Bingo.
How to Fix It
Wait until late summer and then lift and replant in much the same way you would when dividing them. Only you don’t need to divide them if they aren’t overgrown. Think swimmer, linear with the soil, partially submerged.
3. Not Enough Sun
Irises are sun worshippers. Six to eight hours of direct sun is non-negotiable. Anything less, and you’re raising foliage, not flowers. If you wouldn’t get a bad sunburn from standing in their location all day, then you need to move them.
How to Spot It
Unfortunately, this one can creep up on you over time. Neighboring trees and shrubs that have grown up over the years can shade out irises over time. Those irises you planted five years ago, which received plenty of sun, might not be getting as much sun as they used to.
How to Fix It
Location, location, location. It’s time to lift and relocate your irises to a sunnier part of your garden. Remember, 6-8 is the minimum.
4. Watering Issues
Irises can be a bit like Goldilocks when it comes to water while they’re forming buds. Too little water during bud formation, and you may not get many blooms this year. Did you have an exceptionally rainy spring? The rhizomes may have developed root rot.
How to Spot It
Keep an eye out for yellowing leaves early in the season. These are a clear indicator of too much water. You’ll want to check the rhizomes to see if they are mushy or have a bad smell (root rot). If the leaves are crispy or browned on the ends, then the plants didn’t receive enough water during bud development.
How to Fix It

Spring weather is fickle, and most of the time, you end up just fine on the other end of it. But some years, Mother Nature forgets where the tap is and can’t turn it on, while other years, she forgets to turn the rain off.
If your spring is especially dry, go ahead and water anytime the soil is dry to the first 3”. If you get too much rain, there isn’t a whole lot you can do except wait for it to end and hope for the best.
5. Go Easy on the Fertilizer
We gardeners love our fertilizer. A little here, a little there. Unfortunately, fertilizing indiscriminately is a bad habit and can bite us in the butt.
Irises are pretty scrappy and don’t often need a lot of fertilizer. If you’re adding compost each year, that should be enough. However, if you do fertilize, be sure to use a balanced fertilizer, such as a 5-5-5 or a 10-10-10 mix. You don’t want to fertilize with anything too high in nitrogen, as this will give you lots of beautiful leaves and few flowers.
The best thing you can do is to test your soil.
One issue that often affects irises comes when you fertilize your lawn. Lawn formulations tend to be high in nitrogen. If your irises are at the edge of your lawn or perhaps in a flower bed within your lawn, they can get too much nitrogen from these types of fertilizers.
How to Fix It
Top dress your irises with compost every year, but don’t cover the rhizomes. If you choose to fertilize them, be sure to use a balanced, slow-release fertilizer. If you suspect your irises are getting too much nitrogen from a lawn fertilizer, you might want to consider moving them.
6. Pests and Disease
There are generally two issues that can be significant enough to stop your plant from flowering. One is iris borers, and the other is soft rot.
Iris Borers
Iris borers are larvae that hatch from eggs laid on the leaves of the plant. They chew their way into the leaf, nibbling their way down into the rhizome where they pupate. From there, they emerge, in August to September, as a brown Miller-type moth, chewing their way out of the rhizome to mate and start the whole process again.
Needless to say, all this chewing doesn’t exactly help your irises. If the infestation is bad enough, it can wipe out your plants.
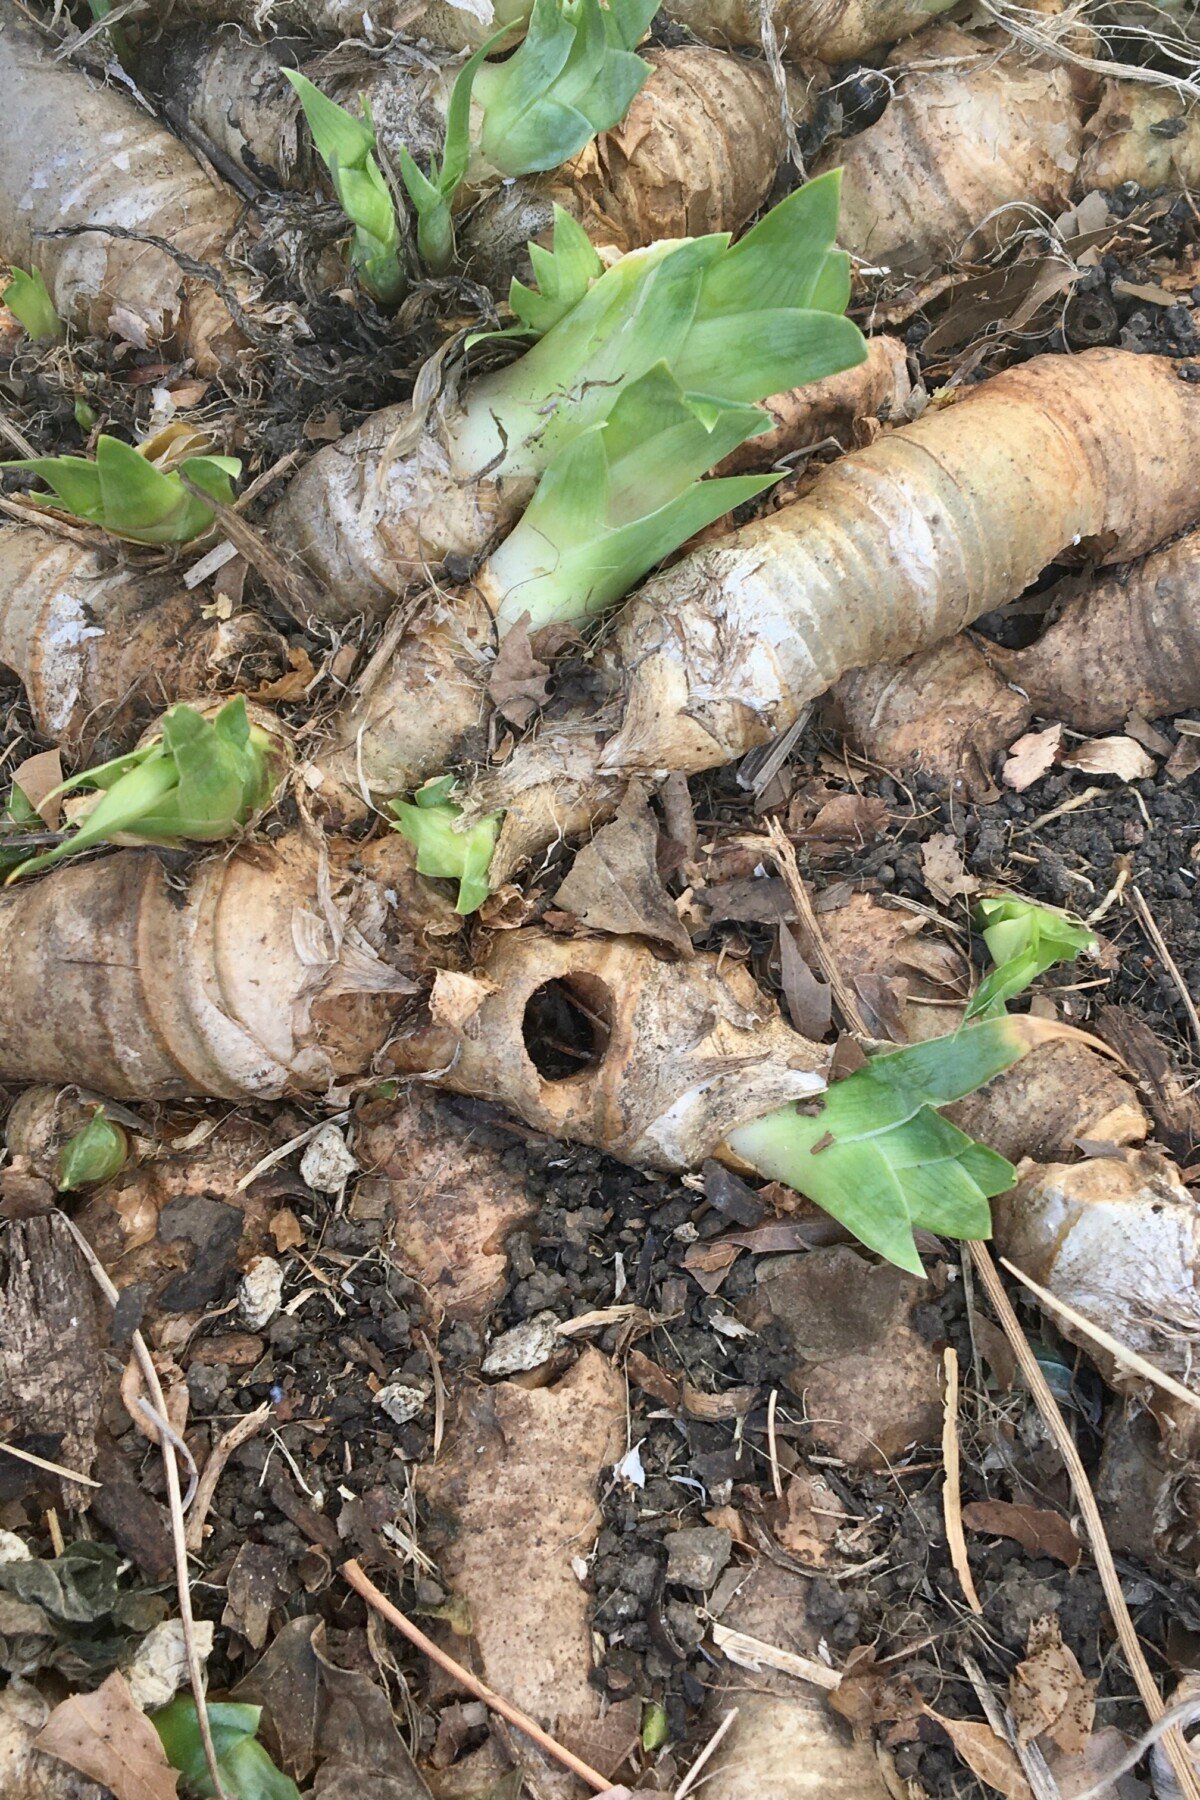
Keep an eye out for leaves that look as though they’ve been tunneled through, or that look kind of wet. Check the rhizomes for holes.
How to Fix It
Be sure to remove foliage in the fall so pests can’t overwinter. Remove any damaged rhizomes and treat healthy rhizomes with powdered sulfur.
Soft Rot
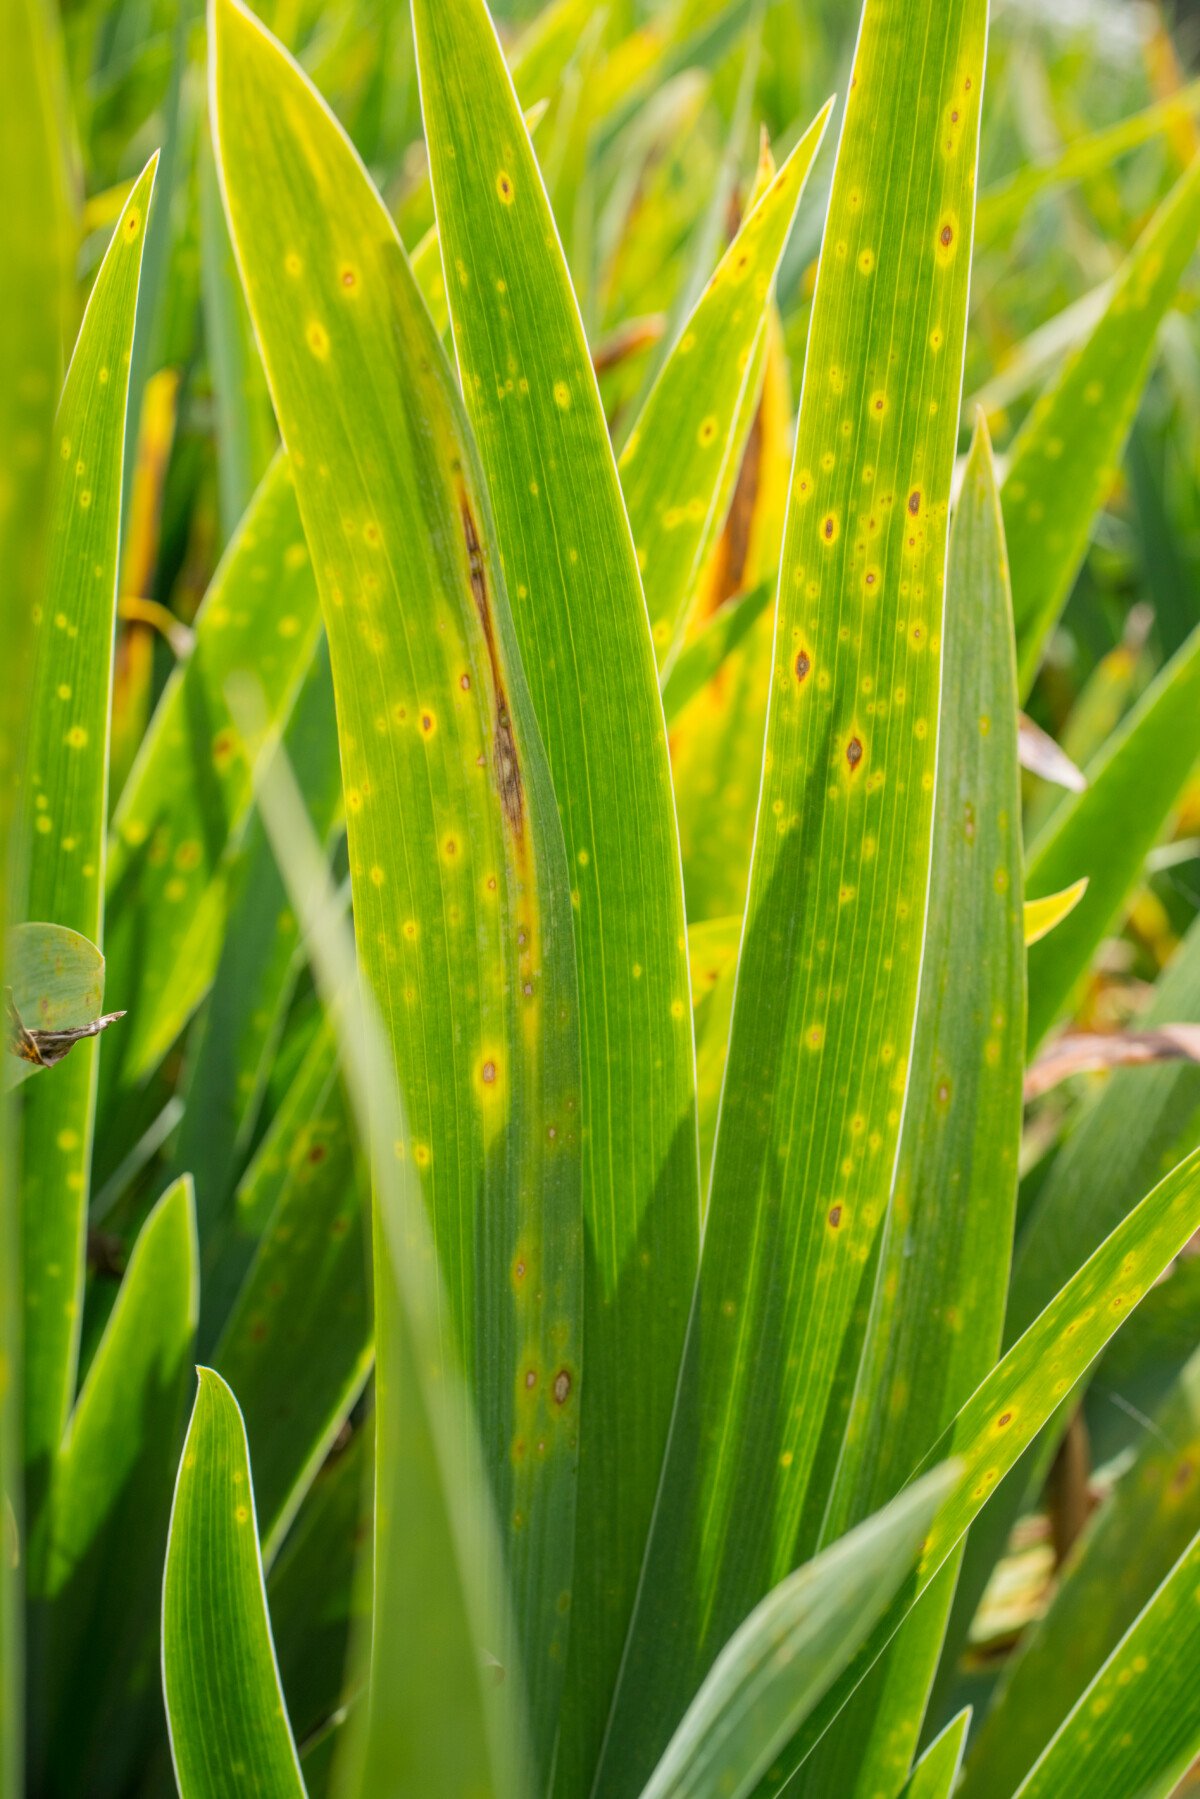
This generally happens due to soil-borne bacteria or when the rhizomes become waterlogged. The leaves are often yellow, and the entire plant will begin to collapse. A quick sniff of the rhizome, and you’ll definitely be able to smell it. The whole thing will be mushy, like an old potato.
How to Fix It
You’ll need to lift the plant and discard any mushy rhizomes. Cut away affected parts until you reach firm flesh again. Treat with powdered sulfur and allow it to dry before replanting.
It’s best not to plant the iris in the same place it was infected. If you must do so, treat it well with powdered sulfur and allow it to dry completely before you replant.
7. New Irises Don’t Like to Be Rushed

Patience is a virtue. It’s also a virtue many of us gardeners lack, myself included. If you’ve only just planted your irises the season before, there is likely nothing wrong, and the plants still need another season to get established. They will bloom when they’re ready.
How to Fix It
Be patient. I know. I’m not either.
In the end, if your irises aren’t blooming, it’s rarely a mystery. It’s more likely a message. They’re trying to tell you something. Nine times out of ten, that message will be, “Mom, she’s on my side of the car! She’s touching me!”

The good news is iris problems are easy to diagnose and just as easy to fix. Once you’ve figured out the issue, you’ll likely only miss one season. Before you know it, you’ll be stopped in your tracks by their beautiful blooms again.

Get the famous Rural Sprout newsletter delivered to your inbox.
Join the 50,000+ gardeners who get timely gardening tutorials, tips and tasks delivered direct to their inbox.