

Back in the late 90s there was a diaper commercial that said, “Live and learn, and get new Brand of Diapers.” This is how it is with watering raised beds. There’s an idea of how it’s going to be, and then there’s the reality.
Over the years, I’ve given up on that ideal and found the perfect way to water raised beds, whether I’m in the garden or at the beach six hours away.
Less Sweat, More Vegetables
What is that ideal? I grew up on Beatrix Potter books and countless episodes of Martha Stewart Living. So, I have this mental image of me walking through my garden in my fancy red Italian garden clogs, wearing a blousy white linen shirt, carrying a beautiful vintage watering can in my canvas-gloved hands. I sprinkle water tenderly on each plant while wearing a large sun hat that shades my face.
In reality?
I’m swatting at mosquitoes with sweat pouring into my eyes and down every crack and crevice on my body. I’m lugging a 2-gallon plastic watering can from Walmart to and from the spigot for the seventy-second time. My arm is about to fall off, I’m feeling faint from loss of blood, and with two more beds to water, I’m seriously considering setting my garden on fire and buying supermarket produce for the rest of my life.
This reality sparked my search for irrigation options in my garden. And once I found the perfect option, I automated it, so watering my raised beds is 100% hands-free.
Soaker Hose vs. Drip Irrigation
Soaker hose always seems like the best choice. Every big box store carries it, so it’s easy to get your hands on. And the first year I used it, it worked great.
Then the second year rolled around.
It stopped soaking. There were entire lengths of it where the tiny pores had become so clogged with dirt that it no longer soaked. I tried scrubbing it clean, but to no avail. I knew that if this were to become my water source, it would need to be replaced every few years, which is expensive. And the thought of that much plastic being thrown away every couple of years so that I could garden didn’t make me feel great.
Finally, the biggest headache with the soaker hose was its size and bulk. It’s fine for long, wide beds. However, if you have smaller beds or need to bend it into smaller curves, it becomes much harder to work with.
Back to the drawing board.
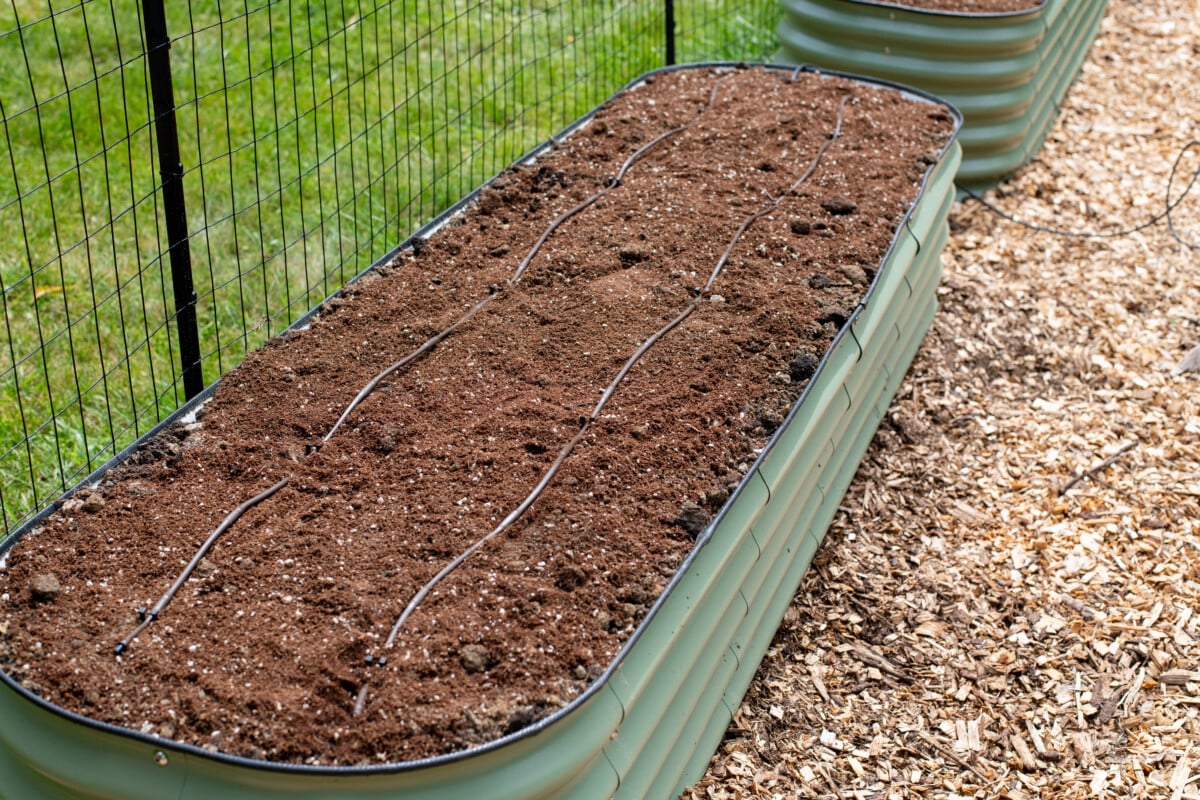
That’s when I found Rain Bird. This company offers drip irrigation solutions for everything from large landscapes to small raised beds. I initially used this back when I was still growing directly in the ground out at my (then) boyfriend’s place.
Rain Bird was a game-changer! I knew I would be a customer for life.
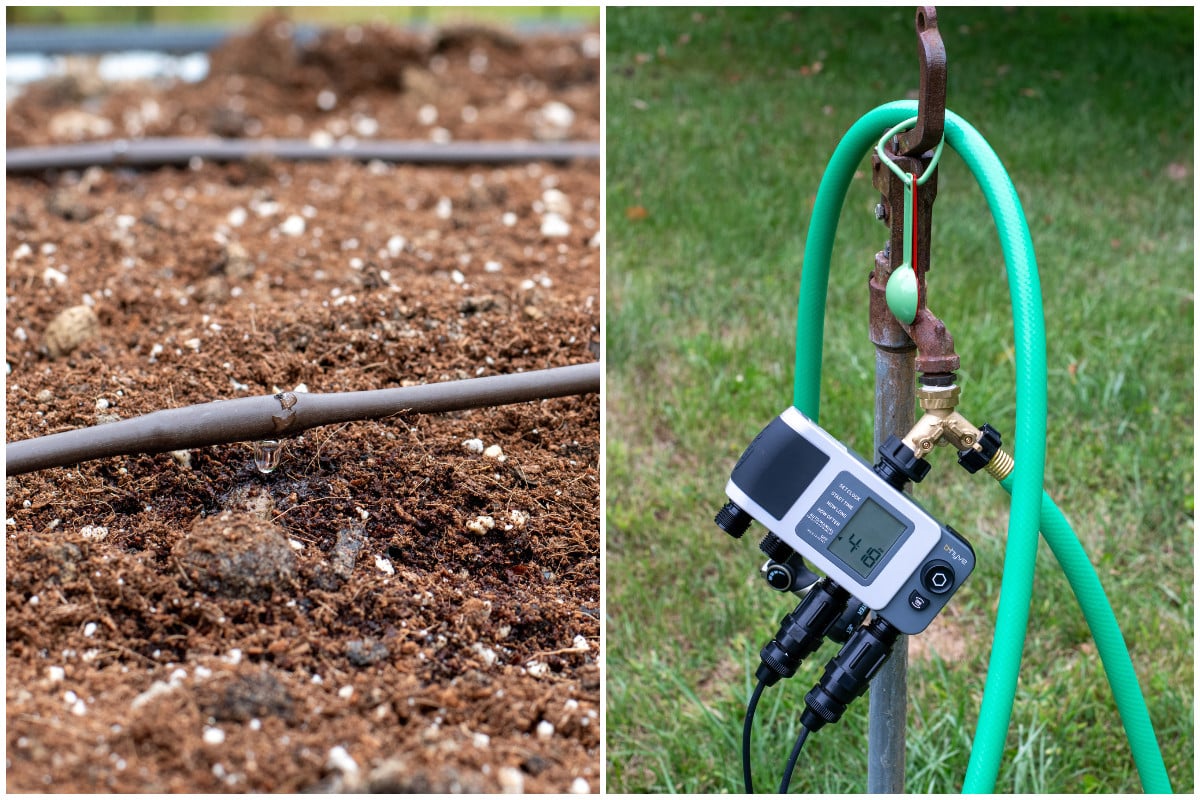
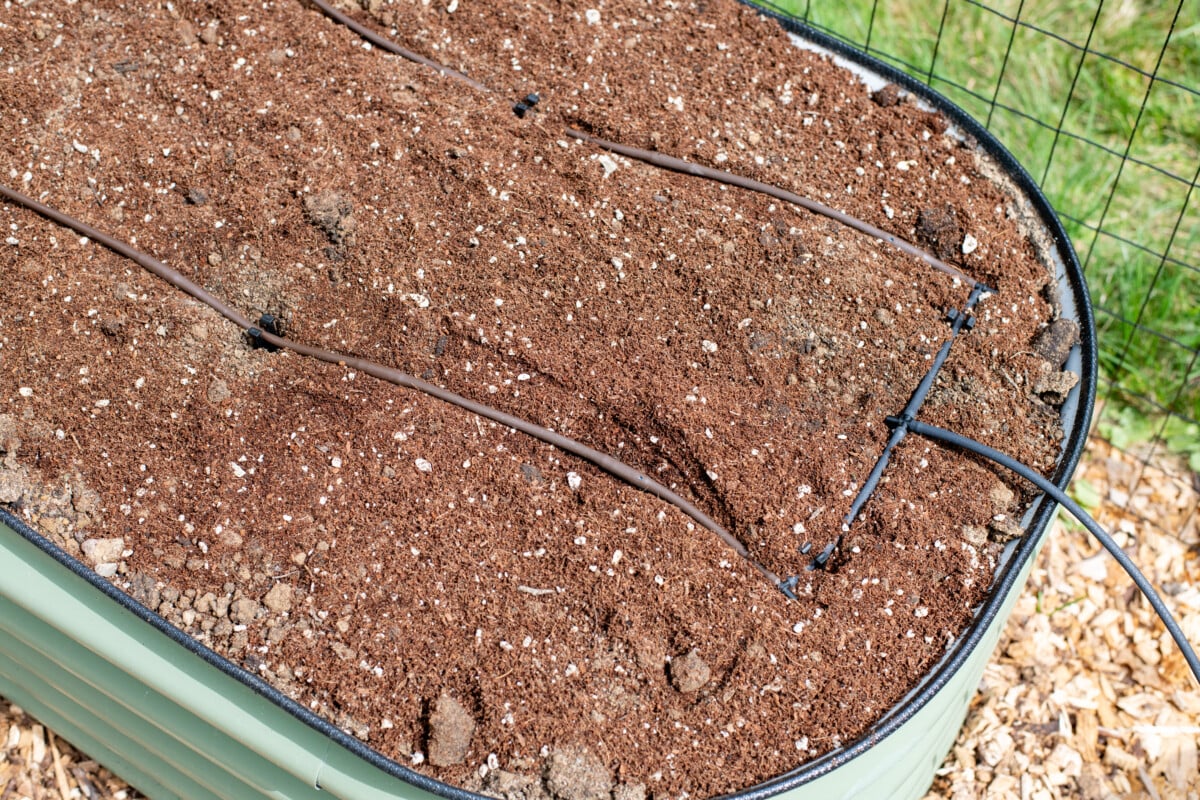
These days, I grow in raised beds, and I’m madly in love with their raised bed drip irrigation kit. You get a lot of tubing and a ton of connectors, all for a great price. My garden consists of six 2’x8’ beds and two 3.5’x6.5’ beds. I was able to set up all eight beds using four of their kits. I have plenty of emitter tubing and connectors leftover for repairs, if needed, or to add a bed or two in the future.
Each kit contains:
- 25’ of tubing, which is used to connect the emitter tubing to the spigot or move water to more than one location.
- 35’ of emitter tubing
- A pressure regulator, filter washer and faucet adapter
- 10 stakes
- 10 tees
- 10 elbows
- 10 couplings
- 10 plugs
The emitter tubing is ¼” and easy to work with. You can cut it with scissors, and it’s easy to shape it to fit your container. The stakes are sturdy, and each one comes with a cap to hold the tubing in place. All the tees, elbows and couplings are easy to wiggle into place on the tubing and secure with no leaks once in place.
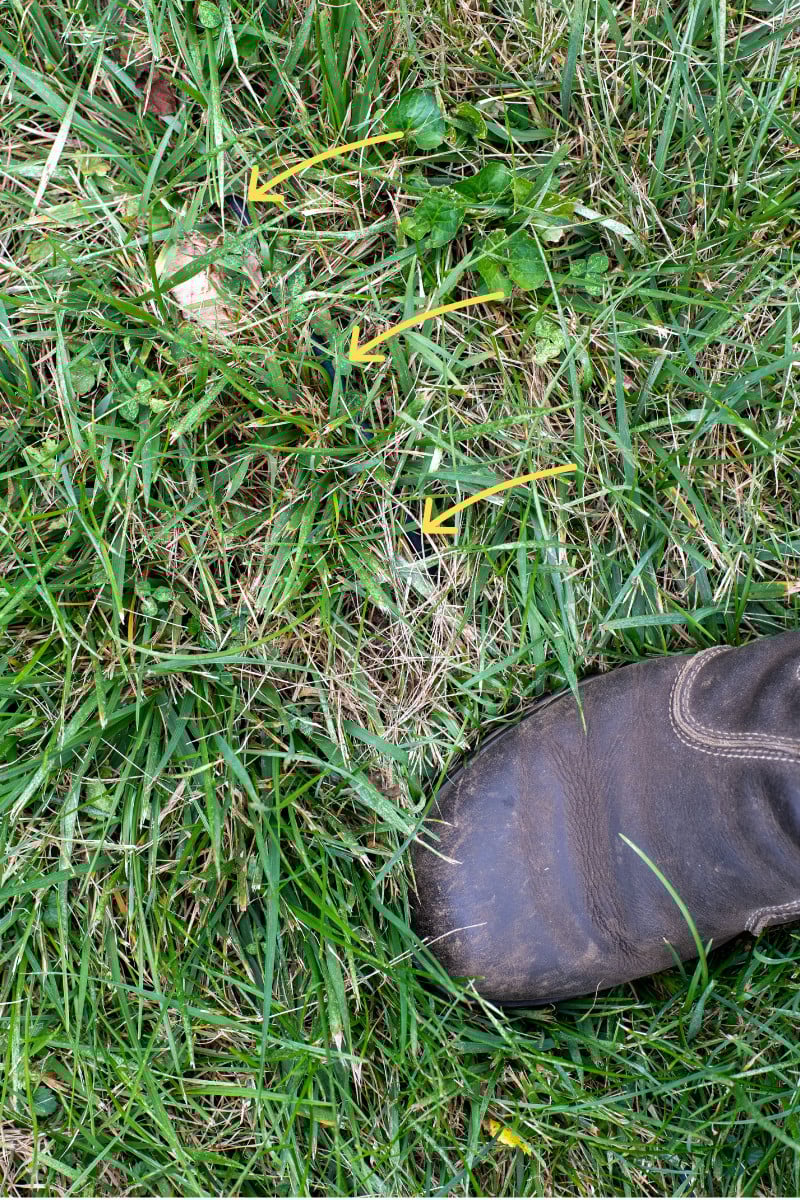
Since I had to run tubing a considerable distance to connect to the spigot, I ended up ordering an extra pack of stakes to secure the tubing and bury it in the grass. It’s hard to see in this photo, but that’s the point. I wanted it as close to the ground as possible so I could mow over it without hitting the tubing. After a week or two, the grass started growing right over top of it.
The kit gives you everything you need to fit any bed shape and style.
Some Things to Remember About Installation
Here are a few things to remember when installing your drip irrigation.
- Straight out of the box, your emitter tubing and tubing will be stiff and coiled. I uncoiled it and tacked it down in a straight line in the sun using a stake on each end. After about an hour in the sunshine, the plastic softened and was much easier to work with.
- Plan out your drip lines, leads to the spigot and connectors on paper first. It makes it much easier to keep everything straight in your head when you’re assembling it.
- Measure twice, cut once. That being said, I eyeballed most of it.
- Use the stakes to tack down tubing, or even better, bury it anywhere you need to walk over it to avoid tripping on it and yanking it up out of the ground/raised beds. I buried mine in the wood chips in my garden paths.
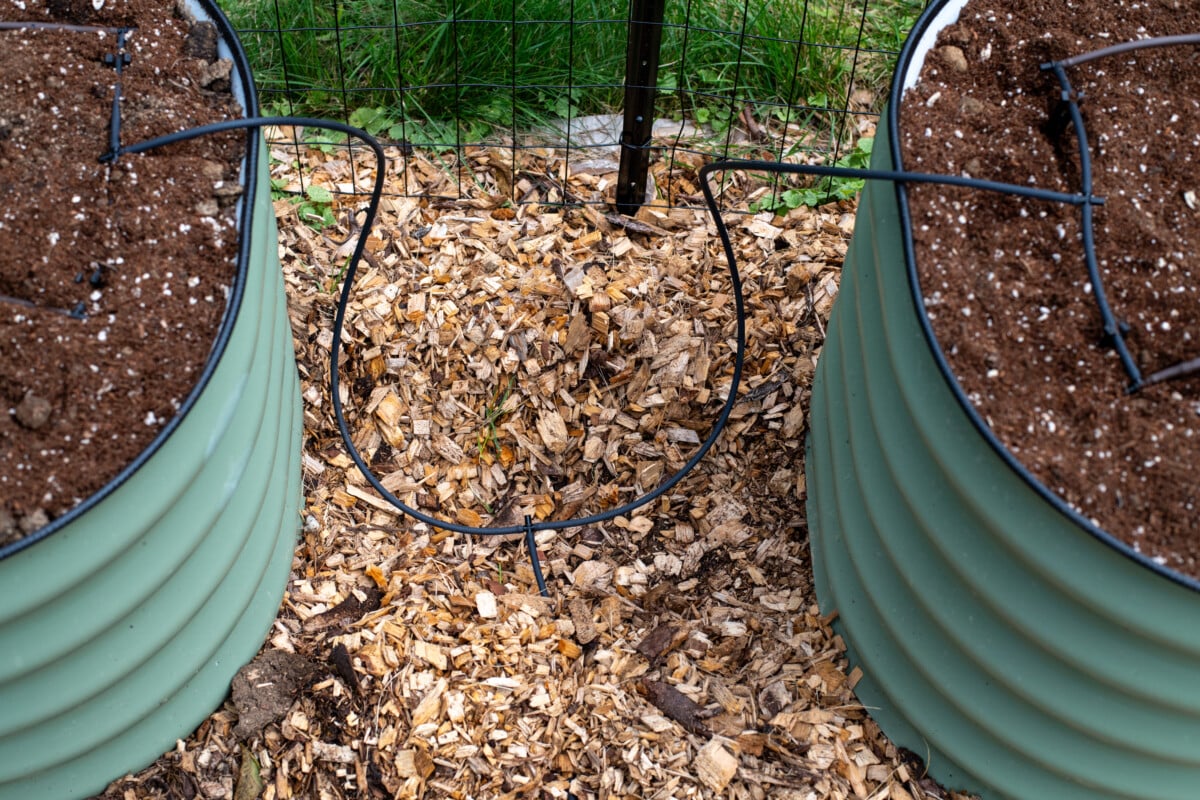
- To that end, be sure to leave a little extra slack in the tubing lines so they can be run straight down the side of your beds to the ground. If you’re anything like me, the fewer the tripping hazards, the better.
- I used a large screwdriver to make a hole in the ground before pushing in the stakes (for the ground stakes, not the ones in my raised beds). We’re about three weeks in with no rain, so the ground is hard as a rock. Thankfully, my raised beds are perfectly watered.
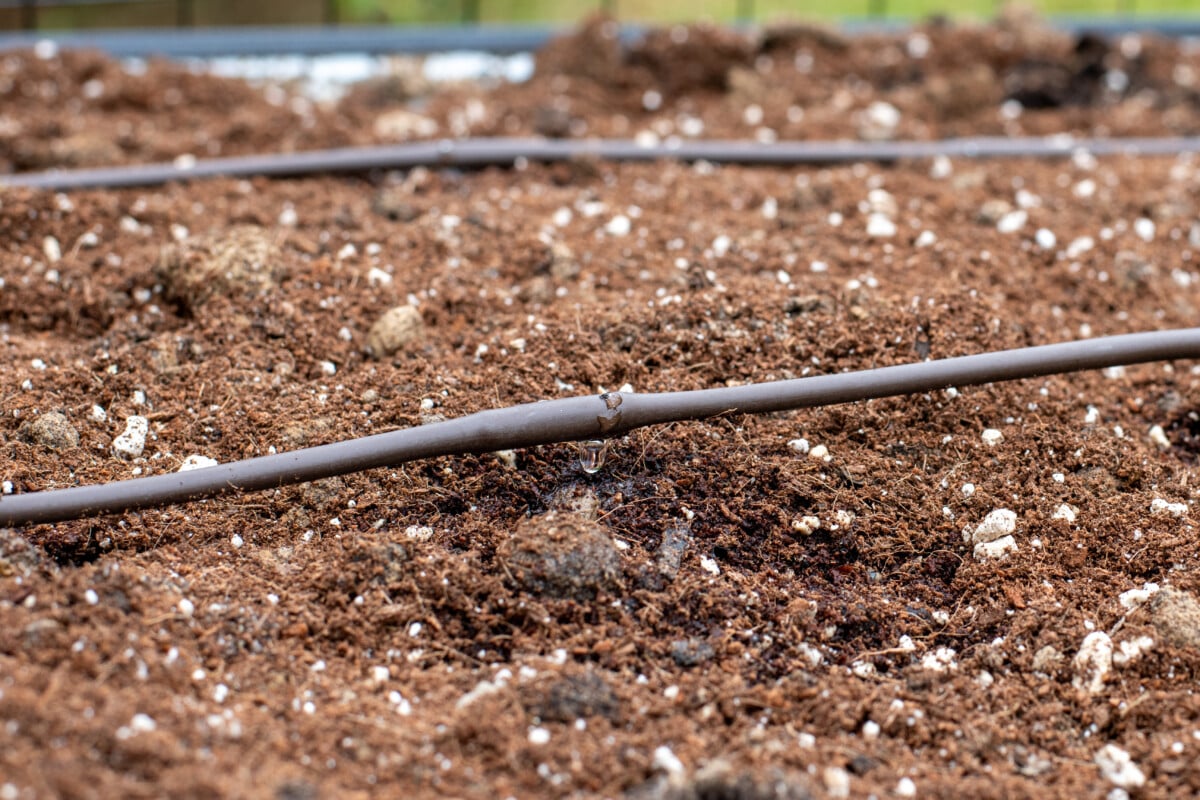
- Ensure your emitter tubing is resting just on top of the soil, not pushed down into it. This is drip irrigation, not a soaker hose. It works best when hovering just above the soil.
- Use plumber’s (Teflon) tape on spigots to ensure a snug fit with fewer leaks.
Related reading: What I Wish I Knew Before Buying & Setting Up 9 Vego Garden Raised Beds
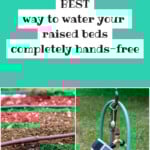
Bonus Points for Automation
Now here’s the great part of drip irrigation. Once you’ve gone through all the work of installing drip irrigation, you only need two extra pieces of equipment, and you can automate the entire thing so you don’t have to worry about watering your garden. It’s on autopilot.
What are those pieces of equipment?
A watering station and a wi-fi hub. For this, I use the Orbit B-hyve system. These little watering timers run on two AA batteries (that seem to last forever).
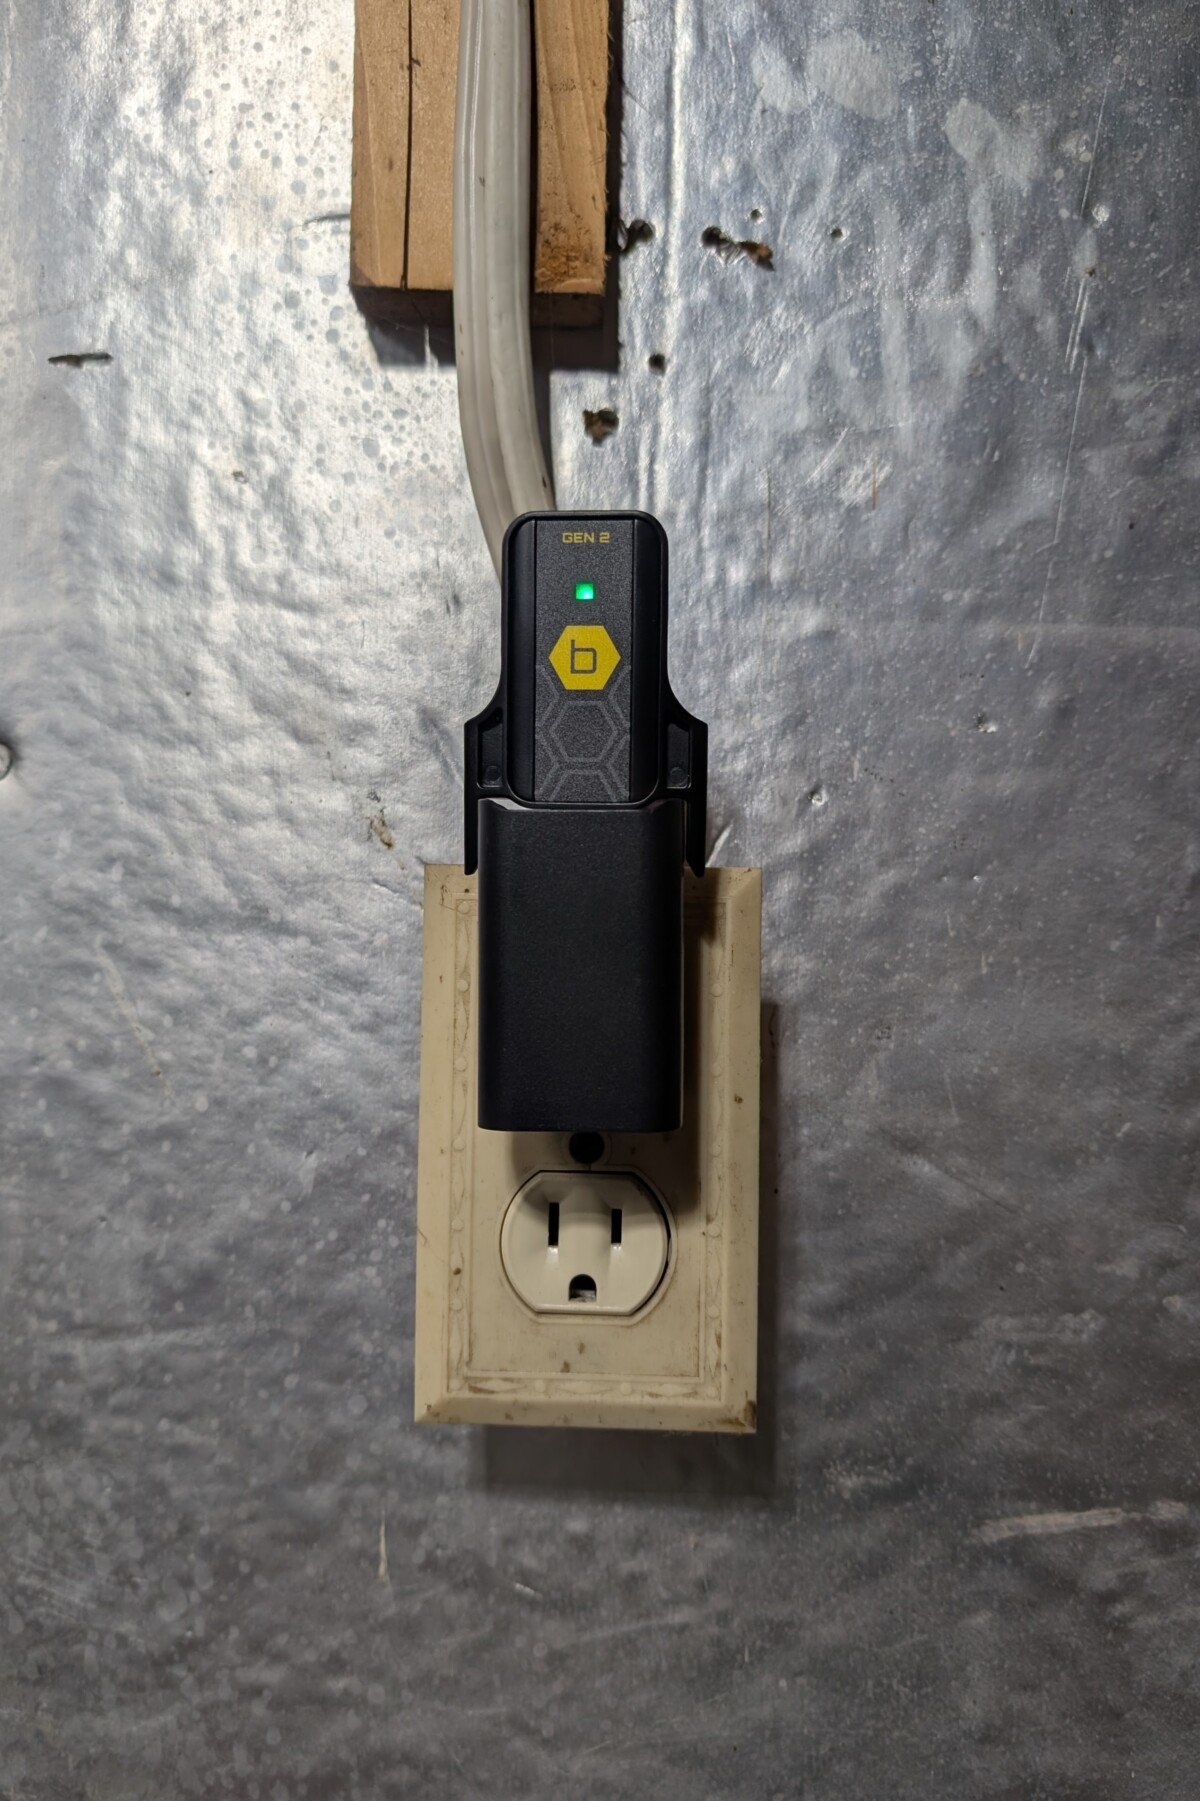
You can set the timers three different ways: you can set up a manual schedule, where it will turn the water on at a specific time each week, you can use Bluetooth to control your water timer from your phone, or you can purchase the wi-fi hub and use wi-fi to control your water timer. (The wi-fi hub isn’t needed for manual or Bluetooth operation.)
This means when I’m at the beach next month, six hours away from home, I can turn the water on in my garden if need be.
But I don’t even want to be bothered with that, so I have a weekly watering program set up, where my garden gets watered without me lifting a finger. I love it!
Save Water
Another great feature is that if you choose to use the app, you can enter your address, and it will coordinate with the local weather. So, if it’s going to rain within 24 hours of one of my watering programs, it will delay that program. That way, I’m not wasting water while Mother Nature is doing the job for me.
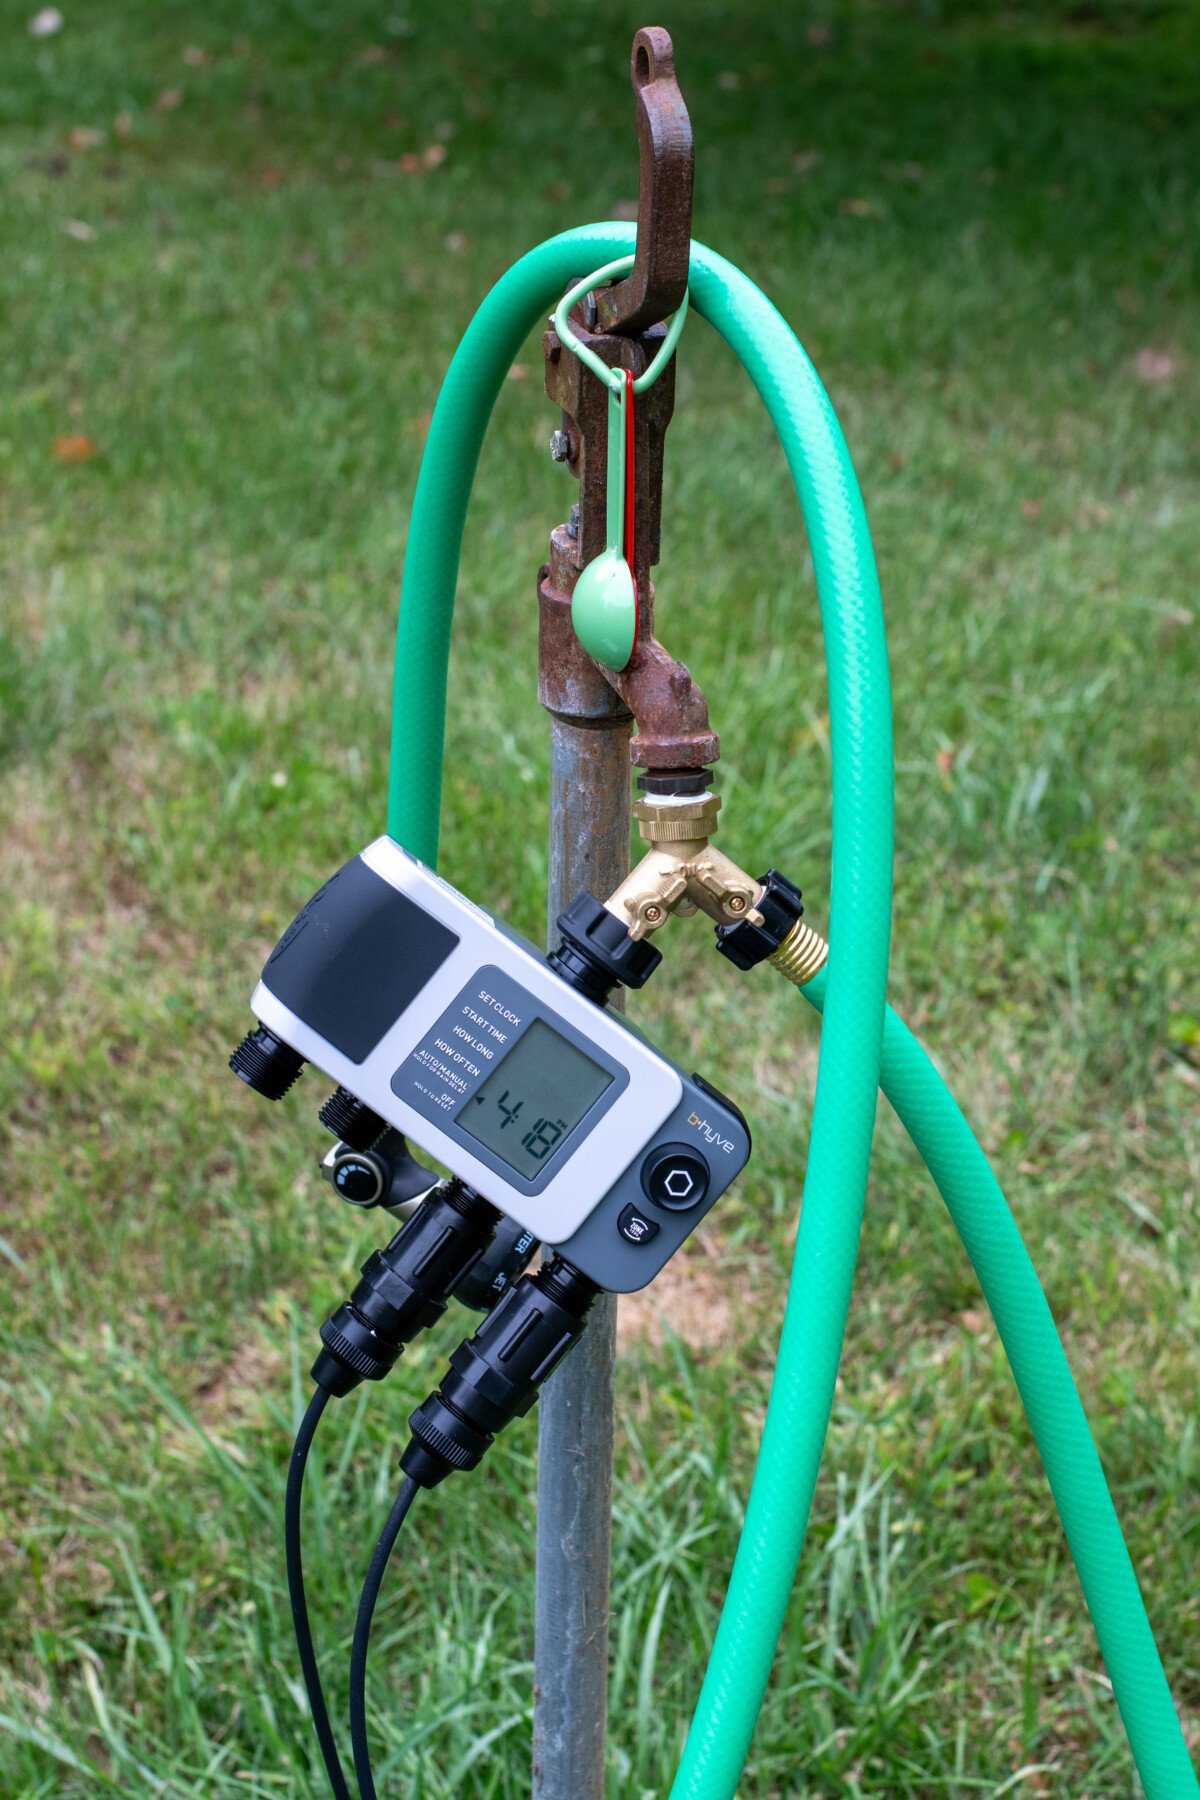
Because I have four different watering zones (tubing leads) in my garden, I have gone for the 4-port Smart Hose timer. (Only two are connected in this photo.) You can get the timer and the wi-fi hub here.
Related Reading: 7 Best Vegetables to Grow in Raised Beds + 3 You Probably Shouldn’t
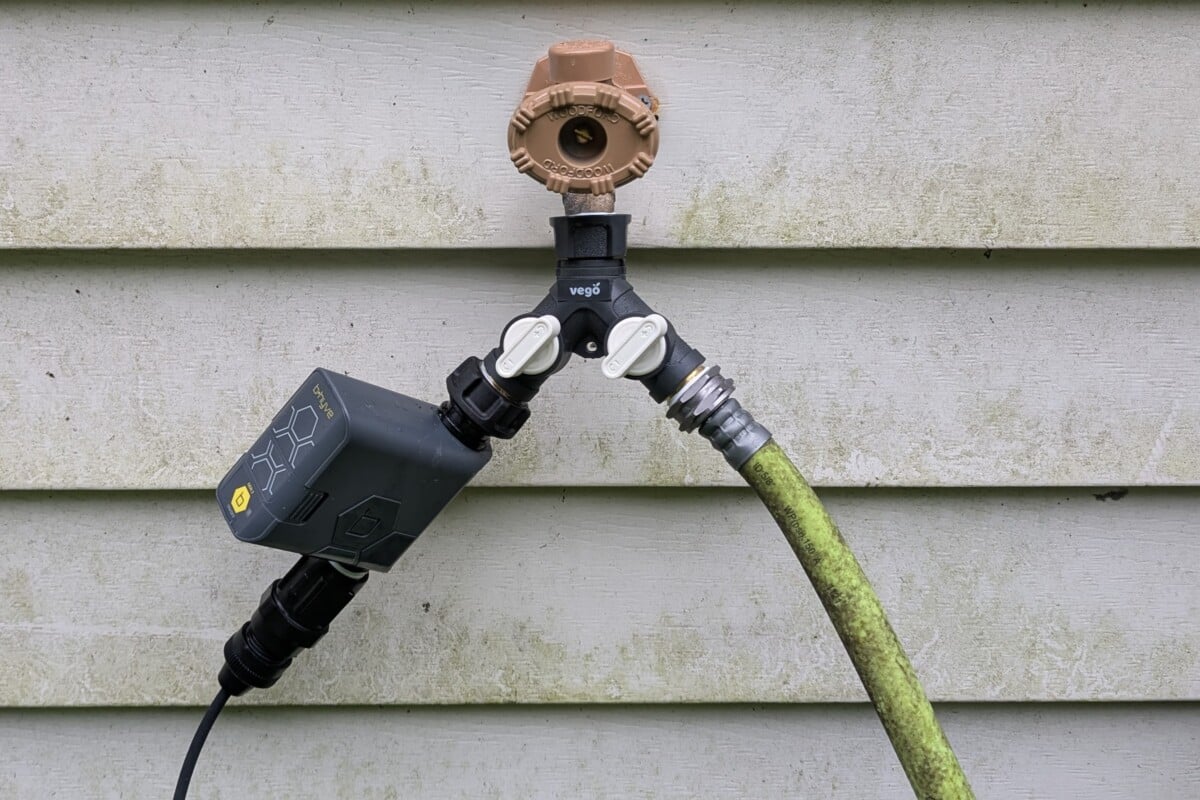
I also have a single port from the spigot on the back of the house for watering the kitchen garden by the back door. (A note: you only need one wi-fi hub. It will connect all of your Orbit b-hyve water timers.) They have quite a few options for all of your watering needs.
The Importance of Mulch
I want to take a moment to discuss how important it is to mulch your raised beds. Mulch and drip irrigation go hand in hand. The best irrigation system in the world isn’t going to do much if you aren’t mulching. We always tout the weed-suppression qualities of mulch, and while that’s great, mulch is a lifesaver when it comes to watering and caring for your raised bed soil.
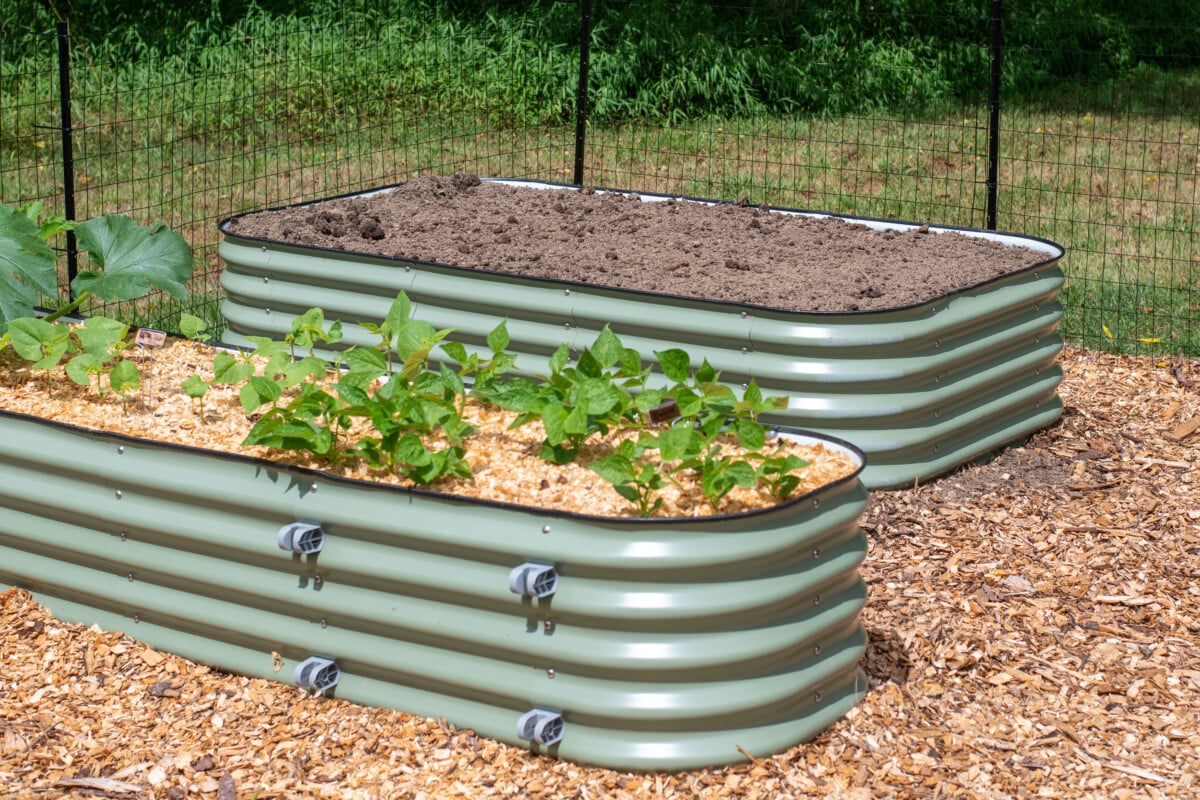
After I finished installing my new raised beds this summer, I filled them with a beautiful growing mix from my local nursery – topsoil, mushroom compost, leaf mold and sand. It’s well-draining and loaded with organic matter.
I filled my beds, but before I could put in the irrigation, it started raining. The next day, I was astounded to find that even a day of light rain had hardened and made the top layer crunchy. I had to go through and fluff it up a bit before putting in the Rain Bird drip irrigation. And then I mulched.
Mulch protects your soil and saves water.
By putting down a thick, two to three-inch layer of mulch, I don’t have to worry about water pounding my soil into a brick-like mass. The mulch protects the soil and prevents compaction, allowing my plants to grow better, especially my root crops.
Aside from protecting my soil from compaction and erosion, it also holds moisture. That means I can water less, a lot less, which saves me money on my water bill.
Even on the hottest summer day, I can go out to my garden, push the mulch aside, and my hand falls on cool, damp soil.
It makes me smile every time.
Because raised beds sit above the ground and have less mass than a garden in the ground, they heat up faster (which is a benefit in the spring), but this also means they get hot and stay hot in the summer. If you aren’t mulching, your beds will cook off any water you put down and stress your plant roots.
My friends, you need to mulch your raised beds. It’s as simple as that.
Between my Rain Bird drip irrigation system and my fancy hose timers, watering my garden isn’t even something I break a sweat thinking about these days. Hmm, I guess it’s time for that linen shirt. And as for the vintage watering can, I can use that for applying fertilizer. Martha Stewart, eat your heart out!

Get the famous Rural Sprout newsletter delivered to your inbox.
Join the 50,000+ gardeners who get timely gardening tutorials, tips and tasks delivered direct to their inbox.