


When you live in a part of the world with distinct seasons, dutifully checking the weather forecast every day is a semi-annual gardening tradition.
Sudden swings in temperature in late spring or early autumn can mean stunted growth, misshapen flowers or fruit, or most tragically, the untimely demise of your frost tender crops.
Like other warm season veggies such as peppers and eggplant, tomatoes will be their healthiest when given plenty of light and warmth.
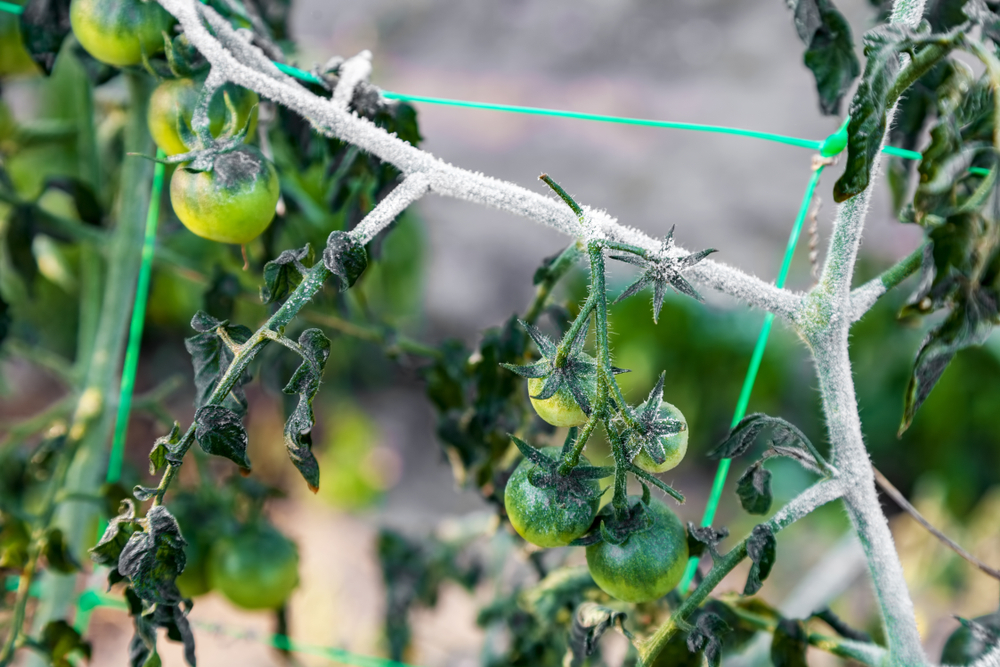
Tomatoes are particularly sensitive to frost; even cool temperatures that don’t dip below freezing can cause lasting harm to tomato plants, both young and old.
How to Protect Tomato Seedlings Against Late Spring Frost

Even when you do everything by the book and plant up your tomato seedlings after the last frost date for your region, a sudden cold spell may come along to foil your plans.
The optimum temperature for productive and healthy tomato plants is between 65°F to 80°F (18.5°C to 26.5°C).
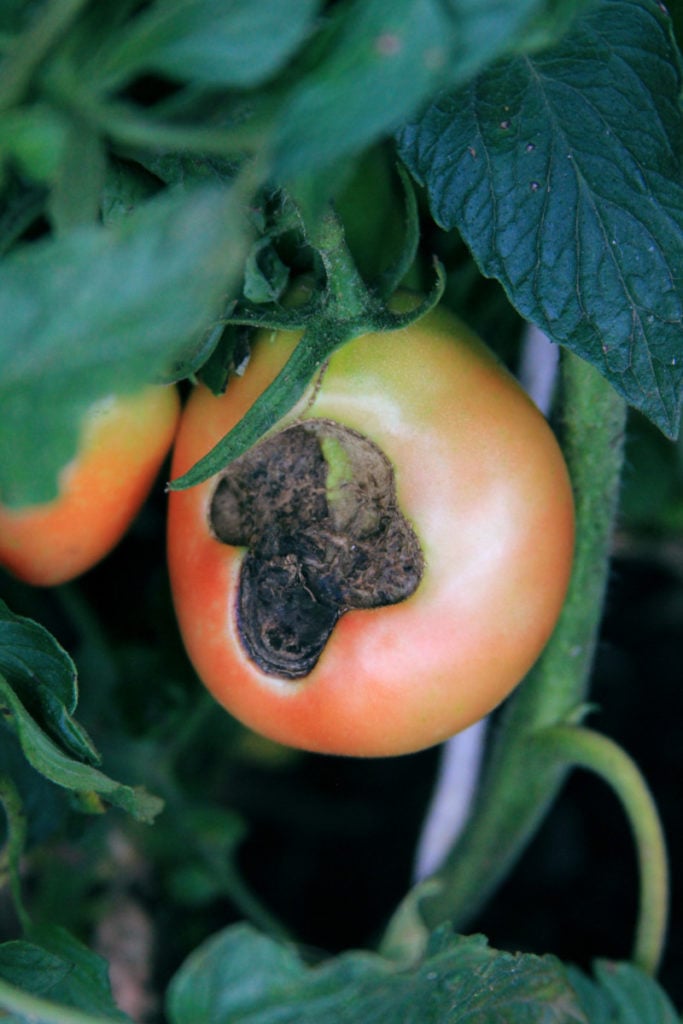
When temperatures are below 55°F (13°C) consistently, the fruit that eventually develops can become misshapen or “catfaced” – malformed tomatoes that are still edible but have brown scarring, holes, and crevasses in the flesh.
Tomato plants exposed to prolonged periods of temperatures below 50°F (10°C) will flower profusely but fruit won’t set.
And in temperatures between 32°F and 41°F (0°C and 5°C), tomatoes become affected by chilling injury, which stunts overall growth, causes foliage to become wilted or die back, and increases the plant’s susceptibility to disease.
For the best yields, you’ll want to keep young tomato plants nice and warm early in the growing season. Luckily, it’s pretty easy to protect them from the cold while they are still relatively small and compact.
1. Garden Cloches
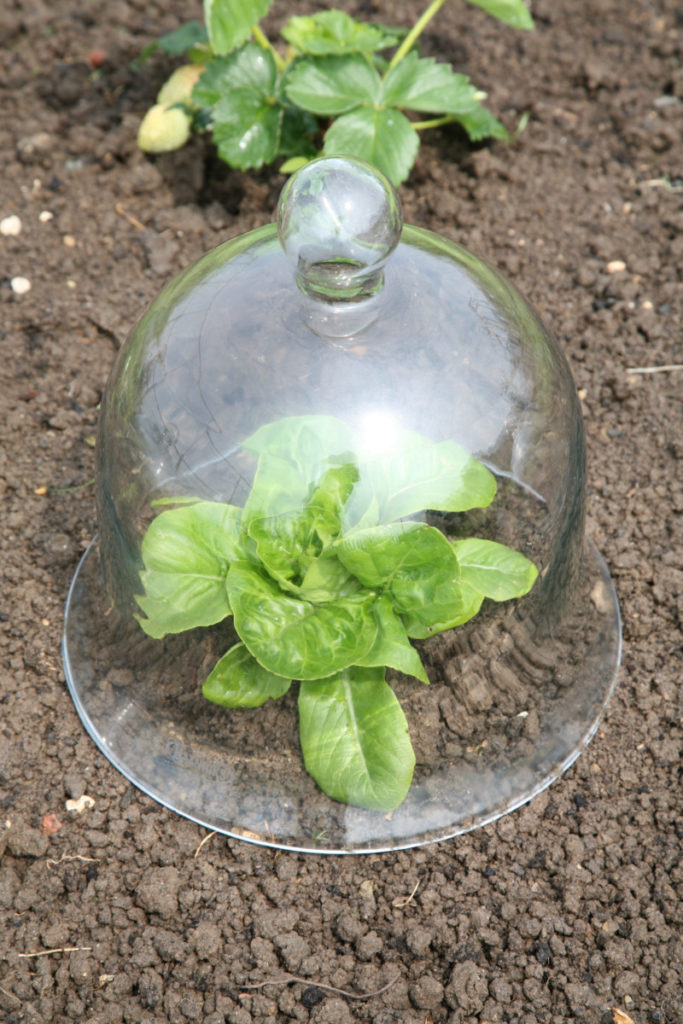
A garden cloche is a plastic or glass dome that is placed over individual plants to protect them from the cold.
When the cold is coming, cover plants up at dusk and remove the cloches first thing in the morning the next day.
These are best to deploy when tomato plants are still fairly young and before they become sprawling behemoths.
You can purchase a 6 pack of garden cloches on Amazon here.
You can also start a collection of garden cloches with items commonly found around the home.
Any rigid container can become a garden cloche. Upside down buckets, terra cotta pots, plastic planters, and waste bins would also work.
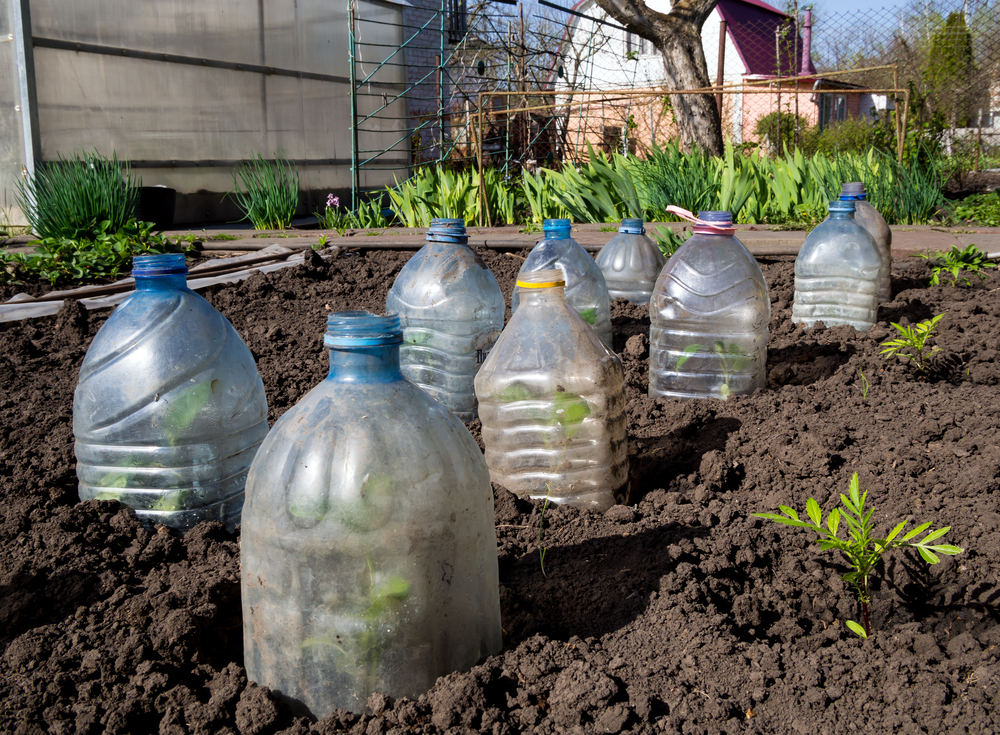
Another option is to cut off the bottoms from plastic milk jugs and large water bottles and nestle them into the soil around seedlings.
2. Wall O Water
Wall O Water (also known as Plant Protectors and Season Starters) are a way of protecting plants from cold and extending the growing season by several weeks.
Made from flexible plastic, these tubular covers are surrounded by a ring of long pockets that you fill with water. The water helps insulate the plant against temperatures as low as 26°F (-3°C).
Situated around each plant, Wall O Water contraptions allow you to transplant tomato seedlings outdoors six weeks earlier than usual.
Keep them on your tomato plants as long as you can through the season, as they also help moderate the heat of midsummer as well.
Just be sure to keep the water topped up!
You can purchase Season Starter 3-packs here.
3. Mini Hoop House Kit
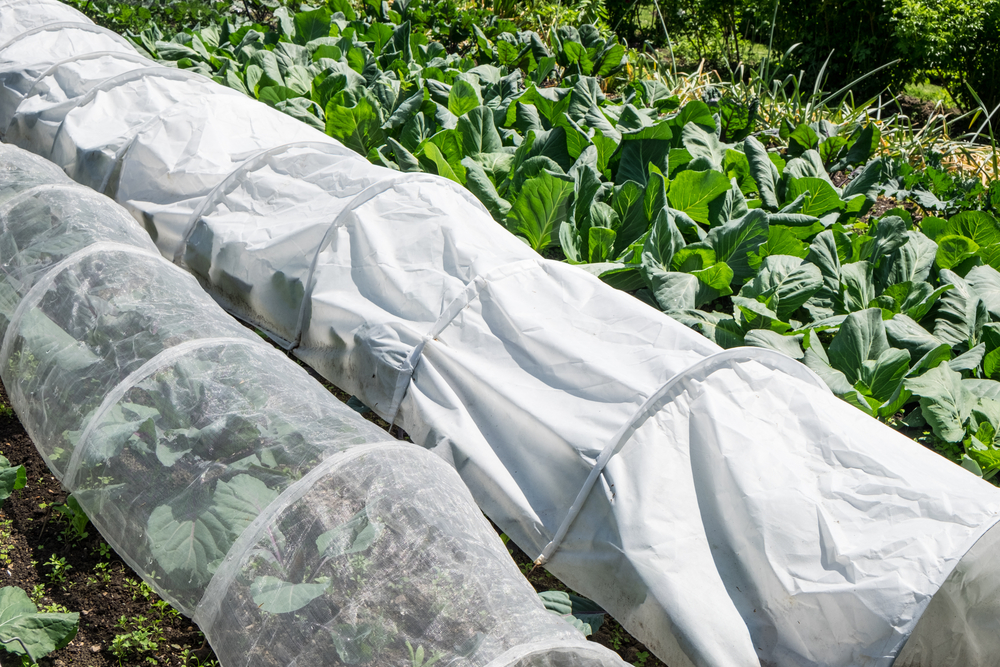
To cover up a row of tomato seedlings all at once, a mini hoop house kit is a great investment.
While you can purchase greenhouse hoops and floating row covers separately, this kit by Terra Garden comes complete with galvanized steel hoops attached to a fitted fleece tunnel.
The ends of the tunnel have a drawstring closure so you can keep plants warm and cozy inside on those chilly spring evenings.
At nearly 10 feet in length when fully extended, the tunnel can be easily adjusted for shorter garden rows because it opens up like an accordion.
When ready to store for the off season, it collapses into a tidy package that can be reused again and again.
How to Protect Mature Tomato Plants from Early Fall Frost
Just as young tomato plants need light and warmth to grow vegetatively, put out flowers, and set fruit, mature tomato plants require certain temperatures for fruit ripening.
The optimal temperatures for tomato fruits to ripen from green to red are between 68°F to 77°F (20°C to 25°C).
Temperatures below 50°F (10°C) can destroy some of the ripening enzymes within the fruit. The more often green tomatoes are exposed to these chilly temperatures, the less likely they will ripen at all.
Tomatoes that are starting to turn red on the vine won’t be as adversely impacted by cold as the green ones, but fruit quality will be compromised by loss of flavor, firmness, and a shorter storage life.
4. Harvesting Immature Tomatoes
For the juiciest and tastiest tomatoes, it’s always better to let your tomatoes ripen on the vine.
Check out these tips on how to speed the tomato ripening process along.
However, when warm evenings start to turn cool and intermittent frost warnings are in the forecast, protect your harvest by picking some of the fruit for ripening indoors.
Only harvest tomatoes that are just about to ripen. You can tell this by color – red, slightly red, and very light green (almost white) tomatoes can be plucked, but leave medium green tomatoes on the plant.
Place unripe tomatoes in a single layer in a cardboard box and cover with newspaper. Kept at around 70°F (21°C), green tomatoes should be fully ripened in about two weeks. Check in on them every day to watch their progress.
Even if some of your tomatoes stay green, there are plenty of delicious ways to use them.
5. Use Floating Row Covers on Large Plants
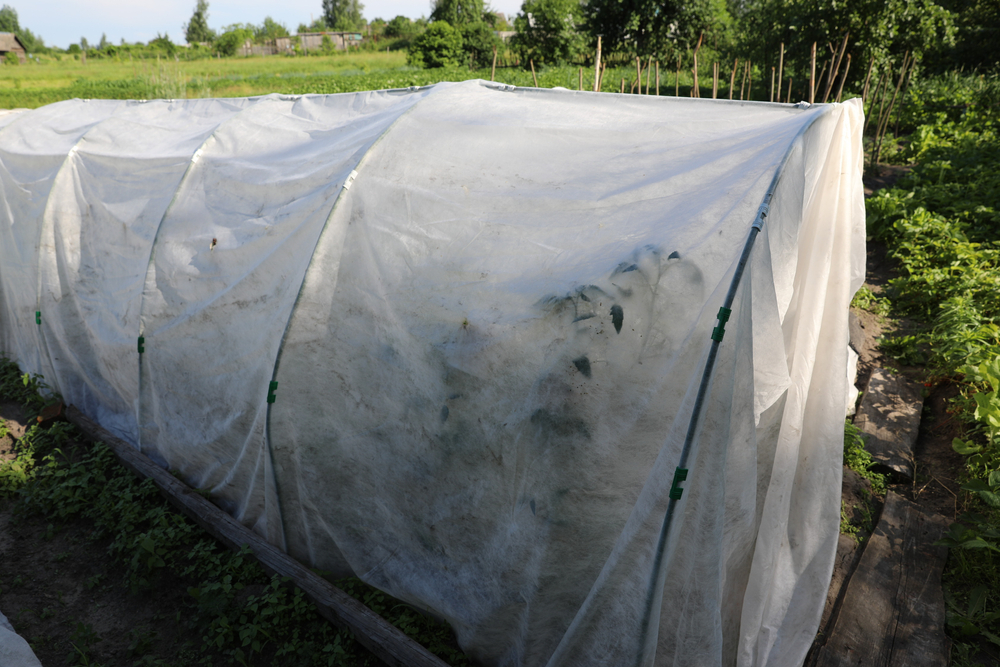
Although tomato plants start out pint-sized, by autumn they can be absolutely massive – especially if they are of the indeterminate variety!
To keep your tomato plants productive for as long into autumn as possible, they will need to be covered up each evening when temperatures dip below 50°F (10°C).
Before laying down a frost cover, first create a tent-like structure by driving several stakes into the ground around your tomato plants. To determine the length of the stakes, measure the height of your tallest plant and then add two feet. There should be one foot of clearance above the tallest plant and one foot for driving the stake into the ground.
Once you’ve created a frame, use a frost cloth designed specifically for the garden, or drape blankets, bed sheets, towels, burlap, or drop cloths over the structure. Lay the fabrics in such a way that the top and all sides are covered, all the way down to the soil line.
Keep the fabric in place by weighing down the edges and corners with bricks or large stones. Or, secure it with ground staples or tent pegs.
Remove the frost cover the next morning so the tomato plants can bask in the sunshine.
6. Add a Plastic Tarp
On chillier nights, layering a plastic sheet on top of the fabric materials will provide a bit more insulation against the cold.
When adding a plastic layer, make sure it is not touching any of the plants’ foliage. In freezing temperatures, any plastic that comes into direct contact with plant tissues will freeze.
7. Add a Space Blanket
For even more protection, the insulating powers of space blankets can be used as frost protection in the garden.
These mylar thermal blankets will help reflect 90% of the heat back to the plants. Drape a layer, with the shiny side down, over top of the plastic tarp.
8. Provide Heat with Water Jugs

Just as with the Wall O Water, plain old H2O can hold on to heat and release it at night when the plants need the warmth.
Fill up several one-gallon jugs with water and screw on the cap. Nestle these jugs into the soil next to the tomato plants, in a spot where they will warm up in the sunshine.
At dusk, cover the plants with your frost covers. The water jugs will slowly emit heat throughout the evening.
Uncover plants the next morning so the jugs can capture another day’s worth of heat.
9. Set Up Some Christmas Lights

Another way to supplement heat is to use those colorful strings of Christmas lights.
To generate the most heat, use the old incandescent variety. Unlike LEDs, these bulbs will be warm to the touch and raise the temperature under the frost blanket by 2°F to 10°F (1°C to 7°C).
Clip the lights all around your plants, attaching them to your tomato plant supports or laying them along the ground. Just make sure they are not touching the plant foliage or the frost cover fabrics.
10. Water in the Afternoon
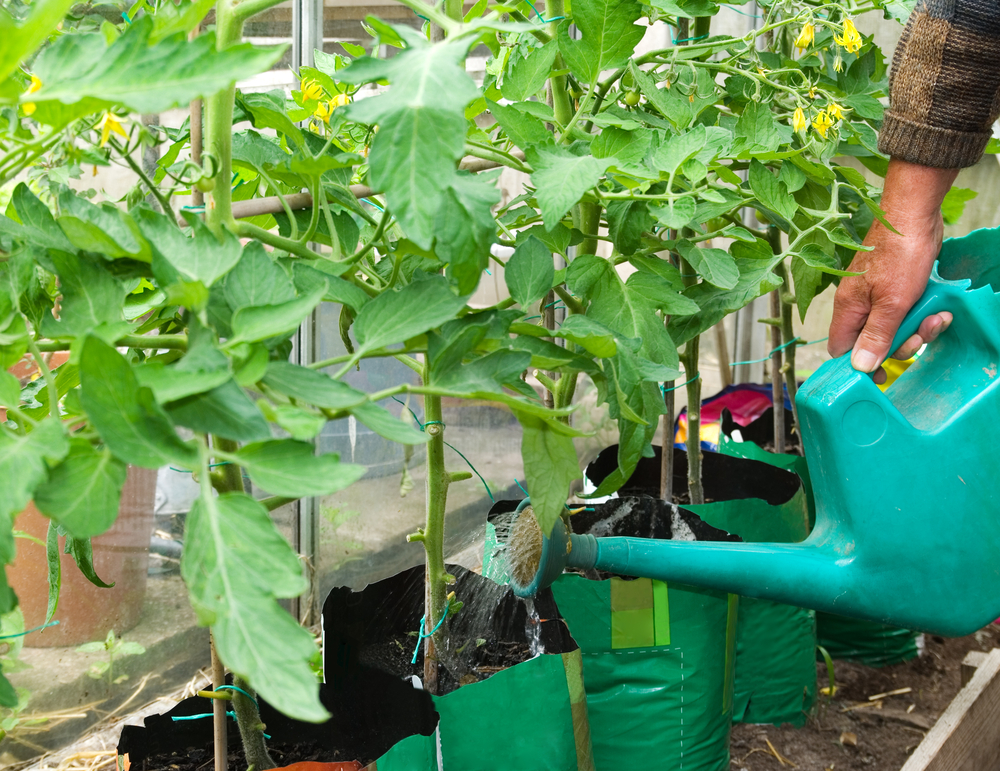
Give your tomato plants a good drink of water before a looming frost.
Moist soil has a warming effect on nearby plants, radiating heat upward throughout the night.
Always water in the early afternoon, when the daytime temperatures are at their warmest, so the soil can heat up before nightfall.
11. Apply a Thick Layer of Mulch
Putting down a heavy layer of mulch around plants also has an insulating effect.
Before a cold snap, apply mulch to a depth of 6 inches in your tomato patch.
Leave an inch or so of soil exposed around the central stalk of each plant. This will allow the heat from the earth to travel upwards through the plant.
When the weather warms back up, pull back part of the mulch to a standard 3 inch depth.
Planning for Frost
When you live in a frost-prone region, the ritual of setting out cloches and frost blankets every evening and hauling them away each morning can become a bit of a chore.
Take away some of the worry of losing your beloved plants by planning ahead for future frosty bouts.
12. Build a Greenhouse
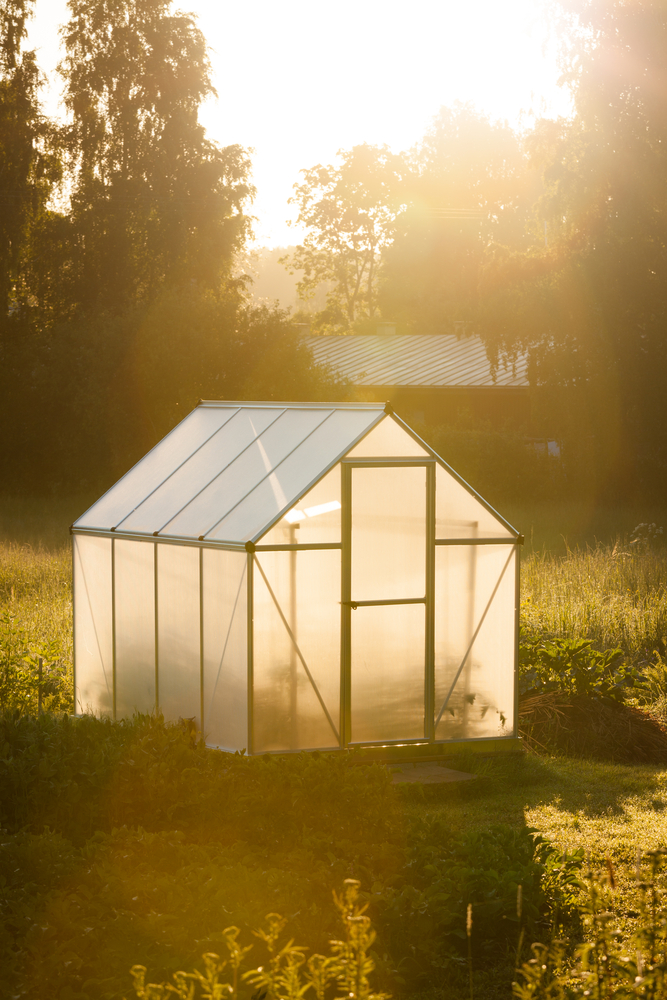
Extend your growing season and protect your warm season crops with a permanent greenhouse structure.
Since a greenhouse is essentially a frame covered in glass or plastic, they can be built in many shapes and sizes.
Here are 26 DIY greenhouse ideas for every budget and skill level.
13. Grow Tomatoes for Cold Climates

From planting to harvest, it generally takes tomatoes around 100 days to mature.
The best types of tomatoes to grow in cold climates are short- to mid-season varieties. These will set fruit in cooler temperatures and reach maturity much faster.
Here are a just a few of the many quick growing tomato cultivars that are more tolerate of cool climates:
- Siberia Tomato –50 days to maturity. This heirloom variety is capable of setting fruit at 38°F (3°C).
- Kimberly Tomato – 54 to 58 days to maturity.
- Glacier Tomato – 55 days to maturity.
- Silvery Fir Tree Tomato – 55 to 60 days to maturity.
- Stupice Tomato – 55 days to maturity.
- Manitoba Tomato – 58 days to maturity.
- Polar Baby Tomato – 60 days to maturity.
- Bush Beefsteak Tomato – 62 days to maturity.
- New Yorker Tomato – 66 days to maturity.

Get the famous Rural Sprout newsletter delivered to your inbox.
Join the 50,000+ gardeners who get timely gardening tutorials, tips and tasks delivered direct to their inbox.