

Rosemary is a popular culinary herb from the Mediterranean, and it always seems to taste better fresh. Luckily, propagating rosemary from stem cuttings is incredibly easy to do. It only takes a few minutes to get it started, and with a little patience, you’ll have beautiful rosemary plants to supply you with fresh rosemary ready for everything from roasts to cocktails.
Getting Good at Growing Rosemary
I live in zone 6b, which means that for me, and quite a few other gardeners, rosemary is an annual. I got tired of buying a new rosemary plant each year, so I tried growing it in a large pot and bringing it indoors in the fall. But I never had the room for a sun-loving plant in a huge ceramic pot.
So, I have to start from scratch every year for one of my favorite culinary herbs. Sort of…
I still keep my rosemary in a big pot outdoors in the summer, but I also take cuttings each year to grow indoors. That way, I have new plants ready for the next season. Luckily, it’s easy enough to do, and I can grow several smaller plants throughout the winter.
Not only does this keep me in fresh rosemary for all of my cooking while the snow flies, but then, in the spring, those new plants are ready to be transplanted outside into my rosemary pot. And in the fall, when my rosemary is huge, I’ll take new cuttings to start indoors, and the cycle continues.
It’s free. It’s easy.
And it keeps me in rosemary, which is important if one loves making hearty roasts and stews and drinking fig old-fashioneds with a sprig of rosemary to chase away the winter chills.
So, let’s propagate some rosemary together. You’ll need a pair of sharp, clean scissors or pruning snips, pots or jars to root the stems in, a substrate (more on that in a moment) and rooting hormone powder.
Rooting Hormone
Do you absolutely need rooting hormone powder? The short answer is no; however, I’ve found that the “easy” in rooting rosemary cuttings comes from using rooting hormones. You can root stem cuttings without it, but your cuttings are more prone to rot before they put out roots. Rooting hormone powder is only a few bucks, and a small jar will last you decades. I think it’s worth it as it makes a huge difference in your success rate. (This is the brand I use.)
Choosing a Substrate
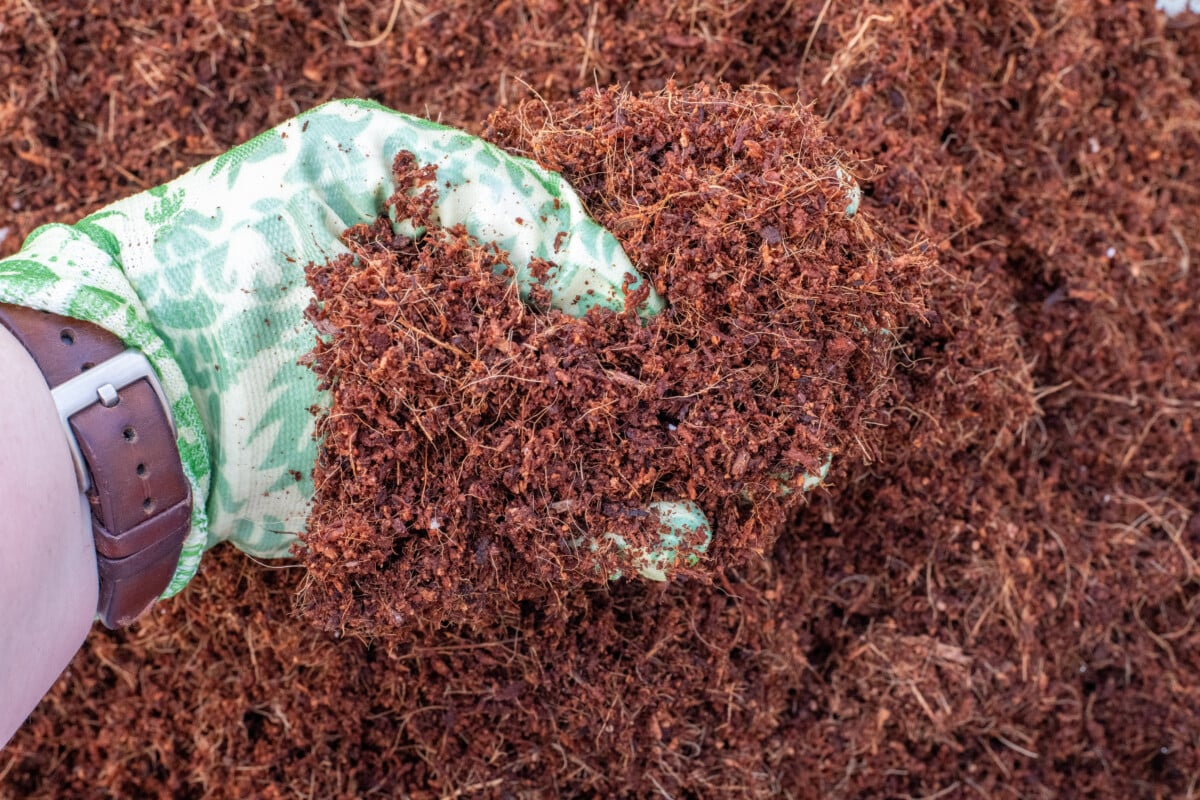
My go-to for rooting anything is always straight coconut coir. Potting soil is too heavy and encourages rot. Coconut coir is light, airy and holds enough moisture to encourage rooting, but not so much as to keep the stem waterlogged.
It’s cheap, easy to find, and best of all, unlike those monster bags of potting soil, it comes in the shape of a brick, so it takes up very little space until you’re ready to use it. In fact, it’s one of the five substrates I always keep on hand for custom blending all of the potting soils I use, from seed starter to African violet potting mix.
Now, here’s something interesting. Rooting your rosemary cuttings in soil that’s heavy and waterlogged will rot your stems, but you can root your cuttings in water. Why? Because in the soil, air has a chance to get in, and that’s what kickstarts the rotting, whereas if the stem is submerged in straight water, there’s no air.
Do I propagate stem cuttings in water? Nope. In my decades of experience, I’ve always had better success rooting directly in a soil substrate. I get roots faster, and it’s easier on the plant when you pot it up into its permanent home.
Prepare a few pots by putting pre-moistened coconut coir (or your well-draining soil substrate of choice) in them. You want the coconut coir to be damp, but not dripping. Set them aside for now.
Time to Take a Few Cuttings

It doesn’t really matter where you get your cuttings from, whether it be a friend’s rosemary plant or one of those handy little live plants from the grocery store. (That’s where my original rosemary plant came from. Yes! You can keep them alive and grow grocery store herbs into thriving, healthy plants. Here’s how.) You need to look for a few things when choosing which pieces to cut.
If you’re taking cuttings from a plant growing outdoors, spring to early summer is the best time to do it.
First, you want the plant to be healthy.
No spots or discoloration on the leaves or stems. A cutting from an unhealthy plant will most likely rot and die rather than root and grow.
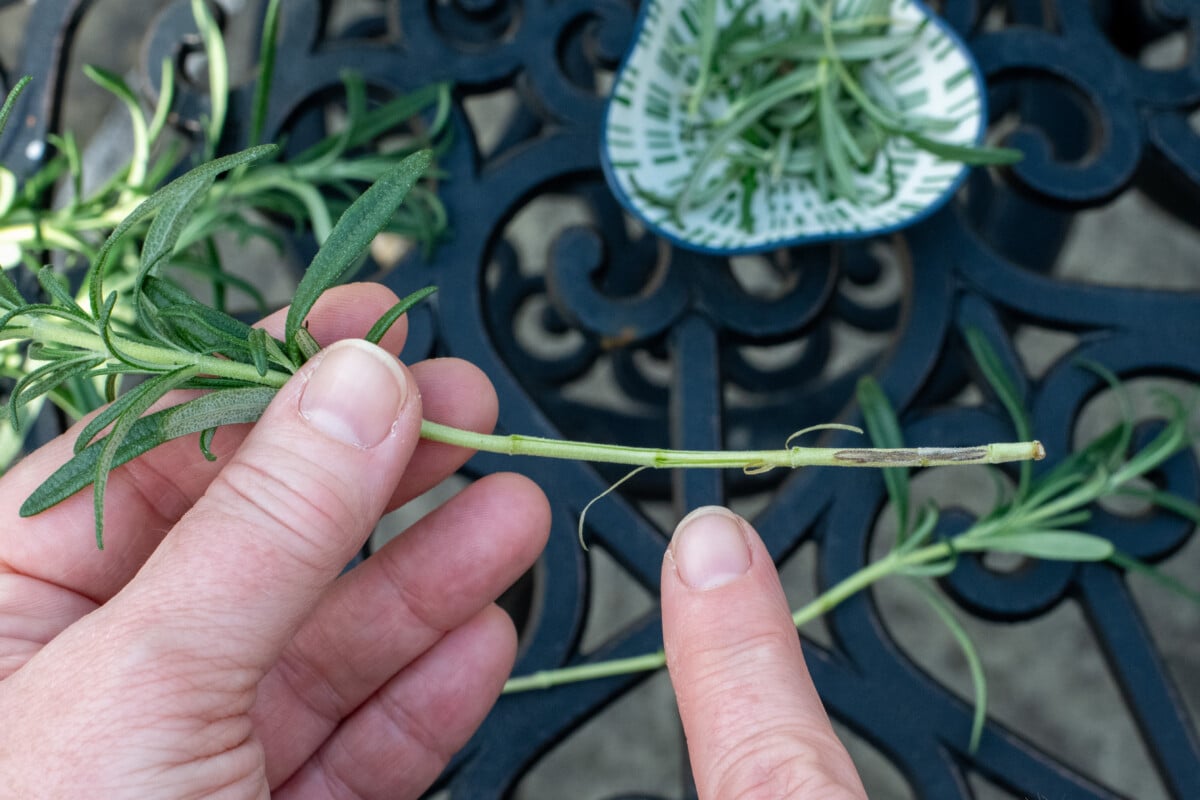
Next, you want the stems to be somewhat firm and starting to toughen up their outer cambium. You don’t want old tough, woody sections, as they are difficult to root. But on the flipside, you don’t want brand-new, soft growth either, as this has a tendency to rot more easily. (Just to be clear, you can root soft cuttings; it’s just harder to do successfully.)
Ideally, you want the bottom inch or so of the cutting to have thicker cambium that’s just starting to look a little woody, but that gives way to softer, newer growth toward the top.
We’re looking for the Goldilocks standard of ‘just right.’ Somewhere between new and soft and old and woody.
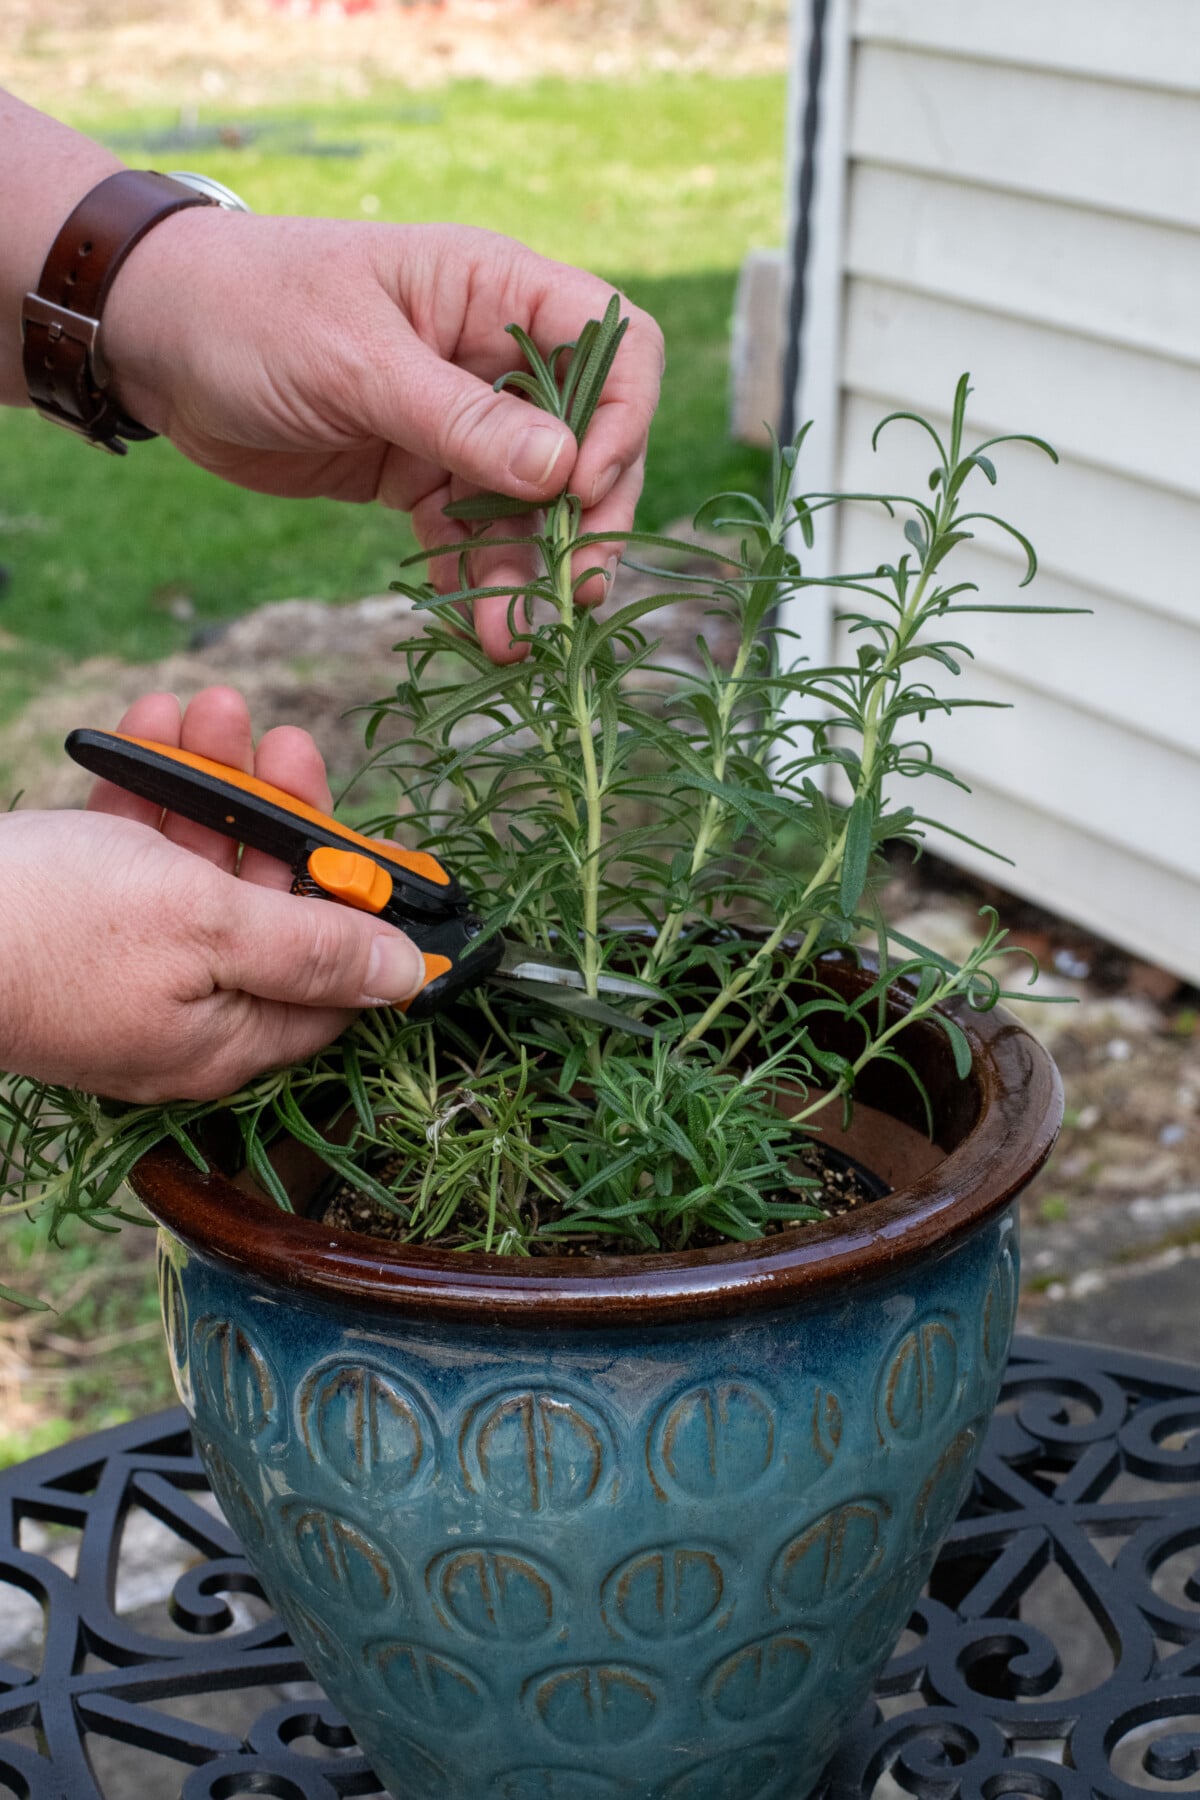
Always use very sharp, sanitized pruners or scissors. Wipe the blades with a little rubbing alcohol. Sharp blades make for a cleaner cut, which leads to faster healing and rooting.
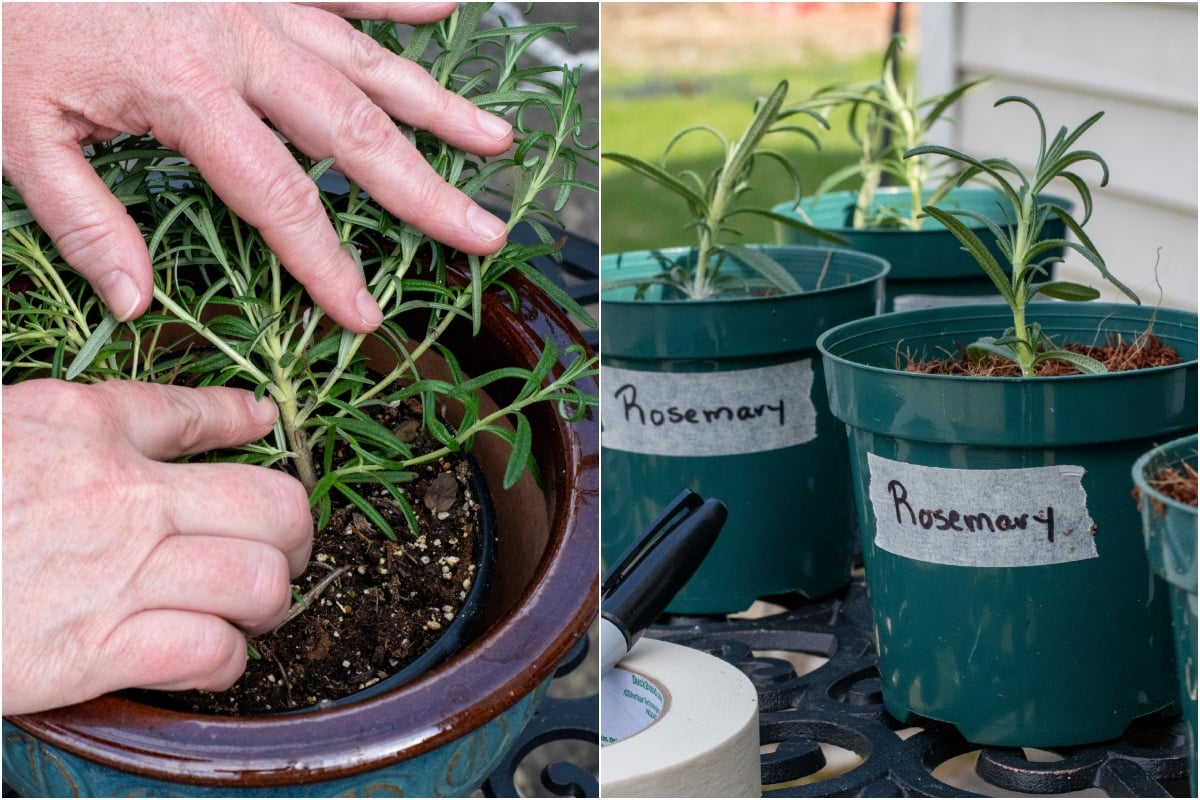
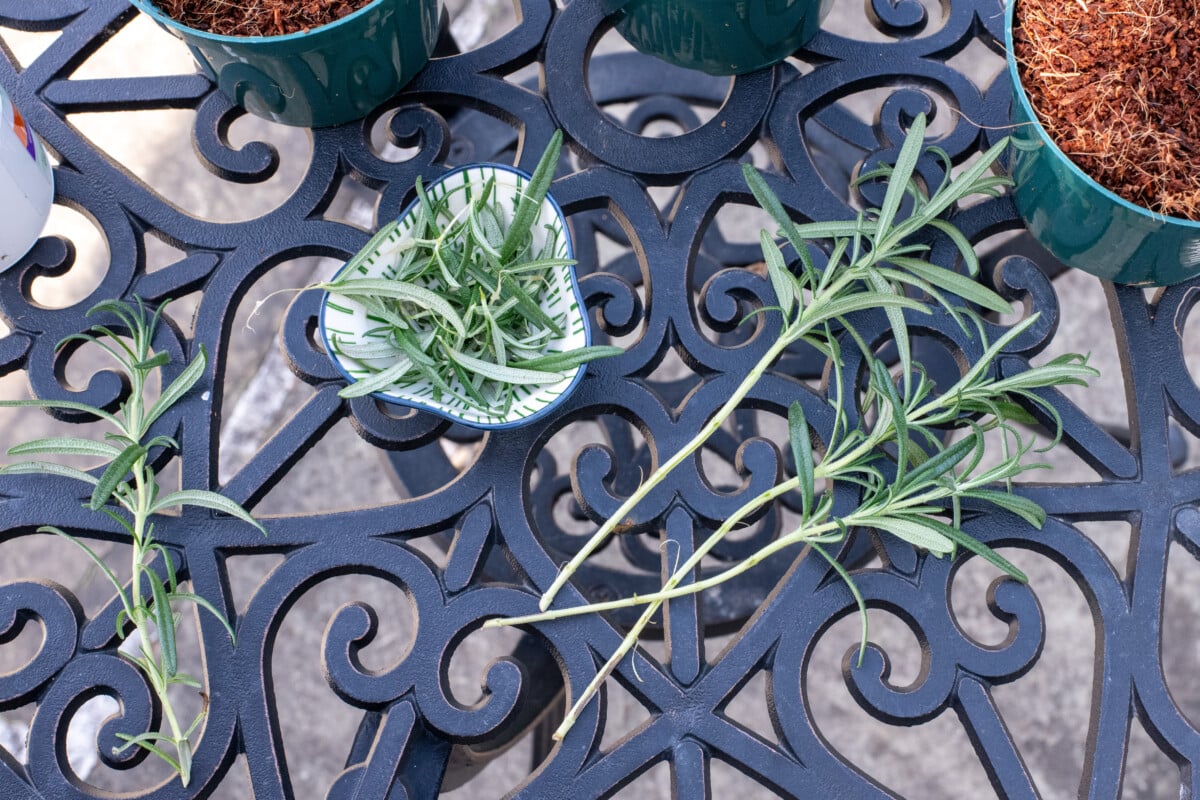
Snip your cutting so it’s between 4 and 6 inches long. Gently peel the leaves from the lower half of the stem. Don’t forget to save them to make something tasty.
It’s okay if the leaves peel away a tiny bit of the stem. In fact, this is a good thing as it encourages faster rooting. Just be careful that it doesn’t rip the stem entirely.
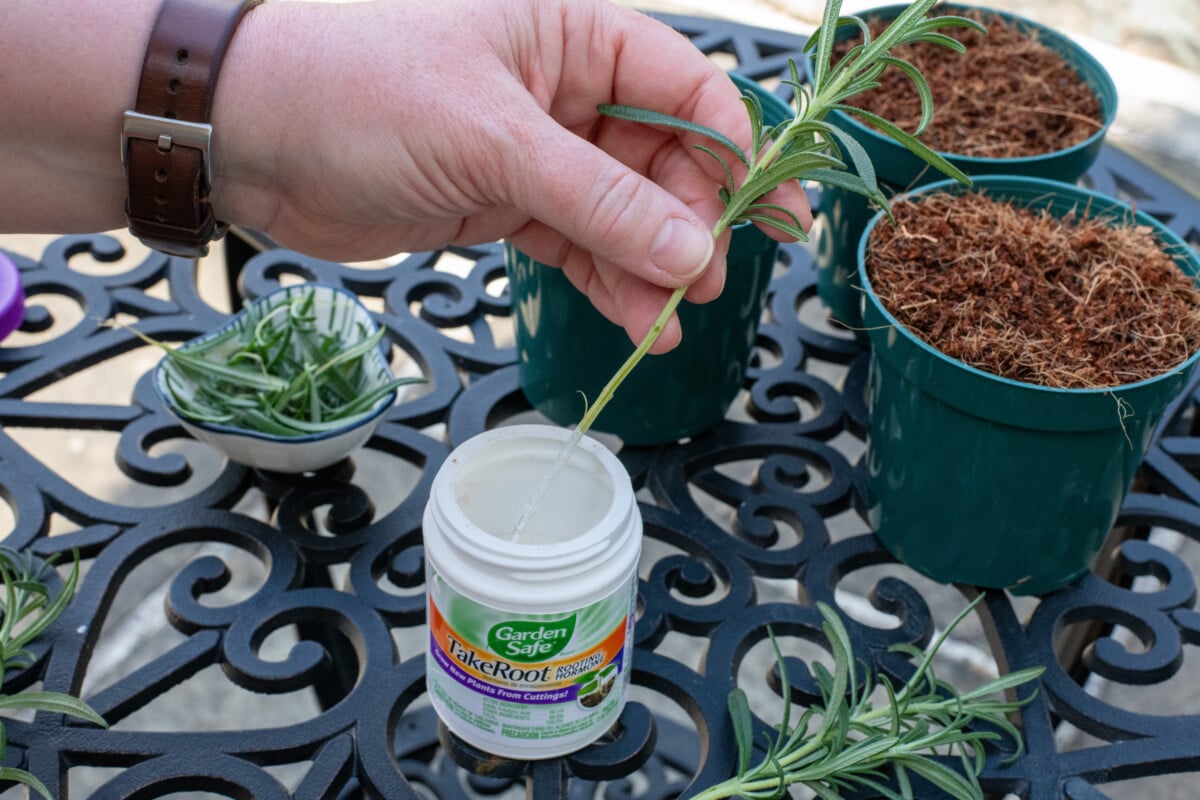
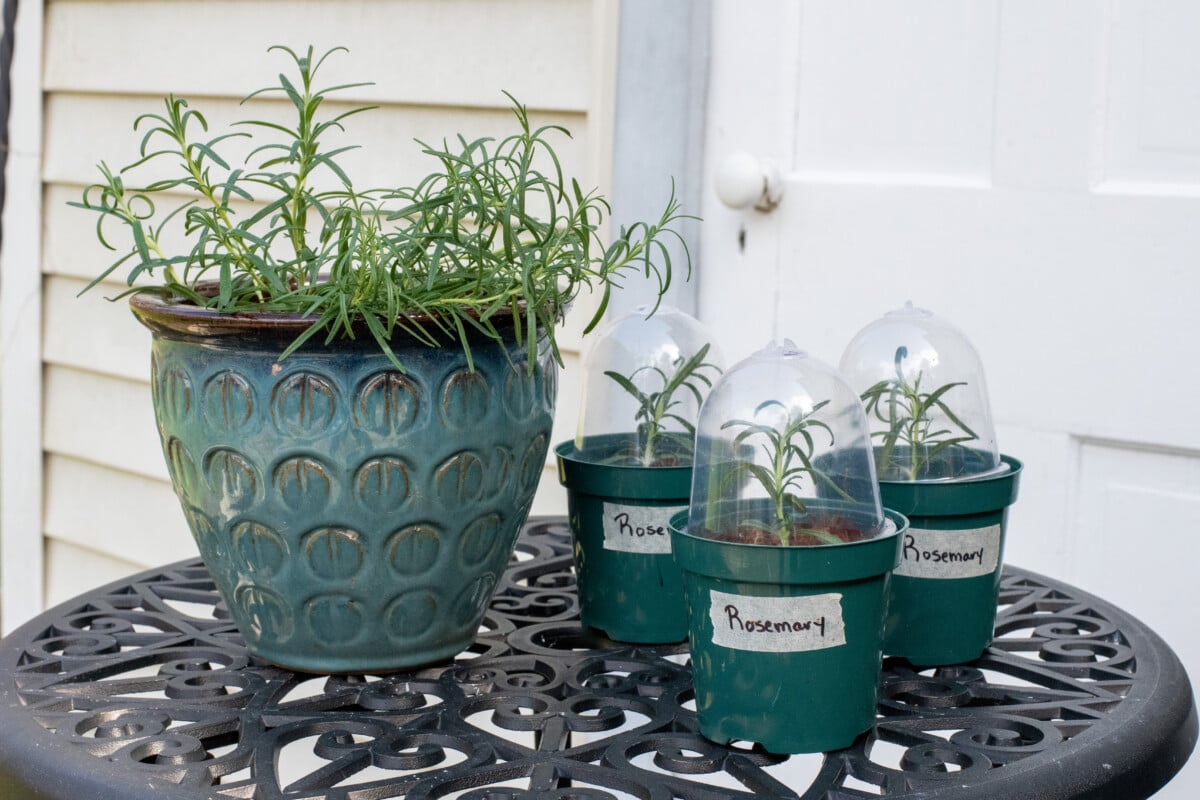
Now dip your stem into a bit of rooting hormone and push the cutting down into the prepared coconut coir. Press the coconut coir around the stem, ensuring that the lower leaves of the top of the cutting don’t touch the coir.
Lock in that Humidity
You need to keep the soil moist and humid. To do that, you’ll want to cover your cutting. You can use a sandwich baggie, plastic wrap or similar. I found these marvelous humidity domes that fit over 4” pots, and they are amazing! I use them for propagating African violets from leaf cuttings, and I use them when starting seedlings each year. They’re just super convenient. They have these tiny little vents in the top, too.
Are they necessary for successful stem cuttings? No. But they sure do help.
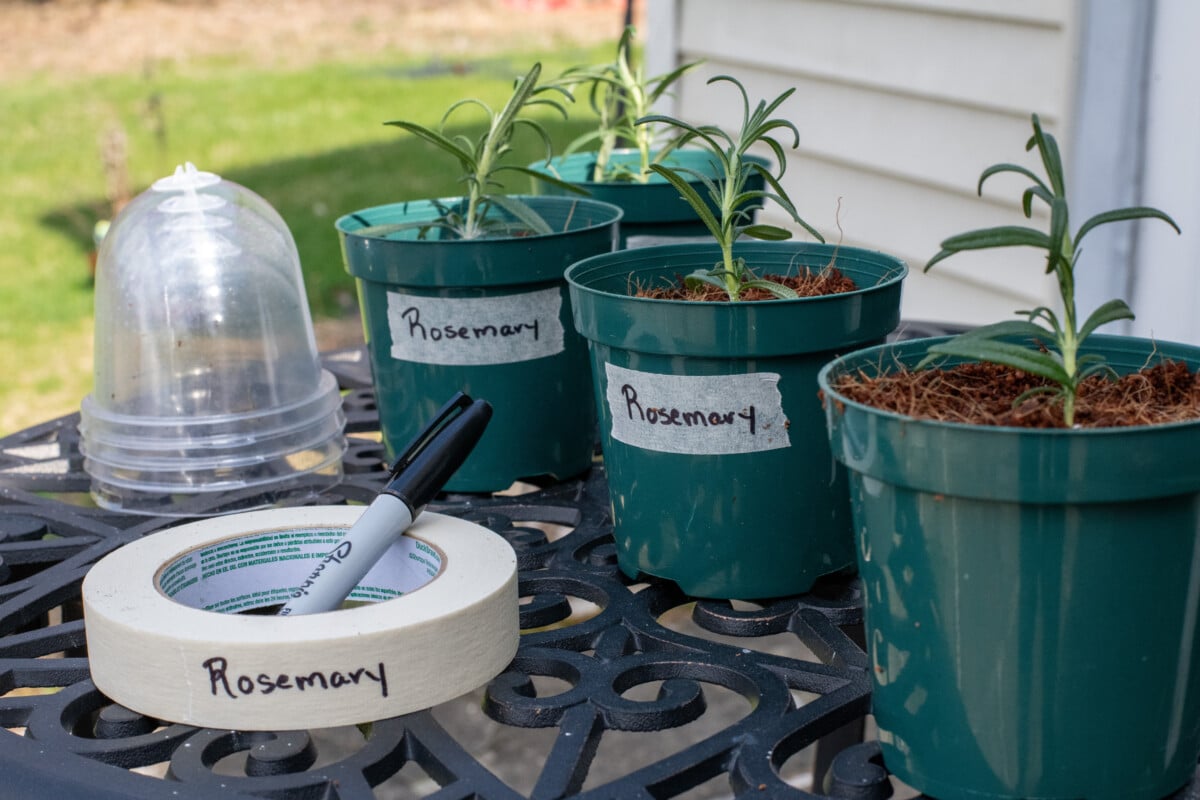
Oh! Don’t forget to label your cuttings. Rosemary is a pretty obvious plant, but you never know. Place your cuttings somewhere warm where they will receive plenty of bright, indirect light.
Wait Patiently
Now comes the hard part – waiting. Resist the urge to check your plant by tugging on it every week or so. Just check on it occasionally and make sure the soil remains moist. Keep an eye on the leaves. When they begin growing, you’ll know you’ve got roots. And yes, if you must, you can check by tugging on the stem lightly to see if there is resistance, but do so infrequently.
Depending on conditions, it can take four to eight weeks for your cuttings to start rooting. So patience is a must.
Once your cutting has well-established roots and has begun growing again, you can pot it up into a more permanent setting, whether that’s a pot or your garden. Just remember that rosemary does not like wet feet. Use a quick-draining potting mix or plant it in sandy soil.
Keep an eye on the humidity level, too. If you notice mold or if the leaves start rotting, you’ve got too much moisture, so create a vent by loosening your plastic baggie or whatever you’re using.
A Final Quick Tip
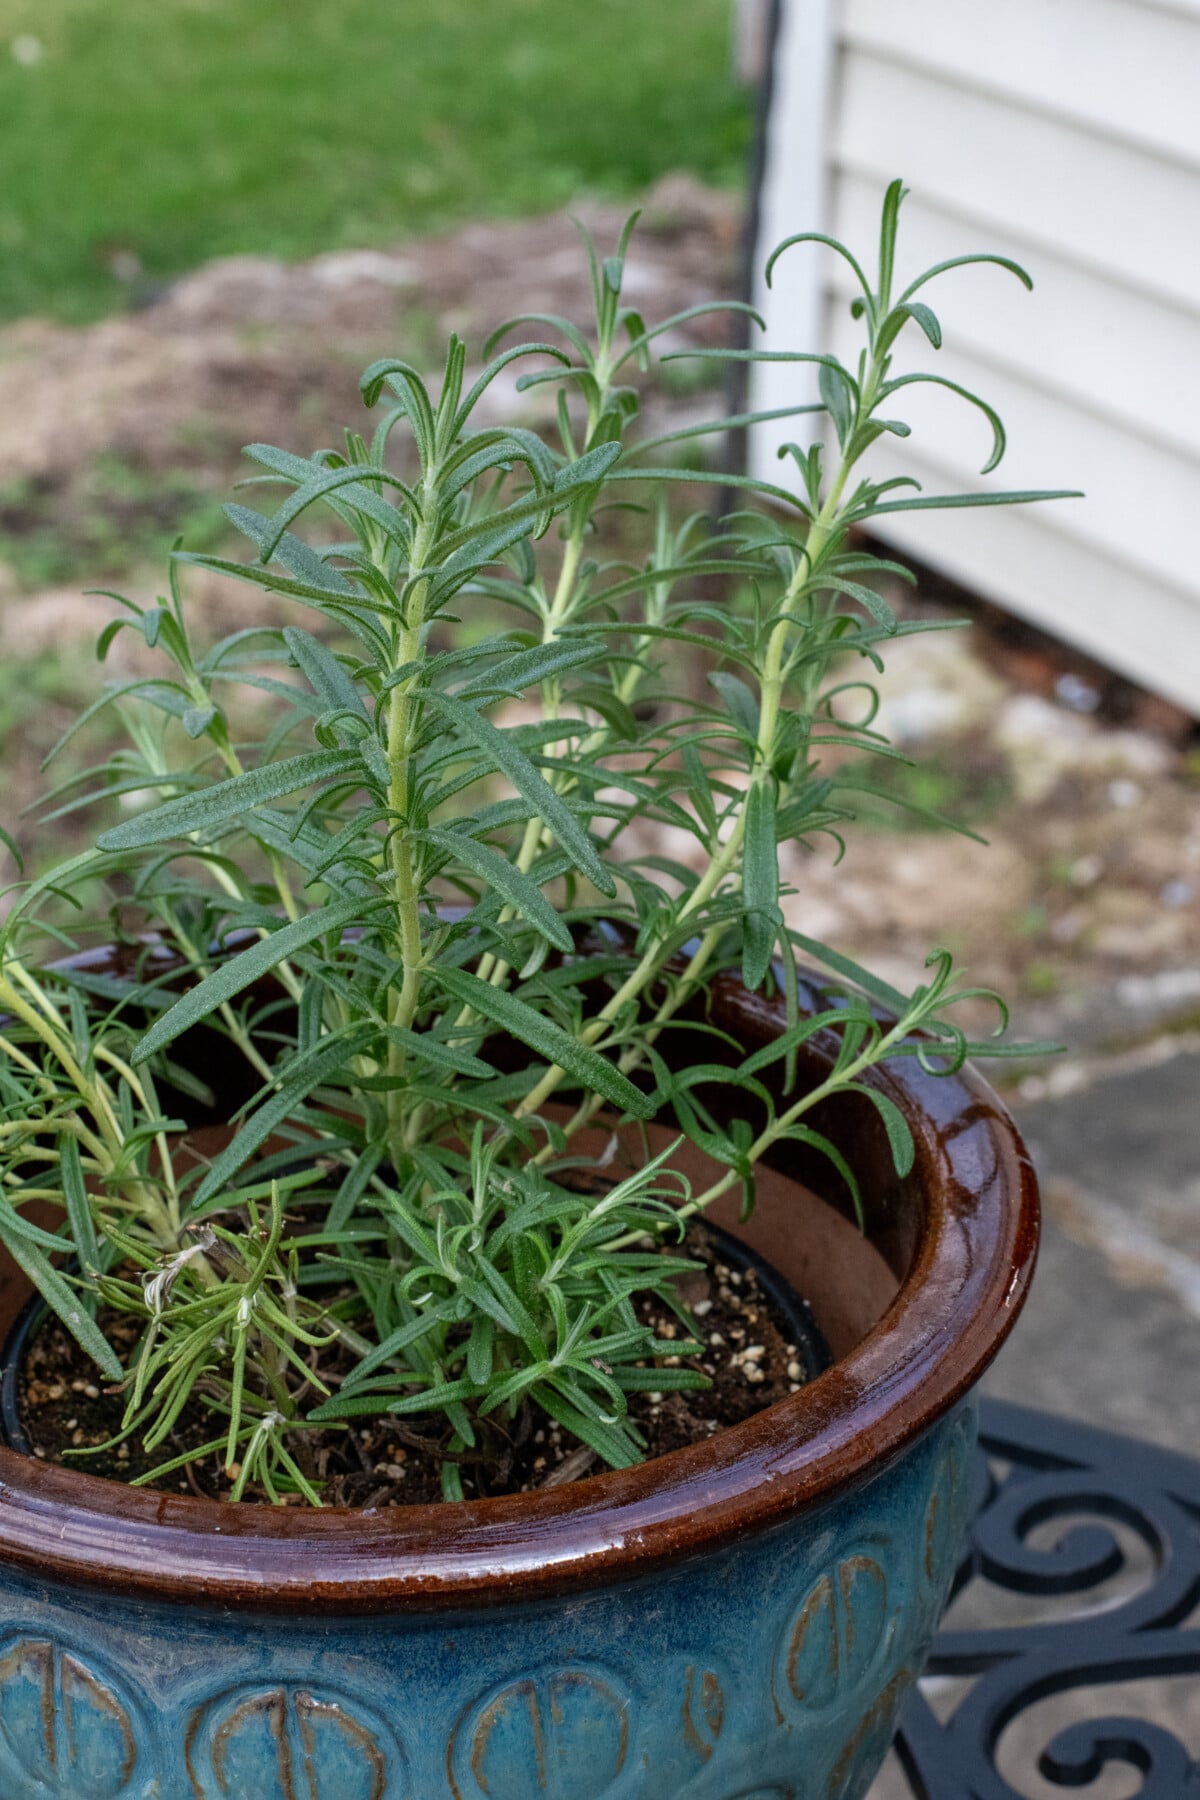
I always grow rosemary in a large ceramic pot each summer rather than directly in the ground. Rosemary is a Mediterranean herb, which means it likes to bake in the sun all day and abhors wet feet.
It seemed as though every summer, my rosemary would die long before the growing season was over because of some ill-timed rainy weather. I finally got smart and started growing it in a pot. That way, I can move it onto the patio and out of the rain if we get a particularly long stretch of rainy days.
Now, who wants rosemary roasted potatoes?

Get the famous Rural Sprout newsletter delivered to your inbox.
Join the 50,000+ gardeners who get timely gardening tutorials, tips and tasks delivered direct to their inbox.