


Check out this ridiculously festive ‘Christmas tree’ I made to hang in my kitchen. I chose a baking theme to tie it in with the room I’m putting it in, but you could just as easily decorate it with other items for a different theme, or stick to the more traditional Christmas tree decorations.
No matter what you choose, there’s a good chance you already have the ‘tree’ hanging out in your garden shed.
Let’s make one together.
Raking In the Christmas Cheer
We’re going to make a Christmas tree out of a metal leaf rake. You know the ones.
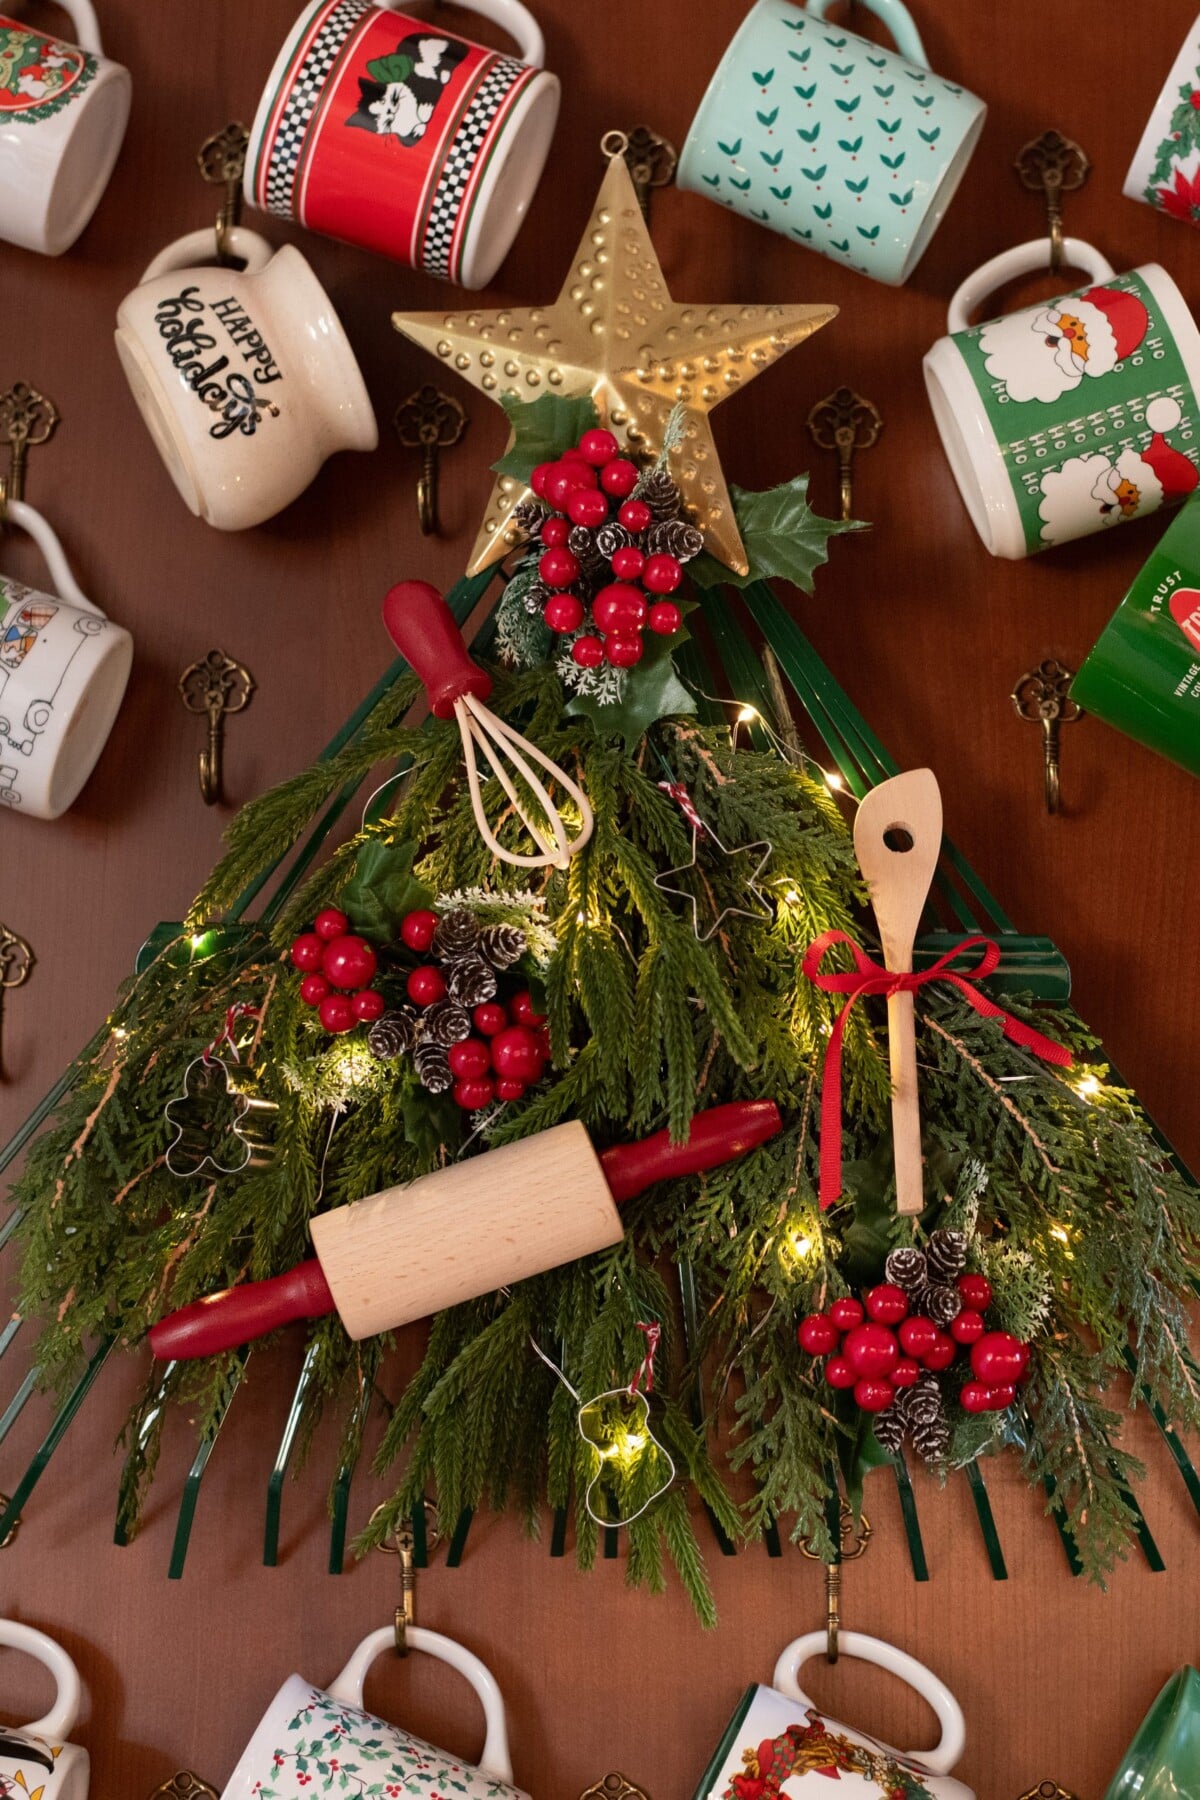
I’ve always loved the look of these old metal rakes. However, actually raking leaves with them is a pain. As a kid, I remember spending more time removing the leaves that were stuck on the metal tines than I did raking. Yet, I still see these in stores next to the larger, more efficient plastic rakes most of us own nowadays.
Personally, I think they make a much cuter decoration than they do a rake.
So, we’re going to turn an outdated tool into something beautiful with which to decorate your home for the holidays.
New or Old?
If you love the look of this Christmas craft, there’s certainly nothing wrong with buying a new rake and taking it apart. (That’s what I did.)
If you choose to use a rake you already have, you may need to clean it up first. If your decorating style leans more toward the rustic, using a rake where the paint is older and worn will give your finished tree a more primitive, antique look.
But if you want to spiff it up a bit, or perhaps paint the rake red for a bold Christmas contrast, you can give it a fresh coat of paint with spray paint. If you go this route, be sure to let the paint dry for a few days before you create your Christmas tree.
Here’s what you’ll need:

A metal leaf rake, new or old, with the handle removed (we’ll get to that shortly)
- Florist wire and wire snips
- Faux greenery picks for making a wreath (You can use real greenery, but you’ll need to take it all apart at the end of the season.)
- Small Christmas baubles
- Twine
- Baker’s string or ribbon
- Acrylic craft paints and brushes
- Mod Podge Super Gloss (to give the painted portions of the baking tools a high shine)
- Child’s baking tool toys (I bought this cute set here)
- Mini Cookie cutters (these are the ones I used)
- (Or other small decorations if you don’t want to make a kitchen-themed tree)
- Optional: battery-operated fairy lights
Prepping the Baking Tools
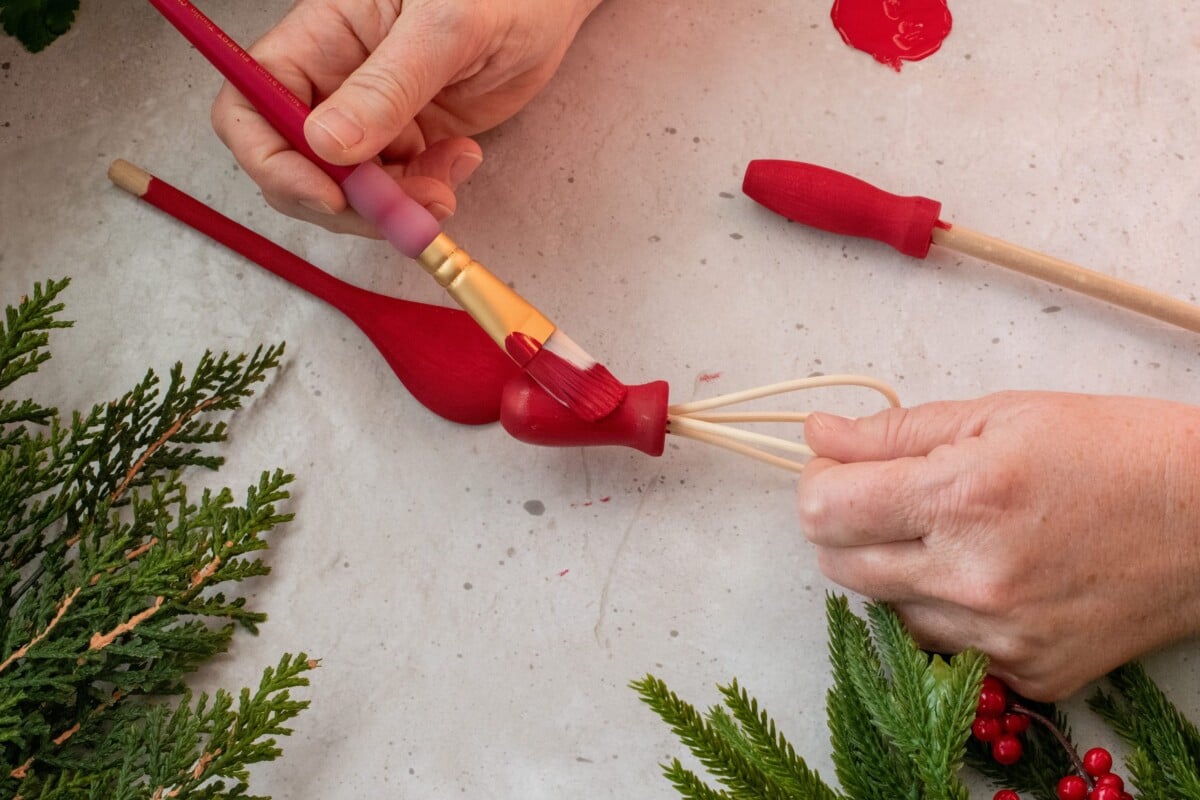
Choose which tools you want to display on the kitchen Christmas tree. I opted for the rolling pin, the whisk and a wooden spoon. Using acrylic craft paints, paint the handles whatever your desired color. If you purchase the same set that I used, the rolling pin handle comes apart, making it easier to paint.
Allow each painted piece to dry before adding a second coat.
Once the paint is completely dry, follow the directions on the bottle of Mod Podge and paint or sponge a layer over the paint. Allow the Mod Podge to dry for an hour to reach a high-gloss shine.
Removing the Handle
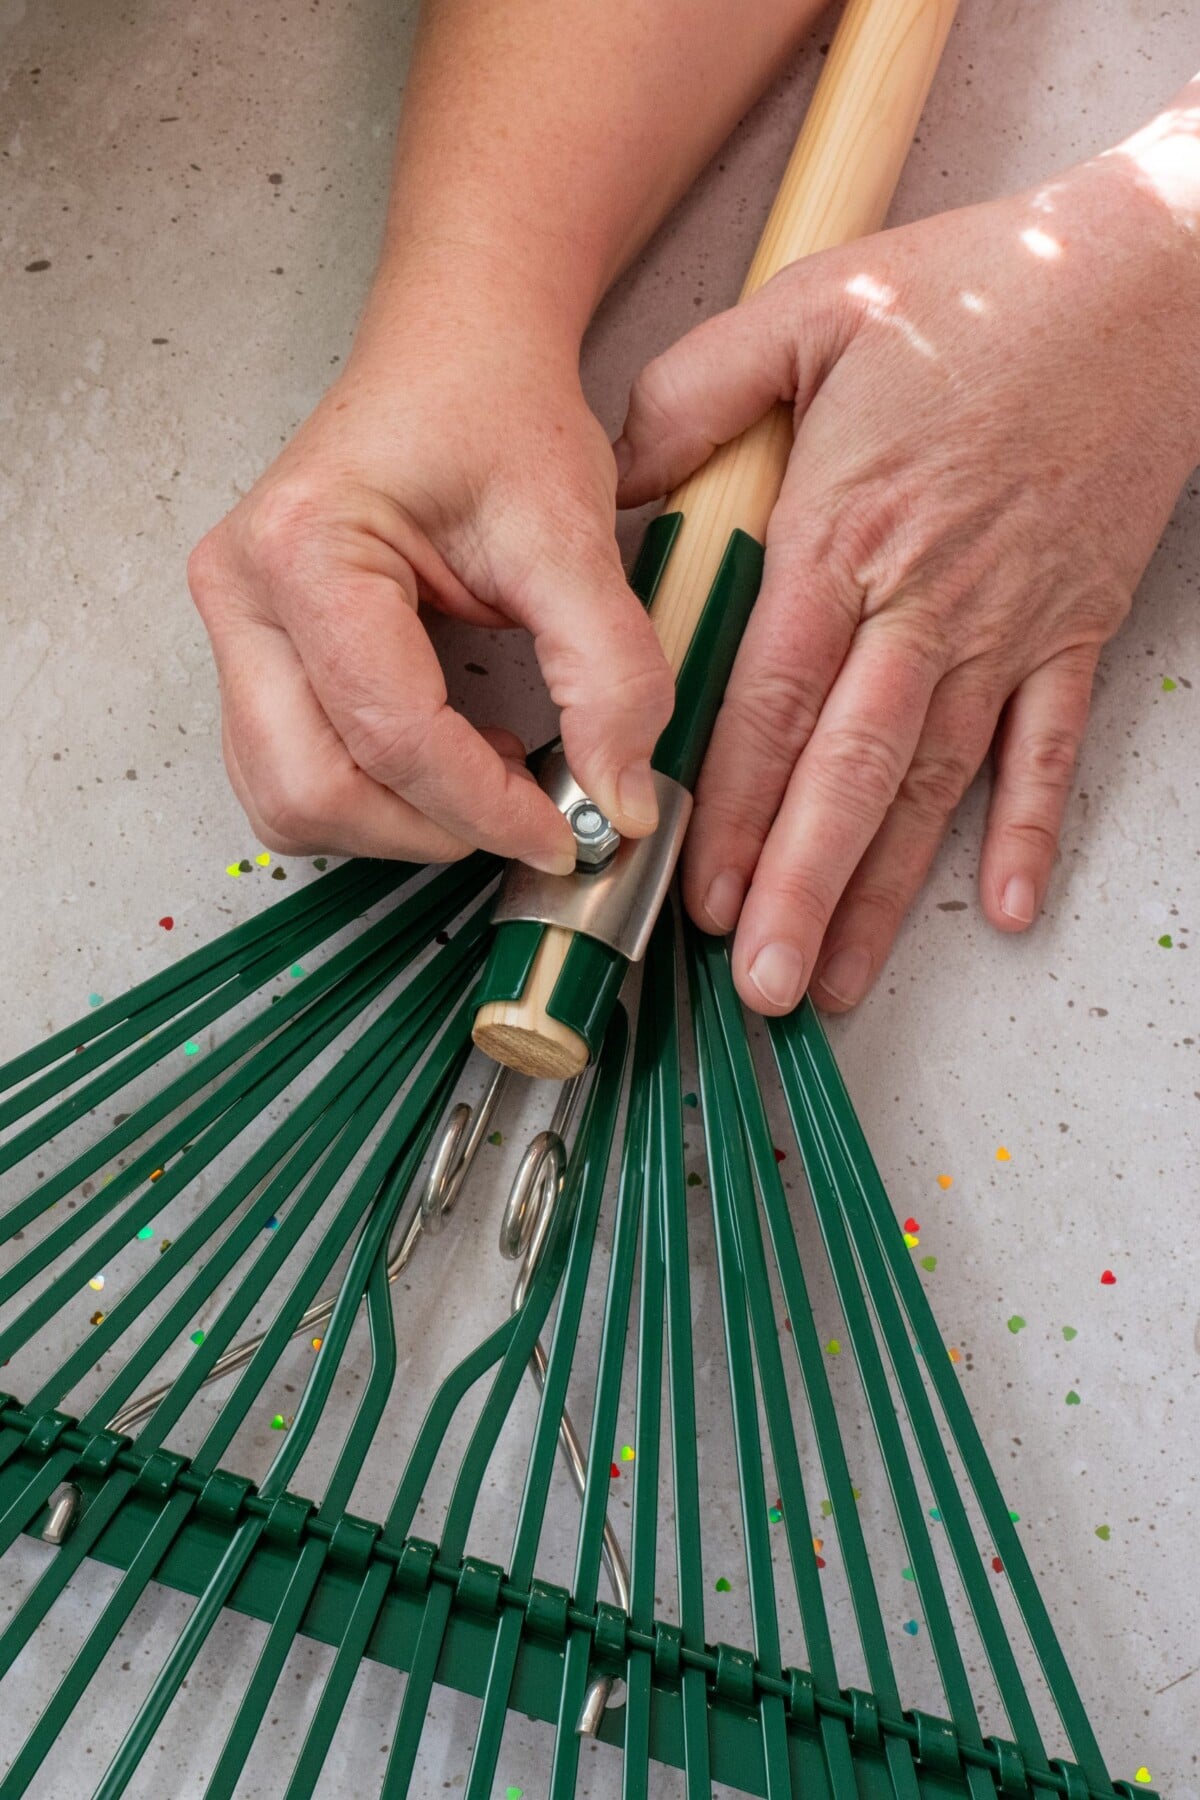
Your rake might be slightly different, but most of them will have one or two screws that fasten the handle to the metal rake. Take these off and remove the handle.
Add a Hanger
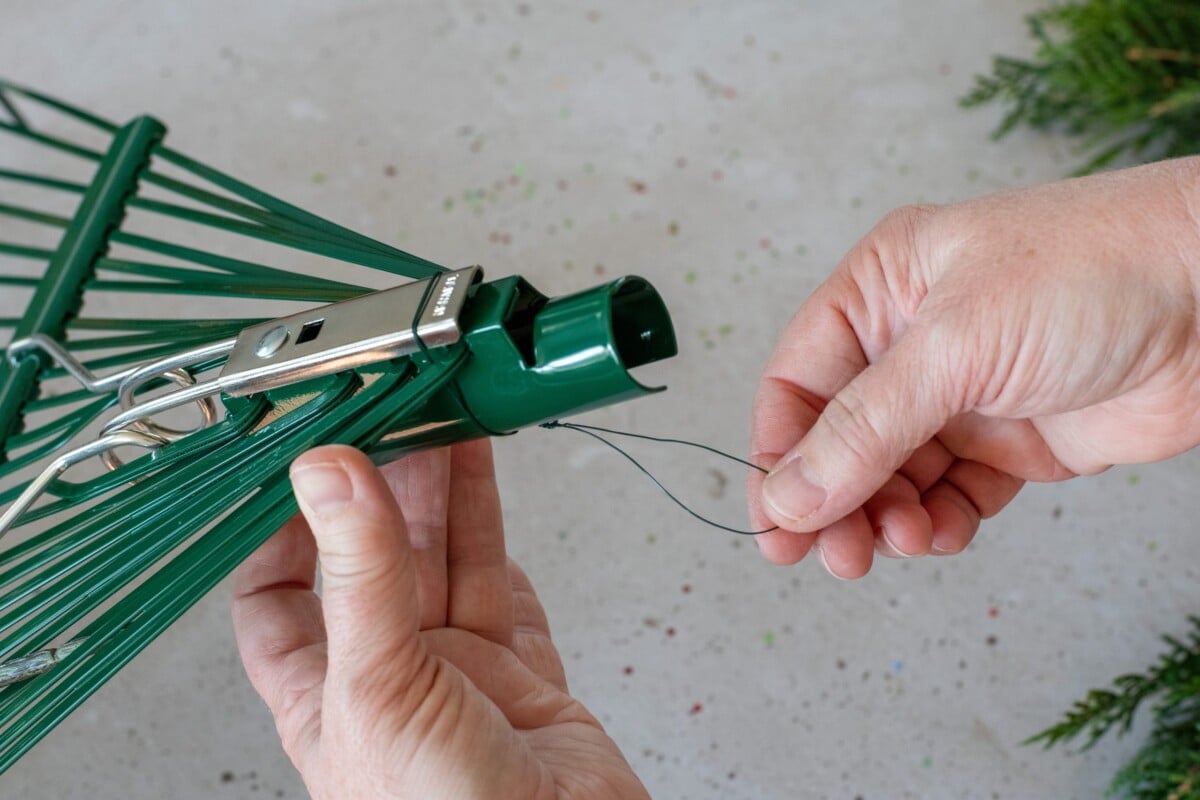
Using the florist’s wire, I cut a piece one foot long and folded it in half. Starting from the backside of the rake, I wove the ends up, over the front of the handle, then back down through to the backside. I twisted them together, leaving a large loop for hanging on the backside, then snipped the excess wire off.
Greenery First
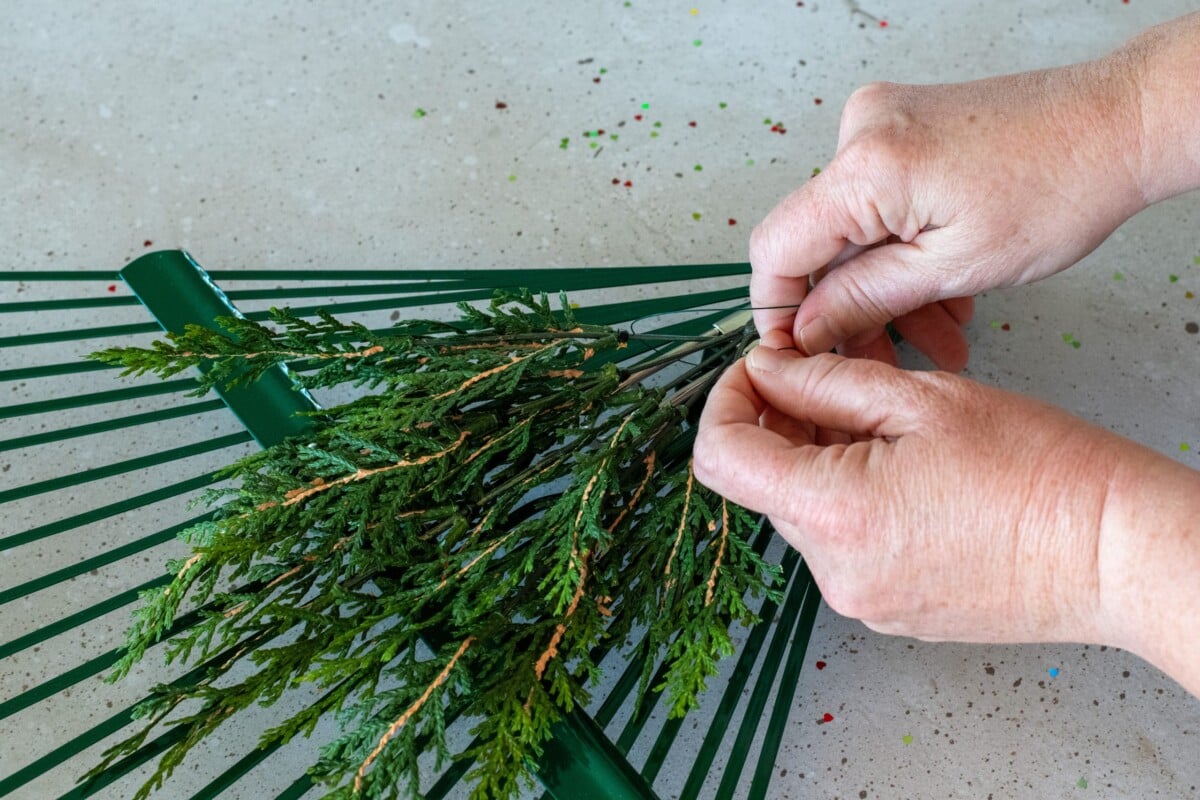
Add your greenery first. How you want your finished Christmas tree to look will determine how dense you put the greenery on.
I wanted the edges of the rake to show, so that you could see what it was. You could also cover the entire thing, essentially using the rake as a form, rather than as part of the finished decoration. You could go a bit sparser with your greenery to leave plenty of room for decorations and to show off the rake. It’s all up to you!
Most faux greenery branches are made up of multiple sections, which can be pulled apart into smaller individual pieces. I did this for the artificial Norfolk pine.
Use more of the florist wire to secure your greenery to the rake, carefully tucking the ends to the backside.
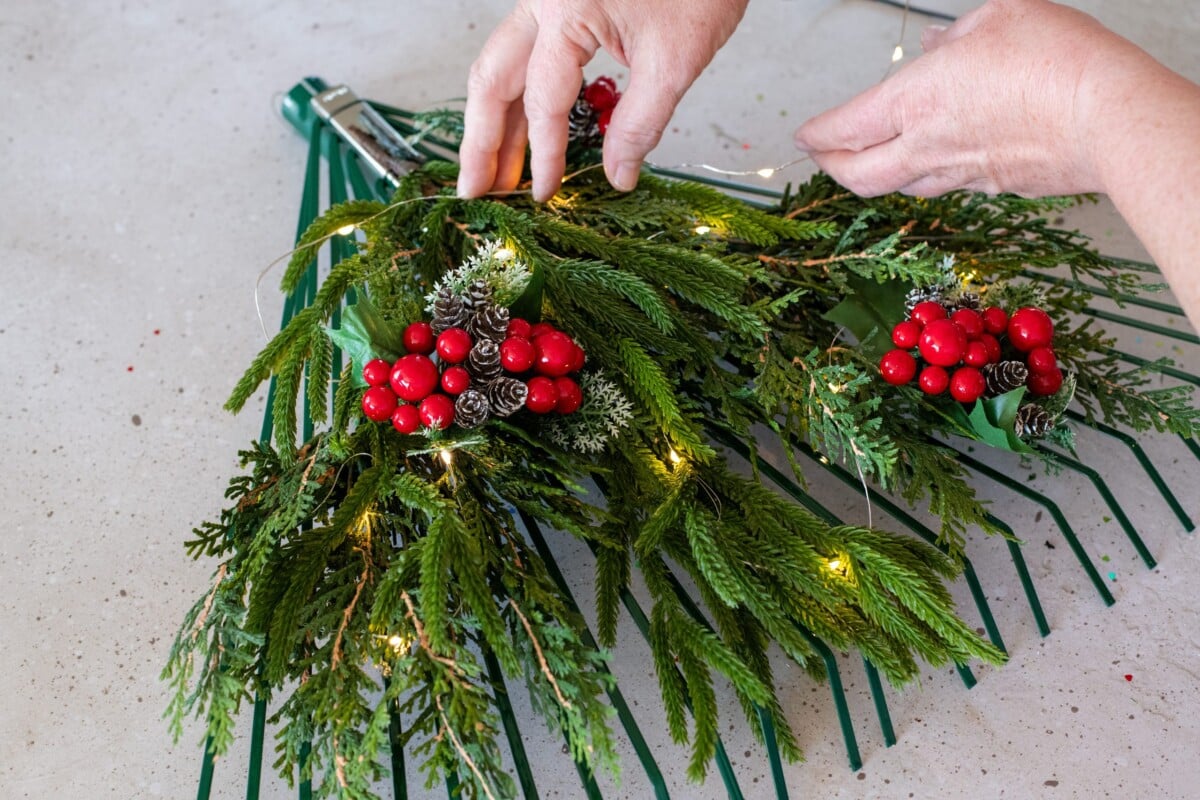
If you want to add a string of battery-operated fairy lights, do that once you’ve finished securing the greenery. Weave the wire in and out among the branches. Take a step back and squint your eyes a little bit. Doing this will help you find any spots on your Christmas tree that need lights.
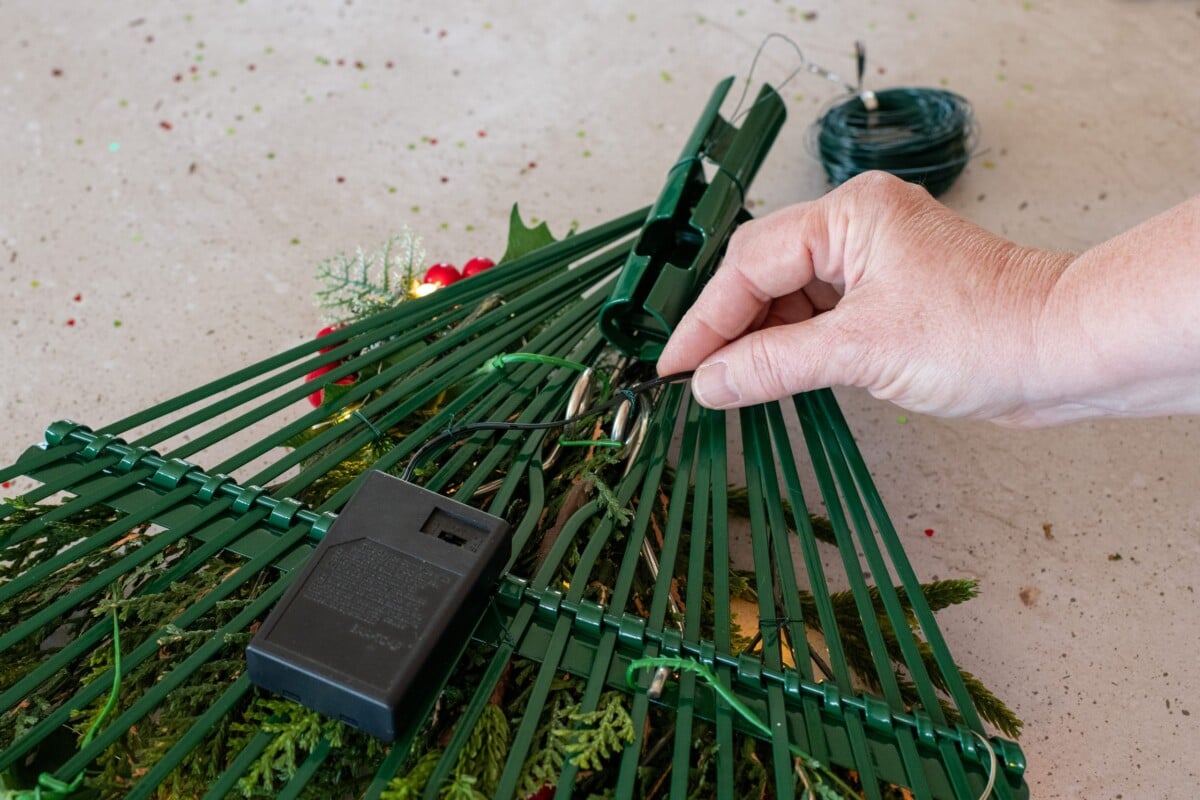
I added my lights so that the leader going into the battery compartment was at the top of the rake. I secured the wire to the back of the rake in a couple of places, allowing the battery compartment to hang free to make it easy to change the batteries.
Decorations

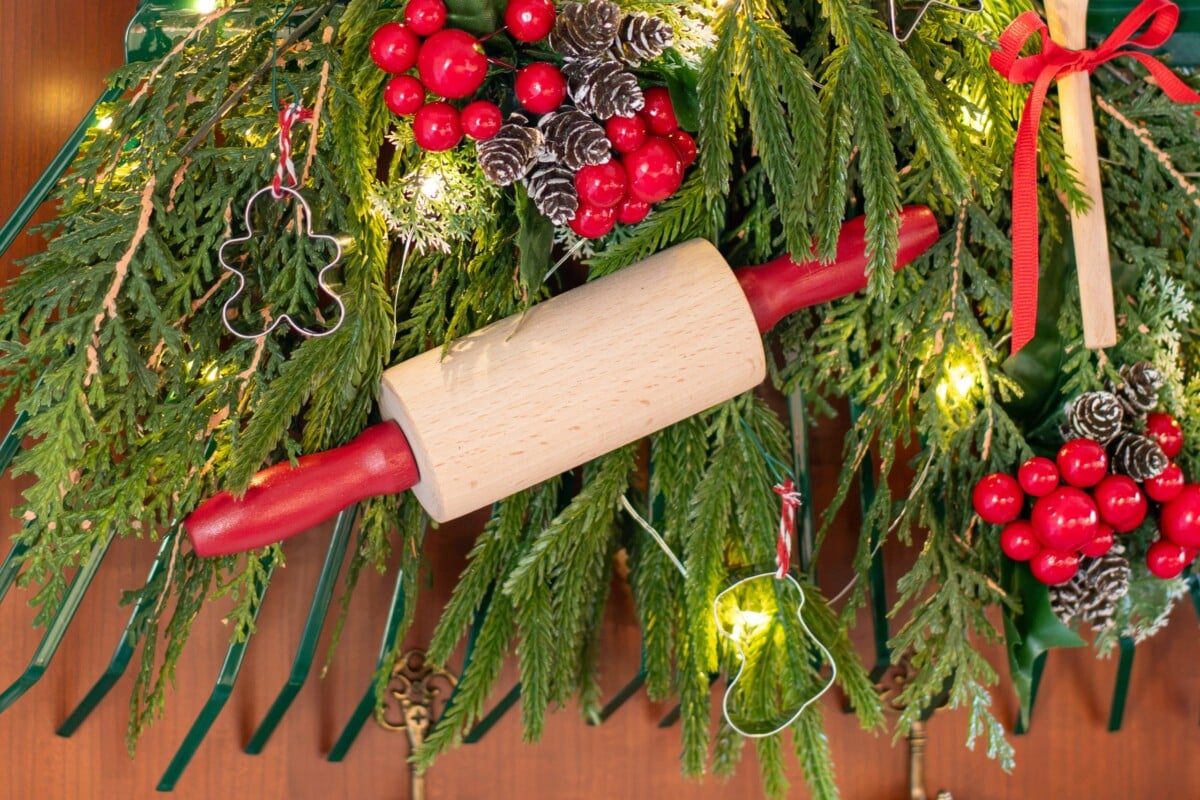
When adding the baking tools and cookie cutters (or whatever decorations you decide to use) to your tree, it’s a good idea to lay them out first before you secure anything. That way you can decide the best layout without anything looking too crowded or one side ending up with more decorations than the other.
Once you’ve achieved the layout you like, you can attach the decorations in two ways.
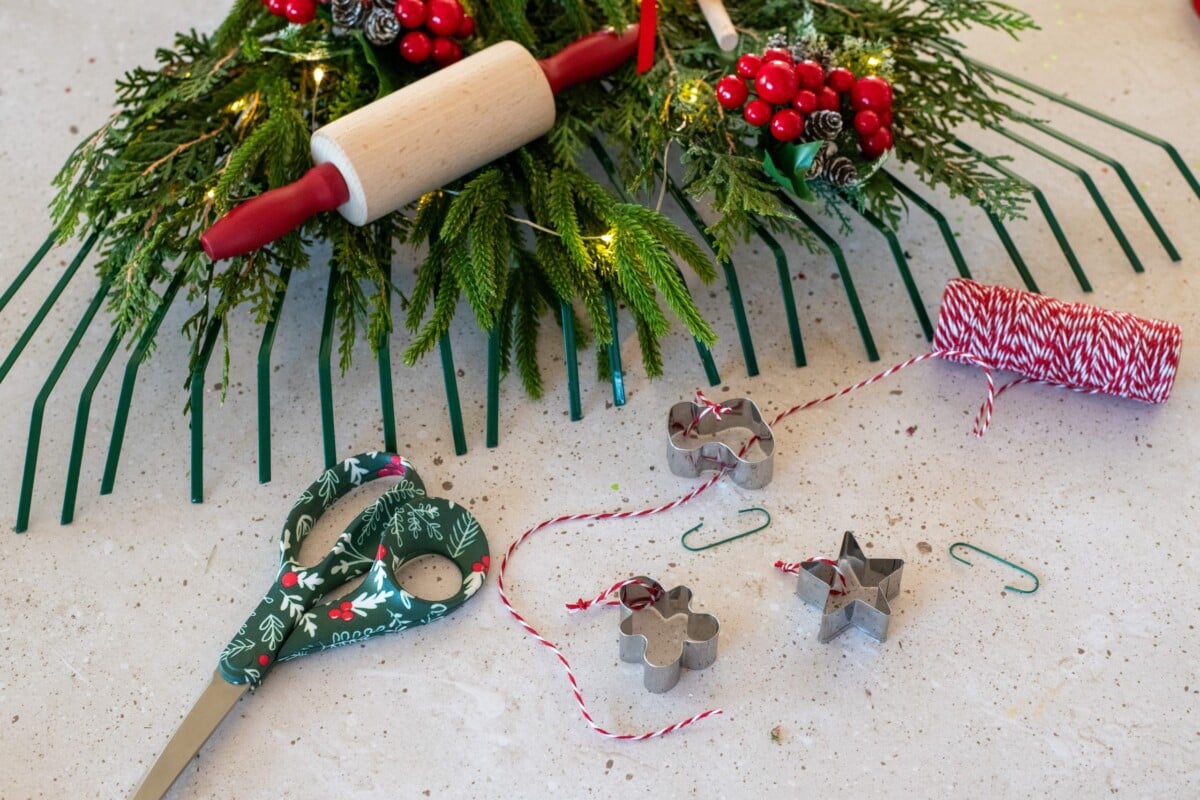
The first is to continue to use florist wire to attach each piece to the tree. The florist wire is easily hidden for some ornaments and decorations.
The second way to attach your pieces is just as you would a real Christmas tree. Tie colorful ribbon hangers to your pieces and hang them from the tree.
You may need to do a mix of both to get everything attached to the tree.
Don’t Forget a Star

Finally, you can wrap the top of the rake with twine or ribbon if you want to disguise that part. Or you can leave it as is for a little rustic flavor. Regardless of which you choose, don’t forget to top it with a star.

I created a kitchen-themed Christmas rake, but I’m already thinking about how to change it up next year. I might swap some of the cookie cutters for some of my cinnamon Christmas ornaments. Since nothing has been glued on, you can easily swap out the decorations. I’m thinking of doing one with vintage glass garland and some of my Shiny Brite ornaments for an old-fashioned-looking tree. Or, in keeping with its original form, why not a gardening-themed Christmas tree?
With the greenery in place, this cute Christmas tree rake can be decorated to fit any decor.

Get Garden Notes From Tracey, Right to Your Inbox
Pull up a chair on the front porch. Join 54,000+ gardeners who get Tracey\'s friendly notes, seasonal to-dos, and hands-on tutorials three times a week.