


When life hands you 30 pounds of sun-ripened peaches, you must say “thank you” and get straight to work. You simply cannot refuse such a sweet gift!
Being prepared is always a wise trait to acquire – especially when it comes down to stocking your pantry, saving and preserving food.
That way, you won’t panic or falter under pressure when a larger load of fruits or vegetables unexpectedly comes your way. Even anticipating such a glut of fresh produce can make the experienced canner give a little gasp at the amount of work that needs to be done quickly – today, rather than tomorrow.
Set your worries aside, as we guide you through the steps of canning peaches in light syrup for the very first time.
Canning peaches in light syrup
One of the most common ways to preserve peaches is in syrup. Cut in halves, quarters, or slices. It really doesn’t matter, unless you are trying to optimize your pantry for space efficiency. In that case, you will be better off making peach jam or peach chutney to fit more peaches in fewer of those precious jars.
Of course, if you are in a time crunch, peaches can be frozen in a matter of minutes. While they may be great for smoothies, you don’t have that same satisfaction of popping open a jar and spooning out a deliciously sweet peach wedge that is ready to eat.
If you are thinking about canning your peaches in syrup, the first thing you need to ask yourself, how sweet is too sweet? Keeping in mind that perfectly ripe peaches have a certain sweetness of their own.
Are you a light, medium or heavy syrup kind of person?
We tend to enjoy life more on the saltier, slightly acidic and savory side, even going as far as canning bilberrys, red currants, black currants and apricot jam without sugar. It is a personal preference as well as being beneficial for our overall health to reduce our sugar consumption.
And in the case of canning peaches, it is reassuring to know that peaches are an acidic food and it is even possible to can them in plain water – though they will lose some of their overall appeal that way. It is also acceptable to can peaches in half water and half juice (100% apple or grape juice)
Another solution?
Canning peaches in light syrup.
For starters, you can preserve peaches in an extra light syrup of 3/4 cup sugar and 6 1/2 cups water.
Or in a light syrup that contains 2 cups of sugar plus 6 cups of water.
A medium syrup consists of 3 cups of sugar to 6 cups of water. Heavy syrup would be 4 cups of sugar for every 6 cups of water.
Just how much syrup will you need? Well, it depends on how many jars, and what size of jars, you are canning at once.
While we are talking about syrup here, it is also useful to know that peaches can be preserved in a honey syrup, or with organic maple syrup. If you are using either of these two sweeteners, you can get away with using a lot less than 2 cups for a light syrup.
We’ll get to the recipe in a moment, but first, let’s be sure you pick the right peaches for canning!
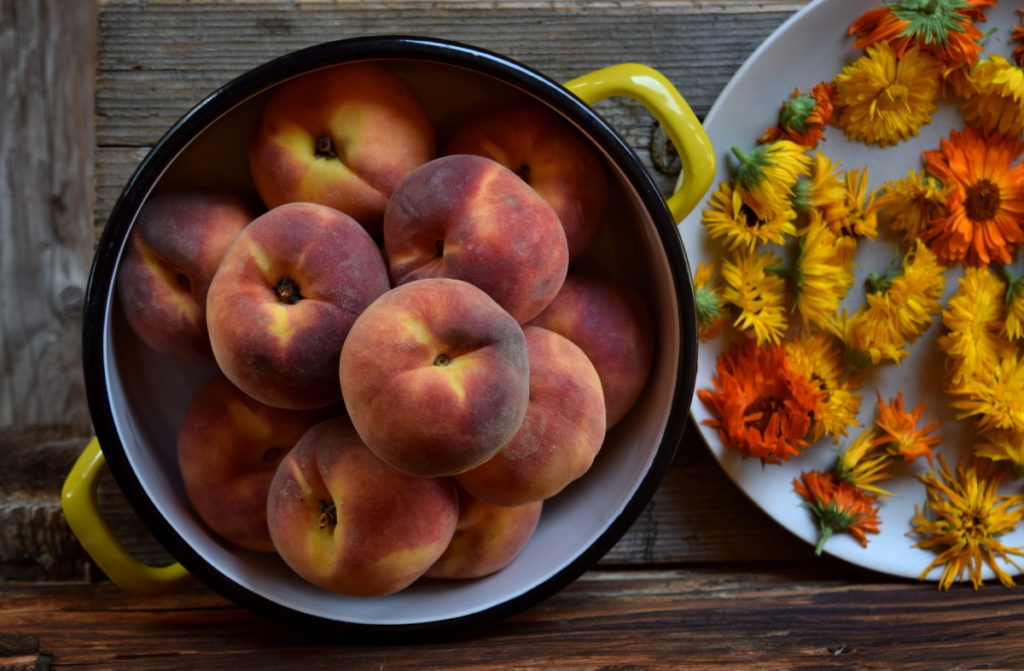
What kind of peaches are good for canning?
Yellow fleshed peaches are in, white peaches are out.
It isn’t that you can’t can white peaches, but since they are a low acid fruit, they will need a little encouragement by the way of lemon juice to bring the pH to a safe level. They are unsafe for water bath canning on their own. Plus, they are so pretty, is is almost better to eat them fresh.
Back to what you can preserve.
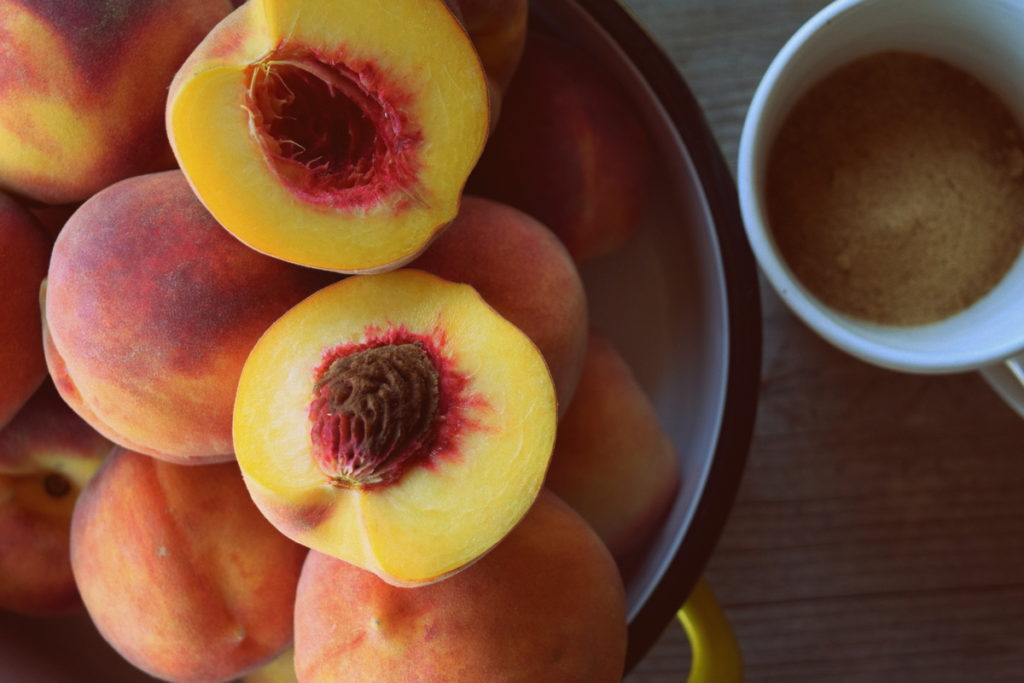
Peaches are either freestone or clingstone. Cut into one and you will find out right away which is which.
With freestone peaches, the pit will come out easily. Clingstone holds on tight. Both will work, though freestone peaches are far easier to work with and can easily be preserved in halves or quarters. Clingstone peaches are far better for slices, jams or chutneys.
Your peaches for long-term preserving must also be on the cusp of complete ripeness, not beyond. As they mature, they lose some of their acidity. Go for peaches that are firm to the touch and with a pleasant flavor. This way you can be pleasantly surprised by their texture when all is canned and done.
Finally, size.
Large peaches are easier to work with, therefore less finicky of a fruit, especially when it comes to peeling them. However, smaller to medium size peaches may fit better in your jars, particularly if you wish to can them in halves.
Should you choose hot- or raw-pack method?
You’ll often find recipes for canning peaches focusing on the raw-pack method.
Canning peaches – raw-pack:
For the sake of simplicity, it is easier to fill your jars with cold peaches, then pour a boiling syrup over them before tightening the lids and putting them in a water bath canner. The downside is that raw-pack peaches tend to discolor after longer periods of time, making them a little less irresistible 3-4 months down the road.
Canning peaches – hot-pack:
This is our method of choice for a couple of reasons.
First off, it ensures that the peaches are partially cooked (warmed through) before packing them into jars. It gives a sense of comfort that all will be well and that all lids will seal.
Secondly, when you add the peaches to a boiling syrup, then bringing the whole mass back to a boil, you are also removing extra air from the peaches, which will help to avoid fruit-float. Bringing the peaches to a quick boil will also prevent the canned peaches from turning brown until you have a chance to eat them.
While it is slightly harder to ladle in hot peaches, it is definitely worth the effort.
Ingredients for canning peaches in light syrup
All you need for canning peaches in light syrup, or any density of syrup is:
- peaches
- sweetener (choose from plain sugar, brown sugar, coconut sugar, honey or maple syrup)
- 1/4 cup lemon juice per 6 cups of water, optional if using raw-pack method (to prevent discoloration of peaches)
That’s it and that’s all.
Though you will need a few more tools for canning:
- canning jars
- canning lids and rings
- jar lifter
- water bath canner
- large cooking pot
- canning funnel
- paring knives
- tea towels
- canning labels
Once you have your canning areas prepared for the work ahead, let the fun begin! Because, canning is a merrymaking activity, right?!
Step-by-step: canning peaches in light syrup
Prep time: 30-60 minutes (depending on how many jars of peaches you are canning at once)
Cook time: 30 minutes
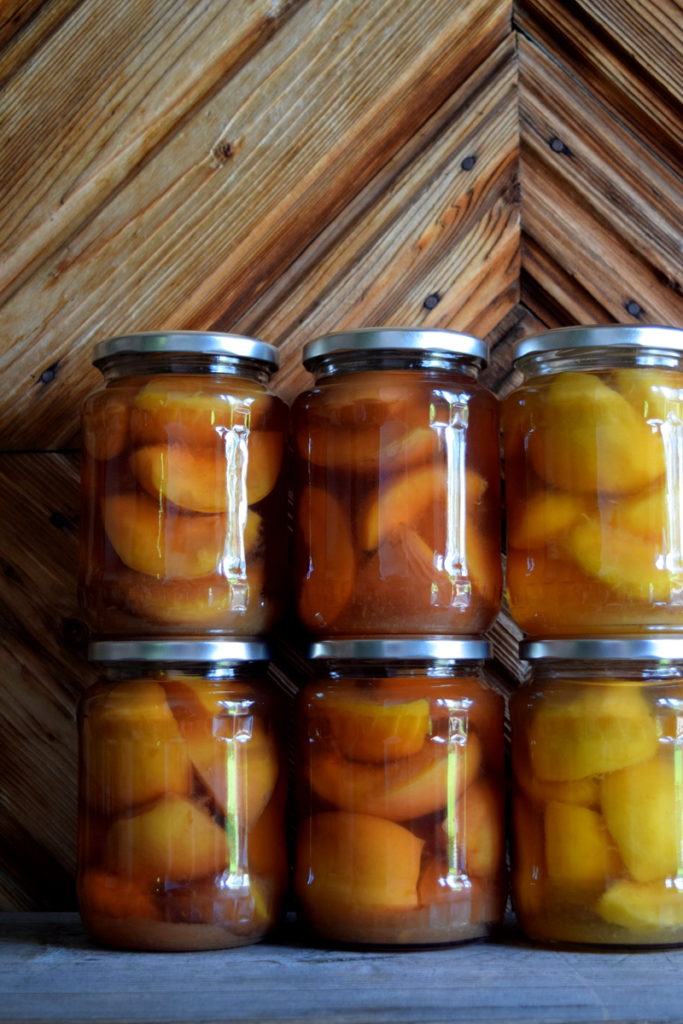
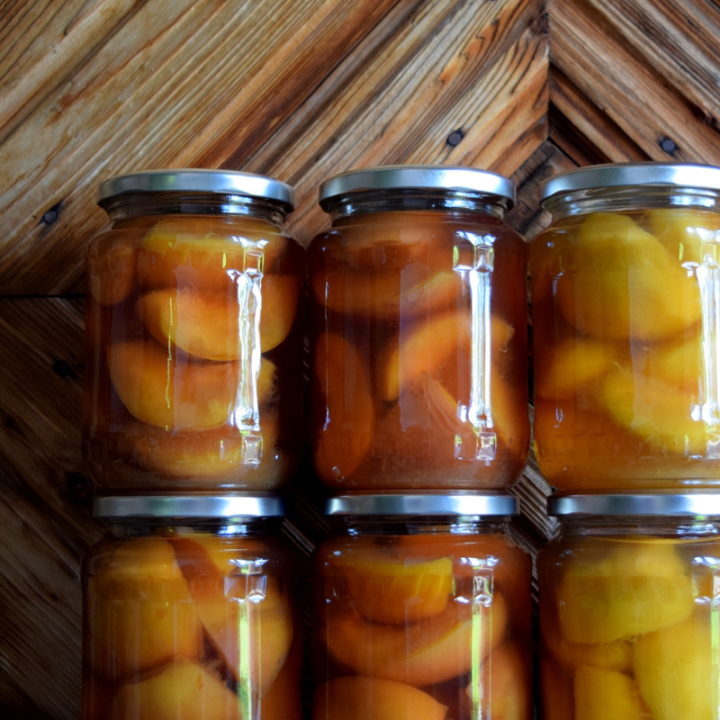
15 pounds of fresh peaches should yield about 7 quarts of canned peaches.
Step 1: Prepare your canning jars
First things first, be sure to wash and sterilize your jars.
One of the secrets to a successful canning season is cleanliness. It will always take your pantry far.
Step 2: Wash the peaches
Working clean also means having the cleanest of fruit, with no specks of dirt in sight.
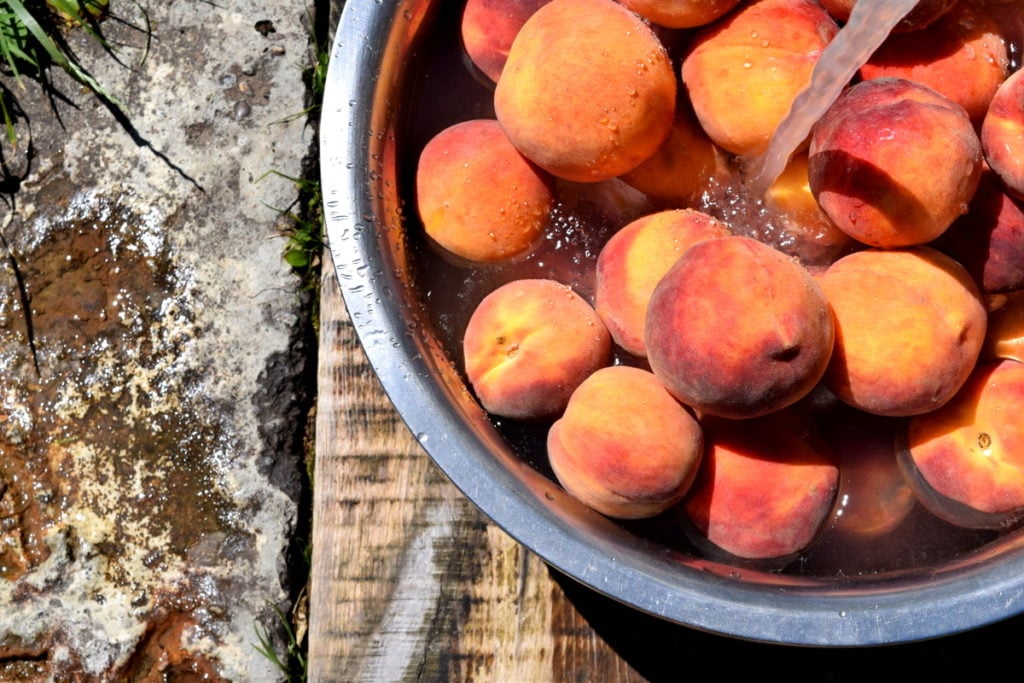
Rinse them in cold water, then drain off the excess.
In the meantime, prepare a pot of boiling water for help in peeling off the fuzzy peach skins, and keep a bowl of cold water close by.
Step 3: Cutting the peaches
While some people find it easiest to peel the peaches whole, we found it easier to cut them to size first, then to peel them – and then not to peel them at all. We’ll come to that in the end.
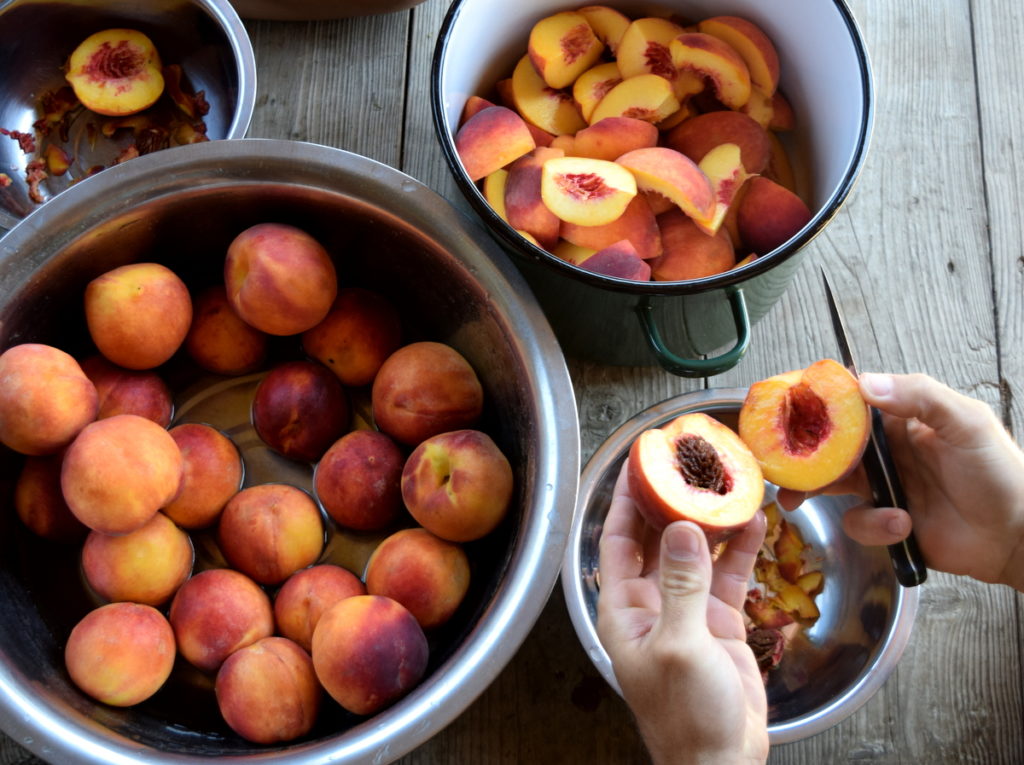
After washing the peaches, cut each one in half to remove the seed, making sure to carefully carve out the area where the stem is attached. Then quarter them for a suitable size that will easily slip into your jars.
It is perfectly acceptable to leave the insides as they are, though some may suggest to remove the rough parts around the pit.
Step 4: Peeling the peaches
Now it is time to pour that pot of boiling water over the cut peaches.
Let the peaches soak in the hot water for 2-3 minutes, working in friendly sized batches, then transfer the peaches to the cold water.
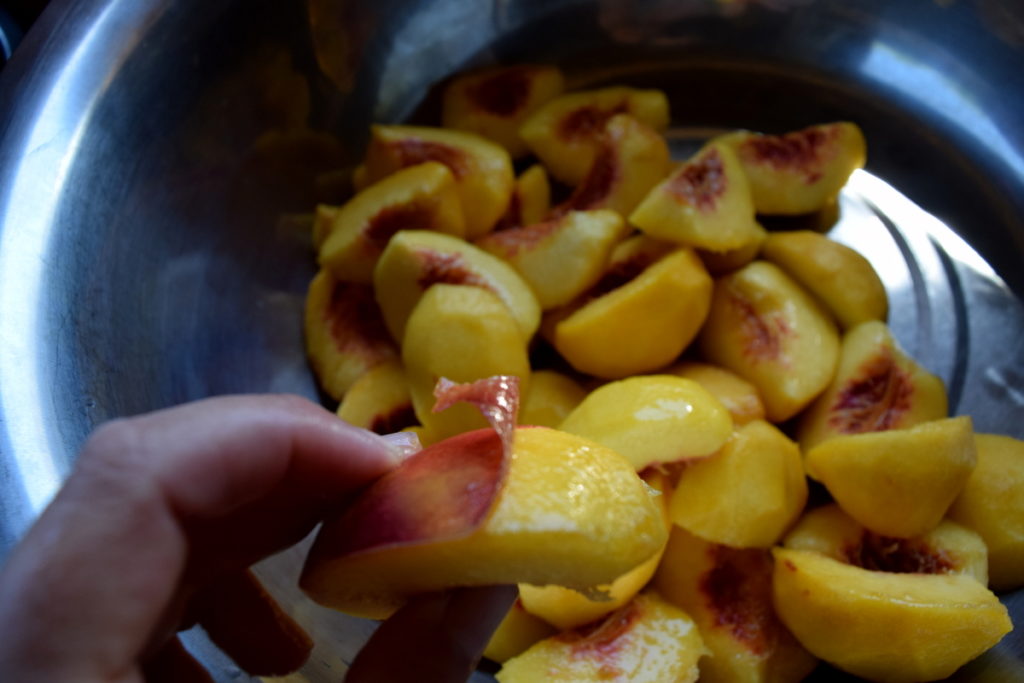
If it is your lucky day, the skins will fall off easily, as is the case with tomatoes. If not, simply use a paring knife to gently remove the skin. In the meantime, do not overcook the peaches in hopes that the skin will slide off without any encouragement.
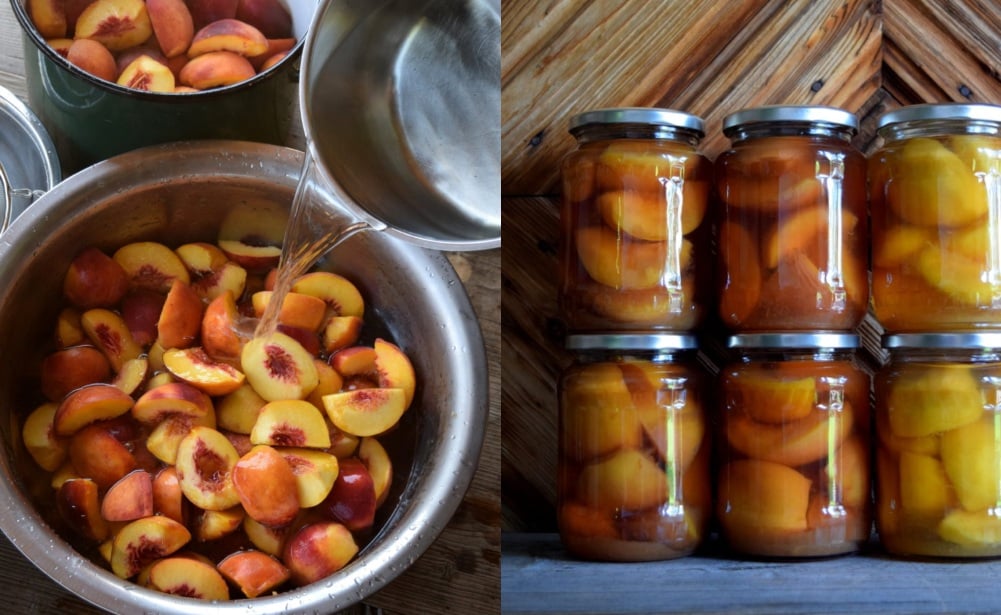
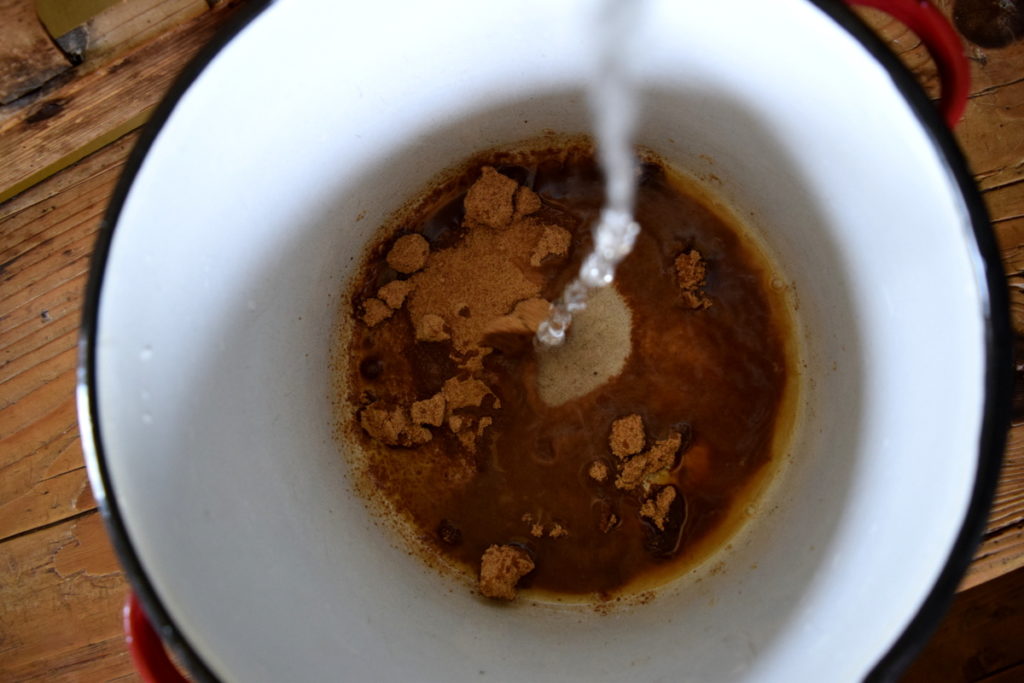
Step 5: Preparing the syrup
In a large pot, add the right amount of water to your choice of sweetener.
Bring it to a boil, then let it simmer until you are ready to add the peaches.
Step 6: Bring the peaches to a boil
When all the peach preparation is done, it is time to gently slide them into the simmering syrup. Bring the mass back to a boil and continue to cook the peaches just a few minutes longer.
Step 7: Hot-packing the peaches
With some dexterity, you will now set out to put as many peaches into each jar as possible, without overfilling it, of course. Now, that you have all that lovely peach syrup, fill each jar leaving about 1″ of headspace, or just a little bit less, depending on your type of jar.
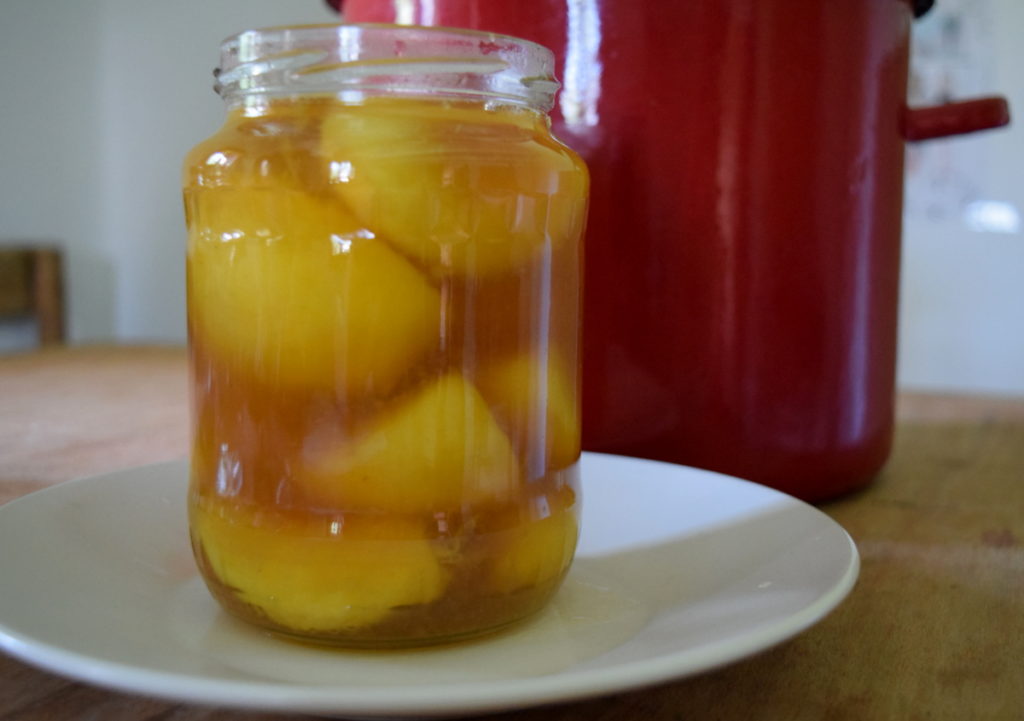
Before sealing the lids, be sure to wipe the rims with a soft cloth for the best seal possible.
If you are making a small batch and wish to stop at this step of preservation, allow the jars to cool on a towel or rack until they come to room temperature. Then store in the fridge.
Step 8: Water bath canning
When all jars have been filled and the lids put on, let’s assume that you were prepared with heating up the water in your water bath canner.
If you are canning peaches in pints, process for 20 minutes.
When canning quarts, process for 25 minutes.
Then allow the jars to slowly come to room temperature on a folded towel, never on a hard (or cold) surface.
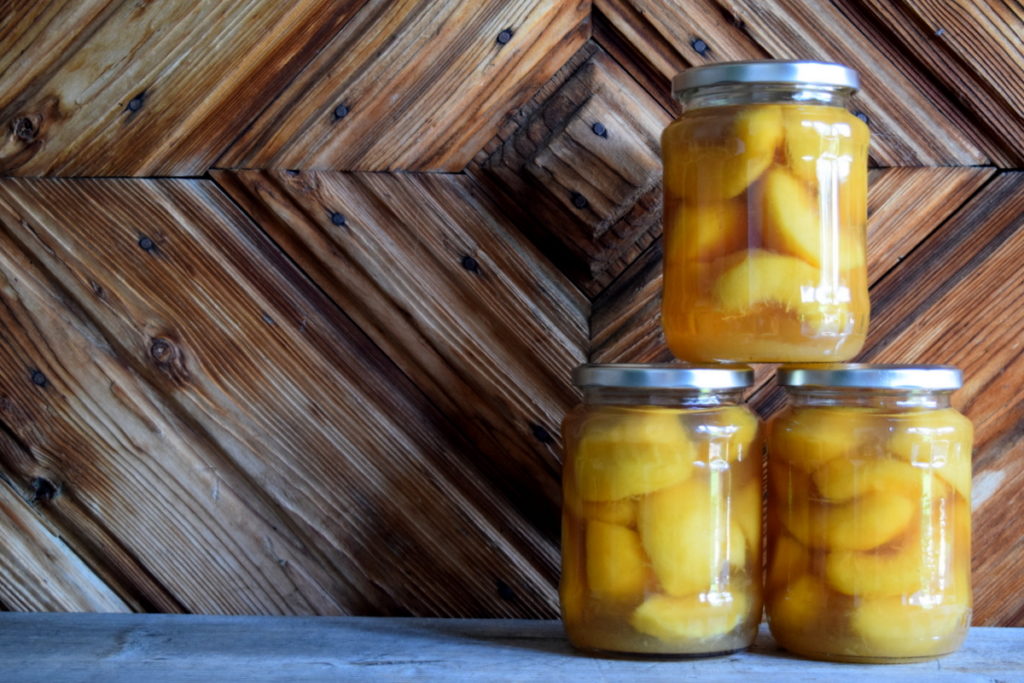
Step 9: Label and wait for winter
It may seem like a chore after a long day of working with your hands (cutting, stirring, ladling, etc.), but you must make sure to always label your canned goods. Though it will probably be easy to recognize your canned peach slices, it will be harder to tell the differences between the peach and other types of jams.
Admire your many jars of peaches in light syrup, then sit back and wait.
It’s hard, isn’t it?! Not the canning, the waiting.
Canning peaches with skins on or off
In a conscious effort to not waste food, and after peeling only about 5 pounds of peaches, we posed the question to ourselves: “What if we left the peach skins on?”
While most people prefer sliced peaches without the skins, perhaps because it looks better, or maybe it is all about the texture, we figured to try it out and see what happens when you leave the peach skins on.
It is amazingly delicious!
In fact, the peach skins add beautiful color and texture to the compote, the flavor is more intense too. Never mind the fact that leaving the skins on also saves a handful of time in the kitchen. Plus, no food goes to waste. Not one bit. Even the pits are dried for the next campfire outside.
Any way you are inclined to can peaches in syrup, go ahead and do it. Your pantry is waiting!
Canning Peaches In Light Syrup
When life hands you 30 pounds of sun-ripened peaches, you must say “thank you” and get straight to work. You simply cannot refuse such a sweet gift!
Ingredients
- peaches
- sweetener (choose from plain sugar, brown sugar, coconut sugar, honey or maple syrup)
- 1/4 cup lemon juice per 6 cups of water, optional if using raw-pack method
Instructions
- Wash and sterilize your canning jars.
- Clean your peaches and prepare a pot of boiling water and a pot of cold water.
- Cut your peaches into quarters removing the seed.
- If you'd like to peel your peaches, then soak your sliced peaches in hot water for 2-3 minutes to make peeling easier.
- Prepare your syrup by adding the right amount of water to your choice of sweetener. Bring to a boil and allow to simmer. Add the peaches and simmer for a few minutes.
- Pack as many peaches as possible into each canning jar. Fill with the syrup leaving one inch of headspace. Wipe the rims with a cloth and seal the lids.
- Process your jars in the water bath canner. If canning in pints, process for 20 minutes. If canning in quarts, process for 25 minutes. Allow the jars to cool on a folded towel.
- Label your jars and enjoy!


Get the famous Rural Sprout newsletter delivered to your inbox.
Join the 50,000+ gardeners who get timely gardening tutorials, tips and tasks delivered direct to their inbox.