

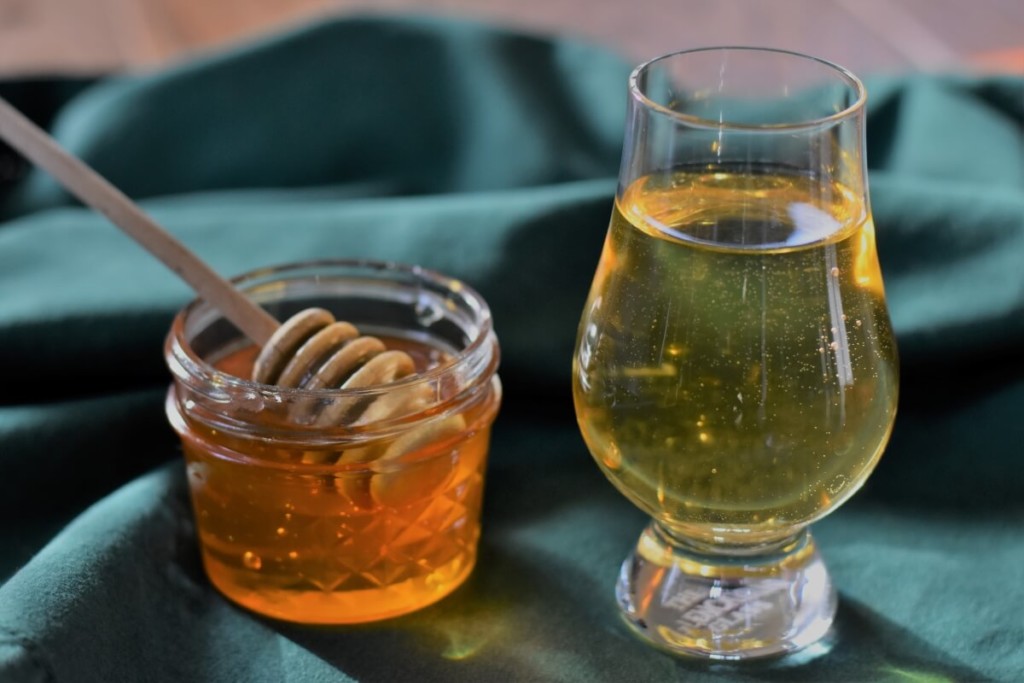
For many folks, mead is something you read about in books with dwarves and elves, not something you actually drink. But for those of us in the know, mead is a delicious sip of fermented sunshine.
As cliché as it sounds, I had my first taste of mead at a Renaissance fair. I was hooked after that first sweet, golden sip. I started making mead a few years ago, and I’m happy to help you get started too.
We’re going to make a simple one-gallon batch of mead together.
Warning: I take no responsibility for the life-long love of making your own mead that may develop.
A (very) brief history
It’s believed that mead, which is sometimes called honey wine, is the first alcoholic beverage that humans made. There is some evidence to suggest that mead predates the wheel. Priorities, yo! While most associate mead with Vikings drinking from steins made of horns, historically mead was found all over the globe. Egypt, China, and India, to name a few places.
A versatile brew
Mead is one of those drinks where everyone can find a version they like. Sweet or dry, dark or light honey, spiced or not. There’s a mead for every palate. And once you make a batch, experimenting becomes half the fun.
As far as homebrewing goes, mead is one of the easiest things you can make.
It’s going to feel like I’m throwing a lot of information at you, but that’s because we will be covering brew day through to bottling day.
You won’t need to use this entire tutorial all at once. You’ll come back to it periodically for the next step. Brew day and bottling day will be the most labor-intensive and even that only takes an hour or so.
Much of homebrewing is letting life go on while your yeast does the work.
Easy, right?
So, grab a cup of coffee and read this tutorial to the end. I want to equip you with the information needed to make your first gallon of mead a great one. And hopefully, you’ll agree when it’s finished that it wasn’t all that difficult.
You need only three things to make mead – honey, water, and yeast.
These days most people who make mead use a commercial yeast strain. This gives your mead a controlled and more predictable flavor profile when it’s finished.
However, wild-fermented mead is becoming more and more popular, especially among the homesteading crowd. This involves using the naturally occurring yeast strains that are found all around us in nature, which can be a little unpredictable.
Jeremy Zimmerman’s book, “Make Mead Like a Viking,” is an excellent resource if you are curious about wild fermenting and the history of mead.
For your first batch of mead, we’re going to keep things as simple as possible and use commercial yeast. Good ol’ Lalvin D-47.
This yeast is popular among mead makers for a good reason. D-47 is very easy to find and produces a nice middle of the road mead. Not too sweet and not too dry; it lets the character of your honey shine through.
Honey
Speaking of honey, this is what it’s all about.
For this recipe, you will need 3-4 pounds of honey. Purchase the best quality, minimally processed honey you can find. If you’re lucky to know someone locally who keeps bees, be sure to check them out.
My mead making habits might keep the beekeeper at the end of my road in business.
As honey is the main feature in mead-making, the type of honey you use directly affects your result. The taste of honey is influenced by what flowers the bees are feeding from. You can get honey made up of all sorts of pollen, or you can choose varietal honey. Clover and orange blossom honey are both popular choices and easy enough to get your hands on.
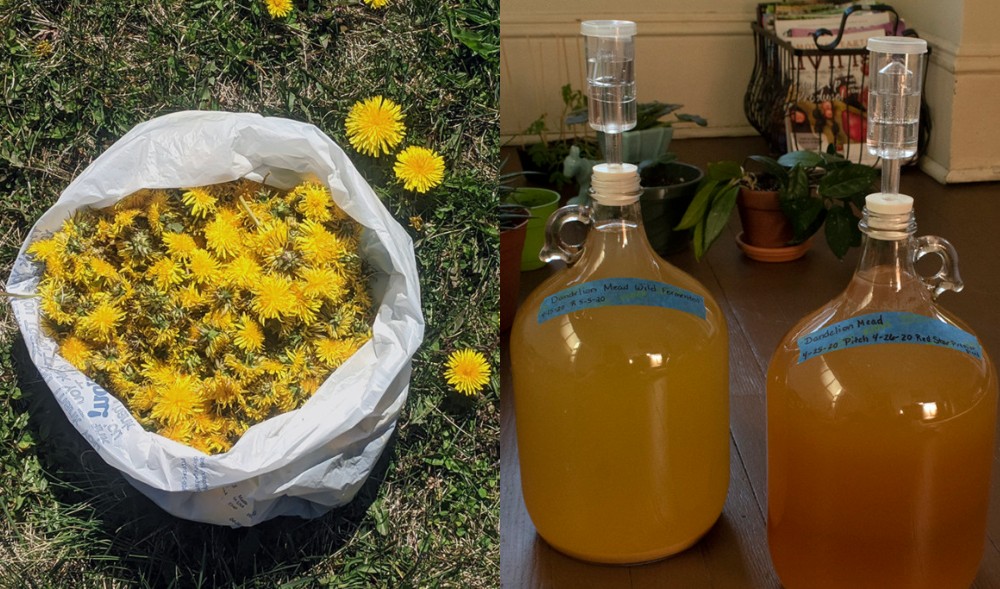
I’m currently making a batch of mead made entirely of buckwheat honey. It’s nearly as dark as molasses. I’m curious to see how this rich, heavy honey ferments out. I have a feeling it will be an excellent brew to sip during the darkest hours of winter.
Water
Water plays another big part in the flavor of your finished mead. I am lucky enough to live in an area that is well-known for its good water. (You can’t throw a stone around here without hitting a craft brewery!)
If you know your local water source is good, go ahead and use it. Soft or chlorinated tap water aren’t great choices, but if it’s all you have boil it and give it a try. As a last resort, you can buy a gallon of spring water.
Yeast
Yeast, like all of us, needs proper nutrition to do their job – turning honey into alcohol. We need acid, nutrients to feed our yeast and tannins. These three additions will give you a well-rounded and full-bodied mead.
And while there are many commercial options available to give your yeast the right environment, I prefer to keep my brewing methods as natural and easy as possible.
We will get our acid from freshly-squeezed lemon juice, our yeast nutrient will come from raisins (organic is best), and our tannins from a strong cup of black tea.
I’ll bet you have most of these in your kitchen already.
Mead-Making Equipment
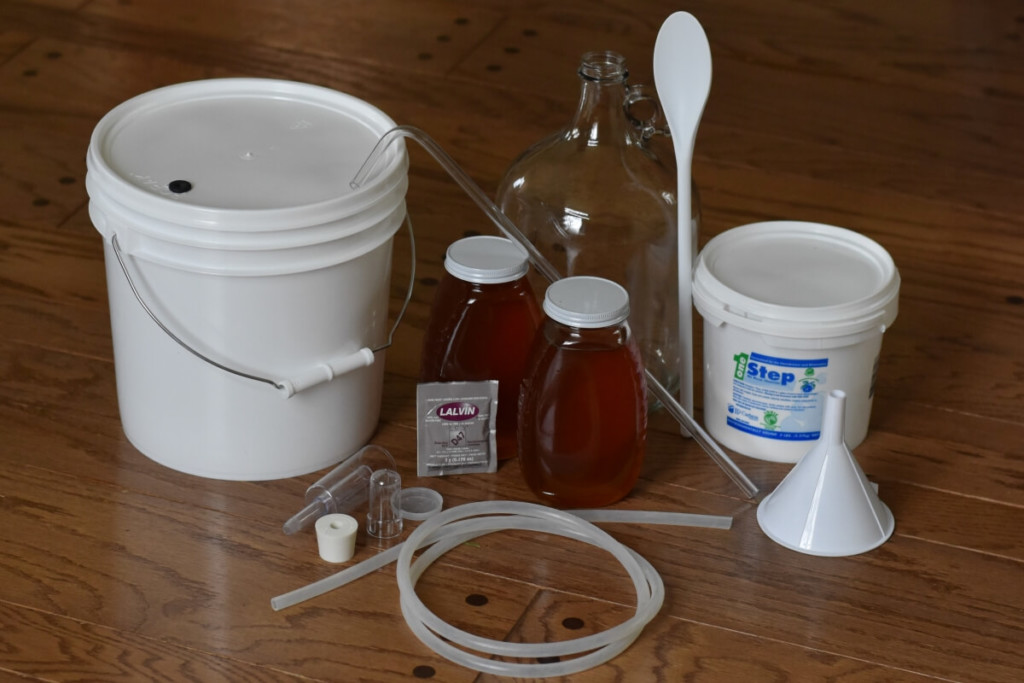
You’ll soon find that the equipment used to make mead, wine, cider, or beer is generally the same. Once you’ve purchased your basic brewing set up, you can easily begin to dabble in other areas of homebrewing.
The initial investment is minimal, between $40 – $50 (USD). Many online brewing suppliers offer a starter kit that has basic equipment at a reasonable price. If you have access to a local homebrew club, ask around, most folks are happy to help a new brewer get going by donating some of their extra equipment.
For your mead you’ll need:
- 2-gallon brew bucket with lid drilled for an airlock
- #6 drilled rubber stopper
- Airlock
- 1-gallon glass jug
- 5/6” ID tubing 3-4 feet
- Tubing clamp
- Sanitizer – OneStep is my favorite
- Racking Cane
When your mead is finished, you will need something to bottle it in. If you’re just getting started, I suggest recycled wine bottles. You’ll need to purchase corks and a corker, but both are easy enough to find. If you don’t like the idea of using a corker, give swing-top bottles a try. They are incredibly convenient and I use them quite a bit.
Things you will need from your kitchen:
- A large pot
- A long-handled spoon
- A knife
- A jar with a lid
Your Ingredients:
- 3-4 pounds of honey
- 1-gallon water
- One packet Lalvin D-47
- Juice from two lemons (use fresh, not bottled juice)
- ¼ cup of lightly chopped raisins
- 1 cup of strong black tea, cooled
Brew day
Wipe down your work area with a cleanser and wash your hands thoroughly.
Sanitize your equipment following the manufacturer’s directions. I usually do all of my sanitizing in my brew bucket.
In the pot, combine your honey and half of the gallon of water. Bring the mixture to a boil and skim off any foam (this is tiny beeswax particles left in the honey). Boil and skim for 10 minutes. Turn the heat off and stir in the raisins.
Congrats!
You just made your first must – this is the name of the juice or mixture that contains the sugar, fruit, and other flavorings you’ll be fermenting.
In the jar, pour in the lemon juice and add the packet of yeast. Screw the lid on and give it a good shake.
Now relax for about an hour while the must cools and the yeast starts to bubble. Once cooled, pour the must into your 2-gallon brew bucket. Add in the lemon juice and yeast mixture, the rest of your water, and the black tea.
Give this mixture a good vigorous stir.
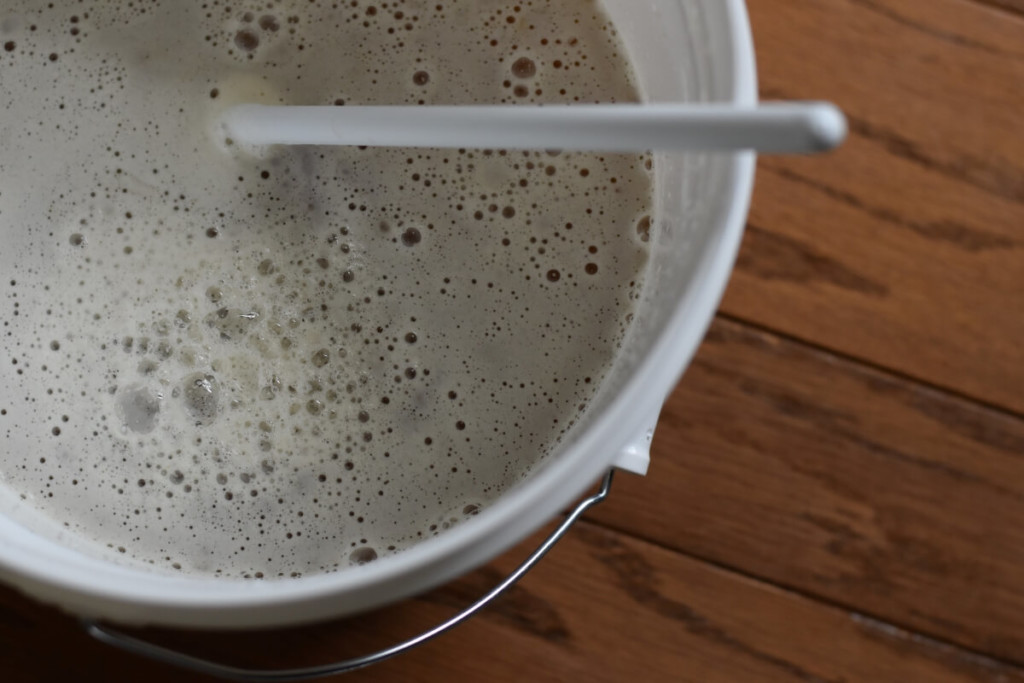
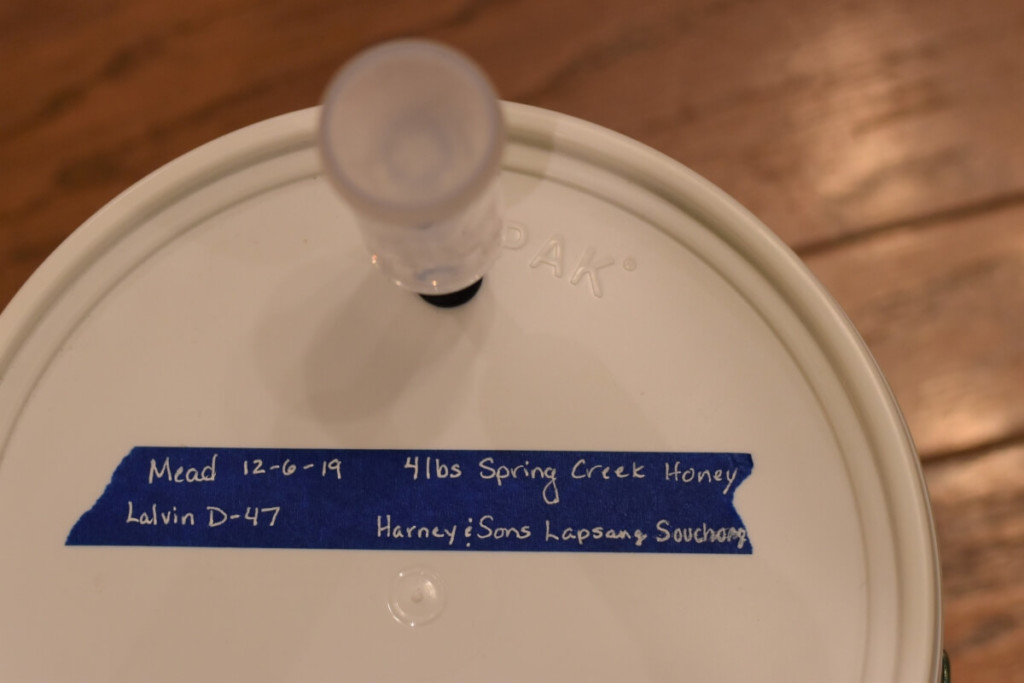
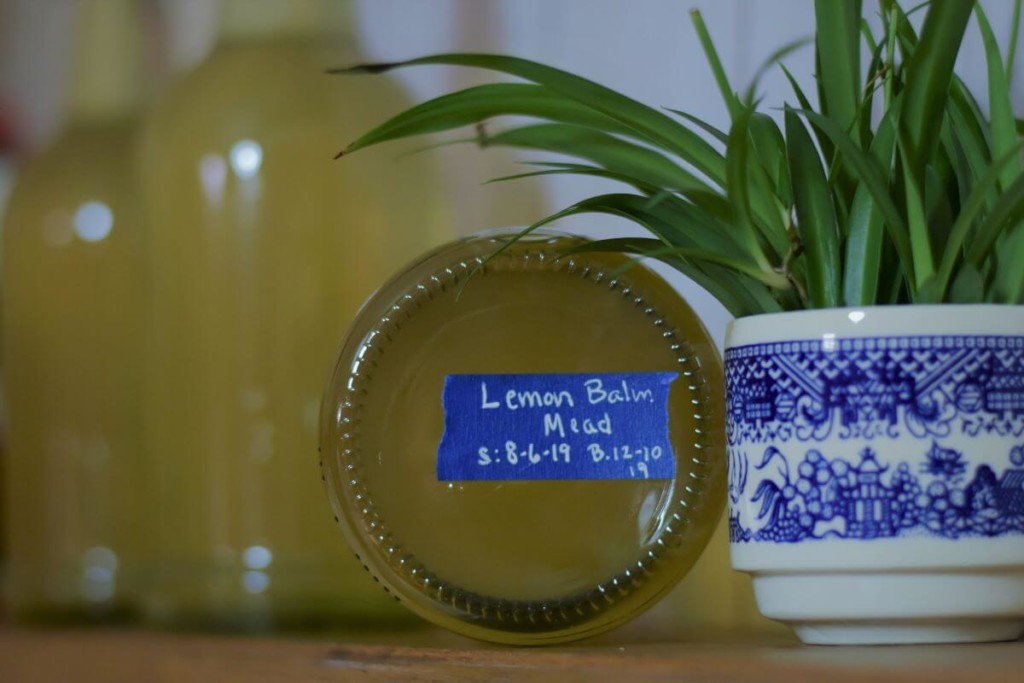
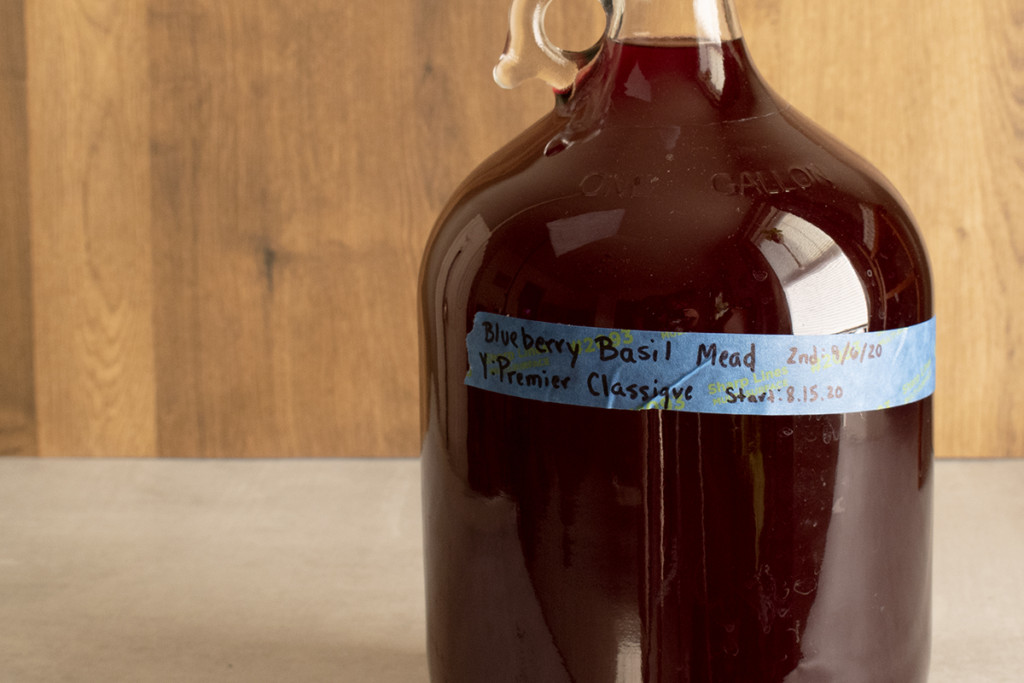
You are adding air to the must, which wakes up our little yeasty buddies. Put the lid on the bucket tightly and add a label (masking or painter’s tape works well), noting the date, type of honey, type of yeast, and anything else you want to remember.
Assemble your airlock by filling it halfway with water, put the little domed cap inside it over the inner stem, and snap the lid on carefully. Fit your airlock into the drilled hole in the lid. Place your bucket somewhere out of direct sunlight that stays between 62 – 78 degrees. A warm closet or cupboard works well.
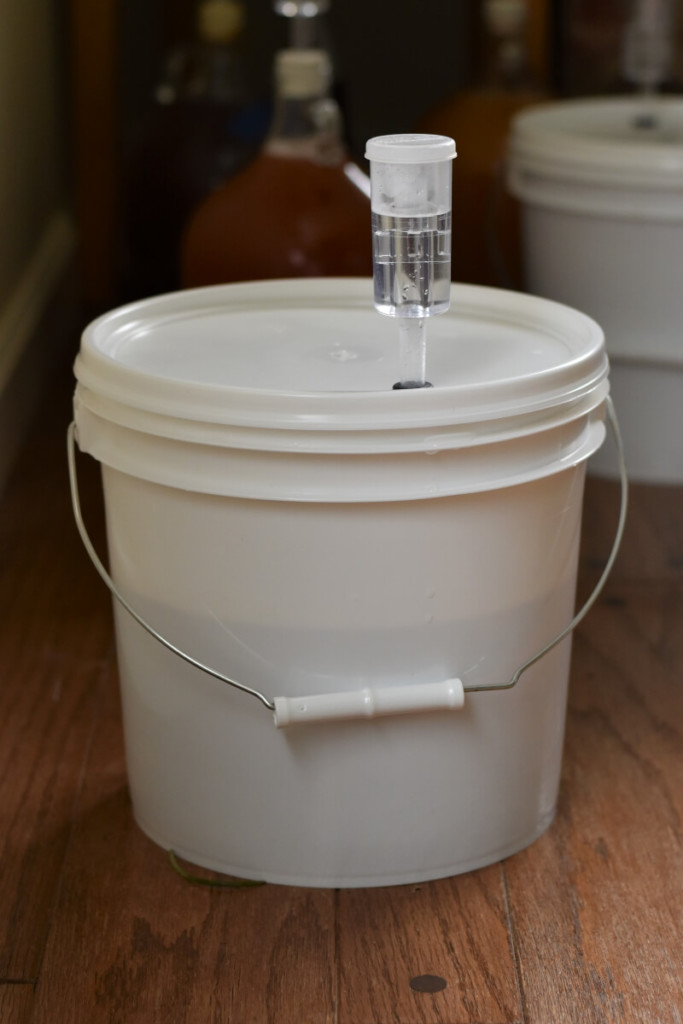
We are going to wait for about one to two weeks. This is when the most vigorous fermentation happens. It’s called the primary ferment. This is why a brew bucket is also called a primary fermentor.
Racking
Once the primary fermentation is finished, we’re going to transfer the mead over to the glass jug. This is called racking, and the glass jug is called the secondary or secondary fermentor for apparent reasons.
Put your bucket up on a counter or table and keep the glass jug on the floor or a lower stool. Move the bucket slowly and gently to prevent stirring up the sediment on the bottom – the raisins and the spent yeast, which is called lees.
Fit the tubing on to the shortest part of your racking cane, put the tube clamp on the other end of the tubing leaving a 6” tail. Place the cane end in your brew bucket. Suck on the other end of the tubing to start suction. Once you get it flowing, put a splash of the mead in a glass and clamp the hose closed.
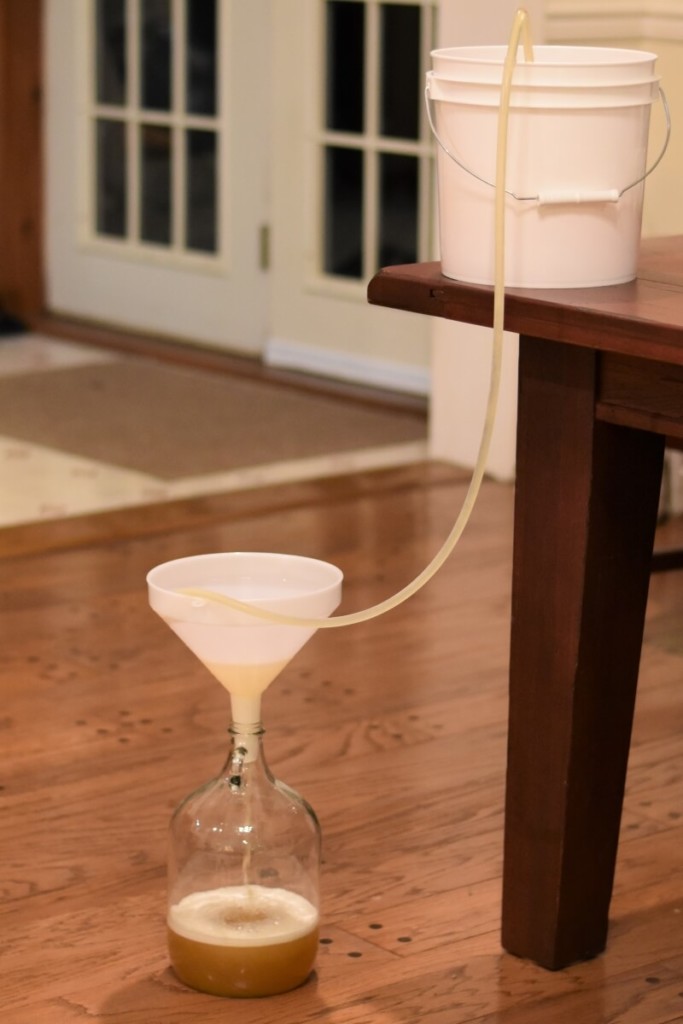
Put the tube in your jug and unclamp the hose lock. Try to keep the racking cane up off the bottom of the jug so you don’t pick up the sediment. Transfer your mead into the gallon jar leaving behind as much of the lees and sediment behind as possible.
Tasting
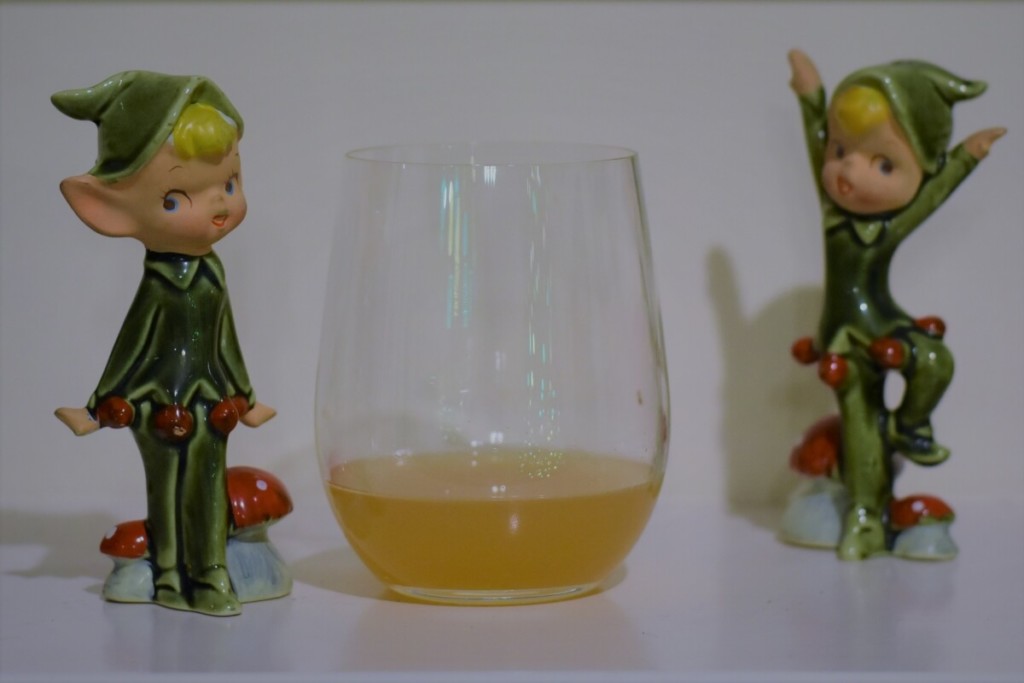
Did you know we used to think pixies were responsible for fermentation?
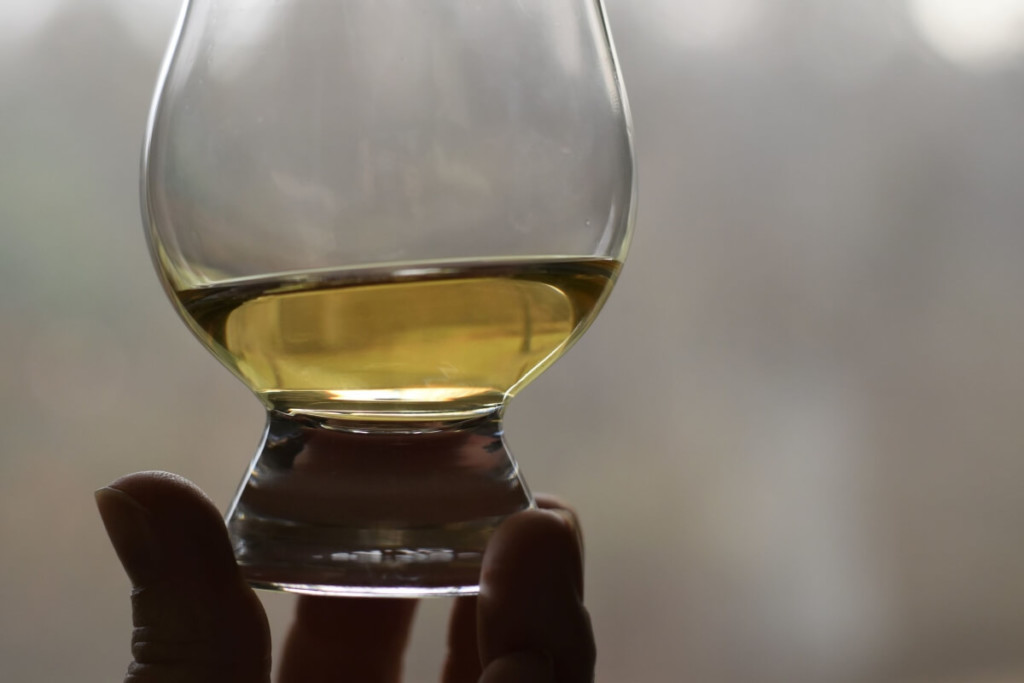
You will notice your mead is already beginning to clear. Go ahead and taste the mead you poured into the glass. (Don’t pour any remaining in your jug.) This is the best part, the tasting! It will most likely be very fizzy and you may begin to taste the alcohol. It’s going to be very green and bitey!
Don’t worry; the finished product will be very different from this young brew.
Relabel your secondary jug with the same information as your brew bucket, plus your racking date. Put the rubber stopper in the top of your secondary and put the airlock in the hole of the stopper. Place the mead back in the warm place where you had your bucket.
And now we wait
The airlock will bubble, and you’ll see hundreds of tiny bubbles rising up to the surface. Your yeast will happily keep turning honey into mead until there are no more sugars left to ferment or until all the yeast has died off.
This can take anywhere from several weeks up to several months, depending on the yeast used and the honey.
Your mead is fermented when it has cleared, and there are no more tiny bubbles rising to the surface. Give the jug a good rap with your knuckle and watch to see if any new bubbles float up.
If you see bubbles, check your mead in a few weeks. If there are no more bubbles, it’s time to bottle!
Bottling Day
Sanitize whatever containers you are bottling in, your racking cane, and tubing. Put your jug up on the counter, being careful not to disturb the lees. If they get kicked up a bit, leave the jug for an hour or two until they have settled again.
Have your bottles ready on a stool or the floor. And don’t forget a glass for tasting!
Assemble your racking cane, tubing, and hose clamp as before.
Carefully place the racking cane in your jug, keeping it up off the bottom, away from the lees. Suck on the end with the hose clamp to begin suction and then close the clamp once you’ve got it started.
Position the tube in your first bottle. Release the clamp and fill your bottle with mead leaving about 1-2” of headspace between the cap or a cork. Close the clamp and move to the next container continuing in this manner until you have filled all of the bottles.
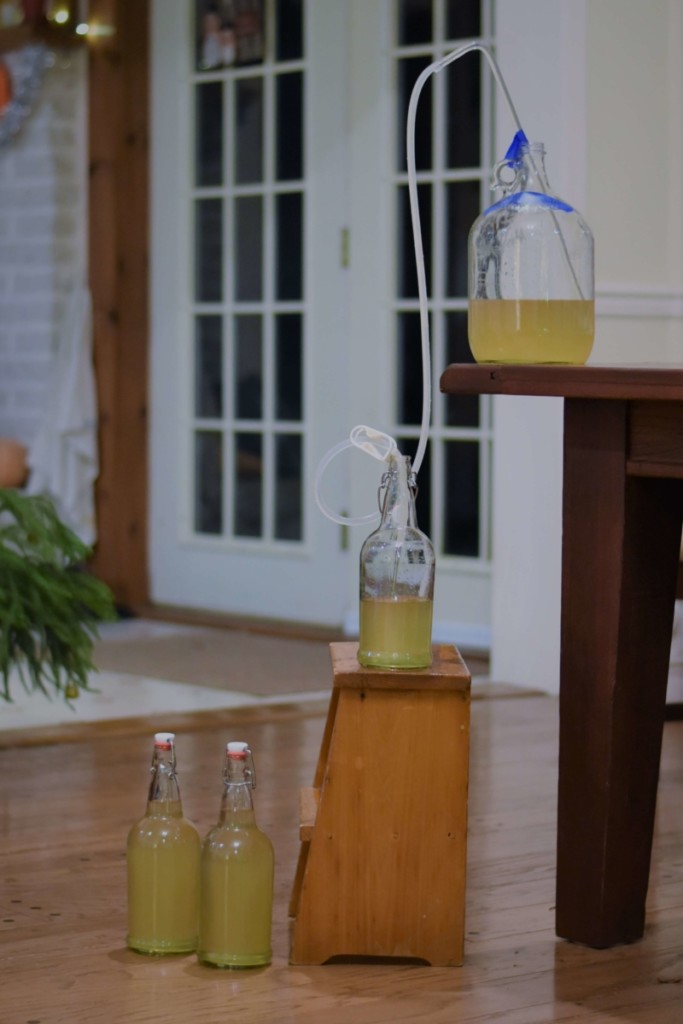
You will most likely have a little mead left that won’t fill an entire bottle, siphon what’s left into a jar being careful not suck up the lees. You can drink this mead right away. You’ll notice how different your mead is from when you first started it.
Storing and aging
Store your bottled mead in a cool dark place. If you bottled with corks, store them on their side. The mead keeps the cork wet, and the bottle sealed. Put a label somewhere on your bottle with what it is, brew date, and bottle date.
While you can drink your bottled mead right away, the best mead comes to those who wait. Give it a couple of months up to two years to chill and mellow and become amazing.
And of course, while you’re letting your bottled mead age, get your next batch going.
If you enjoyed making mead, be sure to try making hard cider! It’s incredibly easy, and you already have all the equipment you need.
Ready to up your mead making game?
Try one of these brilliant recipes:

Get the famous Rural Sprout newsletter delivered to your inbox.
Join the 50,000+ gardeners who get timely gardening tutorials, tips and tasks delivered direct to their inbox.