

About ten years ago I got it into my head that I was going to start making wine, mead, and hard ciders.
I imagined myself opening a bubbling bottle of cider and smugly saying, “Why yes, I made it myself,” while pouring my amazed family and friends each a glass.
I ordered myself a small home winemaking kit and eagerly unpacked it when it arrived in the mail. Laying out all of the different gadgets and powders and hoses I thought,
“Now what the heck do I do?”
I knew there had to be whole corners of the internet dedicated to just this sort of thing. So off I went searching for the wise homebrewing web community.
And I found them, and let me tell you they were a very opinionated bunch.
They tossed around words like specific gravity and hydrometer. They were downright surgical in their approach to sterilization and argued about which yeast strains were best for what fruit. I began to wonder if I might need a degree in Chemistry.
In the end, I was so intimidated that I decided to chuck my homebrew kit in the back of the closet and settle for store-bought wines.
But I kept thinking humans have been doing it for millennia in less-than sterile conditions and without fancy equipment. It can’t be this complicated.
Once I found the right resources, I discovered how uncomplicated homebrewing could be.
Once you’ve made your first batch, you’ll see how easy it can be too.

But I warn you, once you realize how easy making cider is, you may get bitten by the homebrew bug.
This tutorial is going to walk you through the very basics of making a gallon of hard apple cider.
Nothing fancy, just a good, homebrew. I want to keep everything quite simple. As I’ve already pointed out, there are plenty of resources on the internet if you get serious about this.
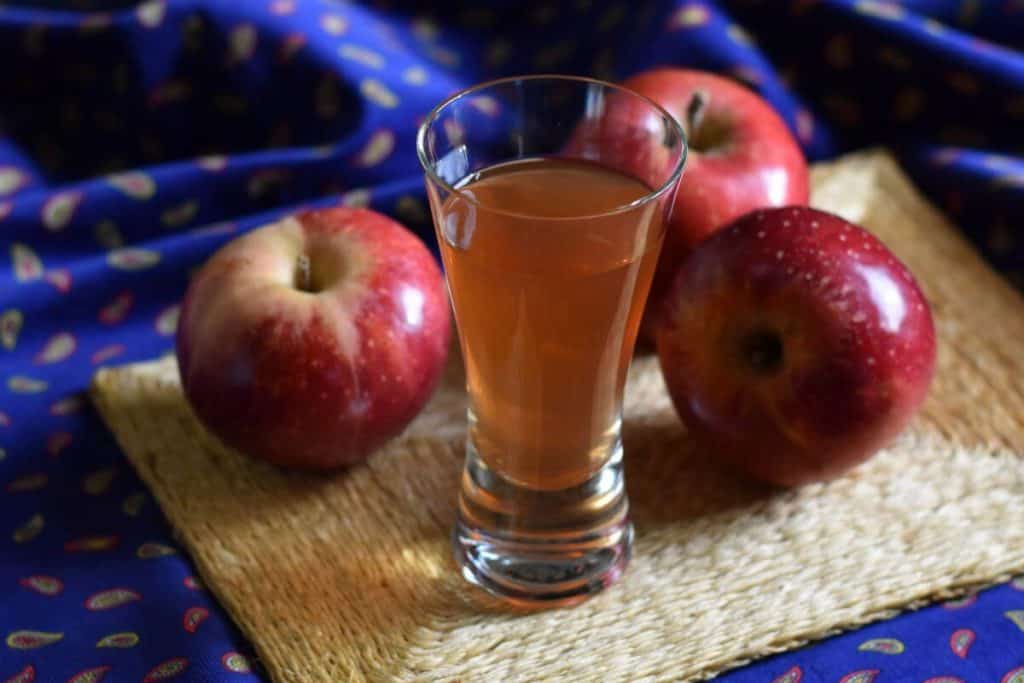
Homebrewed cider is nothing like commercially produced ciders; it’s got a bit more kick to it. And if you’re using an unfiltered, freshly pressed cider, it won’t be perfectly clear.
Equipment
You will need a few necessary pieces of equipment which are easy enough to find at a local homebrew supply store or an online supplier.
I’ve purchased from both sources, and if you have one near you, I highly recommend a local supplier over the internet. The shop owners are usually an excellent resource for troubleshooting and asking questions.
You will need:
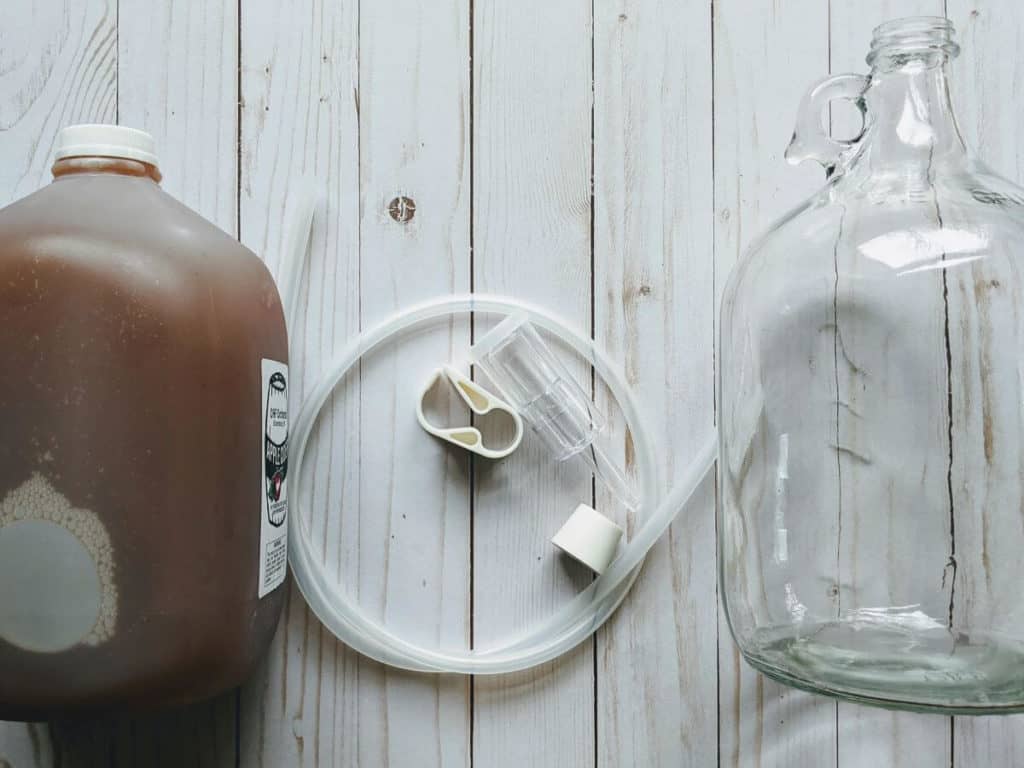
One-gallon glass jug – gallon batches are easier to move around, less-expensive ingredient-wise and more fun to customize recipes for.
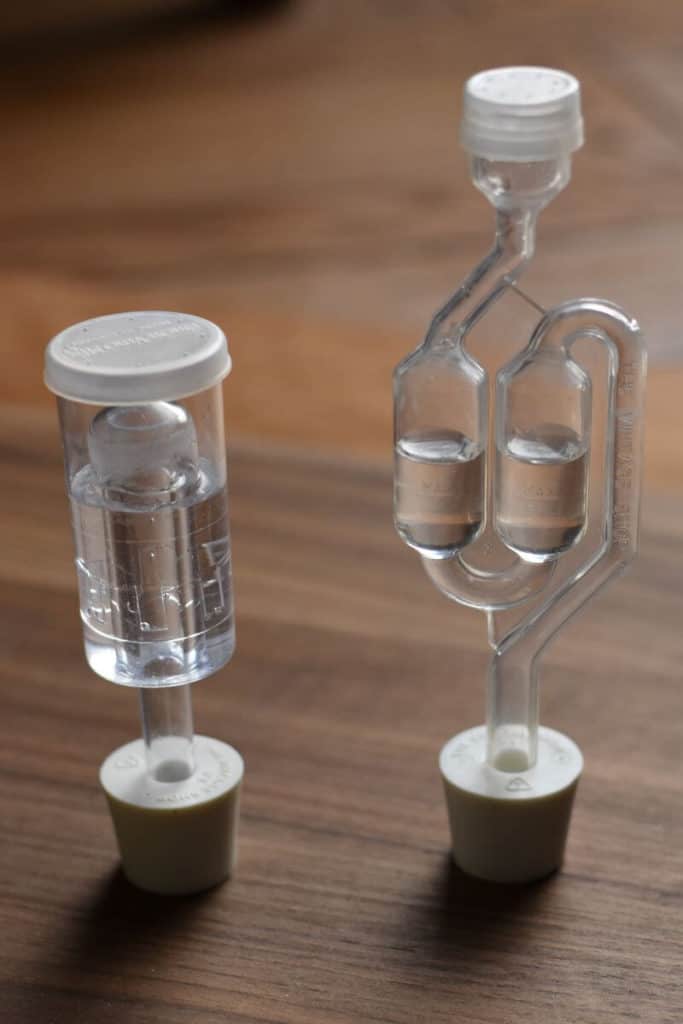
An airlock – airlocks are used to let the carbon dioxide created by the yeast out, but not let air in. You will usually find two different types, a twin bubble or a 3-piece. Either work well.
Drilled bung – #6 fits a one-gallon jug
3-4 foot length of food-safe vinyl or silicone tubing
Sanitizer – my favorite is One Step, it makes the whole process easy because you don’t need to rinse
Eventually, you will need something to put your finished cider in. I prefer swing-top bottles as they don’t need caps or a bottle-capper.
A minor note, if you want a sparkling cider, be sure to purchase swing-top bottles that are made specifically for brewing.

Not necessary, but nice to have:
Two-gallon brew bucket with drilled lid
Your ingredients
- One gallon of cider (pasteurized or unpasteurized, it doesn’t matter as long as it doesn’t have preservatives in it)
- One packet of yeast – Safale S-04 and Lalvin 71B-1122 are both good yeasts when you are just starting out.
- 2 cups of sugar, white or brown
The lingo
There are a few terms you’ll need to know when diving into the homebrewing world.
Must
– this is your fruit juice or whole fruit, it’s basically the liquid (and sometimes solids) that you will be fermenting.
Pitching the yeast
– this is fancy homebrew talk for adding the yeast to the must.
Lees
– the cloudy sediment made up of dead yeast on the bottom of the fermentation container.
Racking
– this is the process of siphoning your cider from one fermentation container to another.
Bottling
– kind of obvious, this is transferring your finished product from the one-gallon jug into bottles.
Fermentation
– the magical process where yeast breaks down sugar into alcohol.
Alright, let’s get started, shall we?
Let’s keep it clean
While you don’t need to create operating room cleanliness, you need to keep your work area and equipment clean. You don’t want to get any competing microbes in your cider. Wipe down your counter with a cleanser and wash your hands before you begin.
You’ll start by sanitizing all of your equipment.
This is easy to do in a brew bucket or your sink. Mix in the One Step and put all of your equipment in.
Be sure to pour some of the sanitizing solution into your tubing. Throw a tablespoon of One Step into the one-gallon jug and fill it up. One of the great things about using One Step is that you don’t need to rinse everything off.
Now that everything has been sanitized we can make the must.
Put your funnel in the gallon jug and pour the sugar in. Pour about half a gallon of cider into the jug. Swirl it around to mix. If you like you can put the bung in, cover the hole, and give it a good shake.
Doing this aerates the cider and dissolves the sugar in preparation for the yeast.
Once the sugar has dissolved, use the funnel to add the yeast. (If you are using the SAFALE S-04, use only half the packet)
Give it another swirl and then top up with enough cider to come up to the neck of the jug.
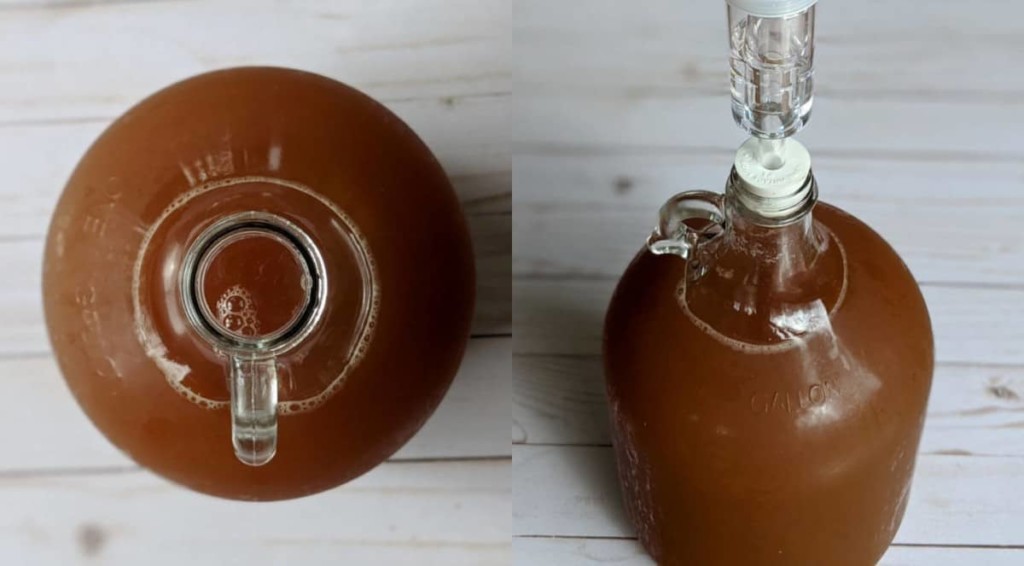
Fit the bung with the airlock into the opening and set your jug somewhere out of direct sunlight. You want the temperature to stay between 68-74 degrees Fahrenheit. A warm cupboard or closet will do just fine.
I put a paper bag over my jugs to keep the sun out and tuck them behind the furniture.

After about a day or two, you’ll notice lots of bubbles at the neck of your jug and your cider will be very cloudy.
Look closely, and you will see tiny little bubbles rushing to the top of your jar. You may even hear the soft blip-blip sounds of the airlock releasing the carbon dioxide created by the yeast.
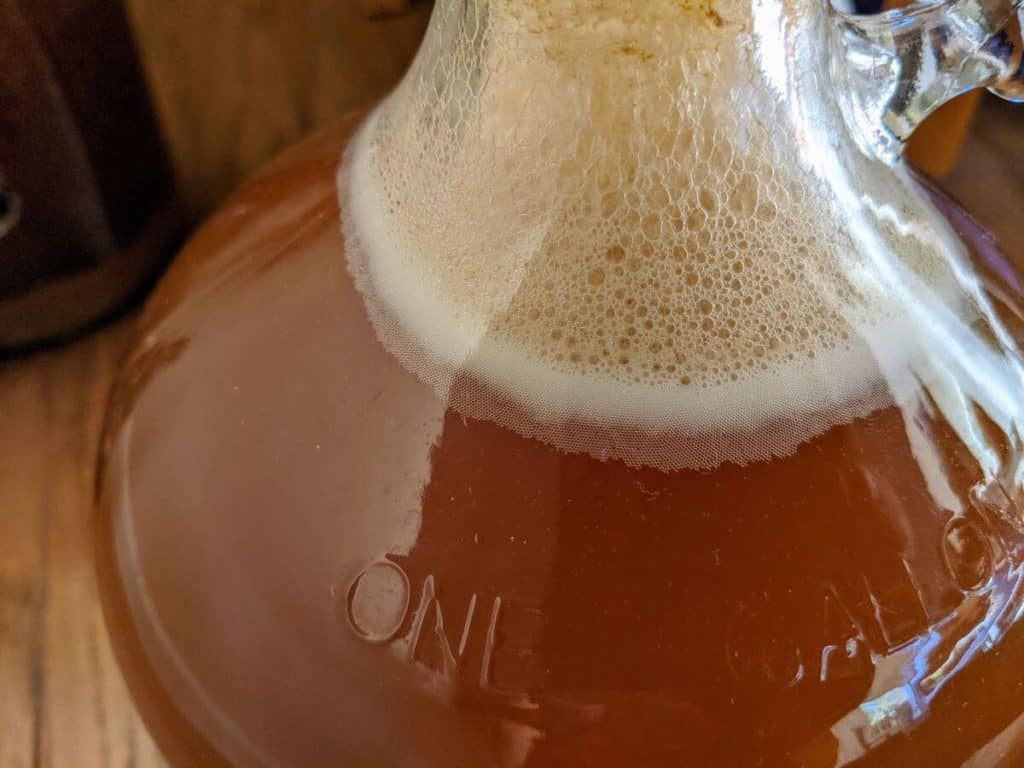
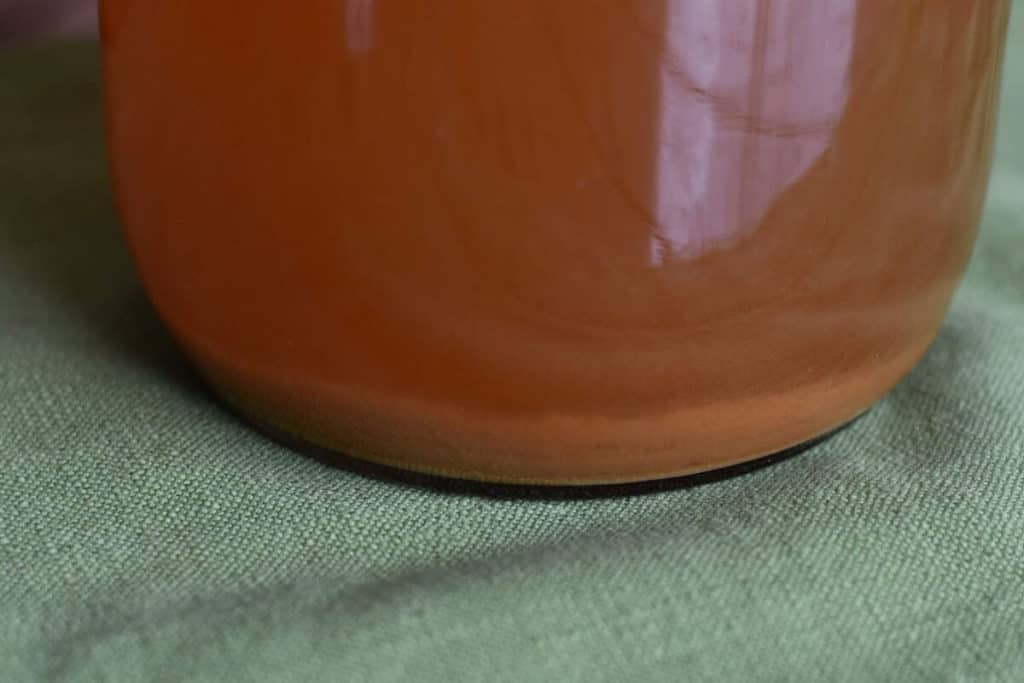
After about 3-4 weeks, the fermentation should be complete. The cider will be clearer, and the airlock will have stopped bubbling.
Gently rap the side of your jug with your knuckle, if lots of tiny bubbles rush up to the top, let it go for another week. (A few bubbles are okay.)
If you are bubble-free, you are ready to bottle.
Bottling
At this point, you have a decision to make – do you want a still cider or a sparkling cider? I wholeheartedly suggest making a batch of each so you can taste the difference.
For a still cider simply bottle your finished cider and let it age for a few weeks before enjoying it.
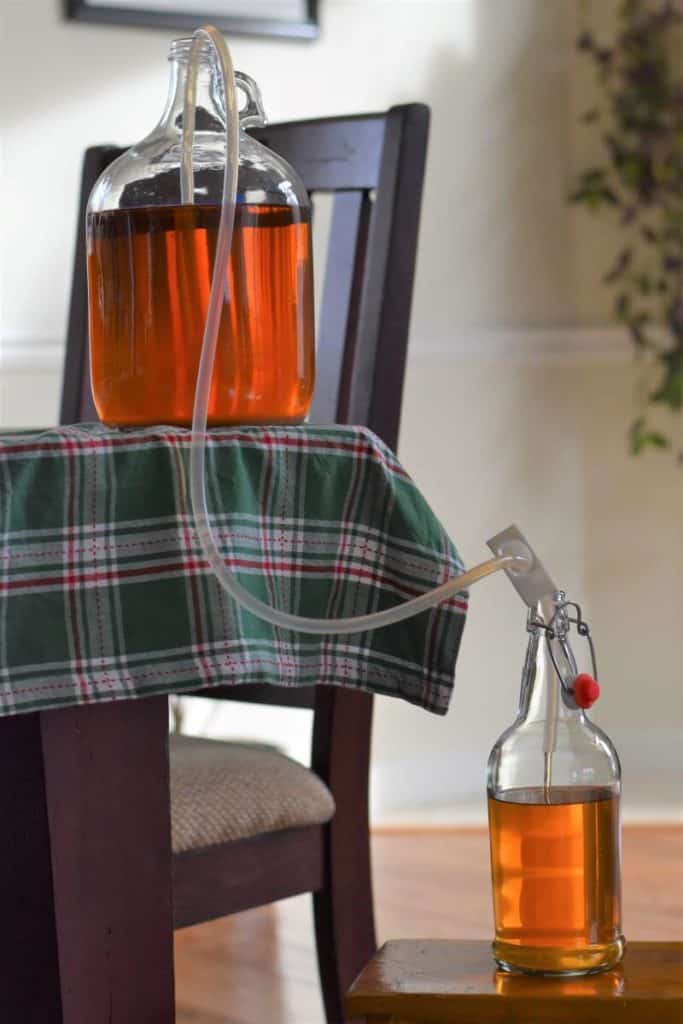
To rack your cider, you will need to put the gallon jug higher up than the bottles you will be racking it into. I generally put the jug on the counter or table and set up a stool for the bottles.
Sanitize your bottles and a racking cane if you are using one. Fit the hose lock onto one end of your tubing, leaving a 6” tail.
Here’s a quick and easy way to start siphoning your cider without sucking on the tubing or stirring up the lees.
Fill your tubing with water about 2/3 full, leaving the top 1/3 of the tubing empty, then lock the hose clamp.
Put the end of the tubing that is free of water into your gallon jug and the end with the hose clamp on it below in a bowl or brew bucket.
Unlock the clamp, and the water will start siphoning the cider from the gallon jug.
Quickly re-lock the clamp when all the water is out of the hose, and cider starts to come out the bottom.
Now fill your bottles with ease, locking, and unlocking the clamp to start and stop the flow of cider. Fill your bottles up into the neck, leaving about a 1” of headspace.
Here is where a racking cane is convenient. Because it’s solid plastic instead of flexible tubing, it’s easier to maneuver when you get down to the bottom of your jug. You can slowly tilt the jug to get more of the clear cider, but try not to suck up the lees at the bottom.
Once all of your cider has been racked into bottles, close the swing-top lids and rinse the outside of your bottles to clean off any dribbles.
To make a sparkling cider, you will need priming sugar.
The sugar gives the remaining yeast just enough food to produce carbon dioxide bubbles in your bottle, which gives you a fizzy cider when it’s opened.
In a small saucepan, add two tablespoons of priming sugar to ½ cup of water. Bring to a boil and simmer for five minutes. Remove from the heat and let your priming syrup cool to room temperature. Pour the priming syrup into a sanitized brew bucket and then rack your finished cider into the brew bucket to mix.
Be careful not to pick up the lees on the bottom of the glass jug. Stir the cider gently to mix in the priming sugar. From there, bottle your cider as we did for the flat, straight from the brew bucket.
Let your sparkling cider age in the bottles for a few weeks before enjoying.
Once you’ve got a few batches of cider under your belt start experimenting with different recipes and yeast strains and other additions.
If you do end up getting bit by the homebrew bug, I suggest picking up Amber Shehan’s book, “Artisanal Small-Batch Brewing”.
She covers the basics of brewing mead, cider and beer, and includes some pretty tasty recipes that can all be made in one-gallon batches.
A toast to your health!

Get the famous Rural Sprout newsletter delivered to your inbox.
Join the 50,000+ gardeners who get timely gardening tutorials, tips and tasks delivered direct to their inbox.