


As I write this, I’m sipping a bubbly glass of peach water kefir, with golden bits of chopped peach floating at the top.
I’ve never been much of a soda person. Commercially made sodas are often too sweet and filled with all kinds of things that I have no desire to drink in large quantities.

But water kefir is a different story altogether.
And I think that’s why when the probiotic drink craze of kombucha took off; I breathed a sigh of relief.
Finally, something fizzy that was good for you. And it wasn’t long after discovering kombucha that a friend introduced me to water kefir.
When I found out how simple it was to make water kefir, I started making my own.
If I’m not starting my morning by drinking a glass, I’m whipping up the next batch.
It only takes moments to set up, and the total fermentation time takes roughly 1-3 days. Now there’s always a jar full of tibicos on my counter turning sugar into one of my favorite drinks.
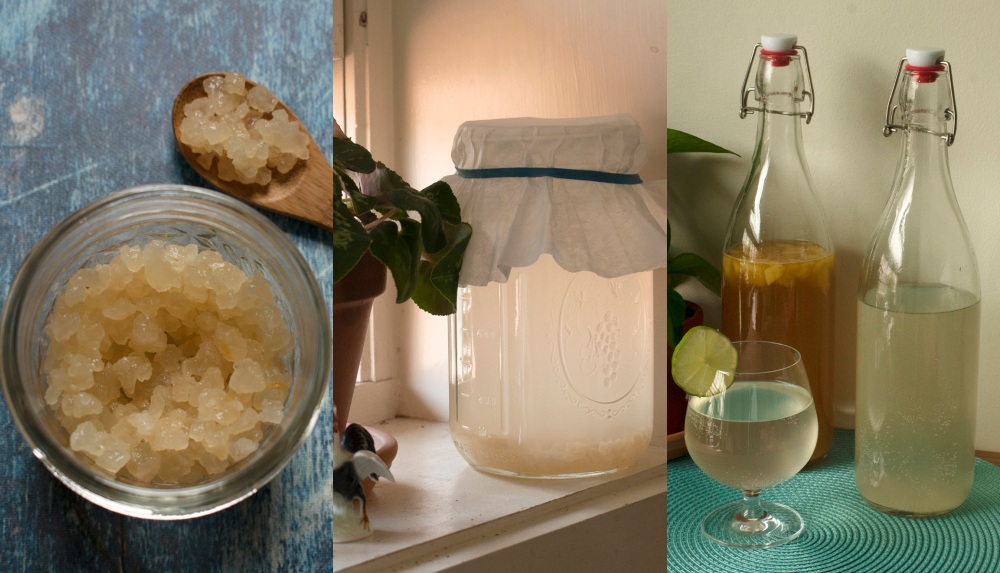
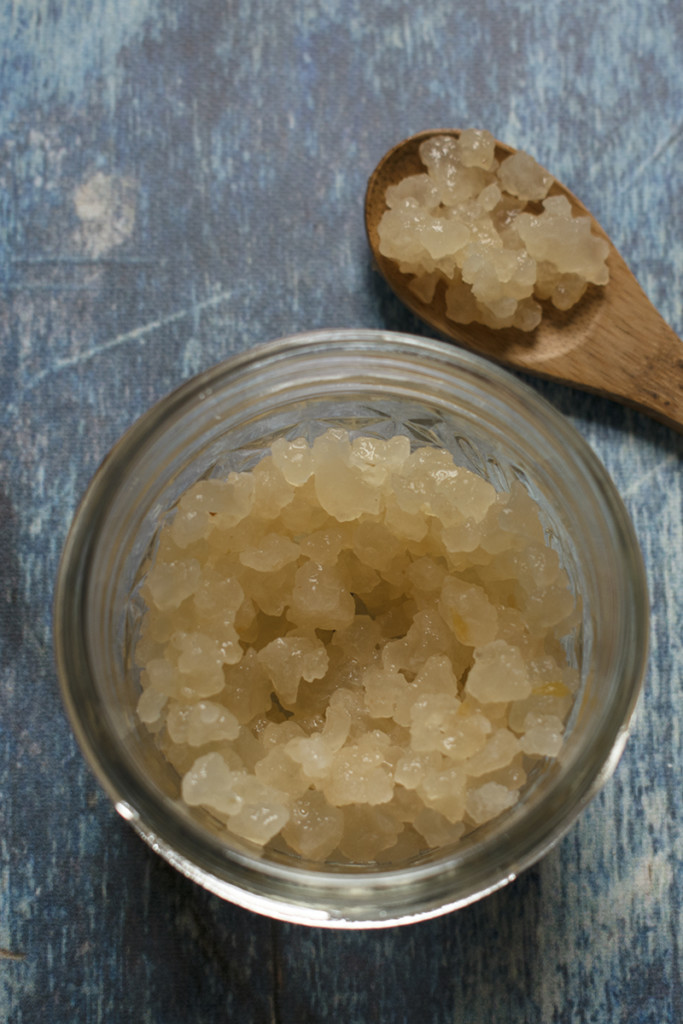
Tibicos is one of the many names for the little translucent granules, which are a SCOBY, or a symbiotic culture of bacteria and yeast.
And let’s be honest, it’s hard not to love a drink made by organisms with such a cute name.
A study of the diverse microbes in water kefir notes that we are still not sure where water kefir grains originated from, but it’s believed they could have come from the Opuntia cactus fig plant. (Microbial Species Diversity, Community Dynamics, and Metabolite Kinetics of Water Kefir Fermentation)
Because you can find water kefir nearly all over the world, we may never know. And the microbial makeup of the grains differs from region to region.
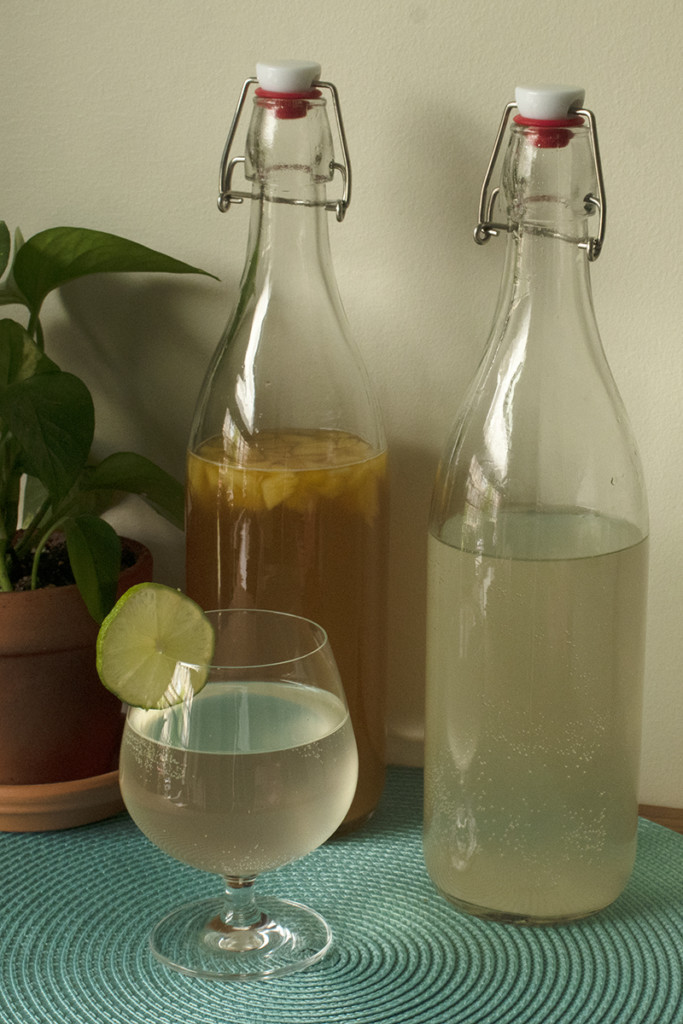
The flavor is reminiscent of a mellow lemonade, slightly sweet and mildly tangy.
And while water kefir is terrific on its own, the addition of fruits, teas, or juices opens the door to some wonderful flavor combinations.
Much like the original unflavored batch, these flavored water kefirs maintain that light, refreshing taste. Never too sweet or too sour.
Water kefir is dairy-free, vegan, and filled with fantastic healthy bacteria and yeasts. The benefits of probiotics are well-documented. And your gut will thank you for learning how to make water kefir.
Acquiring Grains
You will need water kefir grains to get started. They are usually sold ready to go, in a sugary liquid to preserve them, or dehydrated, in which case they will need to be activated before you get started.
I would suggest you start by asking friends and family if anyone is making water kefir. Much like a sourdough starter and dairy kefir grains, water kefir grains multiply over time. So, if you know someone who makes water kefir, they will probably be happy to share some grains with you.
Your next stop would be a local health food store, or the natural foods area of your local grocery store.
(Am I the only one that finds it slightly disconcerting that food stores have an area designated to ‘natural’ foods. A plug for the self-sufficient lifestyle if I’ve ever heard one!)
Finally, there’s always the internet. I purchased my grains from Etsy, but they can easily be found on Amazon as well.
The same seller I bought mine from on Etsy sells kefir grains on Amazon as well.
I’ve always heard good things about Cultures for Health too, but I’ve never ordered from them. If you order grains from them, let me know how your experience goes.
Water
The type of water you culture your grains in is important.
Tibicos need the minerals present in hard water to grow and ferment properly. Using distilled, filtered, conditioned, reverse osmosis or altered water can leave you with slow-performing kefir grains, or sometimes kill them off.
This is one time where your tap or well water might just be your best option.
If you have chlorinated water, take the time to find out if your town uses chlorine or chloramines in their water treatment. Chlorine will off gas if you leave it in an open container for 24 hours, or you can boil it for fifteen minutes and let it cool. Chloramines are a little tougher to get rid of, they require a good activated carbon filter, but then that leaves you with filtered water, which we’ve already mentioned isn’t the best option.
All is not lost.
If you have to use filtered water, you can always put back the minerals you take out by adding a few drops of trace minerals to the water.
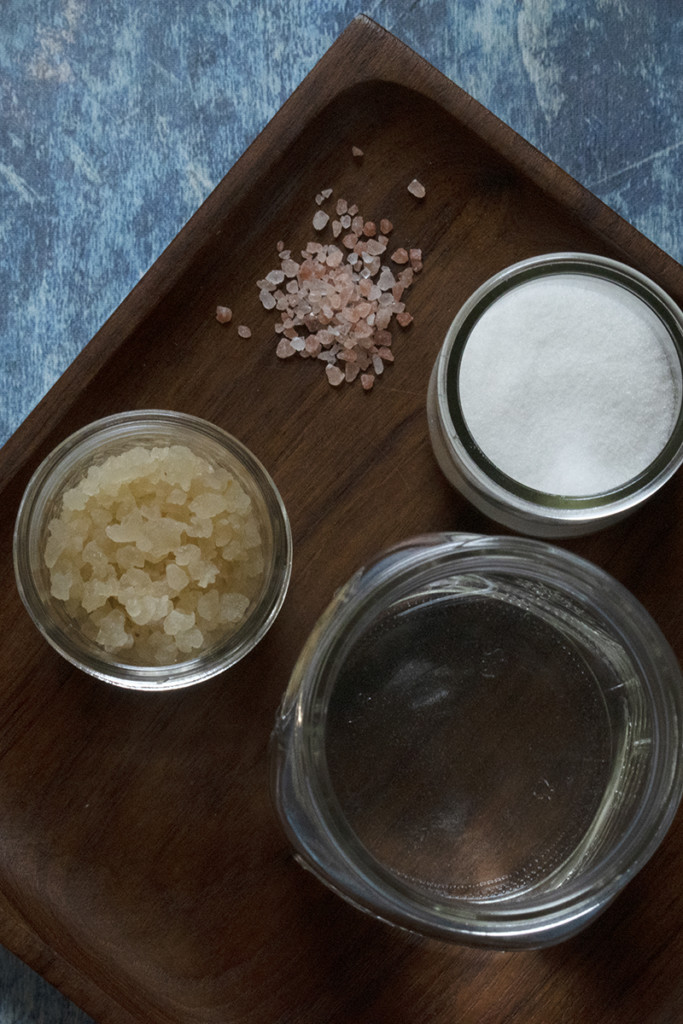
A few other options that work well to replace lost minerals and to give the tibicos more nutrients are adding one of the following – a ¼ teaspoon of blackstrap molasses, a pinch of Himalayan pink or Celtic sea salt, one tablespoon of raisins, chopped dried apricot, or a prune. Using brown sugar for your ferment also gives you lots of extra nutrients.
Giving your grains extra nutrients via one of the listed methods is a good habit to get into anyway, no matter what water you use.
Sugars
You can use nearly any kind of sugar for water kefir. But remember, these are living organisms, and they vary based on where they come from, and they can change over time. So, not every sugar is going to work well with your kefir grains. Try a few different types of sugar and see what works best with your grains.
I tend to use plain old white sugar because it’s inexpensive, and I always have it on hand. I’ve also had some great results with brown sugar and maple syrup.
Tibicos will change color based on the sugar you are using too. When I use white sugar, my grains are nearly translucent and clear. When I used brown sugar, they take on a tan or yellowish appearance.
Don’t use honey to ferment water kefir.
Honey, especially raw honey, contains its bacterial colonies, and you may end up fermenting the wrong bacteria. That’s great if you’re making mead, but not so much if you want water kefir.
Water kefir goes through two ferments, much like our homemade ginger bug soda. The first ferment takes about 24-48 hours, depending on the temperature and how active your grains are. The second ferment is what gives you those fantastic fizzy bubbles and your additional flavors.
Are you ready to give it a try?
What You Will Need
- Quart jar or other glass or plastic container to ferment your grains
- Wooden or plastic spoon
- Muslin, cheesecloth, fine-weave dishtowel or coffee filter
- Rubberband
- Fine mesh (non-metal) strainer or cheesecloth
- Funnel (handy, but not essential)
- Screw-top bottle or swing-top bottle for the second fermentation
Ingredients
- 3 cups of room-temperature water
- Nutrients (trace minerals, raisins, salt, etc.)
- 3 tablespoons of sugar
- 3 tablespoons of kefir grains
- Fruit, tea, juice, or ginger for the second fermentation
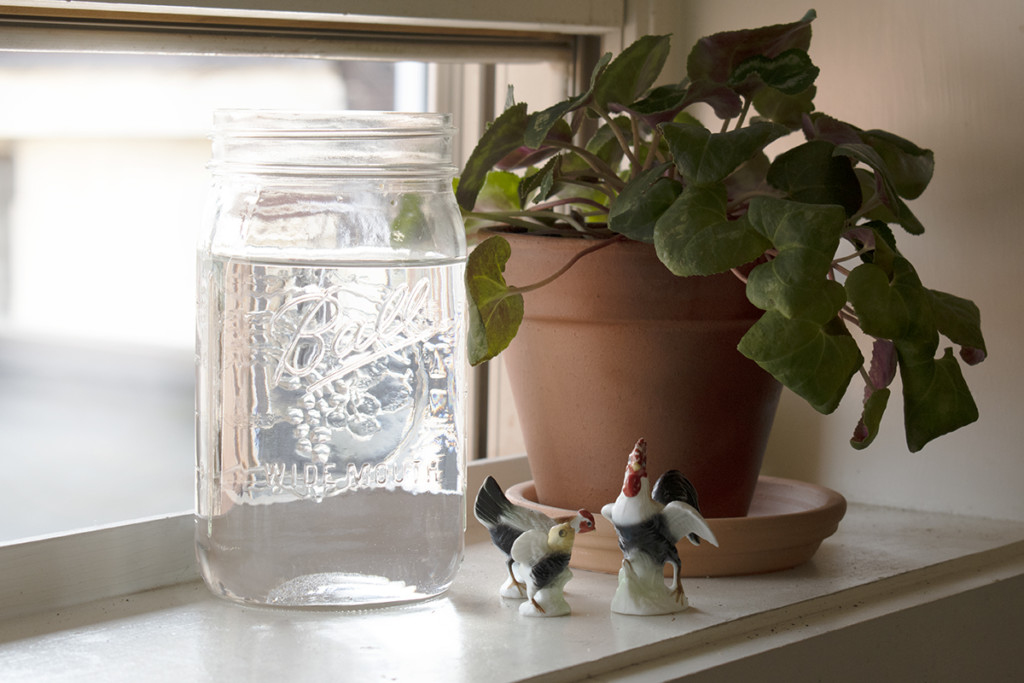
First Ferment
- Pour the sugar and water and nutrients into the quart jar. Stir the solution until the sugar is completely dissolved, this may take a minute or two.
- Pour in the water kefir grains.
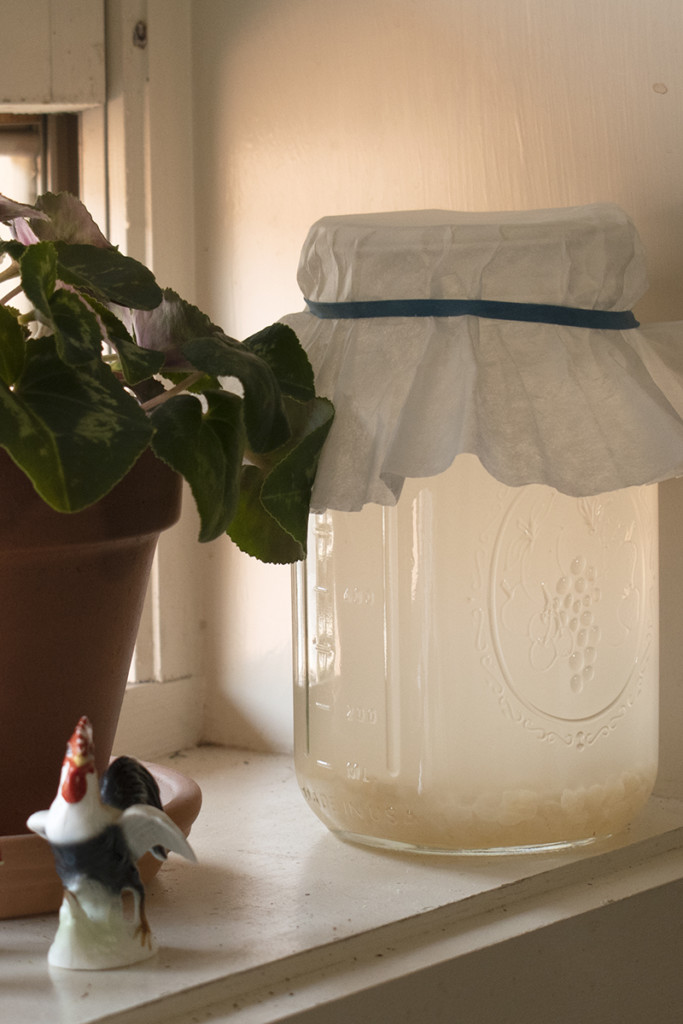
- Put a piece of muslin, cheesecloth, or a coffee filter over the mouth of the jar and secure it with a rubber band. Or you can use a doubled-up fine-weave dish towel to cover the jar.
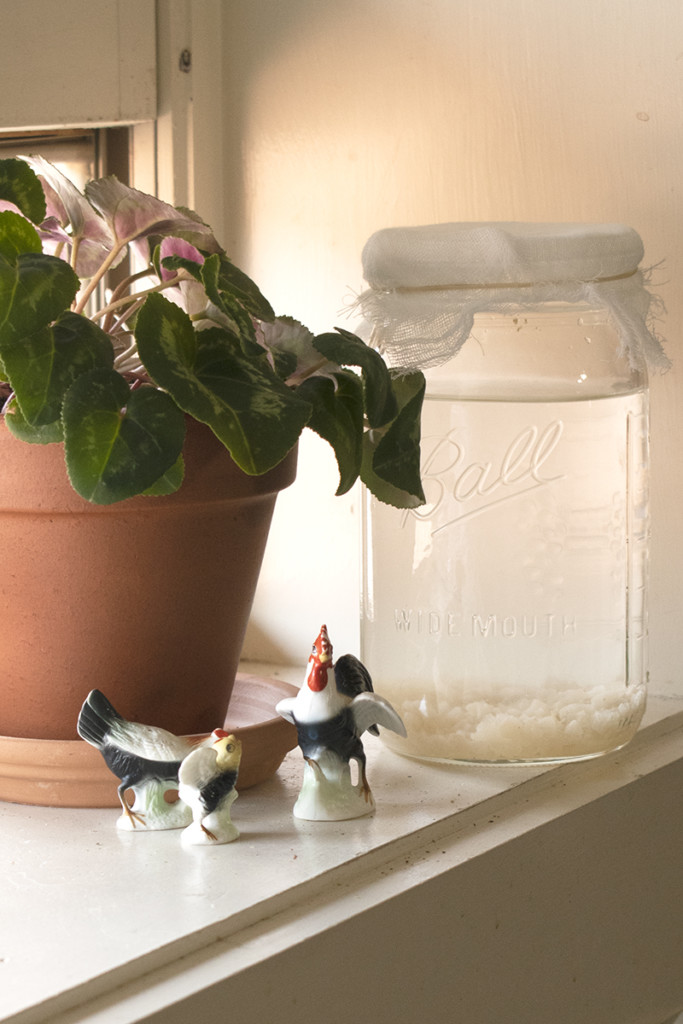
- Place your jar of kefir grains in a warm place in your house.
- Let the grains ferment for 24-48 hours.
- You will be able to tell that fermentation has happened if the water is cloudy and yellowish. You may even see tiny bubbles at the surface. If you taste the water kefir, it will have a slightly tangy, refreshing taste. If it still tastes syrupy sweet, let the grains ferment a day longer.
- Using a fine-mesh strainer or clean cheesecloth, strain the water kefir into a clean bowl or jar. You can use your tibicos again right away, or you can store them.
- To store tibicos, you will set them up to ferment again with water and sugar. Put a lid on the jar and store them in the refrigerator. Stored this way your kefir grains should remain viable for three weeks.
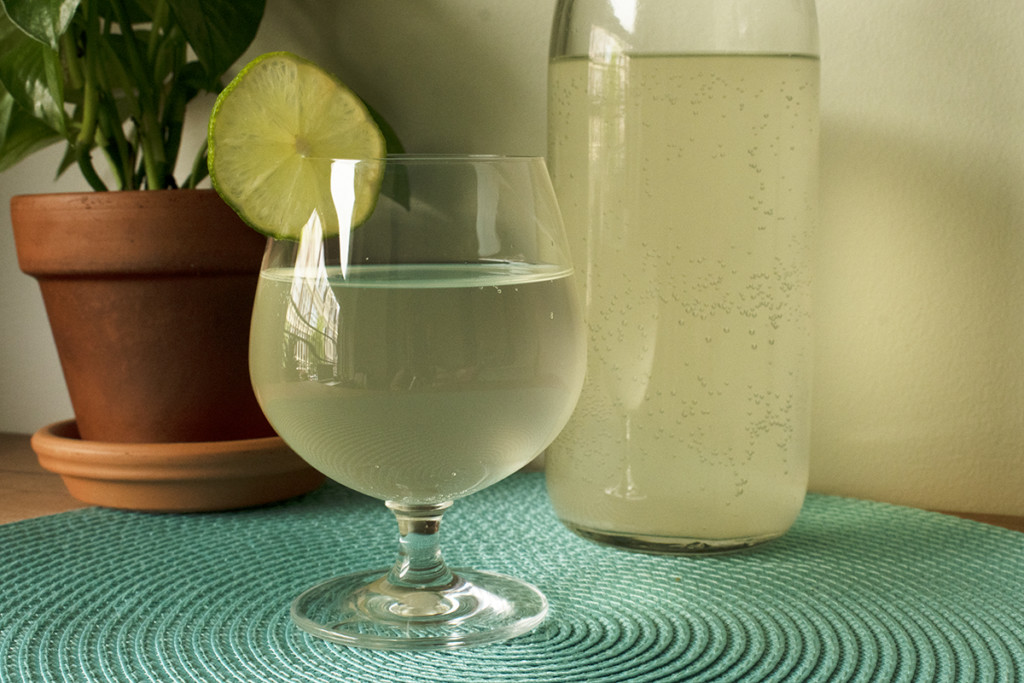
- You can drink your water kefir as is, simply pour it into a clean bottle and refrigerate it. The water kefir will have a pleasant tang, but not be overly fizzy.
If you wish to add fruit flavors and carbonate your water kefir, you will need to do a second fermentation.
Second Fermentation
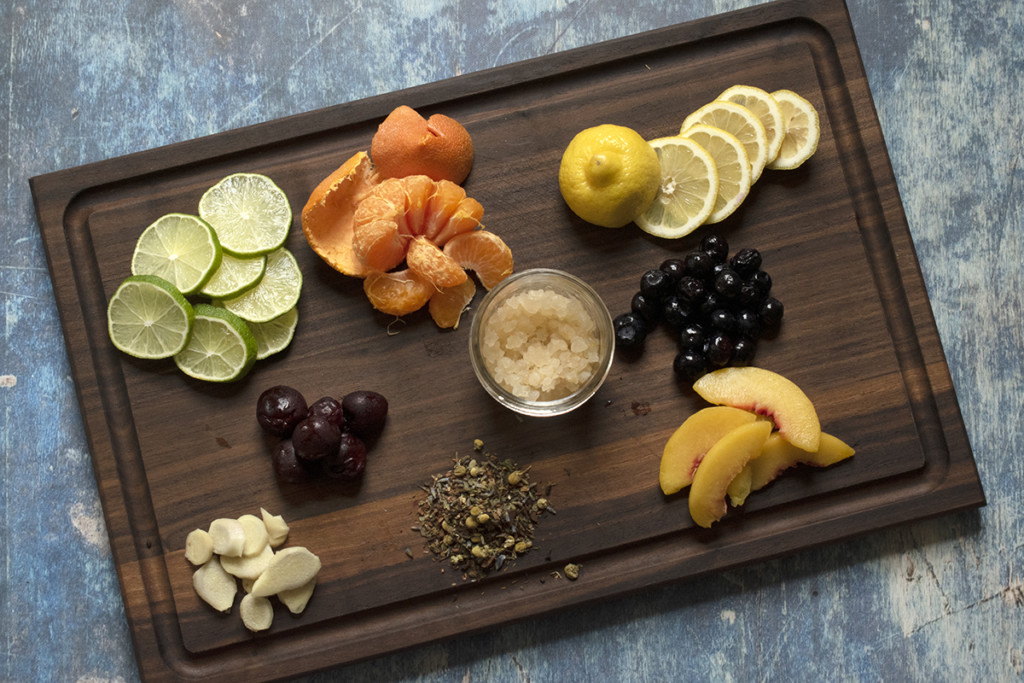
- Fermenting a second time around gives the water kefir a chance to build up some nice fizzy carbonation and add some fun flavors.
- You can use several things to add flavor during the second fermentation.
- Fresh, frozen, or dried fruit are all tasty options. Be sure to chop the fruit so it will fit into the bottle. If you plan on using dried fruit, try to use fruit without sulfates, as this can affect the fermentation process. For citrus, I recommend using the juice and a few long slices of the zest, avoiding the white pith. The natural sugars in fruit will provide just enough sugar to give you some good bubbles.
- Ginger is also a fantastic option for your second ferment – it’s good for your gut and is anti-inflammatory. I make at least one batch of ginger water kefir a week because of this double-whammy health benefit. You will need to add a little extra sugar for the water kefir to “eat” to make bubbles. A teaspoon should be fine.
- Tea is another great option for flavoring your water kefir. And by tea, I mean dried tea leaves. Herbal teas work best. Add two teaspoons of dried tea leaves to the bottle and a teaspoon of sugar.
- Finally, you can use fruit juice for your water kefir. Either freshly squeezed or store-bought will work. Add 1/3 of a cup of fruit juice to the kefir. You want to get the flavor without diluting the water kefir too much.
- Be sure to leave at least an inch of headspace in the bottle, so the bottle doesn’t break from the pressure.
- Once you have added one of the above options, place the cap on the bottle and put it in a warm place. Let the water kefir ferment again for another 24-48 hours. I always suggest opening the bottle over the sink. I’ve had a couple of very excited second ferments in warmer weather that ended up all over me and my counter when I opened them.
- Refrigerate your fizzy bottle of water kefir after the second fermentation and enjoy it.
This is such a fun way to play around with new flavors. And the possibilities are endless. Ginger and turmeric tea, lemon-blueberry, peach and ginger, lavender, berry-blend water kefir!
Use what’s fresh and in season for inspiration.
Tips and Troubleshooting
Slow Fermentation
- If you’ve got brand new kefir grains, it may take a while for them to perk up. Expect your first few batches to take a little longer to ferment.
- Be mindful of your temperature. Kefir grains ferment between 65-85 degrees F. Some good places to put your batch while it ferments are on the top shelf of a cupboard, on top of the refrigerator, on a windowsill of a window that doesn’t get a lot of direct sunlight.
- Your grains may need a rest. See how to store your grains above and give them a little vacation.
- Try changing up your sugars or adding different nutrients.
If you notice the kefir grains getting a little mushy, you will need to ease up on the minerals.
Be mindful when you’re fermenting in the summer that both the initial and secondary fermentation may take less time due to warmer temperatures.
Alcohol in Water Kefir
Because water kefir is a fermented product, it does contain a trace amount of alcohol. It’s less than 1%, usually around .50-.75% This is a minuscule amount of alcohol and unnoticeable.
As you make a few batches, you will notice your grains are starting to multiply. You can easily split your grains and make more than one batch at a time. Or you can give them away to family and friends. You can even eat them. Throw a teaspoon in your morning smoothie for an extra probiotic boost.
Making more or less water kefir at a time
I use a ratio of 1 tablespoon of kefir grains : 1 tablespoon of sugar : to 1 cup of water with success. This makes figuring out how to make more or less at a time effortless.
Can you add fruit/ginger/tea/juice during the first ferment?
Yes, absolutely. I do this quite often. I still let it ferment in the bottle for a day or two as well, though to help develop more carbonation.
Once you get up and running, making water kefir takes only a few moments.
And once you taste it, you’ll want to have it on hand all the time. With it’s fizzy, light taste water kefir is the refreshing summer soda alternative you need.
Load it up with ice or fresh fruit when you pour yourself a glass and drink to your health.

Get the famous Rural Sprout newsletter delivered to your inbox.
Join the 50,000+ gardeners who get timely gardening tutorials, tips and tasks delivered direct to their inbox.