

Once in your lifetime, you should find the time to build a beautiful cob oven in your backyard. If you can’t find time, then you’ll have to “make time”, because you simply cannot live a full life without eating pizza from an earthen pizza oven – you just can’t.
There’s something so primitive-primordial-basic-intuitive-natural about baking bread in a clay oven soaked with the heat of branches past.
I say this with absolute knowledge and bread-eating experience since this is the third cob oven my husband and I have ever made.
The first earth oven we ever worked on, wasn’t ours. We had attended a cob oven building workshop on Whidbey Island in Washington. From the very start of the workshop, we were hooked on building with natural materials – sticking our hands and feet in the clay was something new to us at the time and the curiosity seems to have stuck. In retrospect, we have Eli Adadow at Ancient Earth School of Natural Building to thank for that introduction.
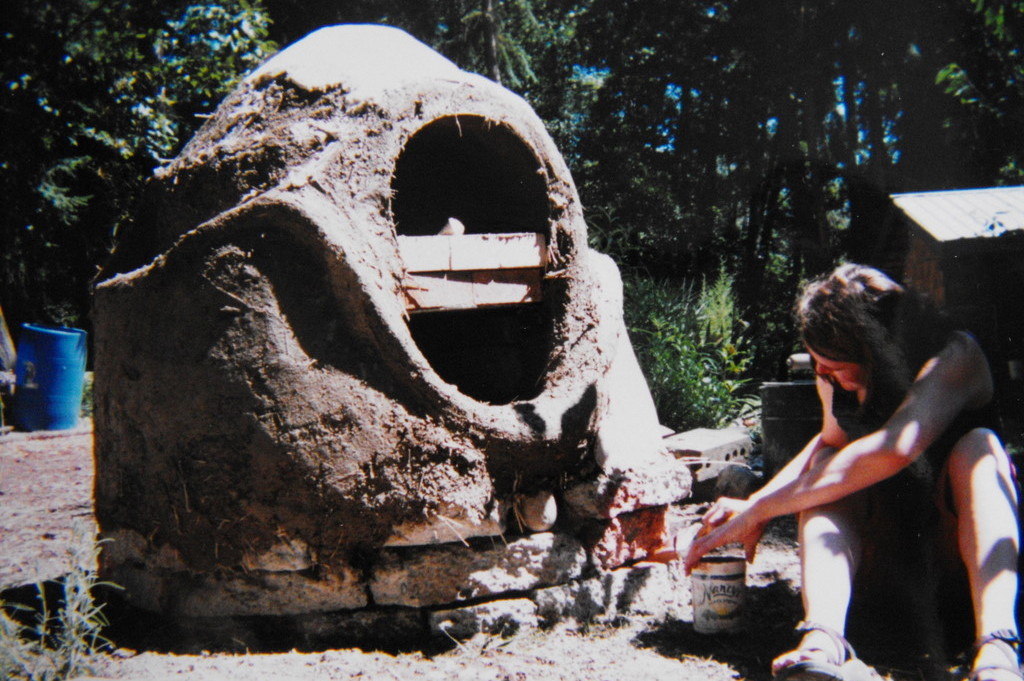
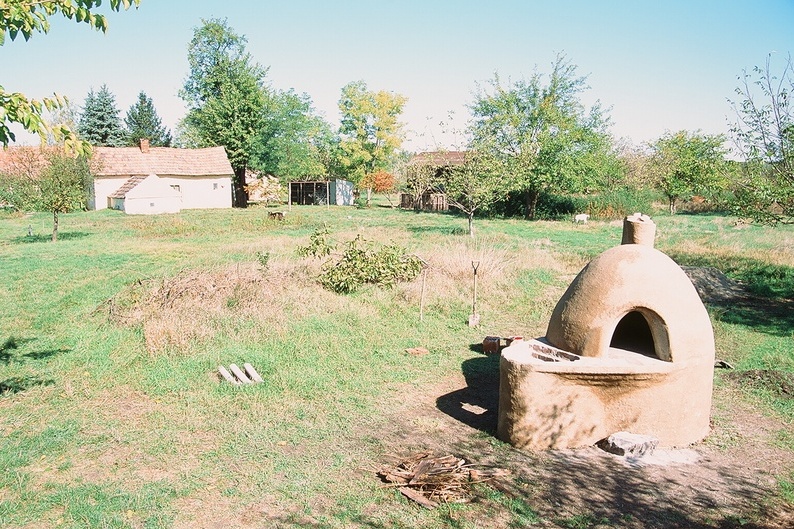
Our second oven was built in the summer of 2007, on our homestead at the time in Ópusztaszer, Hungary.
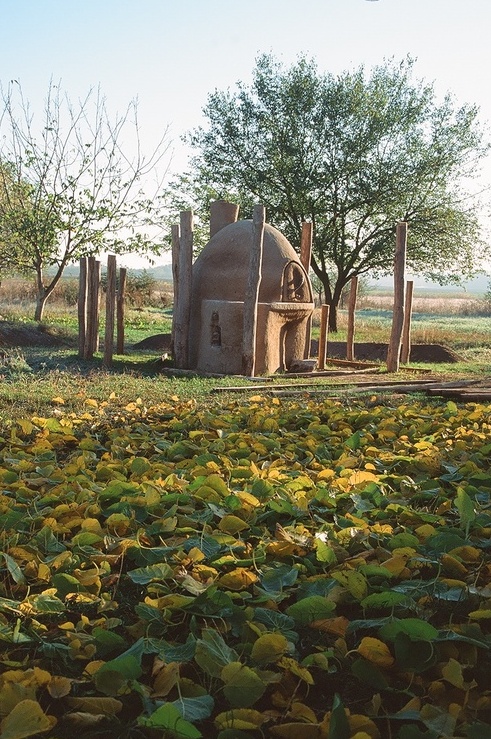
It was massive! But as the saying goes, we bit off more than we could chew. It was too big and too impractical for our needs. Yet, it sure did look pretty.
The upside was that we learned a few more things about building a cob oven. And I say this now for all of you beginning oven makers too – the thermal layer is the most important aspect of the oven. Get that right, and all the other imperfections or accidental happiness will fall right into place.
Building a Cob Oven is a Natural, Organic Process
Now that our third oven is complete, I’m here to share with you the process in both words and pictures, so that you can build your own cob oven.
I’m not saying that it will be easy, there may even be some heavy lifting involved. You know, bricks, rocks, digging and mixing the clay, sand and manure, that sort of stuff.
We’ll get back to the manure later when we talk about the outer protective plaster layer. It’s not as gross as you think, and it’s quite a natural and organic way of building. Our ancestors have been using manure throughout the ages, using what was available locally or what was in abundance. Sometimes it’s both.
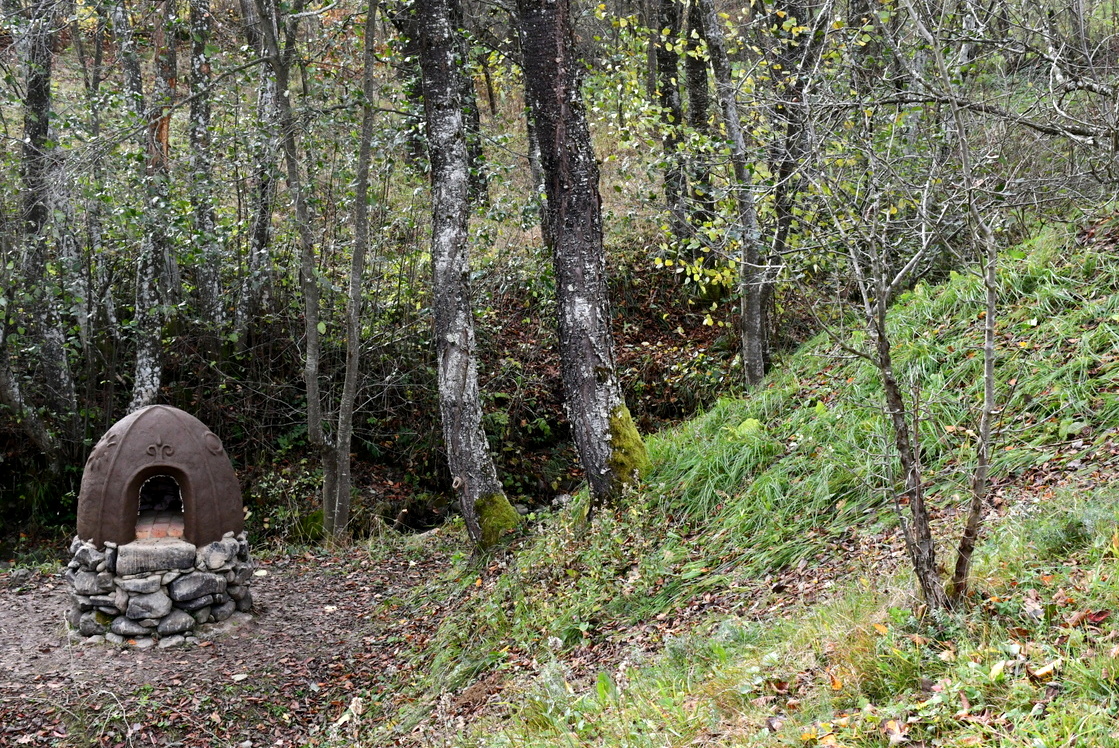
Depending on the location of your oven, the tasks of building it may even entail some extra physical challenges. In siting our oven, we chose beauty over practicality, in part because we’d like to spend more time down by the creek. So in spring, we’ll have to devise a set of earthen steps into the hill. Future plans include a slide-down.
Benefits of Having an Earth Oven
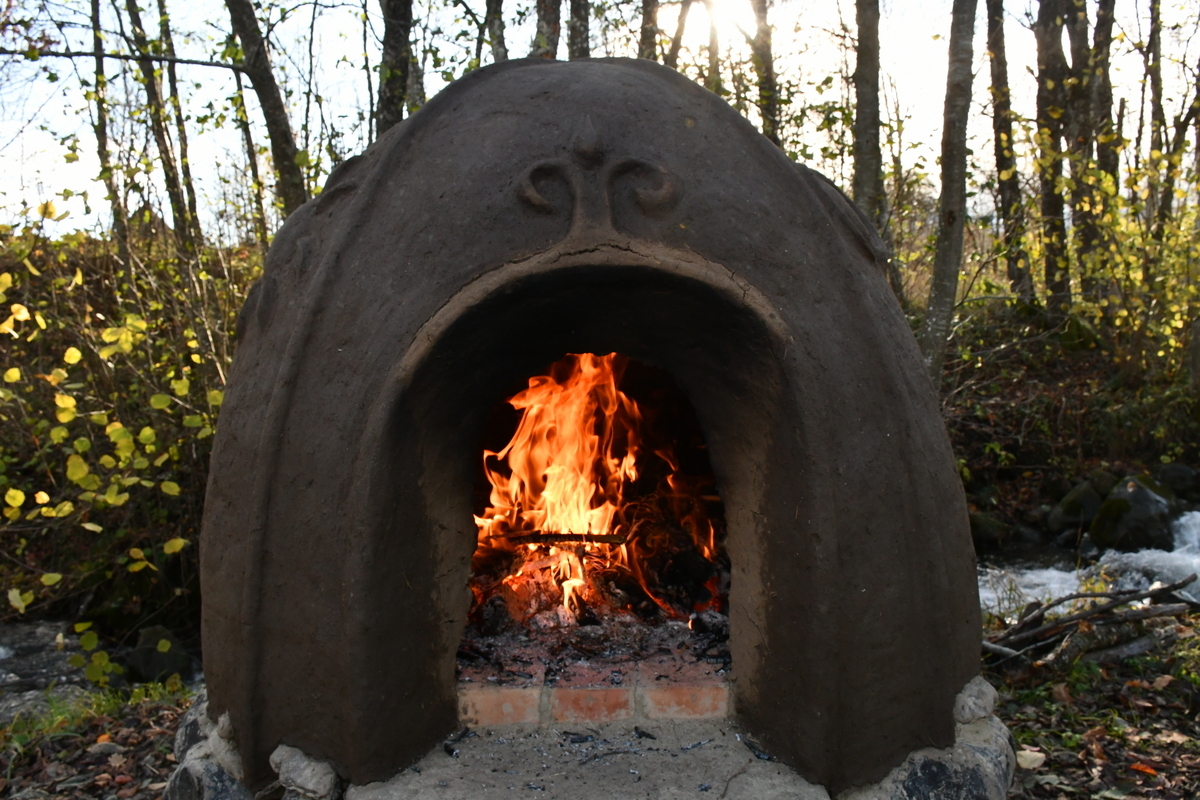
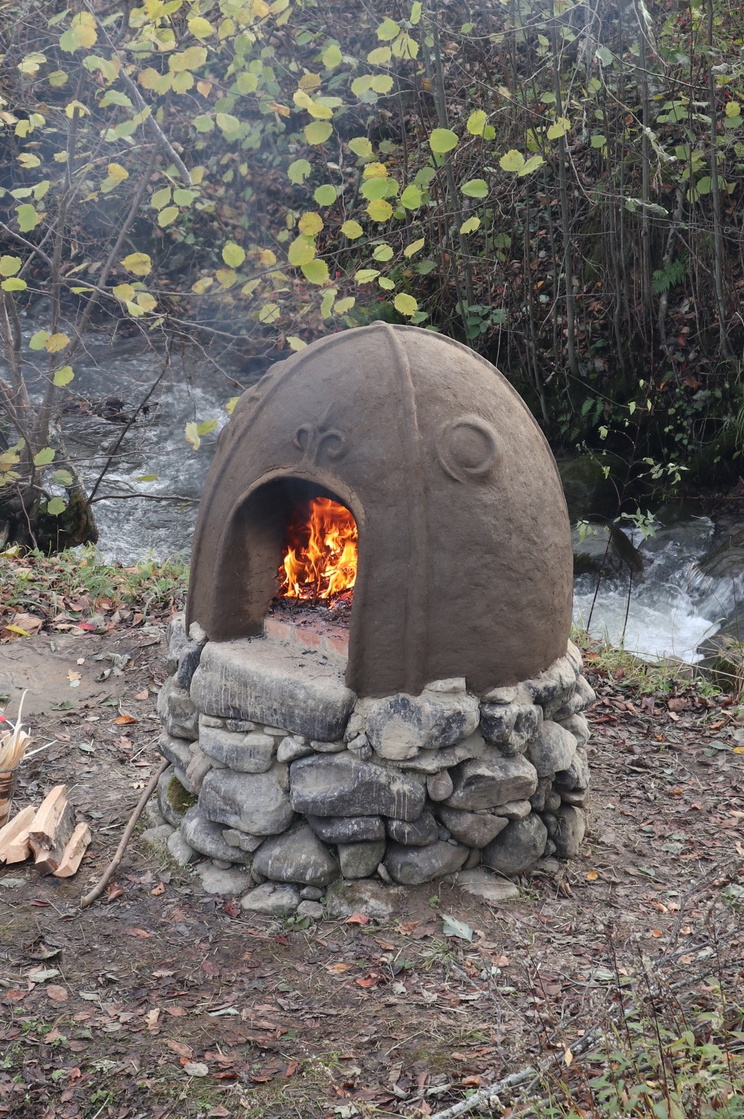
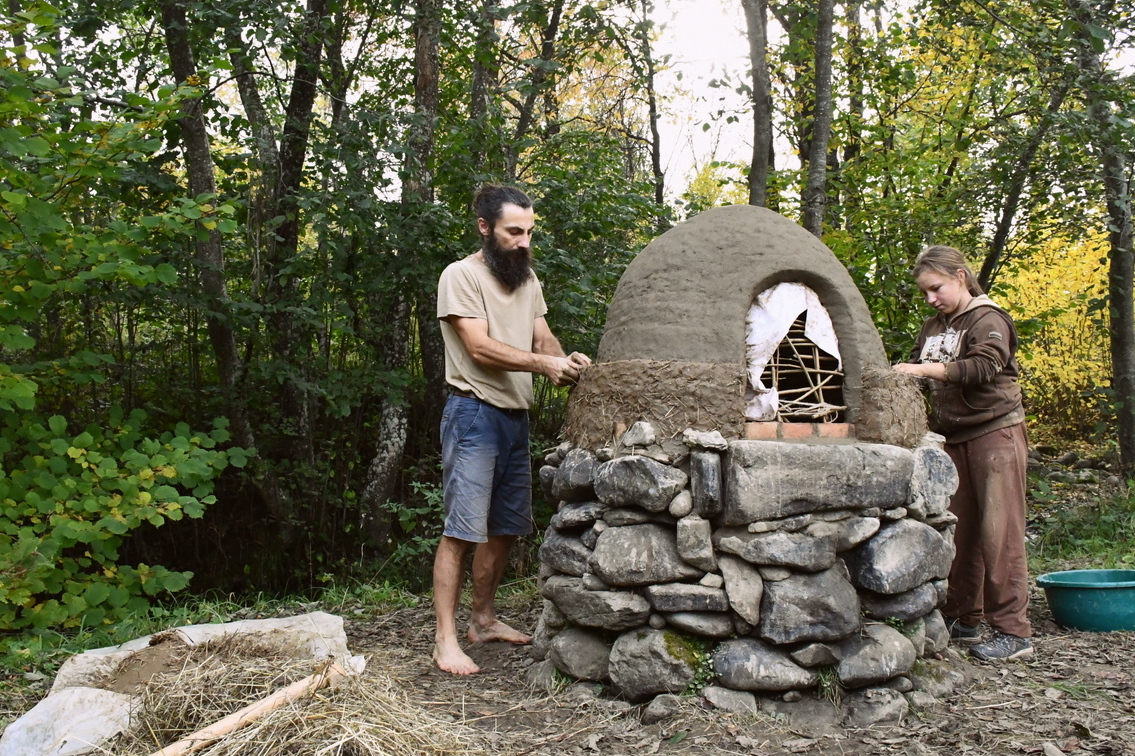
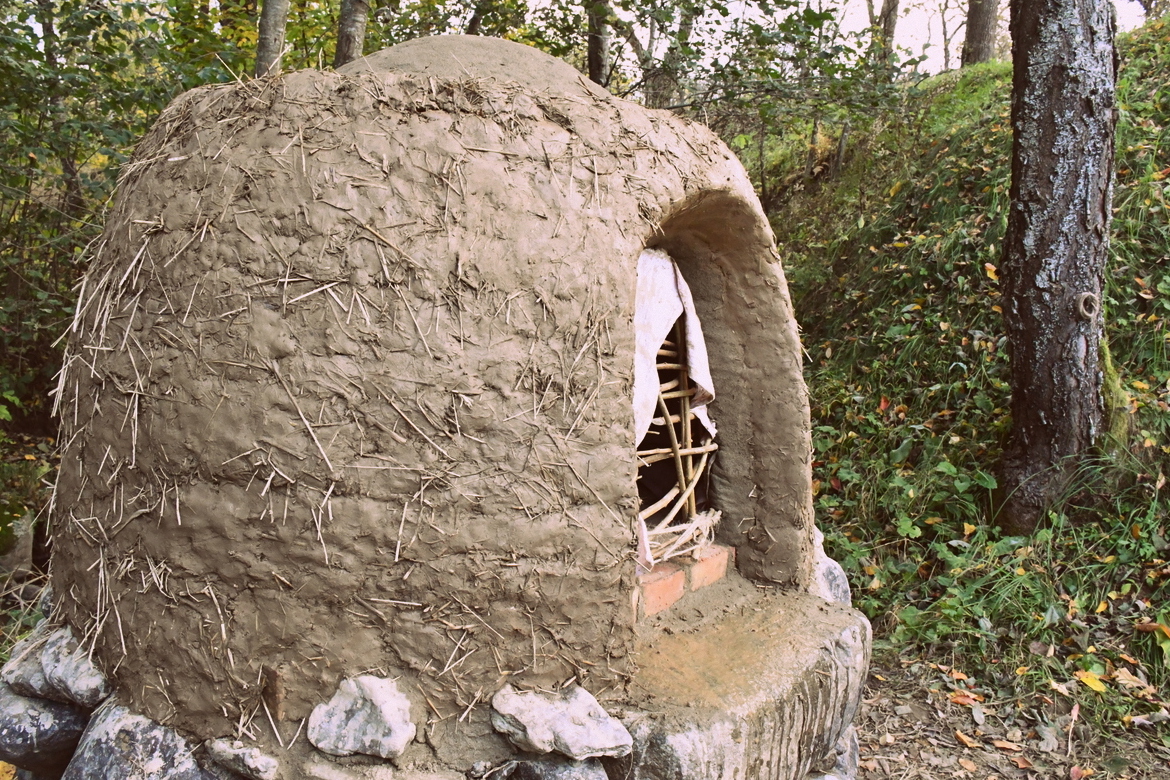
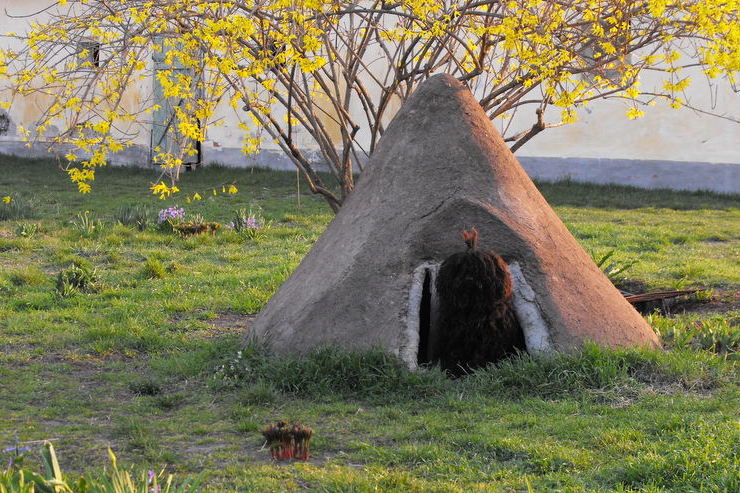
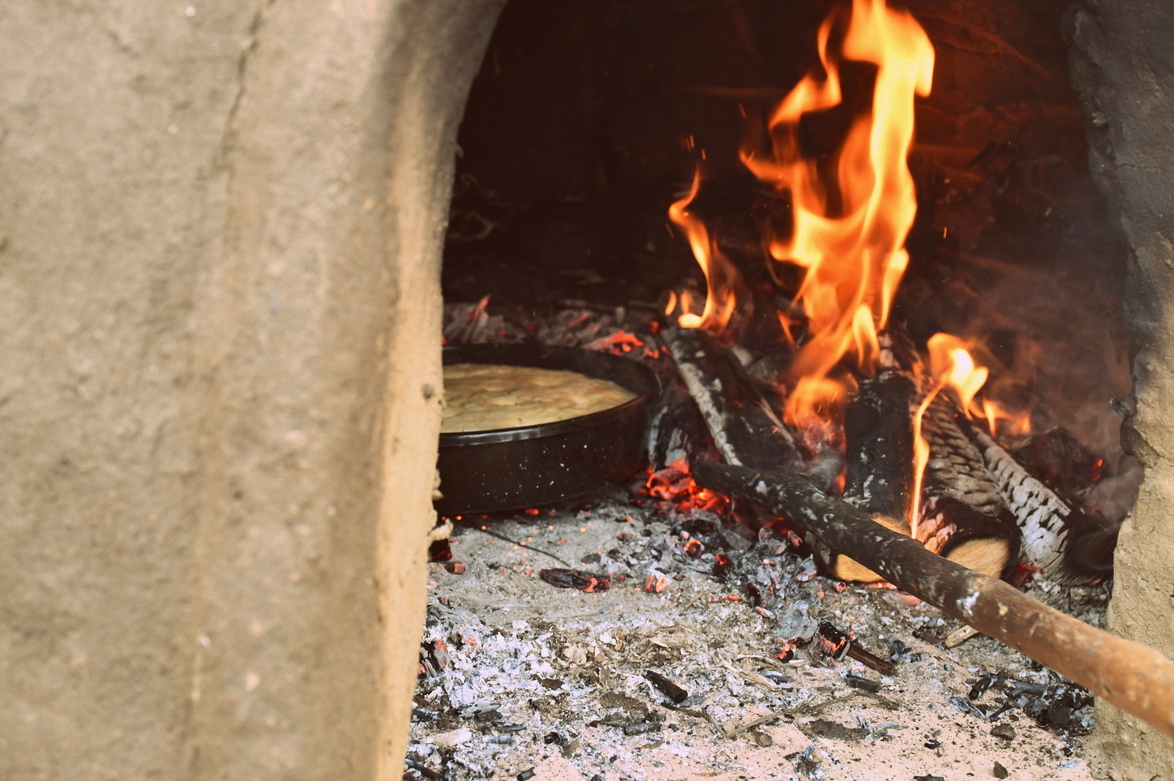
Cob ovens can be built in many ways, including with or without a chimney. As you’ll notice in the pictures, ours doesn’t have one. Instead, while firing and heating up the chamber, the smoke comes out where the door would be. The door is only in place for baking.
See, earth ovens work – and bake well – because the heat generated by burning wood is absorbed into the thermal layer of the oven. Then that radiant heat is evenly released through the air, while conduction (from the contact of the bread dough on the hot bricks) and convection (hot rising air) play a part in the thorough baking process too.
But why would you want to build an earth oven when you already have a place to bake in your kitchen?
Well, you might want to build a cob oven because:
- it has the chance to become the centerpiece of your outdoor living space – where family and friends gather to eat well, laugh and create long-lasting memories in nature.
- clay is an abundant material to work with.
- the wood you burn can be sourced locally, plus it’s renewable.
- cob ovens are a low-impact alternative to gas or charcoal.
- it gives you the chance to apply your artistic and creative abilities to a functional object.
- it promotes self-reliance – you still get to bake, even if the power is out for a prolonged period of time.
- food cooked in cob ovens tastes better, you’ll have to try it to find out.
- you love pizza, or bread, or baked meat.
If you have enough land and you love to eat, then you should build a cob oven. That’s enough reason for you to consider building an oven, isn’t it?
Choosing a Site for Your Earth Oven
Your site – and your cob oven – will look totally different from ours. That’s a great thing!
What you should be thinking about before you build your oven, even before considering how the outdoor oven will look, is how close you want it to the kitchen. Or the garden, where some ingredients for baking may come from?
Make sure that it is far enough away from other structures which could be damaged by heat.
Be sure there is a source of water nearby to put out any uncontrollable fires.
Will it block any views or add to them? Will the neighbors mind the smell? Or will they be coming over to join in the fun?
Also, take into account the direction of any predominant winds. Better to have a blazing fire in the chamber, than to have smoke in your face.
How big should my cob oven be?
Now, that you’ve thought of where your cob oven could be, what size is most appropriate for your appetite and your outdoor space?
To choose the size of your oven, ask yourself the following questions:
- how many pizzas must I bake at once?
- one loaf of bread, or 4 loaves at a time?
- will I be baking meat? a chicken, or a goose?
- are there any traditional recipes I am dying to try?
- will the food be baked straight on the bricks? in pans? or clay pots?
If you haven’t had many opportunities to cook with wood, let me make it clear that it often takes more wood than you think to build up a hot enough fire for baking. Be sure that when siting your oven, you take the amount of space to store wood into consideration as well.
And once you’ve heated up your oven, you’ll want to use all of that heat to its fullest potential.
Perhaps you have some fruit that needs dehydrating, or you simply need to reheat your tea after spending a prolonged amount of time outside. Be creative with that leftover heat before sending it out to the atmosphere.
How Long Does it Take to Build a Cob Oven?
Some articles say that it takes a day to make an oven. A small oven. One that doesn’t have a foundation. In that case, it’s possible to make a cob oven for a weekend project.
The bigger the oven, the longer it will take to build. Depending on the weather, you may not even be able to build it all at once. This brings us quickly to whether your oven needs a roof or not.
I’d say it does. At the moment, ours doesn’t have one yet. However, we didn’t let it stop us from building the oven first. Sometimes you just have to do what you have to do, with the time and materials you have.
The more water you use, the longer it will take to dry out.
It just so happens that we built our oven in autumn, as you can probably tell by the state of the trees. As such, fall in the mountains is unpredictable. Some days were sunny, others were full-on rain. Luckily, we were able to pull the rocks we needed for the foundation from the creek while water levels were still low. We finished just in time.
For the sake of naming a time, allow yourself at least 2 weeks to build an oven, working on and off, allowing the layers to solidify and sufficiently dry out before the first firing.
Materials and Tools for Building a Cob Oven
Let’s take a quick look at the materials and tools you’ll need for building an earth oven. Keep in mind that amounts will vary greatly depending on how large you decide your oven will be.
Materials and tools:
- rocks or bricks for foundation
- clay (from a more pure source, or subsoil with plenty of clay in it)
- sand (sharp-edged river sand, not round or beach sand)
- water
- plant fibers (for example, four wheelbarrows of hay went into our larger size oven)
- manure for the final plaster layer
- lime wash, optional
- new fire bricks, or reused bricks free from mortar/cement
- willow or hazel branches, freshly cut for building a frame
- undyed natural cloth for covering the frame (this will be burnt out upon first firing)
- wood for making a “baking door” in the end
- level
- string and charcoal for making a circle on your baking surface
- measuring tape
- shovel and spade
- buckets for measuring and mixing
- wheelbarrow
- two tarps, one for mixing on, the other for protecting the oven as it dries
I know, it seems like a lot to get started. However, if you are going to invest a lot of time and energy into the project, you’ll want it to last.
Foundation materials are many and varied, but once you get to building the fire chamber, it’s all clay, sand, straw/hay and manure, eventually a lime wash for an additional layer of protection.
A random thought to put in here: I already mentioned having or not having a roof over your oven. Nice, but not necessary – until it is. If you want your oven to last a long time, you’re either going to replace the outer layer every year or build a small roof. Your earth oven won’t wash away all that fast, but over time it will wear thin. Plus, a wet oven takes a lot longer to heat up than a dry one.
How much will it cost to build an earth oven?
That’s not an easy question. In the case of our cob oven, our only purchases were sand and the fire bricks. We bought 30 of them, including a few extra, just in case any broke while taking them down the hill. None of them did.
If you have access to re-used fire bricks and they are still wholesome, go ahead and use them. If they are cracked, go with brand new not to be disappointed if your oven turns out as planned.
The cost of building an oven will depend on how many materials you need to buy.
To keep costs down, you can dig your own clay if it’s locally available, rather than bringing it in from elsewhere. You can barter for manure or sand. Bricks or stone for the foundation can get pricey, so reuse as many bricks lying around as you can.
Heck, you may even be able to barter for clay or subsoil. Maybe someone you know is digging a foundation and would be willing to give you several wheelbarrows of “dirt” for free. Just be sure there is enough clay in the mix before accepting such a generous offer.
Plant fibers for the cob mixes can come from the garden if necessary. I know many people disagree with the use of hay, instead opting for straw, but as I’ve said, our ancestors made do with what was available – and in abundance. Hay is what we have, and we use it successfully in our no-dig garden as well. For us, it would be expensive to bring in straw, let alone for it to be of organic origin.
Bottom line: use what you have, so long as it is natural in origin.
Start at the Bottom – Why the Foundation is Important
In order to have a successful oven, you need to begin at the base. Soil is heavy, and your foundation will need to bear that weight.
You can go cheap, or expensive here, but what really matters is that your base is solid and sound.
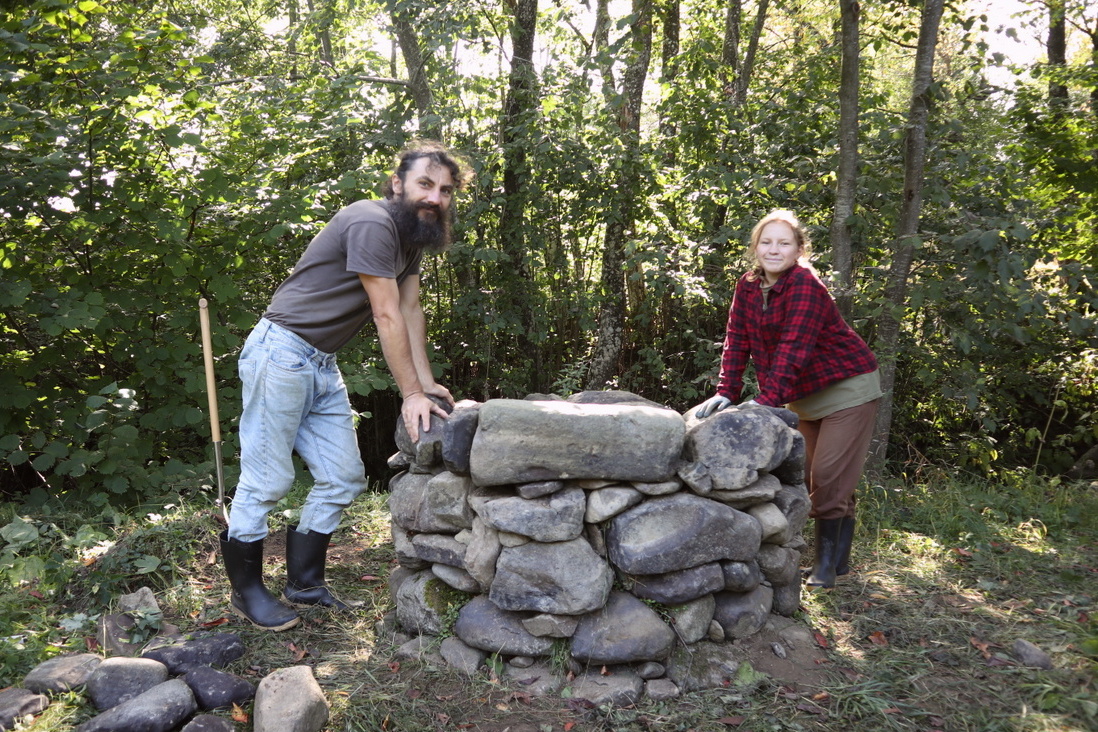
In minimizing our costs, the rocks for our foundation came straight from the creek. We scoured it up and down, searching for the right sizes which took several hours and a lot of man and woman power. All in all, it took a lot more time than we expected.
However, materials were locally sourced and in abundance, so we’ll consider it a job well done.
Digging into the ground, the rocks were secured by the existing soil. Then we put down the largest rocks we could carry. The base layer is slightly wider than at the top where the oven begins. We continued stacking rocks and filling the foundation with subsoil until we reached the desired height of the oven floor (with the bricks already laid). Without giving an exact measurement, this is approximately your waist height.
Laying the Bricks for the Oven Floor
Once the foundation has been set in stone, it’s time to lay the bricks.
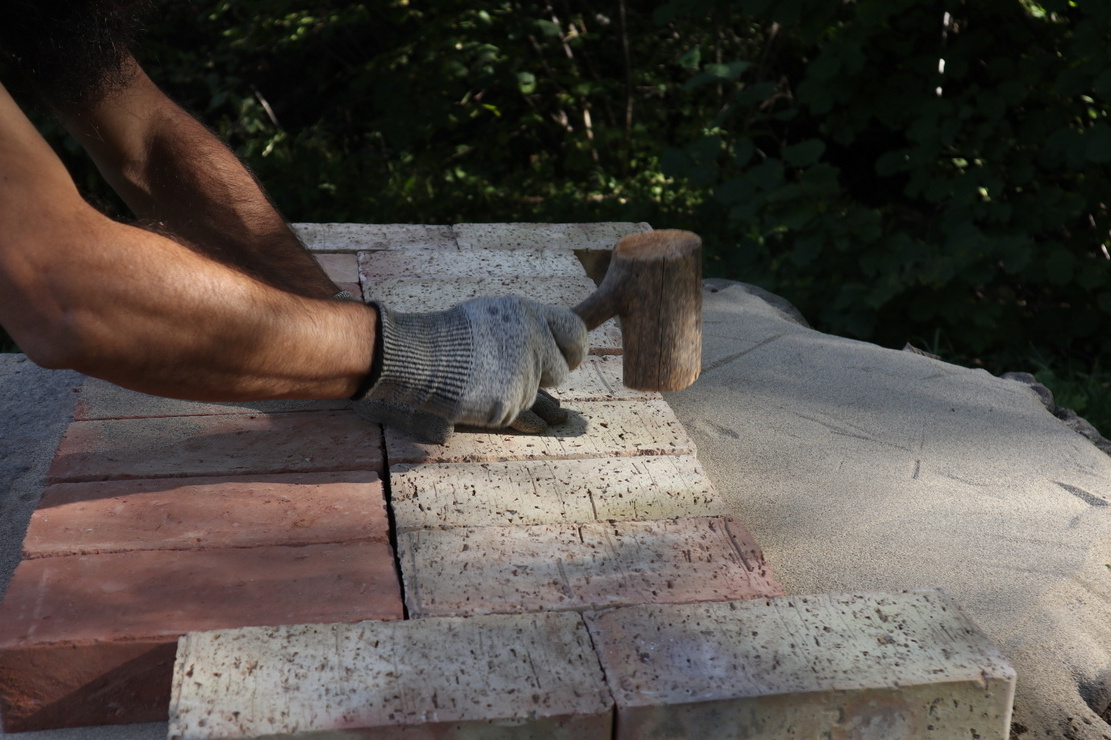
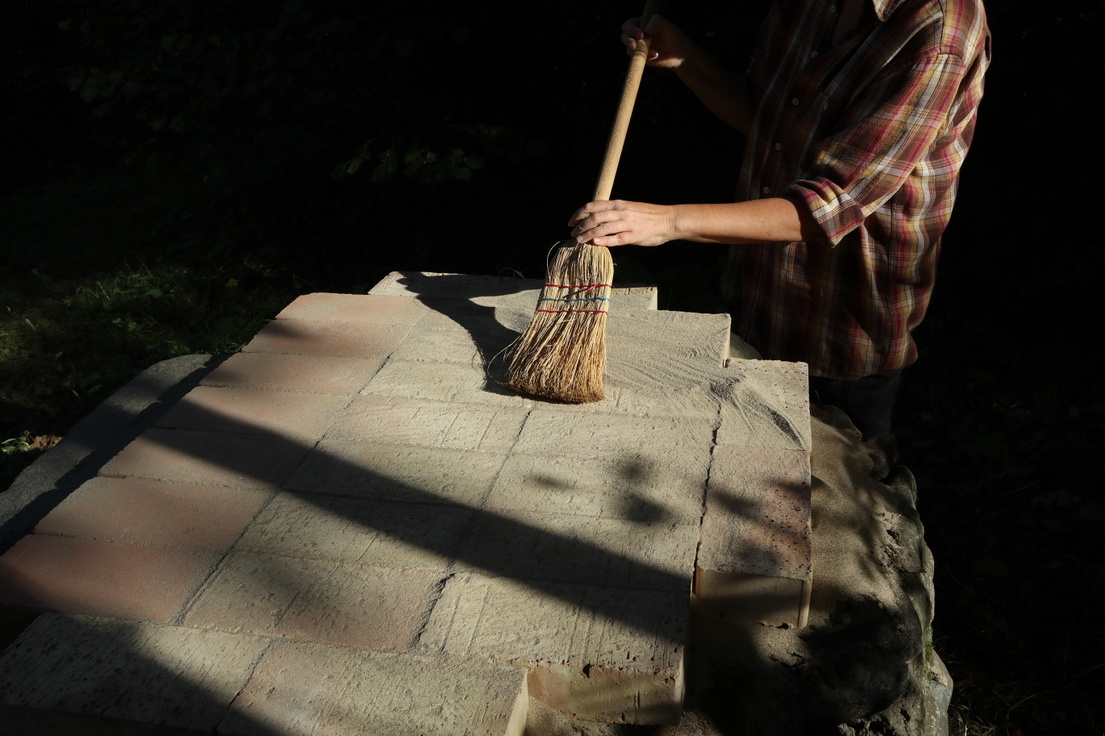
Be sure to set the bricks on several inches/centimeters of sand. Level this off with a long enough board. Then apply the bricks, making sure each one is level. Given that our oven has a stone entrance, we laid our bricks from front to back. Other guides will have you start in the center.
It really doesn’t matter so long as all the bricks lay nice and flat. Also, be sure that the bricks are placed as tightly together as possible. Use a wooden or rubber mallet to gently tamp the bricks into place.
Build a Dome to Create Your Oven Space
There are two ways to create an oven dome: the first involves piling a ton of wet sand in a heap to get the shape you want. The second method is to weave a frame from wet twigs.
For our oven in Hungary, we chose to go with the sand method, since we had a lot of it. It worked out fine, as we were able to cover it with a damp cloth when we took a break or when allowing the layers to dry.
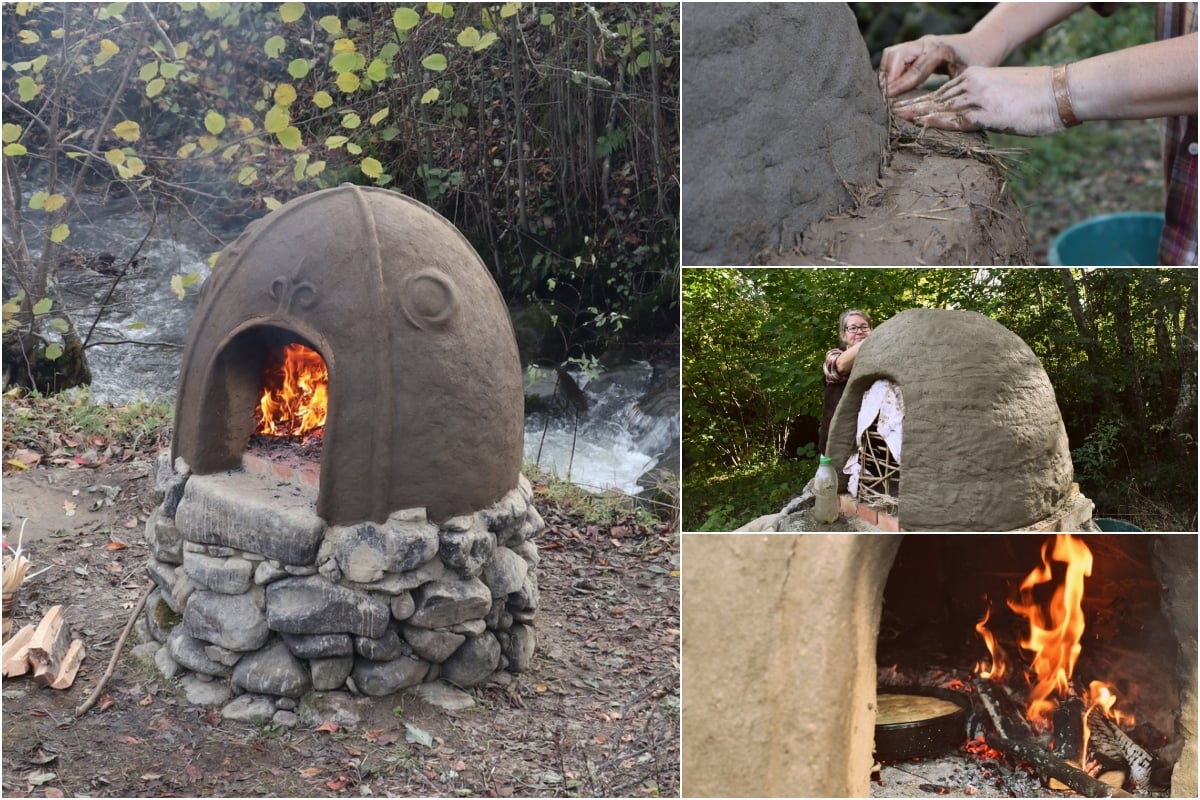
Here, in Romania, we have more rocks and clay. We even had to buy enough sand in 25 kg bags for the entire project. So we chose option number two based on what we had the most of – and built a frame out of willow and hazel branches.
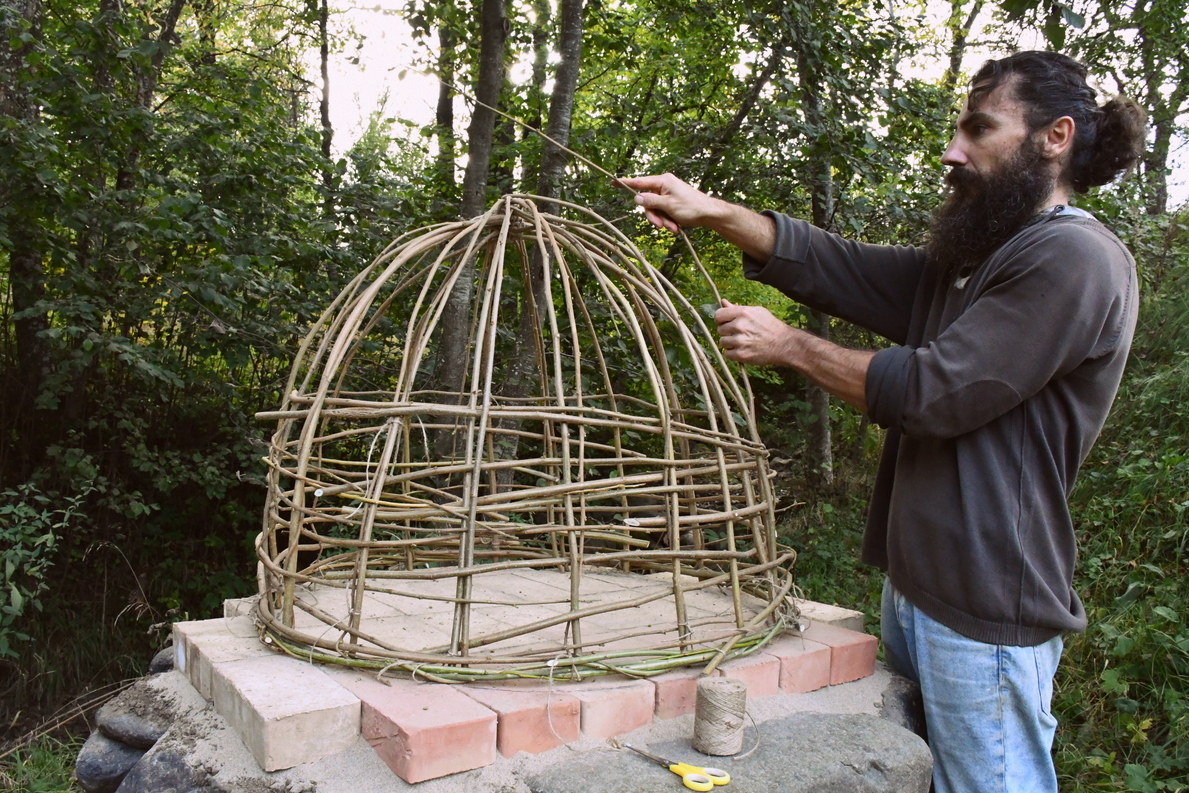
You might also take into consideration your climate. Where we live, in the mountains, it rains much more than in the plains. With all the rain here, our dome would have washed away before we got a chance to finish. Just something to keep in mind.
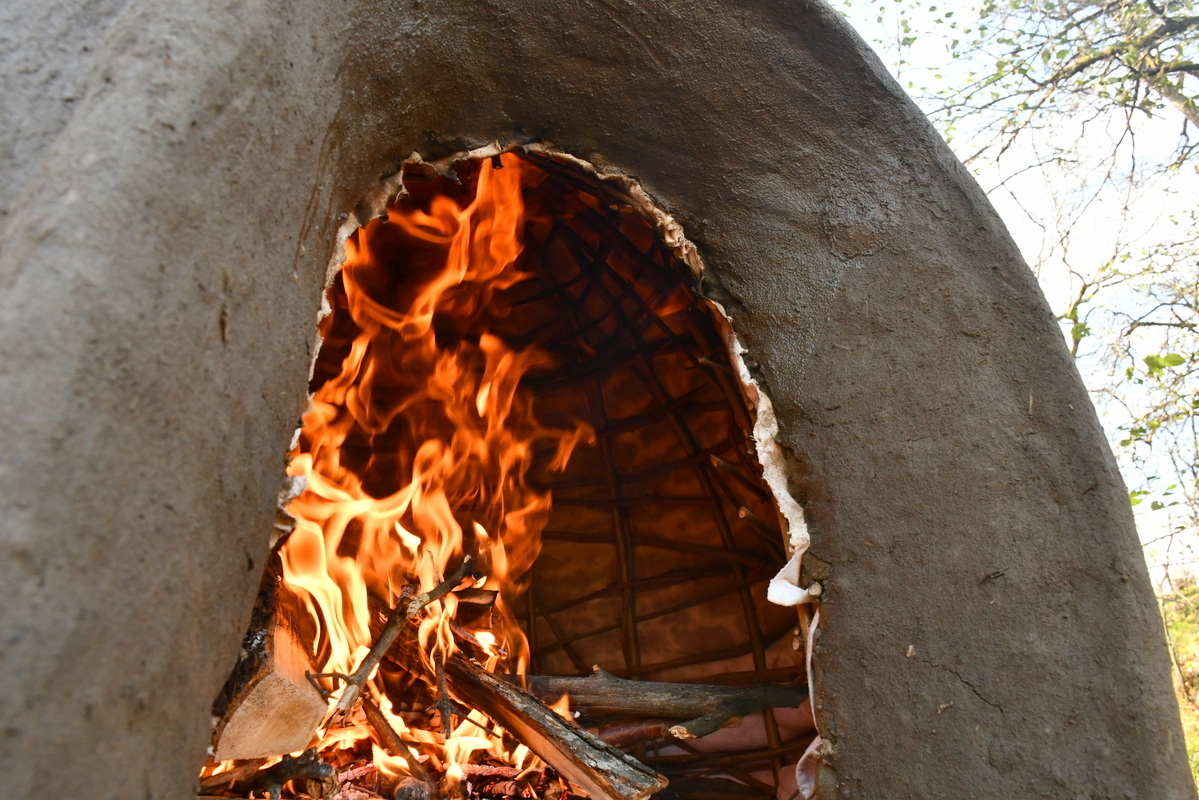
The frame is essentially a loosely woven, upside-down basket. Here, I’ll let the picture speak for itself.
To find the center of your baking surface, take your string and charcoal/pencil and mark the circumference somewhat inside the edges of the bricks. That’s where your woven dome will lay for now. In the end it will be burnt out, leaving an interesting pattern inside your oven.
Finding Clay Subsoil for Making a Cob Mix
Where to find clay? Well, clay is all around a good part of the world. Recognizing it and/or digging it is another task altogether.
We are lucky to have pure clay in the creek that runs at the back of our land. It’s so clean (not pictured above) we can even eat it, and use it for healing purposes. But we didn’t use the purest sources of clay for the oven. Instead, we looked to the land for mole mounds that were of the finest clay soil, brown in color, not gray.
There’s a misconception out there that you need clay to make cob. In reality, a healthy clay-rich subsoil that contains 15-25% clay is perfect for the job. So you won’t need sacks of clay here when a little earth will do.
In fact, pure clay would require you to add in aggregate matter, even up to 75%.
Open up the gifts of nature and try your soil first. A simple dig test will give you the material you need. Just to be sure,
Making the Perfect Cob Mix
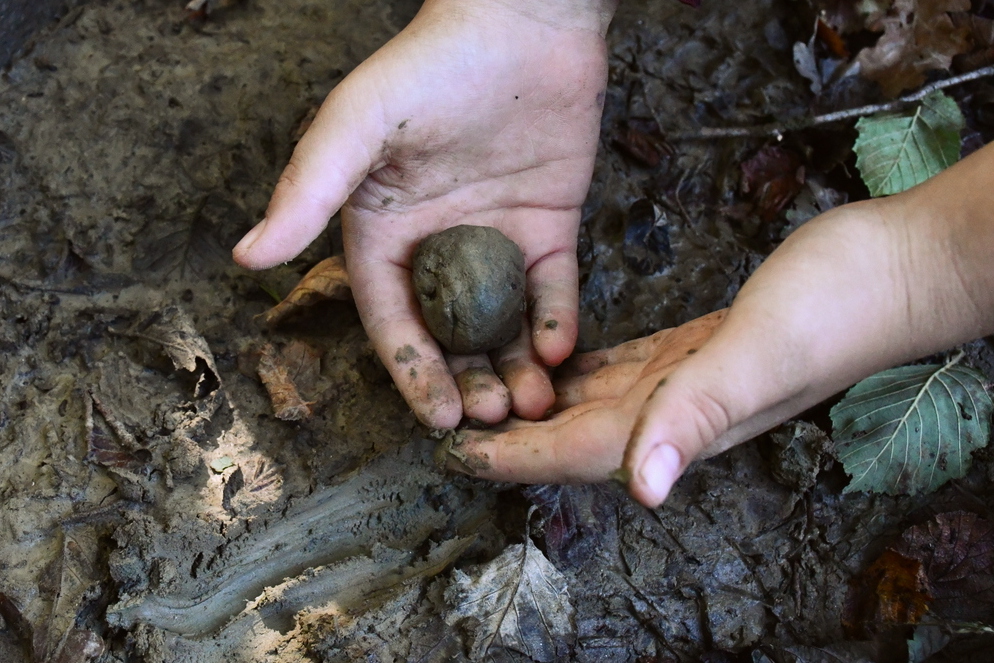
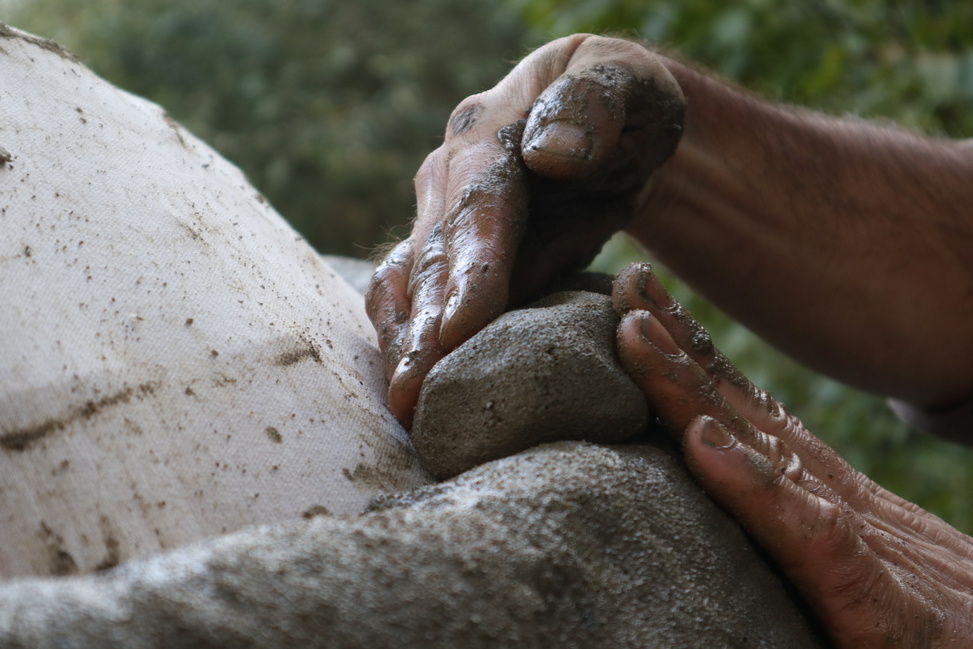
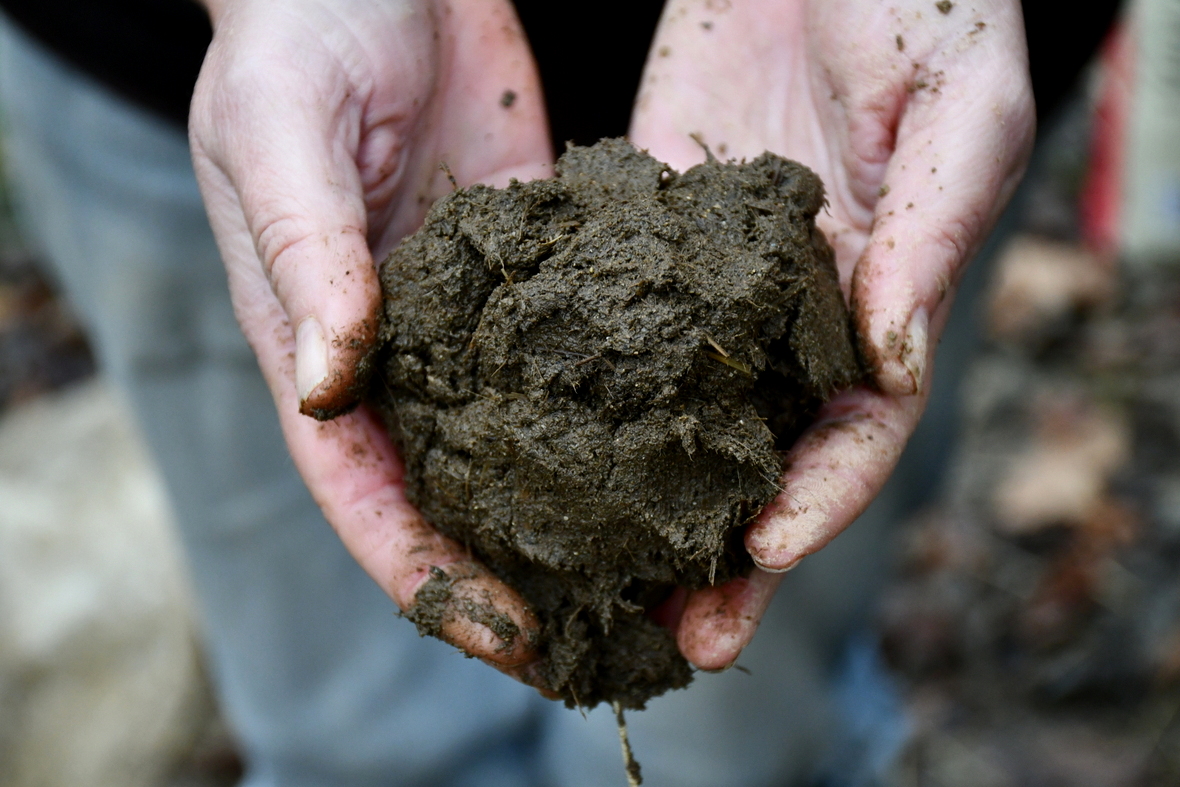
To test your “clay” out, grab a wet handful of soil and massage it together between your palms. Form it into a ball and drop it on the ground from your waist height. See what happens.
Now add some sand to the same mix. Let it dry and see how much it cracks. The more sand you add, the less it will crack, up to a certain point.
The biggest thing to remember here, add less water to each mix than you think it will take. You can always add more water later. But too much at one time is going to cost you in drying time.
With each batch of cob mix you make, you’ll be gaining experience. Your hands will start to feel the difference as you apply it to the oven. Some batches may be stickier, some smoother. Overall, don’t stress that it’s not the same. As you apply the cob to the oven walls, the different mixes will overlap and form a cohesive whole.
For more in-depth reading on the matter, I encourage you to read Cob Building Ingredients – How to Choose the Right Materials.
Thermal Layer
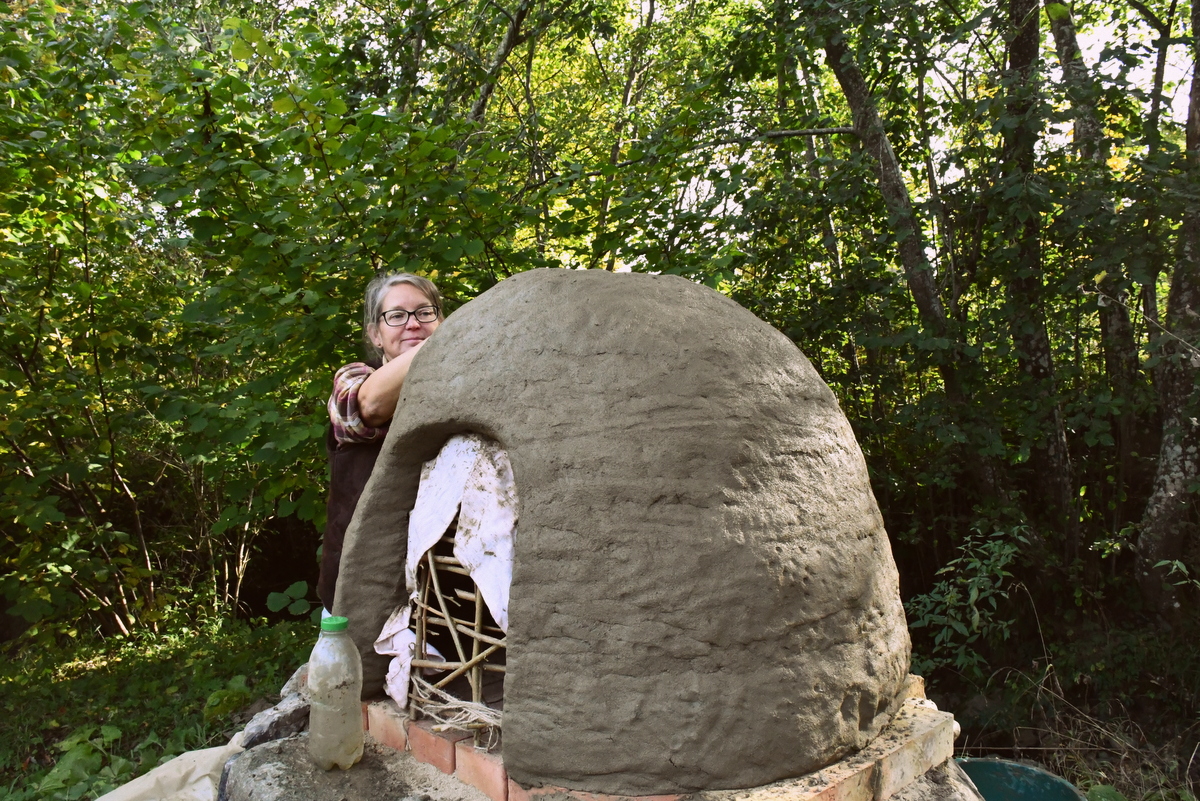
Once you’ve got your woven structure completed it’s time to cover that with a cloth you don’t mind burning. The woven branches and cloth will be burnt out at the first firing.
This innermost cob layer is the one that will store the heat, so do it right the first time.
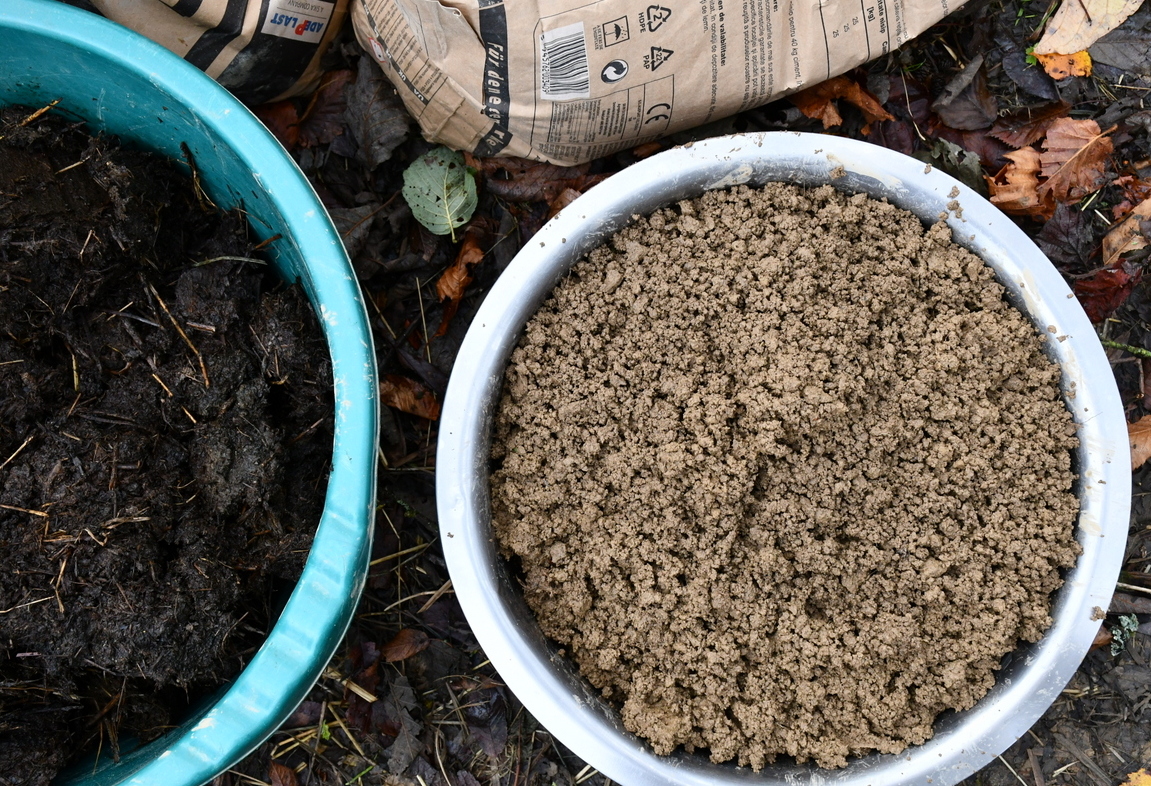
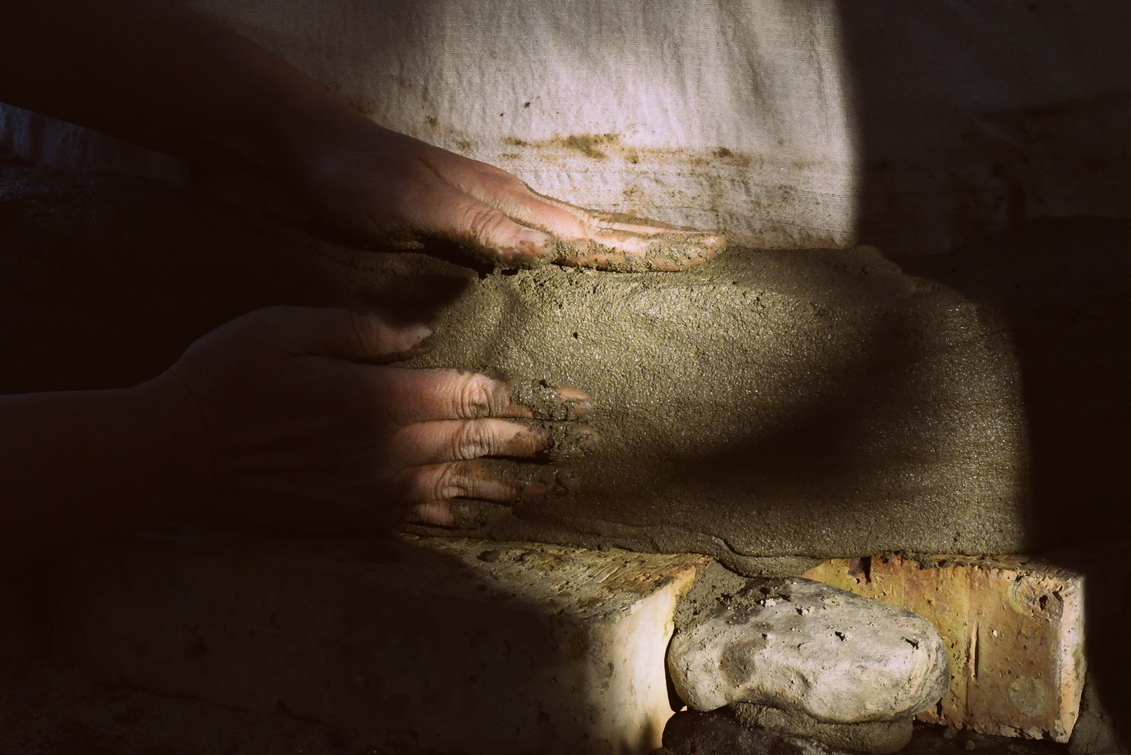
For this mix, you are looking for a specific proportion: 50% clay(soil) and 50% sand. Save the straw/hay for the insulation layer.
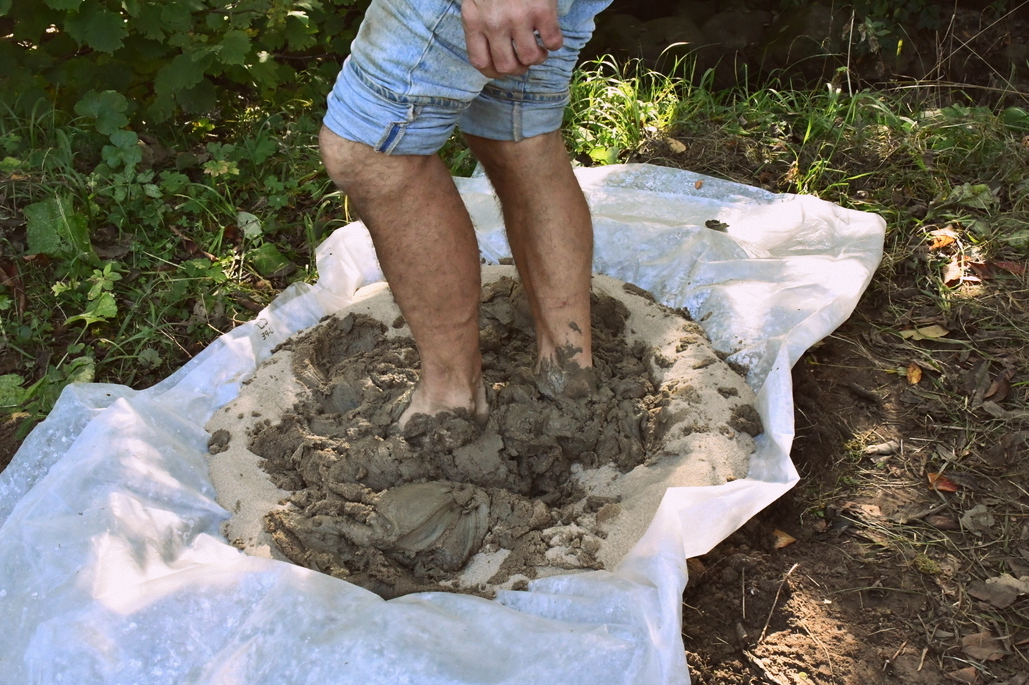
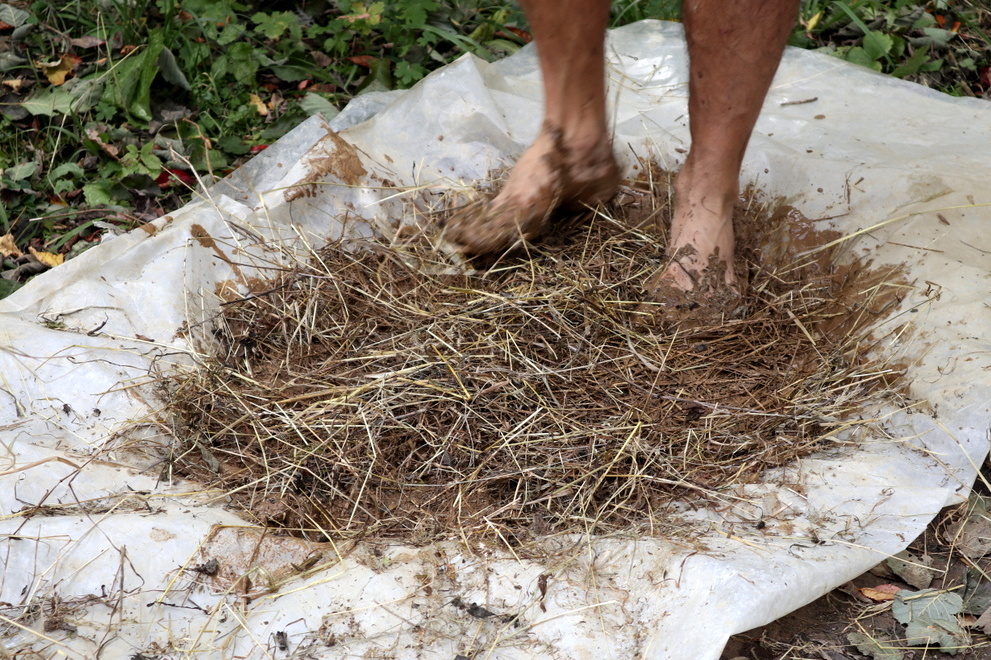
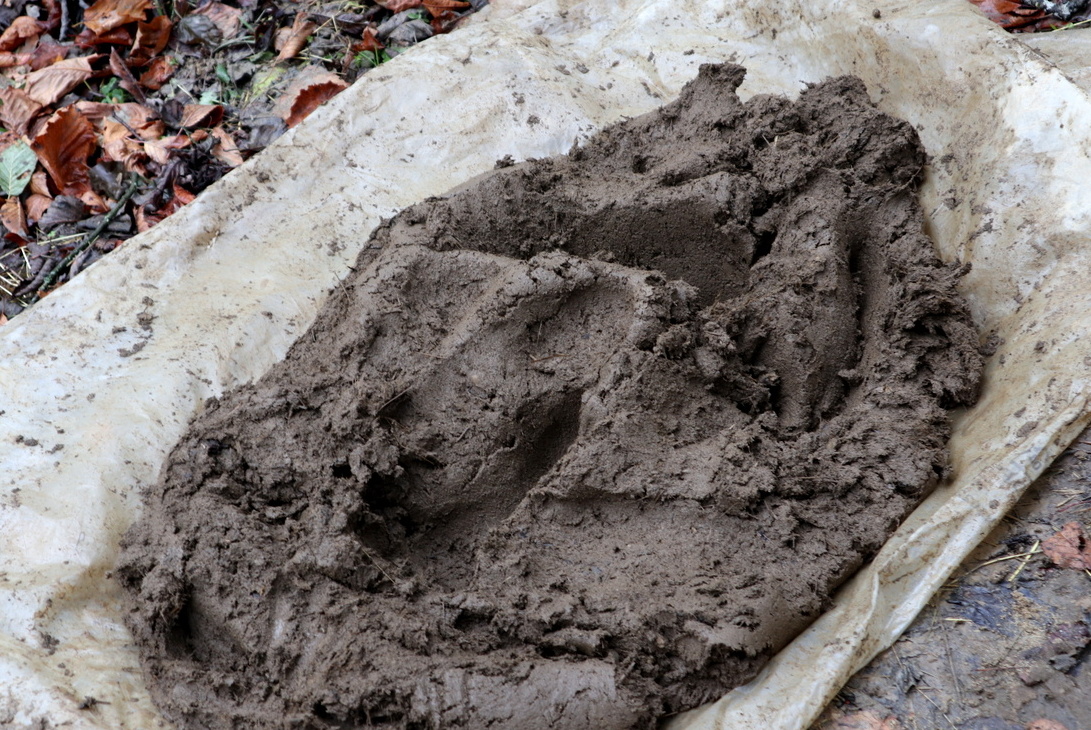
The best way to make these earthen layers is to lay down a thick tarp, add the materials and squish everything together with your bare feet.
Measure approximately both the sand and the soil in an amount that seems workable to you. You don’t have to make the entire layer at once, in fact, it’s easier to work in smaller batches.
Again, add water slowly. Your mix shouldn’t be too wet, but it should hold together in a ball. To test your mix, make a small handful into a ball and drop it as we have just mentioned. It should flatten a bit, yet still hold together. Starting at the base of the oven, begin to slap it on, using enough force to keep the separate handfuls together. Go round and round, leaving room for where the door will be.
When you get to the top, be sure to seal it with one last giant dollop of that squishy clay-sand mix.
Some cob oven builders suggest to make a door now, it’s been our custom to wait until the end, once everything is dry. Use your intuition on this one.
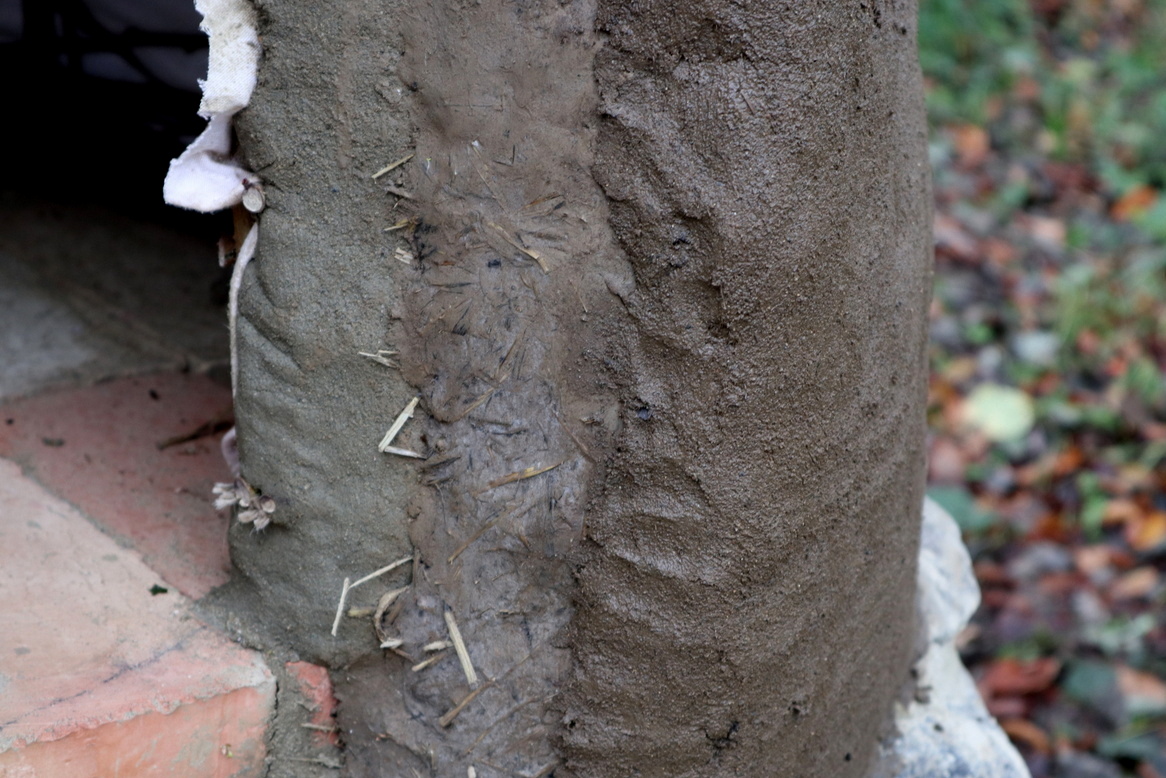
Insulation Layer
The middle cob layer is for insulating the oven and keeping all that lovely heat in while baking.
For this, you’ll need more clay/soil, sand, and hay or straw. Water too, of course, just enough to make the mix workable. Making the mix takes a little bit more work than the previous layer, so be patient with how it all comes together.
Don’t skimp on the plant material here, for that’s what makes the layer special. Add enough that it is hard to work with by hand, then be sure to press firmly with each handful you make.
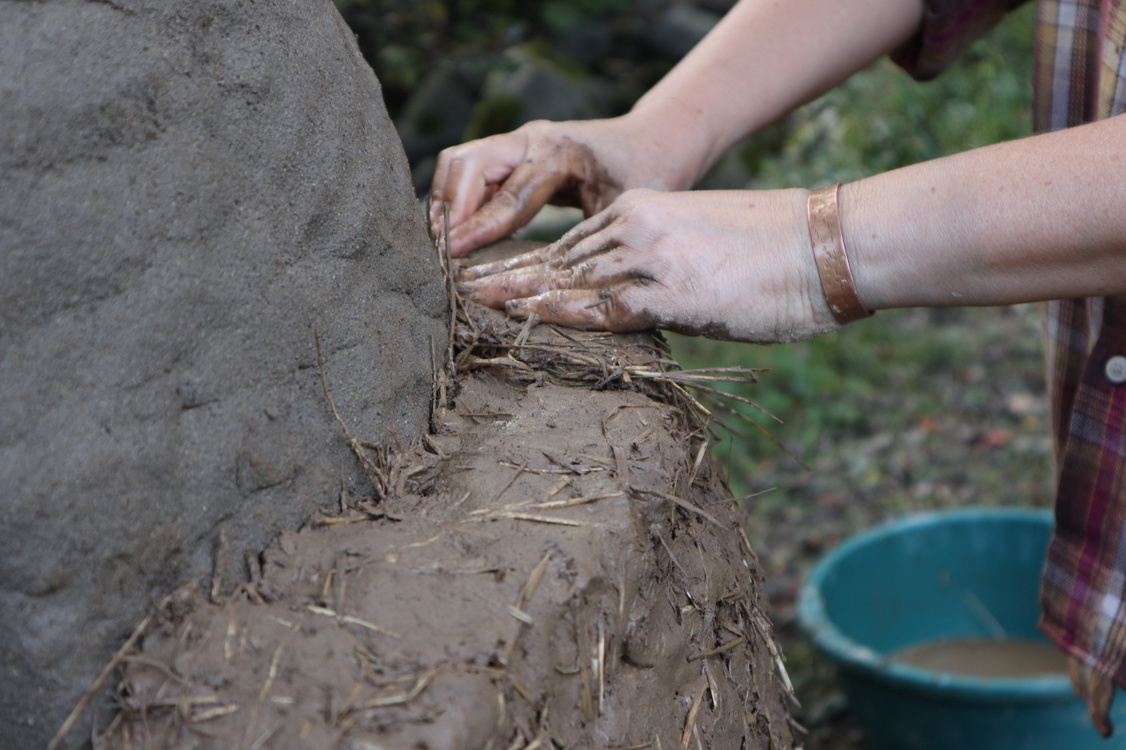
On the outside of the dome, it’s okay to leave some dimples (don’t make it too smooth) so that the plaster layer can key into the insulation layer.
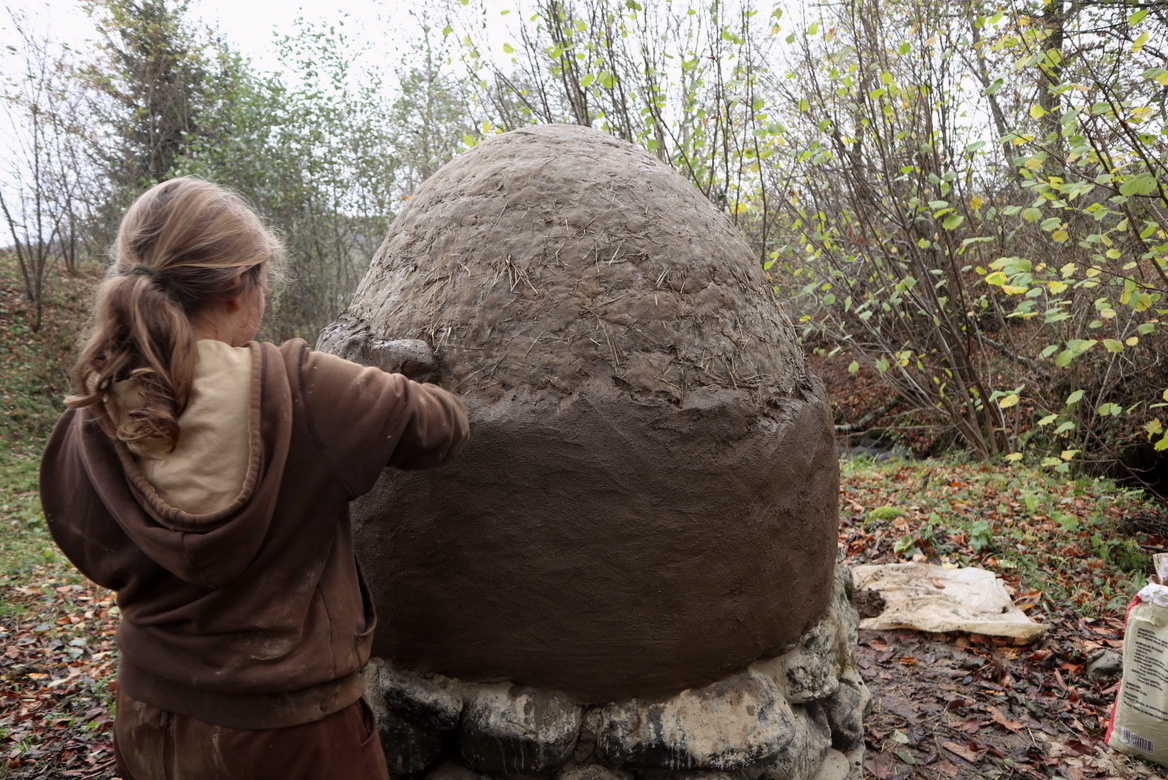
Plaster Layer
The final (almost) layer of your oven is the plaster layer.
For this layer, manure (preferably horse, though cow will do), clay/soil and sand are involved in a 40:40:20 ratio. Add enough water to bring all the elements together. The bottom line is that the mix should feel squishy between your fingers and pliable enough to add the fine decorations and details.
Cover the entire oven with this manure plaster, yes, you can use gloves if you wish, though it washes off easily if you’d like to give it a barehanded try. Once this layer is dried completely, it won’t smell anymore.
We used a manure plaster long ago to cover our dog house – which helped to protect our pup from the rain. It will work wonders for your oven too.
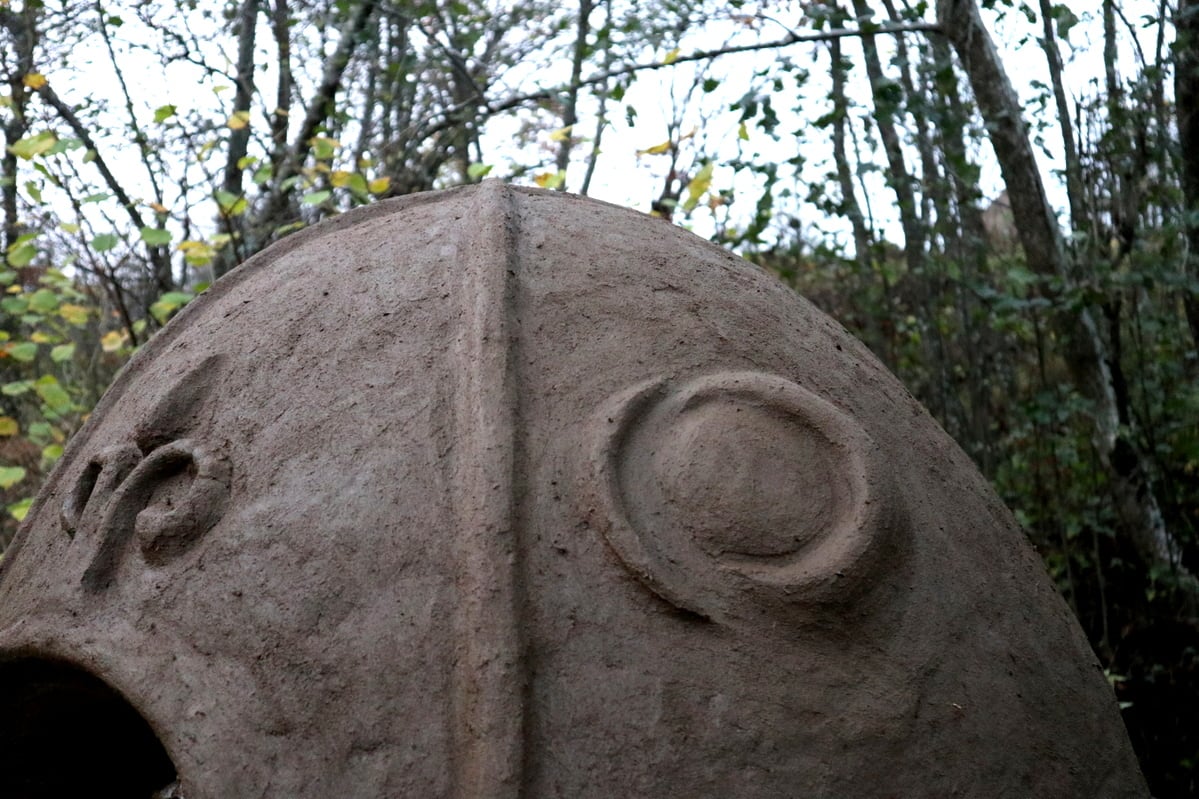
Here, in this final stage, is the chance to make the oven your own. With the mix you’ve just made, add any decorations as you wish, from the sun and moon, all the way to turning it into a dragon. It’s been done before, yet there are so many ways to build a cob oven, yours will be a never-before limited edition.
Adding a lime wash for further protection of your cob oven.
If you’d like to lighten up the appearance of your cob oven, it’s best to do so with another natural material such as hydrated lime and water, stirred to a milk consistency and applied with a brush.
It’s not necessary, but in spring our oven will receive a white coat, being so damp down by the creek and all.
Firing Your Oven for the First Time
The hardest part about building an oven is waiting to use it. More importantly, waiting for the first time to build a fire in it.
Will it hold together? Or crack? Will chunks of the ceiling come tearing off (too much clay, too little sand)? Or will it burn and burn with flames licking the walls and the ceiling, heating up the floor, the internal temperature rising above 700°F?
Resist the urge to light a fire right away. I know, there are weekend cob ovens that allow you to bake the next day, but this isn’t one of them. This oven we built here is a semi-permanent structure that can last at least a decade. We did have to wait (some) for it to dry out.
Then we built a small fire to test the waters.
Since it was burning nicely, we decided to increase the heat.
And finally, even on the first try, we tossed in a simple onion and cheese bread, just to see what would happen. It was delicious!
Come spring, I foresee this fine oven of ours baking on a regular basis for us, friends, neighbors, and workshop attendees alike.
Baking in Your Cob Oven
If you didn’t install any dials or knobs on your oven, then you’ll just have to go by feel – and experience. Seriously though, it’s not hard once you get the hang of it. Inside our home, we also bake with a wood stove, and while baking cakes can be a bit tricky, I never have a problem with bread, pizza, or meat of any kind. Baked apples are yummy too.

Yes, there is some trial and error in finding the right kind of wood and the right sizes of wood to heat it up to a high enough temperature for baking. Ideally, the wood is dry and no larger than wrist thickness. A small bundle of branches will do well to speed up the fire when the embers lose their redness.
In the most ideal situation, you’ll heat up your oven for 1-3 hours depending on the size and wood you are using. Then you’ll remove the embers and sweep the floor of the oven with a damp rag. Shut the door and leave the heat to soak into the oven for 20-30 minutes.
Then start with the fastest cooking food, such as pizza.
In a well-working oven, pizza won’t take more than a few minutes. Next, you can carefully toss in your proofed breads. After that a tray of meat and potatoes, followed by some baked squash.
You can maximize the heat by being prepared.
And remember, it’s not the flame that cooks the food, it’s the heat which is stored in the earthen thermal mass.
In conclusion…
Building an earth oven is a fun and educational way to learn about natural building. Wouldn’t it be great if it was taught in school? This applies to gardening and homesteading skills as well. I suppose that’s why you are here now, to glean bits and pieces of knowledge that’s missing from formal education.
Wherever you are at on the journey, enjoy the ride. Make sure that natural building becomes part of that, in one form or another. Take a workshop, or build an oven. At worst you get your hands dirty. At best you bake bread, learn something new and have a newfound skill to share.
Wishing you all the best in your outdoor oven baking adventures!
If you’d like to learn more about building your own cob oven, we have a 40-page eBook available for purchase. You can find it in our Etsy store: A Cob Oven for the Thorough Baker.

Get the famous Rural Sprout newsletter delivered to your inbox.
Join the 50,000+ gardeners who get timely gardening tutorials, tips and tasks delivered direct to their inbox.