


Clay is often underneath our very feet, whether we are aware of it or not. Which leads to a somewhat serpentine thought process regarding its ample abundance. Consider for a moment that we take most modern vessels (cups, mugs, jugs and bowls) for granted.
See the connection here? Clay = container, in the most simplest of equations. It makes an excellent base material for creating pottery, that can be used for eating or drinking out of.
In our modern world, for only a dollar or two, we can pick out our favorite coffee mug at the store, only to toss it in the trash when it finally gives in.
However, there isn’t much of a creative process in doing that. In order to see the true value and beauty in harvesting clay and experimenting with making your own pottery, you have to travel back in time. Or dig a hole. Whichever comes easier.
Why use clay?
Long, long ago, before the Neolithic period, with skills many of us no longer have today, people dug raw clay from the earth for making their own earthenware pottery.
It may have been rustic to some extent and unpredictable when firing, yet it could be made into all sorts of containers, perfect for storing various foods of all shapes and sizes.
Best of all, the pottery was naturally handmade with materials collected from a local environment. Talk about self-reliance!
If you long for days of old, you can easily return to those familiar memories by harvesting your own clay. And get your hands beautifully filthy in the meantime!
You might also do this to form a stronger bond with the land and make something useful in turn.
So, dig up some clay and get ready to use the creative side of your brain once again. It is a perfect activity for all ages!
Earthenware pottery
Pottery made from clay is categorized into three main groups:
- earthenware – clay that is fired at relatively low temperatures, between 1,000 to 1,150 °F
- stoneware – a non-porous ceramic that is heated up to temperatures of 2,150 to 2,330 °F, stronger than earthenware, yet less refined than porcelain
- porcelain – made from fine kaolin clay, fired in a kiln with temperatures between 2,200 and 2,600 °F
Each of these types of pottery will have specific firing temperatures, along with exact clay mixtures, some which are only available commercially.
For the purposes of being able to create something from clay at home, we are only going to cover the harvesting of clay to make earthenware.
Earthenware can be fired at very low temperatures (600-1200 °C), even in an open fire pit, making it the most primitive form of creating pottery. It may not be watertight without the addition of a glaze, though it can be completely functional.
Colors will range from brown, to reddish-orange tones, even yellow or gray. Terracotta is probably the most common earthenware pottery you know.
Where to find clay
With clay on the mind, do you know where to start looking for it nearby?
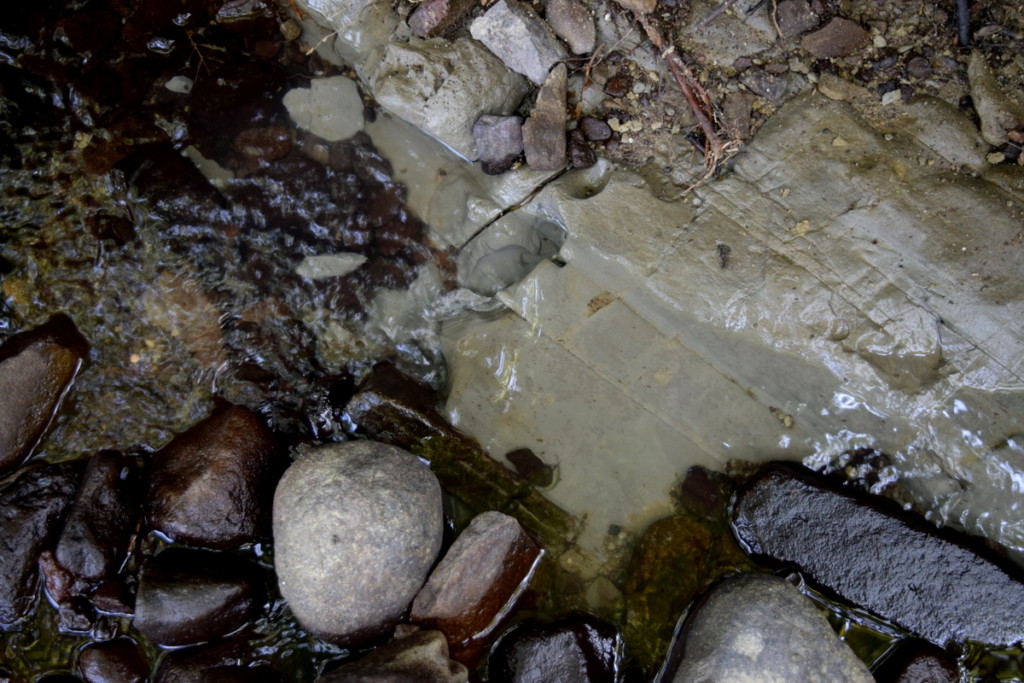
To find clay, keep a lookout for signs where water does not drain very well. Or where the soil becomes cracked in times of drought.
You might also search for clay in:
- creeks and riverbanks
- under the topsoil
- exposed earth from erosion, or in canyons
- construction sites (where the soil has been dug deeper)
If you notice suitable clay on a land you do not own, make sure to get written permission from the landowner, or manager of a construction site before removing any. Never remove soil/clay form National and State Parks, or areas where you may damage the landscape.
In general, follow all the basic rules of foraging and enjoy the hunt for different types of clay.
Different kinds of clay
One thing that you will notice first, is that clay comes in many colors. If you are lucky enough to live in an area where it is used for natural building, you can often glean information from elders on where to find and harvest clay for your own use. They may even offer some helpful tips on how to use it.
Some clays are better for repairing ovens than others, some are superior when added to plaster mixes, while other pure sources of clay can be used for cosmetics, even for poultices and enjoying its benefits internally (eating or drinking). Yes, we eat clay on occasion too.
The purer the clay, the harder it will be to process. In some instances you may even have the opportunity to cut it straight out of the earth in brick form. It is such a treat!
Dry processing of clay
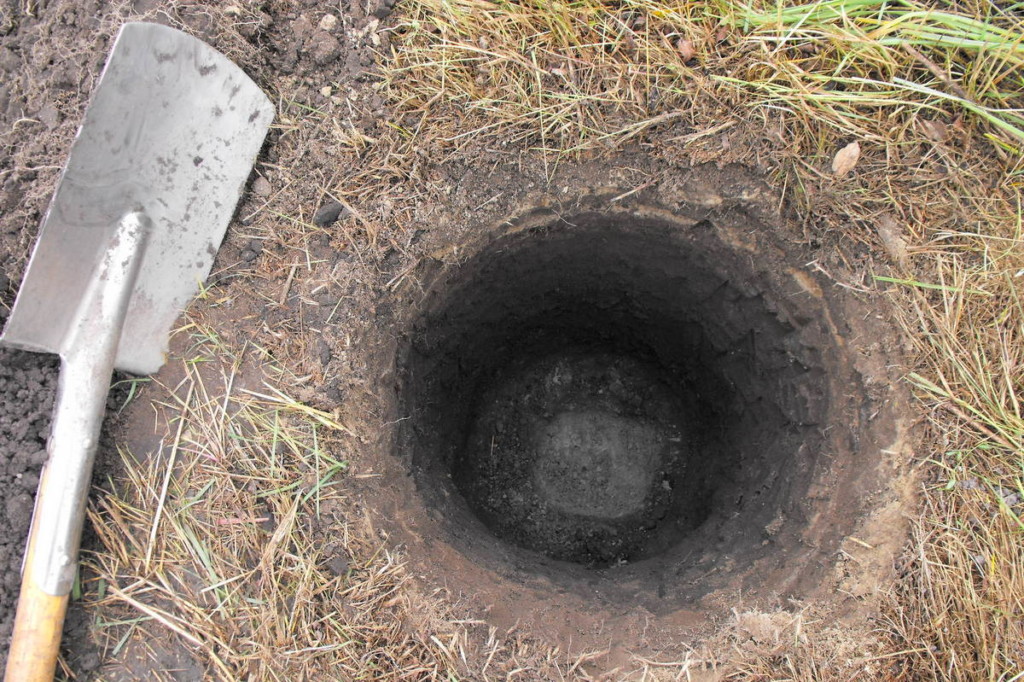
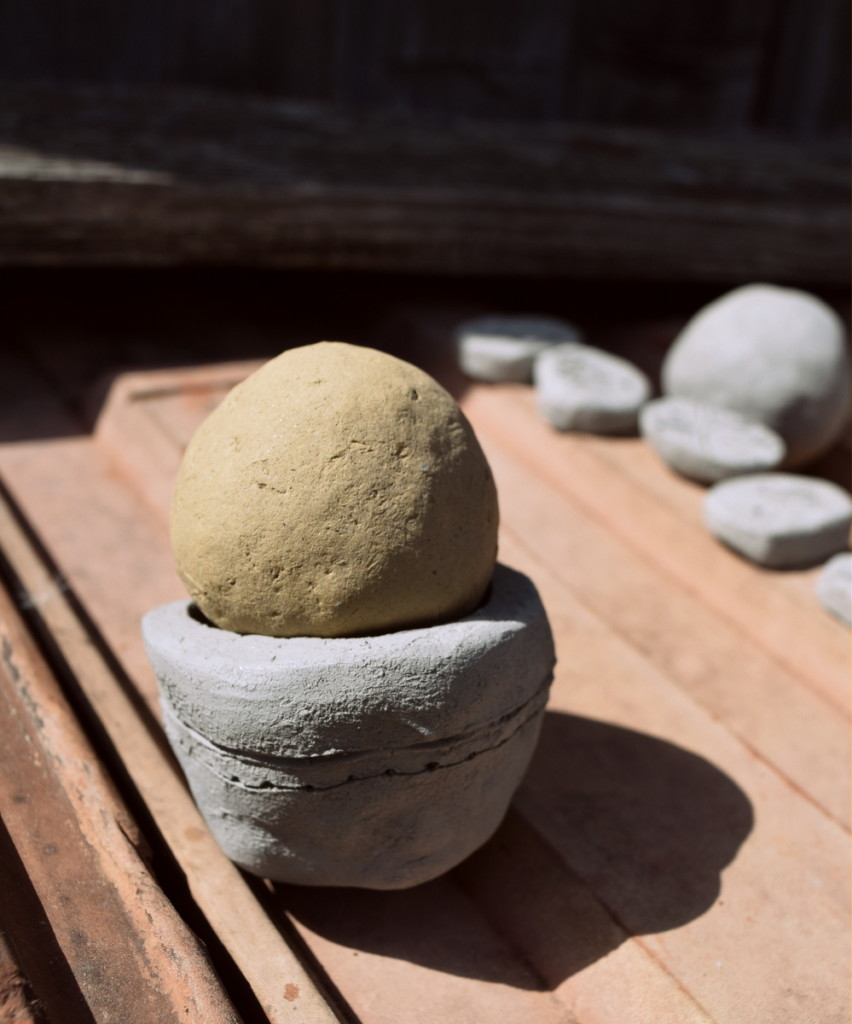
Depending on the type of soil around you, you may easily find out based on the appearance of mole mounds whether or not your soil has enough clay in it to from a ball. With a high enough clay content, the ball is unlikely to crack.
Here is an example of what we found in our backyard.
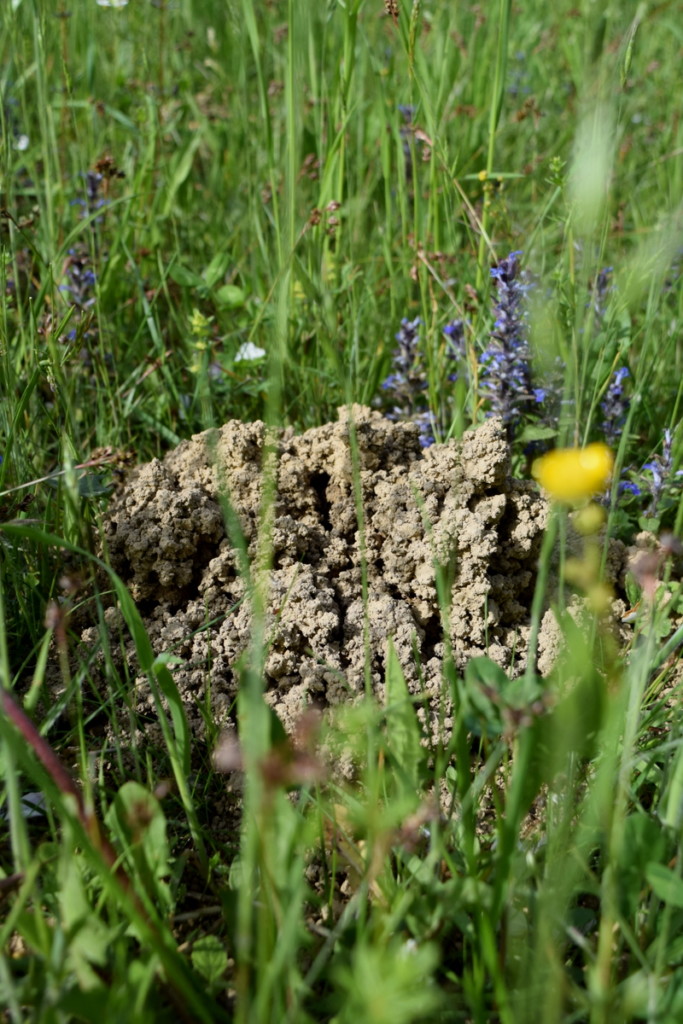
That could be turned into a clay ball with very little effort. After drying in the sun for 2 days it did not even crack.
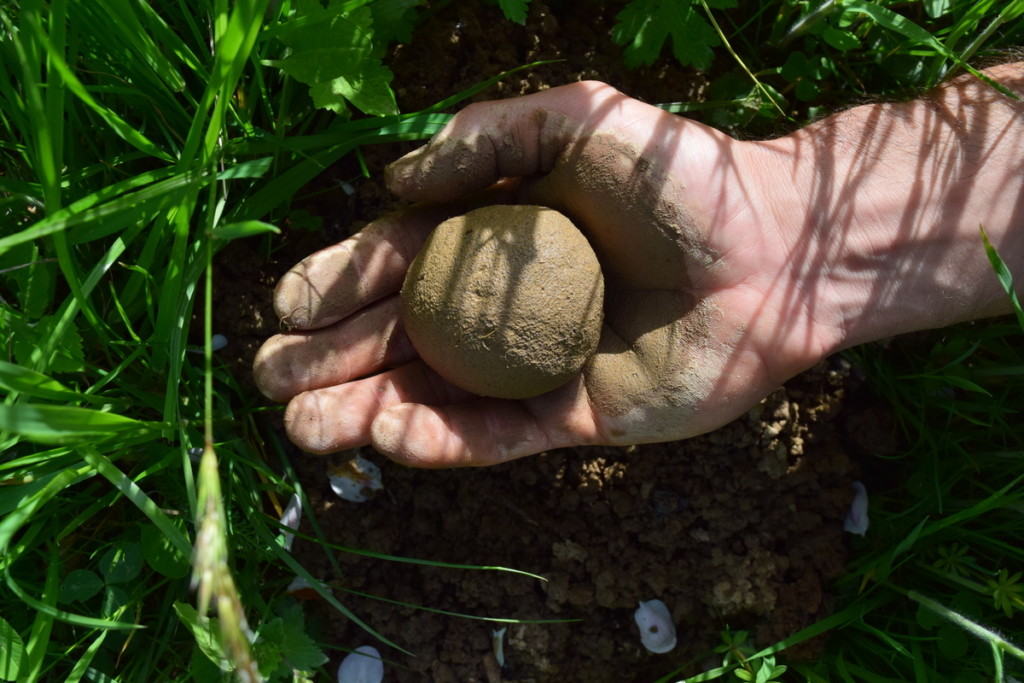
It is a perfect sample of clay that is extremely useful for natural building. The chances of using it directly from the ground, as is, for pottery is unlikely.
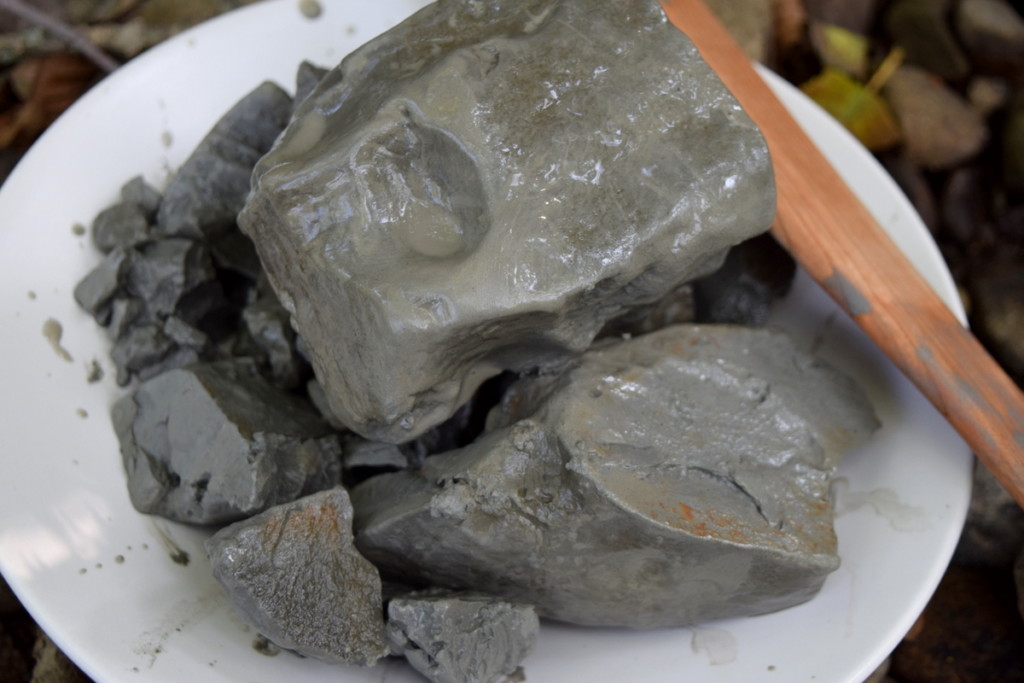
However, with pure clay found in a creek bed, we have the opportunity to blend two different types of clay together – in hopes to form a decent pottery mix.
Refining your dry clay
Once you find a great source of clay, the first thing to examine is how moist/dry it is. Then decide whether or not you want to go with dry processing, or wet processing of your clay. Both have their benefits and time constraints.
Dry processing is far faster and a little less refined, but in most circumstances, the end result is workable. Again, the amount of processing also depends on what you want to achieve with the clay. A rustic cup or bowl, or a fine plaster?
To get started, you need to dry out the clay completely. You can accomplish this simply by leaving chunks of clay to dry out in the sun, or close to a fire.
Then, to make sure that even the insides are dry, begin to crush them with a mallet until the pieces (globs of clay) become smaller and smaller.
Once in powder form, you can sieve out the chunks of organic matter (stones, roots, impurities, etc.) to make it as pure as you have time and energy for. Keep in mind that you may need to add elements to the clay later, such as sand for making the clay mix stronger and more resistant to cracking. The point is to turn the clay into a workable powder that can be rehydrated as needed.
Wet processing of clay
Outside of dry processing – crushing, sieving and pulverizing into a powder – you can also choose to wet process your clay. This is also known as the wet extraction method.
This is the more time-consuming approach, though it is much easier on your muscles. Let the clay and the water do the work instead of you.
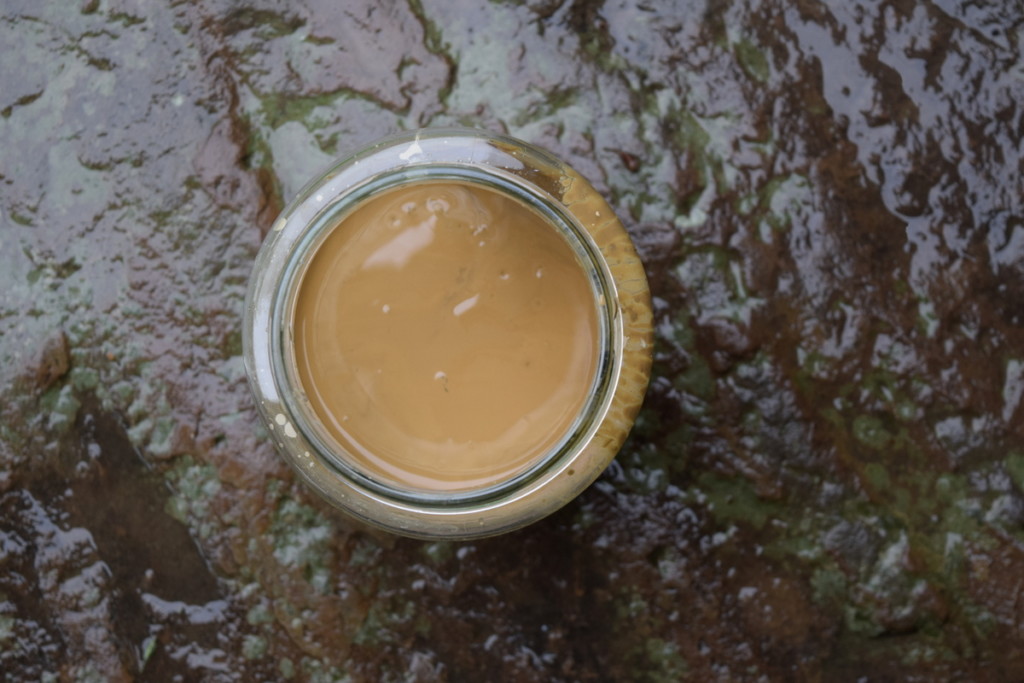
Gather your test soil and fill a container 1/3 full of this “potential clay”. Add water up to the top, pull up your sleeves and get ready to dunk into a clay slip. Break up the clumps with your hands, letting the mud squish between your fingers, then let the mix sit for several hours.
If you are using a glass container (this is highly recommended for beginners), you will be able to observe a separation of layers.
Water on top, clay in the next layer, with sediment on the bottom.
Carefully pour off the water, then even more carefully pour off the clay layer into a new bucket. Do not get sediment into your clay slip, stop pouring before this happens!
Now add water to the clay and let it sit for several hours. In the end, the water should be nearly clear with a dense layer of clay underneath.
Refining your clay slip
From here you can strain the clay through several layers of cloth, for 2-3 days, until the clay begins to dry out enough to work with.
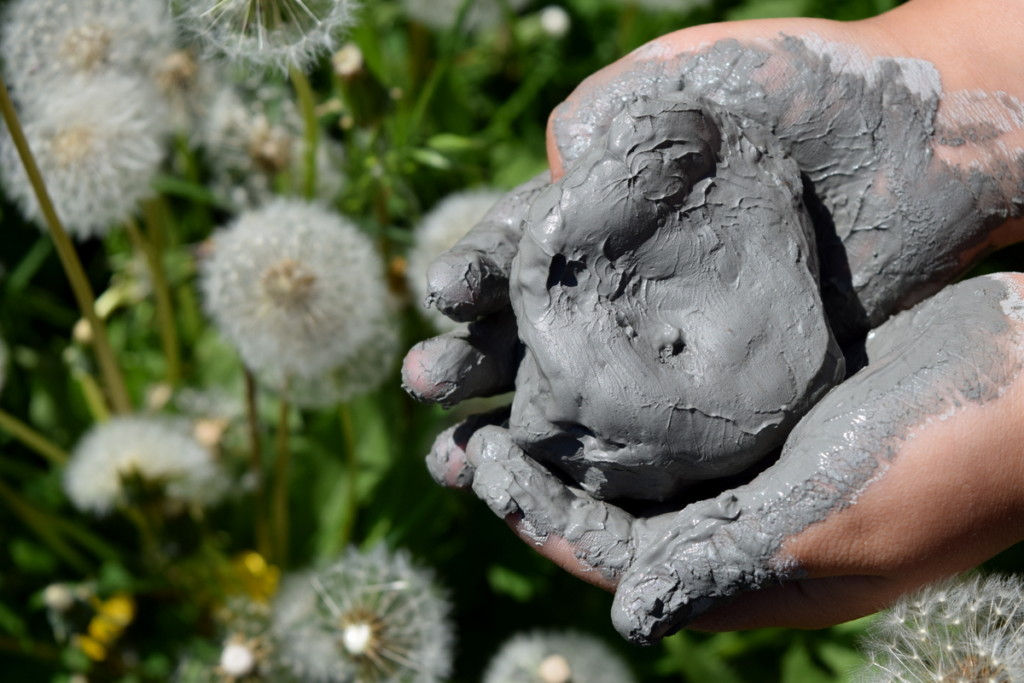
All you have to do now is find creative ways to use it!
Hopefully you have had something artisanal in mind prior to harvesting and processing clay, that would have sparked your curiosity towards this wonderful natural material in the first place.
If this is the step you choose to refine your mud into clay, read this step-by-step article for more pictures and the best advice for making it work to your advantage:
Processing Clay the Easy Way: Water Extraction @ Practical Primitive
How to turn mud into pottery
Without a kiln and plenty of hands-on experience, it is hard to know what might happen when firing your rustic earthenware pottery.
Your ultimate success also relies on whether or not your clay has been tempered. Temper being a material added to your clay to prevent it from cracking and shrinking in high, or inconsistent temperatures. This can be sand, finely crushed rocks or old pottery pieces that have exploded in former firings.
Not having a kiln, doesn’t mean that you can’t fire your wares, experimentally (alone) or experientially (with the leadership of someone more skilled), of course. You just need to have access to land for digging a sufficiently large hole (your primitive kiln) – and make sure to do this when there is no fire ban.
We have yet to try this ourselves as we are still in the phase of creating greenware, though it is definitely something to add to our self-reliant homesteading skills for the future.
Here are some wonderful resources in case you are further ahead in harvesting clay and firing your own pottery, the primitive way:
DIY Primitive Pottery Firing @ Instructables Outside
Pitfiring Earthenware @ Wildwood Survival

Using clay for natural building
One area in which my husband and I do have plenty of hands-on clay experience, is in natural building.
Having attended natural building workshops in Washington, as well as having lived for several years in a cob house in Hungary that needed repairs and upgrading, we had to learn as life carried on.
And as the rain splashed back at the outer walls of the kitchen due to too short eaves. A temporary fix included several sets of plaster and some whitewash to prevent more serious damage.
Early human civilizations quickly figured out that to make a simple dwelling, clay is not only versatile, it is also durable, strong and abundant.
In many cases it can be dug for free, on-site, as you build a foundation to your home.
We aren’t here to convince you to take a step back from your modern life and jump straight into a natural home, though this collection of natural buildings around the world may just be the thing you need to persuade you.
Benefits of using clay for building
As it turns out, living in a house made of clay can be beneficial to your health too.
Clay, as a building material, helps to regulate indoor temperatures – making hot summers much more bearable without an air conditioner. This aspect, in combination with the ability to regulate humidity, creates a positive indoor air quality that is wonderful to breathe in.

Clay is an ideal material for more than creating pottery.
It can also be used in wood-fired pizza ovens, it can be made into bricks for building, it can be mixed with manure to make the best natural plasters – and it is one of the few times you will ever hear pizza and manure in the same sentence.
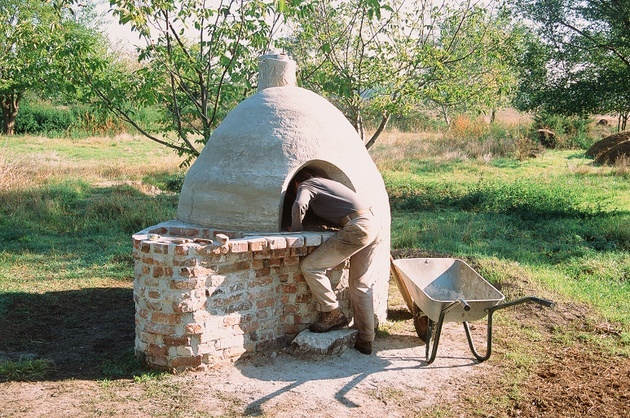
Wood-fired ovens
One of the greatest things about clay, as a sustainable material, is that it can be used and reused, so long as it still sticks together and holds integrity.
Just as you can harvest clay for pottery, you can do the same for creating an outdoor (or indoor) oven by hand, though it will take plenty of it!
If you are thinking to upscale your outdoor cooking skills, and you have the backyard to do it, why not try building a cob oven this summer?
As long as it is protected from rain and snow, you can use it all year long.
Here is what ours looked like, before we moved on and left it to someone else:
If you find that you truly enjoy working with clay, this is an amazing summer project to undertake!
Find some more earthen oven inspiration here:
How to Make and Bake With an Earth Oven @ Natural Living Ideas
DIY Wood Fired Outdoor Pizza Oven {Simple Earth Oven in 2 Days!} @ A Piece of Rainbow

Natural plasters
As long as you are busy harvesting clay, and happen to live in a natural building, or long to make a natural doghouse, you are also going to have to learn how to make a clay plaster.

Clay plasters will help to protect your creations from melting in the rain.
They are also:
- non-toxic
- of natural, sustainable origin
- durable
- and beautiful (beauty being in the eye of the beholder, of course)
If you’d like to learn more about clay plasters, the best thing you can do is to attend a natural building workshop.
There is no batter way to learn how to work with clay, than to actually have it in your hands. This way you can feel the right consistency to work with, as it differs in many applications.
Whether you are thinking about pottery or natural building, keep a lookout for all the possibilities of clay that are hiding around you, often in plain sight!
Then come up with a plan on how you can utilize the clay the best.
Practice makes perfect, or at least presents an enjoyable skill that can be passed down to the next generation. Just make sure that everyone has a chance to get their hands dirty!

Get the famous Rural Sprout newsletter delivered to your inbox.
Join the 50,000+ gardeners who get timely gardening tutorials, tips and tasks delivered direct to their inbox.