

With so many delectable ways to make chutney, it is extremely hard to pick just one!
What’s more, with this zesty orange and fennel apple chutney recipe, there is plenty of room for personal freedom and ingredient adaptation.
You can add further spices on a whim, or toss them out as you like – or don’t like. The end result will always be unique, a beautiful moment preserved in time. That being said, practice mindful eating when indulging in a jar of homemade apple chutney and allow the random spices to excite your taste buds with every other bite.
Choose your ingredients wisely and you will be able to savor the magic workings of apple with aromatic spices for many months to come.
A myriad of ways to make chutney
While most chutneys tend to fall on the spicier side of life, it is entirely possible to adjust the heat to as little, or much, as you can tolerate.
The most important thing to remember is that chutneys are meant to be a “strongly spiced” condiment, consisting of chopped fruit(s) and/or vegetable(s), vinegar, sugar and spices, with the occasional dried bits of fruits added too. Outside of that basic knowledge, all you have to do is search for chutney recipes (including your fruit of choice) until you find something that piques your interest.
Types of chutneys, besides apple, to try:
- tomato chutney
- coconut chutney
- onion chutney
- plum chutney
- apricot chutney
- rhubarb chutney
- ginger chutney
- tamarind chutney
- mint chutney
- mango chutney
- carrot chutney and so on…
If you haven’t had a decent chutney in a good long while, are seeking new-to-you flavors, or have simply never made chutney at home before and wish to give it a try, this recipe will have you heading straight back to the store for more ingredients, or to the apple orchard to gather enough apples to make a second batch.
Preserving apple chutney
In the world of chutneys, there seems to be no right or wrong way to get the job done. Though it helps immensely if you love the outcome of your couple of hours spent in the kitchen.
If you aren’t confident of just how much spice you like in your chutney, always start with a lesser amount. As you become more accustomed to intense flavors such as star anise, coriander seed and ground cumin, your creations will become more playful. There are so many variations of chutney, even within a single fruit alone, that nearly every time you make it, the results will be different.
Embrace that aspect of cooking and preserving at home, and you’ll begin to avoid store-bought preserves for that very reason. Sameness is overrated. Distinctive flavor is in.
Go gather your ingredients and get to work!
Ingredients for apple chutney
As mentioned, there are several ways to make apple chutney.
Change up the type of vinegar and wham! – different end product. Add some crushed red pepper flakes and freshly grated ginger, then put it on a toasted sandwich for a special treat. Use sour apples, or sweet. It is guaranteed to taste distinct every time.
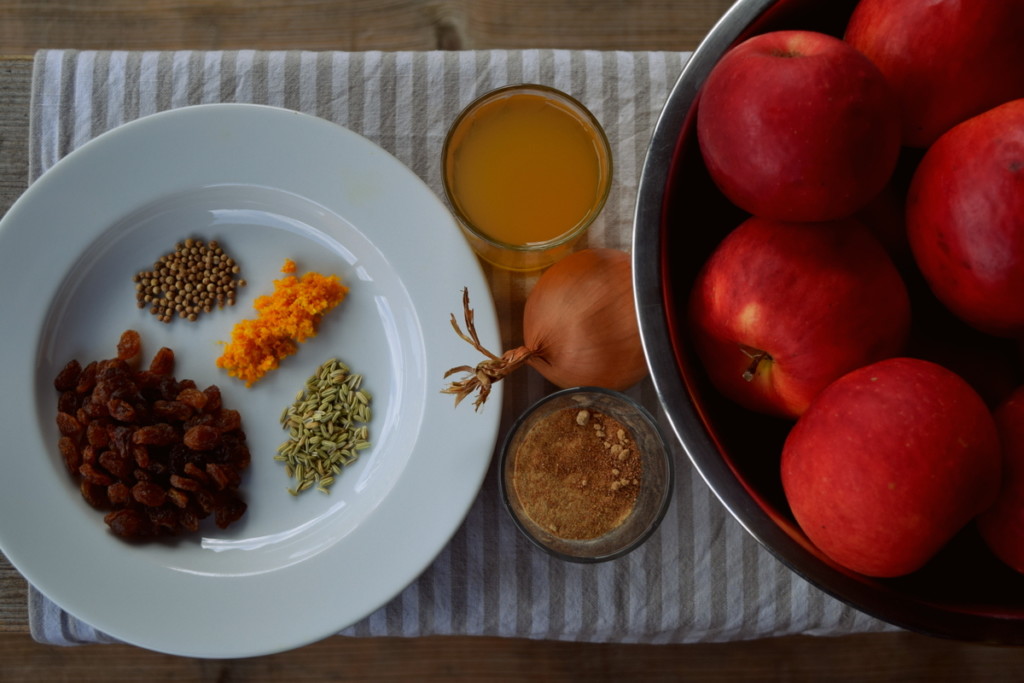
Here are the ingredients for apple chutney we are making today, just enough to fill 2 jars with ample leftover for sampling:
- 2 pounds apples (any kind)
- 1 1/2 cups apple cider vinegar
- 3/4 cup coconut sugar, or brown sugar
- 1/4 – 1/2 cup raisins
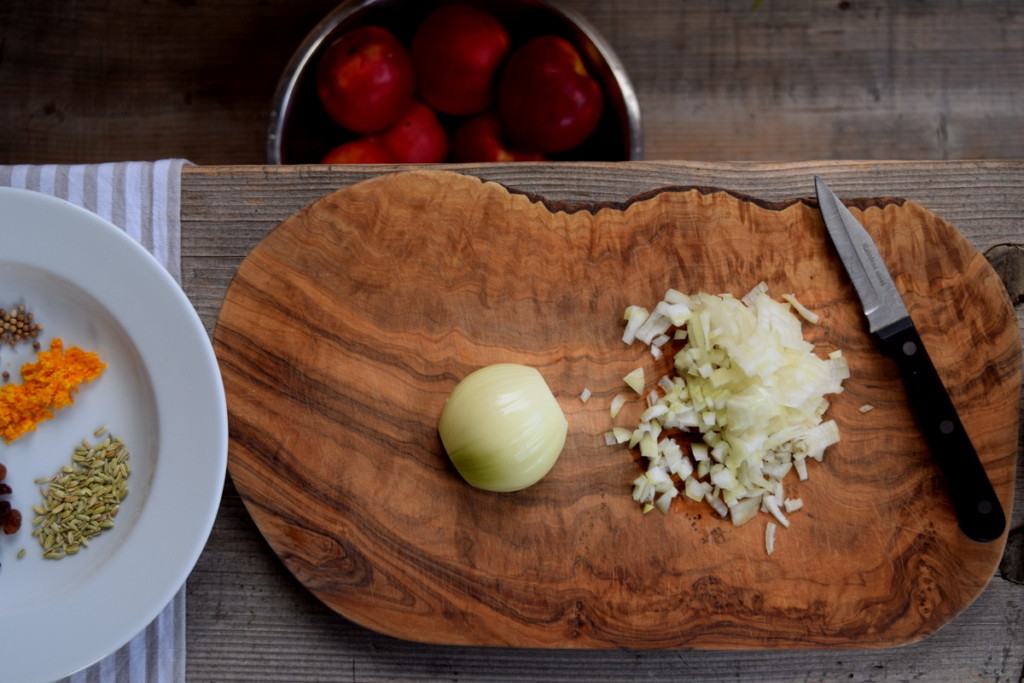
- 1 onion, finely chopped
- 1 tsp. (or more) of coriander seeds
- 1 tsp. (or more) of fennel seeds
- zest of one organic orange
- 1 cup of water
This apple chutney recipe is easy enough to double or triple, just make sure to increase the cooking time. What you want in the end, is for it to thicken ever so slightly, never to be runny. Naturally this consistency will depend on the type of fruit you use.
If your apples contain loads of pectin, your chutney will be thicker. In this case, you can add more water as it cooks, letting it boil down gradually.
Optional ingredients for apple chutney
Take this recipe and make it your own, simply by adding your own dried, crushed red peppers for spice. Or chop up some chilies fresh from the garden, if that is what you have in store.
Other apple chutney recipes may call for star anise and dried apricots or kombucha vinegar and turmeric. Possibly even malt vinegar and chopped dates.
Seriously, just about anything goes. But, give the ingredients a smell test first, to see if they combine beautifully. There is never any harm in trying to preserve a small jar or two. Just be sure to write down the ingredients you choose to use, lest the recipe will be lost forever!
Instructions for cooking and canning apple chutney
Preparation time: 30 minutes
Cooking time: 45 minutes
Step 1: Gather all ingredients.
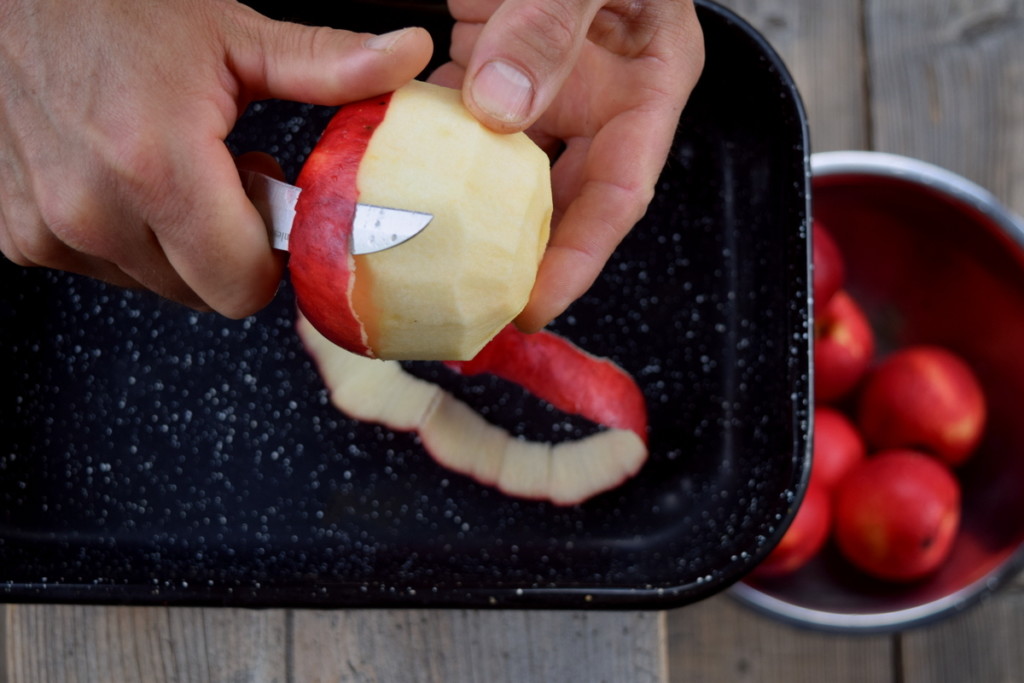
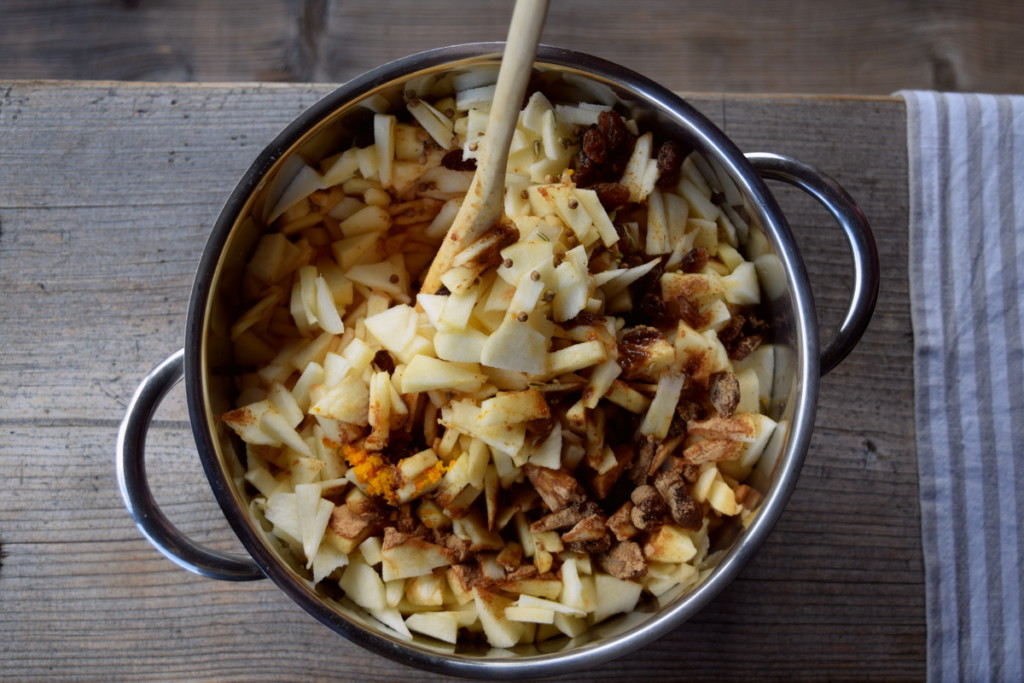
Step 2: Wash apples and set about peeling, coring and cutting them by hand. Alternatively, they can be grated or tossed in a food processor for a few seconds. Small bites are what you are after. Set aside the apple peels for drying, practicing zero-waste in the kitchen.
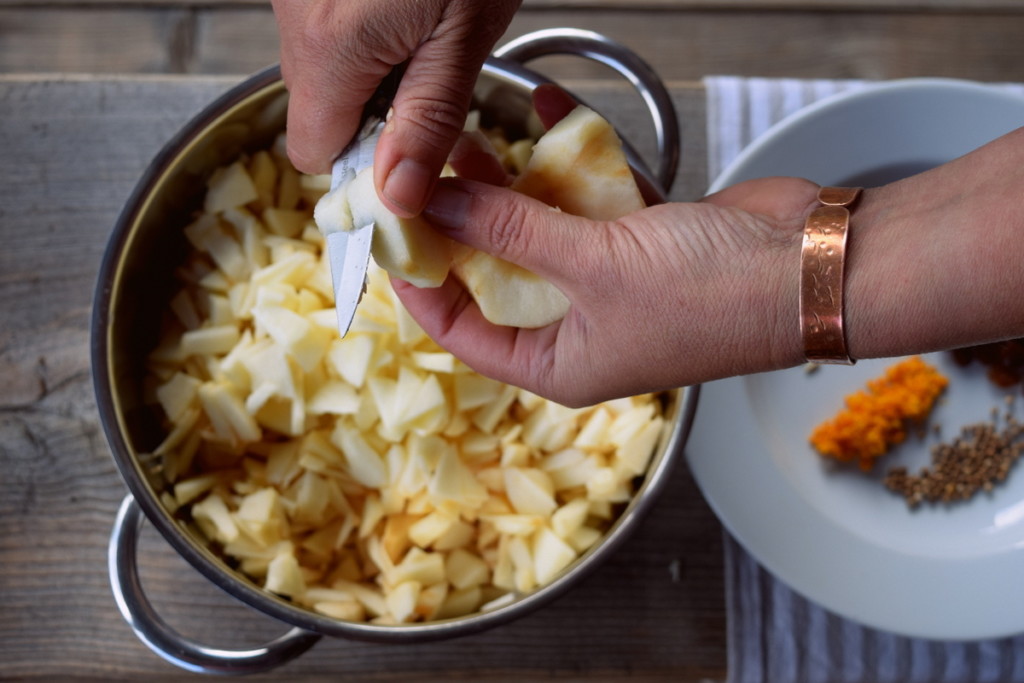
Step 3: Finely chop the onion and add all ingredients to an appropriate size pot.
Step 4: Stir all ingredients together, along with a cup of water to prevent the contents from burning.
Place the pot on the stove over medium heat. Bring to a boil, then lower the heat, so that the chutney continues to simmer away.
Step 5: Simmer for 45-60 minutes, till your chutney is a desirable consistency. Stir frequently. Add more water, if necessary, to prevent the chutney from sticking and/or burning. Sample halfway through, to make sure the flavors are melding nicely together. This gives you time to check the acidity as well – add more vinegar, if it is called for.
Step 6: Remove pot from heat and let it sit for a minute or two without stirring.
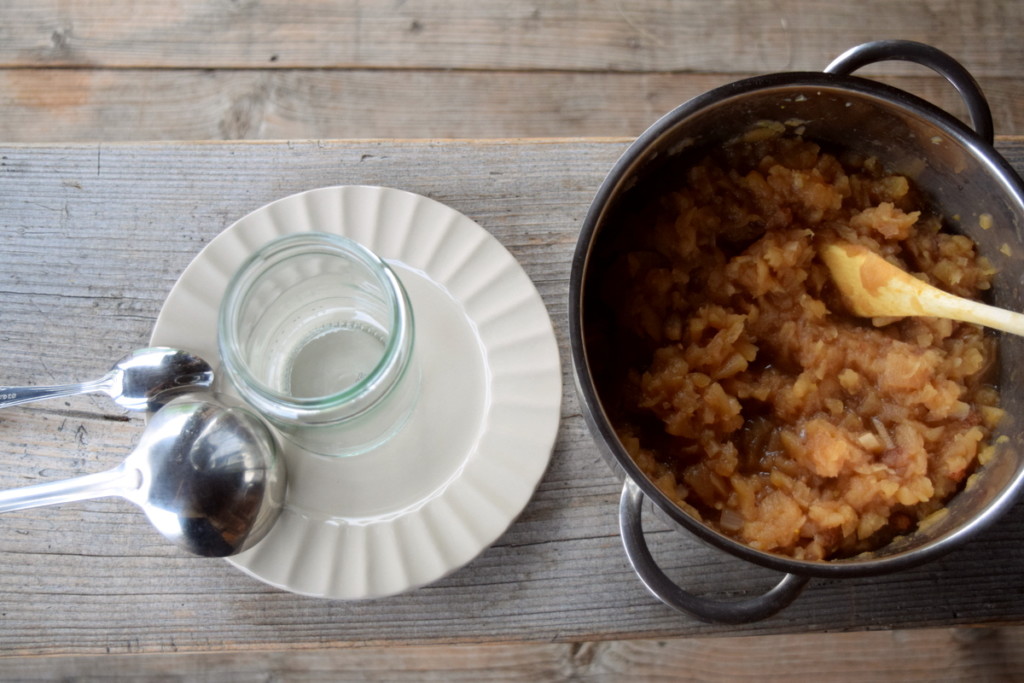
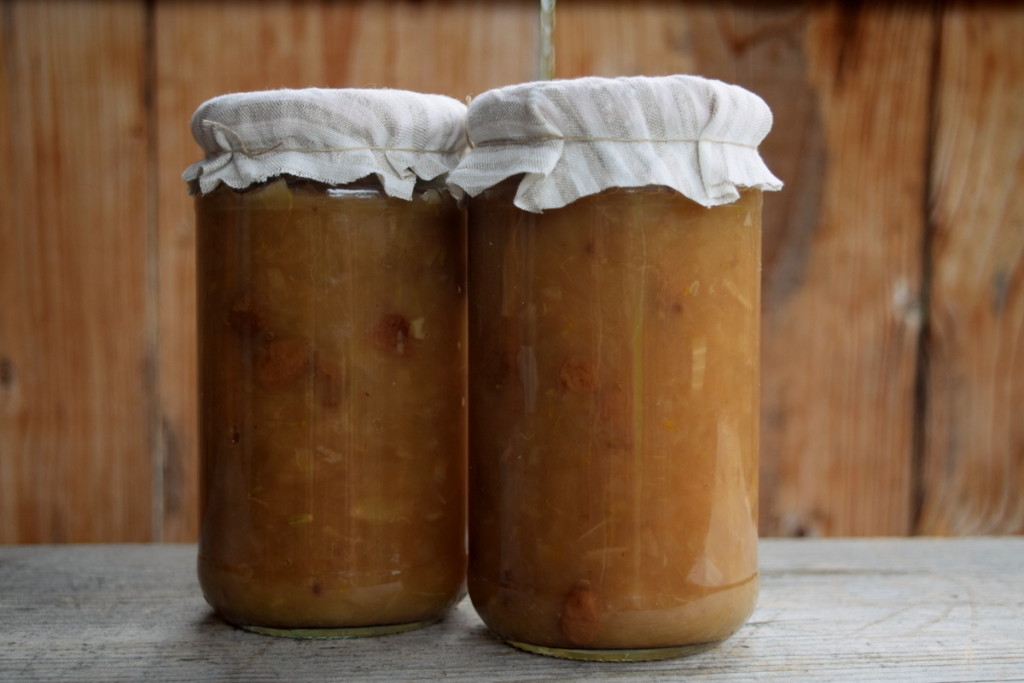
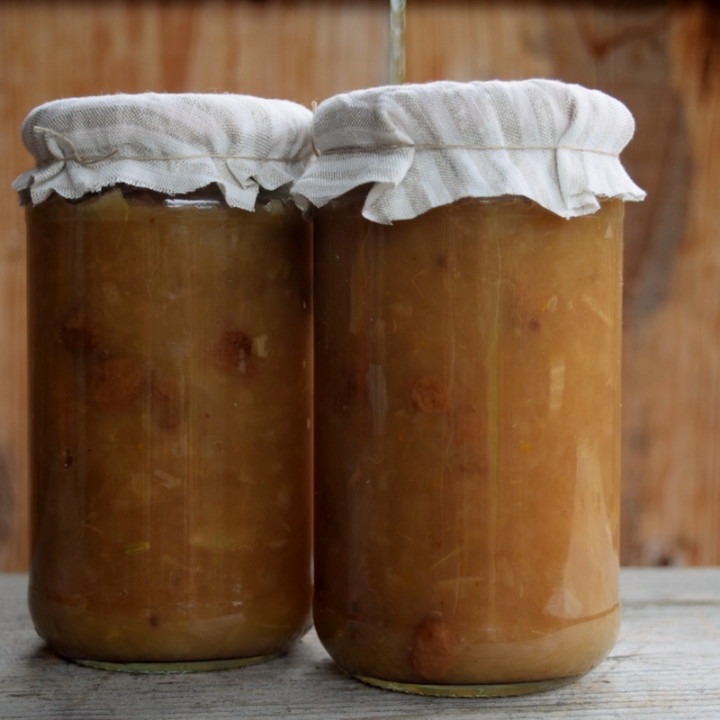
Then spoon the hot chutney into jars, making sure to wipe the rims before tightening the lids.
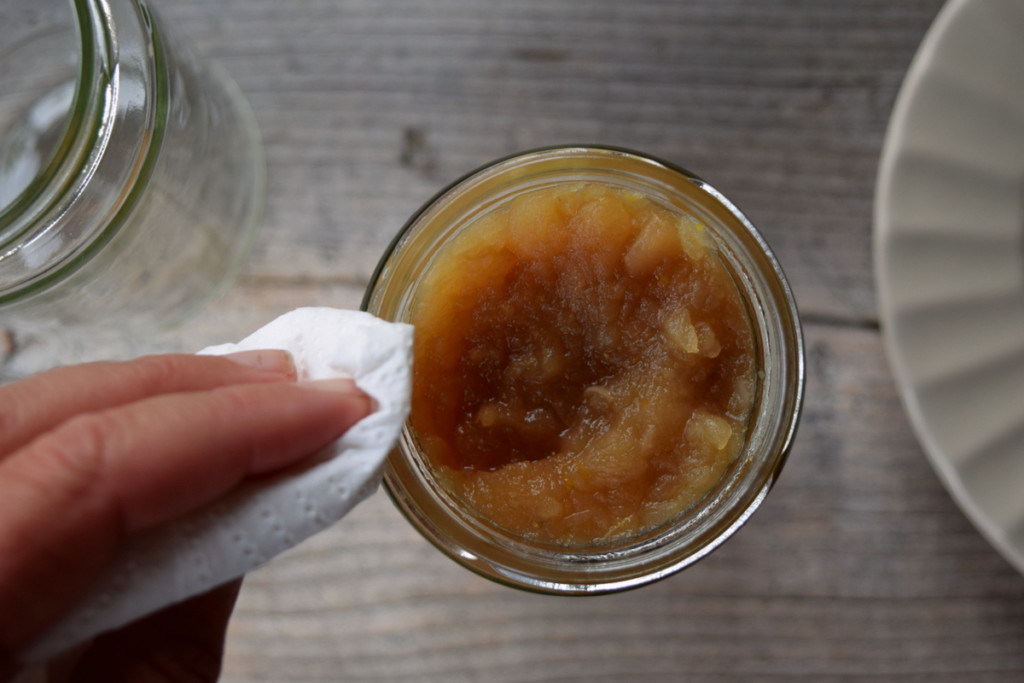
Step 7: Optional. Preserve your jars in a water bath canner for 10-15 minutes.
Refrigerate any leftover chutney that does not fit into jars and enjoy it fresh!
Simple, isn’t it?
Before you forge your own path and start tossing in random spices into your chutney, you’ll likely have a few questions/concerns.
What vinegar to use, how long can you store it, and how many jars do you need to fill the shelves in your pantry?
Continue reading to find the answers below.
Which vinegar is best for making chutney?
First things first, you want your chutney to taste its very best. In order for this to happen, you must use ripe, but not over-ripe fruit.
Secondly, the type and quality of sweetener also matters. Though we have chosen to use coconut sugar, it is also sensible to use brown sugar in its place. Honey can be used as well, in the making of chutney, provided that you are eating the chutney shortly after canning and storing it in the fridge.
Which brings us to vinegar.
5% acidity is what you are shooting for, nothing more, nothing less. Apple cider vinegar is among the healthiest options for making chutney. ACV, along with white wine vinegar has a less harsh flavor than plain distilled white vinegars, making the first two a much better bet.
Other cooks use red wine vinegar or malt vinegar to produce a darker colored chutney. These of course, change the flavor profiles too.
In the end, the better quality vinegars, the ones you prefer for pickling and drinking a tablespoonful in a warm glass of water, are the best.
How long does chutney last?
If you have followed the proper method for sealing your jars using a water bath canner, your chutneys will last for a year and then some, unopened in the pantry.
In the fridge they can be kept for several months. Once they are opened, however, it is recommended to consume them in less than 4 weeks.
Seeing as how uncomplicated it is to whip up a small amount of chutney (of any kind), you can make several smaller batches throughout the year. Always leaving you with ready-made chutney for fresh eating.
How to use up all your delicious homemade apple chutney
Now that you have a few extra jars of chutney on hand, with some more to hand out as gifts, people are going to ask “what do you eat it with?”
The answer is crystal clear – any way you wish.
Chutneys are a mouthwatering mix, somewhere between jam and pickles. In essence, the best of both worlds.
You can top your scrambled eggs, or eggs over easy with apple chutney.
Add a dollop to your egg salad, chicken salad, or potato salad.
Serve it alongside grilled sausages, hamburgers, meatloaf or a pork roast hot from the oven.
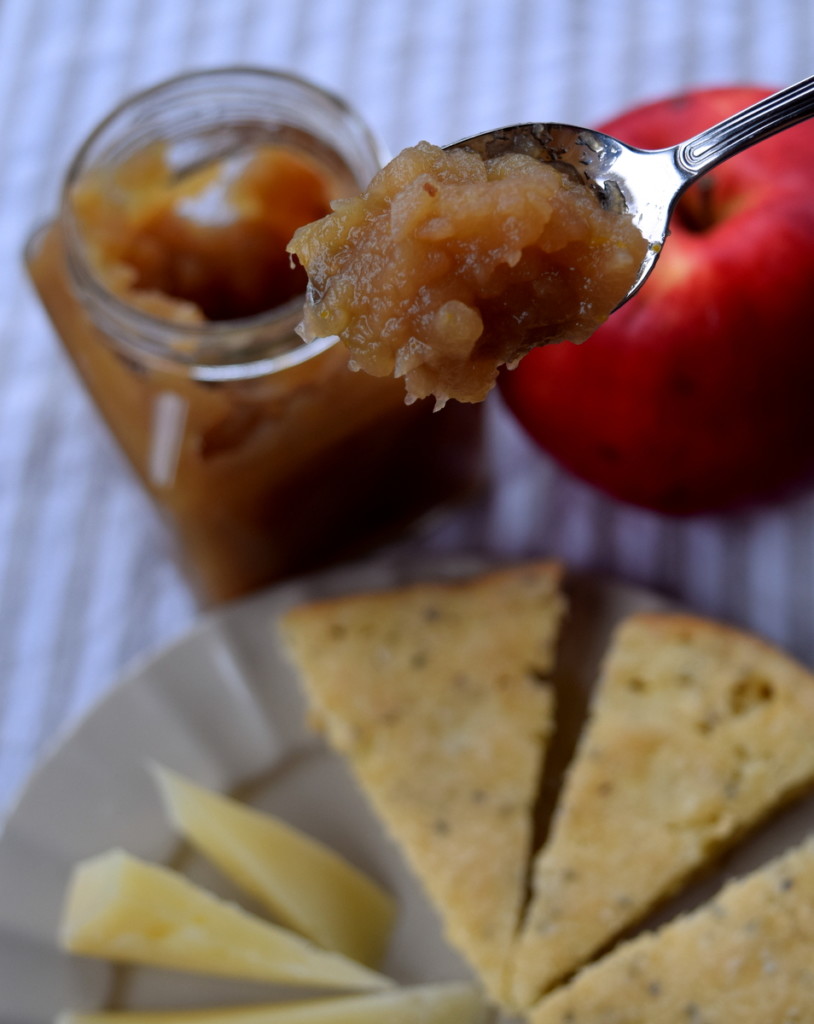
Take a spoonful and spread it on a sandwich or a slice of bread, as is, or with lettuce, cheese and other toppings.
Purée it and use it as a scrumptious sauce for egg rolls, or mix it with yogurt for a tantalizing dipping sauce.
However you wish to eat apple chutney, is entirely up to you. Anything goes: as an accompaniment for breakfast, lunch, dinner, or alongside a snack-worthy cheese platter.
Zesty Apple Chutney Recipe
There are many ways to make apple chutney, but this zesty chutney is my favorite.
Ingredients
- 2 pounds apples
- 1 1/2 cups apple cider vinegar
- 3/4 cup coconut sugar
- 1/4 - 1/2 cup raisins
- 1 onion, finely chopped
- 1 tsp coriander seeds
- 1 tsp fennel seeds
- zest of one orange
- 1 cup water
Instructions
- Gather all ingredients.
- Wash apples and set about peeling, coring and cutting them by hand. Alternatively, they can be grated or tossed in a food processor for a few seconds. Small bites are what you are after. Set aside the apple peels for drying, practicing zero-waste in the kitchen.
- Finely chop the onion and add all ingredients to an appropriate size pot.
- Stir all ingredients together, along with a cup of water to prevent the contents from burning. Place the pot on the stove over medium heat. Bring to a boil, then lower the heat, so that the chutney continues to simmer away.
- Simmer for 45-60 minutes, till your chutney is a desirable consistency. Stir frequently. Add more water, if necessary, to prevent the chutney from sticking and/or burning. Sample halfway through, to make sure the flavors are melding nicely together. This gives you time to check the acidity as well – add more vinegar, if it is called for.
- Remove pot from heat and let it sit for a minute or two without stirring. Then spoon the hot chutney into jars, making sure to wipe the rims before tightening the lids.
- Optional. Preserve your jars in a water bath canner for 10-15 minutes.

Get the famous Rural Sprout newsletter delivered to your inbox.
Join the 50,000+ gardeners who get timely gardening tutorials, tips and tasks delivered direct to their inbox.