

Remember when we were all, “Myco…what did you say?”
It was only a few years ago that most of us had never even heard of mycorrhiza. Many barely paid attention to the vast network of microbes beneath our feet. But as more scientists began to check out what was happening below the soil, a whole new world opened up to us, as well as new possibilities for healthier plants and bigger yields.
The use of mycorrhizae among home gardeners has grown at a stupendous rate.
I remember when I first started using mycorrhiza in my garden, I had to order it online. My local garden center had never even heard of it. Now, even Lowes carries packets of mycorrhiza inoculant.
But if you’re ready to jump on the helpful fungi bandwagon, you’re probably wondering about one important thing – how exactly do you use the stuff?
Don’t worry; by the end of this post, you’ll be a mycorrhizal inoculation pro. (I promise, it’s easier to do than it is to say.)
What Is It & Why Should You Use Mycorrhizae in Your Garden
There are so many benefits to using mycorrhizae that I won’t list them all here. If you want the low down on mycorrhiza, you can read my article here. I go through what it is, why it’s so important to plants, and how it benefits you as a gardener.
But the Cliff Notes version is this: mycorrhizae are microscopic fungi that are naturally occurring in healthy soil and form symbiotic relationships with most plants.
They embed themselves in the roots of plants and grow outwards, creating a vastly larger root system for the plant involved. The fungi also secrete substances that break down nutrients locked in the soil, making them readily available for the plants to use.
By inoculating your seedlings with mycorrhizae, you’re ensuring your plants have access to more nutrients and water, which in turn creates larger plants that are more resistant to drought, pests, and diseases.
But the bonus everyone gets excited about is that using mycorrhizae also leads to higher yields.
So yeah, adding these helpful little fungi to your soil is an easy and inexpensive way to give your garden a big organic boost.
The Best Time to Use Mycorrhizae is in the Spring
For mycorrhizae to work, it has to come in contact with the roots of your plants. Naturally, this is a bit difficult to do for things that happen to grow underground.
Luckily, we have the opportunity to apply a mycorrhizal solution directly to the plant roots every spring – when we transplant our seedlings.
This is the best time, as you’re removing the plants from their small nursery pot and putting them in the soil.
If you’re reading this and you’ve already got plants in the ground, don’t worry; you can still inoculate your plants. You get to skip to the end for instructions on how to do that. However, you’ll want to make a note to follow the instructions for inoculating your seedlings when you plant them in years to come. It’s much more effective and efficient.
A Quick Note: Skip the Brassicas
Brassicas are one of the few plant species that don’t naturally pair up with mycorrhizae. So, if you’ve got brassica seedlings, you can skip inoculating them.
Which Mycorrhizae Should I Buy?
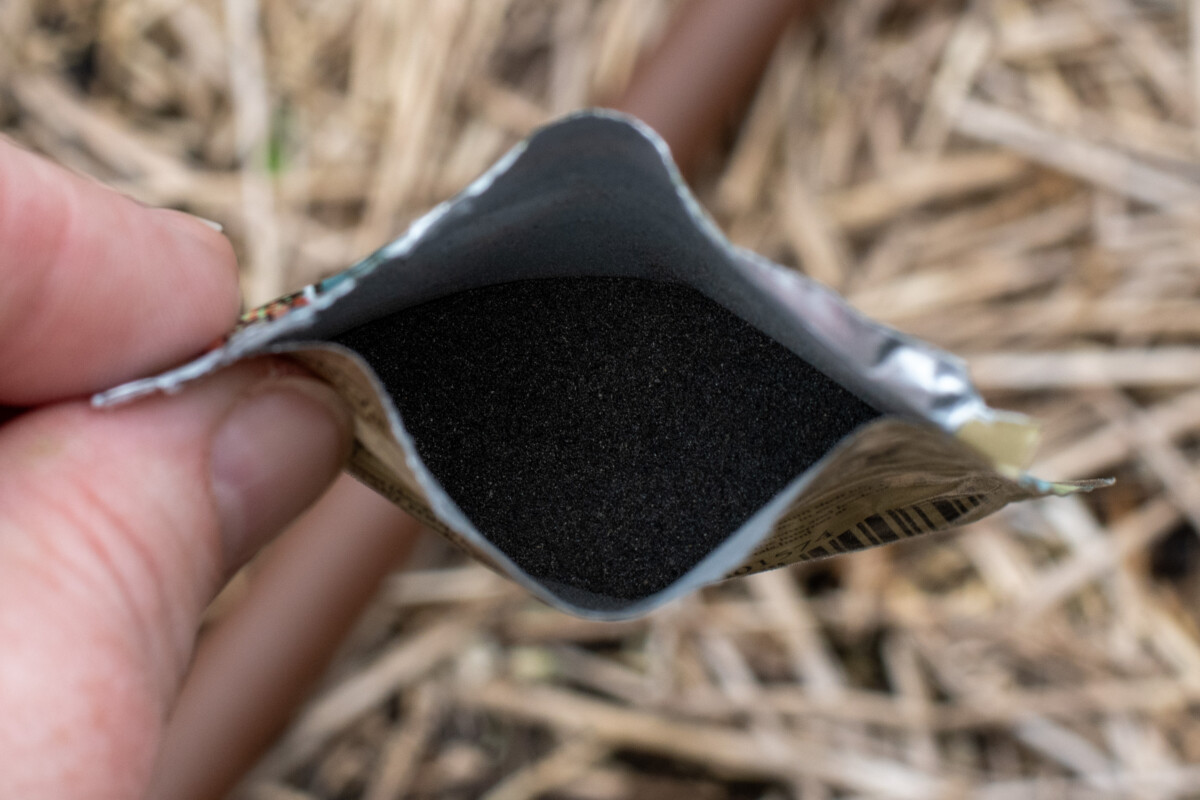
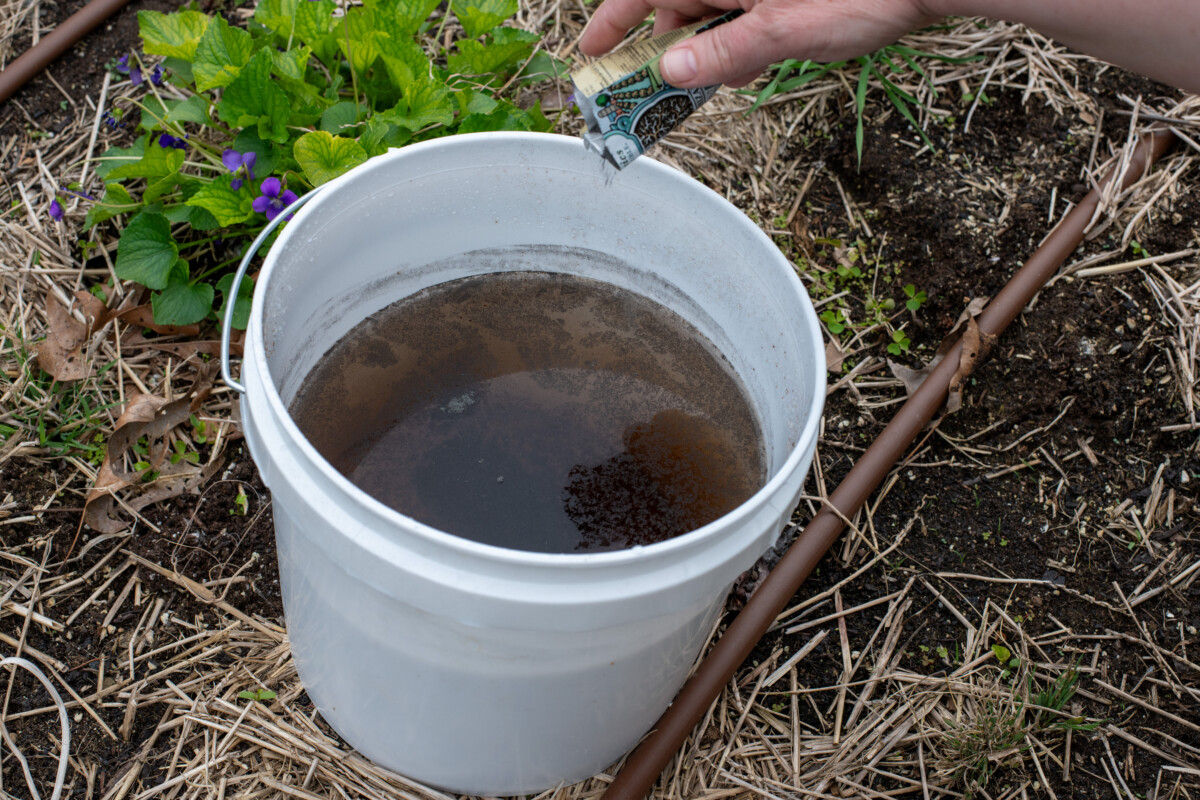
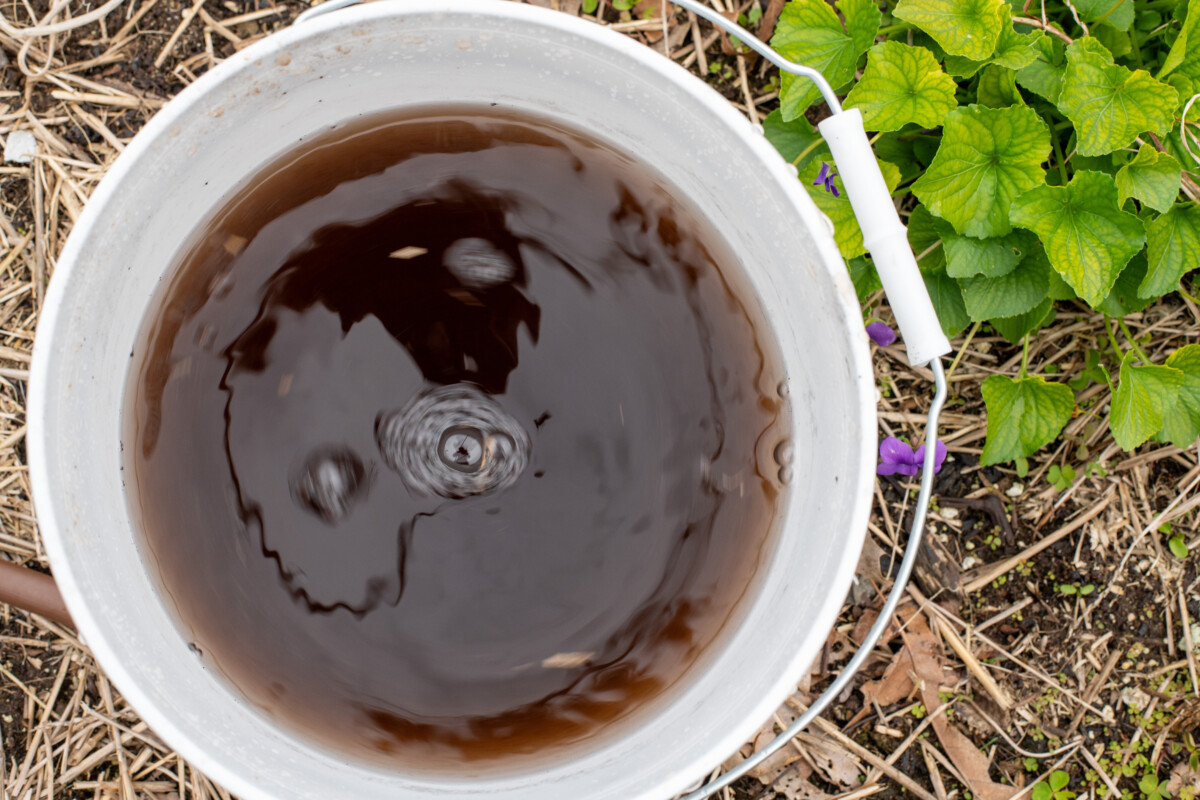
Generally, there are two types of mycorrhizae on the market. One is a granular variety. You can only use this when you’ve got direct access to the plant’s roots, so when you’re planting or repotting. The other type is a powder that’s meant to be mixed with water and used as a dip or soil drench.
Either works fine, but keep in mind how you’ll be using it. I don’t use the granular kind because I find the water-in concentrate to be much easier. I can use it both on established plants and new plantings.
I recently heard of a brand that you mix with a gel to form a kind of mycorrhizal paste. It sounds messy and inconvenient, and from what my friend who used it said, I think that about sums it up.
I’ve had great success with both Bigfoot Mycorrhizae and Plant Success Organics Mycorrhizae (this is the brand you can now find at Lowes).
I’ve even tried mycorrhiza inoculated potting mix from Happy Frog, but aside from the odd mushroom showing up in my houseplants, I didn’t notice much of a difference using it.
How to Inoculate Seedlings with Mycorrhizae
What you’ll need:
- Your hardened off seedlings (You did harden off your seedlings, right?)
- Mycorrhizae
- Water
- Garden trowel or hori hori
- A small bucket or bowl to mix the mycorrhizae and water in if you’re using a water-in concentrate
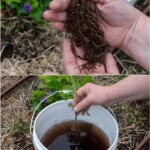
Inoculating Your Seedlings
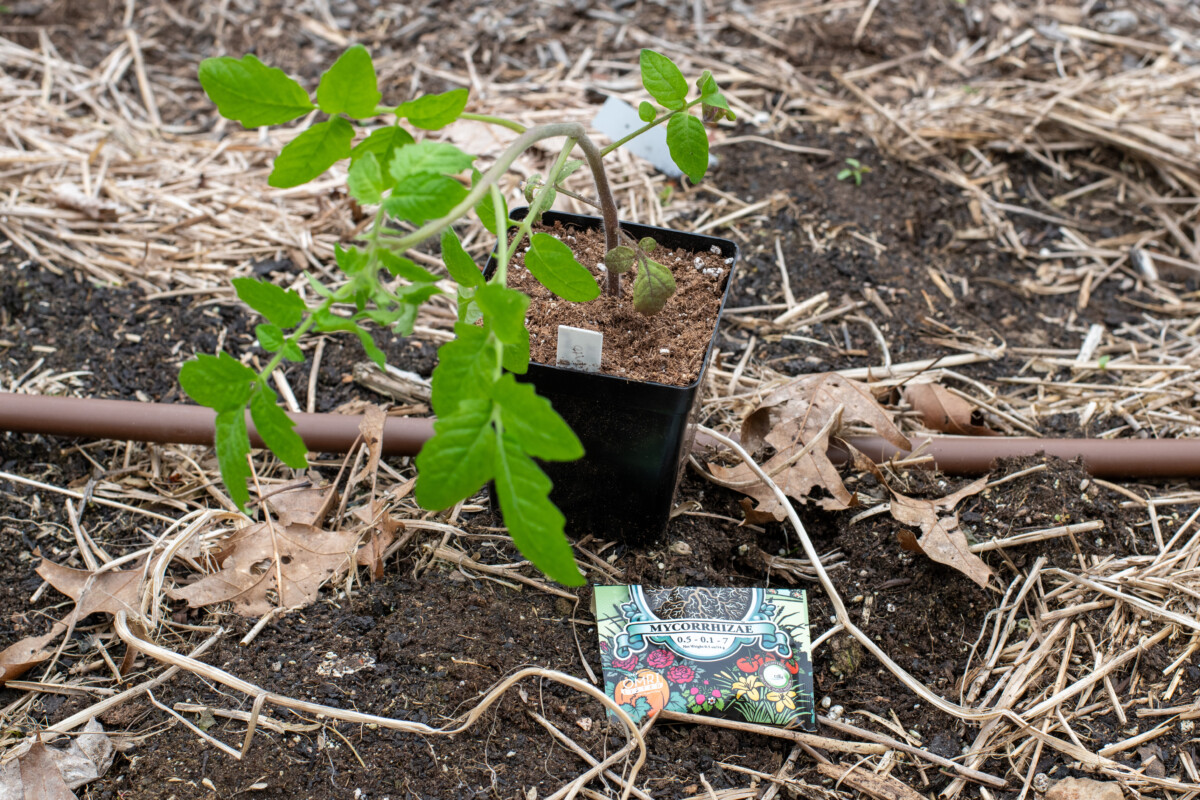
- If using a water-in concentrate, start by mixing it in the bucket according to the package directions. I always ignore the directions and double the amount of mycorrhizae called for. It’s not a fertilizer, so it’s not going to burn my plants’ roots. This way, I can ensure that the roots are thoroughly coated with the inoculant.
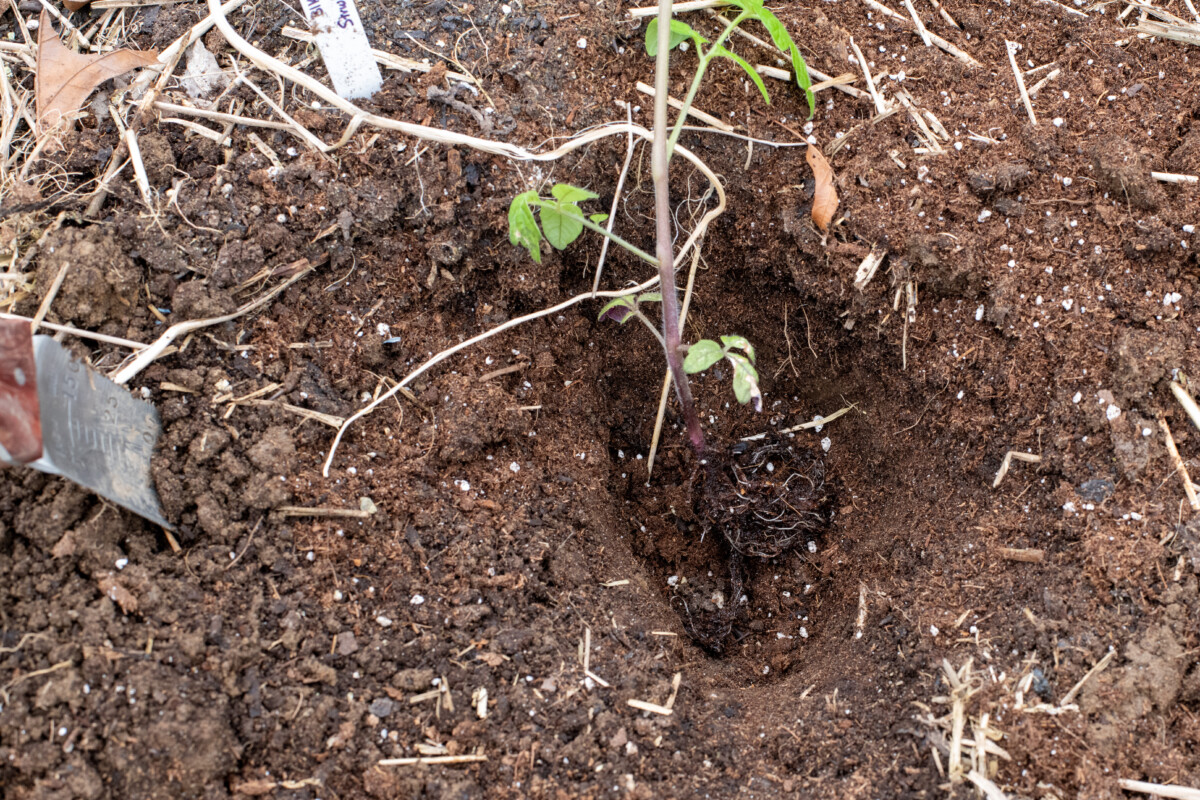
- Dig your hole for the seedling, adding any other amendments you plan to add. (Now is the perfect time to give your plants an extra boost.)
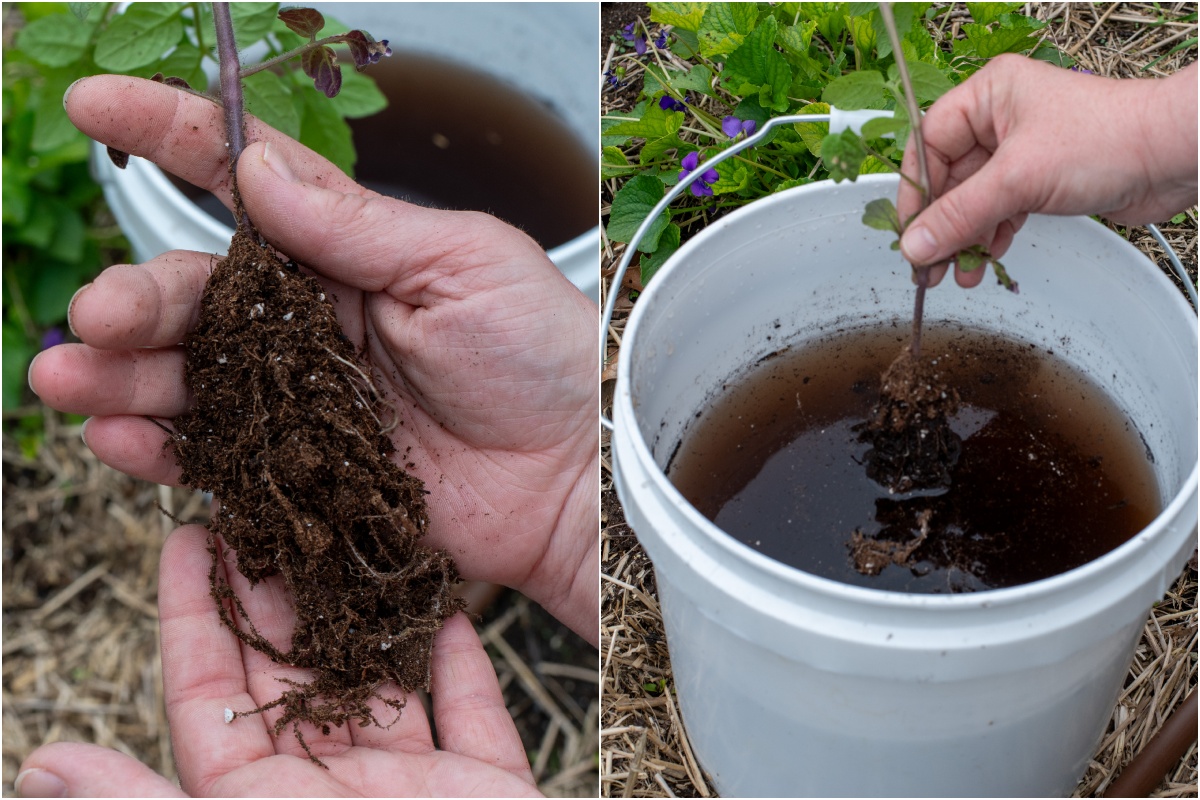
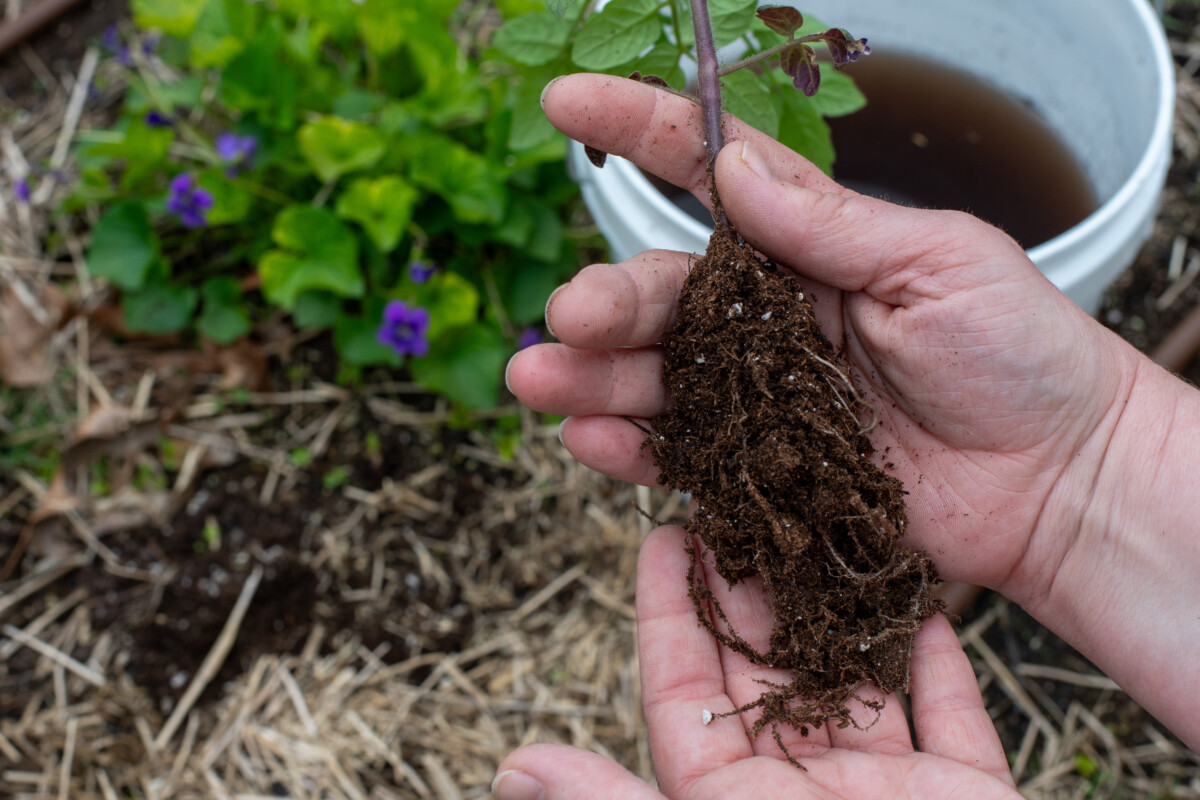
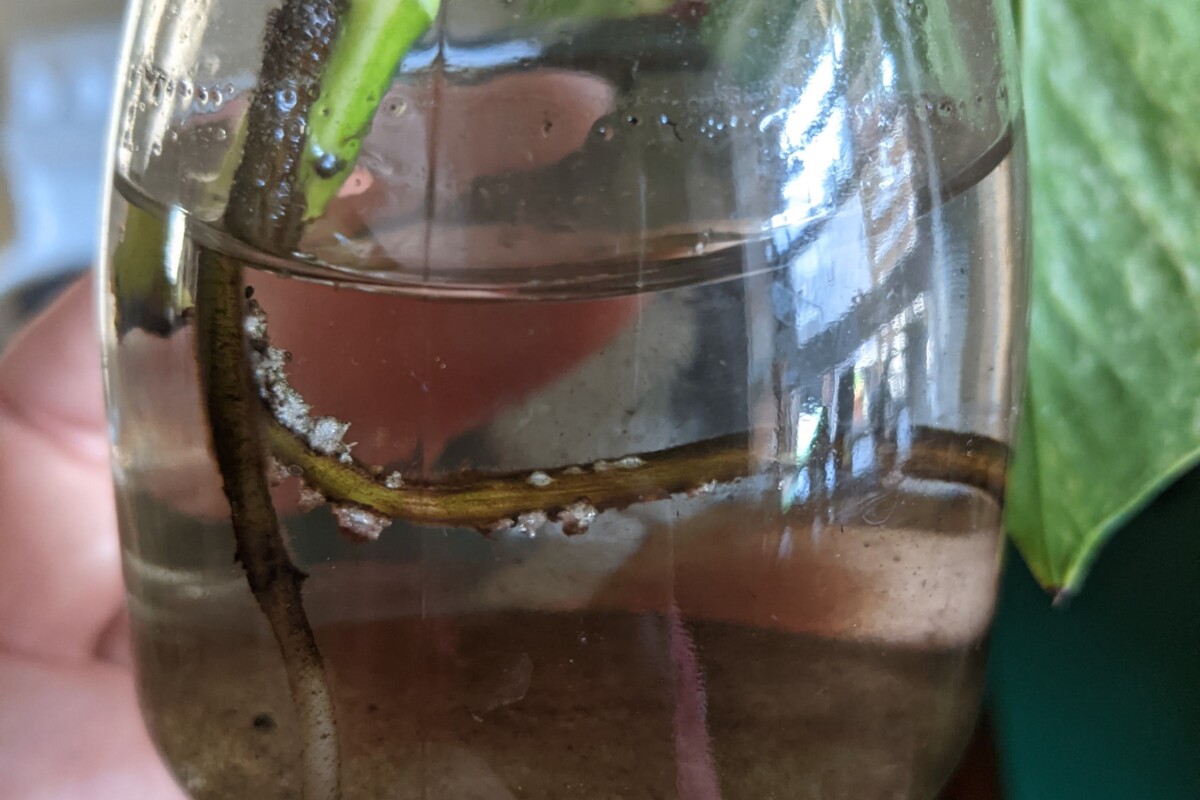
- Carefully remove the seedling from the nursery pot. Gently tease apart the root ball and remove enough of the soil so that plenty of roots are showing.
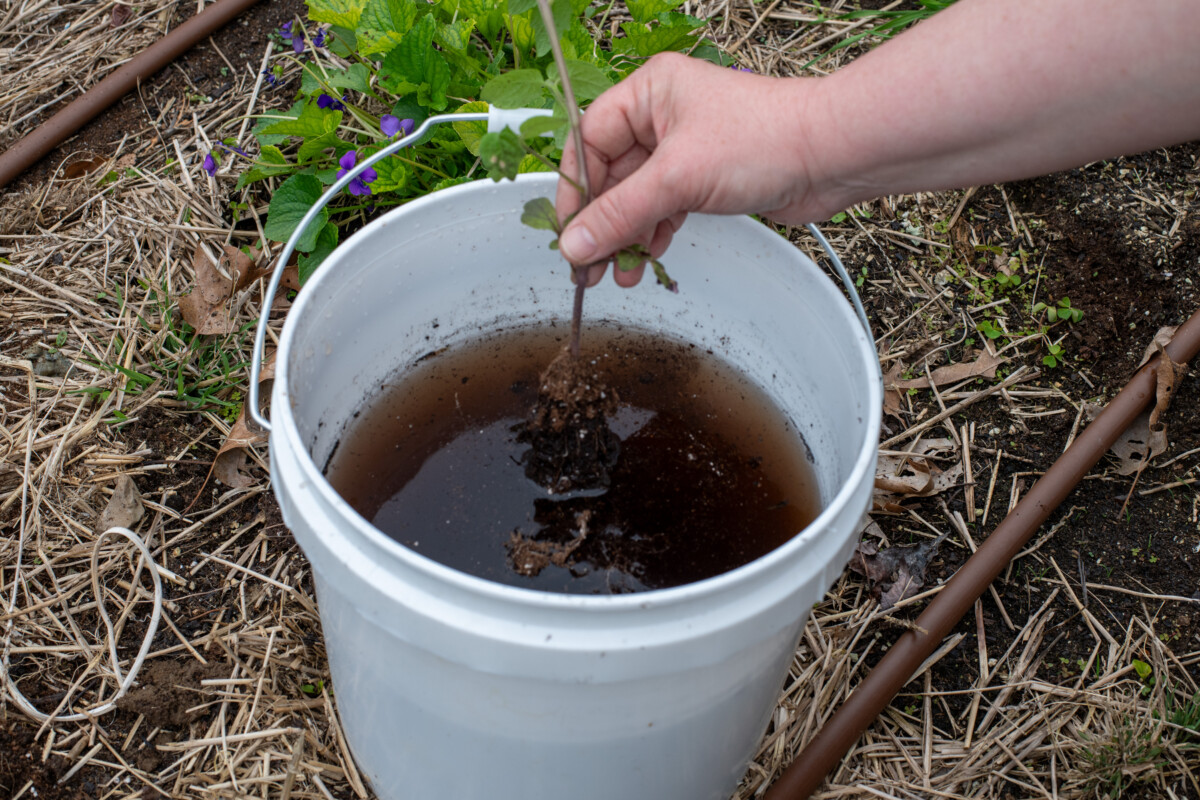
- If you’re using a water-in variety, dip the root ball in the inoculated water several times, soaking it thoroughly. Then, place your seedling in the hole and backfill it.
- If you’re using a granular variety, add the granules to the bottom of the planting hole as directed, place your seedling in the hole and backfill it.
- Water the seedlings well.
Continue inoculating and planting until all of your seedlings are planted.
Tips:
- I always give the inoculated water a stir before I dip my next plant in.
- Once all my seedlings are planted, I pour the remaining water into my watering can and water at the base of my tomato seedlings. Because I bury my tomatoes deeply (you should too; here’s why), I’m inoculating the stem, which will encourage the rapid development of adventitious root growth.
(Seriously, mycorrhizae work fast.)
- You only need to inoculate your plants once.
Inoculating Plants that Are Already in the Ground
We’ve already talked about how the roots need to come in contact with the mycorrhiza for this to work. Well, what do you do when you’ve already planted everything? Some brands suggest a soil drench with a higher concentration of the mycorrhizae mixed in the water. Some of it should reach the roots.
However, I’ve taken matters into my own hands with much better results.
Use a turkey baster.
Granted, you probably won’t want to use the one you cook with, as it will get scratched up from shoving it in the ground. You can pick up one for a couple of bucks, though.
First, use the empty turkey baster to poke a few holes around the base of the plant. You want to be careful and try not to harm the roots. Push the baster into the soil as far as it will go.
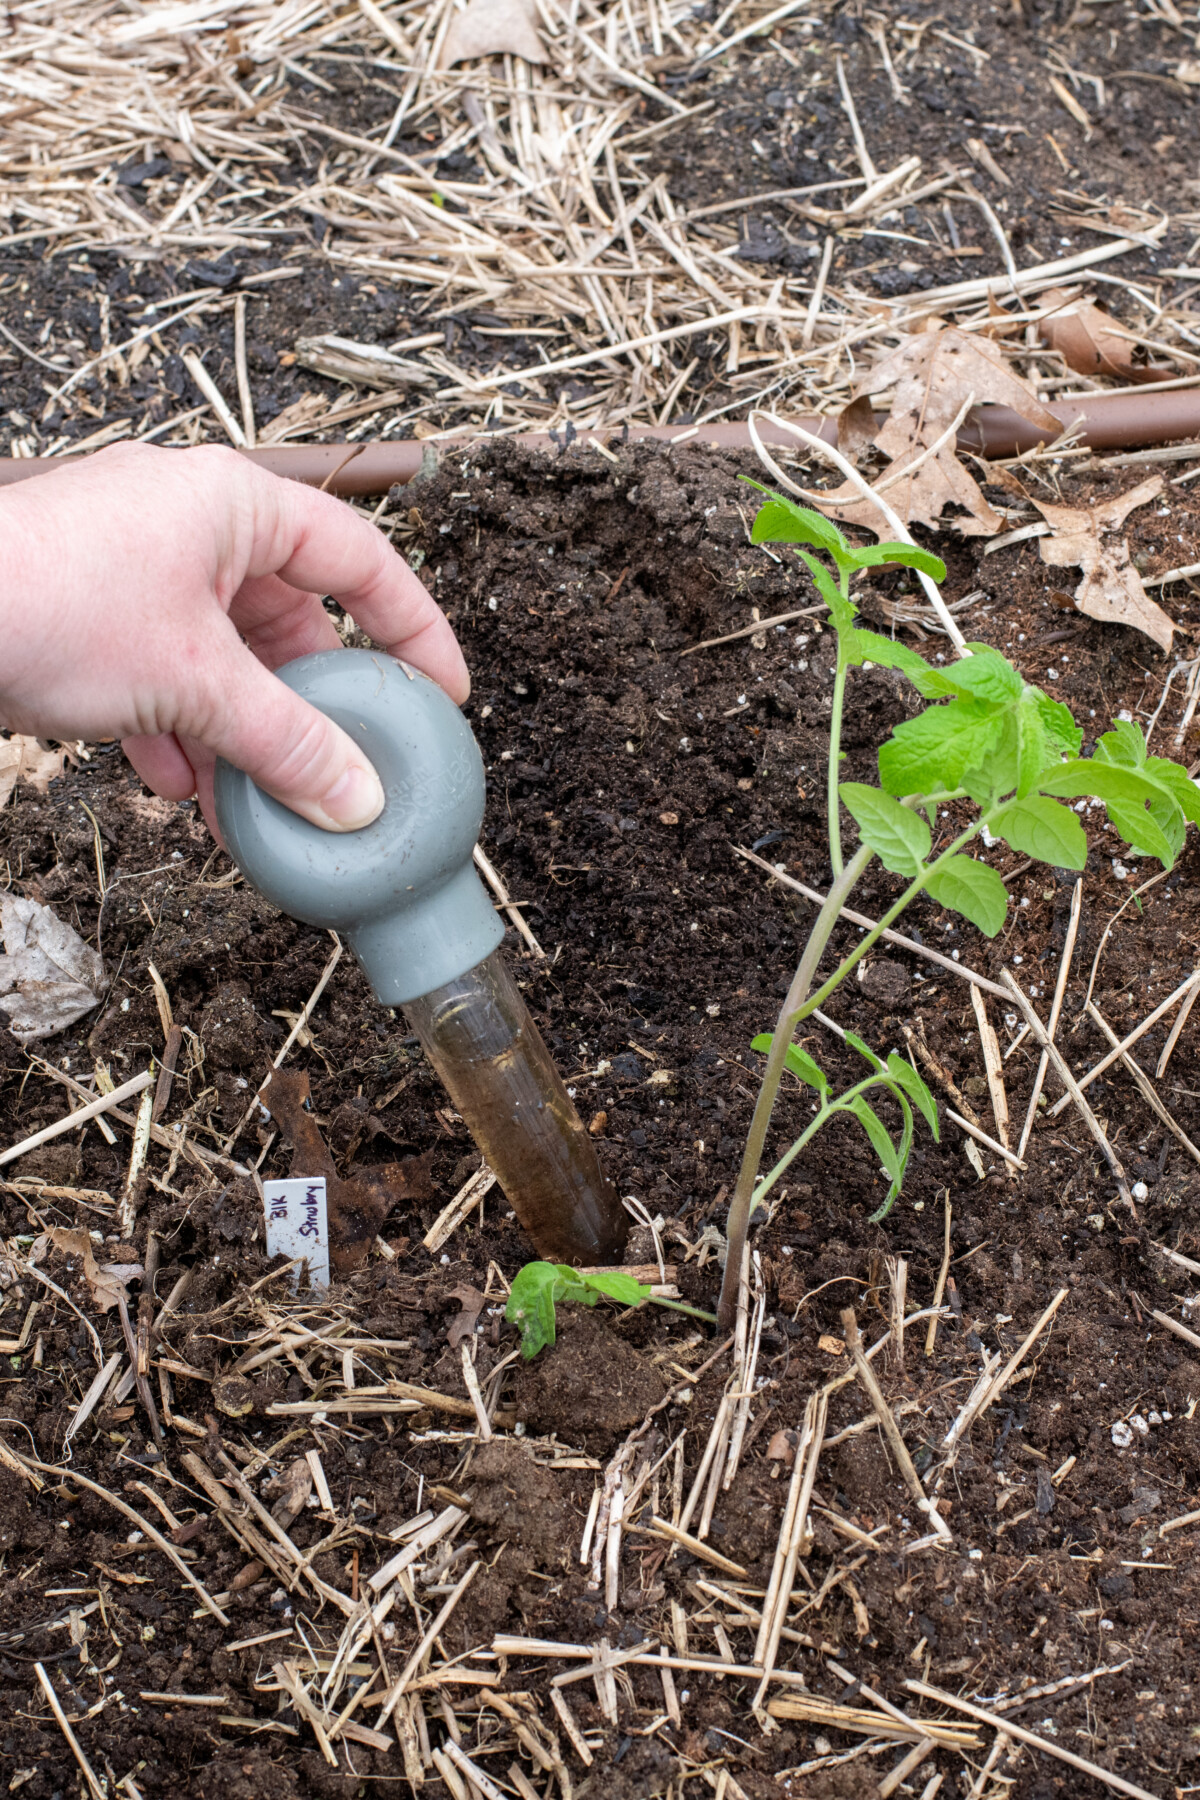
Once you have a few holes poked in the soil, fill the bulb with the inoculated fluid, push it down into each hole and squeeze the inoculant into the soil around the base of the plant.
Do this several times with each hole to ensure you get plenty of the fluid down to the roots. Remember, this is not a fertilizer; you won’t burn them.
This is also a great way to inoculate houseplants.
Now that your plants are inoculated, there’s nothing else to do. The microscopic fungi will take it from here. All you have to do is sit back, relax and enjoy the benefits. Oh, and continue to take care of your garden. I’m still waiting for scientists to discover a mushroom that will weed the garden for me.

Get the famous Rural Sprout newsletter delivered to your inbox.
Join the 50,000+ gardeners who get timely gardening tutorials, tips and tasks delivered direct to their inbox.