


Do you know how many raspberries fit into one jar of syrup?
Me neither. All I can say, is that it takes plenty – and a lot more than you think!
In fact, it is impossible to count as you pick berry, after berry into your basket.

While many of us desire to have an overflowing berry patch, it just isn’t going to happen without sufficient land. But, that doesn’t mean we should miss out on one of the best fruits of the summer season!
You could, however, save some time – and effort – and skip merrily away from the market with 2 pounds of ripe raspberries (picked generously by somebody else).
Where there is a will, there is always a way.
Benefits of small-batch canning
When it comes to doing something with your handpicked raspberries, outside of quickly freezing them for later, canning a couple jars’ worth at a time is the way to go.
In the case of making syrup, you will find out that raspberries are not as juicy as you expect, and a couple of pounds only goes so far. To say that raspberry syrup is concentrated, is an understatement.
Sometimes you have to work with what you have, or what you harvested. If you only have a small amount of raspberries, making syrup (or delicious raspberry jam) is still possible. It is fragrant and flavorful, and a must-add to your growing list of canning recipes this summer.
Grab your bowlful of raspberries and experiment with small batch canning, for it certainly has its advantages:
- experiment with different flavors, spices, sweeteners
- test out new combinations of fruits
- great for beginner canners who are intimidated by canning 10+ jars at once
- takes relatively little time
- allows you to easily preserve food for smaller households and use up smaller harvests (as is typically the case with berries)
If that sounds like your style of canning, then you are going to love how uncomplicated this homemade raspberry syrup is to make.
Ingredients for homemade raspberry syrup
Let’s keep life as simple as possible.
Homemade raspberry syrup takes just two ingredients:
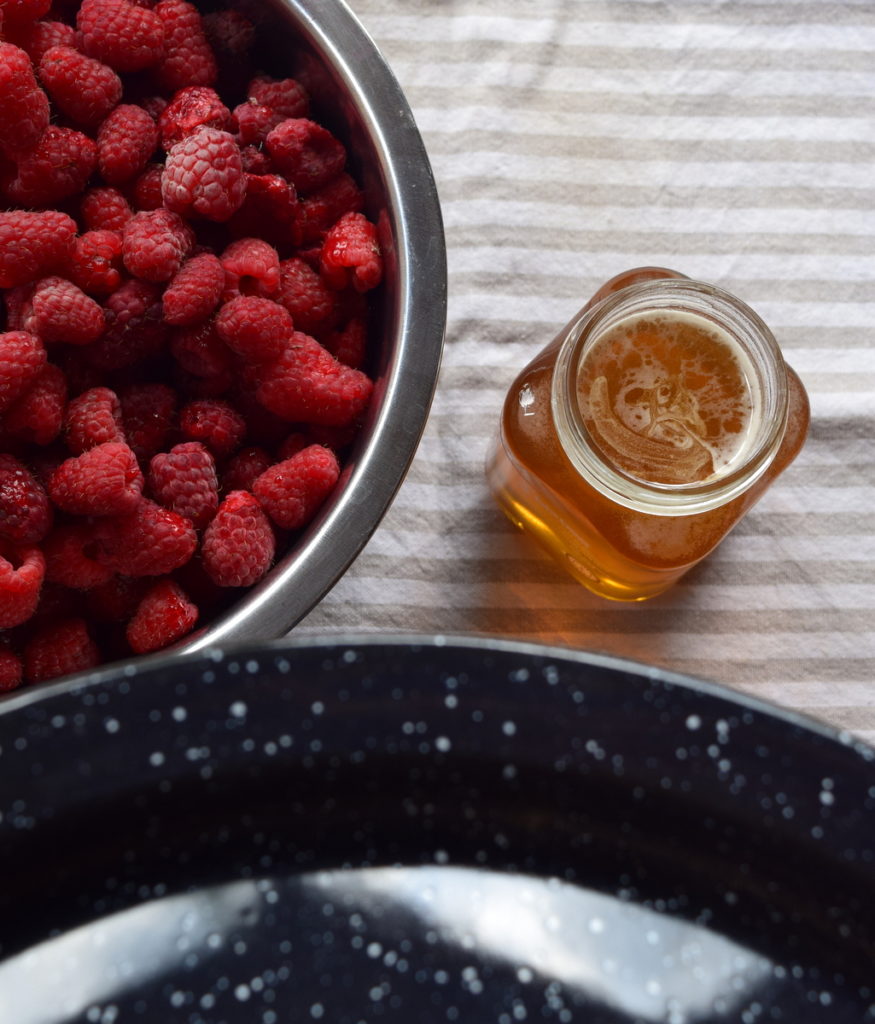
- 2 pounds raspberries
- 1-2 cups of honey to taste, or the same amount of sugar
Plus water. About 4 cups should be enough.
Time: less than an hour.
To make the raspberry syrup, you will also need a fine strainer and two pots. One for cooking the crushed raspberries in, the other for bringing the raspberry juice to a boil.
Step 1: Washing the raspberries
Gently wash the raspberries with cool water, making sure to remove any leaves and/or bugs. Strain and add to your cooking pot.
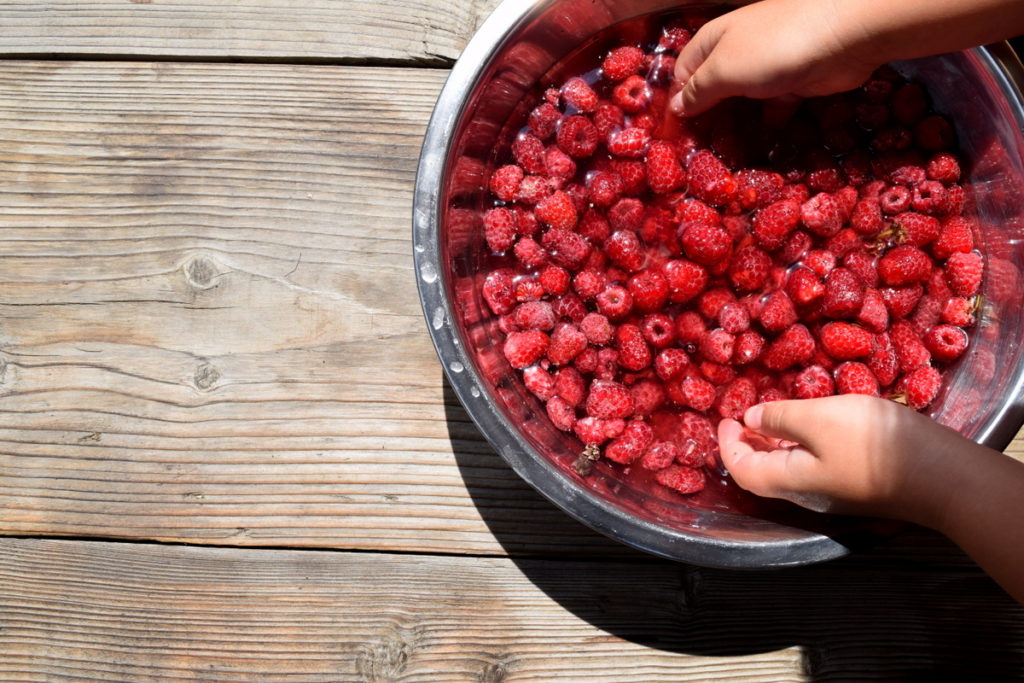
It is best to harvest them the same day as you intend to preserve them, as raspberries are highly perishable. They will not ripen after being picked – they will not allow you to hesitate! Just another reason they are suitable for small-batch canning.
Step 2: Mashing the raspberries
You can do this, either by hand or potato masher. Just ask your canning apprentice which is more fun.
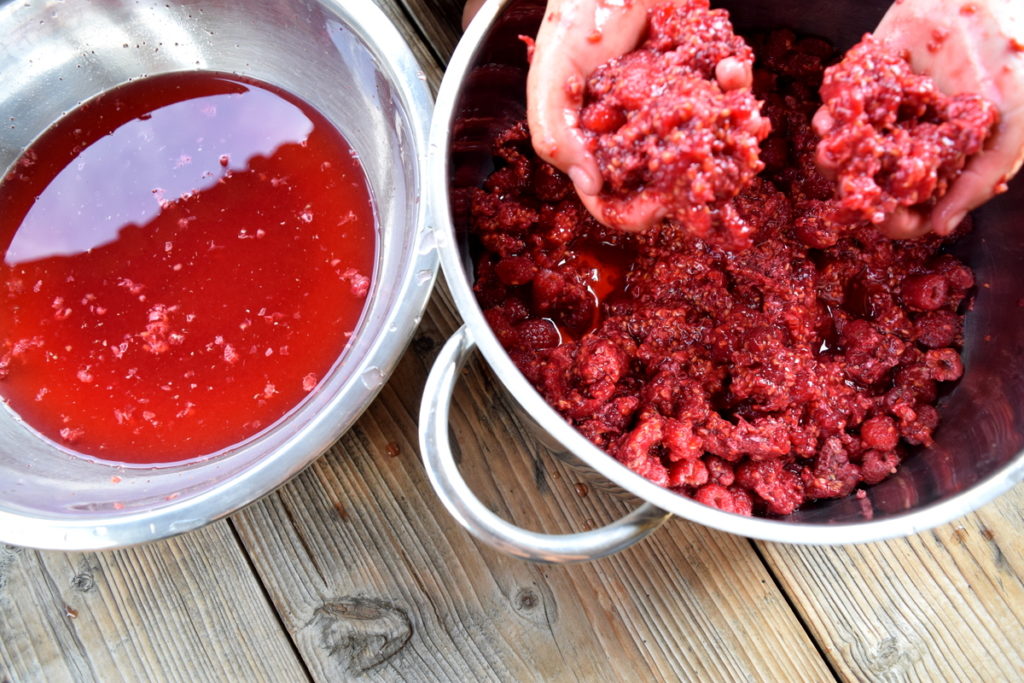
Step 3: Bring the raspberries to a boil
With the mashing done, bring the pot of raspberries and water to a boil. Reduce the heat to a simmer and let the berries cook for 20-25 minutes to bring out their color and intense flavor.
Step 4: Separate liquid from solids
After boiling, you will want to separate the juice from the solids by using a fine-mesh strainer. Careful, it can be extremely hot!
Using a ladle over a second cooking pot allows you to transfer the raspberry juice safely and efficiently.
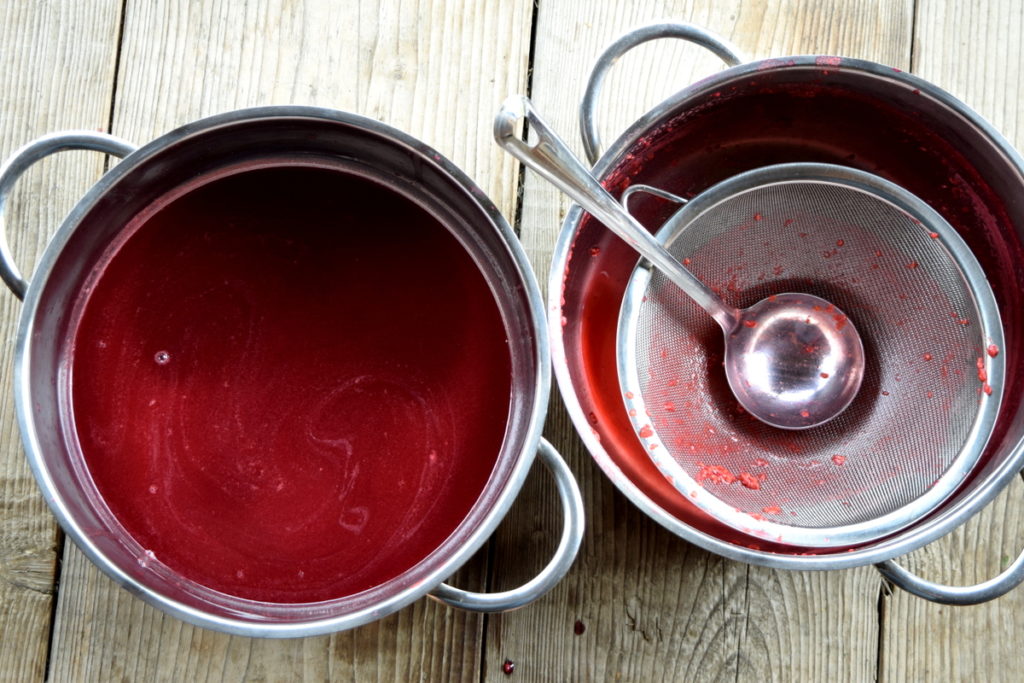
Many recipes will tell you to now discard the solids. What? Wait! That is not a zero-waste approach to eating.
Save that pulp in the fridge, or freezer, and add to smoothies and cakes. Dehydrate it or feed it to your farm animals. Do not throw it away, it is perfectly edible, if not a little bit seedy, but that is what we expect from berry jams, right?
Step 5: Add honey – or other sweetener
Bring the raspberry juice back to the heat, then stir in your honey, or other sweetener of choice.
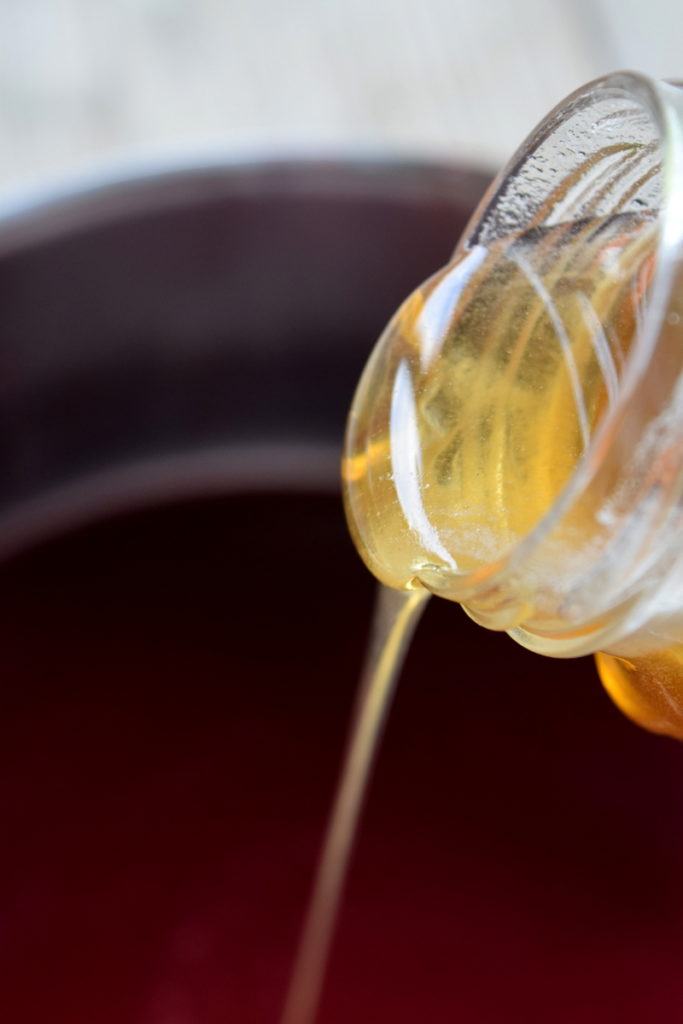
Cook for 5 minutes longer, making sure to skim any foam that arises.
We greatly appreciate the acidity of raspberries and find that less is more when adding sweetness to the syrup. It is a personal decision, however, that is best left up to you.
If you are making a small batch, don’t forget to take notes and write down how much you use, so you can make it again next year.
Step 6: Put into jars
You will have already sterilized your jars by now, and are ready to pour the raspberry syrup into them.
Remove the pot of syrup from the stove. Using either a ladle and funnel, or a steady hand to pour directly from the pot, fill each jar (leaving sufficient headspace). Make sure to remove foam before putting on the lids.
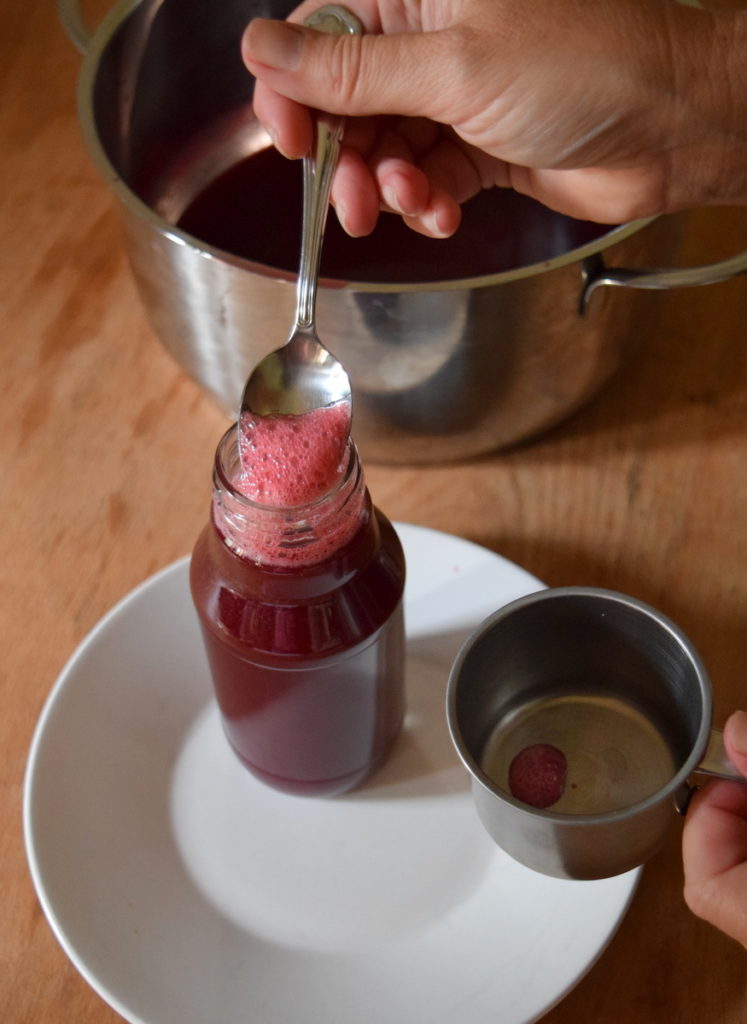
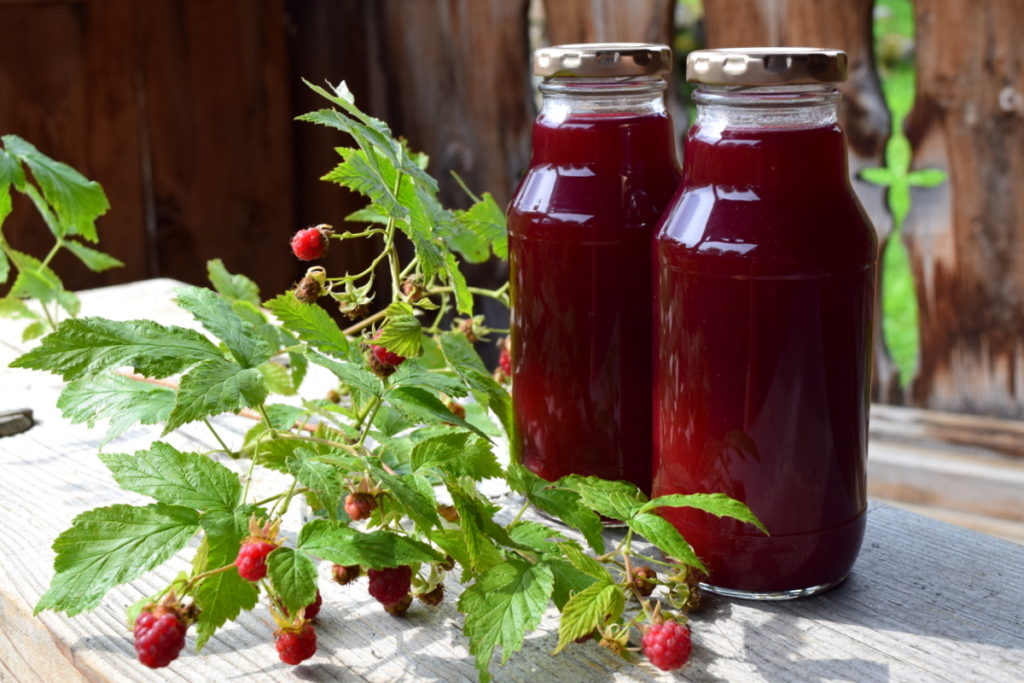
Allow the jars of raspberry syrup to cool completely before storing in the fridge. There they will last several weeks to a few months.
Additional notes on making raspberry syrup
If you prefer a thicker syrup, or wish to preserve it for longer, you may want to add more sweetener or boil it down for longer. Find more details from the National Center for Home Food Preservation on preserving berry syrup.
It has been said that raspberry syrup becomes cloudy if you press down on the mashed fruit. Again, this is up to your preference. If you are seeking a store-bought appearance, you may just lose out on flavor.
So, if you are all in favor of preserving all of the fruit you can, go and press away! It will still look wonderful in your cocktails.
Which brings us to the question – how are you going to use up your raspberry syrup?
Use it to flavor teas and milkshakes, add a splash to your cocktails, drizzle some over your ice cream or pancakes, add it to a vinaigrette. The possibilities are nearly endless.
One more thing to consider, is that raspberry leaf tea is wonderfully beneficial for your body.
While you are out foraging, earlier in the season, rather than later, go ahead and dry some raspberry leaves and stems for winter use.
Enjoy all parts of the humble raspberry, responsibly.
Simple Raspberry Syrup with Honey
This raspberry syrup made with honey rather than sugar is intense and rich. It can be used to flavor teas, milkshakes, add a splash to cocktails, drizzle over ice cream or pancakes. The possibilities are endless.
Ingredients
- 2 pounds raspberries
- 1-2 cups honey to taste
Instructions
- Gently wash the raspberries with cool water, making sure to remove any leaves and/or bugs. Strain and add to your cooking pot.
- Mash the raspberries.
- Bring the pot of raspberries and water to a boil. Reduce the heat to a simmer and let the berries cook for 20-25 minutes to bring out their color and intense flavor.
- After boiling, you will want to separate the juice from the solids by using a fine-mesh strainer.
- Bring the raspberry juice back to the heat, then stir in your honey, or other sweetener of choice. Cook for 5 minutes longer, making sure to skim any foam that arises.
- Remove the pot of syrup from the stove. Using either a ladle and funnel, or a steady hand to pour directly from the pot, fill each sterilized jar (leaving sufficient headspace). Make sure to remove foam before putting on the lids.
- Allow the jars of raspberry syrup to cool completely before storing in the fridge.

Get the famous Rural Sprout newsletter delivered to your inbox.
Join the 50,000+ gardeners who get timely gardening tutorials, tips and tasks delivered direct to their inbox.