


The knowledge and ability to harvest elderflowers and elderberries for both food and medicine, will take you far on your journey to a self-reliant life.
Naturally, you may be able to purchase small elder bushes from a local tree nursery, or buy propagation material online, though it is quite simple, and extremely rewarding, to propagate elderberry cuttings on your own.
All you have to do is find out where the closest elder bushes grow, snip a branch, or ten, and tend to them with healthy soil and water.
While it is one thing to go out and forage for elderberries and flowers, just think how much better-prettier-more convenient it would be if you had an elderberry bush growing in your own backyard?!
Anyone and everyone can learn to propagate elder from cuttings.
Most importantly, don’t overcomplicate the process. It doesn’t take a course to understand the basics of taking cuttings. Often the courage and curiosity to try (and to learn a new skill) is enough to be successful.
Benefits of elderberry
Most likely you’ve already heard of the many benefits of elderberry and why it is considered an essential natural treatment during the winter months. But did you know that it is so easy to propagate elderberry at home? So that you can harvest the very best for your own well-being right from the comfort of your own backyard?
If you have been searching for more edible perennials to add to your landscape, this is one not to miss.
Sambucus nigra, and Sambucus canadenis, are natural immune system boosters that bring vitality and joy to those who know and use them wisely. It has long been recognized as a cold and flu remedy, though it is reported to help those suffering from hay fever and sinus infections too.
Every year, we gather just as much as we need of both flowers and berries, plus a little extra, as the quality and amount of harvests varies from season to season.
While the flowers, tinctures and processed syrups can all be bought online, if you don’t have elderberries growing near you, collecting your own elderberries gives you the opportunity to process them and use them exactly how you wish.
Foraging for elderberries
Foraging not only helps increase your knowledge of the land around you, it is also a healthy, active, practical and such a meaningful way to spend more time in nature. That gives your immune system a great boost, even before making berry syrup and elderflower cordial!
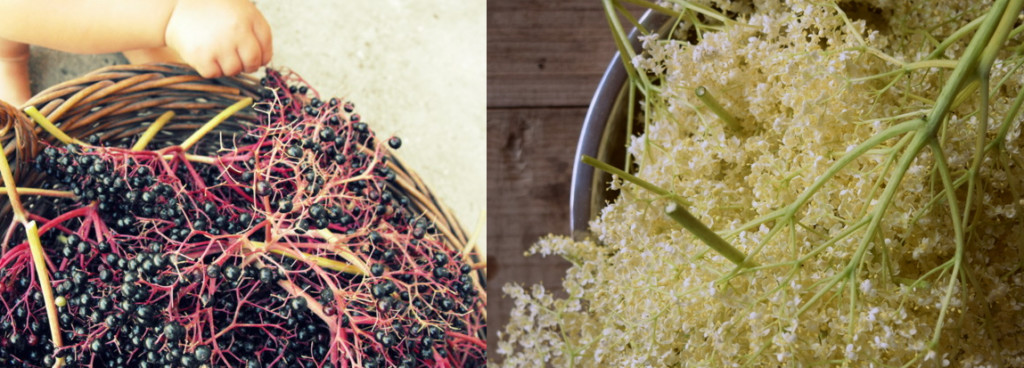
If you’ve ever been out collecting elderflowers, you’ll recognize their delicious aroma from far away. Take only what you need and leave the rest for bees and insects.
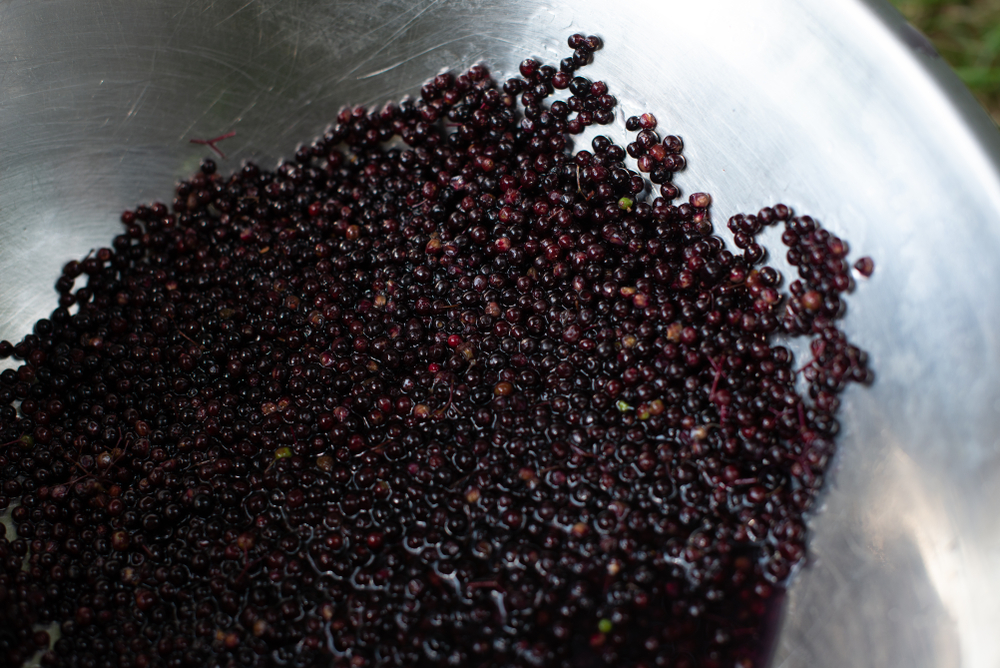
Once the berries ripen in late July through early September, you can harvest them for syrups and tinctures. You can also use them in jams (it will be tart!) and in baking. Just make sure to cook elderberries first, as unripe or raw elderberries can cause nausea, vomiting and diarrhea.
Elderberry syrup
Most people want to grow their own elderberries for the sole purpose of making an immune-boosting elderberry syrup.
It all starts with 1 pound of fresh or frozen elderberries, or 1/2 pound dried ones. For this you will need to harvest from a few elder bushes. Keep this number in mind when deciding just how many cuttings you want to take. Then double that number, because not all cuttings will take root.
Elderflower tea and cordial
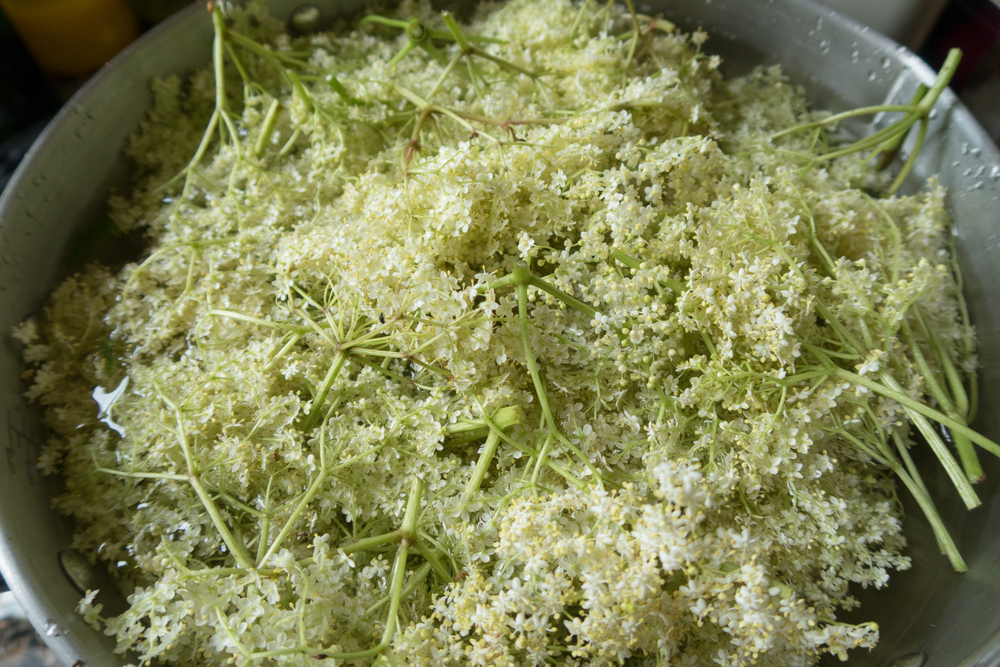
Before the berries, come the fragrant yellow flowers, full of powdery pollen.
Truth be told, they are treasured in our herbal tea blends and are particularly lovely when combined with raspberry stem, plantain or horsetail.
The flowers can easily be dried indoors or out, in an area out of the sun. Use a clean, wire clothes rack to hang the whole blossoms on and let them dry out slowly.
In May, the fresh flowers can also be slightly fermented and made into a refreshing elderflower cordial.
It is worth noting, as is the case with rhubarb, the leaves of elderberry are considered poisonous. The same rings true for the bark and branches. Only the berries and the flowers of the elderberry are edible.
Taking elderberry cuttings: a step-by-step process
Elderberry bushes can be propagated by both softwood and hardwood cuttings. The latter is beneficial if you have taken cuttings in late fall or early winter.
Softwood cuttings are what we will be discussing now, right as the elders are coming out of dormancy in the northern hemisphere.
Step 1: Identify the best elderberry bush
The best time to identify an elderberry bush, is when it is either flowering or draped with small purplish-black berries. An experienced forager knows that it pays to keep your eyes open throughout the year for material you may want to harvest later.
If you missed that summer window of opportunity, there are plenty of winter and spring clues that will show you exactly what you are looking at.

Examine the overall bush
Look at the shape and the height of an elderberry bush in question. Most elderberry bushes grow 5 to 12 feet with canes that grow upright in the center and curve out on the edges.
They also tend to grow wide – often 6 to 12 feet across.
Observe the bark and branching structure
The trunk and bark of the elderberry is fairly smooth, with young shoots and branches having a gray-brownish colored bark.
Older branches are a similar color, only more rough with shallow fissures.
Leaves will emerge in opposite pairs, giving you a great clue as to being on the right elderberry identification track.
Once you have learned to recognize it in all seasons, you’ll never forget it.
Another way to identify an elder bush is when you cut into the larger branches. You will find a spongy pith inside that can be hollowed out to make an elderberry whistle.
Step 2: Cut and gather your elderberry cuttings
Once you have identified the perfect elderberry specimen(s) to take cuttings from, get your pruners ready and learn where to cut the branches.
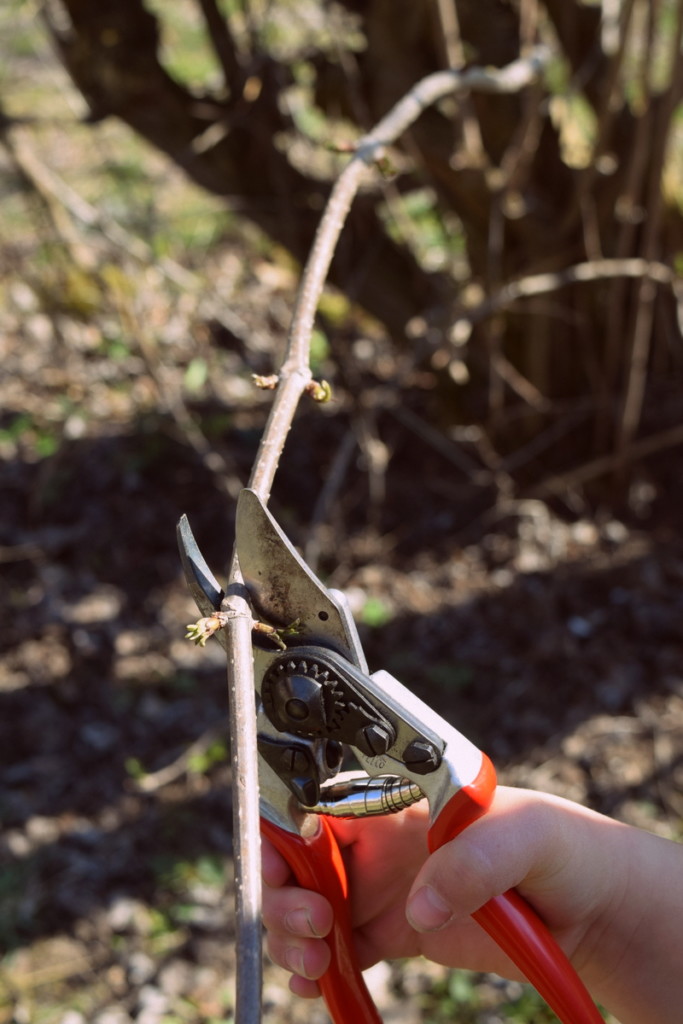
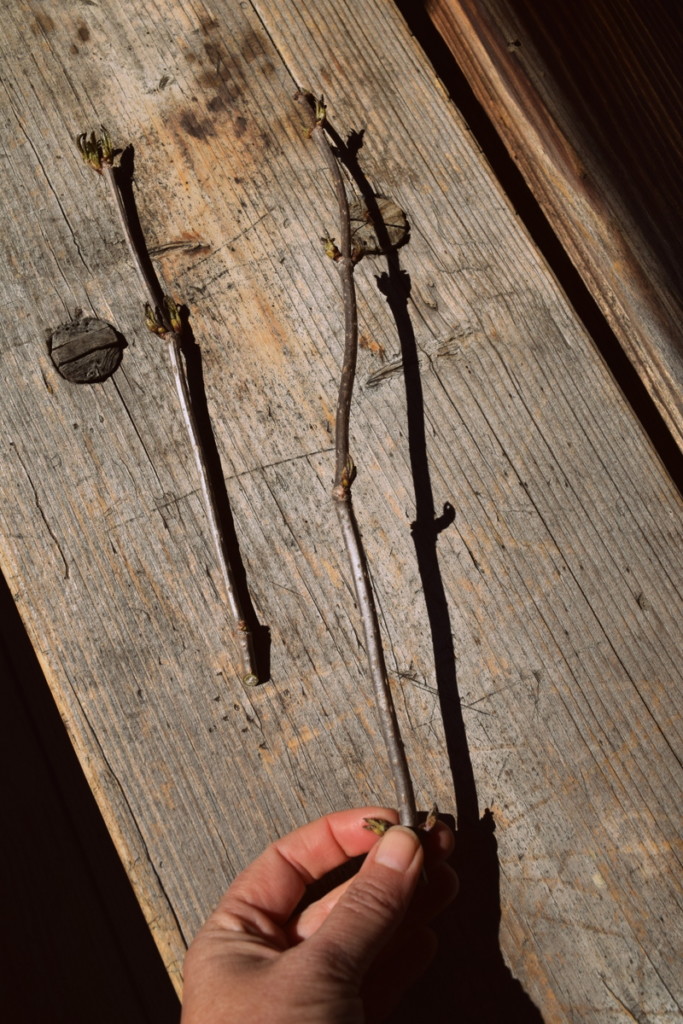
From one branch you can take several cuttings, always making sure to include at least 4 buds. They should also be 6-10″ long, depending on the branches you collect.
If the buds are just beginning to open, it will be obvious what direction should be up. In any case, it is a good procedure to make a slanted cut on the bottom end and a flat cut on the top to prevent any confusion. This will also make it easier to push into the soil.
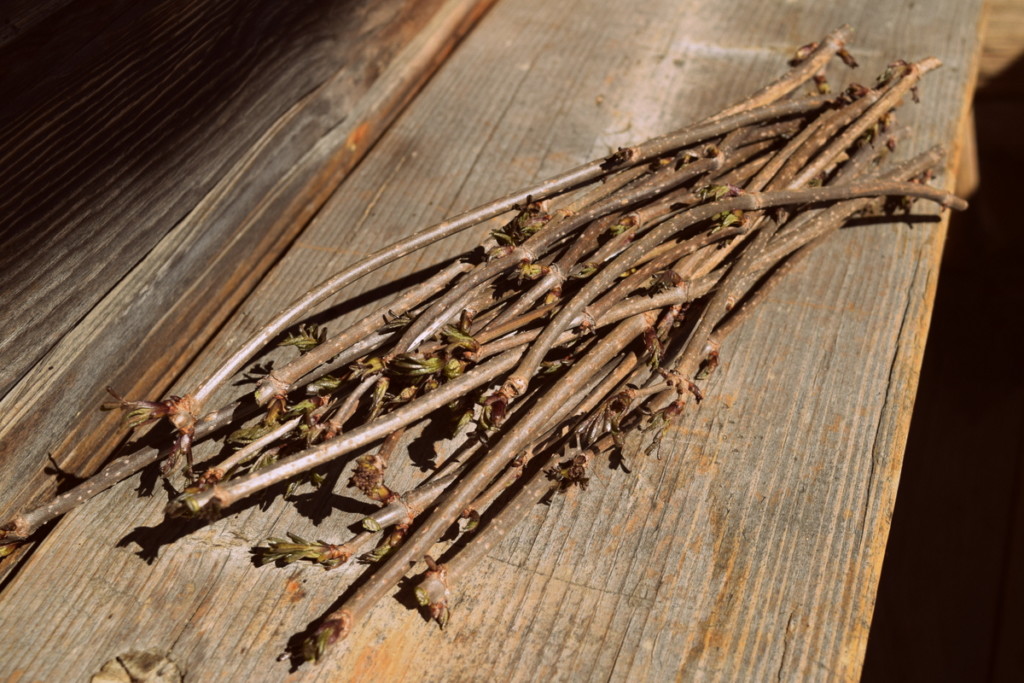
Now that you have a bundle of cuttings (make more than you think you need – you can always give away or sell the rest), go through them once again and pull off the bottom two leaf buds by hand.
Be sure to leave the top sets of leaves!
Before potting up or planting directly in the soil, you will want to soak them for 24 hours first.
Making a willow tea as a rooting hormone
One additional step you can take, is to use a rooting hormone. It can be helpful, though is not always necessary to use with an easier-to-root plant like elderberries.
However, if you have a bunch of willow growing near you, why not try it?
Any species of willow will do, there is no need to overthink this step either. Chop up the youngest growth into 1-2″ size pieces and soak them in water for 24-48 hours as they sit in the sun.
Remove the woody material and your homemade plant rooting hormone is ready. You can use it on roses too!
Let your elderberry cuttings sit in this willow tea for 4-6 hours before planting, then place the cuttings into your growing medium.
Step 3: Choose a growing medium
Depending on resources at hand, you have two options for starting elderberry cuttings: water or soil.
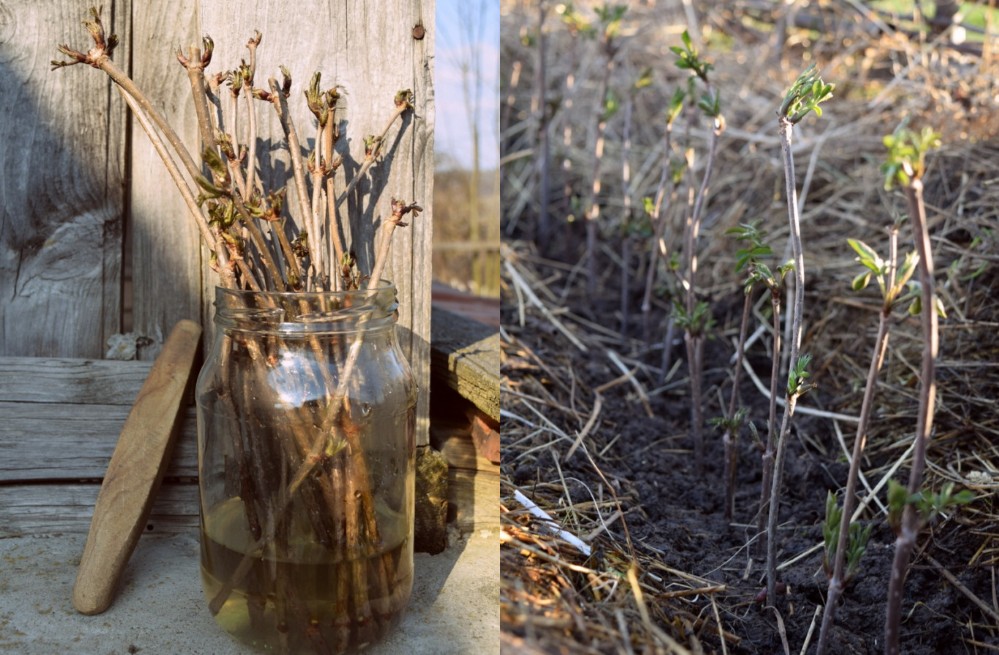
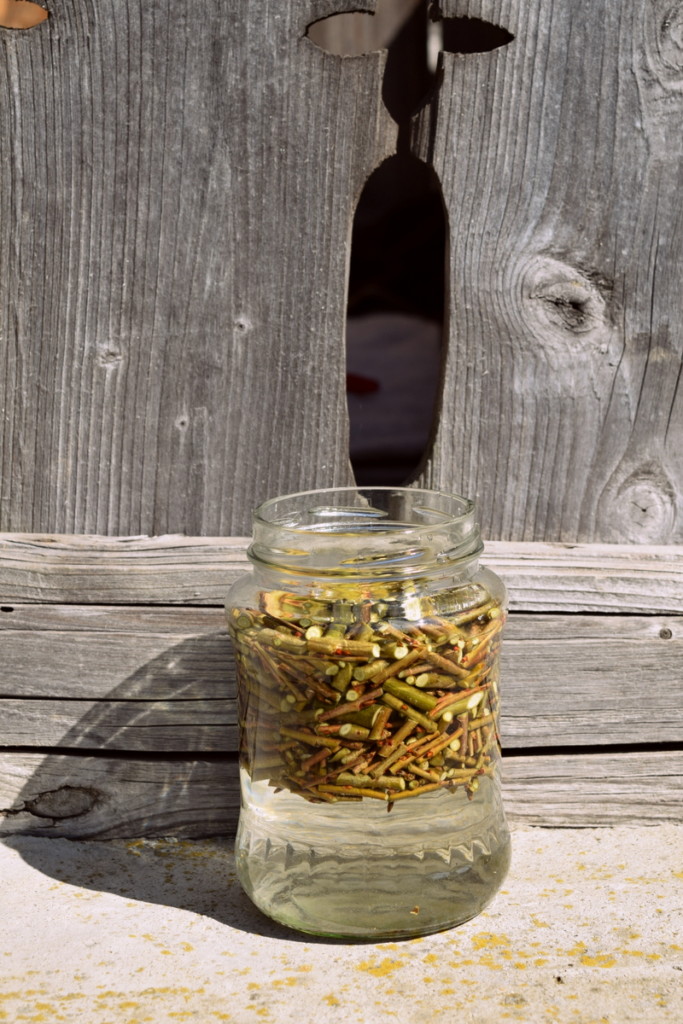
Water method
One advantage of rooting cuttings in a jar, is that it is a real space saver if you don’t have extra room for nursery-type growing in your yard. Plus you can watch the progress week by week.
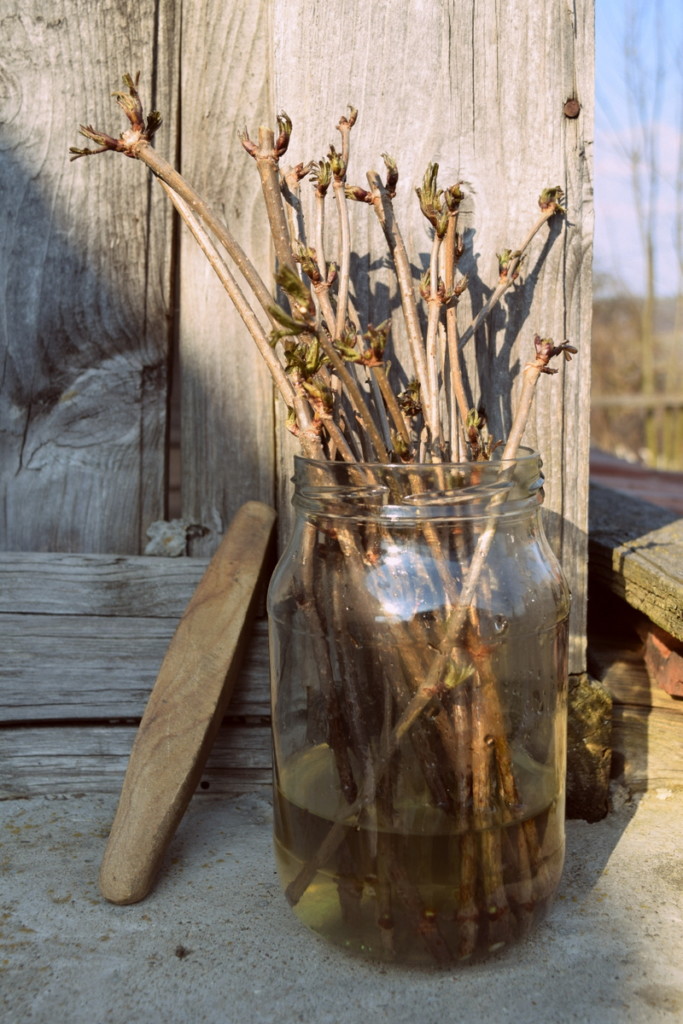
Place the elderberry cuttings, cut side down in a jar, covering them with 2-3″ of clean water. Optional, though not required, is to add one cup of willow tea to the water in the first week.
Set the jar of cuttings in a safe, mostly sunny place for 6-8 weeks, changing the water weekly. Be sure to spray or mist the cuttings every few days.
Be sure that roots are well formed before transplanting in your garden.
Soil method
Plant your elderberry cuttings in a greenhouse or directly in the ground, both ways work equally well.
In pots
If you don’t yet have the garden space or land to dedicate to cuttings, you can root them in pots as most tree nurseries do. The advantage here is that you can keep the soil relatively moist as needed, and they take up only as much space as you allow them to have.
It is also easy to monitor those that have survived and those that will not make it.
Be sure to push your cuttings into a pre-dampened soil mix, with 2-3″ in the soil. They should be kept in a cool, not cold, place to encourage root formation. Avoid direct sunlight, if at all possible, which will encourage more top growth.
A cool basement or semi-dark cellar may also provide a good temporary storage solution for your potted cuttings.
Directly in the ground
With access to land (or garden space) in your favor, find a well-sheltered fence line that provides both shade and protection from the wind.
Loosen up the well-draining soil and stick the elderberry cuttings in the ground a few inches apart, pointy side down.
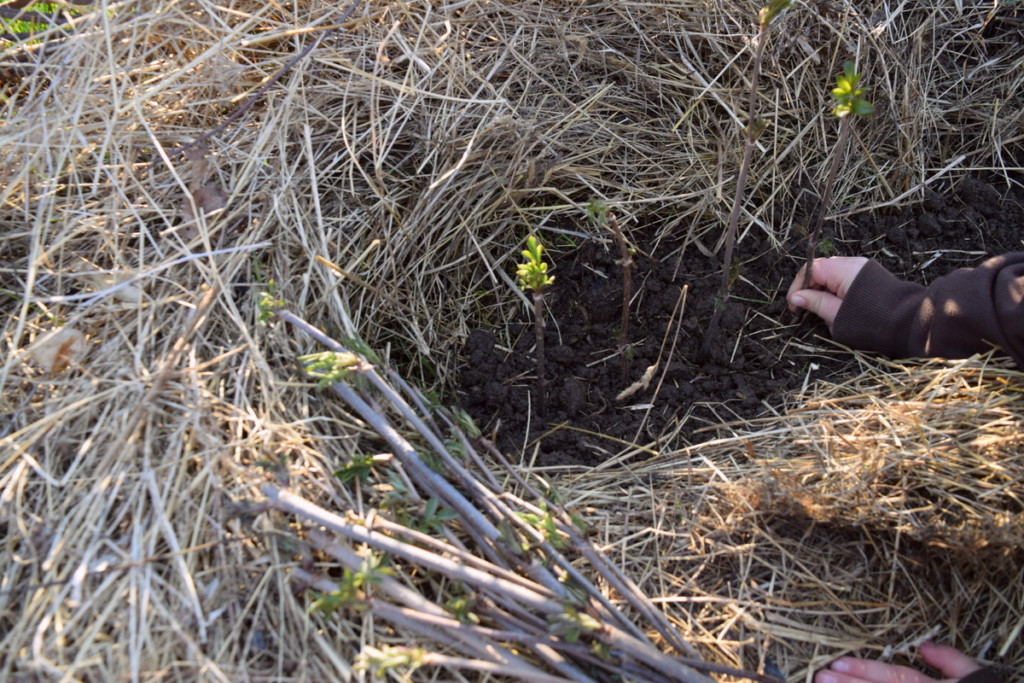
As with potted cuttings, keep the soil moist, but not soggy and mist every few days.
Step 4: Wait
New roots will form on the lowest leaf nodes that are in water, or in soil. With this rooting success you will have an exact clone of the parent plant.
It will take anywhere from 6 to 12 weeks for your elderberry cuttings to start pushing out significant amounts of roots. In the meantime, they will also send out new shoots.
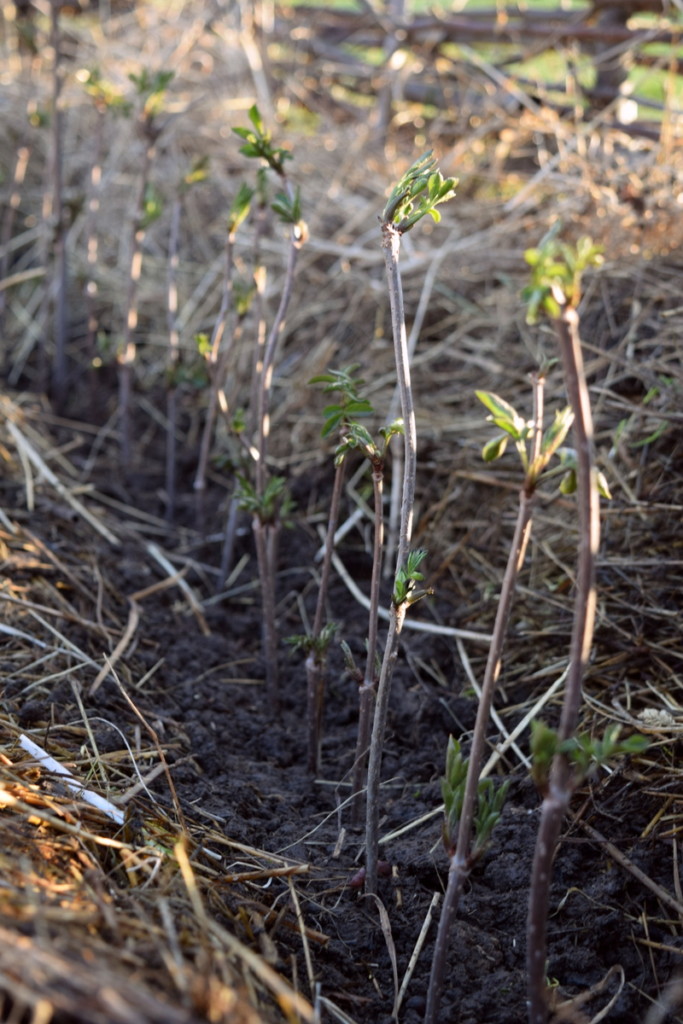
Elderberry cuttings grown in water will have weaker roots than those direct planted in the soil, or those grown in pots. Keep that in mind when transplanting them out after a few months.
And wait longer…
Tempting as it is to pick the first flowers for tea or fritters, go ahead and do it! This will stimulate the underground growth, letting the elderberry extend its roots in the first year without interruption.
This also means that the cuttings should be left in the ground for one year before transplanting, unless you have strategically planted the cuttings in the ground right where you wanted them all along.
Propagate elderberries not only for your benefit, but for the well-being of wildlife and insects too.
Recommended Book: American Horticultural Society Plant Propagation: The Fully Illustrated Plant-by-Plant Manual of Practical Techniques
Read Next:

Get the famous Rural Sprout newsletter delivered to your inbox.
Join the 50,000+ gardeners who get timely gardening tutorials, tips and tasks delivered direct to their inbox.