


Many years ago, when I first discovered that a surefire way to get free houseplants was to bring some in from the garden, you would have thought I’d hit the jackpot.
When you’re a plant-obsessed student on a half-a-shoestring budget, it does feel like winning the lottery when well-meaning family members give you plants from their garden.
Even now, after more than a decade of enjoying gardening, I feel giddy when I successfully turn garden plants into indoor plants. Some of them stay indoors just for half a year, from fall until spring, and we overwinter together. Others I keep indoors all year long. It’s often a combination of the two, sometimes with the same type of plant.
If you want some bonus plants, too, here’s a short list of plants I’ve turned from garden plants to houseplants without too much of a hassle.
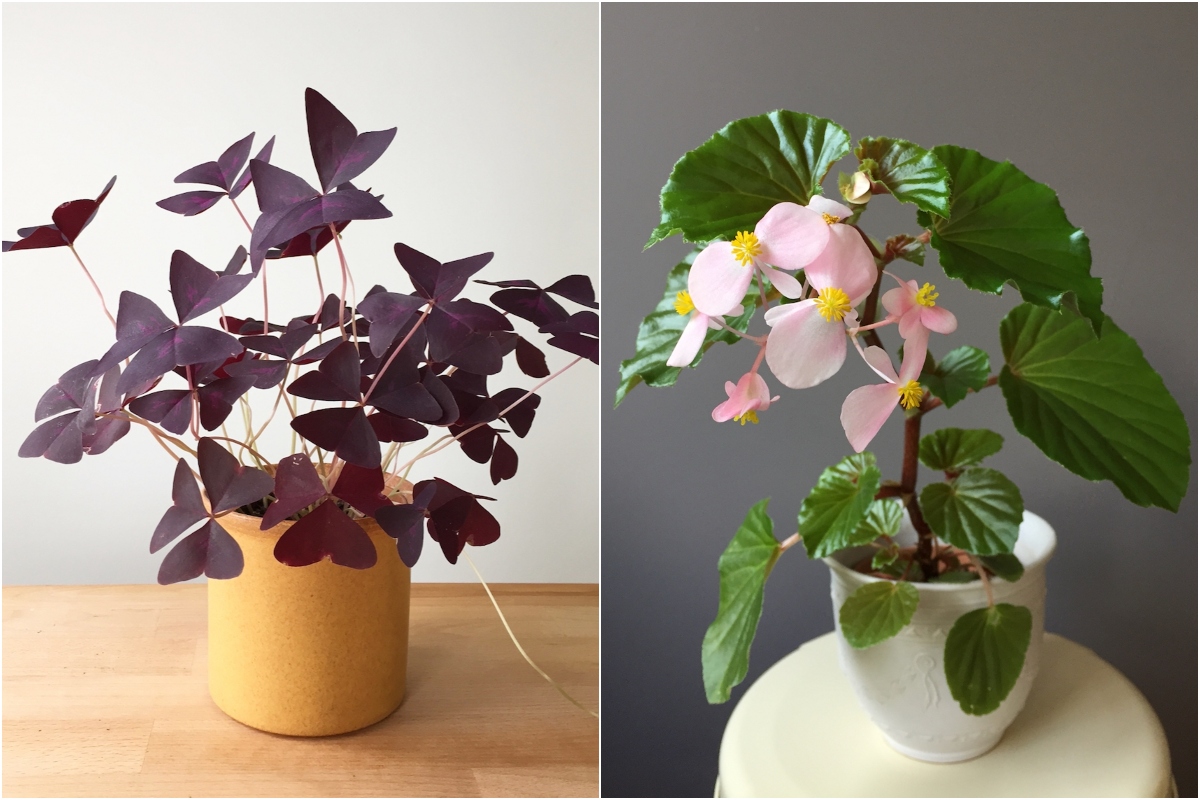
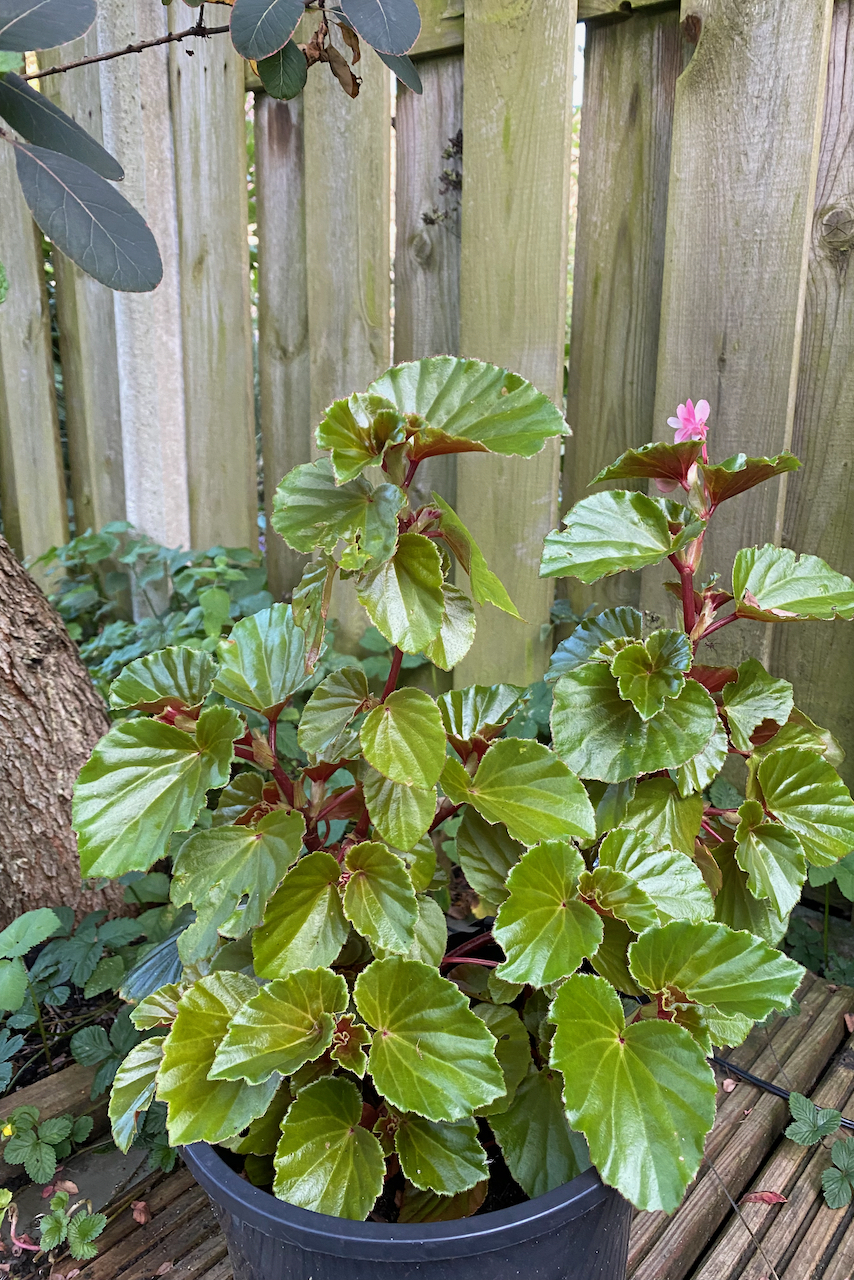
1. Begonia
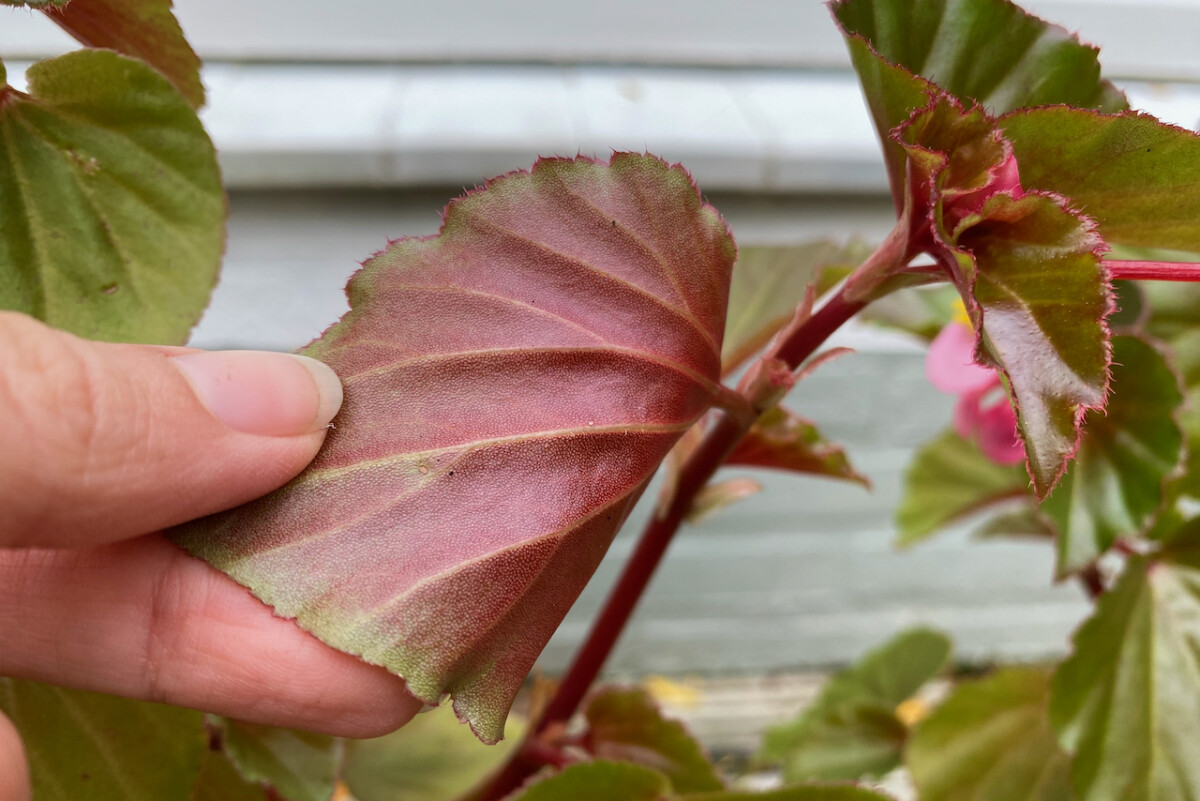
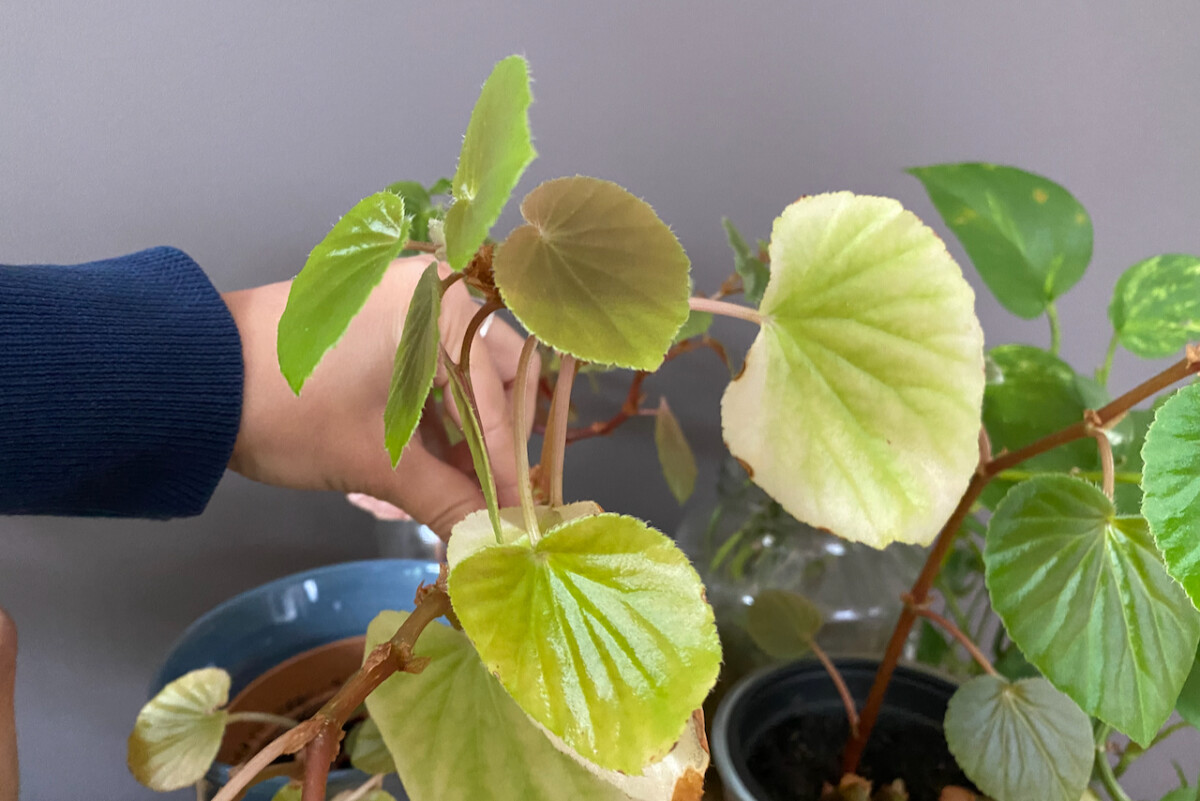
I have to start with begonias because they have been, by far, my most successful indoor-outdoor-indoor transition every year. Rhizomatous begonias, wax begonias (also known as Sempterflorens), and rex begonias are the three types that will handle this transition well.
They will certainly live to see another season in the garden.
Whether you’re growing your begonias in containers or in the ground, I highly recommend changing their soil before you take them indoors. You don’t want any hitchhikers coming indoors and moving on to your other plants.
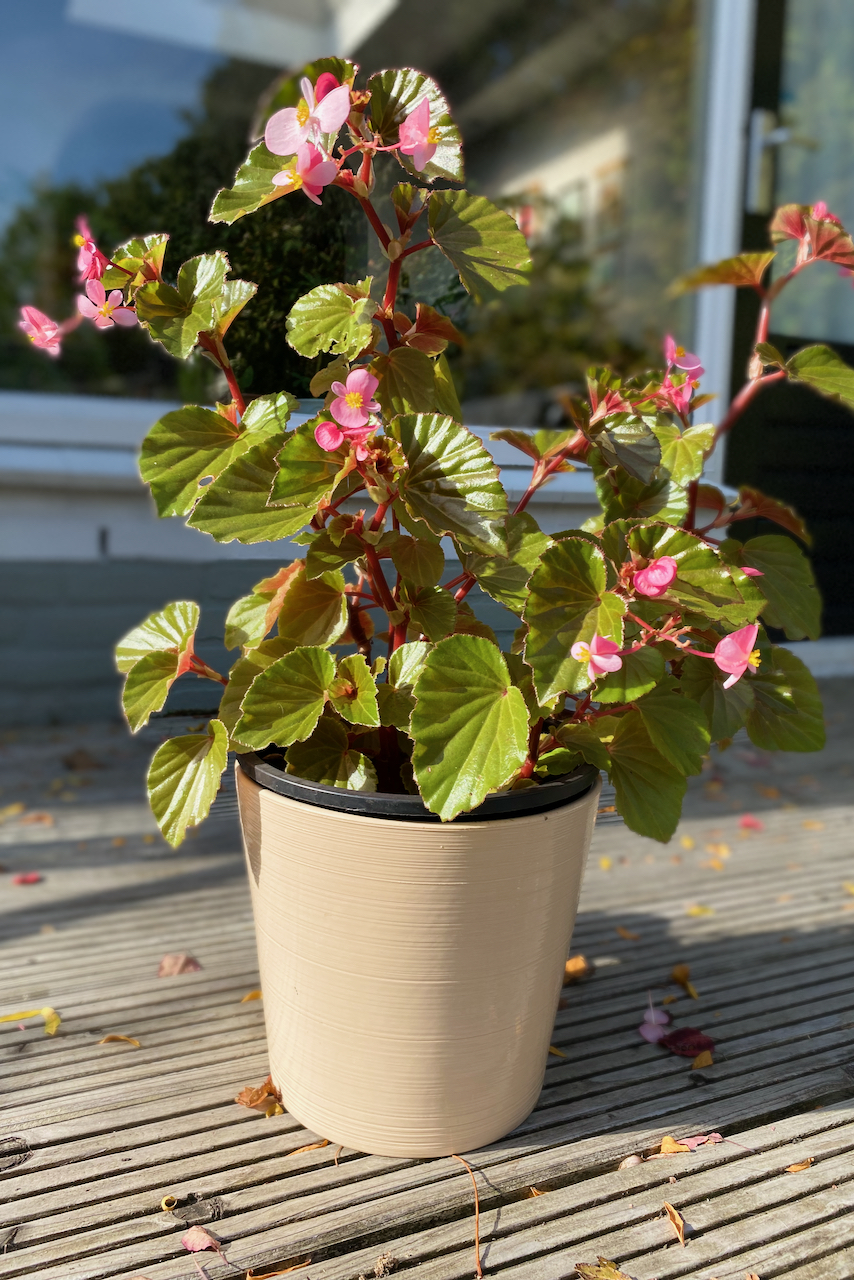
I have to warn you that begonias tend to be a bit finicky indoors. They need humidity which is often in short supply in the winter indoors. They also can’t handle cold drafts. Even though my begonias are happy and thriving in a partly shaded location outside in the garden, they tend to get a bit stretchy indoors in the winter.
So even though they don’t need direct sunlight, they do need plenty of daylight.
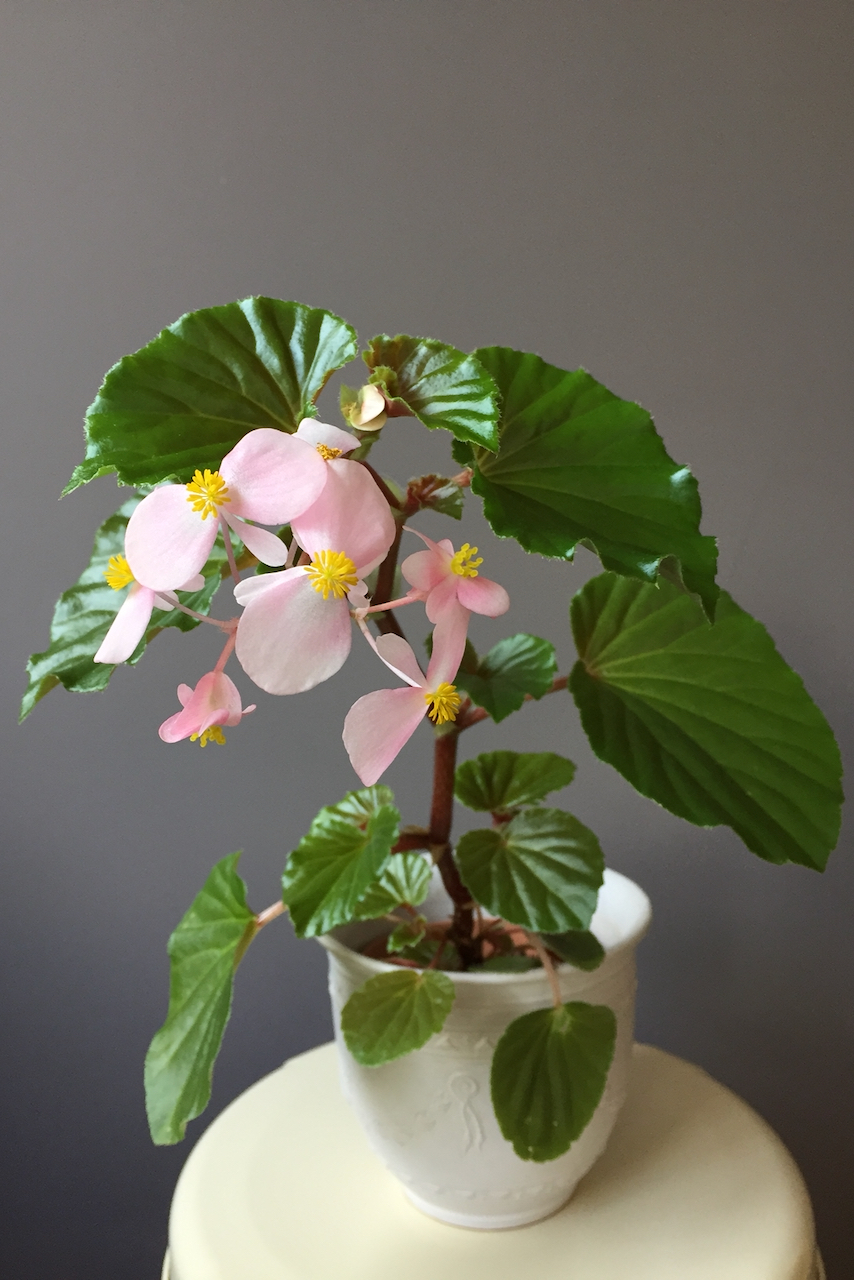
Does that mean that begonias won’t be happy indoors? Not at all. They’ll be thriving inside as long as they have enough humidity, water and bright indirect light. You might even get your begonia to bloom inside in the cold months.
Begonias will bounce back wherever you move them.
Now here’s a piece of good news: even if your begonia might get a little bit frazzled indoors, it will bounce back very quickly when you take it back outdoors.

If you’re nervous about taking your begonia indoors, you can reach a compromise with this garden queen and take just a snippet inside. This will ensure that should you get frost during the cold months, you’ll still have a backup begonia ready to go.
I like to take begonia cuttings early enough in the season – usually in September – and root them in pots outdoors. This gives the cuttings enough time to grow a strong root system in ideal weather before I bring them indoors.
For more begonia care tips, have a look at this article I wrote about this very versatile plant.
2. Coleus (Coleus scutellarioides)
Coleus is another indoor-outdoor favorite of mine. Just like with begonia, you can bring your entire coleus plant indoors when the temperatures dip or just take a cutting to overwinter inside.
Another similarity to begonia is that coleus can tolerate shade outside – and thrives in part shade – but really reacts poorly to lack of light indoors. So if you can find a place where it can reliably get enough bright indirect light indoors, you’re all set. And just like begonia, it will bounce back quickly once you relocate it outdoors.
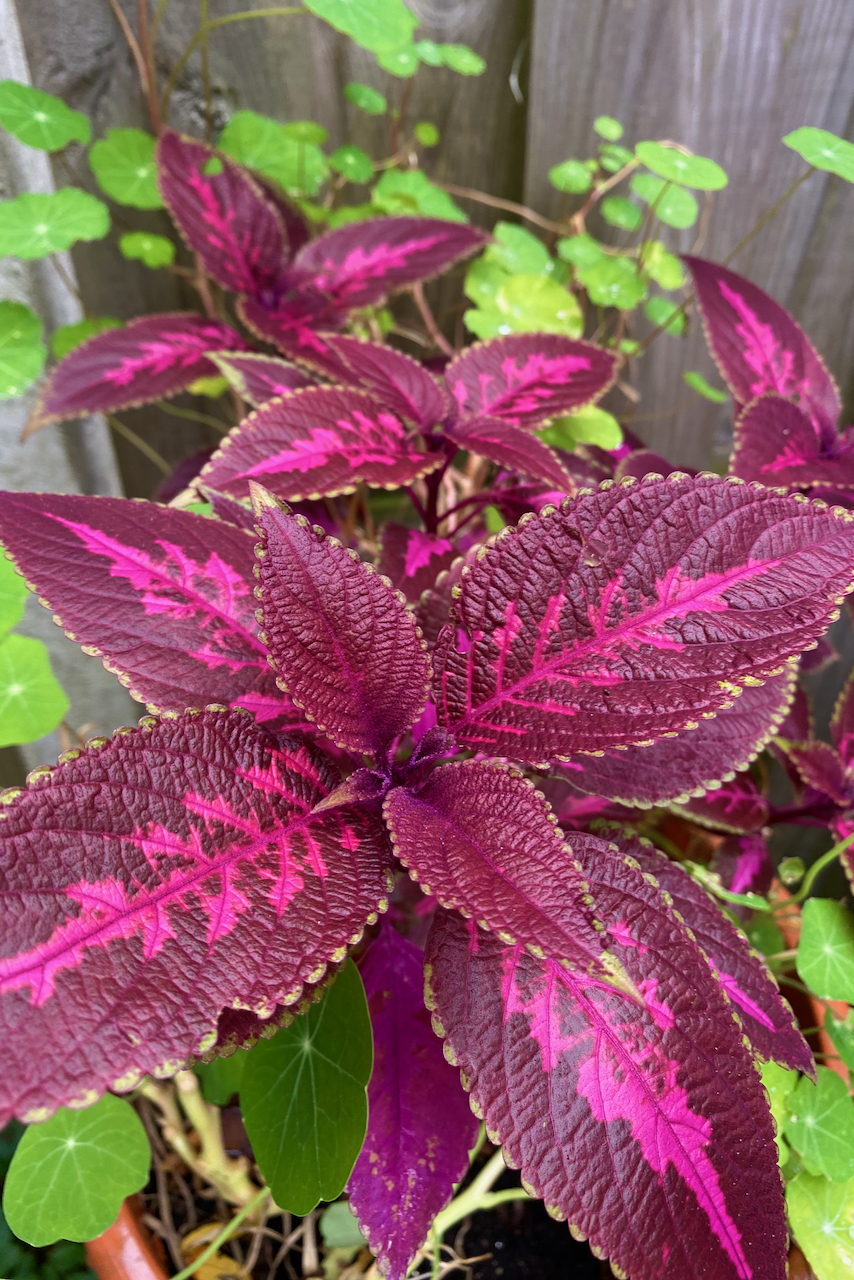
Without a doubt, the main coleus attraction is its mesmerizing colorful foliage. There’s a coleus in every color or shade imaginable in nature, from lime green to bright red to deep burgundy.
But will coleus keep their colorful leaf pattern indoors? Yes and … no?
Here’s what happened to my coleus when I moved it inside, then planted it out in the garden, then moved it inside again.
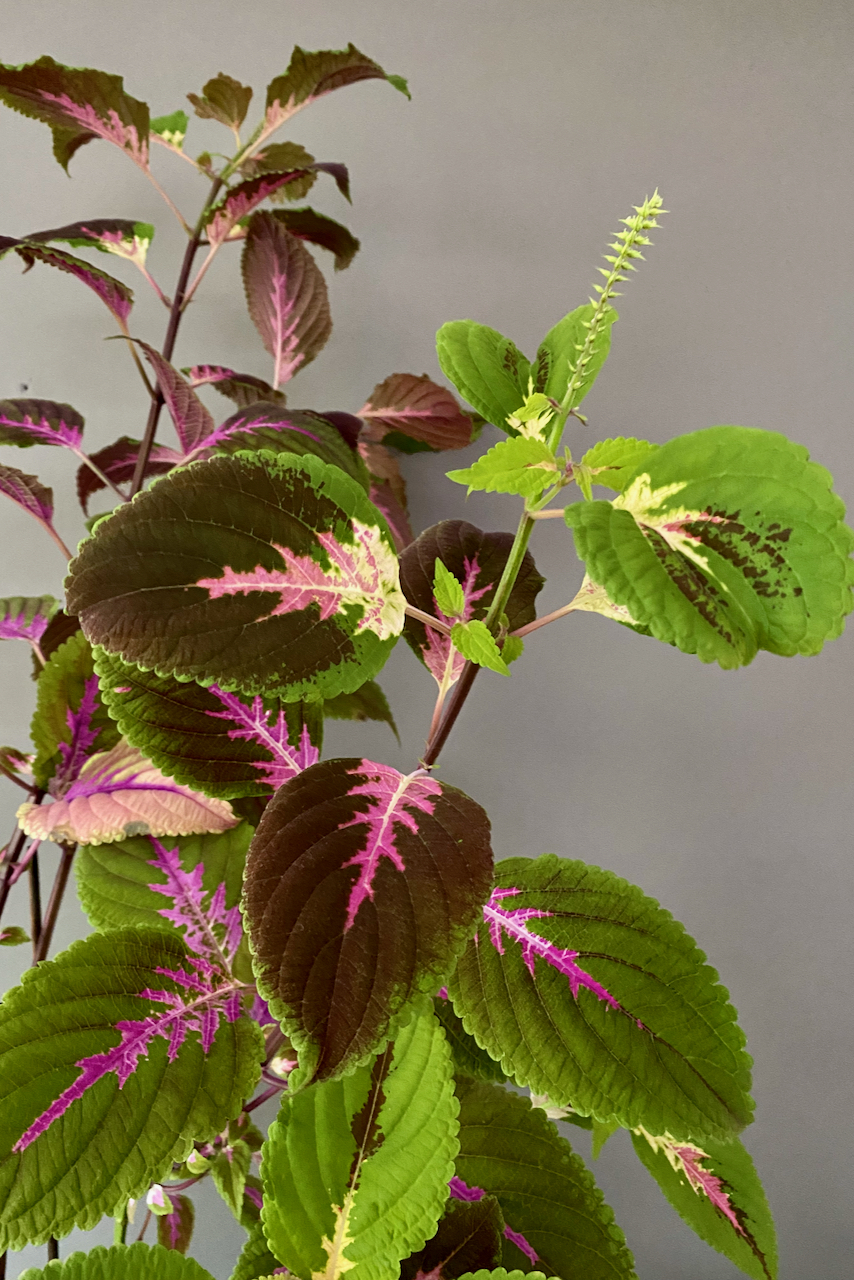
Out in natural light, the colors were deep and intense. In indoor light, especially during the winter, it turned a bit more pale (but still had some splashes of color). When I returned it outdoors, this time in a generously large container, it went back to growing strong, velvety leaves.
One year, I wanted to see what would happen to my coleus if I kept it as a houseplant. I had the pleasant surprise of ending up with this. An enormous houseplant that was in bloom for weeks. Surprisingly, a plant with such stunning foliage doesn’t have equally show-stopping flowers. The coleus flowers are delicately small, baby-blue or purple blooms.
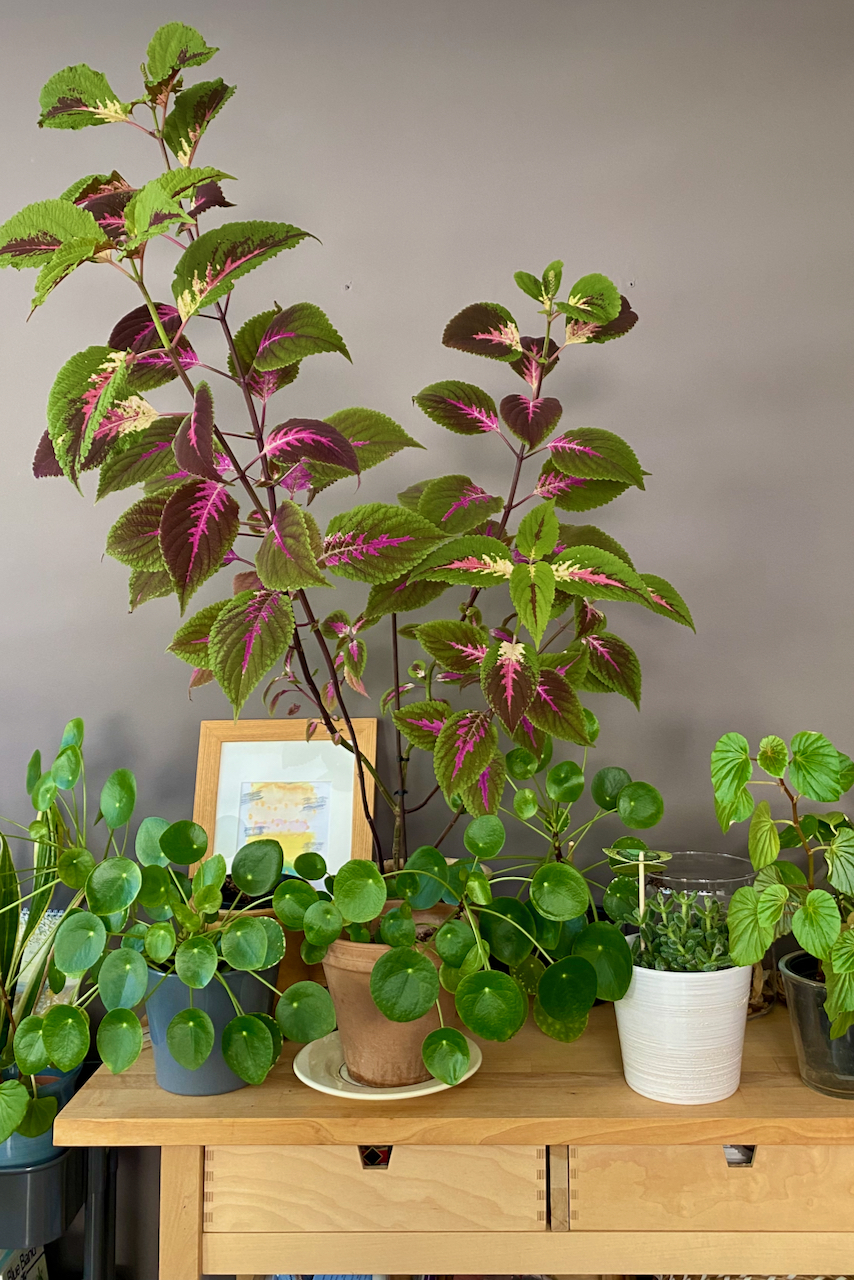
It was getting a bit out of hand and a bit too etiolated (leggy) for my taste, so out into the garden it went the following spring. I could have kept it a bit more compact by simply pruning it where it branched to encourage lateral growth.
3. Oxalis
My story with oxalis happened the other way around. I had been growing it as a houseplant for a good five years before I dared turn it into a garden plant. I carried it from one apartment to another, and it reliably brightened up dark corners or rentals while being the least fussy plant I had. (Yes, that included the pothos.)
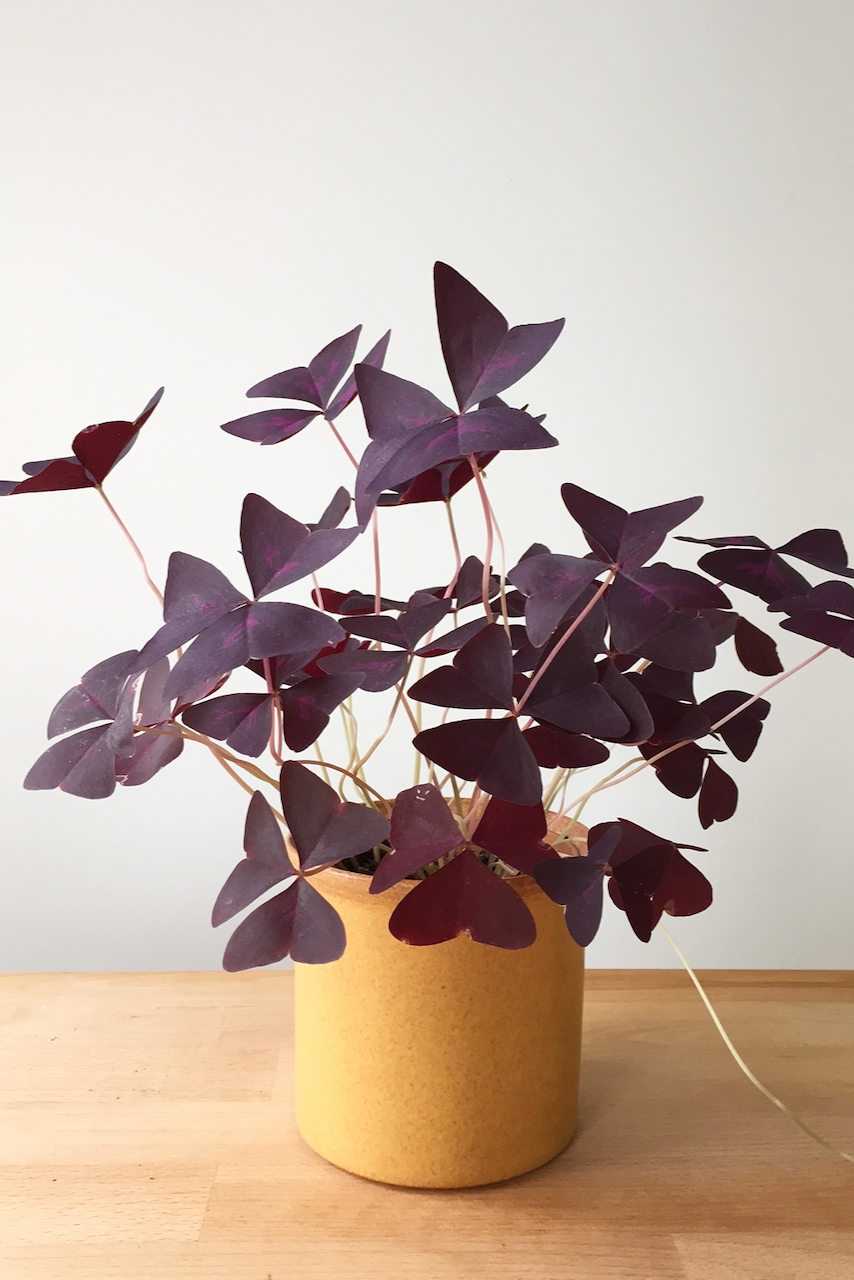
When I once again had my own garden, I moved the oxalis outdoors with nary a trepidation in my heart. My intuition was right. It thrived as an outdoor plant just as much as it did as a houseplant.
Outdoors, oxalis will start dying back when the temperatures reach the low 50s F (around 10-14C). But it’s only the part above ground that dies. Both oxalis grown from rhizomes and those grown from bulbs will just retreat underground and sprout back up in spring. When you’re bringing your oxalis indoors and turning it into a houseplant, you get to skip this part.

Most oxalis will keep the foliage year-long when you keep them indoors, although it may slow down their flowering.
The best way to make sure your oxalis thrives – both indoors and outdoors – is to avoid overwatering it at all costs. You should also upsize its container every year or at least every other year. A happy oxalis is an oxalis that has enough room to split and multiply without any constraints.
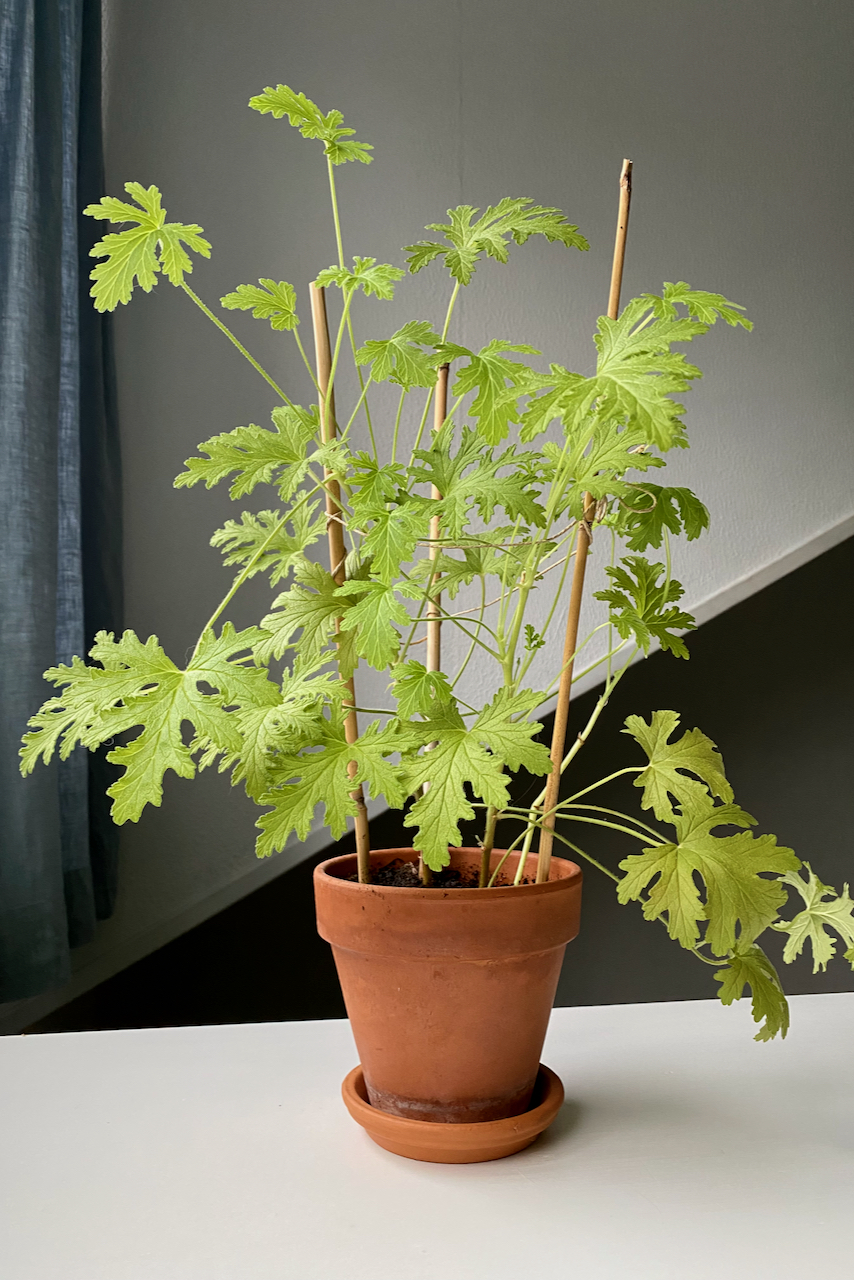
4. Geraniums
Are you surprised that geraniums weren’t number one on my list? Well, I’ve already written an article about overwintering pelargonium geraniums indoors on our sister site, Blooming Backyard. So I feel that shows I’m firmly in the ”geraniums as houseplants” camp.
My favorite type of geranium to grow as a houseplant is the lemony-scented Pelargonium crispum. Pelargonium tomentosum (which smells like mint) is also a good choice. Just slightly brush past them, and the entire room will smell fresh and crisp.
Light is especially important for geraniums. So when you bring them indoors, place them in a south- or east-facing window. This goes well for both geraniums that flower and the ones that we grow for foliage.
I had to move my lemon-scented geranium around a bit before I found a spot that suited it best. Close to the east-facing double window – not right in front of it, but slightly below it, reaching up. It did lose some older leaves as it adapted to a lower level of light than it was getting outside on my deck, but once it stabilized, it started growing again, even through the winter months.
Geraniums are also sensitive to overwatering, so keep a light hand in winter. But don’t let them get too dry between watering sessions, as they’re also not big fans of frequent water fluctuations.
The downside of keeping geraniums indoors is that they won’t bloom as profusely as when you’re growing them in the garden. But that’s okay since, with this type of plant, it’s the foliage that carries both visual and olfactory appeal.
5. Chinese hibiscus (Hibiscus rosa sinensis)
Growing up in a temperate climate in the Northern Hemisphere, I only ever saw hibiscus grown as a houseplant. (One of my aunts who had a particularly green thumb used to have an indoor hibiscus the size of three of my cousins put together.)
It was only when I started traveling further south that I started seeing hibiscus grown outdoors.
In all honesty, if you look at a hibiscus shrub, it’s hard to imagine ever taking it indoors. That’s because not all hibiscus make good houseplants. And with over 200 varieties of hibiscus in circulation, that would be hard to imagine.
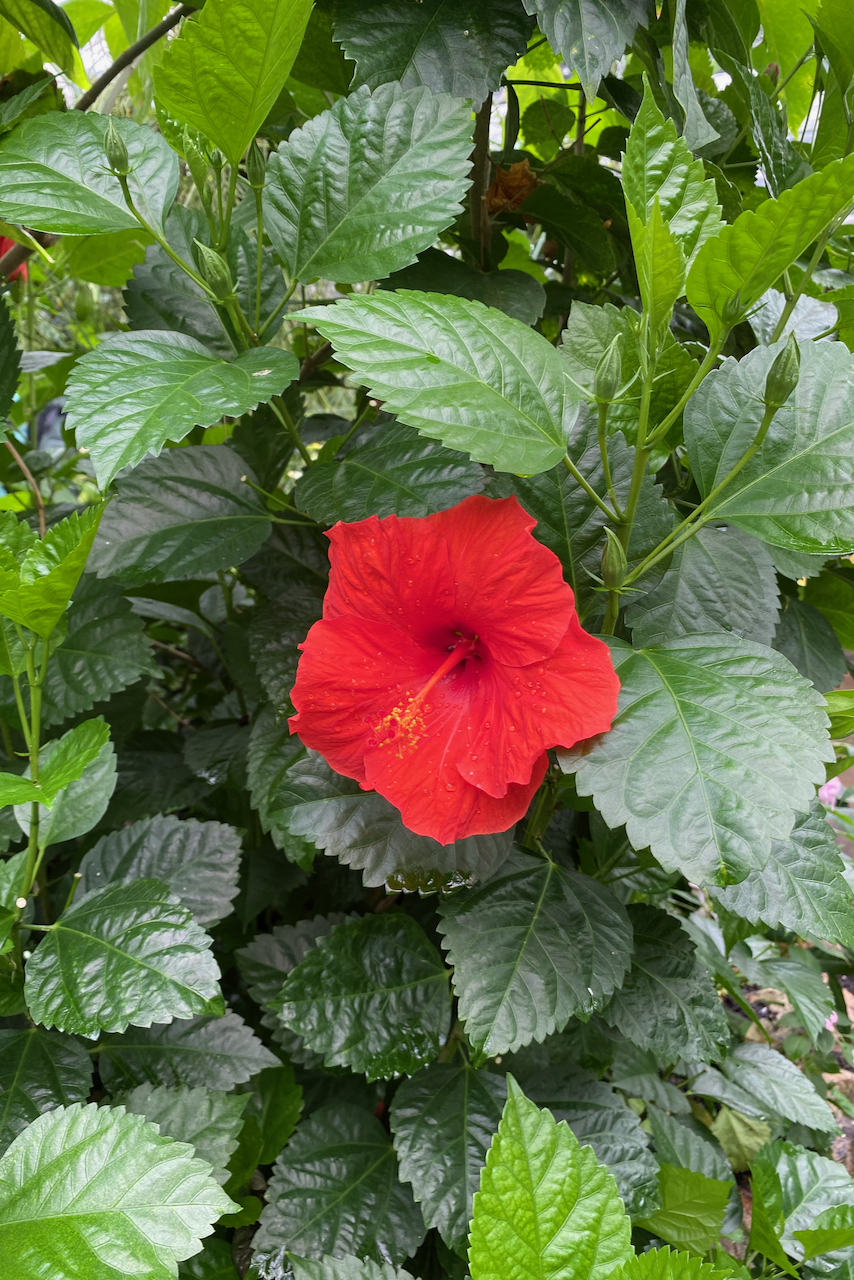
The one that always does, though, is the tropical hibiscus (also known as Chinese hibiscus). You’ll recognize it by the shiny deep green leaves and the bright flowers that come in shades of pink, red, orange or white.
The trouble with hibiscus is that, because they’re tropical plants, they need to get as much bright sunlight as possible. Since that’s easier said than done in the winter months, your hibiscus might throw a bit of a temper tantrum when you first bring it indoors.
Two common signs that the hibiscus is still adapting to the transition include the flowers falling and the foliage turning yellow. That’s okay as long as the plant still has a healthy-looking stem and is growing new foliage at the top.
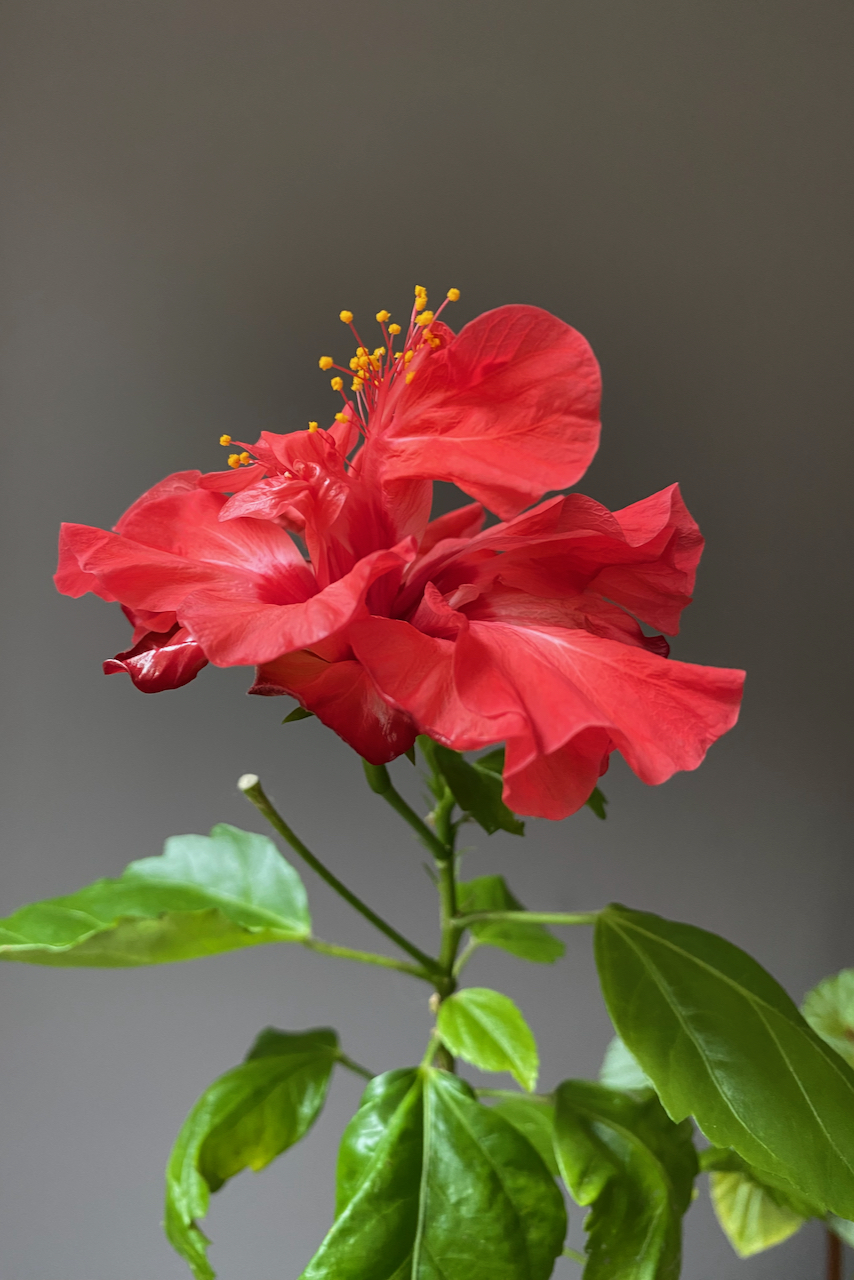
Hibiscus dislikes dry air as much as they dislike darkness.
So placing them in the company of other plants, on a humid pebble tray, or in a room with more humidity will help hibiscus cope better in the dry months. Of course, make sure you keep this plant away from sources of direct hot air, such as furnaces, stoves, vents or fireplaces.
Some hibiscus may bloom all winter long, provided they get enough sun. Mine never does, though. It enters a state of complete bliss and relaxation in which it doesn’t grow but doesn’t die back, either. And that’s good enough for me. Once the days start getting longer and brighter in spring, my hibiscus starts growing and blooming as usual.
4 Tips for Transitioning Outdoor Plants to Houseplants
In my opinion, there is no definite right or wrong way to transition plants from the garden to an indoor environment. However, through trial and error, I found a few tips that will make the job easier.
1. Before you move them inside, transition to an outdoor space that mimics indoor conditions.
This is similar advice to the one I had when I was talking about moving houseplants outside in the summer.
It’s just as important to acclimate our garden plants to indoor conditions before we take them fully indoors.
However, my outdoor plant pots are inhabited by all sorts of critters that have been feasting and burrowing in the soil. They’re welcome to it, but I don’t want them spreading to my houseplants. The last thing I want is a school of pill bugs dispersing over my living room floor.
So it’s not practical to move the same pots from outdoors to indoors and back again over a period of a few weeks just to acclimate them. What I do instead is move the plants I plan to take inside to a more shaded location. This helps them adjust to lower levels of light intensity. In the case of plants that tend to go dormant in the winter, such as hibiscus, I also start watering them less.
2. Clean up the plants thoroughly.
If the plant you’re bringing indoors is currently residing in the ground, half the job is done. Lift it gently, spray the root structure with water to clean everything thoroughly and pot it up. Make sure you use fresh potting soil specially mixed for indoor containers.
However, if the plant has been happily residing in a container outdoors, the choice is a bit trickier. If you decide to leave it in the same pot and just move it as is, you have to be really thorough when you check it. Really thorough!
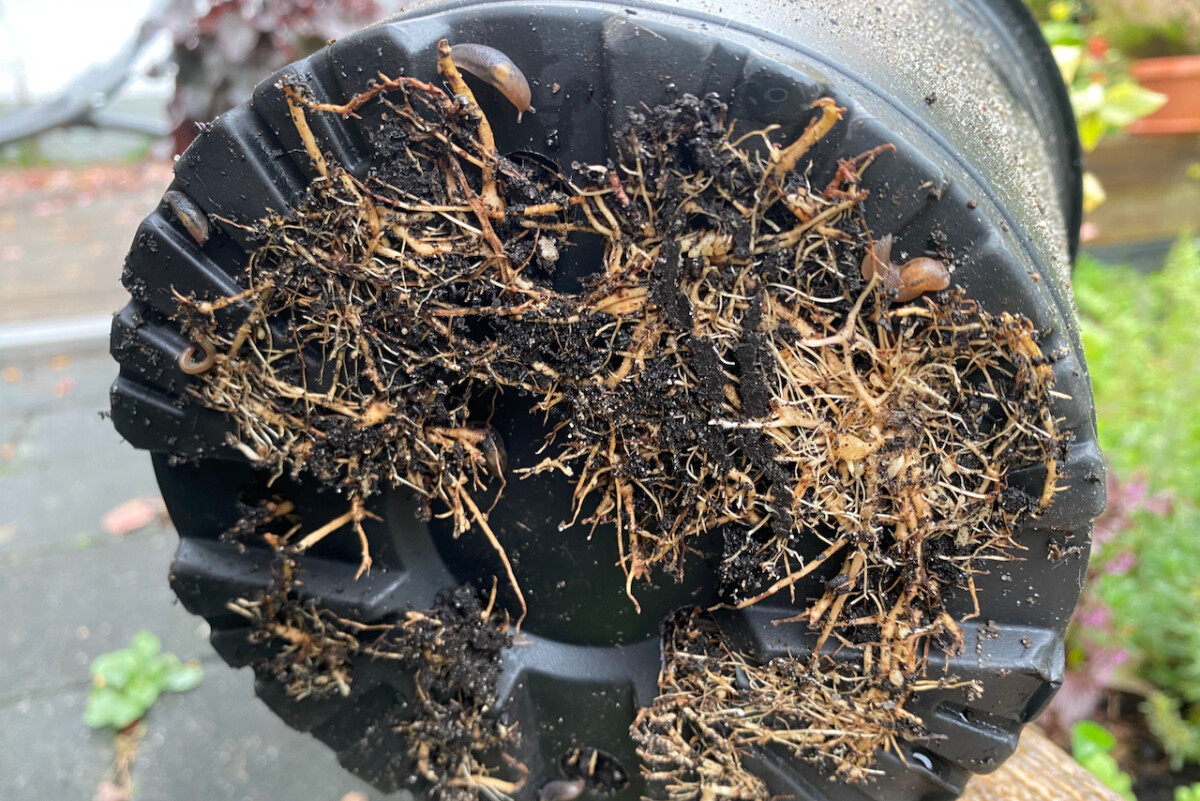
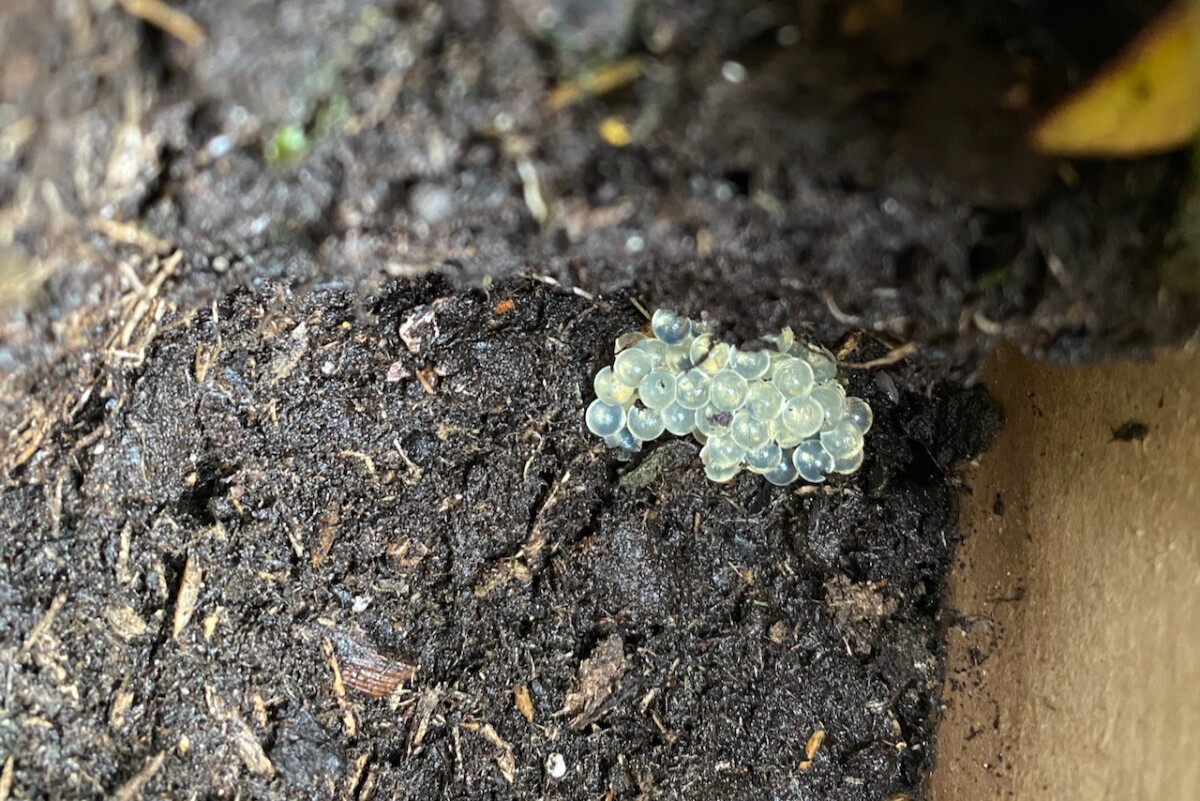
Check the drainage holes because that’s where slugs, snails and earthworms reside. Then thoroughly check the top of the soil and dig a bit deeper around the rim of the container. That’s where you’re more likely to find slug eggs.
Speaking of above soil level, take the time to inspect and clean all the leaves. I start by giving the plant a nice shower with the hose (while still outdoors, of course); I then wipe it dry with a soft rag and inspect it at the same time. I check the underside of the leaves for spider mites and the stems and new growth for aphids.
And repot the plants if you’re not sure.
Yes, my advice may sound a bit overly cautious, but it’s a case of “been there, done that, regretted it, and now I’m warning everyone against it.” That’s why I prefer to repot all the outdoor plants I’m taking back indoors. I do it for my own peace of mind and for the well-being of all my houseplants. And I always find new uses for the old potting soil because I hate waste just as much as any gardener does.
And if you have a transitional space available, such as a sunroom, an enclosed porch, or even a guest room where no other houseplants reside, that’s where I would put them first. Keep the garden plants as far away from your houseplants as possible for at least a couple of weeks.
3. Reduce the size of the plant, if necessary.
First, I start by removing all the dead and diseased leaves or branches. No diseased matter should enter the house. No exceptions. Then I trim some of the leggy growth. You don’t have to do this step if you have plenty of room to accommodate a larger plant, but I find things get a bit cramped with this new influx of houseplants.
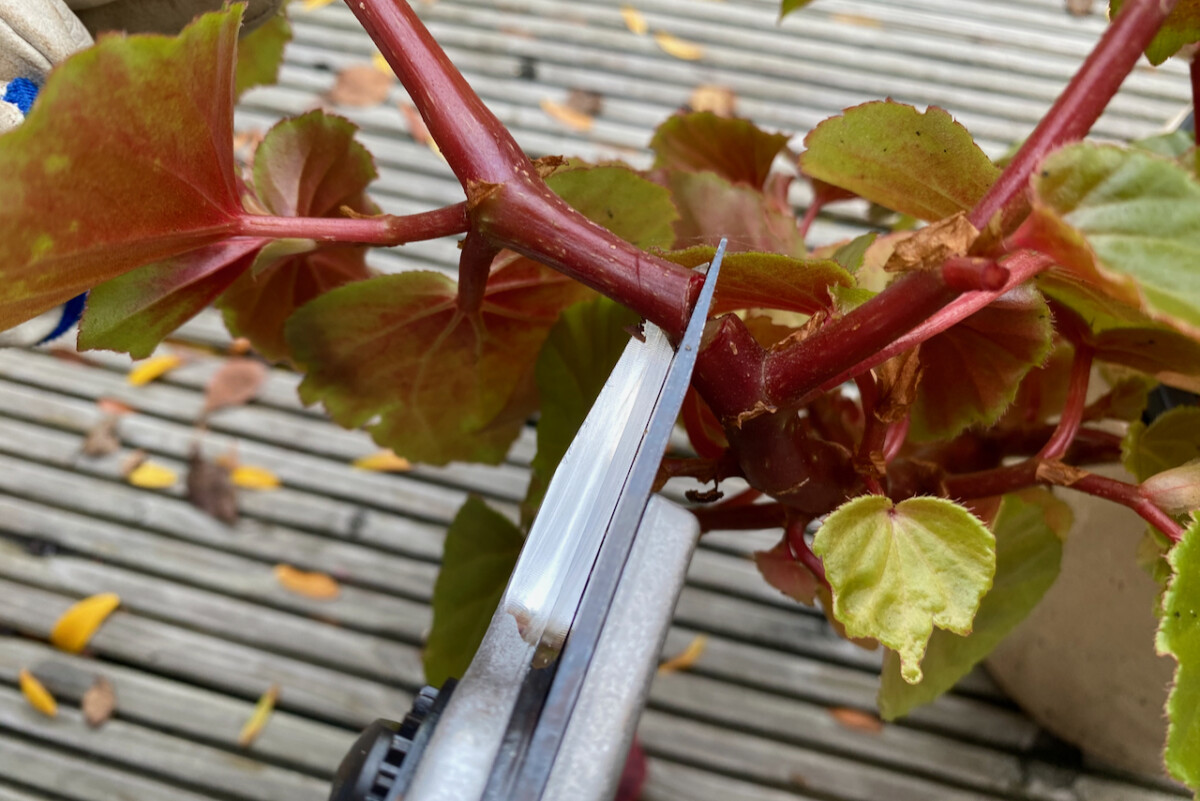
For example, in the case of both begonia and coleus, I almost always end up trimming a few errant branches. Again, in the interest of no waste, you can try to propagate the cuttings, although for some plants, it might be a bit too late in the season.
Please keep in mind that I don’t do any major pruning at this time. I don’t want to stimulate new growth. So just a light trim will do.
4. Expect a bit of a rough patch.
Listen, there’s no way to sugarcoat this. When you turn outdoor plants into indoor plants, there will be an adjustment period. And the best way to deal with it is to adjust your expectations accordingly.
Due to the changes in light, temperature, humidity, airflow and temperature (so basically almost everything a plant relies on to thrive), the plant will react. It will stop blooming. Then it will lose leaves. It may even start growing altogether. But that’s okay. And it’s just temporary. Please don’t attempt to “save it” by adding more fertilizer or giving it more water. That’s only going to make matters worse.

Get the famous Rural Sprout newsletter delivered to your inbox.
Join the 50,000+ gardeners who get timely gardening tutorials, tips and tasks delivered direct to their inbox.