

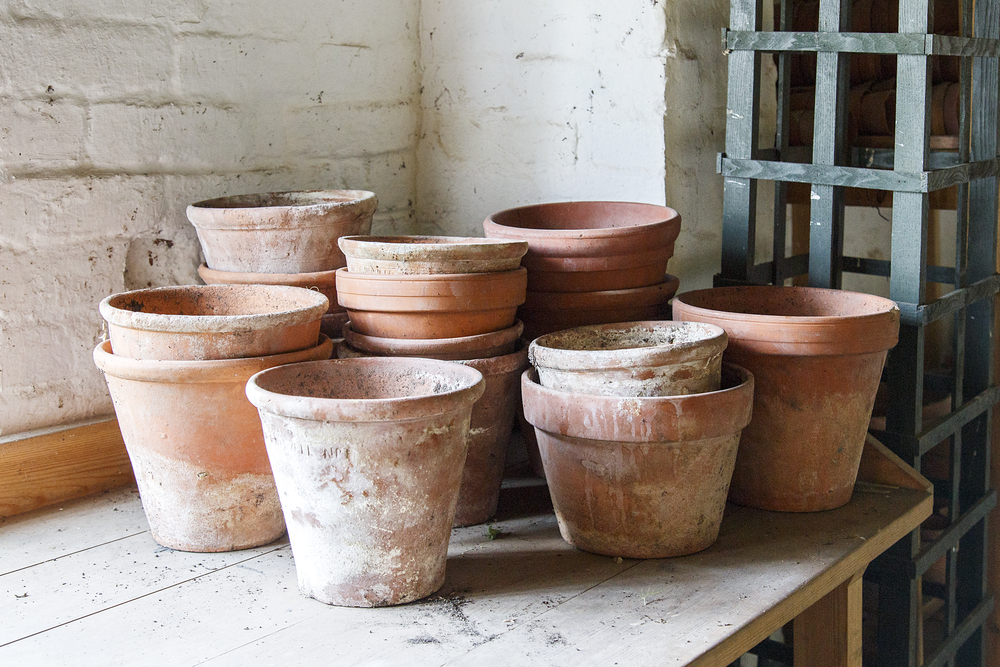
Terracotta pots have a way of multiplying when you turn your back on them. With each passing season, our towers of stacked pots grow taller. And why not? They’re a gardening staple for a reason, and once you know how to use them correctly, they tend to accumulate.
Of course, if you’re anything like me, you may have plenty of terracotta pots, but never in the size you need. So, it’s off to buy more pots.
If you’re looking to repurpose some of your terracotta, we have some practical projects to help you repurpose them around your home and garden.
Whether you’re looking to repurpose pots you already have or want to make a project with the rustic charm of terracotta, these seven projects will get you off to a great start.
A quick note
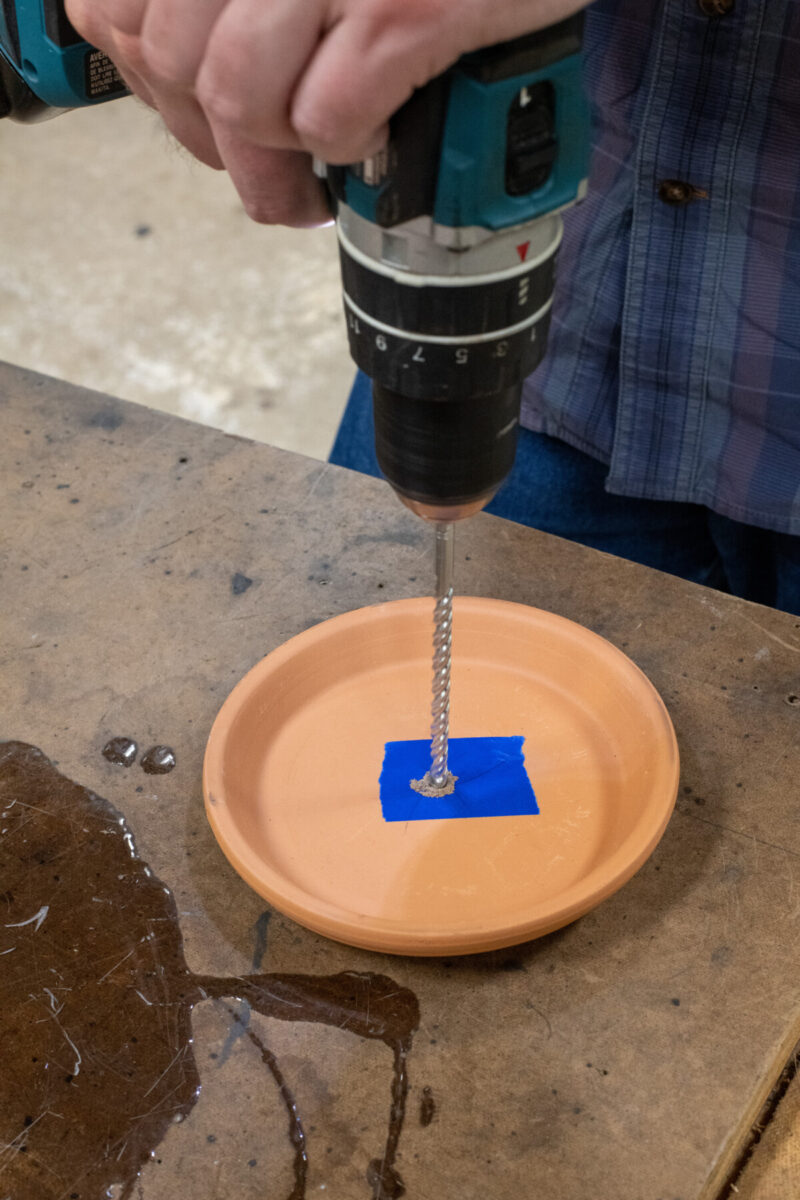
For some of these projects, you may need to drill a hole in the saucer. Place a piece of masking tape over the spot you’re going to drill and go slow to avoid cracks.
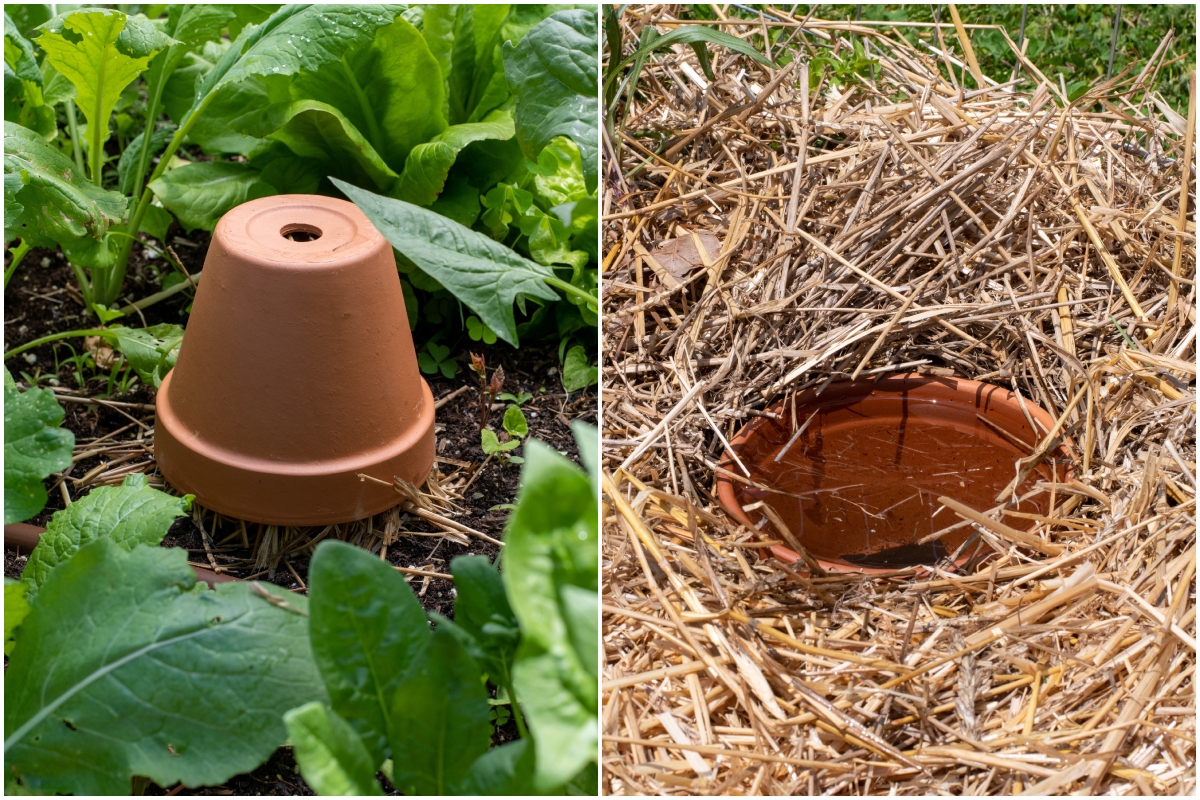
1. Earwig Traps
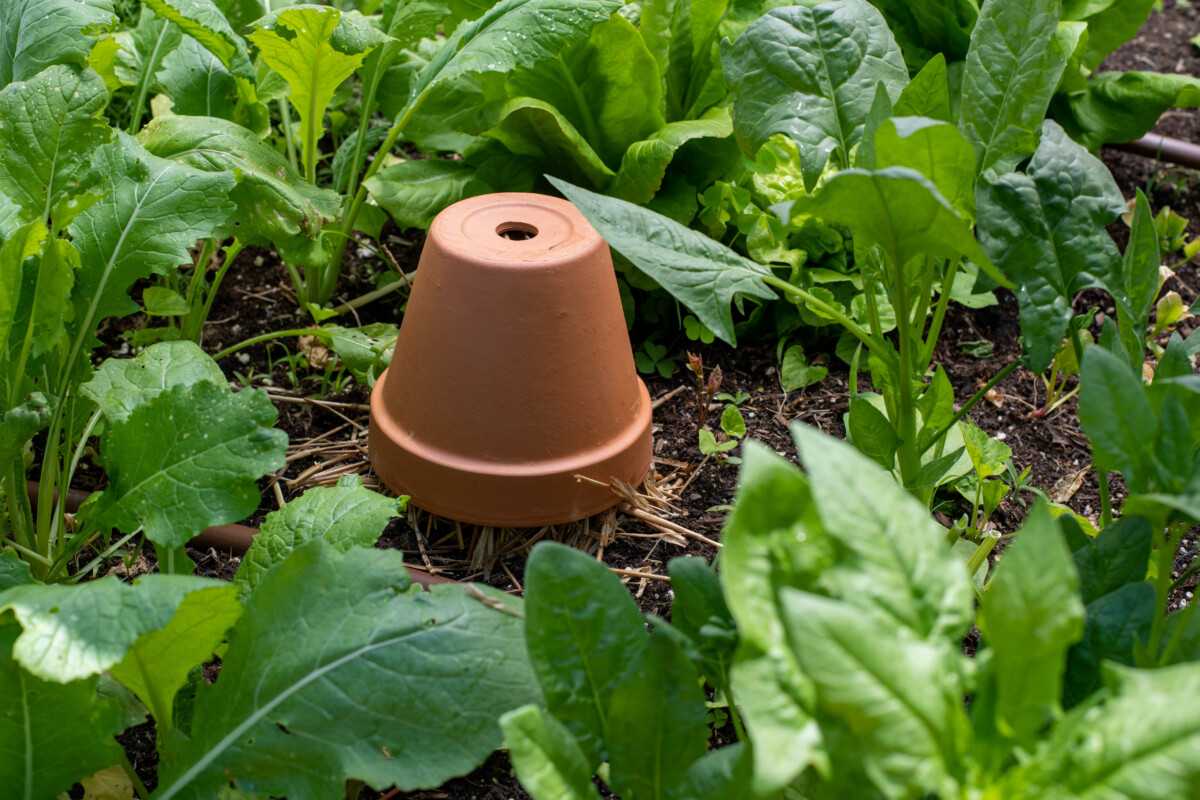
Earwigs can be a frustrating pest in and around the garden. While they mostly enjoy munching on dead organic matter, they can wreak havoc on unestablished seedlings, soft fruits like strawberries and raspberries or tender lettuces.
Lindsay has several tips on how to stop earwigs from invading your home and garden. One of which is to use a terracotta earwig trap. Placing these traps around your garden, compost pile and other areas of your yard where you frequently find earwigs will encourage them to nest in the terracotta shelter rather than your garden.
Every couple of days, simply dispose of the collected earwigs in your preferred manner. You can dump them in water to drown them.
I like to feed them to my chickens. I think that’s my hens’ preferred earwig disposal method.
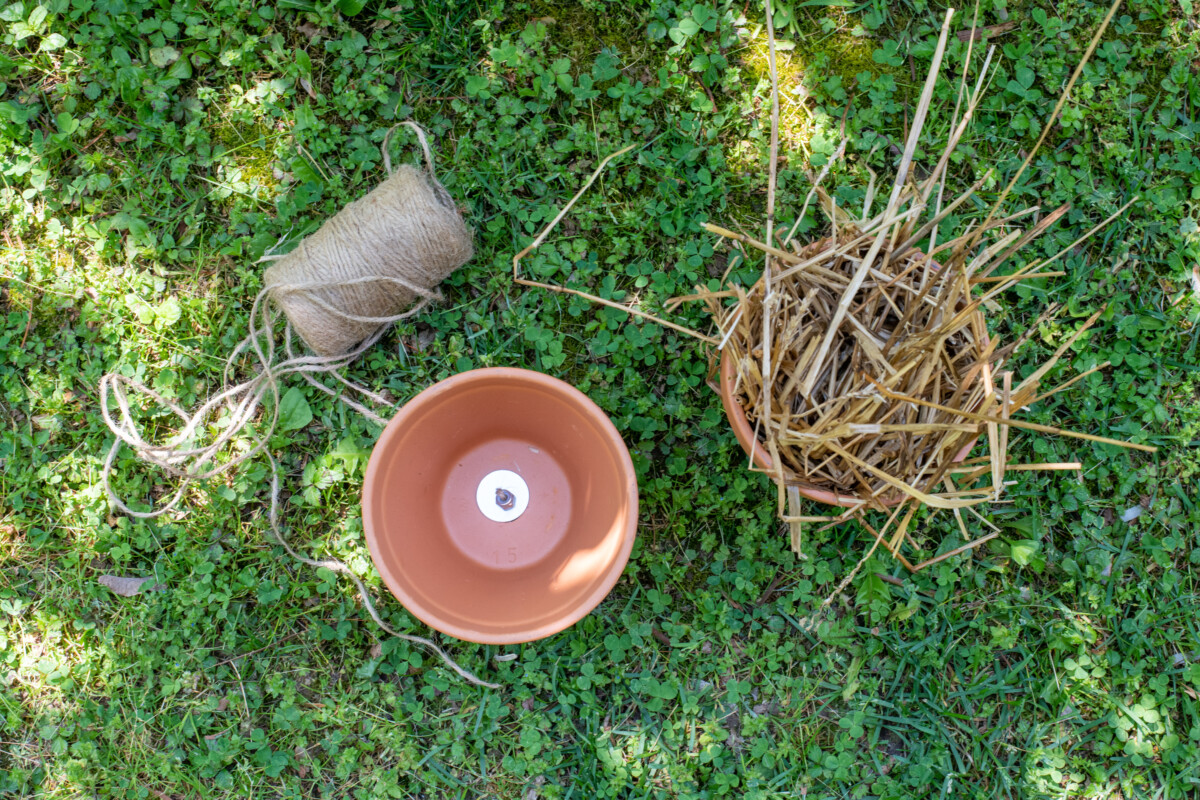
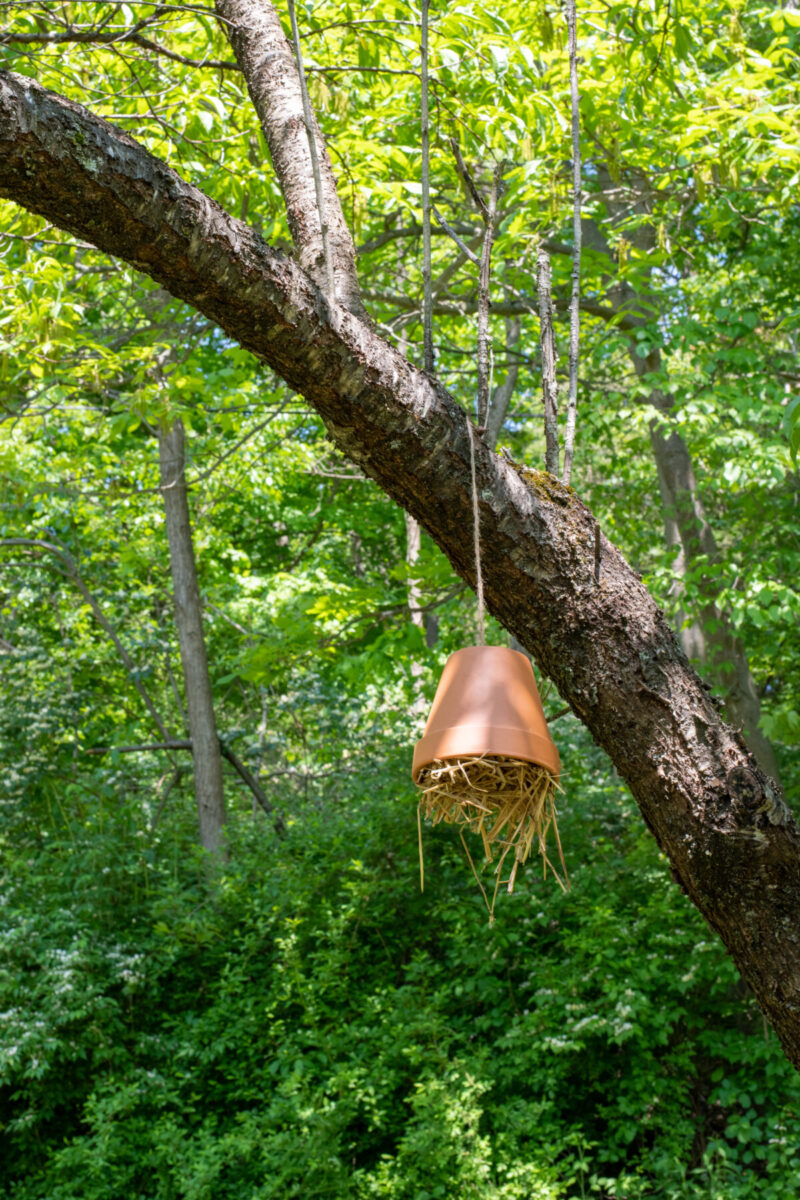
Stuff straw inside a terracotta pot, then place the pot straw-side down wherever you see earwigs. You can even hang them using a washer large enough to cover the drainage hole in the bottom of the pot and a nut threaded through some twine. If you have stone fruit trees, such as peach or apricot, you’ll want to hang a few in your trees.
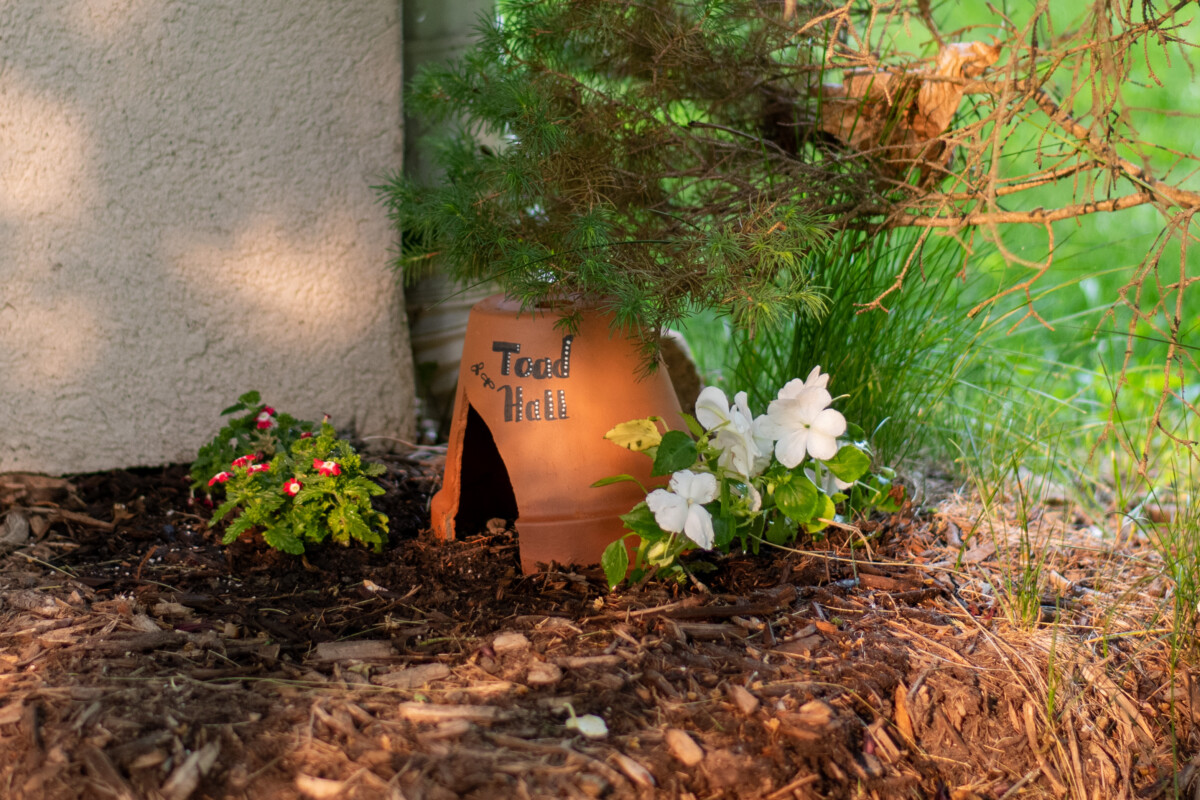
2. Toad Houses
Setting up a few toad houses around your garden is a great way to help manage six-legged pests. With a daily diet of around a thousand insects, you want to attract toads and frogs to your garden as well as near patios or any other outdoor seating.
Toads can put a serious dent in your pesky mosquito population.
To encourage these croaking visitors to stick around, give them a cool, dark place to hide in during the day. You can make a toad house with a terracotta pot. Use the pot as is, with a couple of rocks used to prop it up off the ground. Alternatively, you can use a pot with a broken rim, creating a door to the toad house.
They look quite charming as they are, but you can break out the acrylic paints and paint the pots to add a pop of color or even to look like a little cottage.
Place the toad houses in quiet, shady areas of your yard and garden to encourage the little creatures to move in.
3. Bird Feeder
You can make a lovely bird feeder with some easy-to-find hardware, a terracotta orchid pot, and two saucers. And the best part is, you don’t need any tools to assemble it.
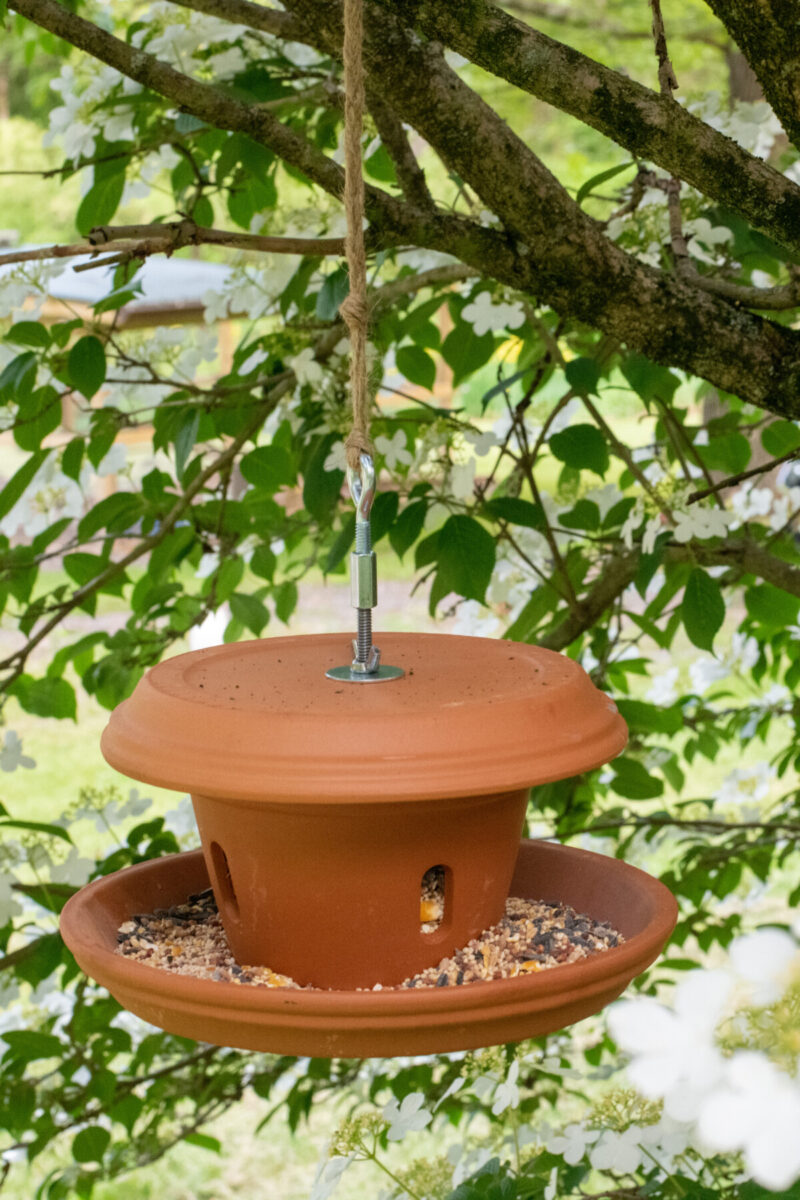
This style of bird feeder works well with most wild bird seed mixes; if you have a mix with larger ingredients, such as peanuts, you’ll want to make sure everything fits through the holes easily.
It’s important to clean bird feeders regularly to prevent the buildup of bacteria or fungi, which can lead to disease. The easy assembly also means it’s easy to take apart and clean.
Once filled, it’s quite a heavy feeder, so use a strong rope to hang it.
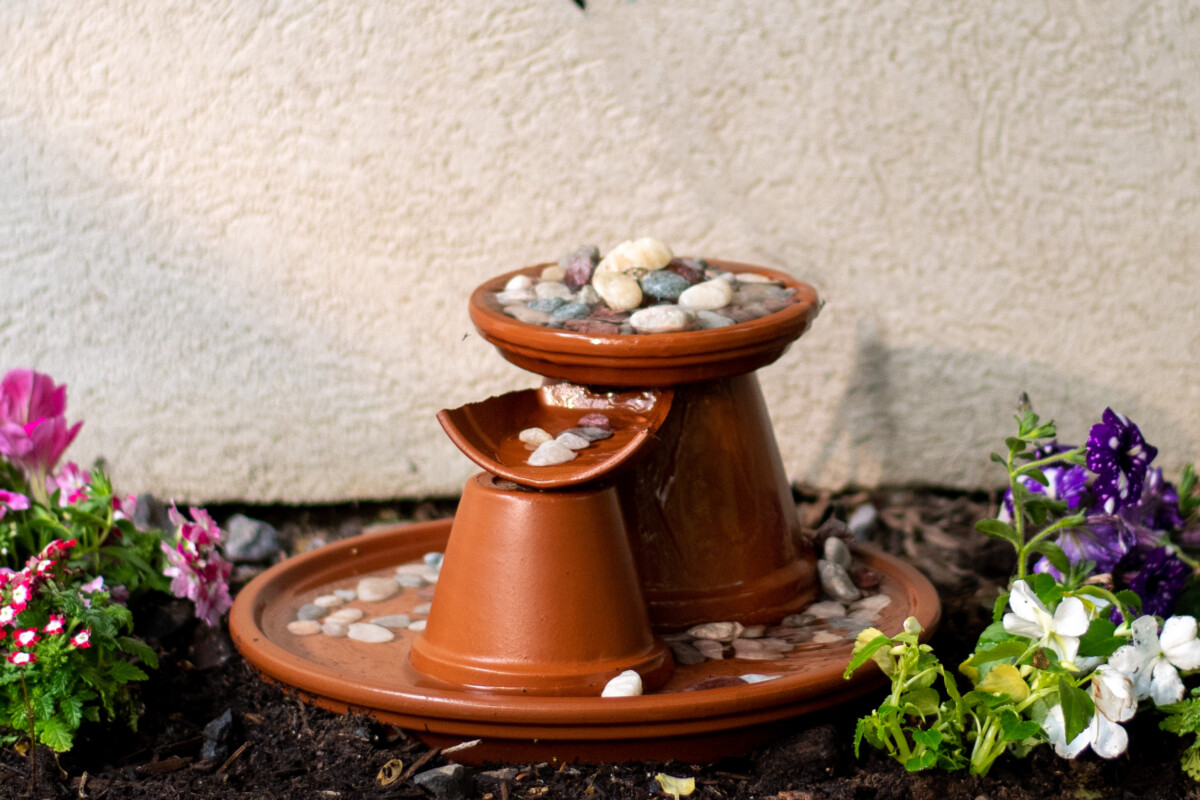
4. Terracotta Pot Fountain
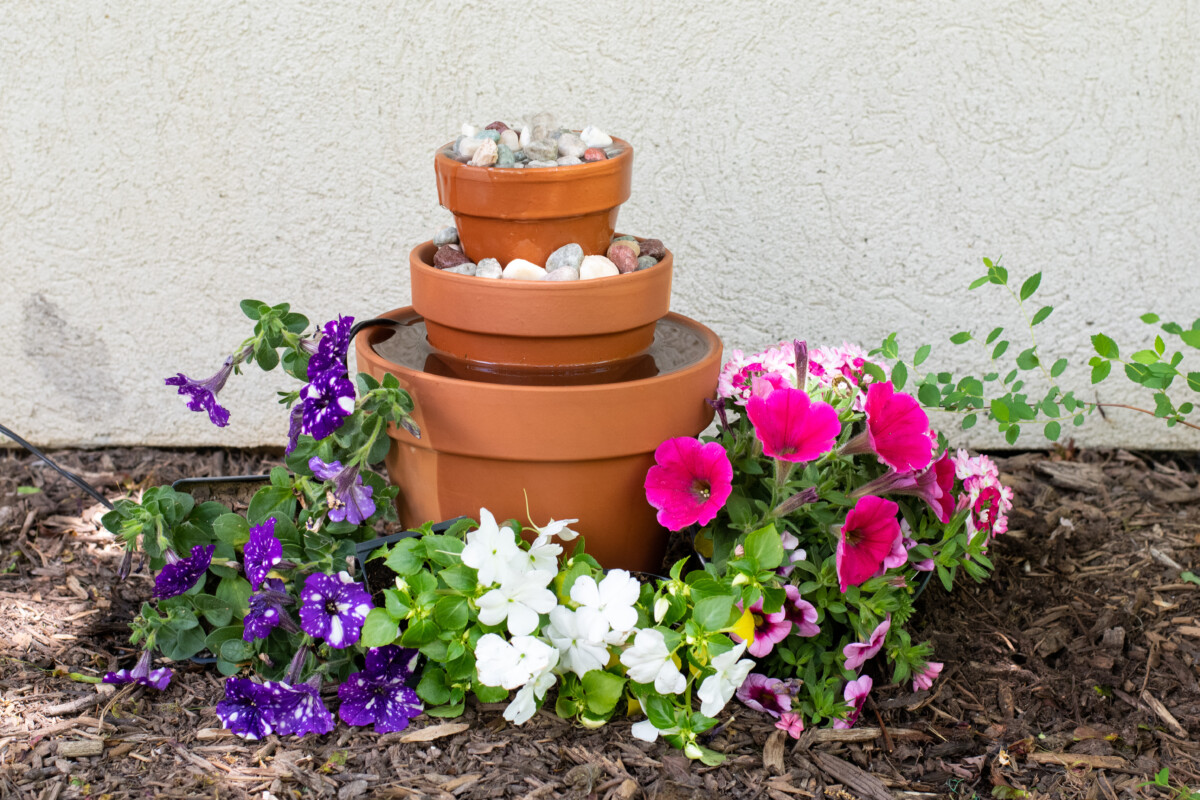
There’s nothing quite as soothing as sitting on the patio in the evenings listening to the soft gurgle of a fountain nearby.
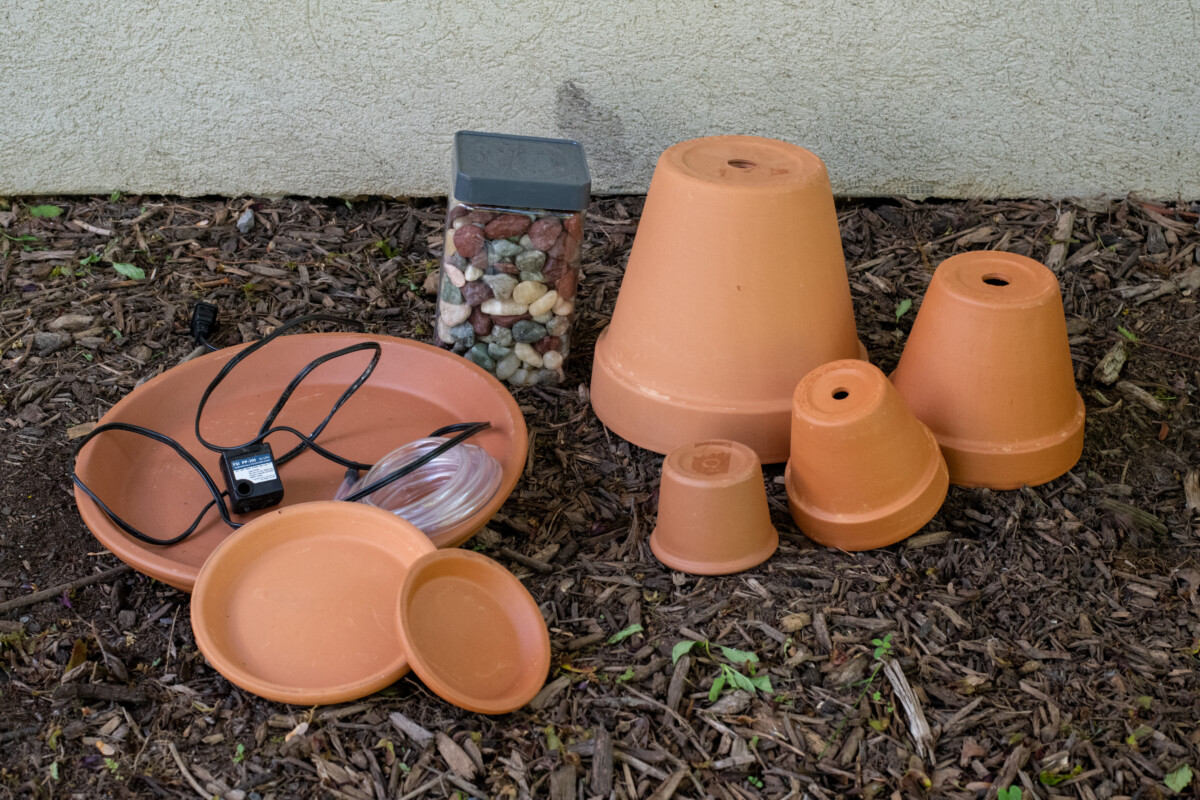
You don’t have to spend hundreds of dollars on an expensive water feature. With a small submersible pump and a few terracotta pots, you can easily make your own fountain.
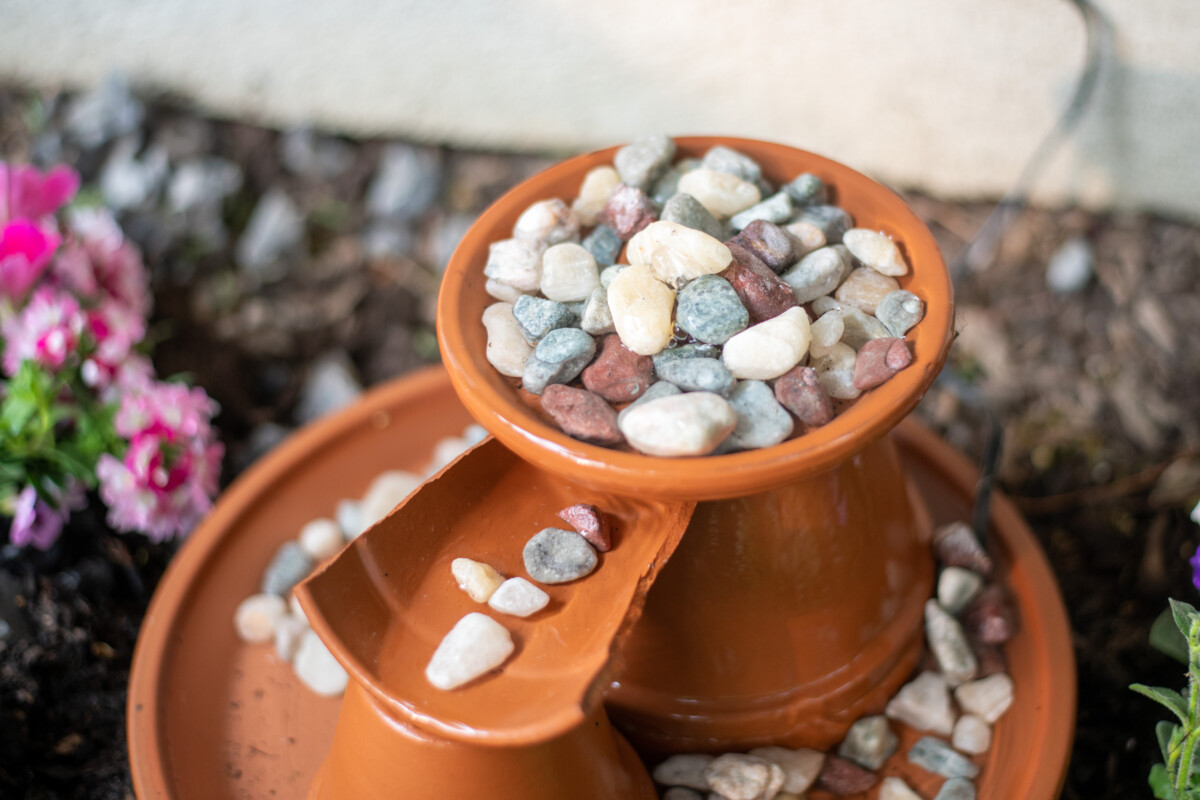
Add river rocks for an inexpensive water feature for your patio, garden or balcony. But watch out, I can tell you from experience, once you know how easy they are to make, and how beautiful they are when finished, you’ll be hard-pressed to stop at just one fountain.
5. Olla Irrigation with Terracotta Pots
The porous nature of terracotta pots makes them perfect for irrigation. Olla irrigation is a great passive watering technique in which unglazed terracotta pots are buried in the soil up to their rims. Water is added to them, and then, as the soil dries out, it wicks moisture from the pots back into the soil.
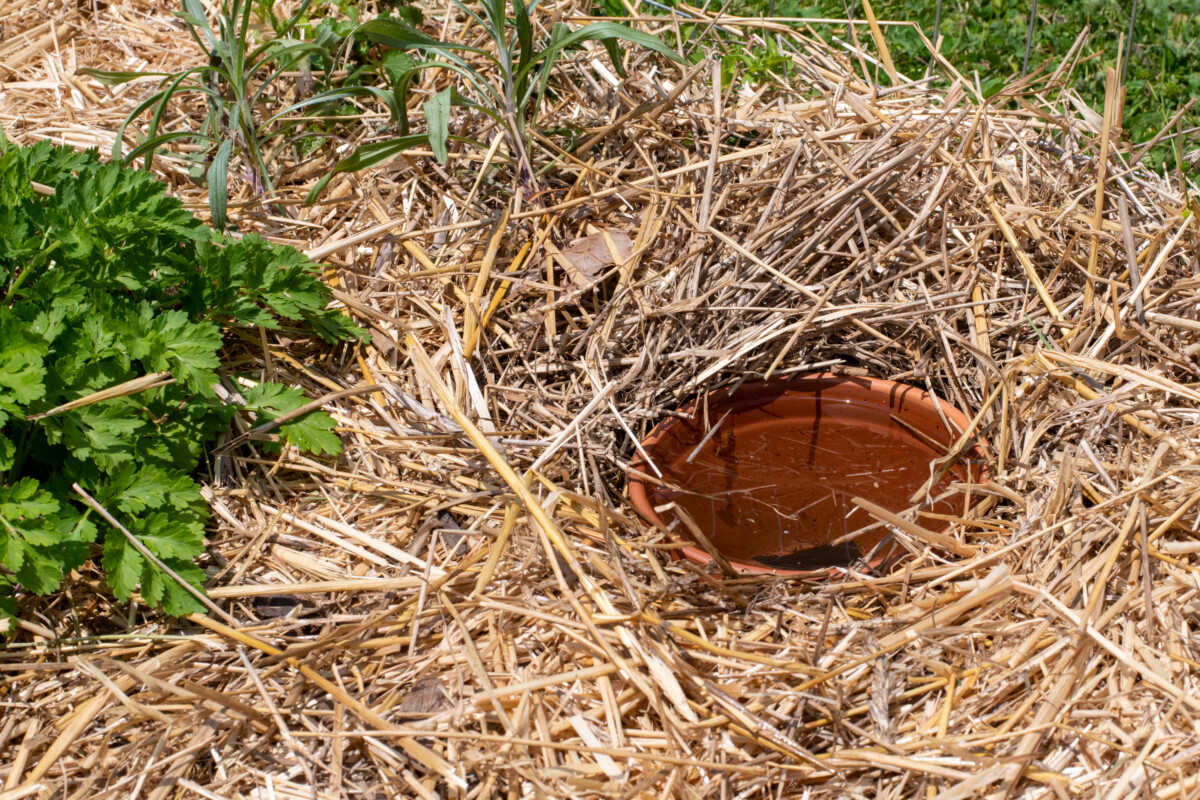
Even if you choose not to water your garden this way regularly, olla irrigation is a great way to keep your garden watered while you’re away on vacation.
You’ll need to seal the hole in the bottom of the terracotta pots you use before burying them in the soil. I have found that silicone caulk works great for this. Let it cure for 24 hours before you put the pot in the soil.
Be sure you press the dirt firmly around the sides of the pot when you bury it. Then fill the pot with water up to the rim.
My colleague, Mickey, has a more in depth guide on keeping your garden watered with terracotta ollas here.
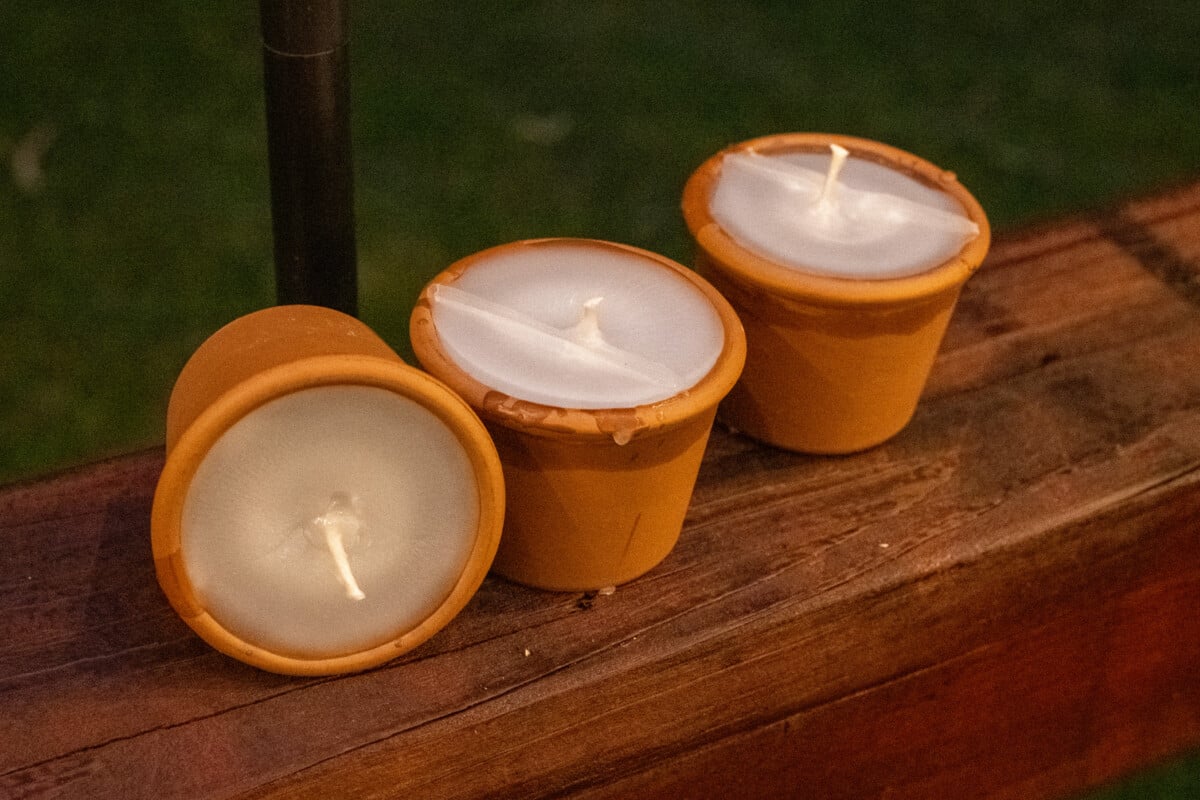
6. Terracotta Bug-Repelling Candles
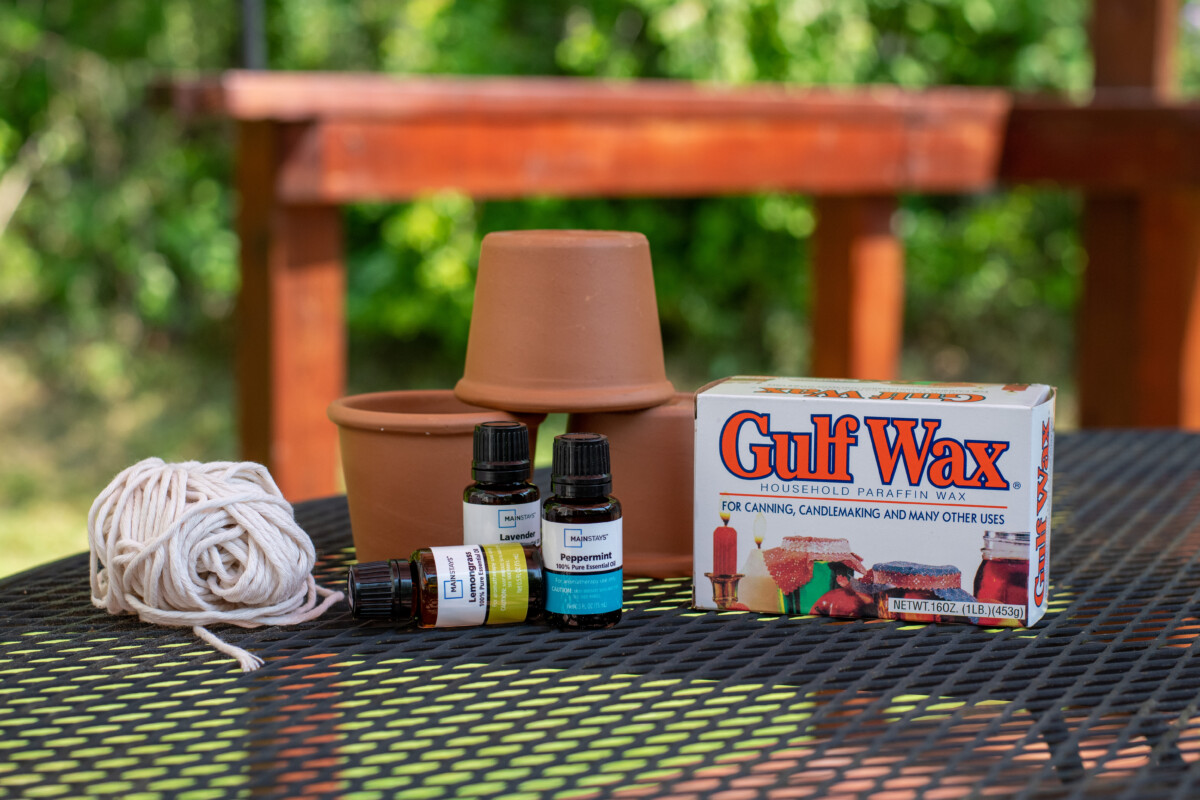
If you’ve got an abundance of smaller pots, make up a batch of bug-repelling candles to keep mosquitos away. All you need to make your own candles are paraffin wax, cotton string (I found butchers string works best.) and essential oils. If your pot has a drainage hole, you’ll need to seal it first.
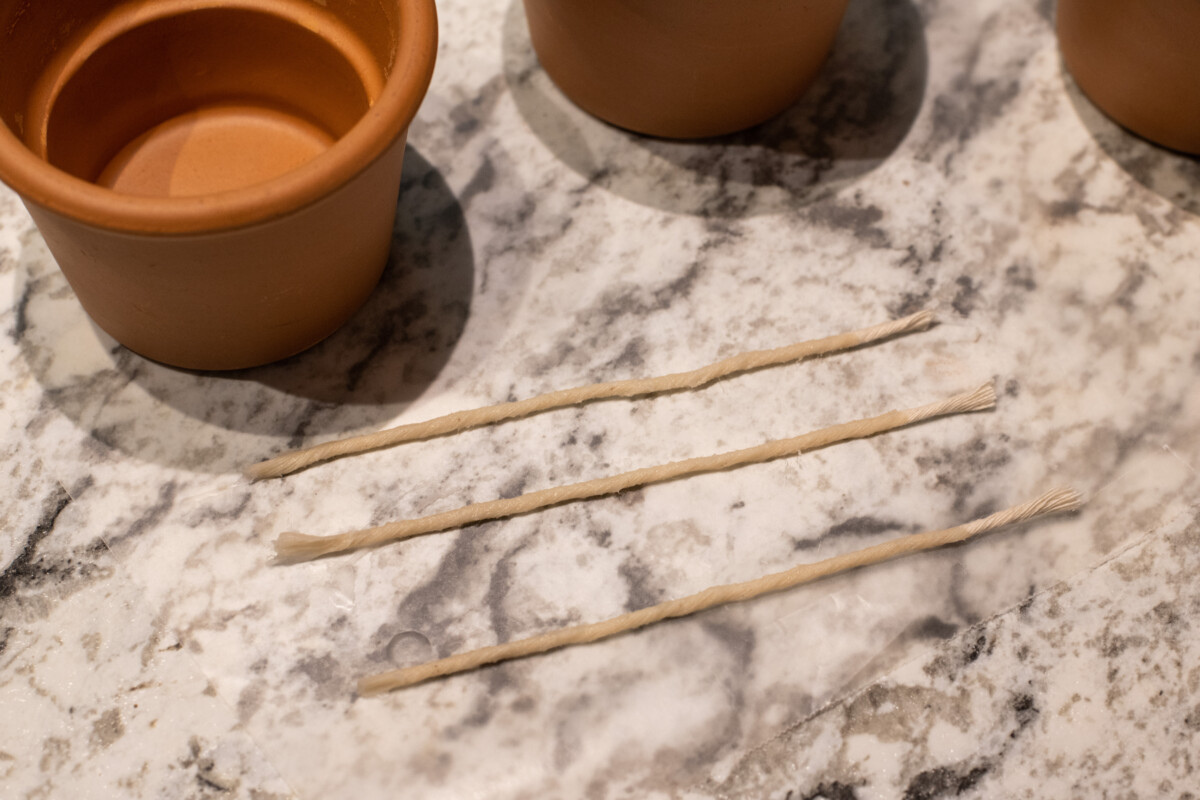
Slowly melt the paraffin wax over a double boiler. You’ll want to dip your cotton string into the paraffin and then lay your wicks straight on wax paper to dry.
Once the paraffin is completely melted, remove it from the heat and add your essential oils. Some great scents to repel mosquitoes are lemon grass, lavender and peppermint. I used all three in my candles. I added ten drops of each.
Use a chopstick to wrap the wicks around while you pour the scented wax into the terracotta pots.
You may need to add more wax once the first pour hardens. Keep topping it up each time it cools until the surface is level.
Resist the urge to use your candles right away. Let them cure for about a week to get the best scent (and bug-repelling power) from them.
Make one or all of these projects, and before you know it, those towers of terracotta will be much shorter. And don’t forget; we’ve got some great ideas to use up broken terracotta pots, too.
Read Next:

Get the famous Rural Sprout newsletter delivered to your inbox.
Join the 50,000+ gardeners who get timely gardening tutorials, tips and tasks delivered direct to their inbox.