


Honey is one of the coolest natural products we’ve got going on this planet. I mean, just think about it.
Honey is a food made by insects; that in itself is amazing.
A bug made the honey you just put in your tea. A bug!
How many other food items can you think of that are made by an insect? (Excluding the act of pollination, of course.) And raw honey is jam-packed with naturally occurring bacteria, enzymes, yeast colonies, and a multitude of other good-for-you compounds.
The health benefits of consuming raw honey are well-documented and too numerous even to begin to get into.
This stuff is downright miraculous.
I want to share with you one of my favorite ways to use honey in my kitchen.
We’re going to take a closer look at the bacteria and yeast in raw honey. Those happy little colonies can do something incredible when you add the right ingredients – they can ferment.
Raw honey will ferment on its own if left to its own devices.
There’s even some speculation that this is how humans discovered mead. Rain, honey, and a few hot days and someone crazy enough to come along and drink whatever liquid they found sitting in a puddle in a tree. Ta-dah!
(Please don’t drink tree puddles.)
Moisture and heat are all it takes to get those little yeasties active in raw honey. This is why most commercially produced honey is pasteurized; it kills off the yeast and bacteria and stays shelf-stable. But it also changes the flavor, and you lose many of the health benefits that come with eating raw honey.
Today I’m going to teach you how to make the easiest fermentable food there is – delicious honey-fermented garlic.
How easy is it to make?
Well, in the words of my great-grandmother, “It’s easier than fallin’ off a log.” (This statement often left me wondering how many logs my grandmother had fallen off of in her lifetime.)
This is my go-to when I teach friends and family about the magic of fermentable foods because it’s so simple. It really is set-it and forget-it fermentation. Once you get this batch going, you can keep it going forever, simply by adding more of either ingredient.
And it’s a great way to preserve a bumper crop of garlic.
Here’s what you’ll need for a pint of this fabulous kitchen wonder:
Ingredients
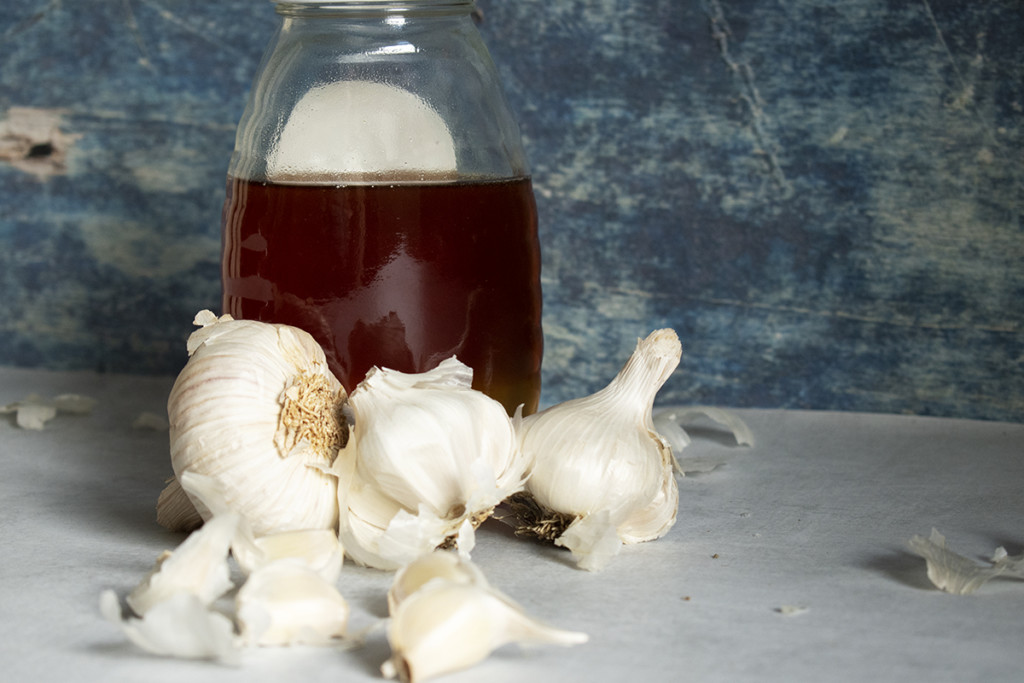
- Roughly one to one and a half cups of raw honey (It’s important to use raw honey. Pasteurized honey will not ferment.)
- Two to three heads of garlic – why not grow your own?
- A sterilized pint jar with lid
- Optional – airlock and lid
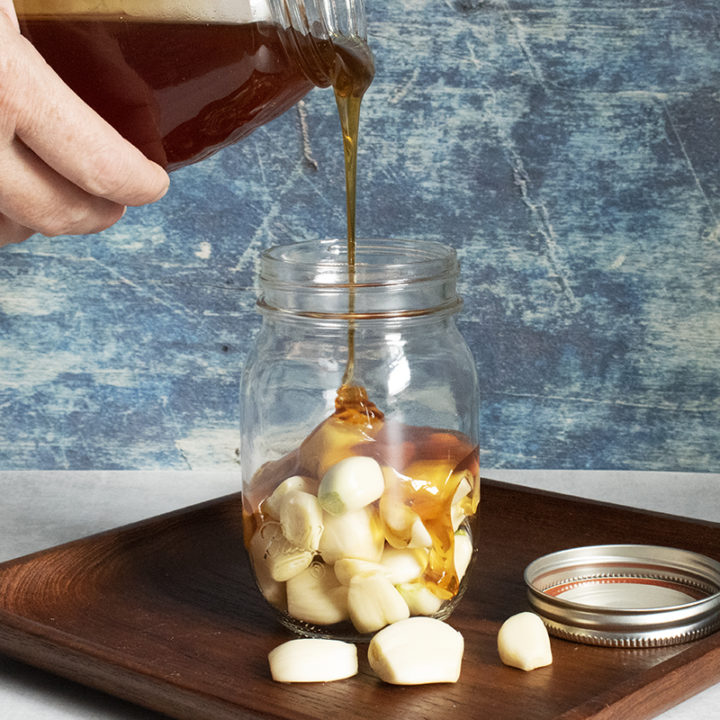
Whenever you’re using honey to ferment something, it’s essential to be sure you use a sterilized jar. You only want the yeast and bacteria in the honey to grow, not anything in the jar itself. Once the yeast and bacteria get going, they’re pretty good at overpowering any other strains, but you need to keep things squeaky clean to get them off on the right foot.
Submerge the jar and lid into boiling water and boil for five minutes or run them in the dishwasher on the hottest setting. Make sure the jar and lid are completely dry before beginning.
Once you have your jar ready, it’s on to the garlic.
Choose the freshest garlic you can get your hands on. You can put in as little or as much as you want. I usually aim to fill the jar halfway with garlic. I find this works best when it comes time for scooping out the liquid or individual cloves. It’s less messy.
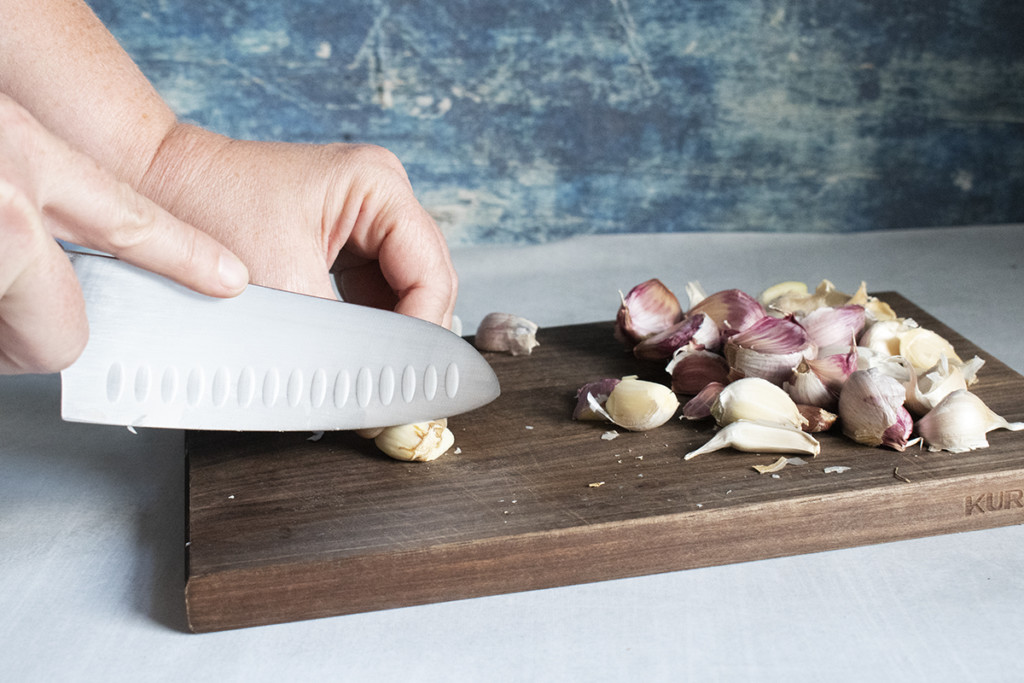
Peel the garlic, making sure you remove any of the papery skin.
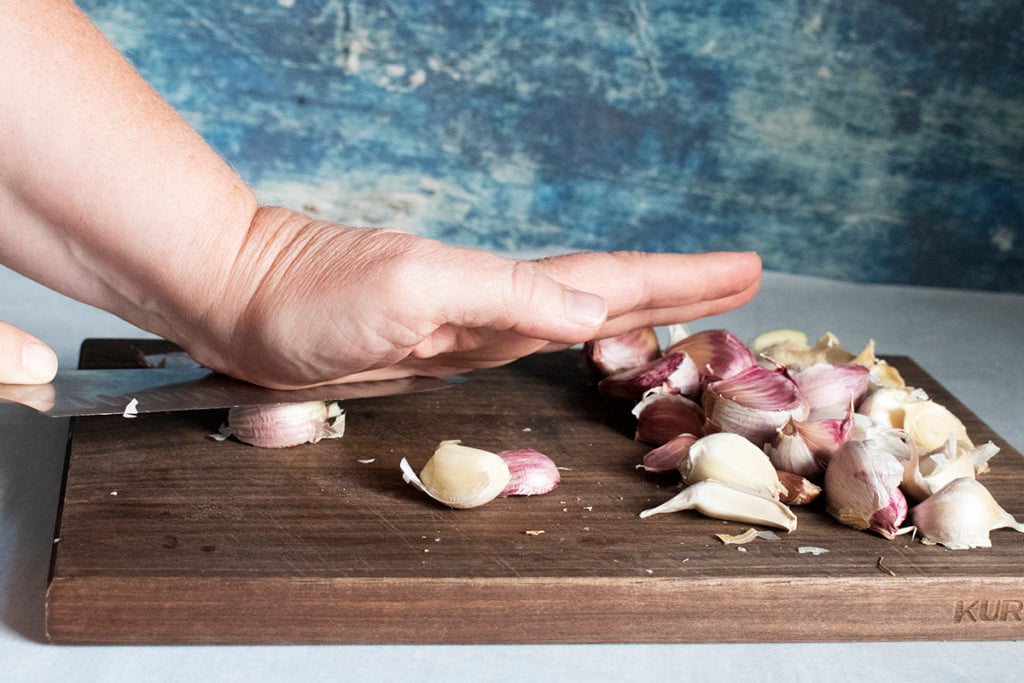
An easy trick to get the skins off is to slice off the end and tip of the garlic clove. Then using the flat of a large chef’s knife, give the clove a gentle ‘thump.’ Once you do it a few times, you’ll get a feel for when the paper cracks free from the garlic, and it’ll usually pop right off. Remember, a gentle ‘thump,’ we aren’t smashing the garlic into oblivion. (Although, it’s okay if you do get a few smashed cloves.)
Slice off any brown spots on the individual cloves.
Don’t use any that have a lot of spots or mold on them. Remember, we only want the bacteria and yeast in the honey to grow.
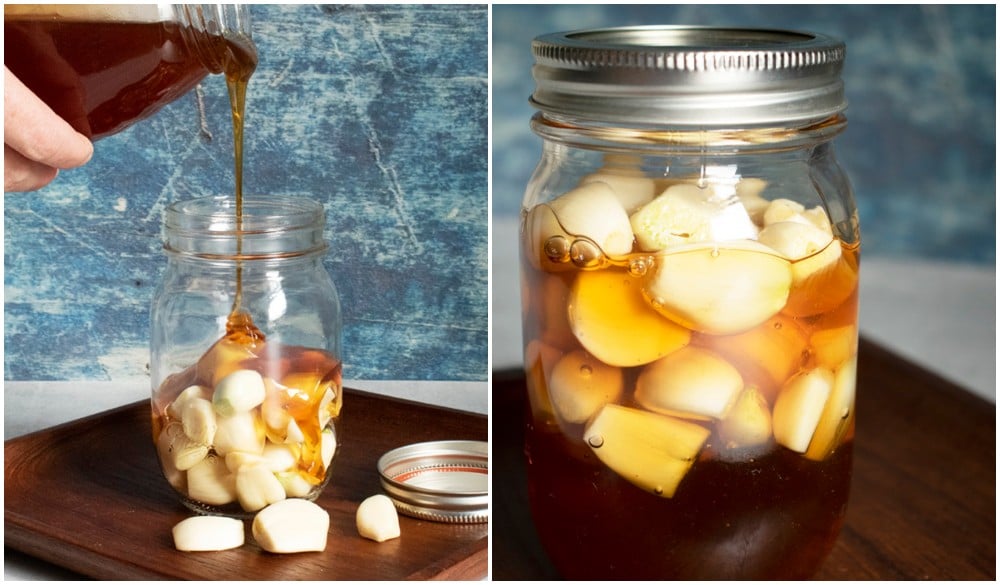
Once you’ve filled your jar with two or three heads of garlic, go ahead and pour in the honey.
Pour in enough honey to cover the garlic.

Once settled, the garlic may float, that’s fine.
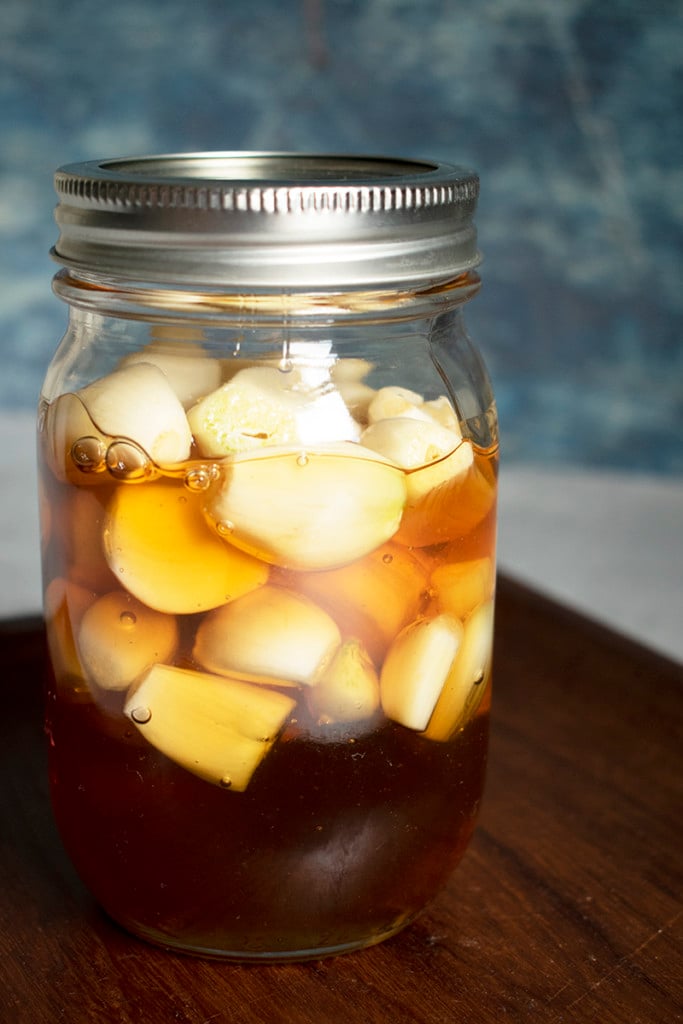
Cover tightly and give it a little shake.
Now put your jar of future deliciousness in a warm spot on the counter and check on it every day.
Within 24-48 hours, pressure will begin to build up in your jar.
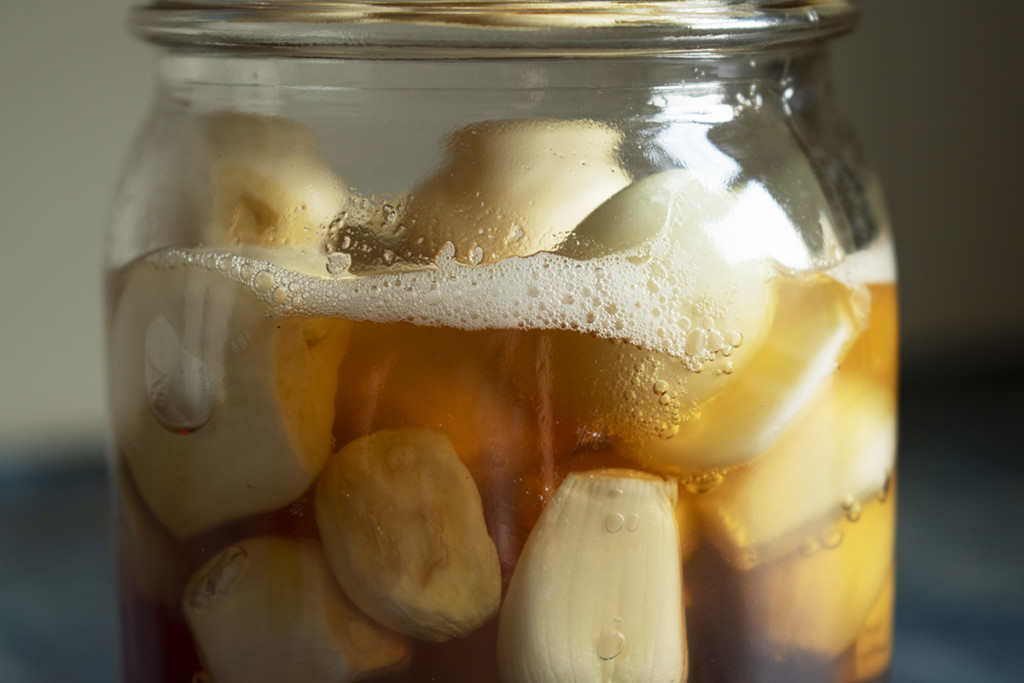
That’s good! That means you have fermentation happening.
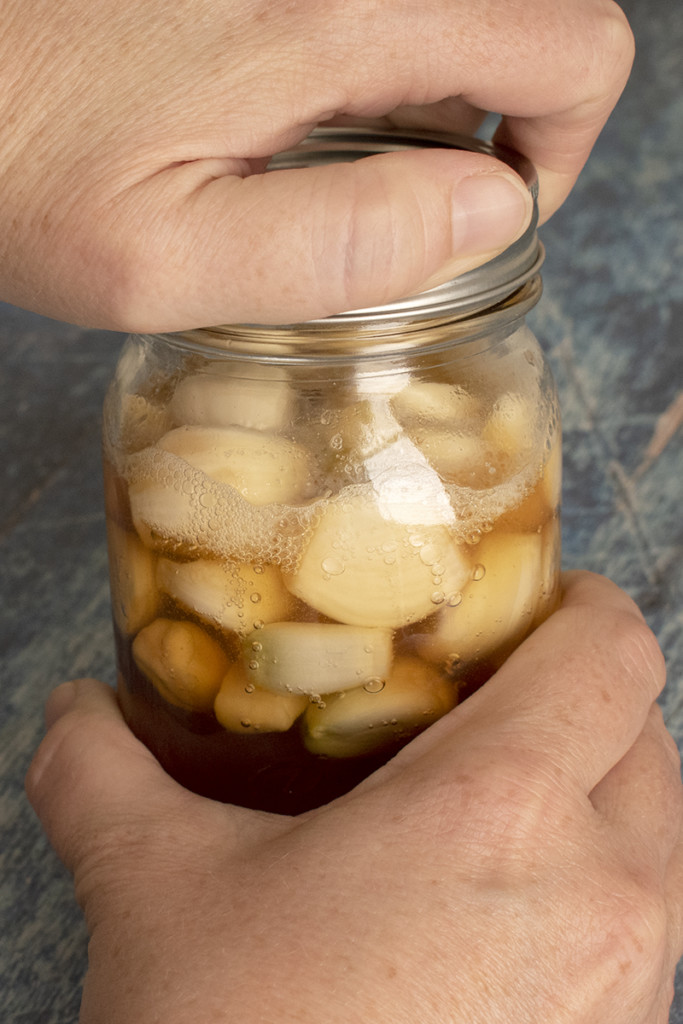
At this point, you’ll need to burp your jar. Slowly open the lid, and you’ll see bubbles rushing to the surface of the honey. That’s from the happy yeasties, doing their job.
And it’s about now that I should warn you that the resulting gas released by the yeast smells…well, a little like a fart. Or a lot like a fart.
Lucky for us, the resulting honey and garlic cloves taste immensely better than the smell of the gas released during fermentation.
Once you’ve got a good ferment going, you can tighten the lid back down and continue to burp it each day or two. Or you can leave the lid a little loose to keep the pressure off. I like to use a special lid that has a grommeted hole for an airlock. This lets the gas out and keeps air from getting into your honey/garlic mixture.
For the best flavor, give it a week before you start using it.
The honey will thin out, and the garlic will begin to turn gold in color as it soaks up the honey.
Now that you have your jar of honey-fermented garlic going, you can add honey or individual cloves to it as each gets low.
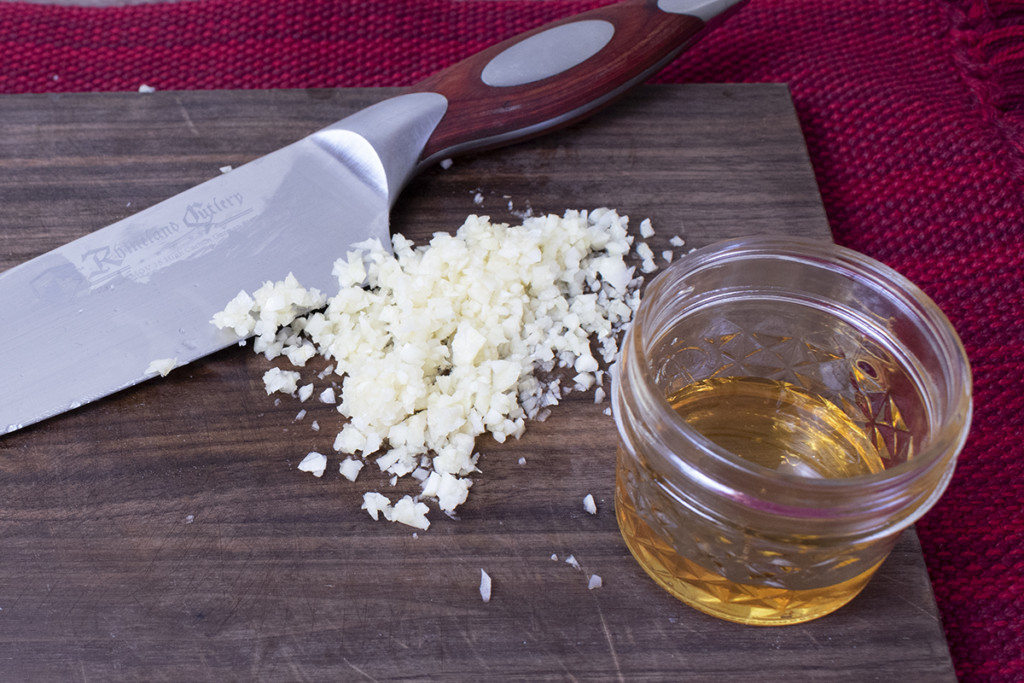
To change things up, try making a batch using finely minced garlic. This is an excellent option if you want to add a scoop of honey and garlic to veggie dishes as you’re cooking, or to mix in with salad dressings or marinades.
And that’s all there is to it. See? Easier than falling off a log.
Okay, great, Tracey, I made honey-fermented garlic. Now, what do I do with this stuff?
I’m so glad you asked.
Put it in everything.
- Add a few tablespoons of the garlicky, honey, as well as the cloves to your next batch of fire cider for an immune-boosting kick.
- Fish a few cloves out with a spoon and use them in the next recipe that calls for fresh garlic.
- Slow roast the cloves until they’re tender and then smash them with a little olive oil to make a decadent garlic spread for toast.
- Add the honey to homemade salad dressings.
- Use the garlicky honey in bread recipes that call for honey.
- Eat a clove of the garlic at the first sign of a cold to nip it in the bud. (And to ensure pesky coworkers keep their distance during the workday.)
Need more ideas? Here’s a super easy recipe that’ll have you licking the spoon.
Easy Garlic – Honey Mustard Dressing
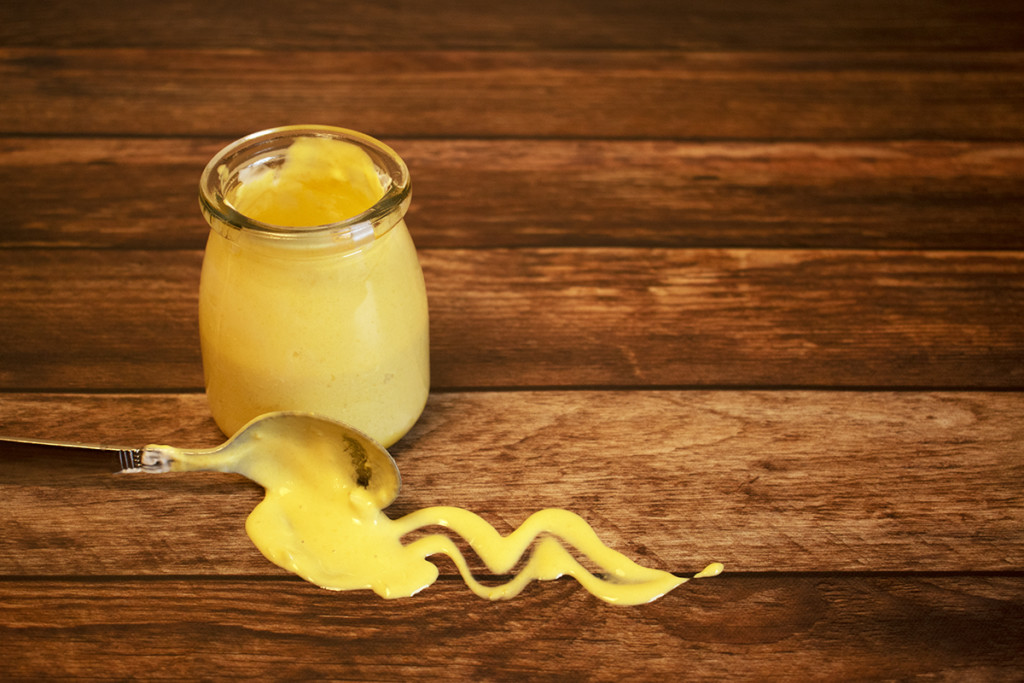
In a clean jar, combine the following:
- 1/3 cup of plain yogurt
- 2 tablespoons of prepared yellow mustard
- 1-2 tablespoons of fermented honey
Whisk the ingredients together, adding enough of the garlicky honey to reach the desired consistency. Enjoy on salads, spread on wings, or add the entire thing to your next batch of homemade macaroni and cheese.
Need another idea? Here’s an easy weeknight recipe for boneless chicken breasts.
Panko Crusted Honey Garlic Chicken Breasts
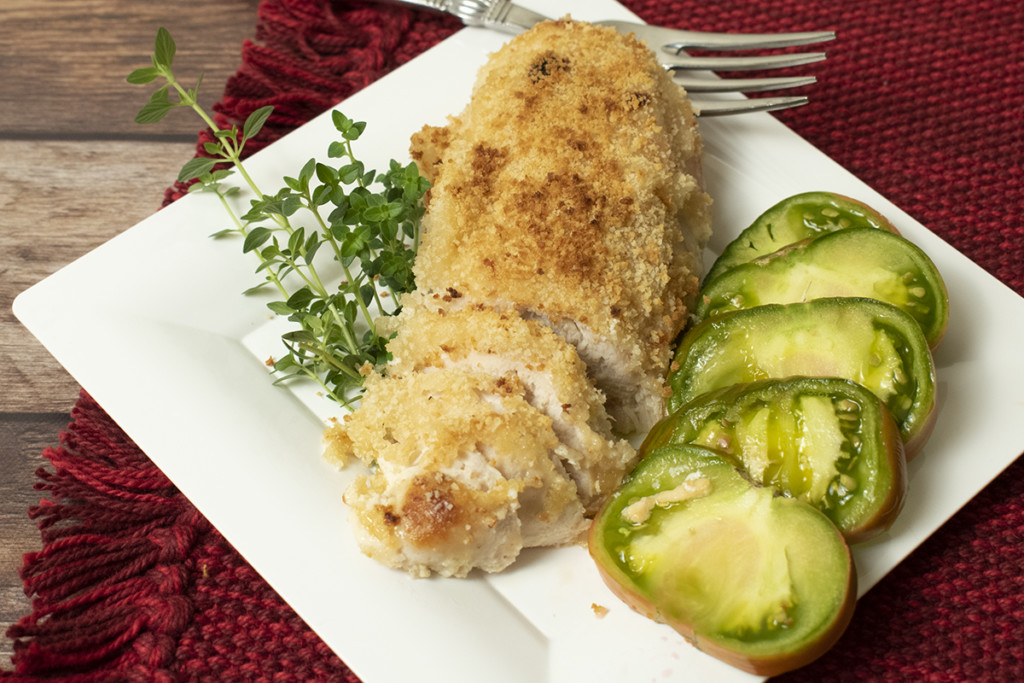
Ingredients
- 4 boneless, skinless chicken breasts, patted dry
- Salt and pepper
- ½ cup of sour cream
- 2 honey-fermented garlic cloves, finely minced
- 3 tablespoons of garlicky fermented honey
- ½ cup of panko breadcrumbs
Directions
- Preheat the oven to 350. Lightly grease a shallow baking dish. Place the chicken breasts in the baking dish and sprinkle them with salt and pepper.
- In a small dish, whisk together the sour cream, minced garlic, and garlicky-fermented honey. Spoon or baste half of the sauce over the chicken and bake uncovered for 25 minutes.
- Remove the chicken from the oven and spoon/baste the other half of the sauce over the chicken breasts. Sprinkle the panko breadcrumbs liberally over the chicken. Return to the oven and bake until golden, another 10-15 minutes.
- Enjoy!
I hope you choose to make a batch of honey-fermented garlic rather than falling off a log. And once you taste how delicious this healthy, fermented food is, I hope it has a permanent spot on your counter.
Ready to try a different fermentation method for preserving garlic? Give our lacto-fermented garlic a try.
Honey-Fermented Garlic - The Easiest Fermented Food Ever
Today I’m going to teach you how to make the easiest fermentable food there is – delicious honey-fermented garlic.
Ingredients
- - 1 to 1 1/2 cups of raw honey
- - 2-3 heads of garlic
- - sterilized pint jar with lid
- - airlock and lid (optional)
Instructions
- Sterilize your jar
- Peel the garlic, making sure you remove any of the papery skin and slice off any brown spots.
- Half fill your jar with garlic cloves and cover with raw honey. Seal tightly and give it a little shake.
- Put your jar in a warm spot on the counter.
- Check your jar every day and open the lid to "burp" the gas.
- Allow a week for the best flavor to develop.
Read Next:

Get the famous Rural Sprout newsletter delivered to your inbox.
Join the 50,000+ gardeners who get timely gardening tutorials, tips and tasks delivered direct to their inbox.