

Getting more value from your garden produce or farmers’ market haul is always the goal, and few kitchen hacks have a higher return on investment than fermenting.
Small batch fermentation is a simple preservation strategy that boosts both the flavors and nutritional value of your vegetables.
Fermenting 101: Understanding the Basics
This time tested method of food preservation is most likely a happy accident of history.
Laborers likely packed fresh produce in pots with salt and came back weeks later to discover the fermented result. Most cultures with abundant salt supplies had a tradition of fermenting, from sauerkraut in Europe to kimchi in Korea and soured grain dishes across Africa.
Though the specifics can vary, the process is simple.
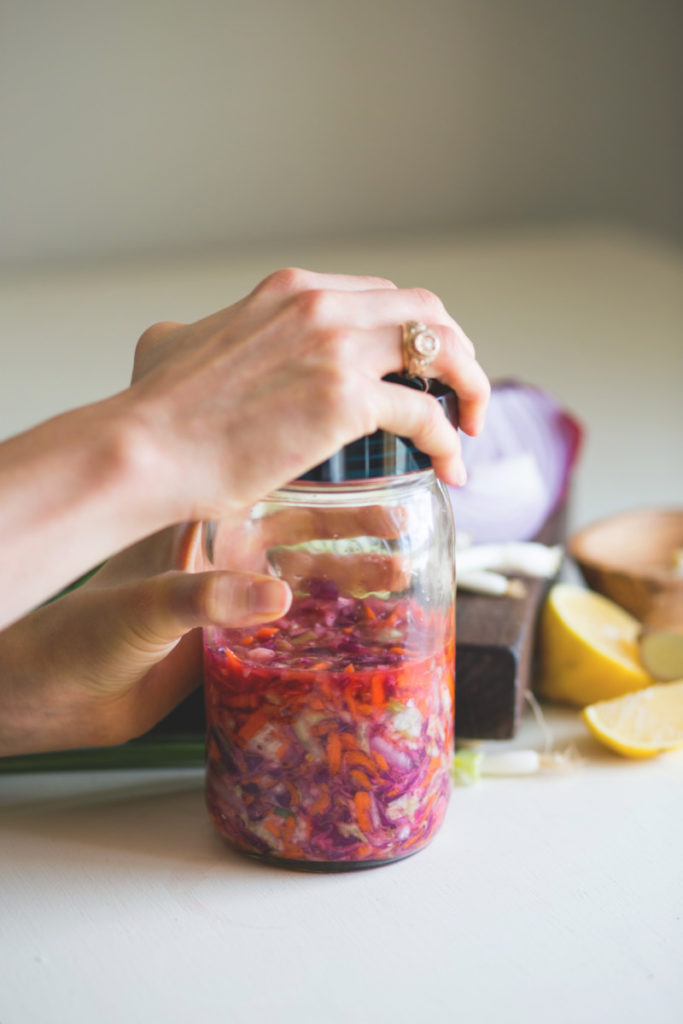
You’ll rough cut your produce of choice to release juices and increase surface area. Next you’ll add in salt or brine, which draws moisture out of the vegetables while inhibiting spoiling.
Let everything mingle together in an oxygen-free environment so the lactobacillus bacteria can do its job of digesting the natural sugars and transforming them into lactic acid. This acid creates a distinctive tangy flavor while preventing harmful microbes from getting established.
You can enjoy the end product immediately or store it in a cool place for future enjoyment. Refrigeration will stop the fermentation process—any ferment left on the counter will continue to soften and sour.
But why should you ferment in the first place? Let’s explore its advantages.
8 Reasons To Start Fermenting
Beyond being fun, there are many benefits to learning how to use a home fermenting kit.
1. Easy, Natural Food Preservation:
Don’t let this low-tech simplicity scare you; fermentation is one of the safest food preservation strategies. It’s the perfect way to improve the shelf life of homegrown produce without any more effort than prepping the ingredients and waiting for microbes to do their job. Compare it to canning, which requires you to sterilize and boil jars for long periods, and you’ll see the appeal of fermentation’s simplicity.
2. Enhanced Flavors:
The fermentation process creates lactic acid, which adds an appealing tangy taste to the dish.
3. Acts as a Digestive Aid:
Fermented foods have long been used as a natural remedy for stomach problems. They can stimulate the production of digestive juices, keep your stomach at the optimal pH level, and break down complex carbohydrates so your system better absorbs their nutritional benefits.
4. Supports the Endocrine System:
Fermented foods may help you moderate your hormones. The gastrointestinal tract is the body’s largest endocrine organ, and keeping it healthy will positively affect your mood, weight, and immune system.
5. Lowers Disease Risk:
Adding ferments to your diet may stave off lifestyle diseases. One study in the British Journal of Nutrition determined that eating fermented dairy can lower your risk of coronary heart disease. Another study found that good gut bacteria (the kind fermented foods provide) reduced the risk of cancer for mice.
6. Better for the Planet:
Canning and freezing are both energy-intensive ways to preserve food. Learning how to use a home fermentation kit, in contrast, requires nothing more than some counter space, which makes you less dependent on fossil fuels for food storage.
7. May Boost Nutrition Content:
Not only do fermented vegetables retain their original nutritional benefits, but this “predigestion” process actually increases their bioavailability (especially calcium and vitamin C), so your body can absorb a higher percentage of them. Fermentation also synthesizes nutrients associated with skin, nail, and hair health, including biotin, folic acid, and vitamin B12.
8. Delivers Probiotics:
Consuming fermented foods gives your stomach a dose of beneficial bacteria known as probiotics. They collectively improve your gut microbiome for wide-ranging health benefits.
It doesn’t take much time or specialty equipment to learn how to ferment, so consider experimenting with homemade ferments for your next culinary adventure.
Let’s look at what comes in a home fermentation kit to make the process even simpler.
What Comes In a Fermentation Kit?
While all home fermenting kits vary, there are several components you should know about.
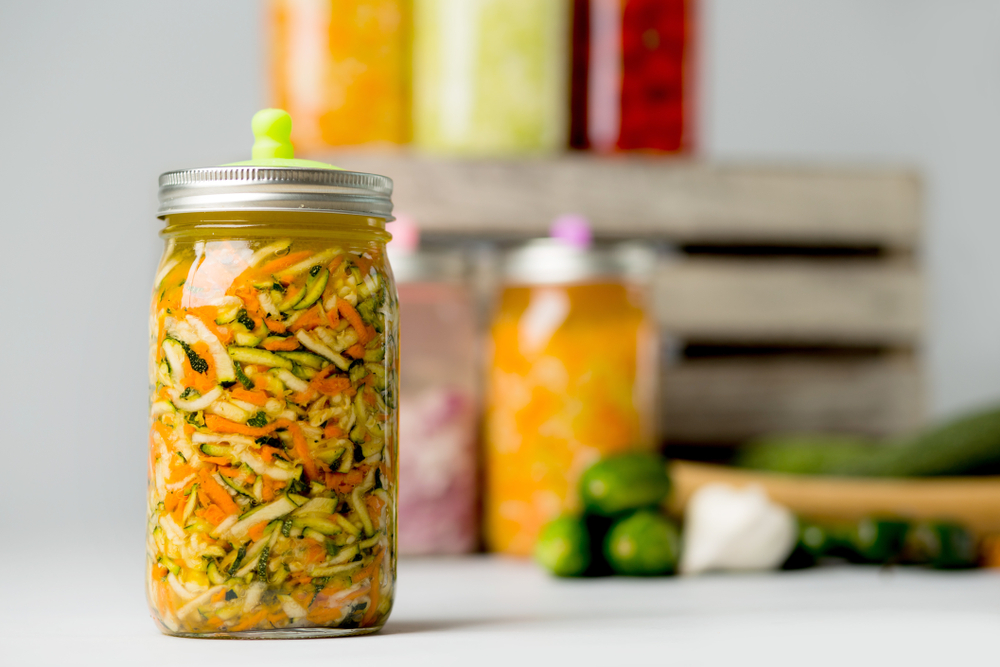
Airlocks
Airlocks are a component of the jar lid that creates an anaerobic (oxygen-free) environment within it. They act as one-way valves to release fermentation gasses without letting in fresh oxygen, microbes, mold spores, or other contaminants.
While they aren’t technically necessary for fermenting (you can get by with just a coffee filter for small batches), they significantly reduce the odds of developing mold or having a batch turn bad.
Below are two popular types:
- Three-Piece Water-Filled Cup Airlocks: Commonly used by beer and winemakers, this style lets oxygen and excess CO2 escape from the jar’s top, while the water within it prevents air, mold spores, and other contaminants from entering the jar. This system is slightly higher maintenance, as you’ll need to fill the inner cap with water.
- One-Way Waterless Self-Sealing Airlock Valves: These simple caps are usually made from silicone. They bulge as gasses build up within the jar until they escaped through small openings at the top, which reseal themselves once the pressure relieves. Again, this prevents outside contamination.
Note: You don’t need airlocks for storing your ferments, so you only need to purchase as many as you plan to use when actively fermenting.
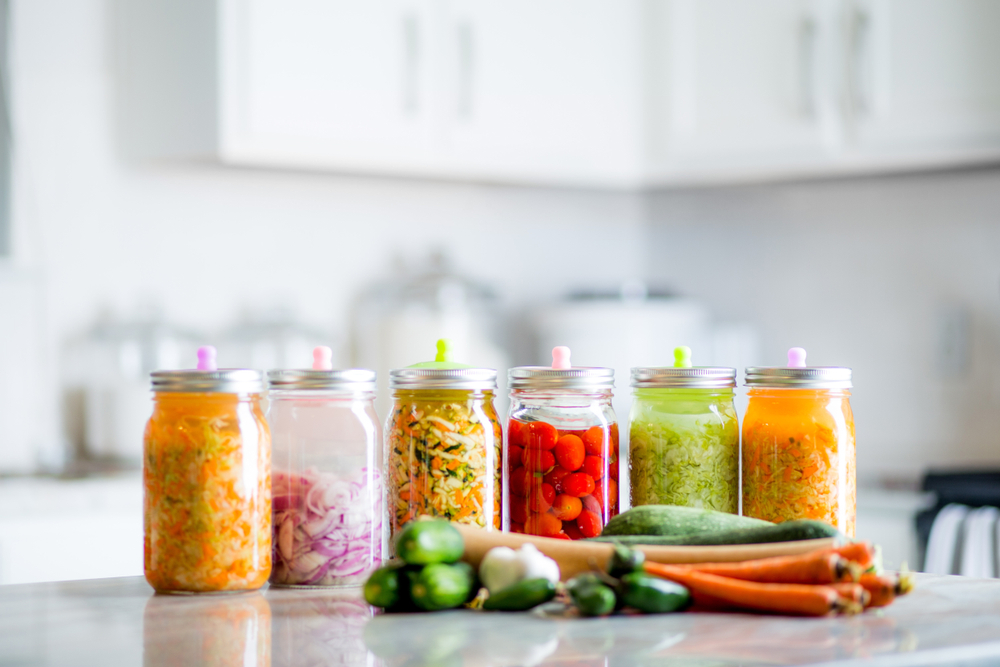
Fermentation Weights
These special-shaped weights keep your jar’s contents submerged below the brine to limit air exposure and speed up the fermentation process.
Fermenting Jars
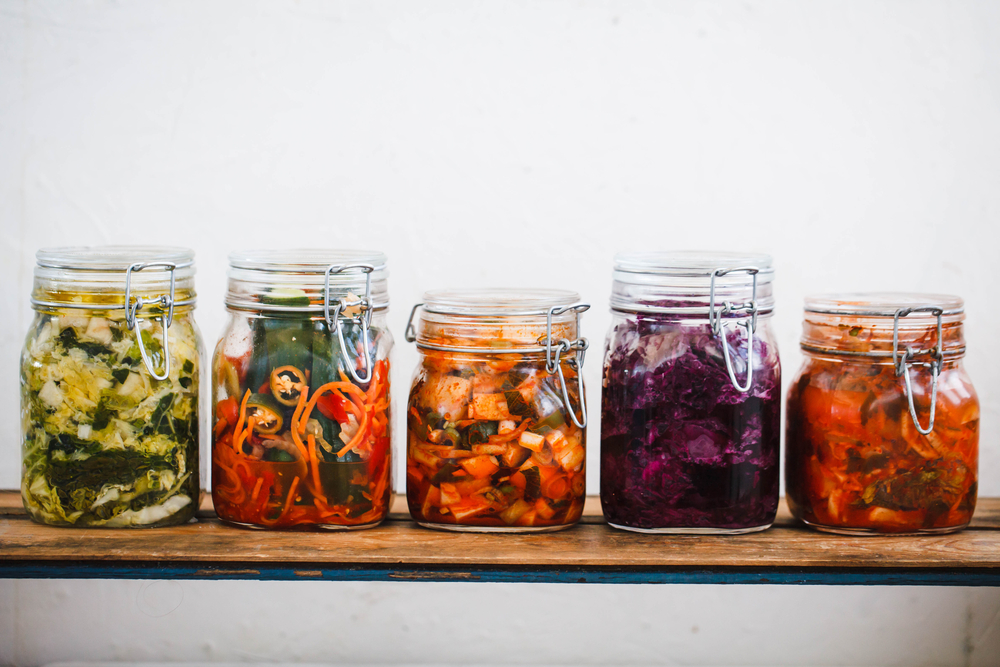
Just about any container can be adapted for fermenting purposes, though most fermenting kits today rely on wide-mouth mason jars. Not only are these versatile containers easy to sterilize, they also let you monitor the fermentation process in real-time.
Porcelain and ceramic containers will also work, though you should avoid plastics, as they can leach chemicals into your food over time.
Pickle Packer
You want your vegetable material to be as compressed as possible within the jar, and a pickle packer makes this easy. Use it to break down plant fibers, so they release their juices and ferment fast.
Other Items
Expect to provide these other fermentation essentials yourself.
- Fresh produce: While any raw vegetable can be fermented, you’ll do best to stick with fresh, organic produce that’s free of pesticide exposure.
- Water: Pure, filtered water works best. Allow tap water to sit out before using so the chlorine can dissipate.
- Knife: Depending on your recipe, you’ll want a sharp knife that makes shredding easy and maximizes surface area for fermenting.
- Preservation Agent: Depending on your recipe, you’ll need salt, whey, or a starter culture for your ferment. If you have some on hand, unflavored water kefir or kombucha can both be used as a starter culture at a ratio of about ¼ cup per quart of brine. You can use brine from one batch of fermented vegetables to another by adding ¼ cup to the new batch to inoculate it. Regarding salt, choose one that’s additive-free (pickling salt works well), so your ferments don’t develop unappealing flavors or colors.
Home Fermentation Kits To Try
If you are looking to get started with home fermenting, then see below for a selection of complete kits you can try.
Dry Salting Or Brining? What’s the Difference?
One decision to make is whether to dry salt or brine your ferments.
Dry salting refers to mixing finely sliced produce with salt so that it naturally brings out the juices to the point that it ends up submerged. Sauerkraut is a classic example. The general rule is to use one tablespoon of fine ground salt per two pounds of vegetables.
Brining, in contrast, lets you leave your vegetables whole or in larger chunks. You’ll pack them tightly in a jar, cover them with a brine solution, and allow them to ferment. Standard practice is about one teaspoon of salt per cup of water.
10 Home Fermentation Recipes
Once you’ve mastered the home fermentation essentials, it’s time to put your prowess to work with different recipes. Consider the following for inspiration.
1. Sauerkraut:
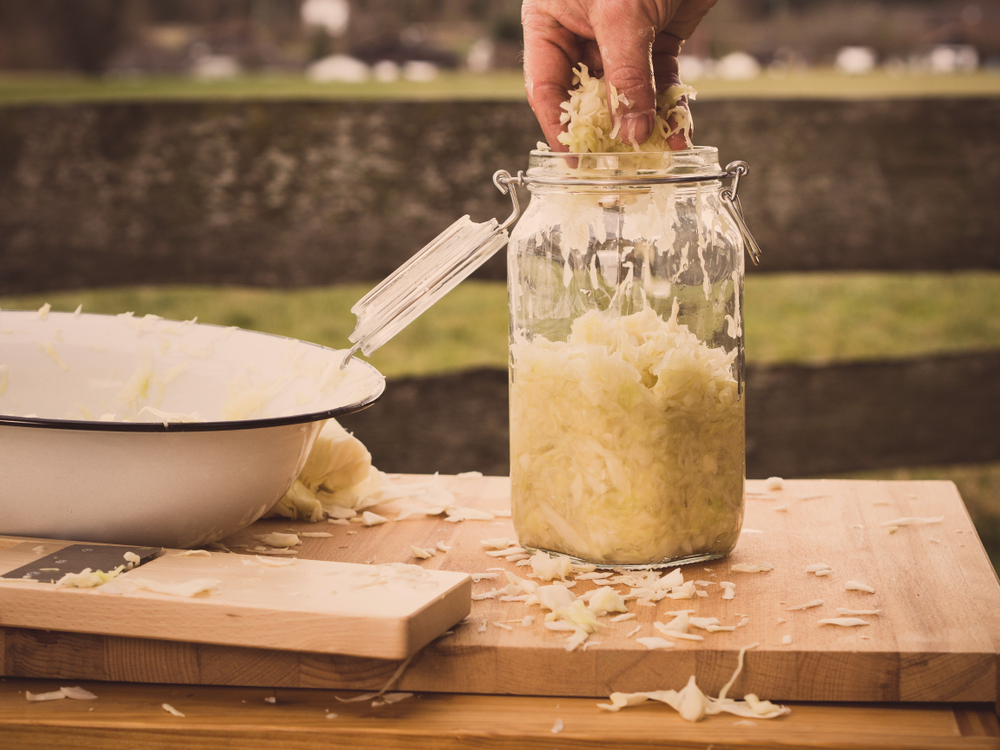
This fermentation staple is simple for beginners. All that’s necessary is cabbage, salt, and time before you have a tasty condiment. The key to success is thoroughly massaging your cabbage so it breaks down faster.
Learn more from The Pioneer Woman.
2. Kimchi:
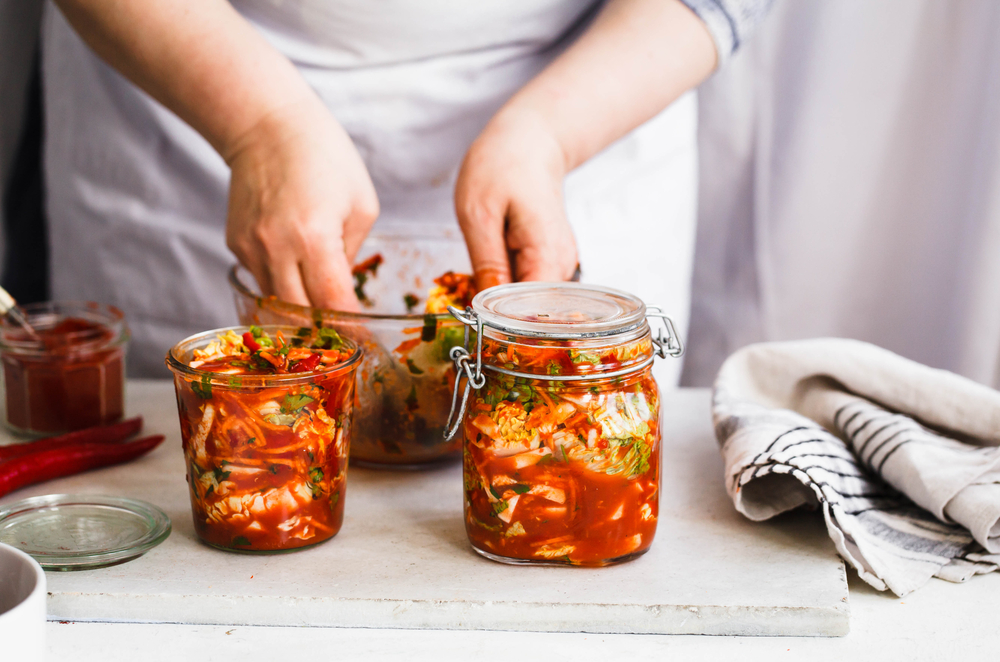
This Korean staple is a versatile addition to almost any dish that needs some spice. It’s another take on fermented cabbage you can customize from the traditional recipe with your own spice mixes.
Get started with Feasting at Home.
3. Fermented Ketchup:
Bring more flavor nuance into your homemade ketchup by using a starter culture to ferment it. Apple cider vinegar and whey (or water kefir) are responsible for the microbial action that makes it noteworthy.
Find the recipe at Serious Eats.
4. Apple Cider Vinegar:
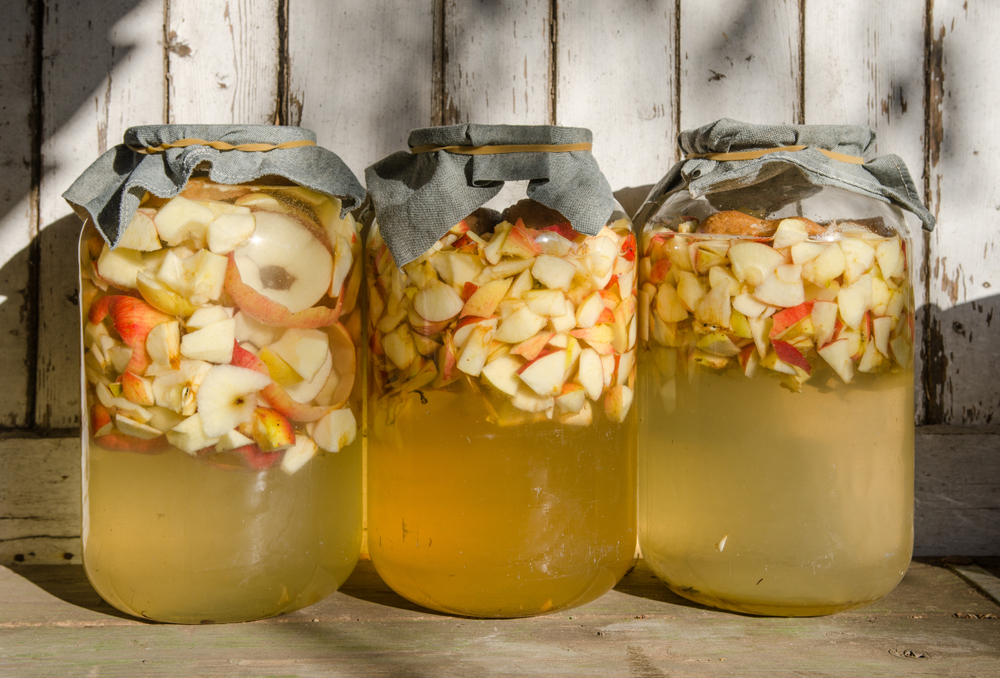
Apple cider vinegar makes a fizzy tonic that is praised for its impressive health benefits. Brew your own at home with nothing but apple scraps, sugar, and some premade vinegar as an inoculate
Instructions at Fermenting for Foodies.
5. Beet Kvass:
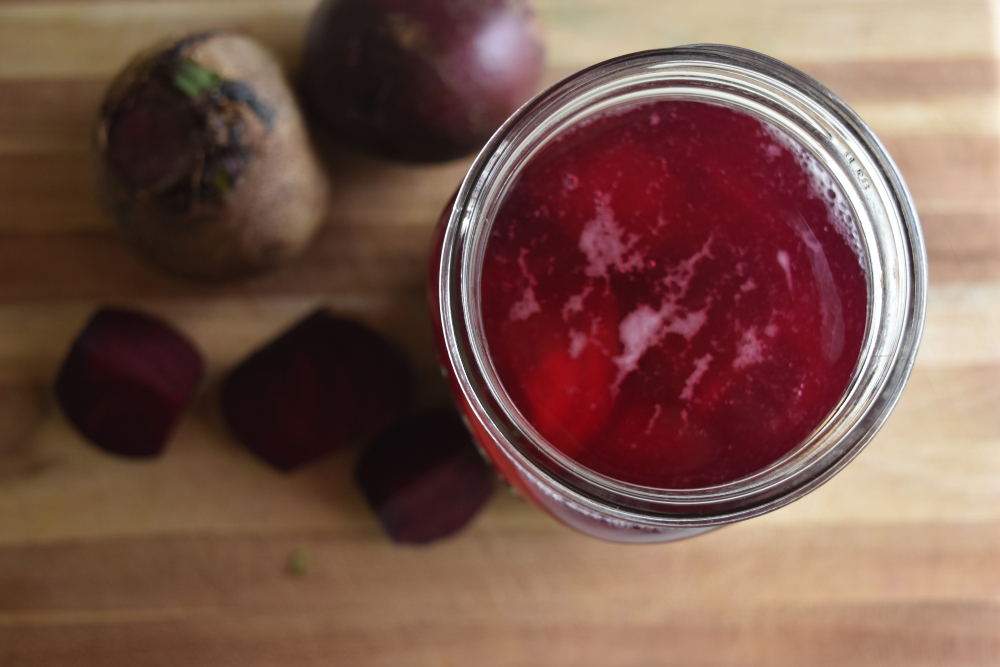
This jewel-toned drink needs more attention. Lacto-fermented beets are burgeoning with probiotics and other health benefits in a tangy, salty drink that is surprisingly satisfying. It’s one of the easiest fermented dishes you’ll ever try.
Learn more at Rural Sprout.
6. Fermented Giardiniera:
Enjoy the flavor variance in this dish of Italian pickled vegetables that are traditionally served as appetizers. Fermenting for Foodies shares what you need to ferment a batch with cauliflower, bell peppers, carrots, cucumbers, celery, and more.
7. Sour Dill Pickles:
Forget vinegary pickles; fermented pickles offer far more flavor nuance and nutritional benefits. You can customize the spices in this recipe from the Nourished Kitchen to your own preferences.
8. Gingered Carrots:
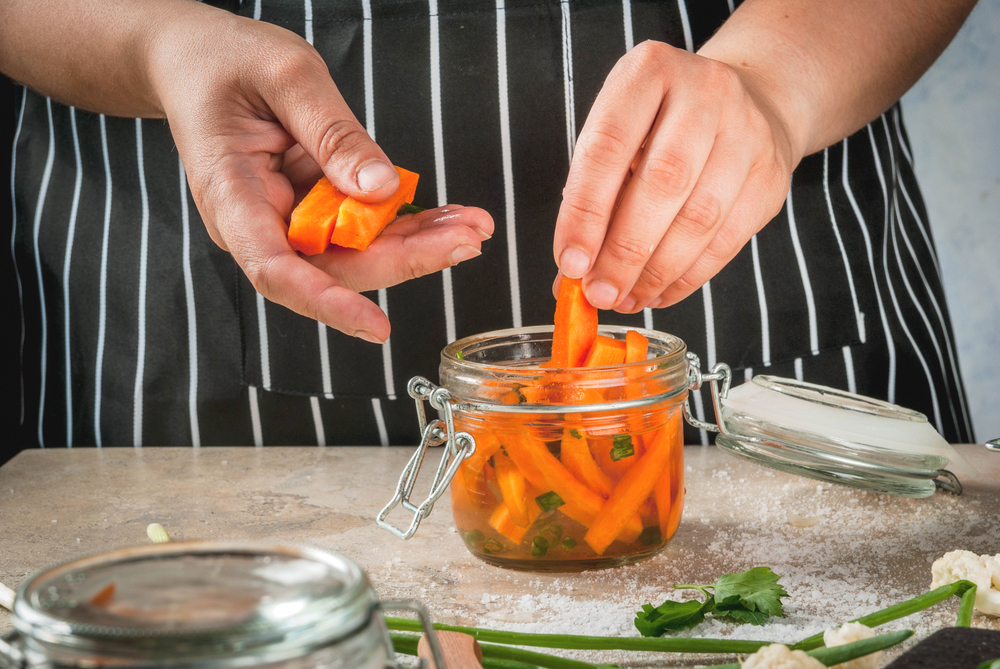
For those new to fermenting flavors, these carrots make for a mild introduction. They stay crisp after fermenting so you can use them with your favorite dips.
Clean Eating shows you how.
9. Preserved Lemons:

Beloved in Moroccan cuisine, preserved lemons let you infuse tang into dishes ranging from salads to seafood or even your evening cocktail. Follow the recipe from the NYT Cooking, and you can enjoy them within four weeks.
10. Lacto Fermented Garlic:
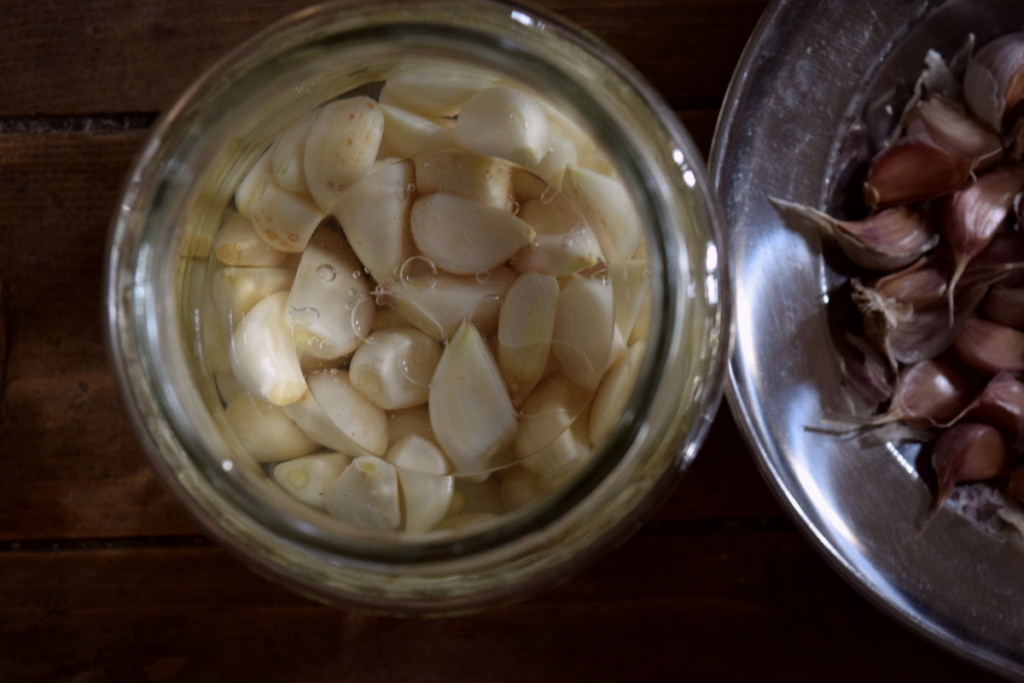
You’re missing out if you’ve never tried fermented garlic. The aging process mellows out the flavor without removing any health benefits, making the resulting cloves perfect for pasta dishes.
Recipe at Rural Sprout.
Enjoy Fermenting at Home for Better Health
Once you start learning how to use a home fermenting kit, you’ll be amazed at what options open up for experimentation.
Just be mindful that eating too much fermented food at once can overwhelm your digestive system if you’re not used to it. Start with a tablespoon or two a day for the first few weeks, and slowly build up based on your body’s response.
Soon, you’ll be enjoying the sour tang of home ferments on everything from scrambled eggs to stir-fries, and your system will be better for it.

Get the famous Rural Sprout newsletter delivered to your inbox.
Join the 50,000+ gardeners who get timely gardening tutorials, tips and tasks delivered direct to their inbox.