

Often, social media gets a bad rep. And it’s usually warranted. But one of my favorite things about social media is the ability to share ideas that make life easier. Someone halfway across the world shares this ingenious trick they’ve been using for ages, and the rest of us benefit. Thank you, social media; you’ve just made the last two hours of scrolling worth it!
(To make social media really worth it, you might want to follow Rural Sprout on Facebook where we share all our best ideas daily.)
But every now and then, you see a tip or a hack and think, “There’s no way that works.”
For instance, a video showing how you can grow tomatoes from tomato slices.
I know, pretty crazy, right?

You can find this little gardening trick all over the place. Here are a couple of videos if you’ve never seen them.
YouTube (I’m a sucker for a good time lapse.)
TikTok (This guy needs to cut back on the caffeine).
The idea is simple.
You slice a tomato and then “plant” the slices in a pot of soil, water them, and in a couple of weeks – voila! – you’ve got tomato seedlings to plant in your garden.
When I first stumbled across this hack (Is anyone else growing tired of that word?), I immediately thought it wouldn’t work. Obviously, the tomato slices would just rot in the soil. But the more I thought about it, the more I thought,
“Why not? Of course, the tomato slices are going to rot in the soil. That’s exactly what needs to happen for this to work.”
Join me in this two-part series as we test this fun gardening hack to see if it works and whether or not it’s worth it. I’ll start by getting everything set up and planted. We’ll take a look at why, in theory, this should work but also why it probably doesn’t.
Even if you do end up with seedlings, right off the bat, I can see a glaring issue with this nifty trick. (I’ll bet seasoned gardeners can spot it.)
I will do everything I can to set this up so it will succeed, and in a couple of weeks, I’ll post an update on whether or not it works.
Let’s jump in.
Why I Don’t Think It Will Work
I’m a natural-born skeptic.
I never outgrew that annoying phase of asking, “Why?” I want to know why we do it this way or how it works. (I used to work in a stodgy, bureaucratic institution where “that’s how it’s always been done” was the usual reply. I ruffled a few feathers during my time there.)
You should be a natural-born skeptic too. Don’t take things at face value. It’s always a good idea to ask questions. If something seems a little too easy, it probably is.
And this hack seems a little too easy.
In this day and age, it’s incredibly easy to fake a photo or video for social media. One of the biggest red flags for me is that if you watch enough videos demonstrating this neat trick, you’ll notice that the seedlings that pop up aren’t in the same place where the tomato slices were “planted.”
Check out this suspect video. Notice where the two tomato slices are planted, and then a few seconds later in the video, you’ve got perfectly spaced seedlings all around the pot. Riiiiiight.
But the biggest reason I’m skeptical lies in my garden, and probably in yours too.
We grow tomatoes every year.
Naturally, some of them fall off the plant and end up rotting where they land. And it never fails that every spring, one or two volunteer tomato seedlings sprout up. We find them in the compost sometimes as well.
But if this hack works as well as all these content creators claim, shouldn’t we all see tomato seedlings popping up as overripe tomatoes hit the dirt in our gardens?
Something doesn’t add up there.
But oddly enough, this is also why I think it might actually work.
Why It Should Work
Alright, kids, in today’s class, we’re going to learn a bit of anatomy – tomato anatomy. Inside tomatoes are cavities that hold the seeds. These are called locular cavities, and they can be either bilocular (usually cherry or plum tomatoes) or multilocular (your slicing varieties).
You’ve seen them each time you slice open a tomato.
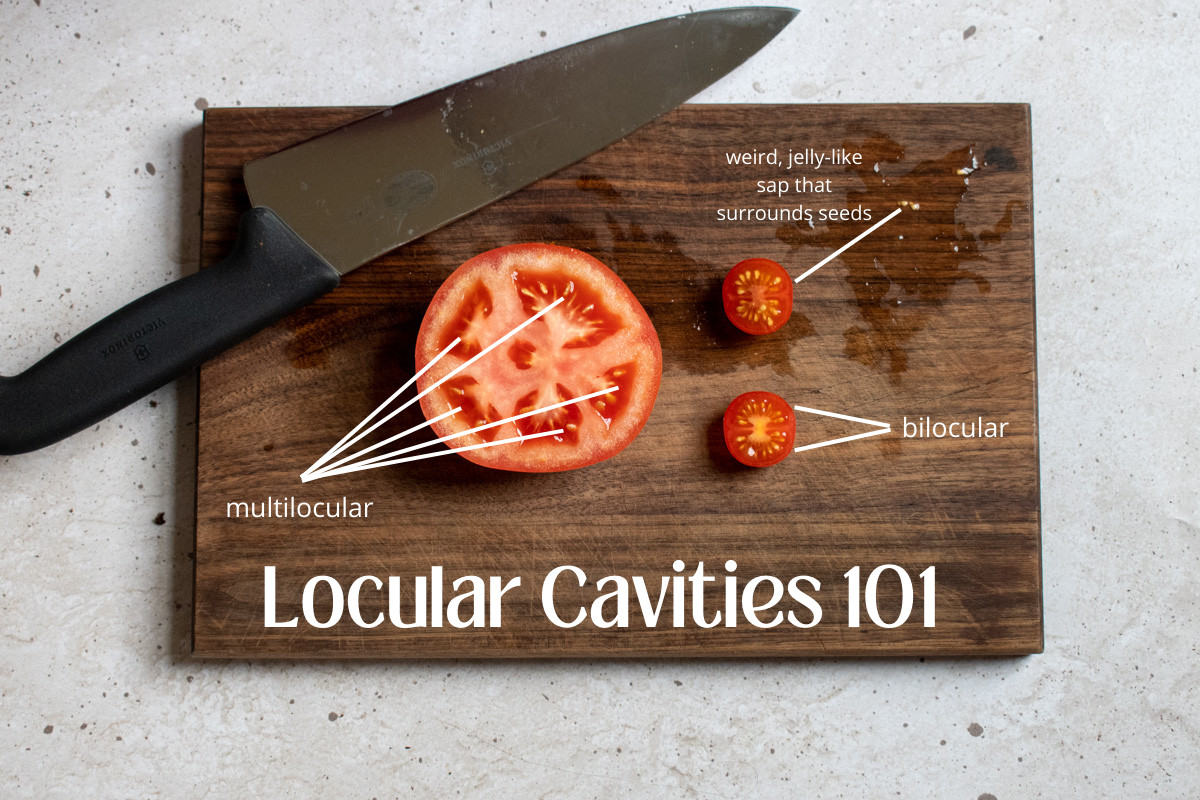
Any recipe that has you scoop out the seeds, such as when making salsa, has you scooping out the locular cavities. Throw that one around the kitchen a few times.
“Honey, can you scoop out the locular cavities on the tomatoes while I remove the capsaicin glands from the jalapenos?”
You’ve also probably noticed the jelly-like substance surrounding the seeds. This thick, sap forms a sac around each seed and contains a naturally occurring compound that prevents germination.
It’s noted on gardening websites that this is to prevent the seeds from germinating right before cold weather, but looking at wild tomatoes and their native climates, where they grow perennially, I would respectfully disagree and call this a wild guess at best.
However, tomato seeds will only germinate after the sap has broken down, revealing the testa (the outer covering of the seed).
If you’ve ever saved tomato seeds, you know you have to ferment them to remove this gel so the seeds will germinate properly next year.
In the wild, this whole process happens naturally.
When tomatoes fall to the ground in the Andes in South America, they rot where they fall. Fermentation happens as the plant rots. Sugars inside the tomato mix with naturally occurring yeast from the air (yeast is everywhere), and bam – you’ve got the world’s tiniest microbrewery inside a rotting tomato. Eventually, the whole fruit breaks down, leaving behind seeds ready to germinate.
This entire process only takes a couple of weeks, which is why I think there’s more going on here than preventing plants from growing right before winter.
That reasoning only makes sense for cultivated tomatoes grown somewhere with an actual cold winter. Tomatoes have been growing wild year-round for millennia in South America. If I had to hazard a guess, I would say the breaking down of the sap acts more as scarification of the seed. But what do I know?
The truth is, from a scientific standpoint, there’s still a lot about germination that we don’t know.
Anywho, this process is also how we end up with volunteer plants in our gardens. And this is why I think there’s a chance this will work. If the tomato slices rot and begin to ferment, then the gel coating on the seeds should dissolve, and the seeds germinate.
Let’s give it a go and find out.
The Set Up
I’ve watched numerous videos for this technique, and there doesn’t seem to be any hard and fast guidance available. Every video has different parameters. (Another red flag that makes me wonder about this technique.) So I’ve gleaned the parts from each video that seem the most conducive to success.
Soil

I’ve seen numerous soil suggestions – from soilless seed-starting mix to potting soil to a mix of garden soil and compost. I will use a soilless seed-starting mix as I feel it will give us the best chance at success. After all, it’s specifically suited to starting seeds, and that’s our goal.
Container
Choose a container wide enough for your slices to lay flat. You will prick out and pot up the resulting seedlings later. (Don’t forget to plant them sideways.)
That is, if this actually works.
Choosing a Tomato
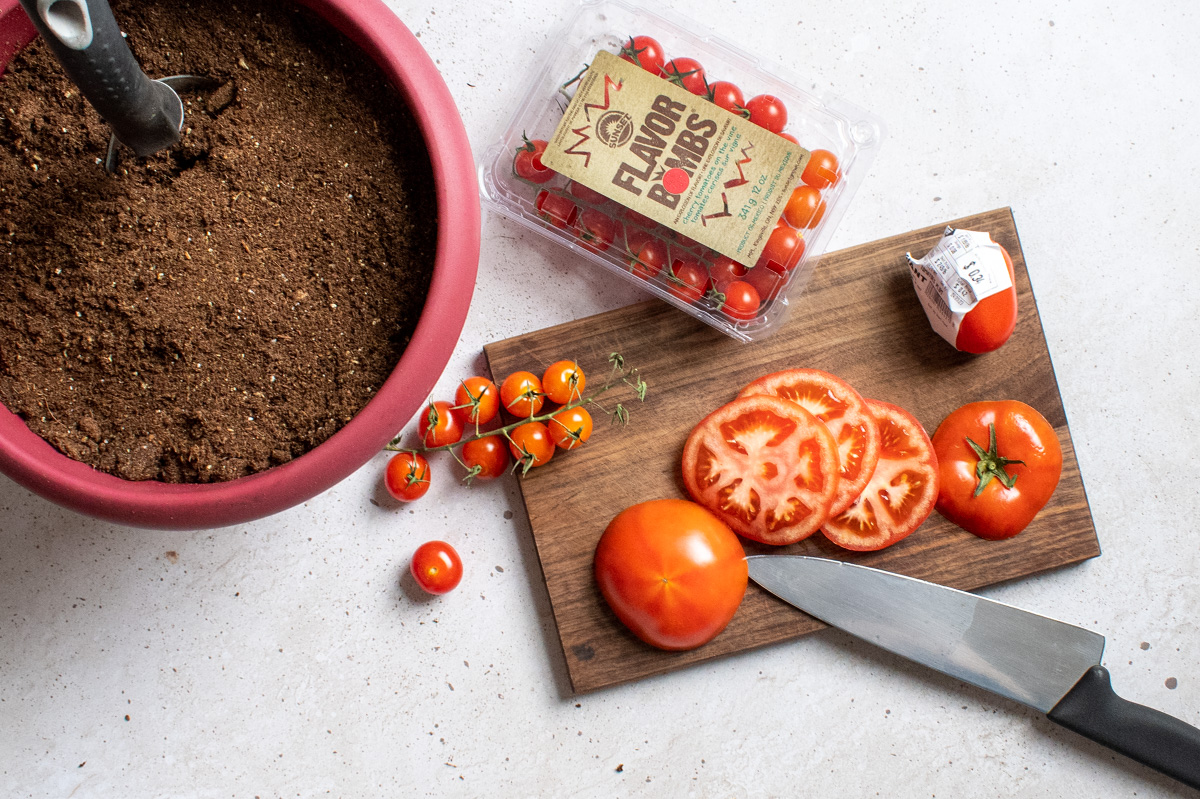
Like me, you’ll most likely need to use a tomato from the supermarket; after all, that’s generally all that’s available when you would start tomato seedlings in late winter or early spring. Be sure to look for the freshest, healthiest tomatoes. Avoid ones with soft spots, bruising, or cracks.
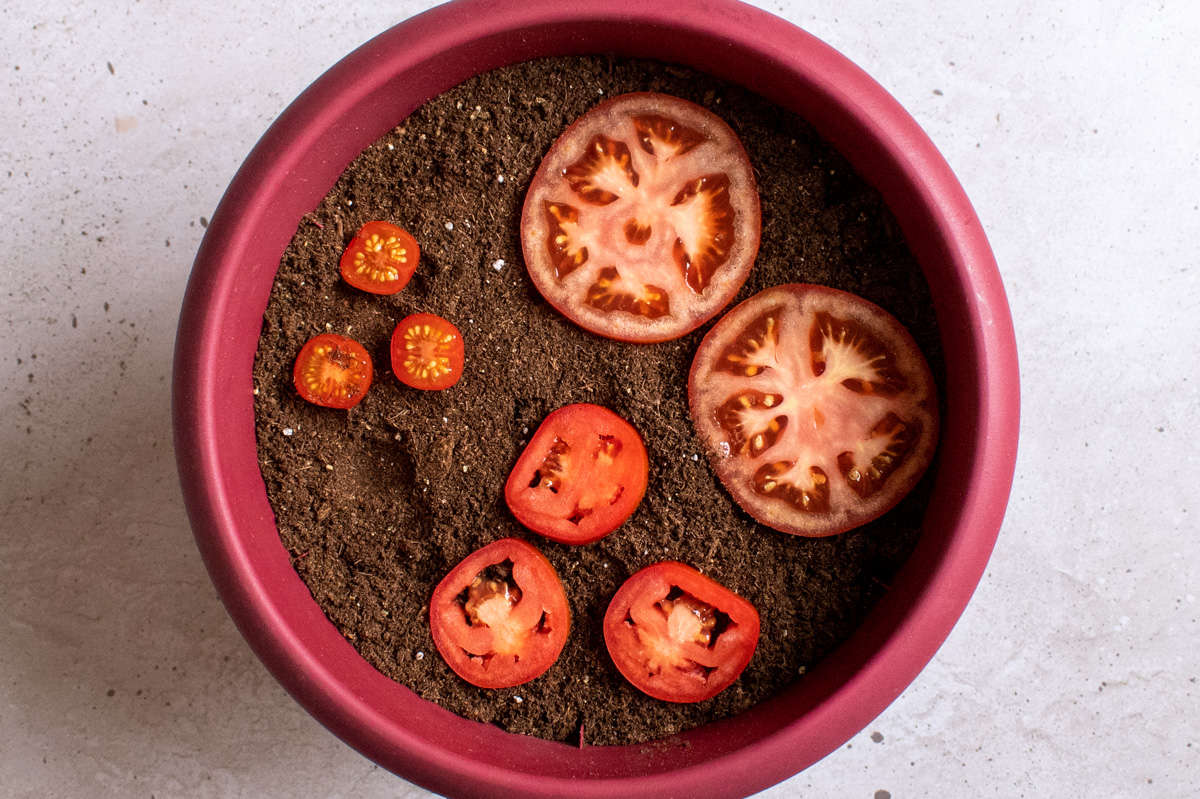
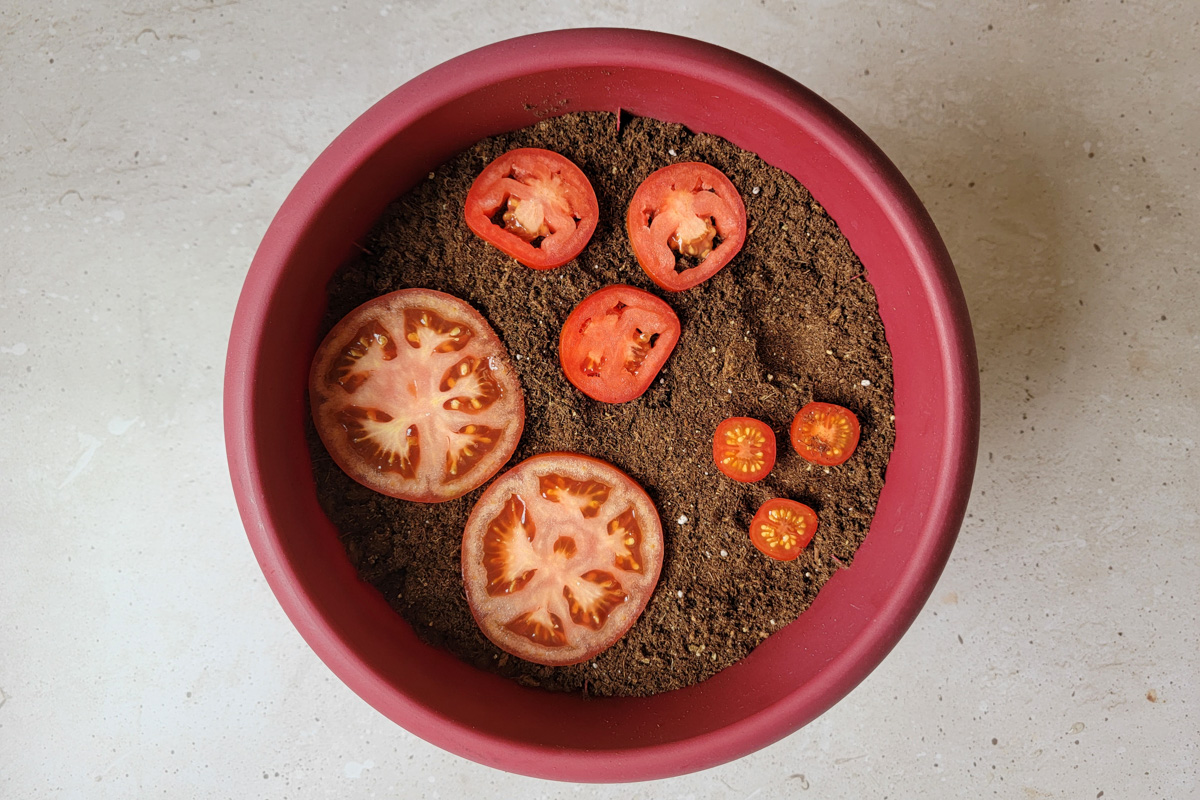
We will try three different tomato slices, as I’ve seen all three used in these videos. I’ve chosen a cherry tomato, a plum tomato, and a larger slicing tomato labeled ‘Beefsteak.’
What To Do
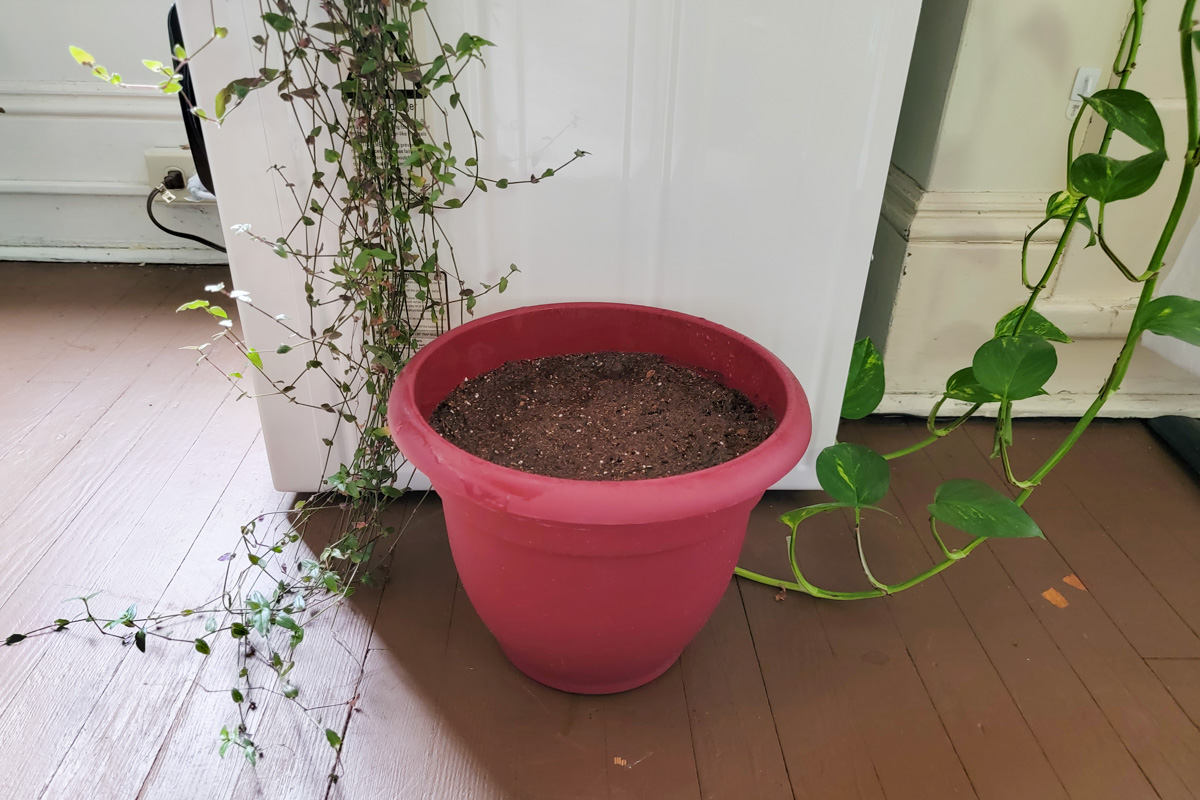
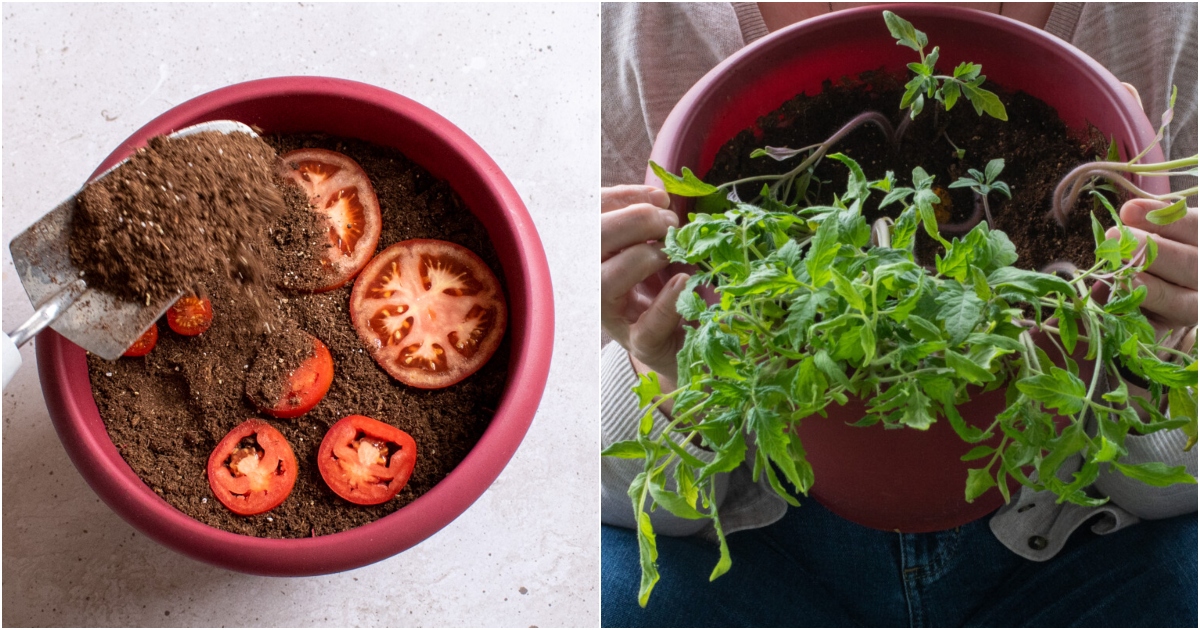
- Fill your container with potting mix, leaving a space of a couple of inches at the top.
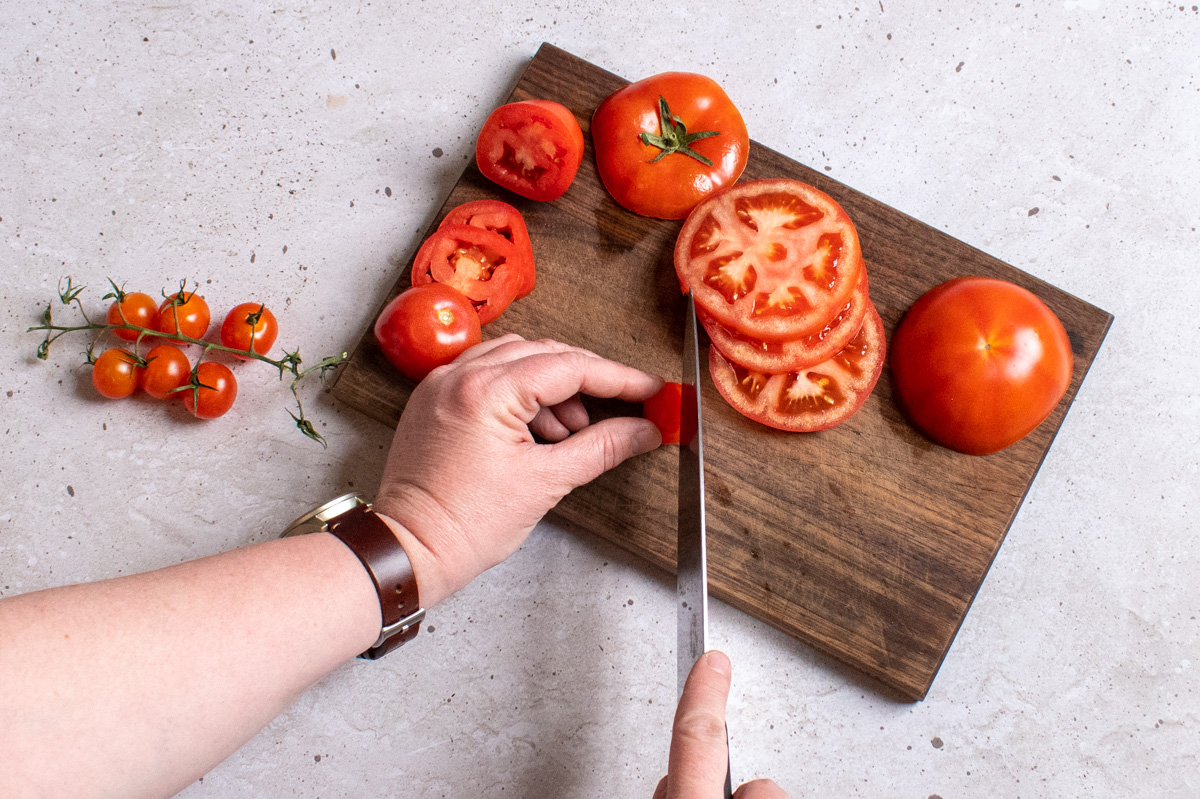
- Slice the tomato. There seems to be no rhyme or reason for how thick. I’ve seen paper-thin slices used, I’ve seen suggestions of ¼,” and I’ve even seen people simply slice cherry tomatoes in half.
- I will cut the cherry tomato into halves and the other two tomatoes into ¼” slices.
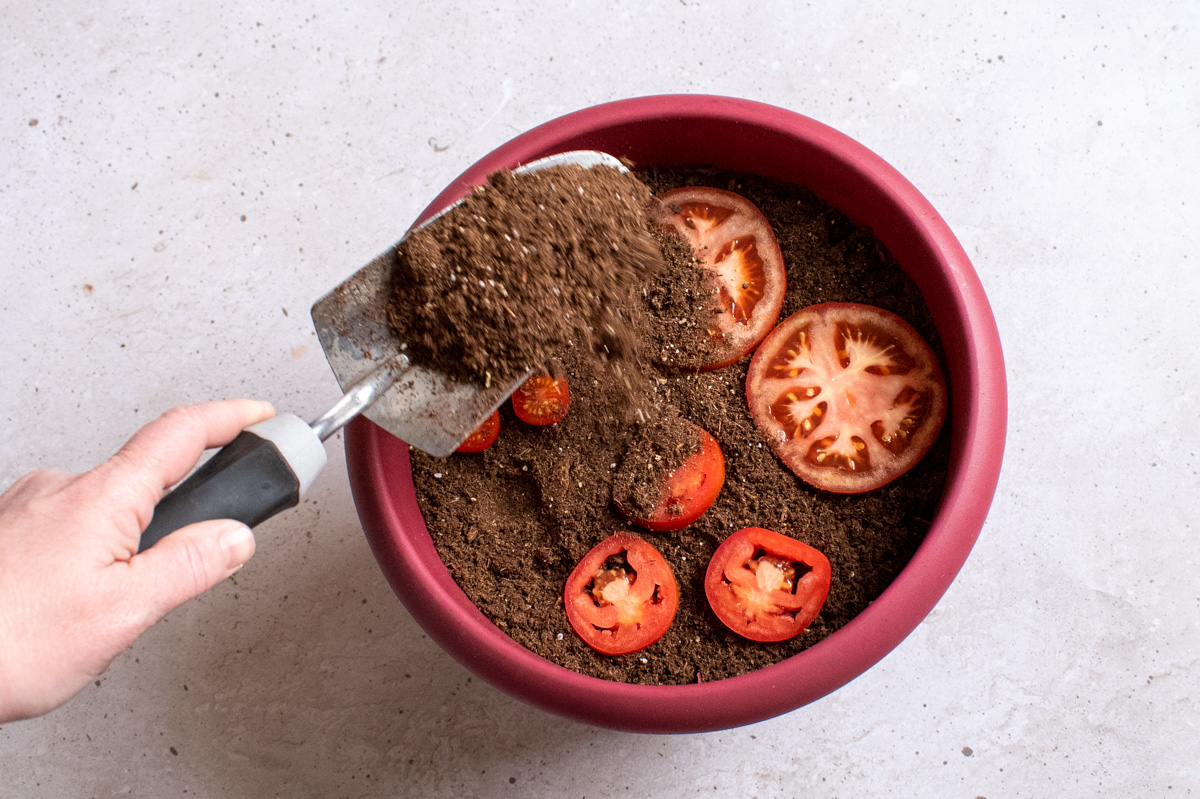
- Lay the slices on top of the potting mix and cover them lightly. Water them well, using a spray bottle, so you don’t wash the potting mix off of them.

And Now We Wait
Place the pot somewhere warm, where it won’t receive direct sunlight and continue to water it with the spray bottle as the soil dries out.
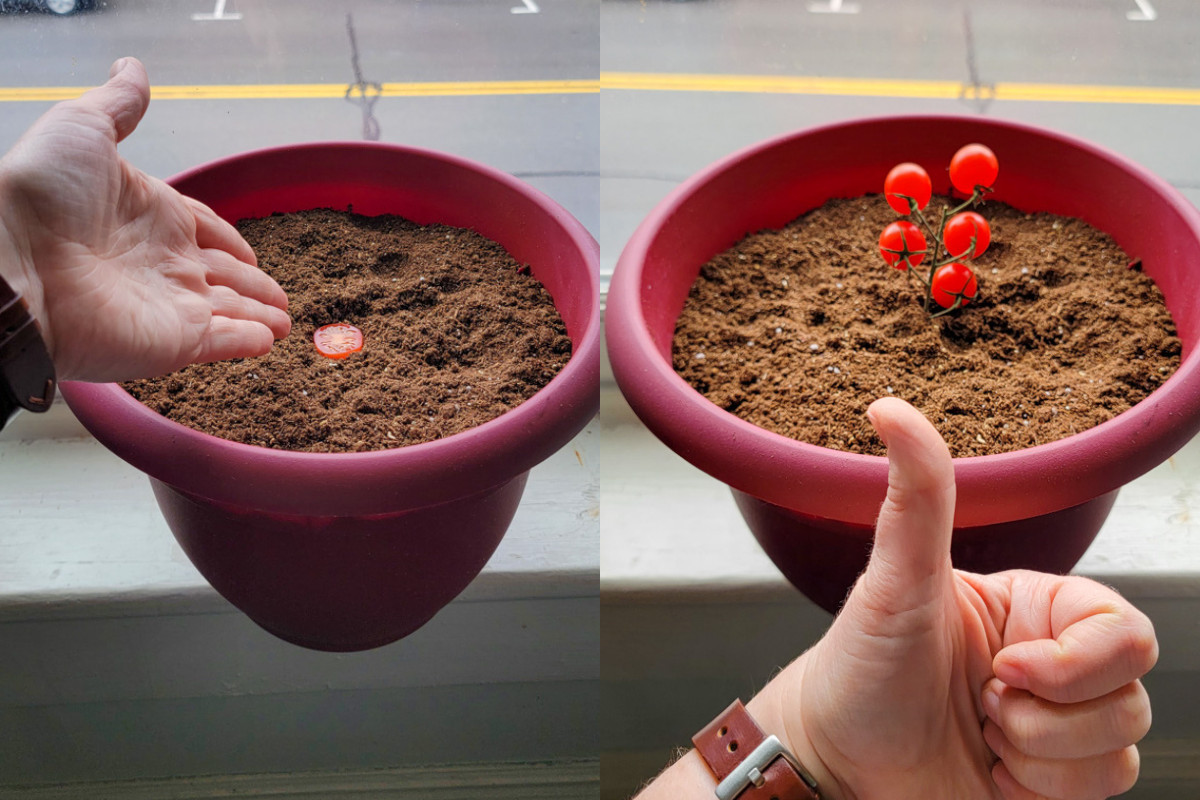
In theory, we should see sprouts within 7-14 days.
At that point, move the pot where it will get plenty of light, then stand back, shake your head and mumble some bemused statement that amounts to, “Well, I’ll be…it worked.”
I hope it doesn’t smell like rotten tomatoes in a week.
No Matter How You Slice It, There Are Problems With This Hack
I’ll be back in a couple of weeks with an update.
UPDATE MAY 2023: I’m back and I’ve got some results to share. Come and take a look at the surprising results from this tomato planting experiment.
If it works, hopefully, I’ll have some tips for success should you choose to try starting your own sliced tomato seedlings.
But even if it does work, I have a hunch I’ll still start my tomatoes the old-fashioned way each spring – with a packet of seeds. As I mentioned way back in the beginning, there is a glaringly obvious problem with this method of starting seedlings. We’ll get to it in the update.
But for now, I’ll leave you with a piece of advice my mother always gave me whenever I was in trouble for some hair-brained idea I carried out to fruition. (It was generally accompanied by an exasperated sigh and a loss of TV viewing privileges for a week or two.)
Just because you can do something doesn’t mean you should.
See The Results:

Get the famous Rural Sprout newsletter delivered to your inbox.
Join the 50,000+ gardeners who get timely gardening tutorials, tips and tasks delivered direct to their inbox.