


At long last, here’s the update on the crazy garden hack we tried – growing tomato seedlings from a tomato slice.
We watched some sketchy YouTube videos and vague TikTok instructions. Ultimately, I had to try this for myself to see if it worked.
We even had readers write in to share their thoughts on whether or not they thought this would work. I had a couple of folks say they tried it, and it worked fine and others who said it didn’t work for them.
Read on to find out if it worked.
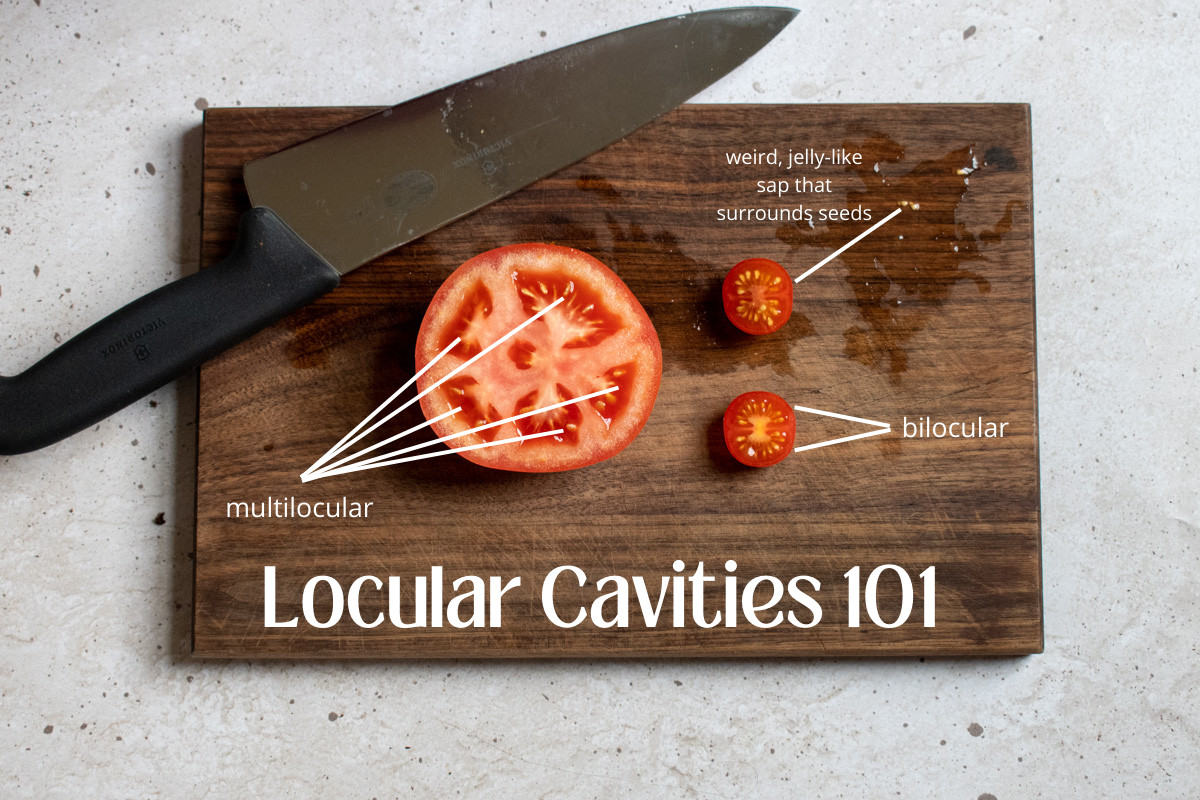
I was optimistically skeptical going into this. As I said in the initial setup, the fact that the slice will slowly rot in the soil is exactly what needs to happen for this to work. If you recall, tomato seeds have a special gel coating around them that breaks down, allowing the seed to germinate. The natural rotting process causes this to happen in nature.
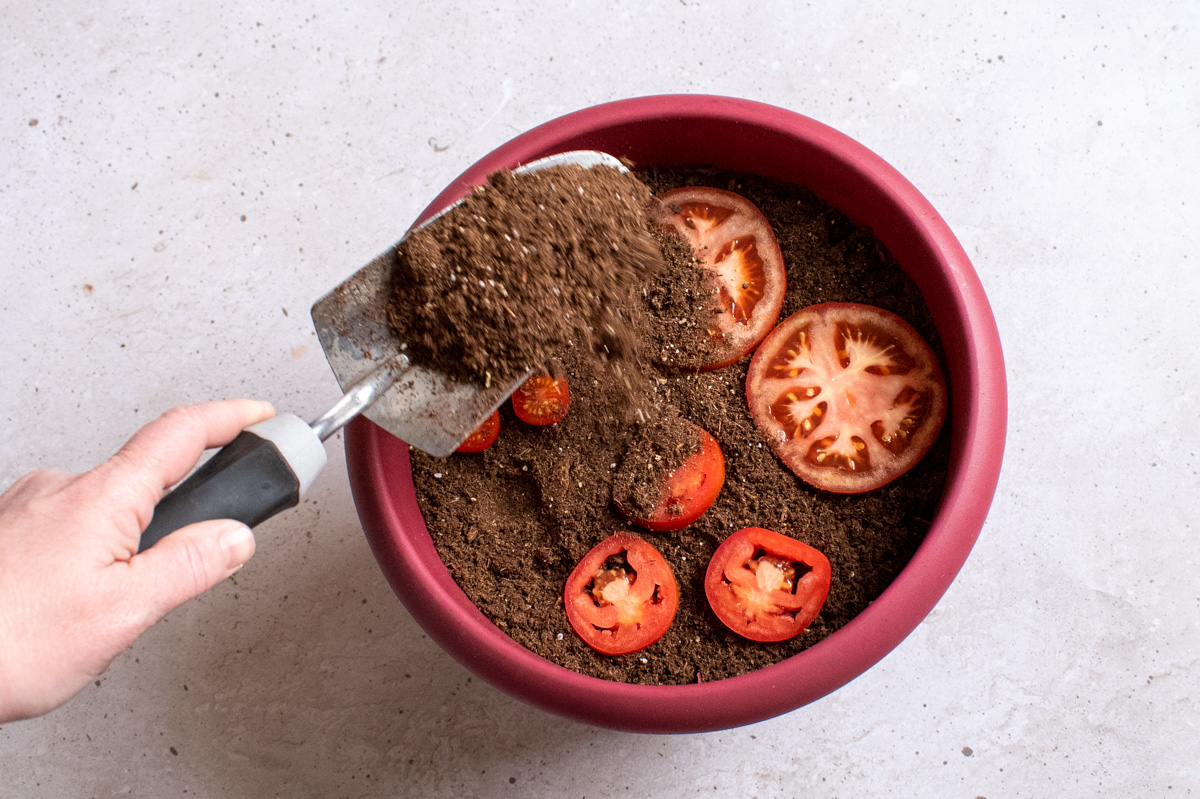
I “planted” three types of tomato slices: a Roma tomato, a large “Beefsteak” type slicing tomato and a cherry tomato. I kept the soil moist and put the pot near my clothes dryer, where it’s typically humid.

Week One
The first week was pretty uneventful. I had a daily reminder on my phone to check on the pot, but not much was happening beside it needing water every couple of days.
However, around the five-day mark, things started to get a bit…hairy.

Rather than bright green seedlings, I noticed mold was beginning to grow across the surface of the soil in the spots where the tomatoes were planted. “Okay,” I thought, “here’s where it either works or gets gross and smelly.”
Week Two
I continued watering the pot. The mold stuck around but didn’t seem to be spreading, which I took as a good sign.
About halfway through the week, I began to feel silly for thinking this might work. It clearly wasn’t working. It was just getting moldy and gross. Oh well. I packed my weekend bag and headed out of town.
Of course, that’s when it happened.
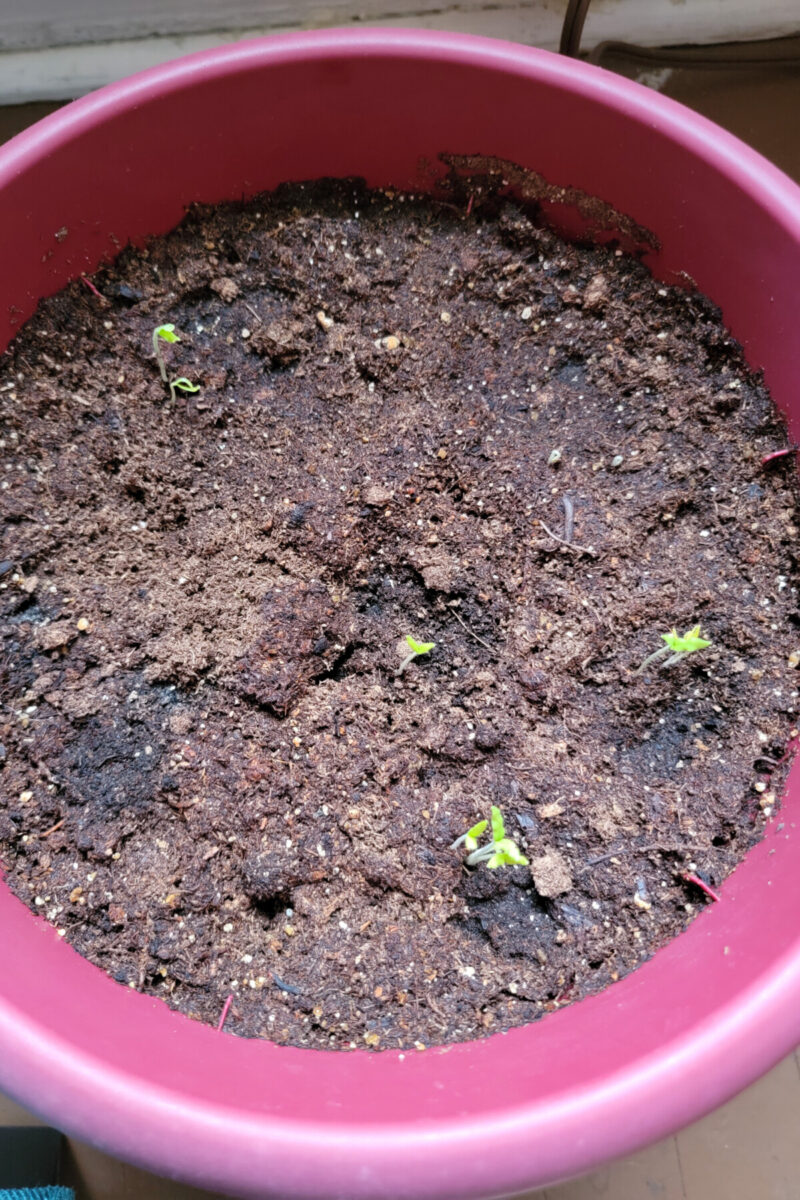
Nearly two weeks to the day after burying the tomato slices, I came home from my weekend getaway to find tiny, green leaves poking up out of the dirt. Cool! It works!
Unfortunately, the cherry tomato didn’t sprout.
Week Three
At this point, I moved the pot under my grow light set up and continued to water, watch, and wait. More sprouts continued to pop up out of the soil over the following week.
But still no cherry tomato.
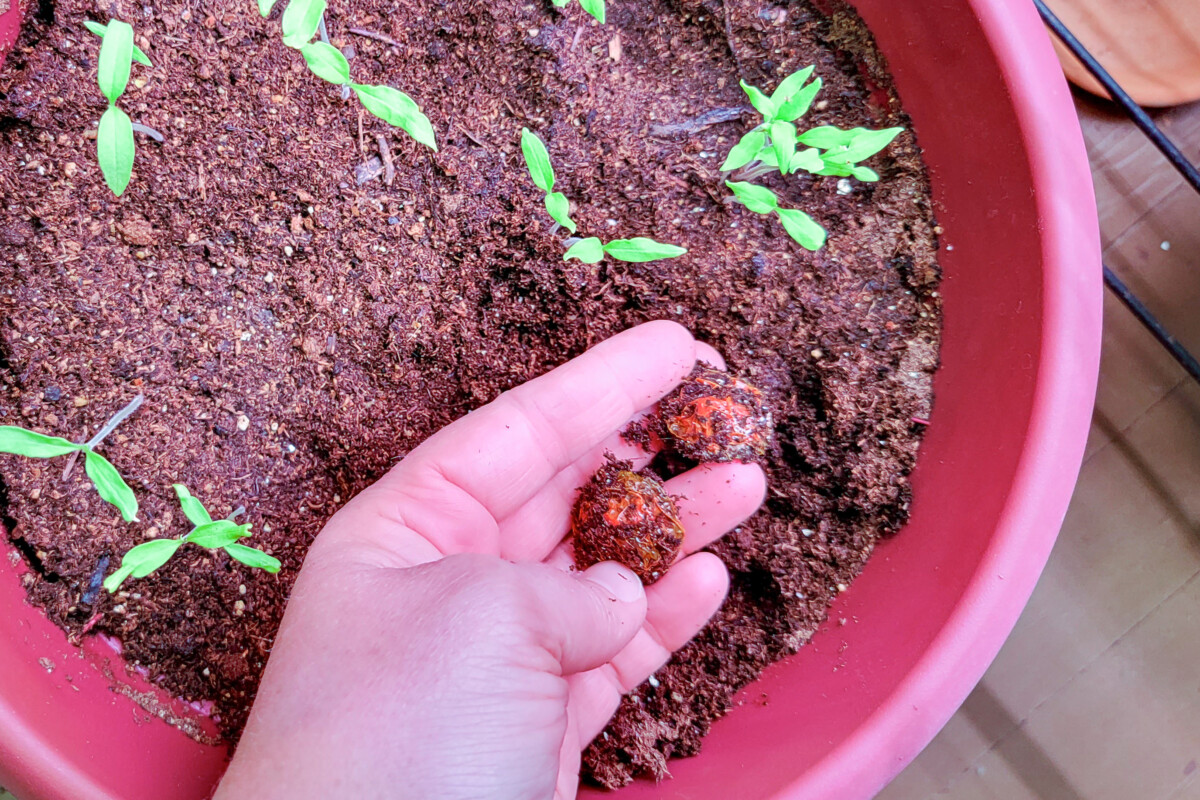
I kept watching that one empty spot where the cherry tomato halves were buried. Nothing seemed to be happening, and eventually, I noticed the outer tomato skin was showing through the dirt. It was papery and dried out.
Finally, after nearly a month, I noticed a few tiny sprouts growing from the cherry tomato spot.

Conclusion – Does it Work?
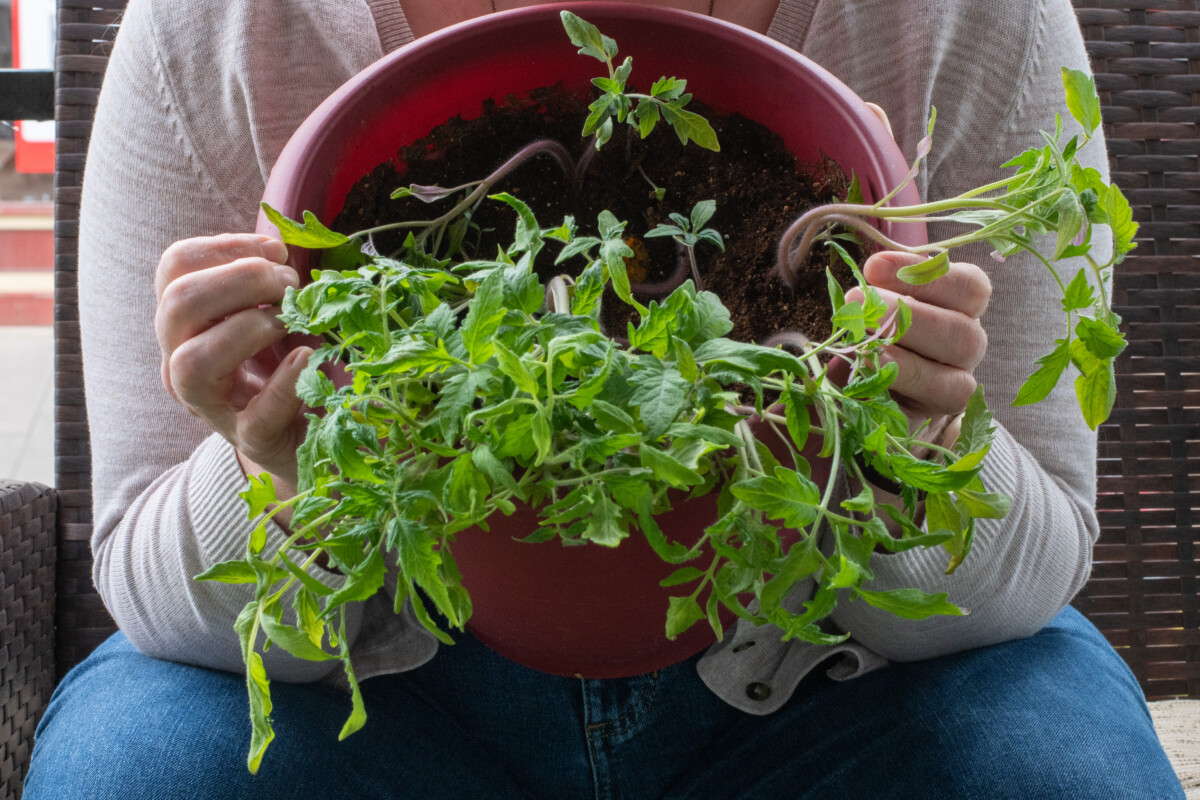
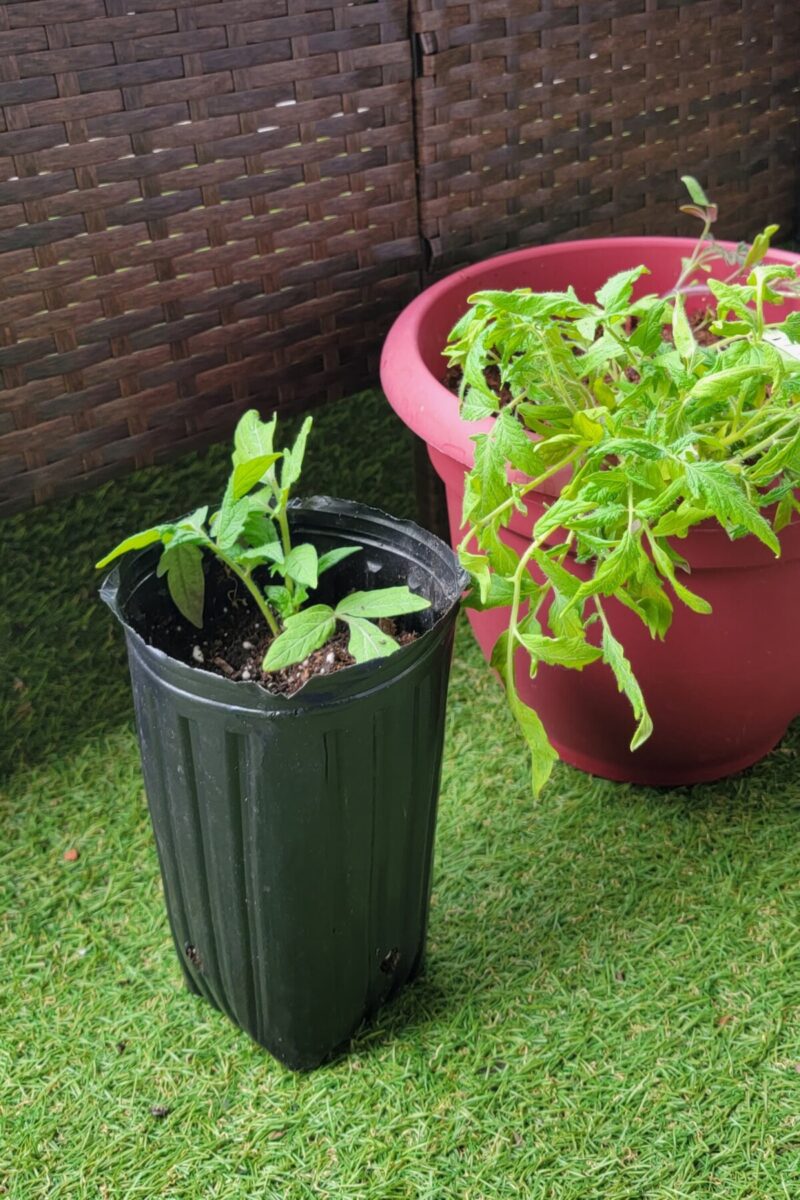
Yup, it works. You can start tomato seedlings by burying a tomato slice in the soil. With a little patience and plenty of water, you will end up with seedlings. Lots of them!
But There’s a Catch
In the first part of this little experiment, I mentioned that there was a glaring issue with this method of starting tomato seedlings. (Kudos to all the gardeners who figured out what it is already.)
The problem with growing seedlings this way is you will most likely use a grocery store tomato.
For most of the world, we live where the time to start tomato seedlings precludes us access to beautiful heirloom varieties at the farmers’ market. Most of us will be sourcing tomatoes from our local supermarket when tomatoes aren’t in season.
And that means using hybrid varieties.
Okay, Tracey? So what?
Hybrid vegetables do not breed true when grown from seeds saved from the plant. Hybridization, not to be confused with genetically modified organisms, is the process of selective breeding to achieve specific traits. Plant stock with certain characteristics is crossed with other varieties or specimens within that variety to produce specific characteristics in the offspring – disease resistance, larger fruits, faster growing, etc.
Hybrid vegetables are great, allowing us to grow tomatoes in colder climates, avoid certain tomato diseases, or be the first on our block to harvest a super-fast-growing tomato variety. But the seeds you buy are only good for one generation of tomatoes. Meaning, if you save the seeds from your Early Girl tomatoes, the genetics used to create that hybrid, will be diluted in the next generation.
You won’t know what you’ll get, as the traits from the parent plants are only passed to that one offspring plant.
They won’t be passed from the offspring to any resulting plants grown from that seed.
You have no idea what the resulting tomato grown from the seeds will be like.
Only open-pollinated varieties breed true, making perfect copies of themselves generation after generation. And it’s rare that you will find open-pollinated varieties of tomatoes in a supermarket. Nearly all of their offerings are hybrids grown from clones of the hybridized plants.
Most of us who grow tomatoes do so because we want specific varieties or types of tomatoes. We have plans for those beautiful red fruit—canning sauce and salsa or slicing thick slabs onto a BLT. So, we want the guarantee that what we’re growing will match up with the photo and description on the seed packet.
But!
Don’t let that stop you from giving this fun hack a try.
I have a whole pot full of weird little seedlings. It was fun to watch them pop up. I plan on planting a few of them merely to see what fruit these little franken-tomatoes produce.
A Couple of Tips
- If you plan on doing this, I recommend starting the project 10-12 weeks before you plan on transplanting the seedlings outside. This will give you a little buffer of time as you have no idea what the germination window is for these seeds.
- Keep your tomato slices moist and warm. You may even want to cover the container with plastic wrap or a baggie to create a greenhouse environment.
- Once your seedlings sprout, don’t forget to pot them up nice and deep to ensure they have a large root system ready to be planted deeply or sideways.
I’ll be sure to show you some photos of my tomato slice tomatoes in the newsletter later this summer. Thanks for coming along on this little experiment. I hope you give it a try yourselves.

Get the famous Rural Sprout newsletter delivered to your inbox.
Join the 50,000+ gardeners who get timely gardening tutorials, tips and tasks delivered direct to their inbox.