

Jerusalem artichokes (Helianthus tuberosus) aren’t native to Jerusalem, nor the Middle East, as their name suggests. They have been cultivated as native plants in North America and Canada for hundreds of years, domesticated by Native Americans.
Most people ask that question first, where are they from? Then they set forth the question, are they some kind of artichoke?
No, they aren’t artichokes either. See how misleading names can be?
Now that those answers are out of the way let’s dig down deep into the soil for a handful of sunchoke growing tips.
But first, you wish to know what you are growing, right?
Eventually how to cultivate it and ways to eat it that both taste good and give you a pass on the gas (it’s nicknamed fartichoke, which tells you a lot). Everything is in order, just keep reading.
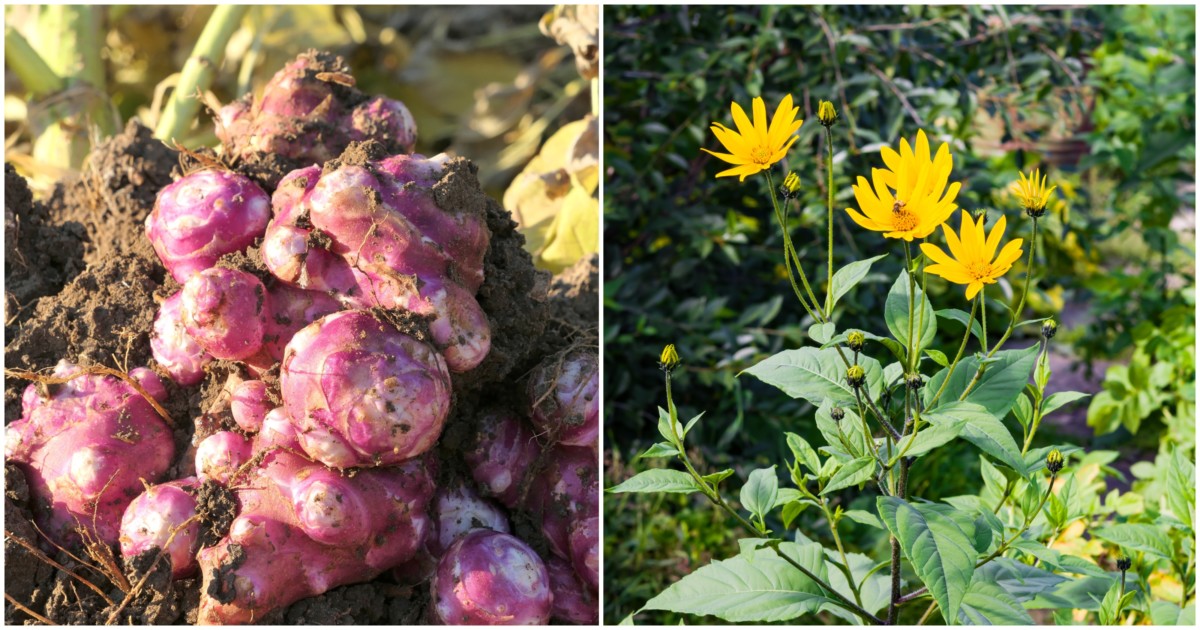
What is a Jerusalem Artichoke?
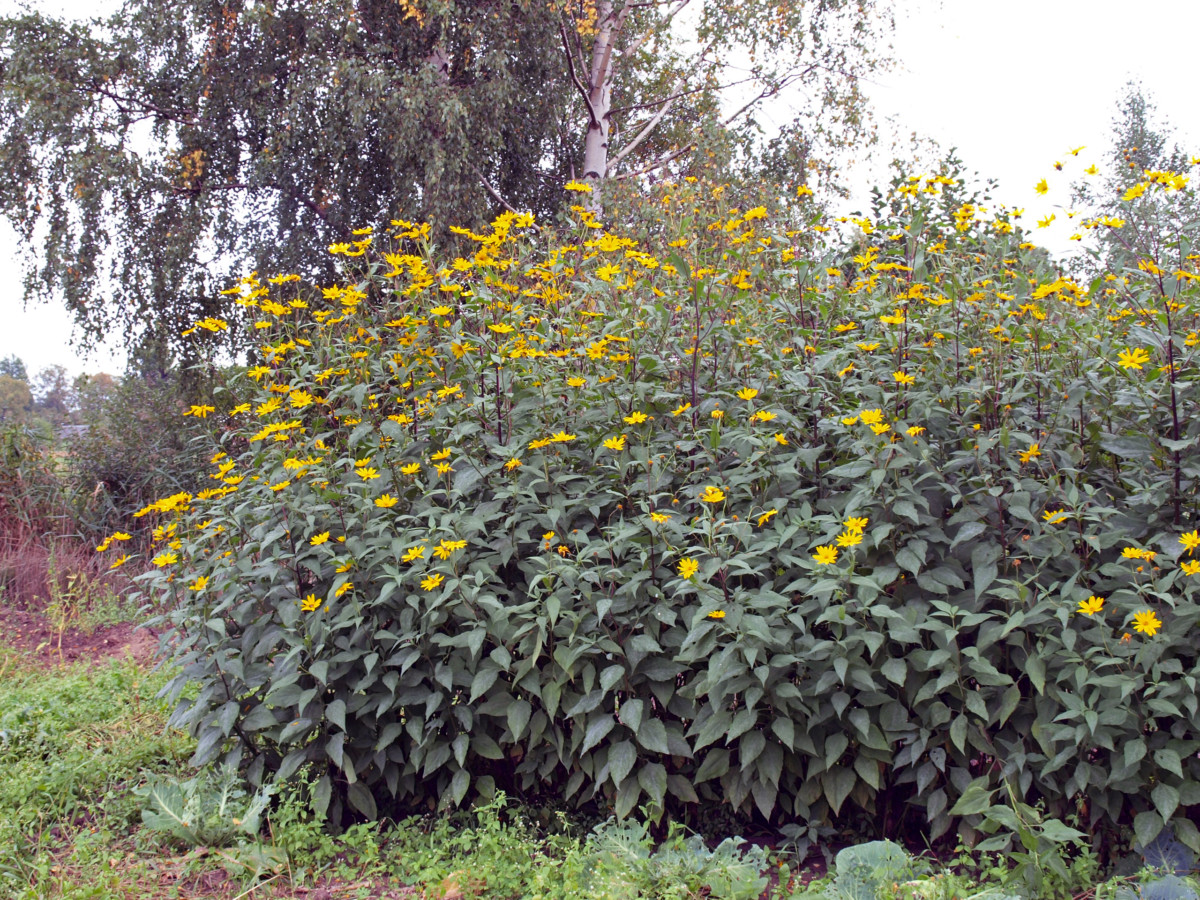
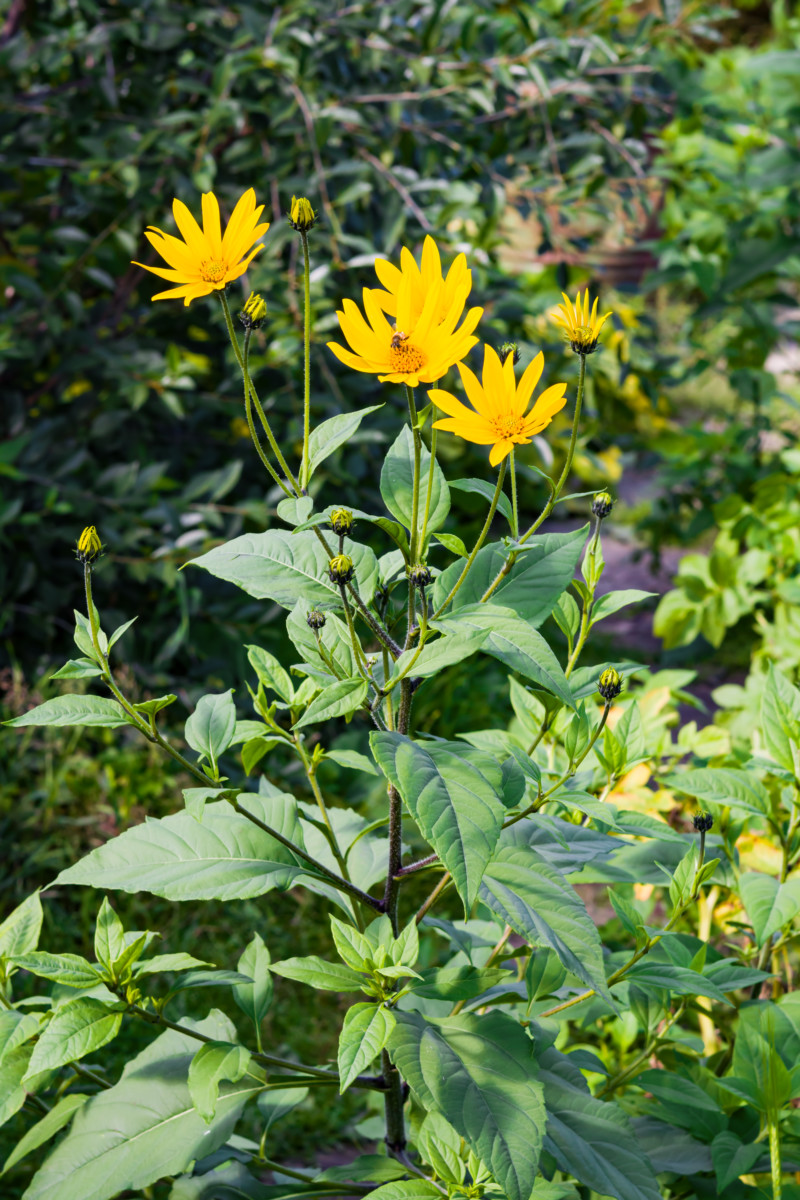
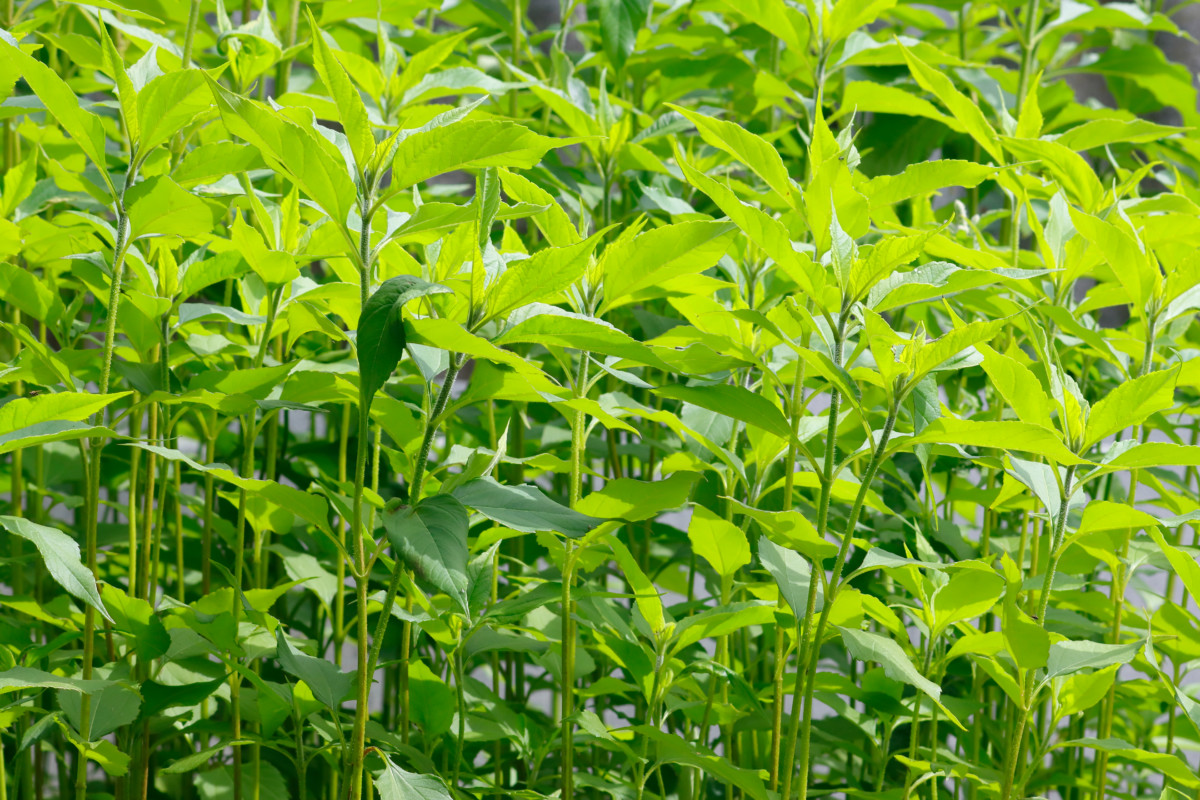
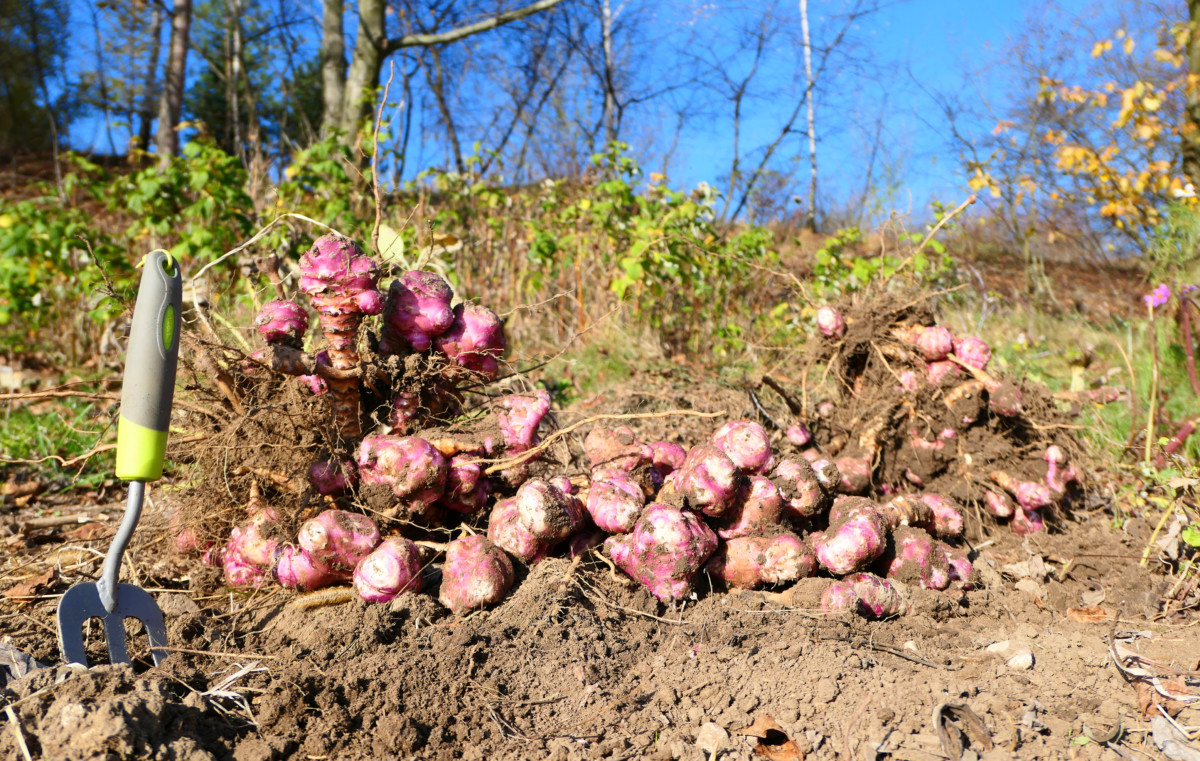
Years ago, a friend gave us a handful of strange looking tubers to plant in our garden in Hungary. No questions asked, we dug them in the ground as we were told, and when spring warmed up, the green stalks became more and more apparent. As they reached for the sky, approaching 2 meters (6.5 feet), they set forth the most beautiful sunflower-like blossoms.
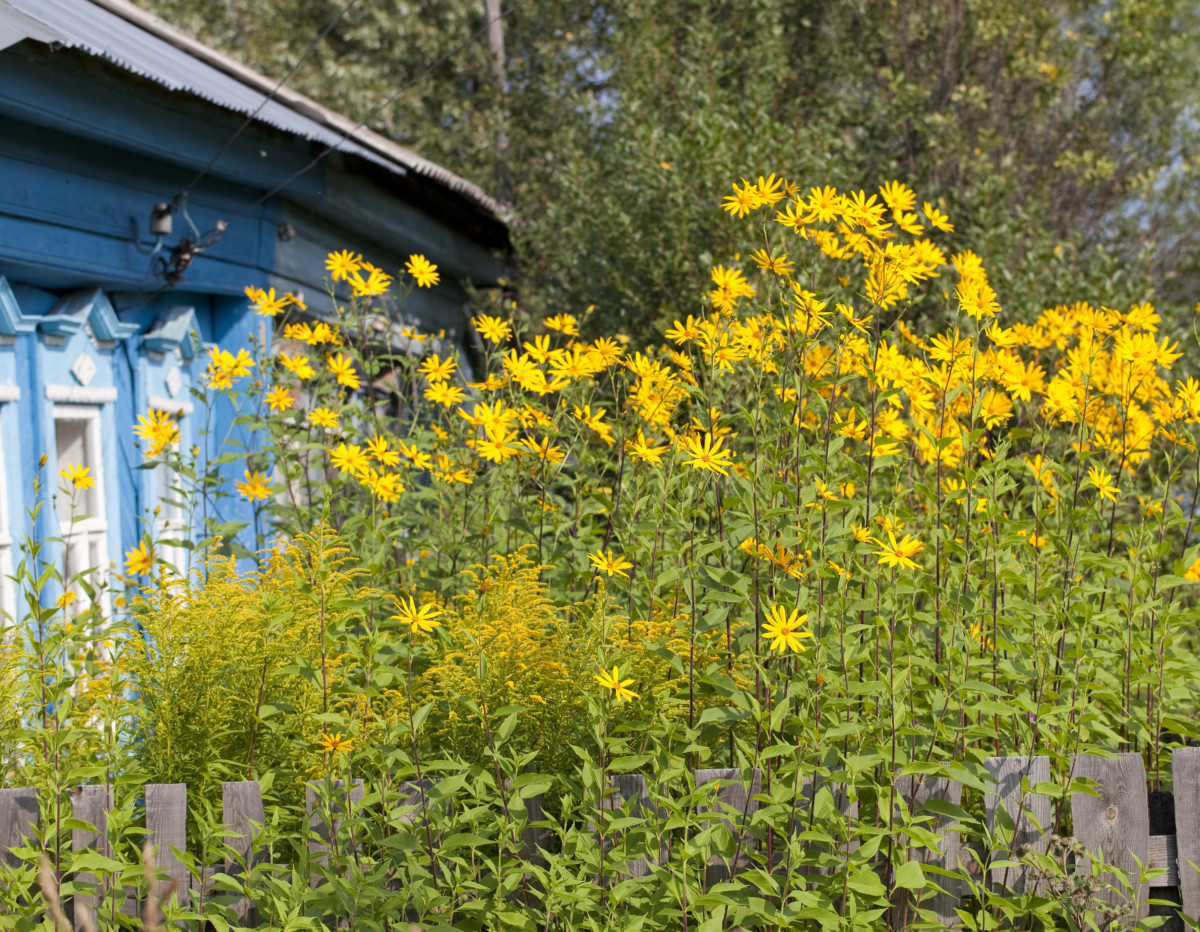
They make for a fabulous garden backdrop, but it’s what you harvest below the ground that steals the show.
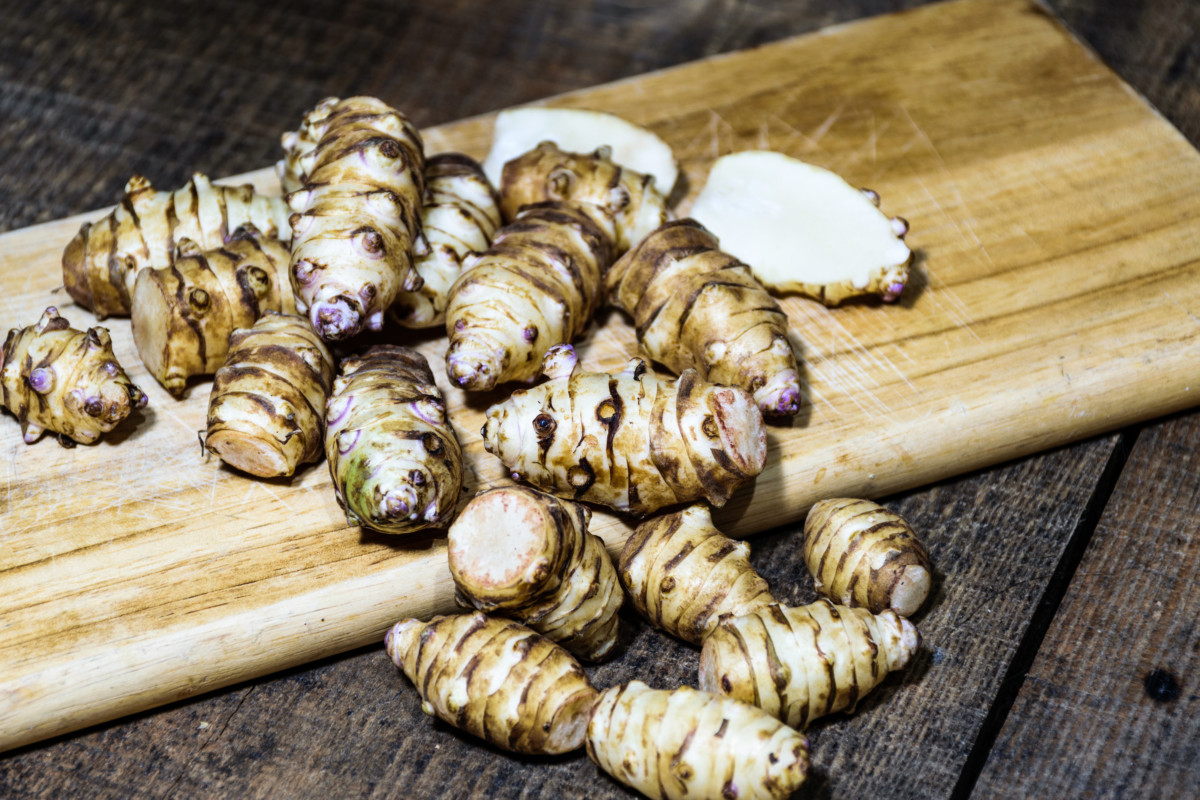
Flavor-wise, sunchokes have a water chestnut vibe to them. Others liken the resemblance to jicama, while some say it tastes like a nutty potato with a slight artichoke aftertaste.
Overall, the tuber has a starchy flavor (despite the fact that they contain no starch at all), which lends itself well for using with potatoes or yams. It’s a very confusing vegetable indeed!
Basically, a picture shows it all.
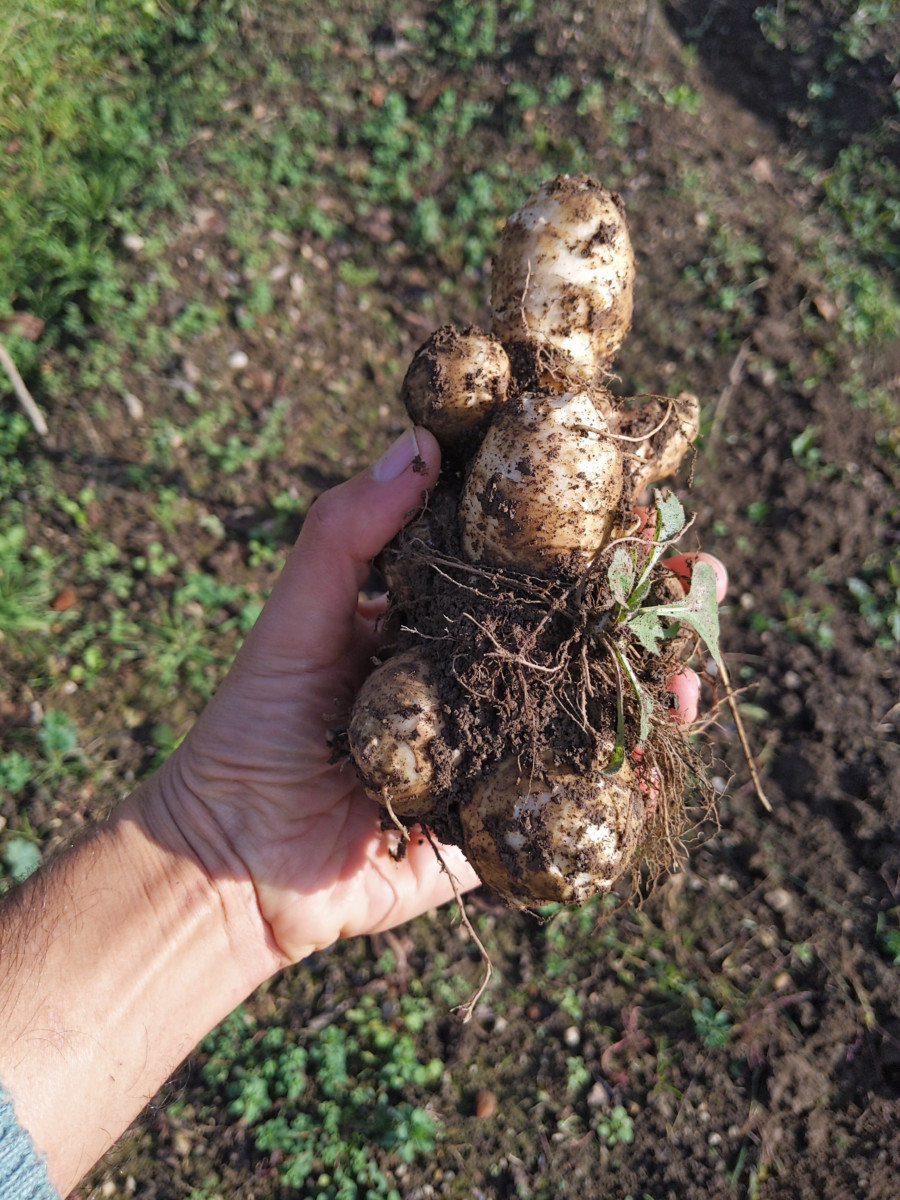
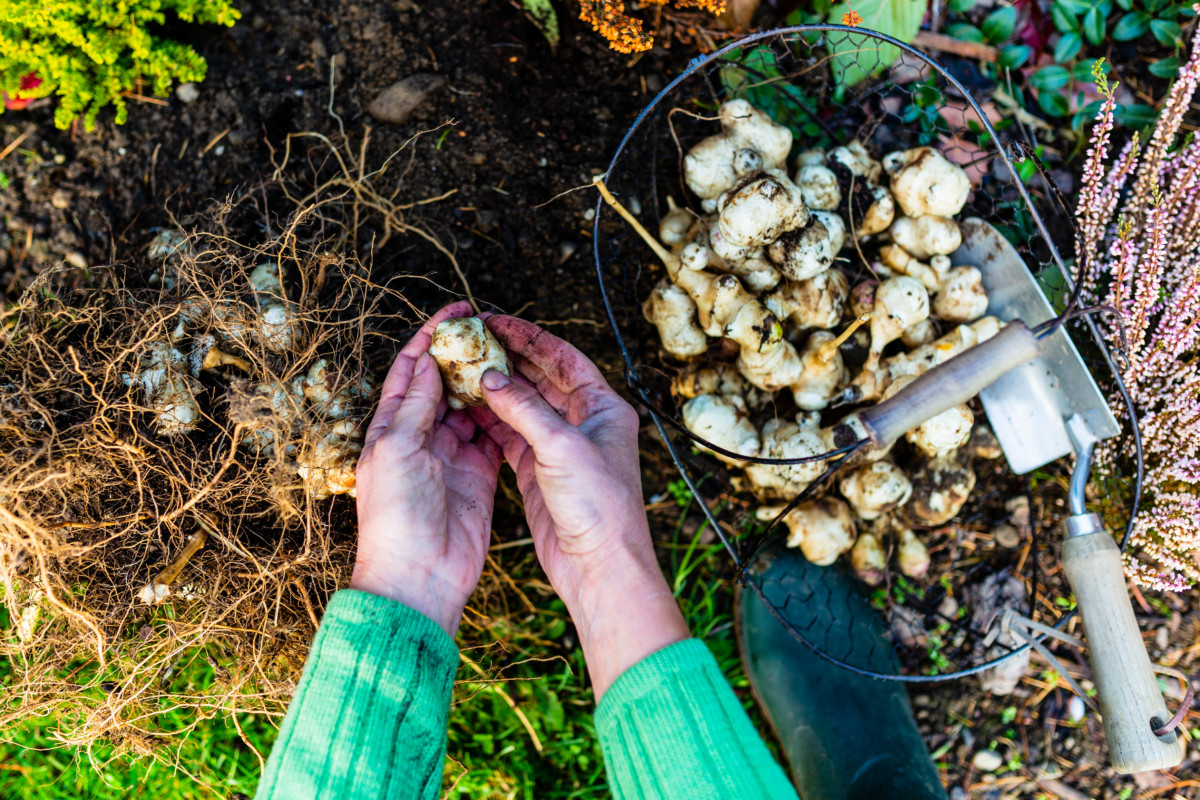
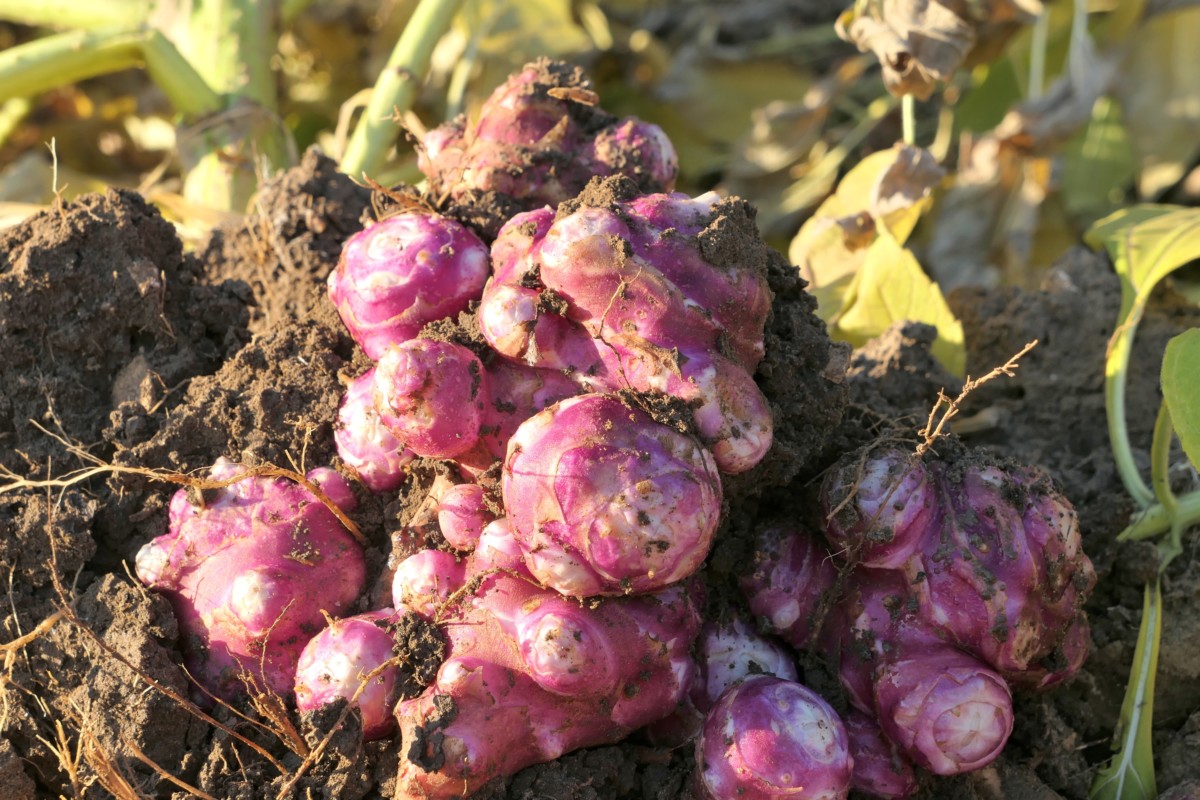
A Jerusalem artichoke is a knobby tuber that is edible, skin included. It resembles a ginger root. There’s no need to try to scrape off the delicate skin of the sunchoke. Just wash, cook and eat.
7 Reasons To Grow Jerusalem Artichokes
We often grow things for the way they taste, homegrown tomatoes take all. Yet, there are times when we need to look beyond flavor, even past nutrients. Sometimes we need to go as far as thinking about survival. If you had a crop that was sure to survive a bad season, it would be Jerusalem artichokes.
Why Grow Sunchokes in Your Garden?
Jerusalem artichokes are a wonderful addition to your garden for many reasons.
Sunchokes are:
- perennials
- low maintenance
- drought tolerant
- disease resistant
- bountiful producers that can act as seasonal privacy screens
- fodder for backyard animals
- and attractive to beneficial insects
All that sounds pretty good to me, besides they are beautiful and grand. There must be a catch. And there is.
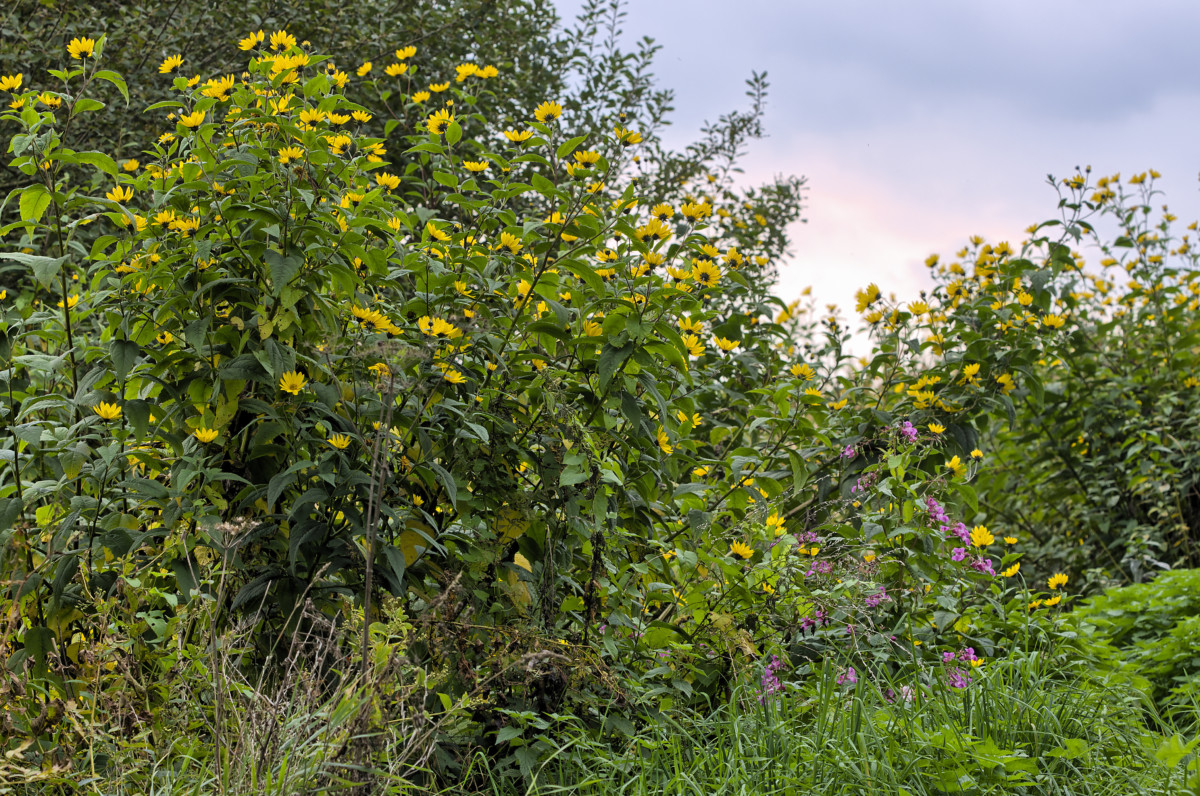
Sunchokes can also become invasive, as it’s hard to harvest all the small tubers that break off while harvesting. Anything left in the ground is subject to emerging again. This could be a good thing however, it all depends on how you look at it. If there’s anything to be concerned about, a raised bed would definitely be to your advantage.
When we grew sunchokes, we tried to contain them to one garden bed. We also found out that if you leave them in the ground over winter, they will emerge in mass in spring. Though our land is long abandoned, I bet they are still there, the gracious yellow flowers blooming every summer and the tubers pushing up the sand.
They are also allelopathic. Meaning that they can inhibit the growth of other plants (think English walnut as another such plant species), though in our garden, this never became a concern.
Health Benefits of Sunchokes
Sunchokes are an excellent source of vitamins and minerals from the garden.
Jerusalem artichokes contain niacin, thiamine, vitamin B6, vitamin C, iron, calcium and magnesium. They are also packed with inulin. This is good news if you, or someone you are cooking for is diabetic. Because inulin is a prebiotic, it has a minimal impact on blood sugar. Some consider inulin a “trendy prebiotic”. I’ll let you decide that for yourself.
The downside of this is flatulence. But cooking can diminish this unpleasant side effect, so don’t dismiss it automatically. Potatoes, cabbage, beans, onions and dairy products are all known to cause gas, yet I’m not giving up those delicious foods for a few barking spiders.
Plain and simple, especially if a plant is native to your region, you should at least check it out. You might be surprised that you either like to eat it, or simply enjoy its beautiful presence in the garden.
Here’s what you need to plant your own.
Planting Jerusalem Artichokes
The best way to find sunchoke tubers for planting, is to ask around. If you can’t find anyone willing to let go of a handful (trust me, gardeners are happy to pass on such plants!) search seed catalogs instead.
There are two ways to go about planting Jerusalem artichokes.
Conventional gardening says to plant them in spring, a few weeks before your last frost date. Our experience says that late autumn/early winter, as long as you can work the soil, is a good time to put them in the ground too.
After all, once you remove sunchokes from the ground, they have a pretty short shelf life. And like I’ve already alluded to, you can’t eat too many at once. Plus, sunchokes are more difficult than other fruits and vegetables to preserve. We’ll get into this more in the harvesting section.
Sunchokes are pretty easy going plants, and just about any soil will do for planting in.
Though they do prefer loose, well-draining soil. Getting them in the ground is easy enough, but once they get established, you need to be careful they don’t overstay their welcome.
You may find that your yields are higher in slightly alkaline soil, but it’s not necessary to try and change your soil to suit the sunchokes. In any case, when planting time comes around, spring or late fall, you need to plant the tubers as you would potatoes.
Small tubers for planting should have 2-3 buds. Plant them just 2-3 inches deep, leaving a large enough gap between sets of tubers of about 12-18 inches apart. If you are making a privacy screen and only want to sample the sunchokes later on, go ahead and plant them more densely.
If a bountiful harvest is your dream, give them plenty of room to spread out.
You can even dedicate an entire garden bed to them, knowing how tall they can get. Just be sure they won’t shade your sun-loving crops.
If you are concerned about the fertility of your soil, go ahead and throw a handful of well-rotted compost in with each set of sunchoke tuber.
Caring for Sunchokes
Jerusalem artichokes prefer full sun, though they grow nearly as well in partial shade. As long as they receive 6 hours of sunlight a day, they will always surprise you with an underground harvest.
If you are planting in the spring, you can expect the green shoots to emerge two to three weeks after planting.
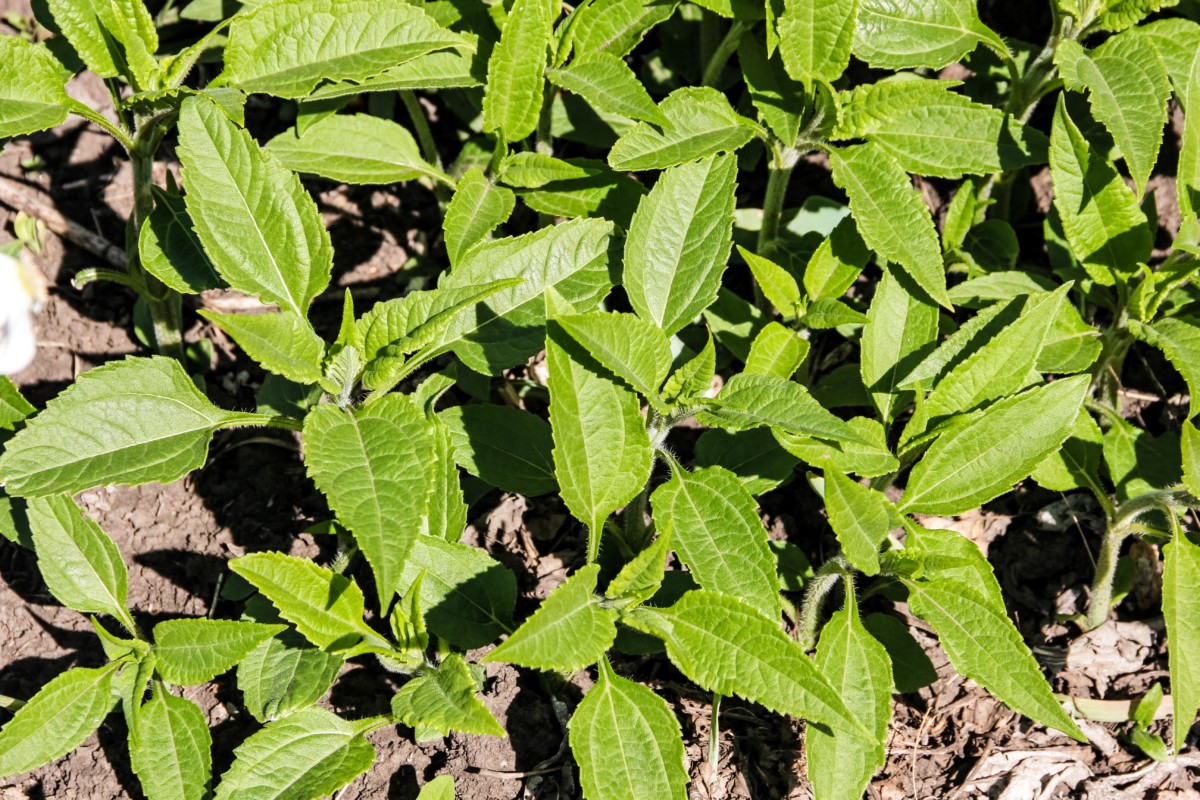
After that, some light weeding and mulching may be necessary. As plants become established, they’ll leave you with little work to do. You won’t even have much chance to water, as sunchokes can handle short periods of drought. If you want to go above and beyond, they’ll drink an inch of water per week, but in most gardens, this is unnecessary.
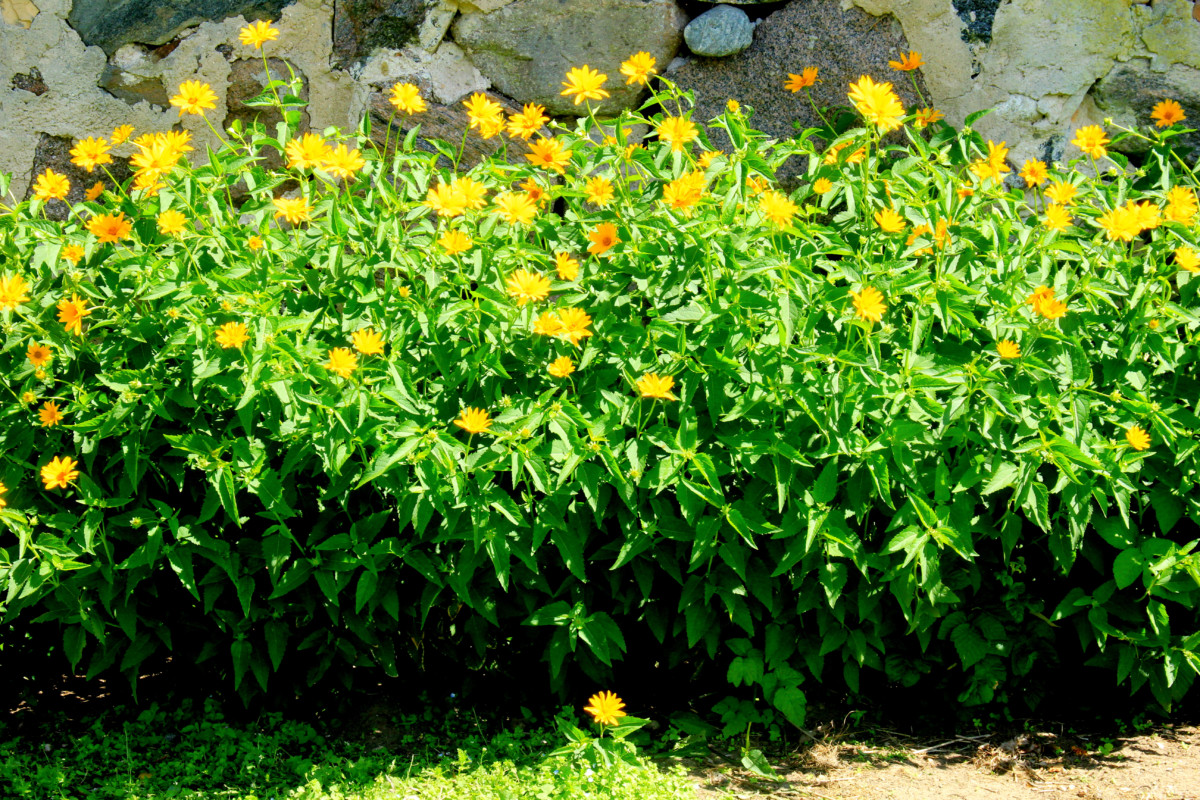
Sometime in August, they’ll start blooming, filling the stalks with brilliant little sunflowers and that’s when the beauty begins. The flowers are extremely fragrant, smelling of vanilla, or so my husband remembers. I remember more the tubers’ flavor, which we’ll get to in the end.
Pruning sunchokes.
While it may be pretty to see all those blossoms swaying in the breeze, it also takes some energy away from tuber production.
If you are food oriented, go ahead and give them a haircut in mid-summer to remove the flower stalk before blooming. Cut them back to four feet high to achieve this.
What if your sunchokes get out of control?
I know from experience that it can be hard to remove every piece of tuber from the ground when harvesting. And if you leave them in the soil without harvesting them, they will escape into other parts of the garden.
While it’s nice to have food that grows on its own, it doesn’t always grow where you want it. In this case removal, not spraying, is the best action plan.
New tubers cannot develop without above-ground shoots. So, in spring, when the plants are just emerging, pull up the green plants by hand or scythe them down. Try to catch every single one to phase them gently out of your garden.
Harvesting Jerusalem Artichokes
I’m not going to lie, the growing season for sunchokes is long. You are looking at 110 to 150 days till harvest. But, you’ve got everything else you need in your garden from cucumbers to tomatoes and leafy greens, so it’s nothing to worry about.
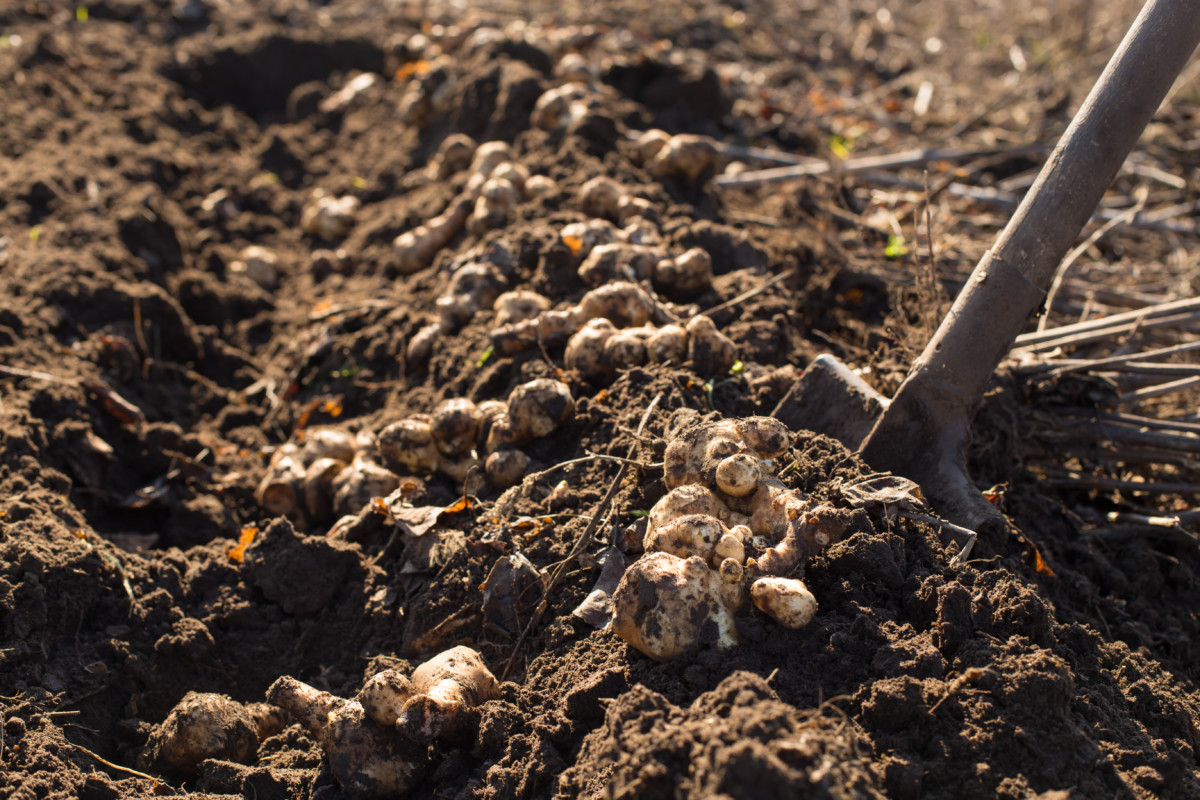
When harvest time comes around, say in October or November, depending on when they were planted, it’s time to dig up your first batch of tubers. This is easily accomplished with a fork or a spade. Take care not to cut through or scrape their delicate skins, because they won’t last very long if that happens.
The best way to prolong your sunchoke harvest, is to only dig out of the ground what you need for a week or two. Leaving them in the ground is the ultimate best way to store them. This way, you can harvest sunchokes fresh all winter long.
If you are concerned about frost, simply cover them with a generous layer of mulch. It’s really easy when you don’t over-complicate things.
It goes without saying that those tubers left to survive in the ground will come up next spring, so be sure to harvest mindfully. If replanting in the same place the following year, be sure they receive a good dose of fertilizer.
Pests and Diseases
The good thing here is that Jerusalem artichokes have no serious pests or diseases. Sometimes slugs will taste them, other times aphids. Both of these are easy to control organically.
Varieties of Jerusalem Artichokes
It’s always fun to shop around for seeds and other interesting roots to plant in the garden. However, seeds found locally are generally worth keeping.
If you can’t find anything in your area, extend your search online. Beware though, purchasing them may be difficult, as they are only available for planting for a limited time each year.
Here are a few Jerusalem artichoke varieties worth biting into:
- Stampede – a high yielding variety with plump white tubers.
- Fuseau – a non-knobbly and smooth skinned variety which is easy to peel.
- Red Fuseau – a red-skinned variety with thin skin and a sweet flavor.
- Dwarf Sunray Sunchoke – grows to 6′ in height with round tubers.
Planting Sunchokes in Containers
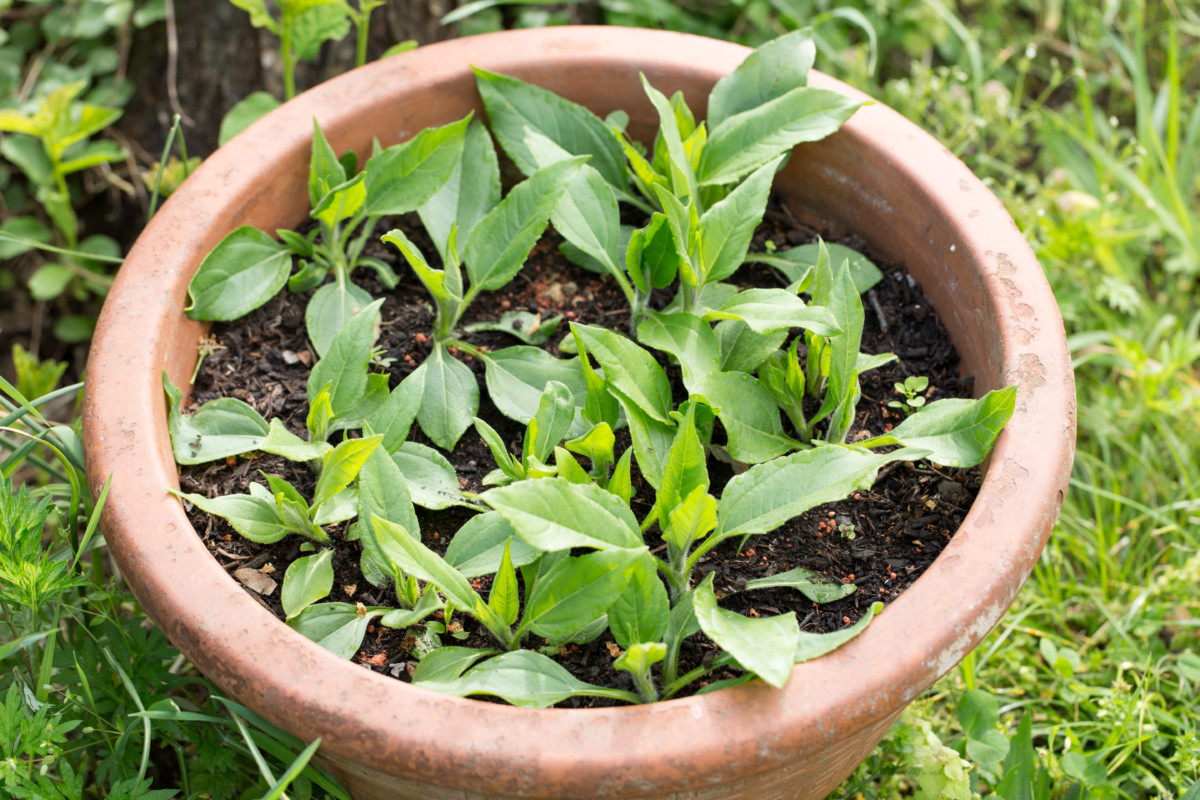
If potatoes and carrots can be grown in containers, so too can Jerusalem artichokes.
The method for planting each, is nearly the same. It all starts with a large container and a good quality potting soil. Plant small tubers 4-6 inches deep in the potted soil and be sure to water them thoroughly, once a week. Before the plants flower, be sure to cut off the top of the stalks to encourage tuber growth.
To harvest sunchokes from a container, simply turn the pot upside down and loosen the tubers with a small hand trowel.
How to Eat Jerusalem Artichokes
This should be a no-brainer, but I believe there is an art to cooking and enjoying Jerusalem artichokes.
For starters, you should never overdo it when it comes to preparing the tubers.
If you dare to eat them in quantity, you’ll likely experience excessive bloating and gas to the point where you’ll think about destroying every trace of them in the garden. It’s happened to my husband when we gleaned an overly abundant sunchoke harvest. We got too greedy, cooked too many at once and suffered the consequences. We don’t want this to happen to you.
They are named fartichokes for a reason.
Tread lightly your first time eating them, to see just how much they affect your digestion.
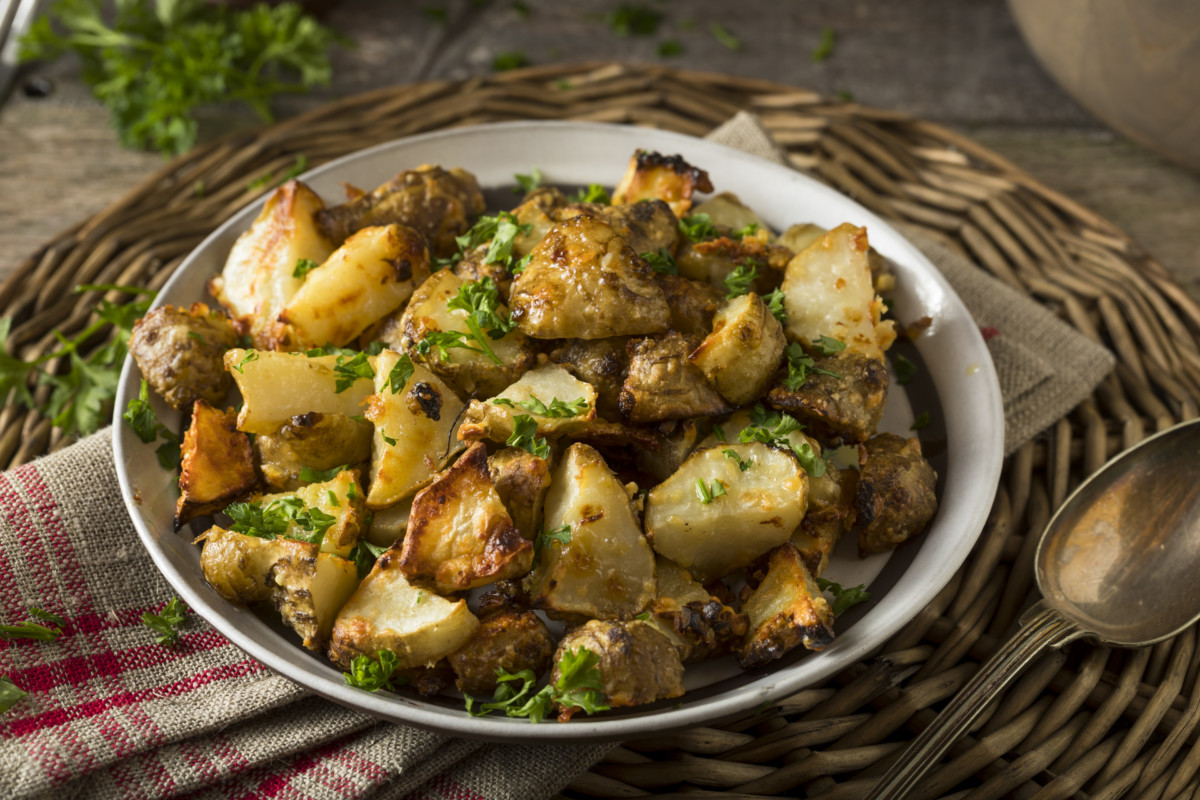
In the meantime, browse the following recipes highlighting Jerusalem artichokes for some dinner-spiration.

- Sunchoke Soup from Simply Recipes
- Roasted Jerusalem Artichokes from Greedy Gourmet
- Jerusalem Artichoke Chips from Abel & Cole
- Creamy Ginger Scalloped Sunchokes from Boulder Locavore
- Roast Chicken With Jerusalem Artichokes and Lemons from Vikalinka
- Pickled Jerusalem Artichokes from Hilda’s Kitchen Blog
It seems there is nothing these sunchokes can’t do.
Sunchoke season is nearly upon us, it happens every late fall through early spring.
Even if planting time isn’t quite here, pick some tubers up at a market, cook them in a variety of ways, sample them till your belly is content, then decide where to plant them in the garden. It’s that simple.

Get the famous Rural Sprout newsletter delivered to your inbox.
Join the 50,000+ gardeners who get timely gardening tutorials, tips and tasks delivered direct to their inbox.