


Have you ever seen a simple and elegant wreath at a craft show and thought “I could do that!”?
Some people pick it up straight away, while others stumble through the process – it all depends on what kind of crafty person you are.
When it comes down to putting your skilled hands to work, one line of thought is that weekends are busy and store-bought wreaths are generally inexpensive.
Another way to look at it: if you have the raw materials, the willingness to learn something new and a couple hours of free time, then you can easily make your own grapevine wreaths at home.
It costs you absolutely nothing (perhaps outside of decorating it further), and there is a great chance that you could even make some money by selling your grapevine wreaths to others who are experiencing those very busy weekends.
Grapevine wreaths also make excellent gifts. For neighbors, friends, teachers, your accountant, the mailman, and for family members you see less often than you would like. It is a nice way to celebrate the seasons and to just send out a cordial hello. Either way, when you learn how to make your own wreaths, you are going to come out ahead.
Making grapevine wreaths for beginners
The first thing you need to procure, is grapevines (Vitis spp.).

Either from your own overgrown grapes, or from someone else who simply didn’t have time to prune grapes in summer for a bountiful harvest.
Depending on the last time they were cared for, grapevines can grow to astonishing lengths. Even up to 12′ or more!
When making wreaths, the longer the grapevine, the easier it will be to make larger wreaths. That being said, the length of grapevines that you collect, will dictate the circumference of your wreaths.
If you are satisfied with a small grapevine wreath, you will still want to aim for harvesting vines with a length of at least 4 feet.
Tools for making grapevine wreaths
For harvesting grapevines, I highly recommend using a great pair of garden pruners. It will make your job so much easier.
They will also prove handy when it comes to making the wreaths.
Outside of that, you may also want some twine or craft wire for tying, though it is entirely optional. If you leave the dry (or drying) tendrils, they will tend to hold the vines together and no further strengthener will be needed.
You may also choose to protect your hands by wearing a pair of gloves for removing leaves and side branches.
Other vines to weave into wreaths
If you happen not to have extra grapevines growing around for far too long, never fear, there are other vines that are perfectly acceptable, and beautiful, for making wreaths.
These ornamental vines include:
- honeysuckle (Lonicera spp.)
- Virginia creeper (Parthenocissus quinquefolia)
- wisteria (Wisteria frutescens)
- wild grapes such as fox, summer and riverbank grapes (Vitis spp.)
You will turn and twist them in the same way you would grapevines.
To soak or not to soak your vines?
As you are harvesting your grapevines, be kind and always cut just in front of the bud as shown in the image below. As if you were pruning them for next year’s growth.

After that, gently pull each individual vine away from the others, or out of nearby trees, should that be the case.

In an effort to keep things orderly, place the removed grapevines end to end, and make a spiral (a large wreath) for later use. This is especially important if you need to transport the vines. Be sure to tie the vines in a few places with twine to secure them.
When you pull on the grapevines, you will begin to have a feel for whether or not they will crack when twisted and turned into a circle.
Freshly harvested vines are less likely to need soaking in a tub and can be used straight away.
For older vines, it may be to their advantage to soak them for an hour before making wreaths. Alternatively, if nature is on your side, you can leave the vines out in the grass as the rain falls on them.

Removing the leaves
Before weaving your wreath, you will also want to remove the grape leaves.

With a gloved hand, pull them off and add them to your compost pile, to your leaf mold or, like in our case, as winter mulch in your no-dig garden.

Preparing the grapevine wreath base
Now that your grapevines are stripped of the leaves, select one of your thickest vines for the base of your wreath and choose a single direction to weave in.
Clockwise is what works best for me, though you may feel more comfortable with the other way around. Feel it for yourself, which is the best way for you to weave.

It does not matter whether your wreath is 5″ or 2′ across, the steps are exactly the same.
Making your grapevine wreath

- Form a circle as large as you wish your wreath to be. Start with the thicker end of the vine, turning and forming it into a circle. Where the vines overlap, grab the small end of the vine and come up through the center of the wreath. Pull it snug as it wraps around your base layer.
- Continue weaving around and around, till you run out of your first vine.
- To add more vines (adding strength and character), insert the thick end of the vine into the wreath and continue weaving in the same direction, always coming up through the center of the wreath.
- As you add new vines, always be sure to hold the growing wreath tightly. When you get to the end of a vine, weave the ends directly into the wreath, assuring an even look all around.
- To keep your wreath nice and even, make it a point to add new vines in different starting places each time. If your wreath is not the exact shape you would like, gently place it under your foot, pulling gently up on it to crack the vines. This will allow it to shapeshift a tiny bit, though your original circle (or oval) will generally dictate the final product.
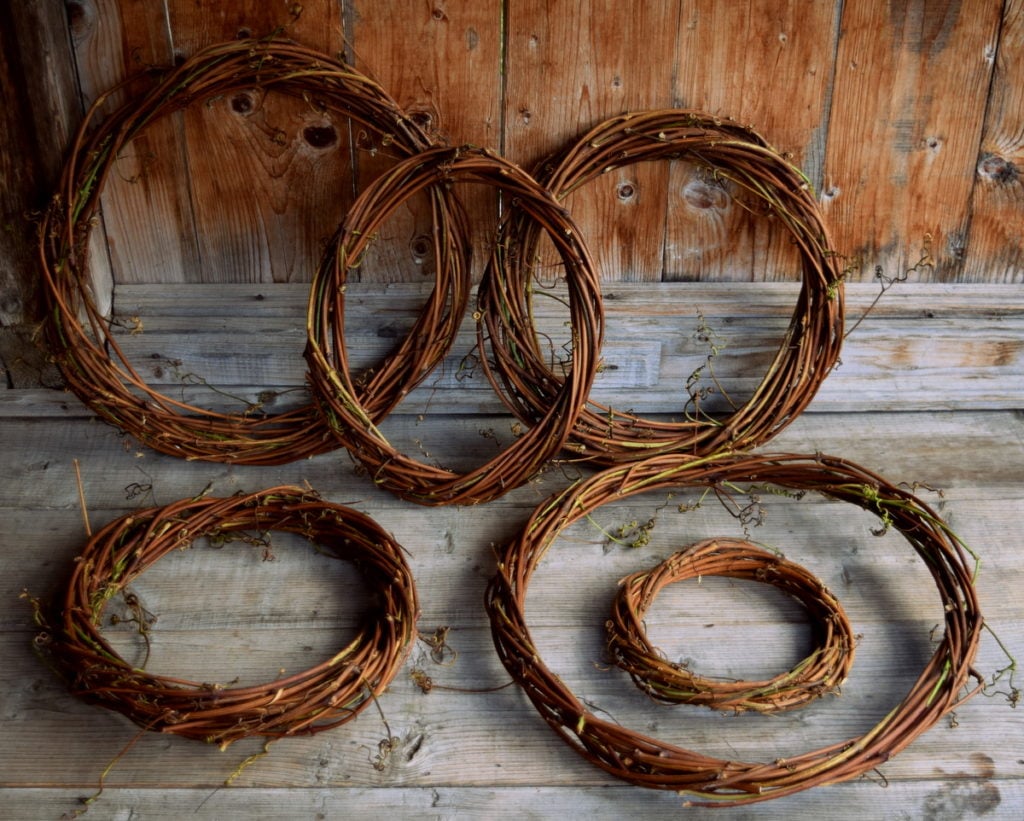
- Keep adding vines until you are satisfied with the overall shape and girth of your wreath.
- Trim any ends that stick out and leave it to dry.

Note that each wreath will likely take 5-10 vines, possibly more, depending on your desired outcome.
At the start of weaving, take some time to approximate the size of your wreath, but keep in mind that certain shrinkage is inevitable.

Weaving time plus drying time

When finished weaving, take a look back and admire your new wreath, knowing all the while that it can shrink up to 1/3 in size once it is fully dry.
The fun part is in the waiting for this to happen.
Resist the urge to hang them straightaway, as this can cause them to become misshapen.
Instead, allow them to lay flat while drying in a place that allows for good air flow. This can be indoors or outside under cover where they are safe from the elements.
How long the grapevine wreath takes to dry, can stretch anywhere from two weeks to a month. It depends on the moisture content of your vines, as well as the environment it is being “cured” in.
Decorating your grapevine wreath
As far as decorations go, your imagination and access to materials are the limit.
Autumn leaves preserved in beeswax are a unique way to add a little flair to your wreath.
Dried flowers are another beautiful way to decorate, taking full advantage of your garden harvest.

You may also choose to keep it simple, as is, for that wildly natural look.
And that’s it. With an armful of grapevines, you can easily weave a wreath suitable for your front door in just a couple of hours. No prior experience necessary – and no time wasted either.

Get the famous Rural Sprout newsletter delivered to your inbox.
Join the 50,000+ gardeners who get timely gardening tutorials, tips and tasks delivered direct to their inbox.