


For many people, the start of fall is signified by an eventful and colorful change in the leaves, as well as darkness arriving earlier and earlier each evening. One of these brings us more joy than the other.
During those precious daylight, and hopefully sun-light hours, it is a delight to be out in nature, harvesting the last crops in the garden and foraging for the most perfect leaves to bring indoors.
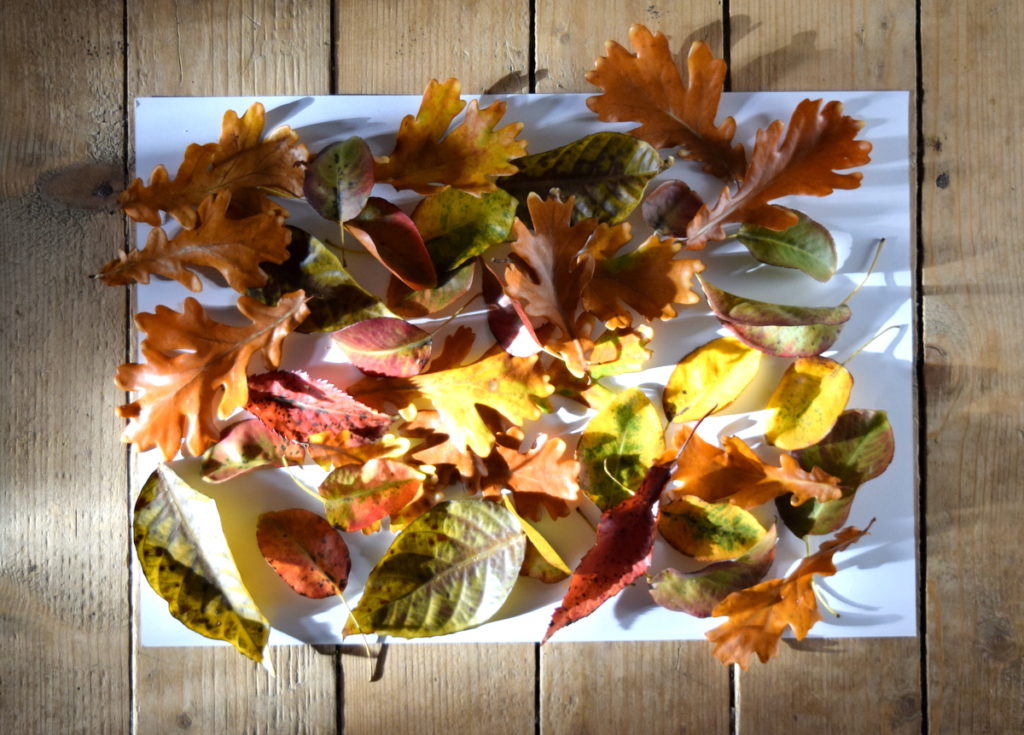
Fall is the time to bring a few select leaves inside, for decorating your walls and windows with autumnal charm.
Beautiful autumn leaves the shape and hue of which can be preserved in beeswax for months to come.
Not only are they bewitching, they smell lovely too.
Plus, they can be used for educational purposes.
Think about how many trees you can correctly identify by leaves alone. What about identifying by bark? How about your children? Have they learned to identify the most common leaves where you live?
Nature education is extremely important both in and outside of school. Gaining an understanding about why leaves change color and why leaf litter is important for healthy soils are two very fundamental lessons to learn.
If you can trust your children with dipping beeswax candles, then they are more than qualified for hunting down some leaves and helping out with dipping them too!
Preserving autumn leaves in beeswax is a wonderfully easy nature craft
Foraging, hunting or casually picking up the most beautiful fall leaves is a fun way to pass quality time while out on a walk.
Some are misshapen, others are holey, a select few are vibrant whereas others are toned down, a reflection of the landscape as a whole.
All of them are perfectly imperfect. Yet, we need to be discerning as to what we bring into our homes.
Collecting fallen leaves
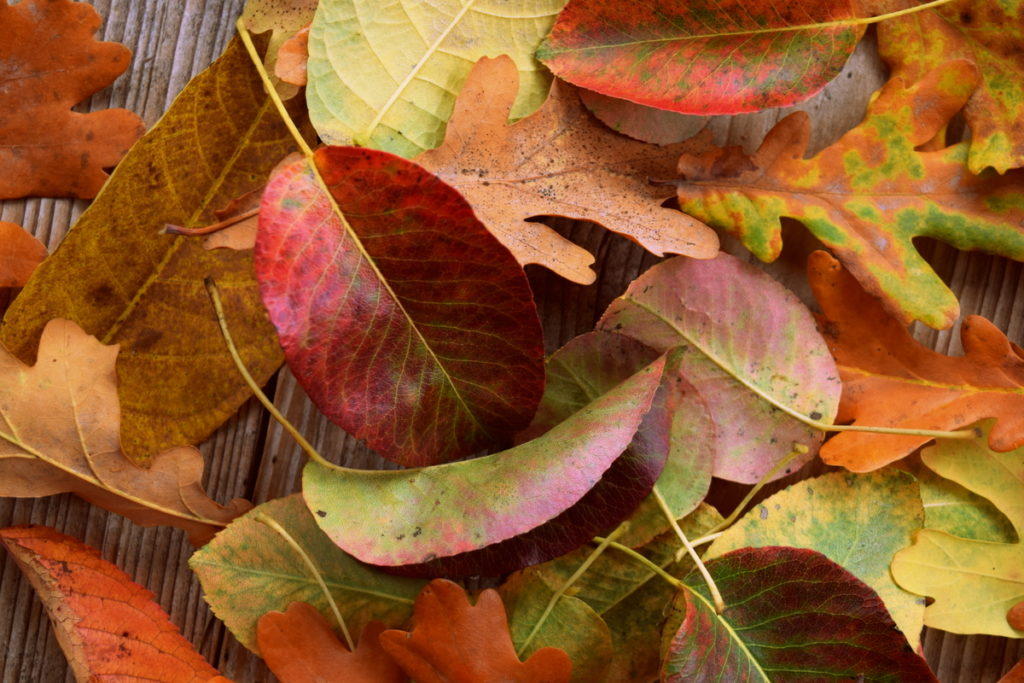
The leaves you want to set aside for preserving in beeswax should be:
- colorful
- dry (free of moisture)
- without cracks
- and healthy (disease-free)
Pass by the fall leaves that are already starting to curl.
Leave the crunchy tipped leaves for the leaf mold.
And by all means, embrace the diversity of nature!
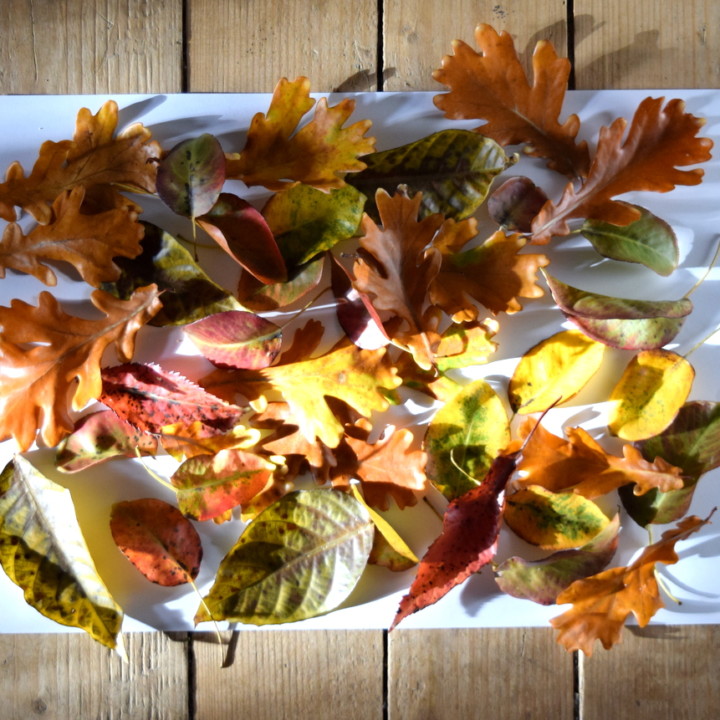
You can preserve just about any leaf (or wildflower!) in beeswax, though you will probably be interested in the most colorful and/or characteristic ones:
- oak
- pear
- cherry and wild cherry leaves
- maples
- quaking aspen
- birch
- dogwood
- walnuts
- bitternut hickory and more!
Just make sure the leaves you pick off the ground are healthy and clean.
A few tips before getting started with dipping your autumn leaves
It is nice (and efficient) to dip a whole big batch at once. Think 30-50 leaves. This number really depends on your end goal. Will you be decorating every window in the house? Or just one? Are you thinking of adding them to handmade wreaths, as decorations on gifts, or as a gift itself – carefully arranged in leftover jars?
So, when you are out collecting leaves, put a few more into your basket than you think you will need. Some of them will not turn out exactly as you wish, take that into account as well.
It is also worth knowing that autumn leaves should be dipped the same day they are collected.
If they are too wet when you bring them in, set the leaves on towels and let them dry out naturally before proceeding. You do not want to get extra water in your melted beeswax.
If you absolutely cannot manage to collect-and-dip on the same day, you can place the leaves in a single layer between two clean sheets of paper. Then put those under the weight of a heavy book. The downside (or upside if you like the look) is that they will now be flat.
If you leave them any longer, they will lose color, and it is best to go out again on a walk to collect some freshly fallen leaves.
Materials needed for preserving leaves in beeswax
Besides colorful leaves, you will need a few more things.
Namely – beeswax.
If you can procure beeswax from a local beekeeper, seek it out before the leaves start to fall. And if dipping leaves is a last-minute creative endeavor, online sources of beeswax never fail to exist.
Here’s our top pick beeswax for this project.
It does not matter whether you start with blocks or pellets. Nor does it matter if your beeswax is white or yellow, since the single layer will go on very thin.

Next thing you will need is either a double boiler for melting down the beeswax, or a small crock pot. One that you will dedicate specifically for craft purposes.
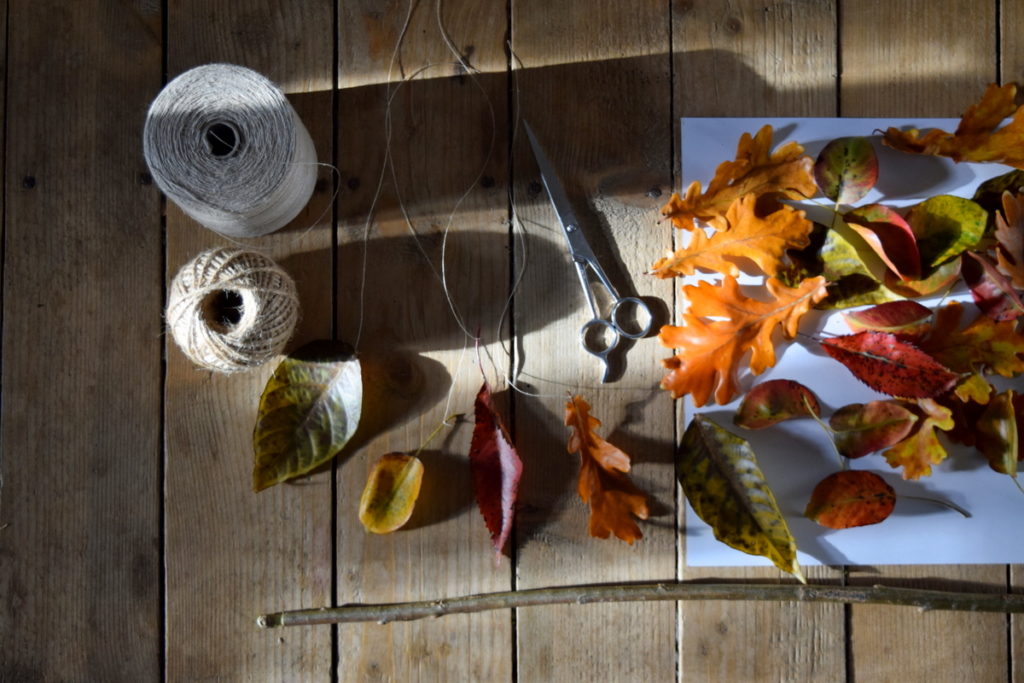
In short, you will want to have the following on hand:
- autumn leaves, as many as you wish to make, plus some extra
- beeswax, enough to fill your dipping pot
- double boiler or small crock pot (for melting wax)
- paper for protecting your table/floor
- natural string/twine, for hanging
- scissors
- branch, if you choose to hang your beeswax-dipped leaves
Outside of that, all it takes is a pinch of creativity and as much time from your day as you are willing to spare for making easy fall decorations.
Once your autumn leaves have been gathered, it is time to prepare your beeswax.
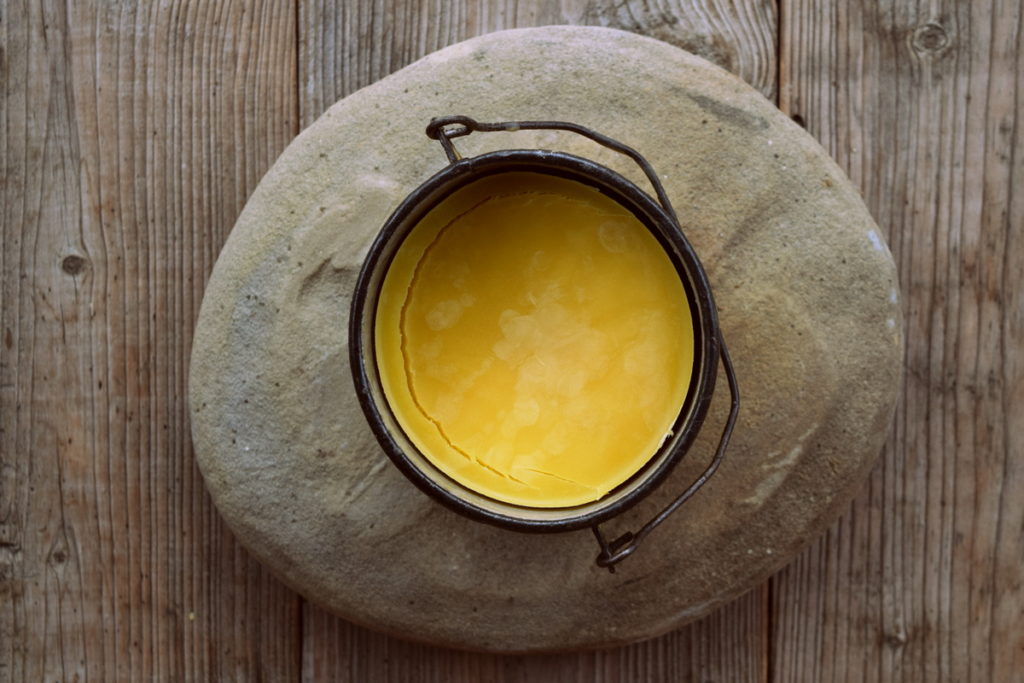
If you start with pure and clean beeswax, you will be able to see the bottom of the pot once it is melted.
Our wax pot has been used extensively for making beeswax candles with local organic beeswax (which contains some impurities), and you’ll notice it isn’t as pure as it once was. It is still perfect for making both candles and for dipping leaves.
A good temperature range for melting beeswax is 144 to 150 °F (62 to 66 °C).
It is not necessary to use a thermometer for this, as you can visually tell when the wax is thin enough to cover the leaves. One thing you do want to take care of, however, is not to overheat the wax, or let it get anywhere near its flash point of 400 °F (204.4 °C) – and never leave it unattended.
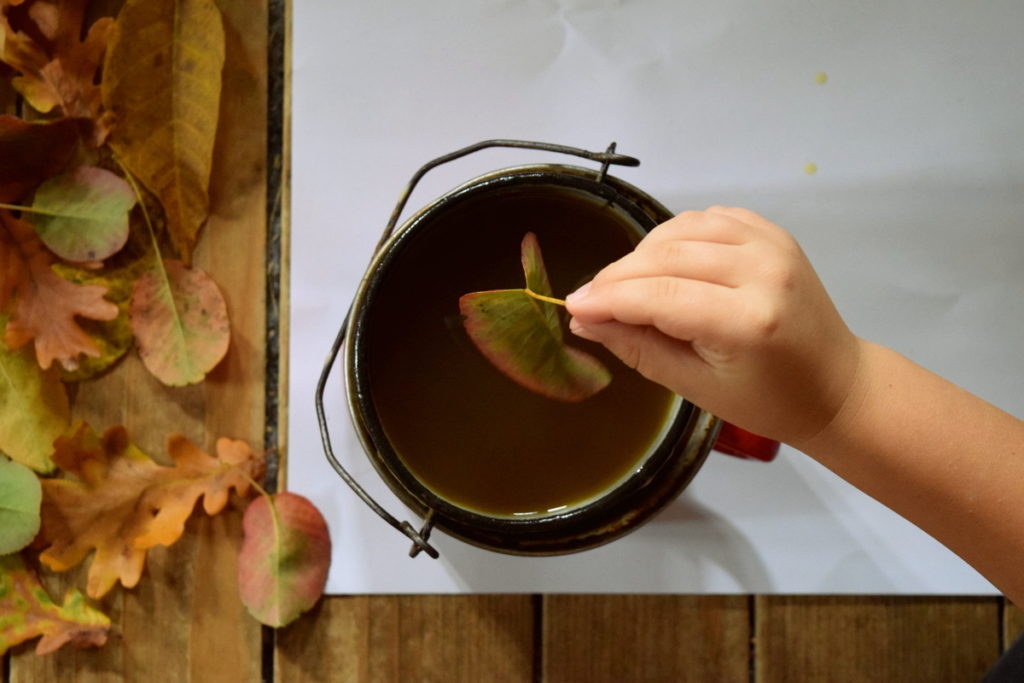
With your wax melted, it is time to dip those fall leaves!
Dipping the autumn leaves in beeswax
Some leaves have stems, others don’t.
For the leaves with stems, dipping is easy. Pinch the stem from the very end and dip into the wax, so as not to touch it with your fingertips.
Stemless leaves, such as the individual leaflets of the composite walnut tree leaves, can still be dipped with care. Hold them very carefully with your fingertips if you dare, or use a pair of tweezers instead.
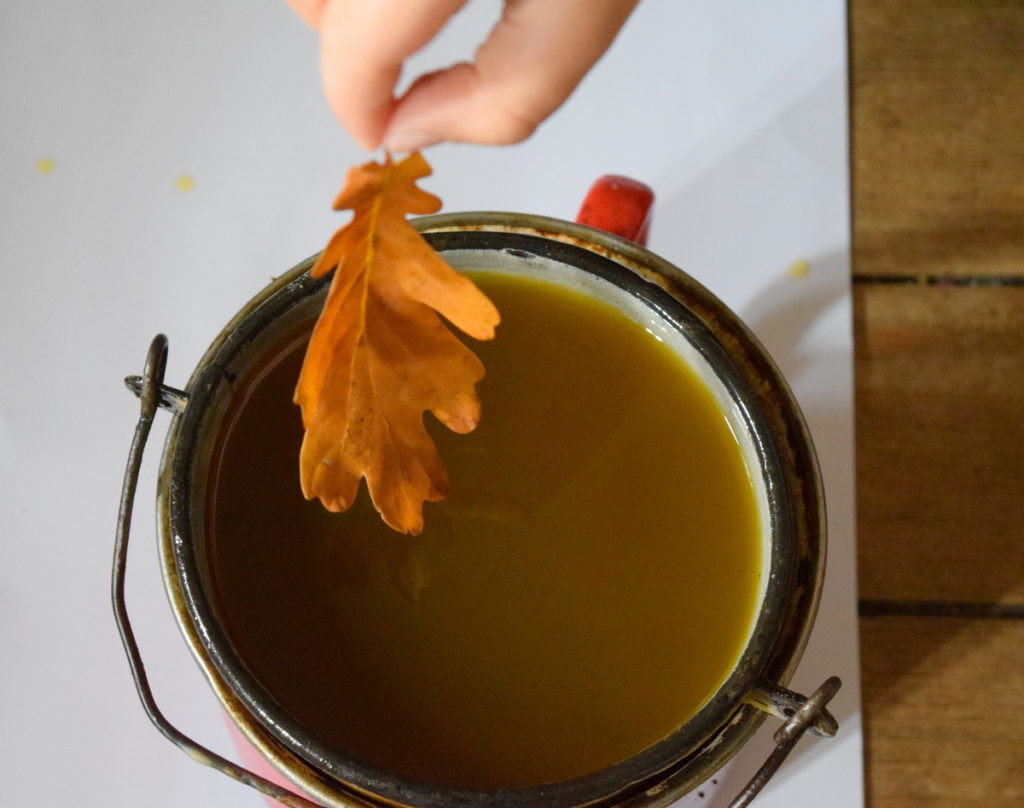
Do not hesitate in dipping the leaves – and dip them only once!
One thin layer of wax will be enough to preserve your leaves for several months. Not only will it lock in the beautiful colors, it will also bring the scent of beeswax wherever you choose to hang your leaves.
So, one quick dip in the wax pot with each leaf. One by one is the way to go, as you let the excess beeswax drip off, then gently shake off the remaining wax drops. (Remember to cover your floor before getting started!)
The finished leaves should sit about a foot away on another large sheet of white paper (or baking paper) so as not to get splashed when shaking off the wax.
The autumn leaves dipped in beeswax take only seconds to harden. Literally.
In the meantime, you should start thinking about how you are going to display their uniqueness.
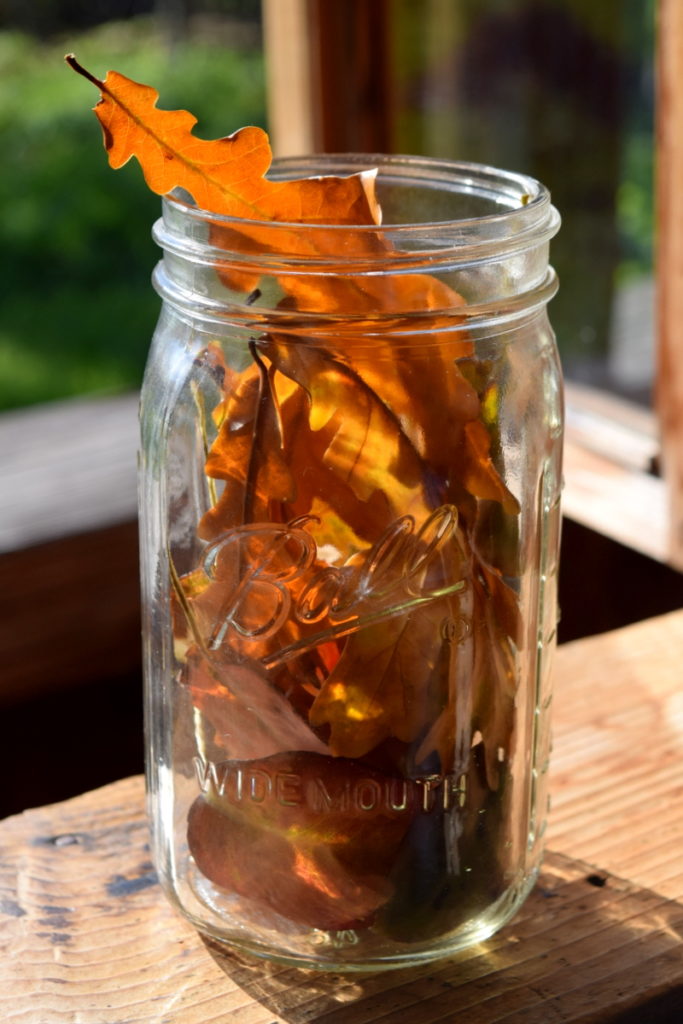
Displaying your beeswax covered leaves
One of the simplest ways to display your well-preserved leaves, is by tucking them loosely into a jar.
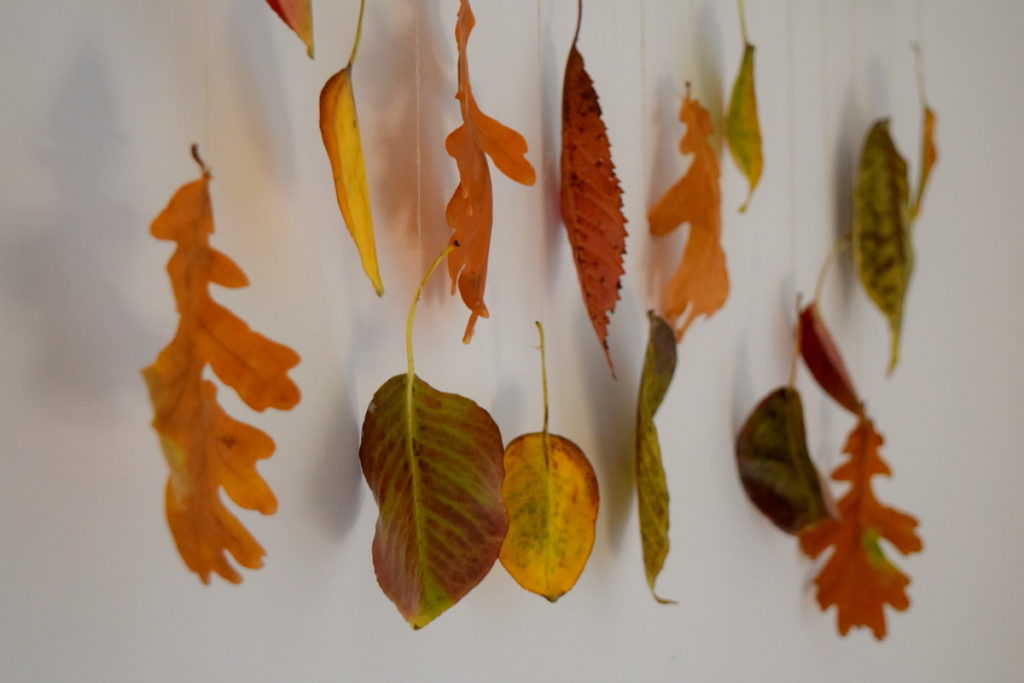
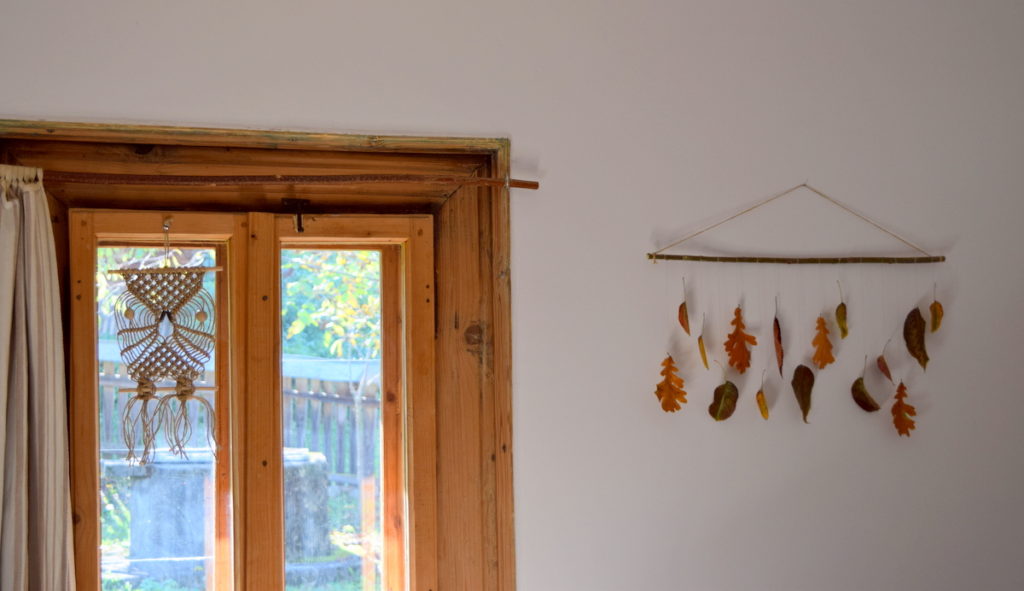
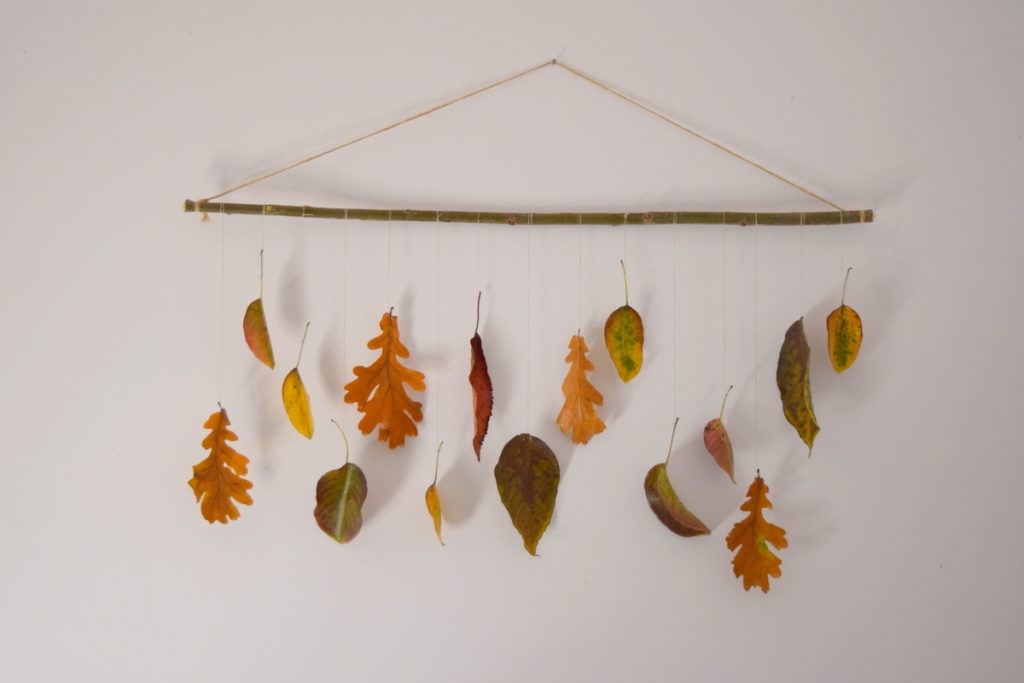
Another way is to hang them, either on the wall, or in front of a window.
When the sunlight hits them, they will really shine with their warm fall colors.
Hanging them entails carefully tying a natural string to the stem of each leaf, and attaching that string to a branch.

One more string as a hanger, one little nail in the wall, and you are ready to enjoy your autumn leaves as long as you wish. They make a wonderful fall decoration!
You could even tuck a few sample specimens into a grapevine wreath.
Organize them by color, arrange them by size or by species, and you can have some artful fun at the same time.
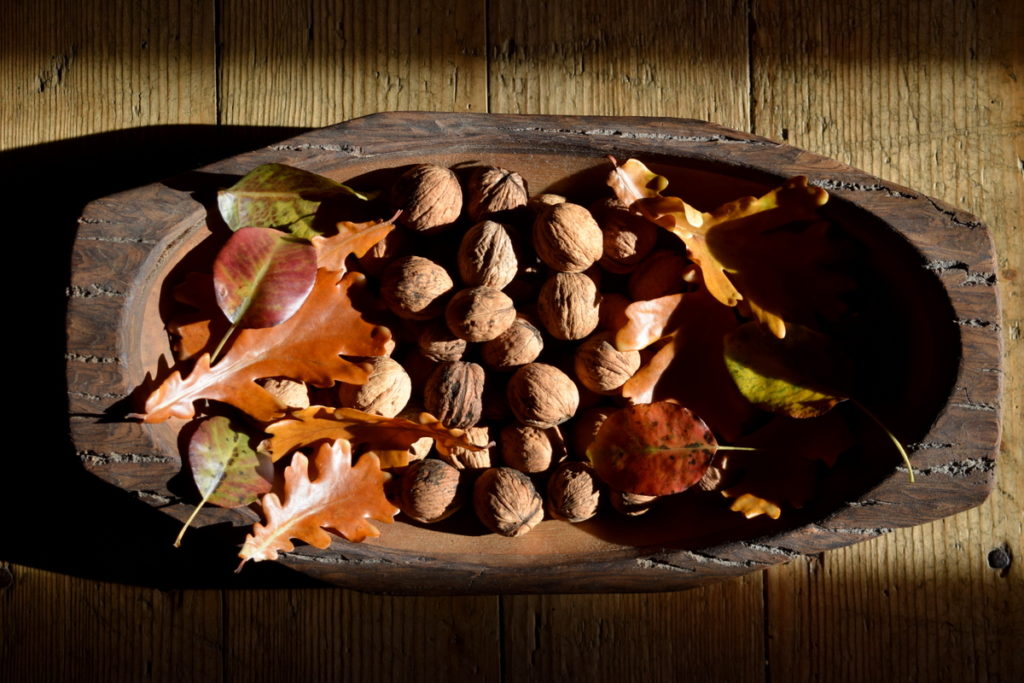
You may even opt to put a few in your walnut bowl, in celebration of all things fall.
In the end, they can even be tossed on the fire as an eco-friendly firelighter.
All in all, preserving autumn leaves in beeswax is an easy nature craft, that not only adorns your home, but the homes of others too. That is, when you choose to give them as soul-warming gifts. Think the perfect addition to a plastic-free natural gift wrap.
Are you ready to go outside on a long walk to find – and preserve – the prettiest leaves of the season?
How To Preserve Autumn Leaves In Beeswax
Dip beautiful autumn leaves in beeswax to preserve their color and beauty and use for brilliant fall decor.
Materials
- Autumn leaves - free of damage or disease
- beeswax
- double boiler or small crockpot
- paper - for protecting your table or floor
Instructions
- Head outside and collect as many healthy and clean fall leaves as you wish to preserve.
- In your double boiler, gently melt the beeswax.
- Carefully, but confidently, dip your autumn leaves in the beeswax only once. Let the excess wax drop off and then shake off any extra beeswax.
- Place to dry on a piece of paper. They will be ready in seconds.
- Choose how you wish to display your beeswax preserved leaves. Packing loosely into a jar is one popular way, or hanging from a branch and mounted on your wall.

Get the famous Rural Sprout newsletter delivered to your inbox.
Join the 50,000+ gardeners who get timely gardening tutorials, tips and tasks delivered direct to their inbox.