

Each spring, there comes a time when the new, green freshness of the season finally wears off, and the long hot days begin to take the notion of summer seriously.
That’s about the time I head out and collect elderflower blossoms for a batch of elderflower champagne.
Their light, fresh scent embodies summer, and the taste of the finished champagne captures that delicate floral.

Elderflower champagne is the perfect drink to welcome in the sun-baked days of summer.
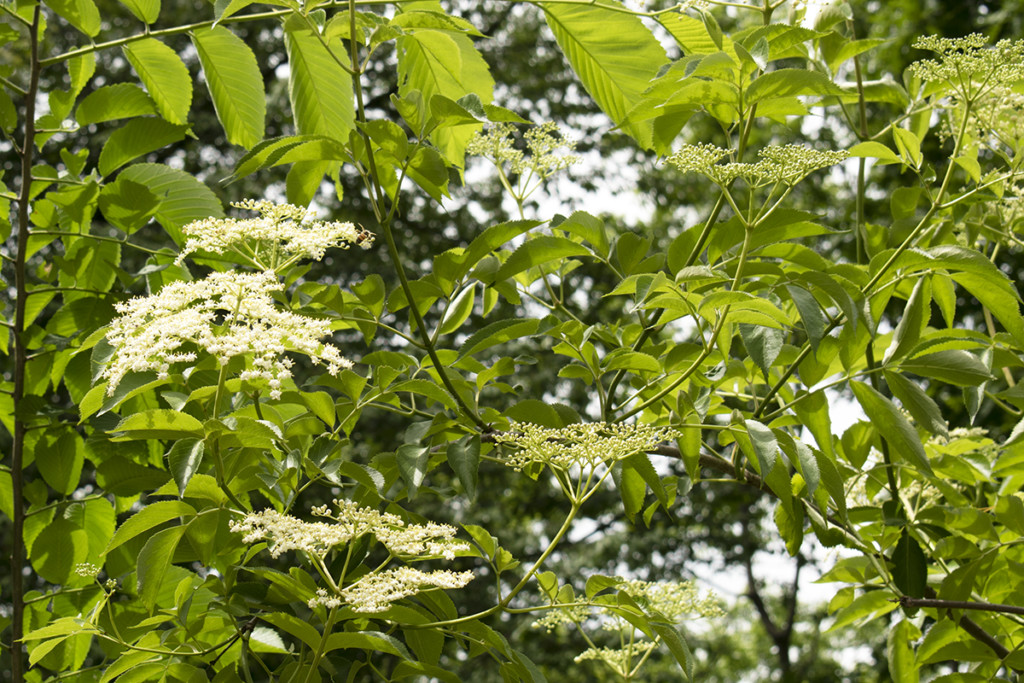
Elder (Sambucus canadensis) is a deciduous shrub growing wild throughout many parts of both North and South America. The elder has been used in traditional medicine for centuries and is currently enjoying a resurgence in popularity as a medicinal plant.
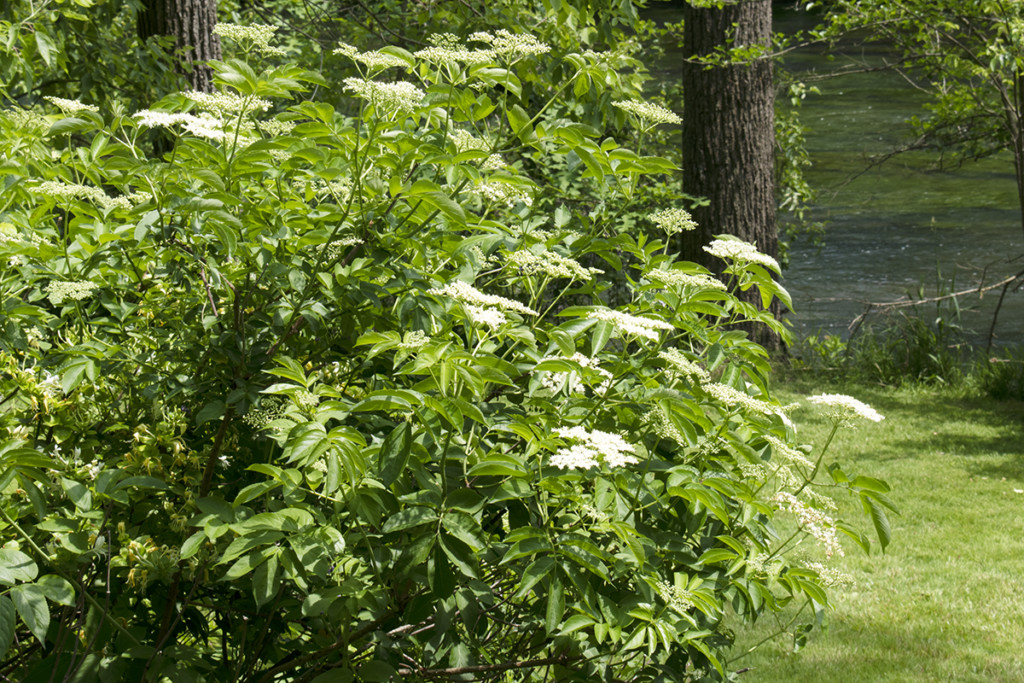
Many are planting elders in their backyards, and you-pick elderberries are becoming more and more popular. While you may be more familiar with elderberry, the lovely cream-colored blooms that begin to appear in June are equally worth your attention.
Elderflower champagne is a favorite among the foraging community. And for the more spiritual, some make it a practice to pick their blooms on the summer solstice. Whatever seasonal rites you enjoy, I hope you add making this wonderful concoction to your list of annual summer traditions.
You’ll be surprised at how easy it is to make and delighted by its refreshing flavor.
As many wine enthusiasts will insist, this is not a real champagne. A true champagne can only come from the Champagne region of France.
Our drink is called ‘champagne’ for its soft yellow hue and tiny, fizzy bubbles. Shhh, don’t tell the French!
Finding Elderflower Blossoms
Blooms should be fully open, and still have that lovely cream color and fresh scent. I like to pick mine in the morning before it gets too hot and before the bugs start looking for dinner. You’ll need around eight large blooms (about 6” across or larger) or about 16-20 smaller blooms.
If you are foraging and not picking from cultivated elders, be sure to forage away from roadsides. Follow proper etiquette and make sure you have permission to gather flowers from the land you’re on.
Identification
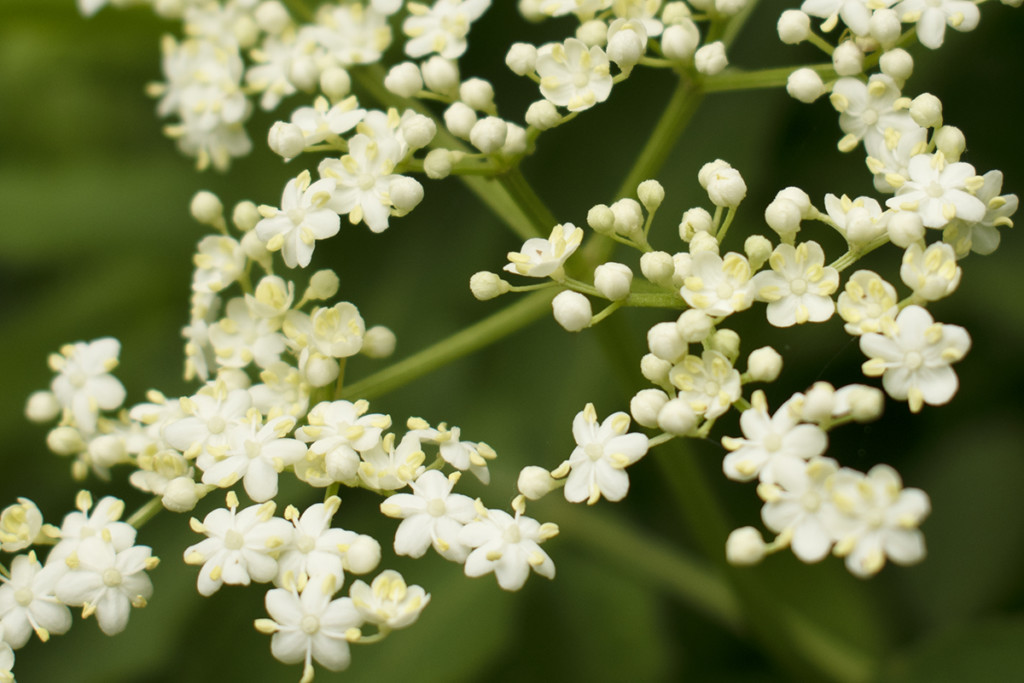
It’s important to be sure that you are picking elderflowers, as several blooms are open this time of year, too, some of which can make you sick. Elderflowers are easy enough to identify, though.
One of the easiest ways of identifying them is their smell – it’s the smell of summer – fresh, light and floral, almost creamy. (Flowers past their prime will smell musty, a bit like cat pee. Skip these and find fresher blossoms.)
The individual flowers have five or six tiny stamens growing from the center of the flower, which look like wee little fireworks.
Elders are shrubs, so your flowers will be growing off of branches, rather than a stalk or stem growing straight up from the ground.
As always, when foraging, if in doubt, don’t eat anything you can’t positively identify. Use a good foraging book or check with an experienced forager.
Most importantly, be sure to leave plenty of flowers so that the bush will be able to produce berries later in the season. You don’t need too many blossoms for this recipe, so this shouldn’t be too hard.
Wild Fermentation
Elderflower champagne is the drink that started me down the path of wild-fermented wines, ciders, and meads.
Yeast is everywhere, on everything; this comes in handy when you want to make delicious fermented food and drink. And you can make any number of fantastic beverages using wild fermentation. Because of this, we won’t need a commercial wine yeast.
In this recipe, we will be relying on the natural yeasts on the flowers for fermentation.
Tools
- 2 Clean plastic brew buckets, or 2 one-gallon wide-mouth jars
- Food scale
- Cheesecloth or funnel with a fine mesh strainer
- Several clean 1L soda bottles, 1L swing-top brew bottles
- Wooden or plastic spoon
- Clean dishtowel or cheesecloth (to cover bucket/jar)
Ingredients
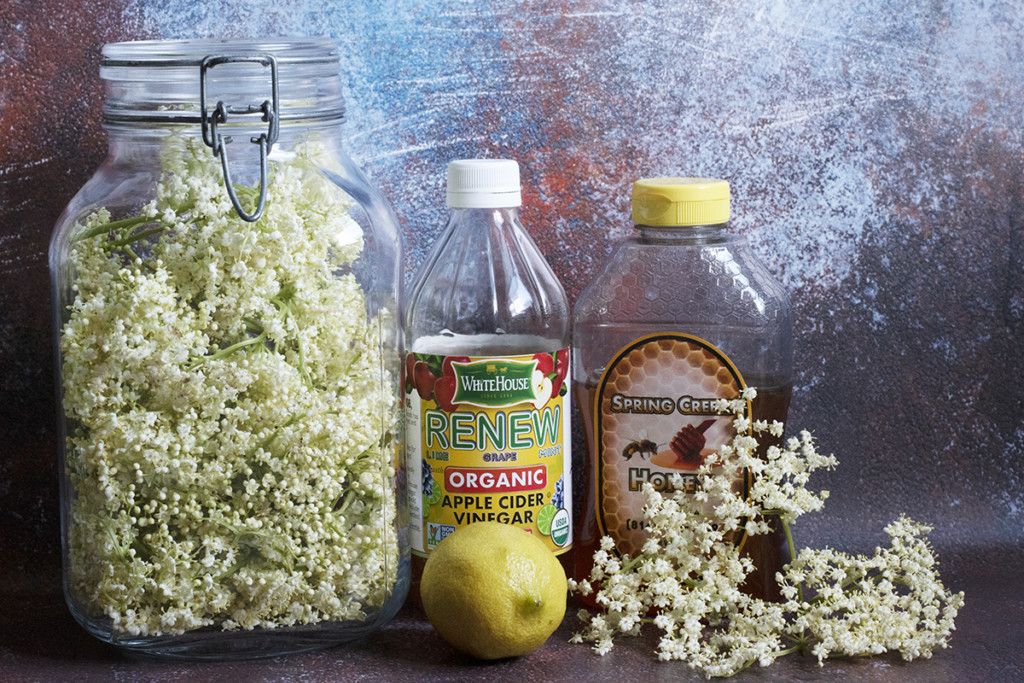
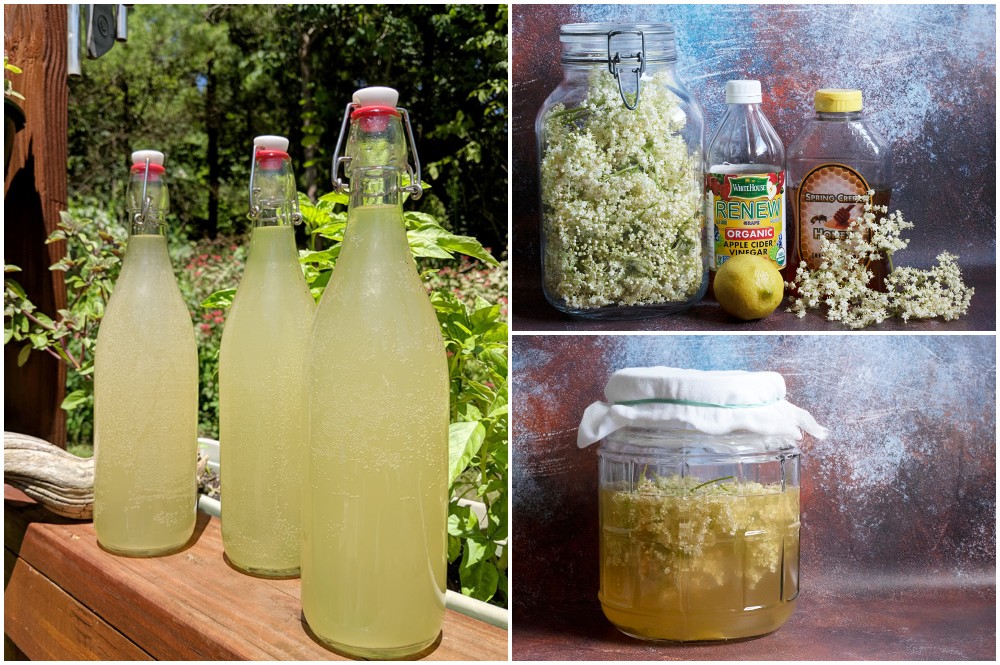
- 8 large elderflower blossoms, or 16 smaller blossoms
- One gallon of water, 2 pints of it set aside (filtered or spring water is best)
- 1 1/4 pounds of white sugar, or 1 pound of honey
- Juice and peel of one lemon (try to remove only the zest and as little of the white pith as possible)
- 3 tablespoons of apple cider vinegar with the mother
Let’s begin
As with any wine recipe, start with sterilized equipment. You can run your equipment through a high setting on a dishwasher or use a commercial brewing sterilizer, such as Star San.
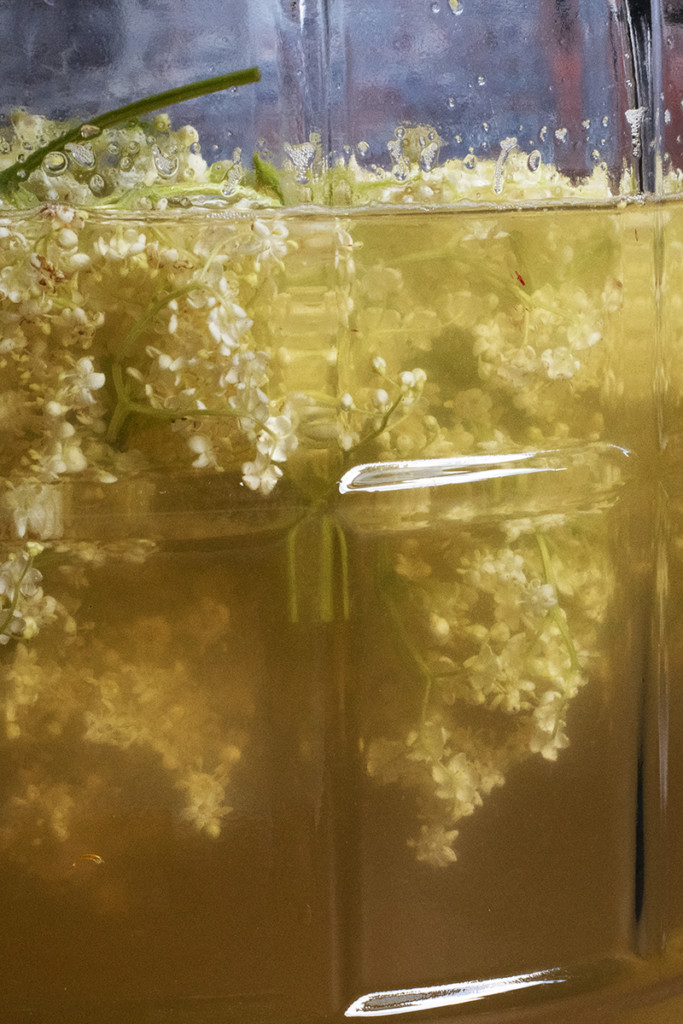
Inspect and clean your elderflower blossoms. Remove any brown flowers, twigs, or bugs, but don’t wash the heads, or you’ll be washing away the natural yeast.
If any critters make it into the jar, you can scoop them out later; we will be straining the final product anyway. Once they’ve been cleaned, remove the large stems from the flower heads.

Bring 2 pints from the gallon of water to a boil.
Add the sugar or honey to the bucket or jar and pour the boiling water into the bucket. Stir well until the sweetener dissolves completely. Pour in 2/3 of the remaining gallon of water; the water should be lukewarm at this point. If it isn’t, let it sit for a while until the water is room temperature.
Add the lemon peel and juice, apple cider vinegar, and elderflowers. Pour in the rest of the water, stir well, and then cover the bucket or jar with a dishtowel or doubled-up cheesecloth.
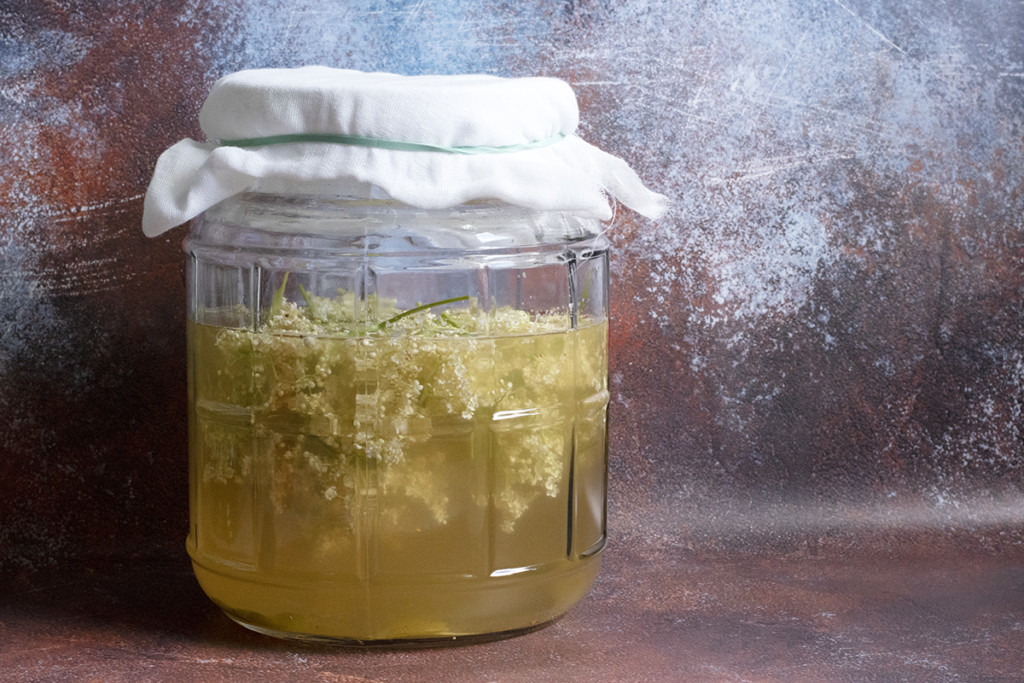
Place somewhere warm and dark, and stir (don’t use a metal spoon) vigorously several times a day for the first 48 hours.
After two days, fermentation should have started. The mixture will take on a pleasant, yeasty smell, there will be tiny bubbles rising to the surface, and you will hear fizzing when you stir the mixture.
If fermentation hasn’t started after 48 hours, you can add a pinch of commercial champagne yeast. Stir it in, cover, and wait another 24 hours.
Second Fermentation
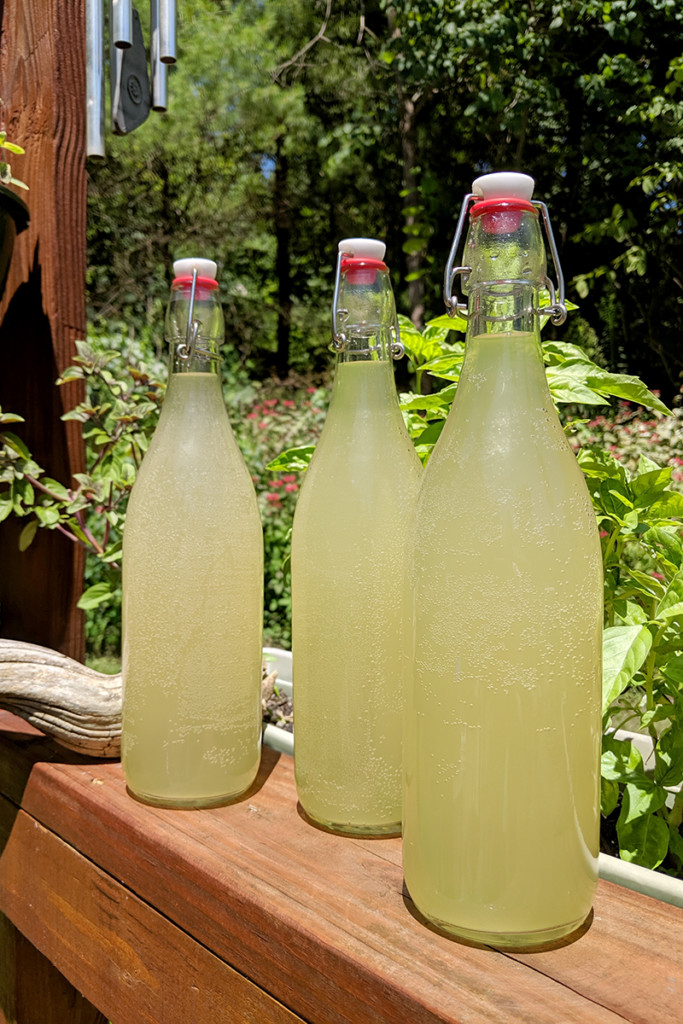
About 2-4 days after fermentation starts, you will strain the mixture into the second sterilized bucket or jar. Cover it again and let the elderflower champagne sit for an hour so any sediment can settle to the bottom.
Using the funnel, carefully pour the champagne from the bucket into the clean soda bottles or swing-top bottles. You’ll want to leave the last bit left in the bucket, as it will contain the sediment, and make your finished champagne cloudy. Leave about an inch of headspace and then screw the caps on the bottles.
Now we wait.
Fermentation will continue, and since the bottles are sealed, the resultant carbon dioxide becomes trapped, resulting in tiny, fizzy bubbles when you open the bottle.
You will need to ‘burp’ the containers once a day, more often if it’s hot out, to release excess CO2 buildup.
After a week has passed, store the bottles, sealed tightly, in the fridge to slow fermentation.
That’s it!
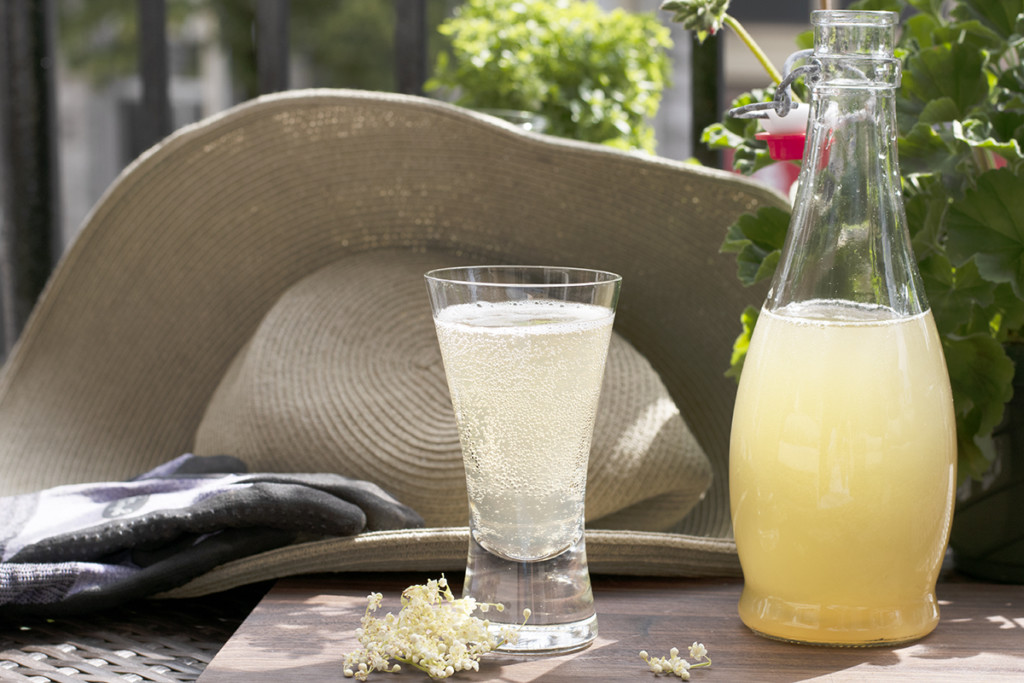
For the best possible flavor, wait another week or two once you put your finished champagne in the fridge. The taste of the elderflower really shines after a little rest in the refrigerator.
Enjoy the crisp, clean flavor of your homemade elderflower champagne served cold as you toast the season of linen and lightning bugs.
Notes
If you’re new to winemaking, I highly recommend using old soda bottles as you can feel the bottles become taught as the pressure builds, so it’s easy to tell when they need to be burped.
Because we aren’t starting with a lot of sugar and the recipe ferments out rather quickly, the resulting champagne is very low in alcohol, usually somewhere between 2-3% ABV.
Because this has a lower alcohol content, it’s best to consume the champagne within a couple of months of making it rather than bottle-aging.
If you use honey, you will end up with darker colored champagne, and it may take a little longer to finish fermenting. If you can, I highly suggest making a batch of each and seeing which you like better. I find using the sugar results in a lighter, crisper flavor, whereas the honey has more body.
If you use swing-top bottles, be sure they are made specifically for brewing; otherwise, you run the risk of creating explosive champagne.
For more adventures using wild yeast for food and drink, try making a wild yeast sourdough starter, or grow a ginger bug to make homemade soda.
And for even more wonderful elderflower recipes, check out 25 Elderflower Recipes That Go Way Beyond Elderflower Cordial.

Get the famous Rural Sprout newsletter delivered to your inbox.
Join the 50,000+ gardeners who get timely gardening tutorials, tips and tasks delivered direct to their inbox.